
TY343181
If you're having difficulty, our friendly
customer team is always here to help.
THIS INSTRUCTION BOOKLET CONTAINS IMPORTANT SAFETY INFORMATION. PLEASE READ AND KEEP FOR FUTURE REFERENCE.
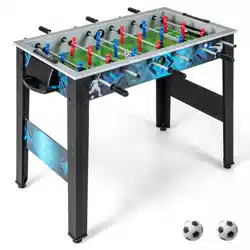
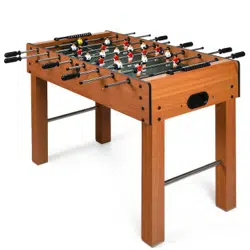
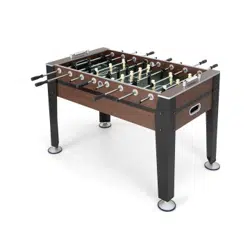
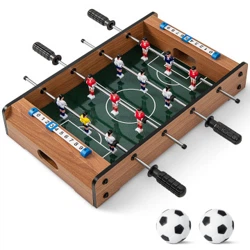
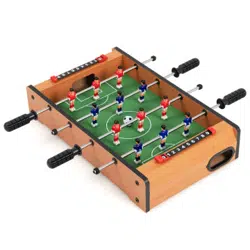
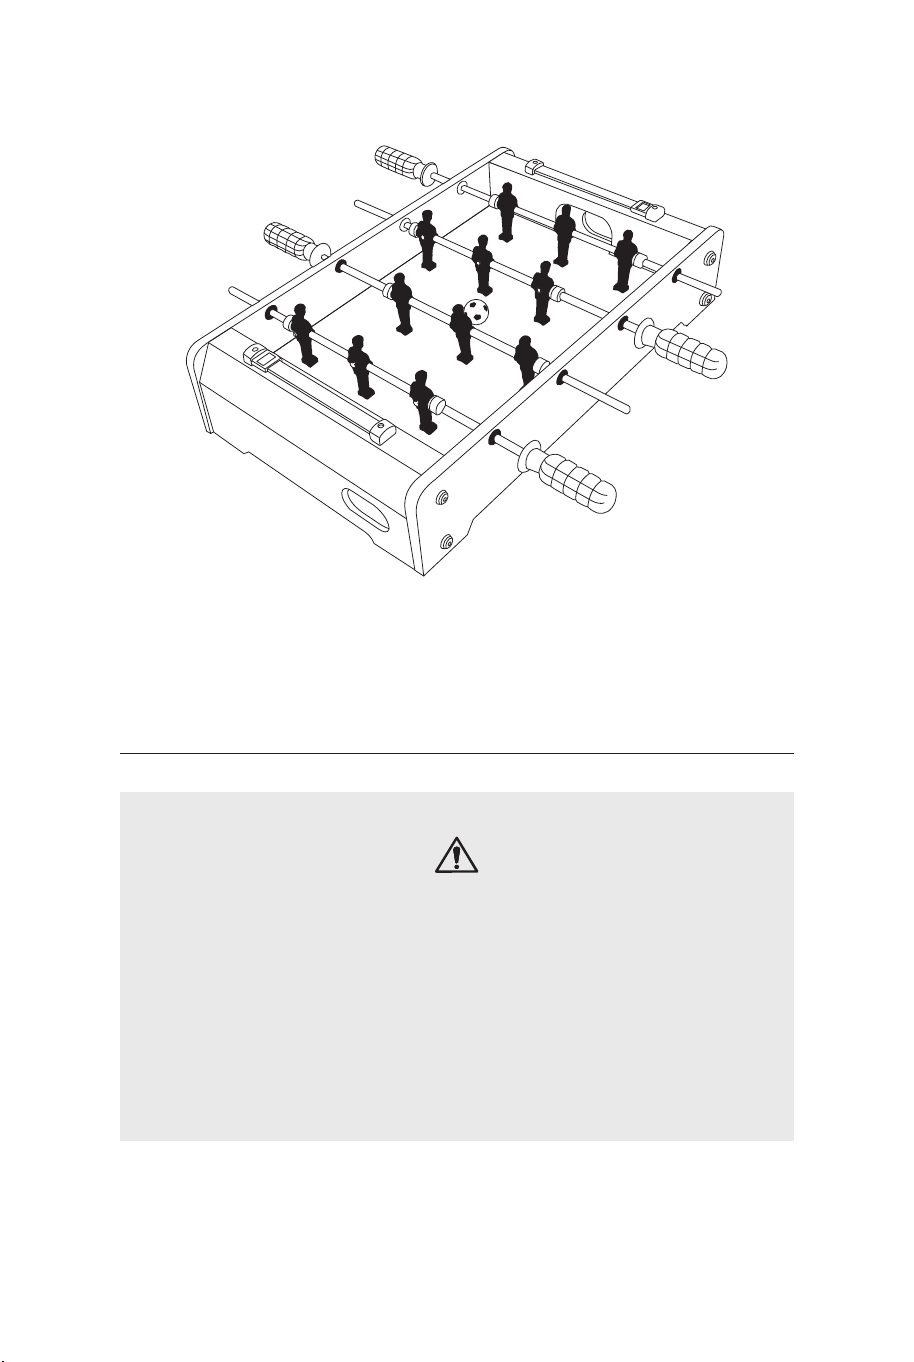
Table Top Football Game
Tischfußballspiel
Jeu de Football de Table
Futbolín
Calcio Balilla
Piłkarzyki stołowe
AUS:cs.au@costway.com
FRA:cs.fr@costway.com
DEU:cs.de@costway.com
ITA:cs.it@costway.com ESP:cs.es@costway.com
POL:sklep@costway.com
GBR:cs.uk@costway.com
DEU office: FDS GmbH, Neuer Höltigbaum 36, 22143 Hamburg, Deutschland
ITA office: Milano
FRA office: Saint Vigor d'Ymonville
POL office: GdańskGBR office: IpswichAUS office: TruganinaUSA office: Fontana
02 03
Allgemeine Warnhinweise
Before You Start Bevor Sie beginnen
Warnung: Kinder sollten diesen Artikel unter elterlicher Aufsicht benutzen.
Warnung: Halten Sie alle Kleinteile und Verpackungsmaterialien, die verschluckt werden
können, von Babys und Kindern fern.
Bitte sorgfältig lesen und zum späteren Nachschlagen aufbewahren.
WARNING:
CHOKING HAZARD
-Small parts.
Not for children under 3 years.
0-3
Please read all instructions carefully and keep it for future reference.
0-3
EN DE
Achtung:
ERSTICKUNGSGEFAHR
-Kleine Teile.
Nicht für Kinder unter 3 Jahren.
Der Artikel muss unter der Aufsicht eines Erwachsenen montiert und benutzt werden.
Lesen Sie jeden Schritt sorgfältig durch und befolgen Sie die richtige Reihenfolge.
Entfernen Sie alle Verpackungen, Überprüfen Sie, ob alle Teile und Zubehörteile
vorhanden sind.
Bitte stellen Sie sicher, dass alle Teile richtig montiert sind, eine falsche Montage kann zu
einer Gefahr führen.
Wir empfehlen, alle Teile möglichst in der Nähe des Aufstellungsortes zu montieren, um
unnötige Bewegungen nach der Montage zu vermeiden.
Achten Sie bei der Montage auf einen sicheren Untergrund und stellen Sie den Artikel
immer auf eine ebene, feste und stabile Fläche.
The product must be installed and used under the supervision of an adult.
Read through each step carefully and follow the proper order.
Remove all packaging, separate and count all parts and hardware.
Please ensure that all parts are correctly installed, incorrect installation can lead to a
danger.
We recommend that, where possible, all items are assembled near the area in which
they will be placed in use, to avoid moving the product unnecessarily once assembled.
Ensure a secure surface during installation, and place the product always on a flat,
steady and stable surface.
General Warnings
Attention: Children should use this product under the parental supervision.
Danger: Keep all small parts and packaging materials for this product away from babies
and children, otherwise they may pose a choking hazard.
Warning Warnung
04 05
Atención: Los niños deben utilizar este producto bajo la supervisión de sus padres.
Peligro: Mantenga todas las piezas pequeñas y los materiales de embalaje de este producto
fuera del alcance de los bebés y los niños, ya que de lo contrario pueden suponer un peligro
de asfixia.
Attention : Les enfants doivent utiliser ce produit sous la surveillance de leurs parents.
Danger : Gardez toutes les petites pièces et les matériaux d’emballage de ce produit hors
de la portée des bébés et des enfants pour éviter un risque d’étouffement.
Avant de Commencer
Veuillez lire attentivement toutes les instructions et les conserver pour la référence ultérieure.
Antes de Empezar
Lea atentamente todas las instrucciones y consérvelas para futuras consultas.
0-3
AVERTISSEMENT :
RISQUE D’ÉTOUFFEMENT
– Les petites pièces.
Ne convient pas aux enfants de
moins de 3 ans.
Le produit doit être installé et utilisé sous la surveillance d’un adulte.
Lisez attentivement chaque étape et suivez l’ordre correct.
Retirez tous les emballages, séparez et comptez toutes les pièces et le matériel.
Veuillez vous assurer que toutes les pièces soient correctement installées, une
installation incorrecte peut entraîner un danger.
Nous recommandons que, dans la mesure du possible, tous les articles soient
assemblés à proximité de la zone dans laquelle ils seront utilisés, afin d’éviter de
déplacer inutilement le produit une fois assemblé.
Assurez-vous que la surface soit solide pendant l’assemblage et placez toujours le
produit sur une surface plane et stable.
El producto debe ser instalado y utilizado bajo la supervisión de un adulto.
Lea detenidamente cada paso y siga el orden correcto.
Retire todo el embalaje, separe y cuente todas las piezas y los accesorios.
Asegúrese de que todas las piezas estén instaladas correctamente, una instalación
incorrecta puede provocar un peligro.
Recomendamos que, siempre que sea posible, todos los elementos se monten cerca de
la zona en la que se van a utilizar, para evitar mover el producto innecesariamente una
vez montado.
Asegure una superficie segura durante el montaje, y coloque el producto siempre sobre
una superficie plana, firme y estable.
FR ES
Avertissements Généraux Advertencias Generales
0-3
ADVERTENCIA:
PELIGRO DE ASFIXIA
- Piezas pequeñas.
No es adecuado para niños
menores de 3 años.
Avertissements Advertencia
06 07
Prima di Iniziare Zanim Zaczniesz
0-3
AVVERTENZA:
RISCHIO DI SOFFOCAMENTO
- Piccole parti.
Non per i bambini sotto i 3 anni.
Przeczytaj uważnie wszystkie instrukcje i zachowaj je na przyszłość.Si prega di leggere attentamente tutte le istruzioni e conservarle per riferimento futuro.
Produkt musi złożony i używany pod nadzorem osoby dorosłej.
Przeczytaj uważnie każdy krok i postępuj we właściwej kolejności.
Usuń opakowanie i upewnij się, że zestaw zawiera wszystkie części i elementy
montażowe.
Upewnij się, że wszystkie części są poprawnie połączone, nieprawidłowa instalacja
może prowadzić do wypadku.
Zalecamy, aby w miarę możliwości wszystkie elementy były montowane w pobliżu
miejsca, w którym będą używane, aby uniknąć niepotrzebnego przenoszenia produktu
po złożeniu.
Zapewnij bezpieczną przestrzeń roboczą podczas montażu i upewnij się, że produkt
znajduje się na płaskiej i stabilnej powierzchni.
PLIT
Avvertenza per il Montaggio Ogólne ostrzeżenia
UWAGA:
RYZYKO ZADŁAWIENIA
- Produkt zawiera małe elementy.
Nieodpowiednie dla dzieci poniżej
3 roku życia.
0-3
Il prodotto deve essere installato e utilizzato sotto la supervisione di un adulto.
Leggere attentamente ogni passo e seguire l'ordine corretto.
Rimuovere tutti gli imballaggi, separare e contare tutte le parti e tutti gli accessori.
Si prega di assicurarsi che tutte le parti siano installate correttamente, un'installazione
errata può portare a un pericolo.
Si consiglia, ove possibile, di montare tutti gli articoli vicino alla zona in cui verranno posti
in uso, per evitare di spostare inutilmente il prodotto una volta assemblato.
Garantire una superficie sicura durante il montaggio e posizionare il prodotto sempre su
una superficie piana, stabile.
Attenzione: I bambini devono usare questo prodotto sotto la supervisione dei genitori.
Pericolo: Tenere tutte le piccole parti e i materiali di imballaggio di questo prodotto lontano
da neonati e bambini, altrimenti potrebbero rappresentare un rischio di soffocamento.
Uwaga: Dzieci moga używać tego produktu jedynie pod nadzorem dorosłych.
Niebezpieczeństwo: Trzymaj wszystkie małe części i opakowania tego produktu z dala od.
niemowląt i dzieci - w przeciwnym razie mogą stwarzać ryzyko zadławienia.
Avvertenza Uwaga
EN
Must assure the product is completely and correctly
assembled according to the instruction before using.
Assembly tools included in box
The process of assembly must be done by adult or
under direction by adult.
CAUTIONS!
REMOVE THE PROTECTION FILM OF THE PRODUCT PARTS
BEFORE INSTALLATION.
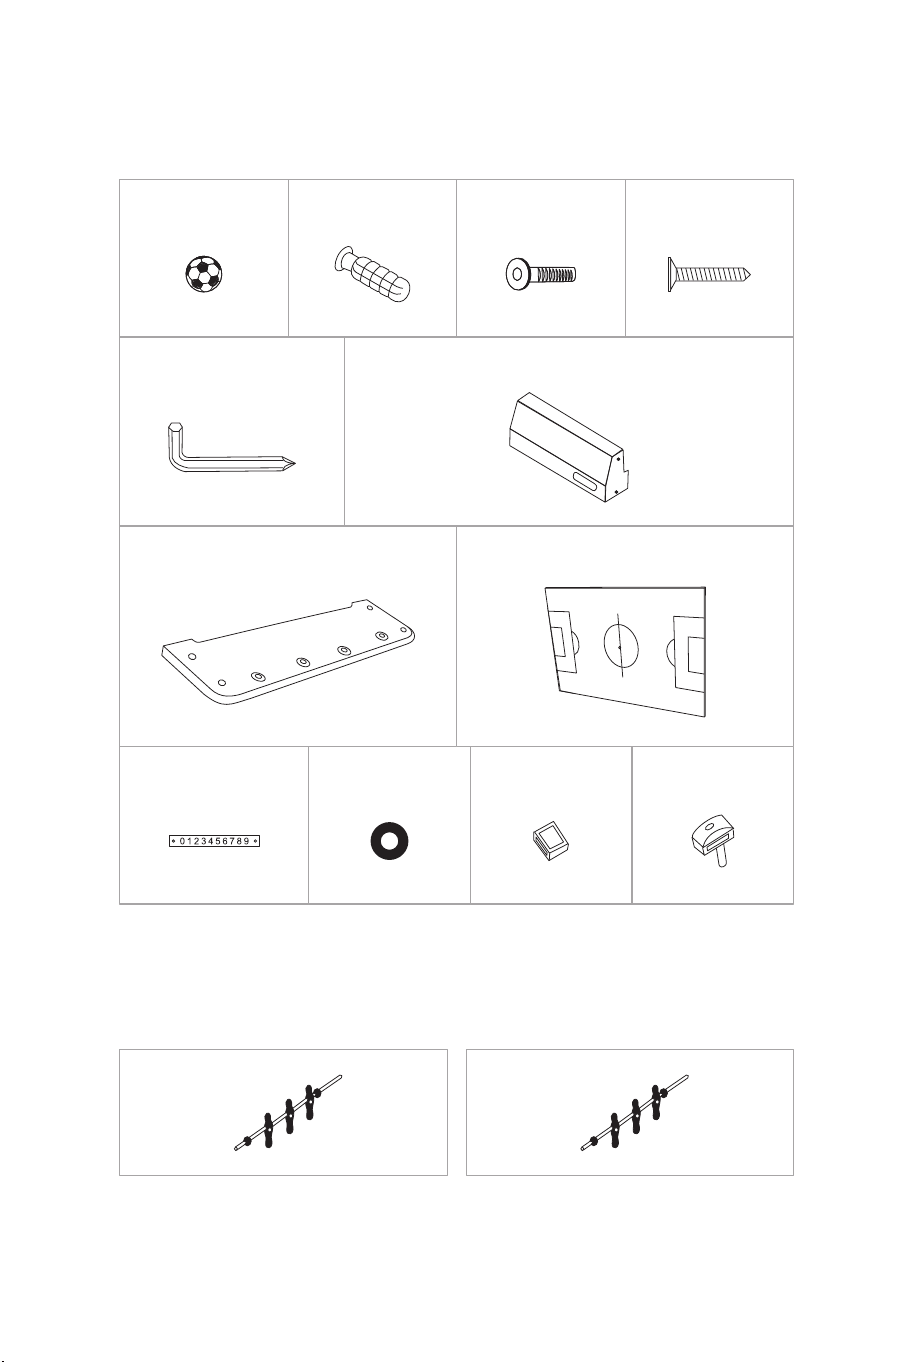
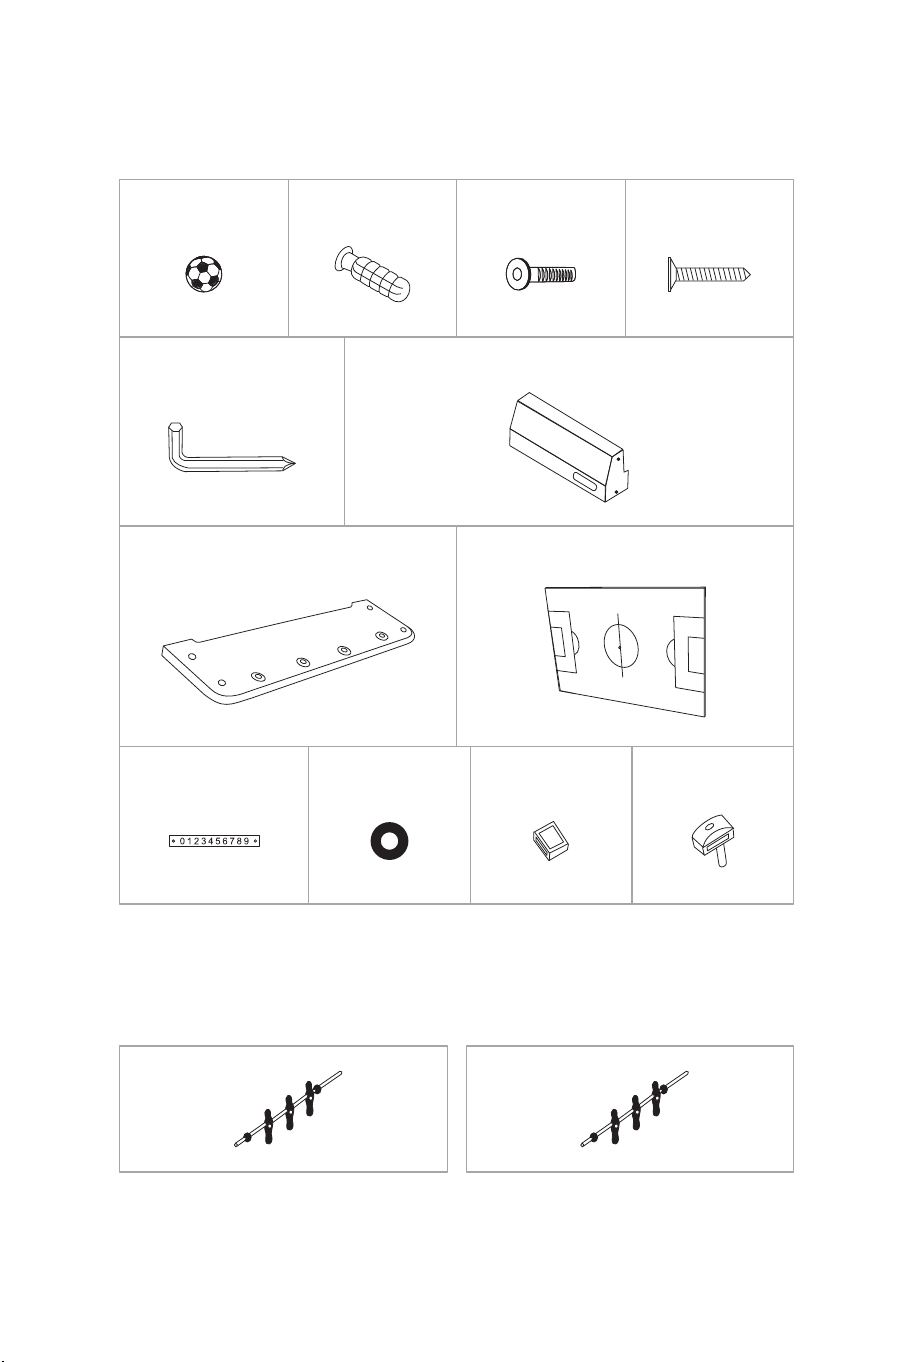
Parts List
HOME TEAM:T1*2 AWAY TEAM:T2*2
T1
x2
T2
x2
A1 x2 A2 x4 B1 x8 B3 x4
C1 x1 E1 x2
E2 x2 E3 x1
E4 x2 E5 x8 E7 x2 E8 x4
08 09

EN
Must assure the product is completely and correctly
assembled according to the instruction before using.
Assembly tools included in box
The process of assembly must be done by adult or
under direction by adult.
CAUTIONS!
REMOVE THE PROTECTION FILM OF THE PRODUCT PARTS
BEFORE INSTALLATION.
Parts List
HOME TEAM:T1*2 AWAY TEAM:T2*2
T1
x2
T2
x2
A1 x2 A2 x4 B1 x8 B3 x4
C1 x1 E1 x2
E2 x2 E3 x1
E4 x2 E5 x8 E7 x2 E8 x4
08 09
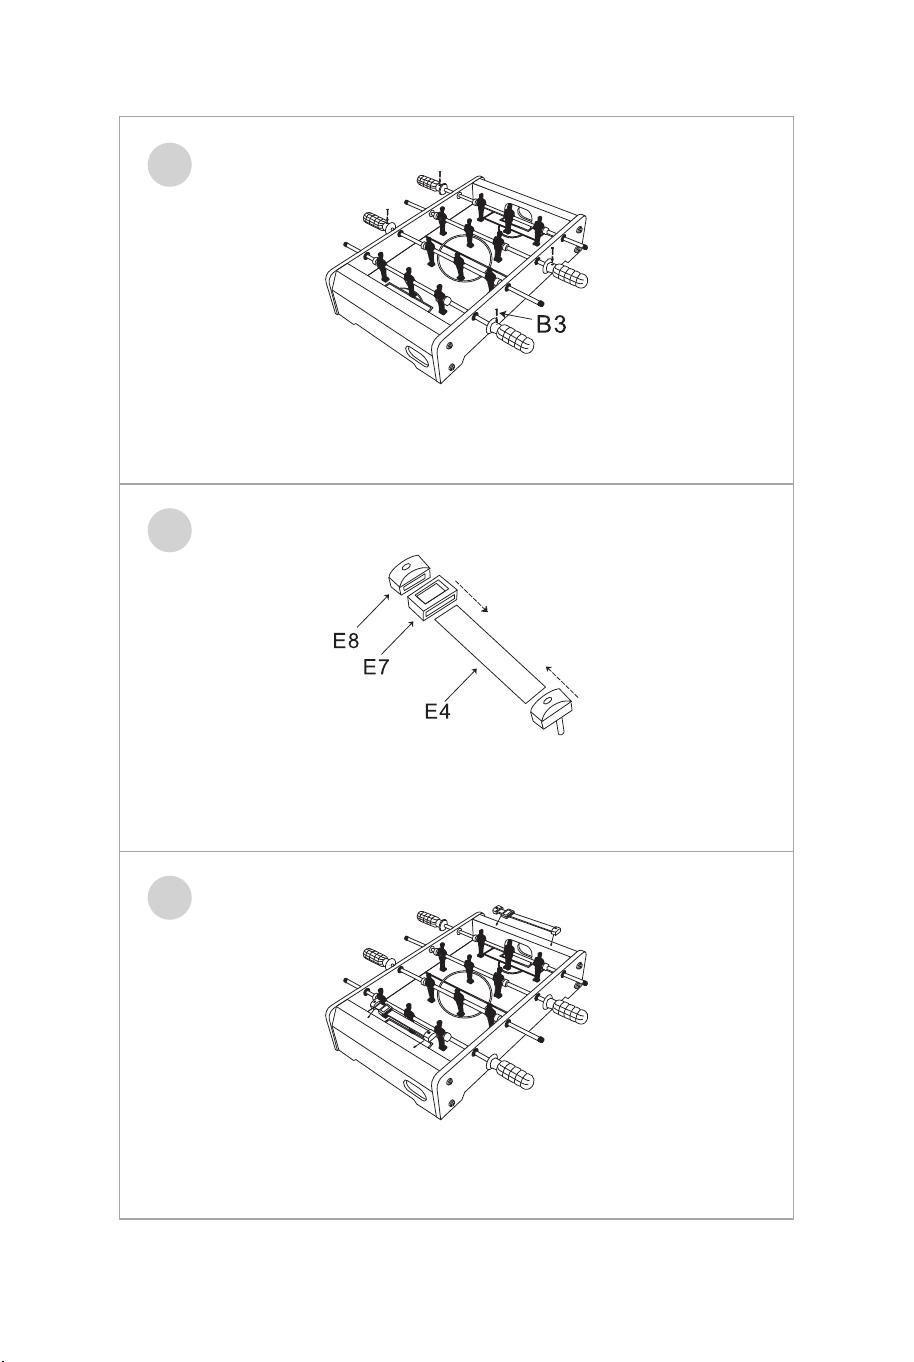
Assembly Process:
1, Assemble two short boards and one long board, then
connected by screws.
2, Insert the bottom board into the assembled boards of step 1.
3, Push the rubber bumper and washer snug against each
outside athlete.
1
2
3
4, Install the bars with athletes into the holes of the long board.
4
5, Insert the last long board right to the position of the bars,
then screw it.
5
6, Insert 4 handles into the bars, make sure that all the handles
are tightened.
6
10 11

DE
Vergewissern Sie sich vor dem Gebrauch, dass das
Produkt vollständig und korrekt gemäß der
Anleitung zusammengebaut ist.
Montagewerkzeug im Karton enthalten
Der Zusammenbau muss von einem Erwachsenen
oder unter Anleitung eines Erwachsenen
durchgeführt werden.
VORSICHT!
ENTFERNEN SIE VOR DEM EINBAU DIE SCHUTZFOLIE VON
DEN PRODUKTTEILEN.
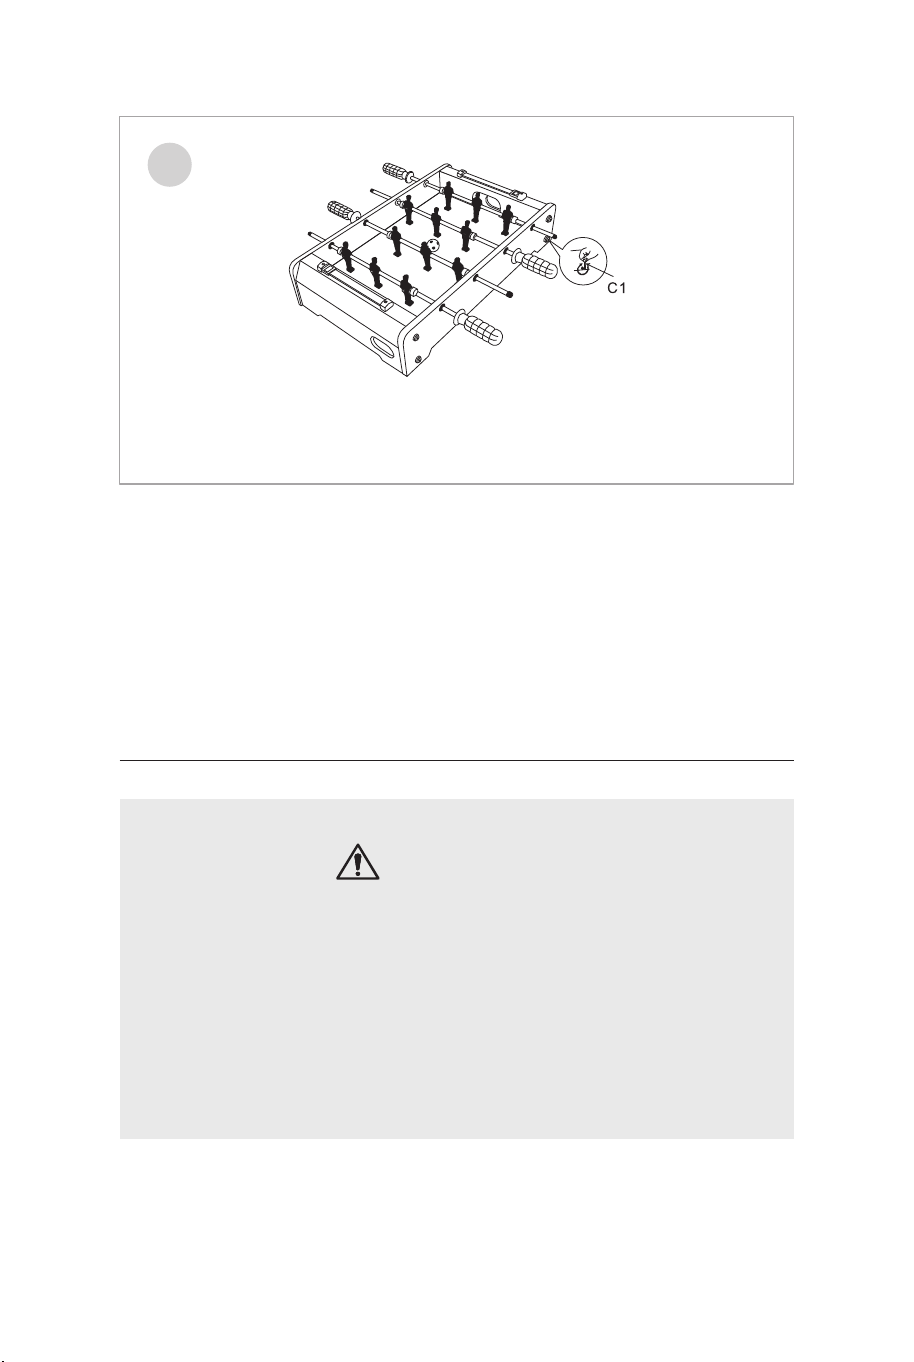
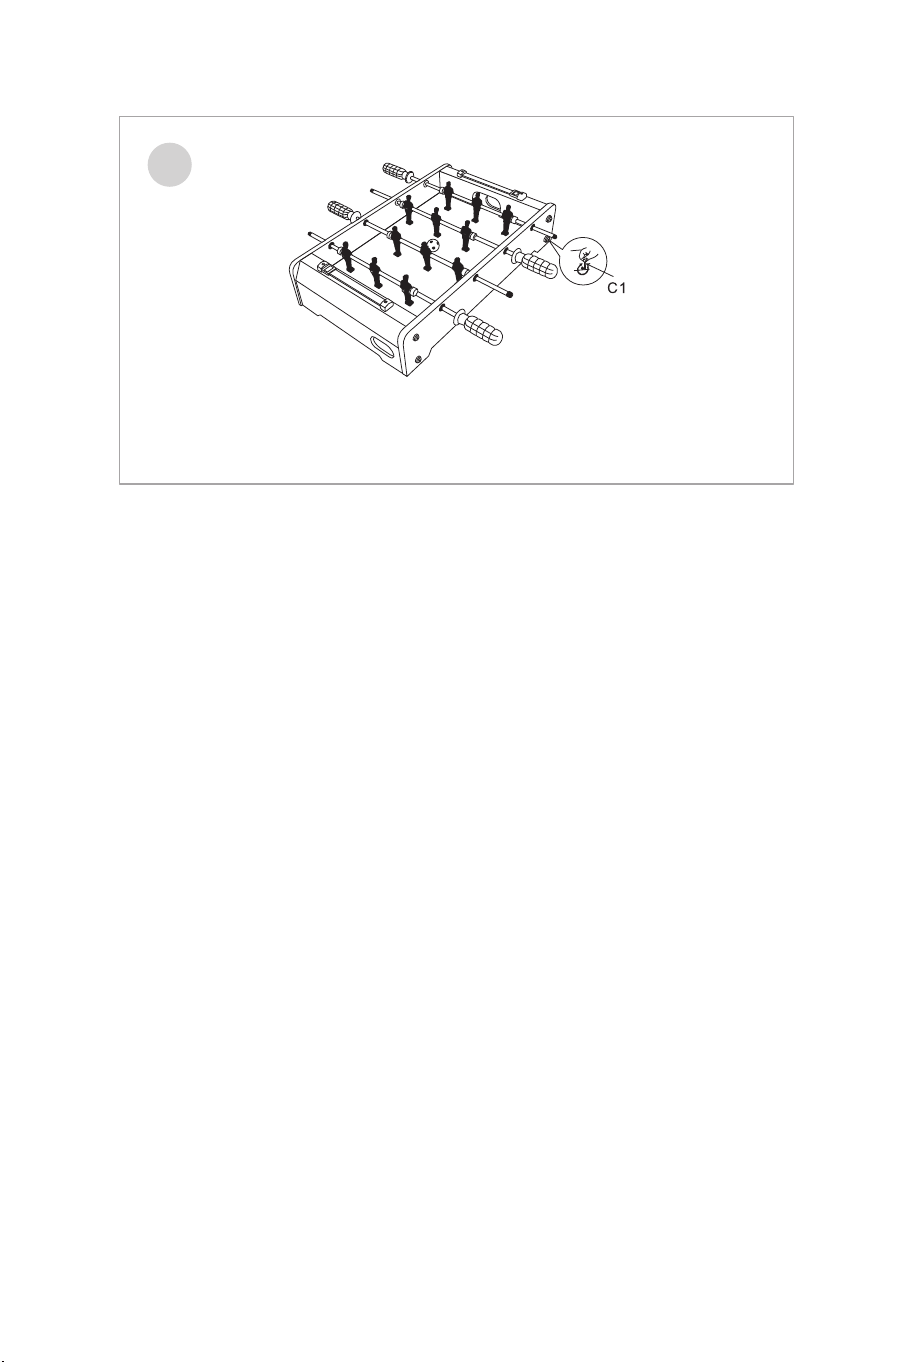
10, Make sure the table is balanced and use wrench to tighten
all screws.
10
7, Insert 4 screws into handles and tighten it.
7
8, Fix the parts of integrator.
8
9, Install a integrator into each end side.
9
12 13
DE
Vergewissern Sie sich vor dem Gebrauch, dass das
Produkt vollständig und korrekt gemäß der
Anleitung zusammengebaut ist.
Montagewerkzeug im Karton enthalten
Der Zusammenbau muss von einem Erwachsenen
oder unter Anleitung eines Erwachsenen
durchgeführt werden.
VORSICHT!
ENTFERNEN SIE VOR DEM EINBAU DIE SCHUTZFOLIE VON
DEN PRODUKTTEILEN.
10, Make sure the table is balanced and use wrench to tighten
all screws.
10
7, Insert 4 screws into handles and tighten it.
7
8, Fix the parts of integrator.
8
9, Install a integrator into each end side.
9
12 13

Teileliste Montageprozess:
1, Zwei kurze Bretter und ein langes Brett zusammensetzen,
dann mit Schrauben verbinden.
2, Setzen Sie die untere Platte in die in Schritt 1
zusammengesetzten Platten ein.
3, Drücken Sie den Gummipuffer und die Unterlegscheibe fest
gegen jeden äußeren Athleten.
1
2
3
14 15
Heimteam: T1*2 Auswärtsmannschaft:
T2*2
T1
x2
T2
x2
A1 x2 A2 x4 B1 x8 B3 x4
C1 x1 E1 x2
E2 x2 E3 x1
E4 x2 E5 x8 E7 x2 E8 x4
4, Installieren Sie die Stangen mit Sportlern in den Löchern des
langen Brettes.
4
5, Setzen Sie das letzte lange Brett bis zur Position der
Stangen ein und schrauben Sie es fest.
5
6, Stecken Sie 4 Griffe in die Stangen und stellen Sie sicher,
dass alle Griffe festgezogen sind.
6
7, Setzen Sie 4 Schrauben in die Griffe ein und ziehen Sie sie
fest.
7
8, Befestigen Sie die Teile des Integrators.
8
9, Installieren Sie einen Integrator in jede Endseite.
9
16 17
Liste des Pièces
10, Vergewissern Sie sich, dass der Tisch ausgewuchtet ist und
ziehen Sie alle Schrauben mit einem Schraubenschlüssel fest.
10
FR
Vous devez vous assurer que le produit est
entièrement et correctement assemblé
conformément aux instructions avant utilisation.
Le matériel de montage est inclus dans la boîte.
Le processus d'assemblage doit être effectué par un
adulte ou sous sa direction.
ATTENTION !
RETIREZ LE FILM DE PROTECTION DES PIÈCES DU PRODUIT
AVANT L'ASSEMBLAGE.
18 19
Équipe à domicile :
T1*2
Équipe extérieure :
T2*2
T1
x2
T2
x2
A1 x2 A2 x4 B1 x8 B3 x4
C1 x1 E1 x2
E2 x2 E3 x1
E4 x2 E5 x8 E7 x2 E8 x4

Processus d'Assemblage
1. Assemblez deux planches courtes et une planche longue,
puis vissez-les ensemble.
2. Insérez la planche inférieure dans les planches assemblées
à partir de l'étape 1.
3. Poussez le pare-chocs en caoutchouc et la rondelle contre
chaque solive extérieure.
1
2
3
4. Installez les barres avec les athlètes dans les trous de la
planche longue.
4
5. Insérez la dernière longue planche à droite dans la position
des barres, puis vissez-la.
5
6. Insérez 4 poignées dans les barres, assurez-vous que toutes
les poignées sont bien serrées.
6
20 21

10. Assurez-vous que la table est équilibrée et utilisez une clé
pour serrer tous les boulons.
10
7. Insérez 4 vis dans les poignées et serrez-les.
7
8. Fixez les pièces de l'intégrateur.
8
9. Installez un intégrateur à chaque extrémité.
9
ES
Debe asegurarse de que el producto está completa
y correctamente montado según las instrucciones
antes de usarlo.
Las herramientas de montaje se incluyen en la caja.
El proceso de montaje debe ser realizado por un
adulto o bajo su dirección.
¡ATENCIÓN!
RETIRE LA PELÍCULA DE PROTECCIÓN DE LAS PIEZAS DEL
PRODUCTO ANTES DEL MONTAJE.
22 23

Lista de Piezas Proceso de Montaje
1. Ensamble dos tableros cortos y un tablero largo, luego
únalos con tornillos.
2. Inserte el tablero inferior en los tableros ensamblados del
paso 1.
3. Empuje el tope de goma y la arandela ajustados contra cada
atleta exterior.
1
2
3
24 25
Equipo Local : T1*2 Equipo Visitante :
T2*2
T1
x2
T2
x2
A1 x2 A2 x4 B1 x8 B3 x4
C1 x1 E1 x2
E2 x2 E3 x1
E4 x2 E5 x8 E7 x2 E8 x4

4. Instale las barras con atletas en los agujeros del tablero
largo.
4
5. Inserte el último tablero largo justo en la posición de las
barras, luego atorníllelo.
5
6. Inserte 4 asas en las barras, asegúrese de que todas las
asas están apretadas bien.
6
7. Inserte 4 tornillos en las asas y apriételos.
7
8. Fije las piezas del integrador.
8
9. Instale un integrador en cada extremo.
9
26 27
10. Asegúrese de que la mesa está equilibrada y utilice una
llave para apretar todos los tornillos.
10
Elenco delle Parti
IT
Deve assicurarsi che il prodotto sia completamente
e correttamente assemblato secondo le istruzioni
prima dell'uso.
Strumenti di montaggio inclusi nella confezione
Il processo di assemblaggio deve essere svolto da
un adulto o sotto la direzione di un adulto.
ATTENZIONE!
RIMUOVERE LA PELLICOLA PROTETTIVA DELLE PARTI DEL
PRODOTTO PRIMA DELL'INSTALLAZIONE.
28 29
Squadra locale : T1*2 Squadra in visita :
T2*2
T1
x2
T2
x2
A1 x2 A2 x4 B1 x8 B3 x4
C1 x1 E1 x2
E2 x2 E3 x1
E4 x2 E5 x8 E7 x2 E8 x4

Processo di Assemblaggio
1, Assemblare due tavole corte e una tavola lunga, quindi
collegate da viti.
2, Inserire la scheda inferiore nelle schede assemblate del
passo 1.
3, Spingere il paraurti in gomma e la rondella contro ogni atleta
esterno.
1
2
3
4, Installare le barre con gli atleti nei fori della tavola lunga.
4
5, Inserire l'ultima tavola lunga proprio nella posizione delle
barre, quindi avvitarla.
5
6, Inserire 4 maniglie nelle barre, assicurarsi che tutte le
maniglie siano serrate.
6
30 31

10, Assicurarsi che il tavolo sia bilanciato e utilizzare la chiave
per serrare tutte le viti.
10
7, Inserire 4 viti nelle maniglie e serrarle.
7
8, Riparare le parti dell'integratore.
8
9, installare un integratore in ciascuna estremità.
9
PL
Przed użyciem upewnij się, że produkt został
zmontowany prawidłowo oraz zgodnie z instrukcją.
W zestawie znajdziesz wszystkie narzędzia
potrzebne do montażu.
Wymagany montaż przez osobę dorosłą lub pod
nadzorem osoby dorosłej.
UWAGA!
PRZED PRZYSTĄPIENIEM DO MONTAŻU USUŃ Z CZĘŚCI
FOLIE OCHRONNE.
32 33

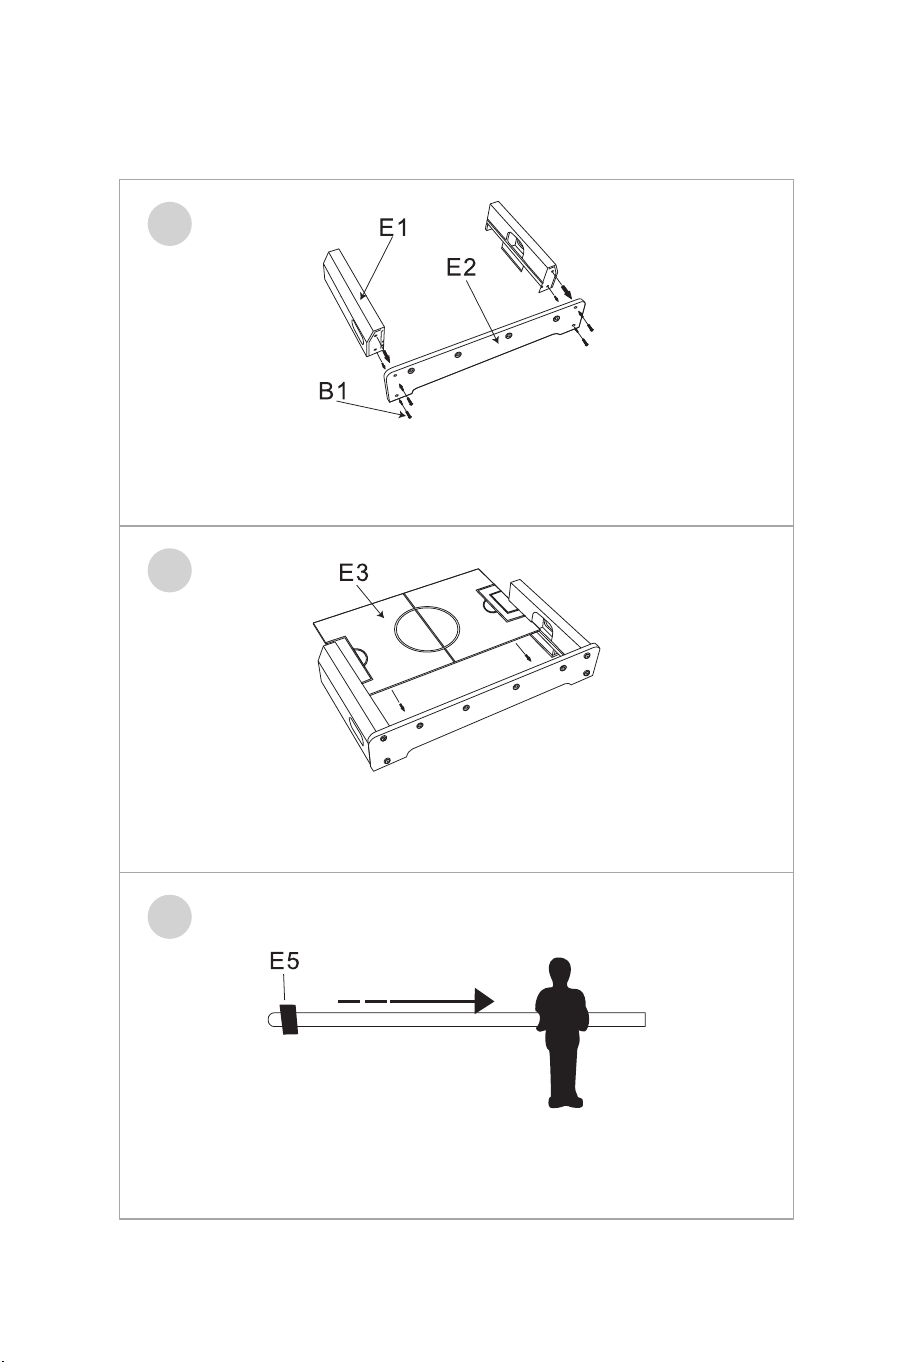
Lista części: Montaż piłkarzyków:
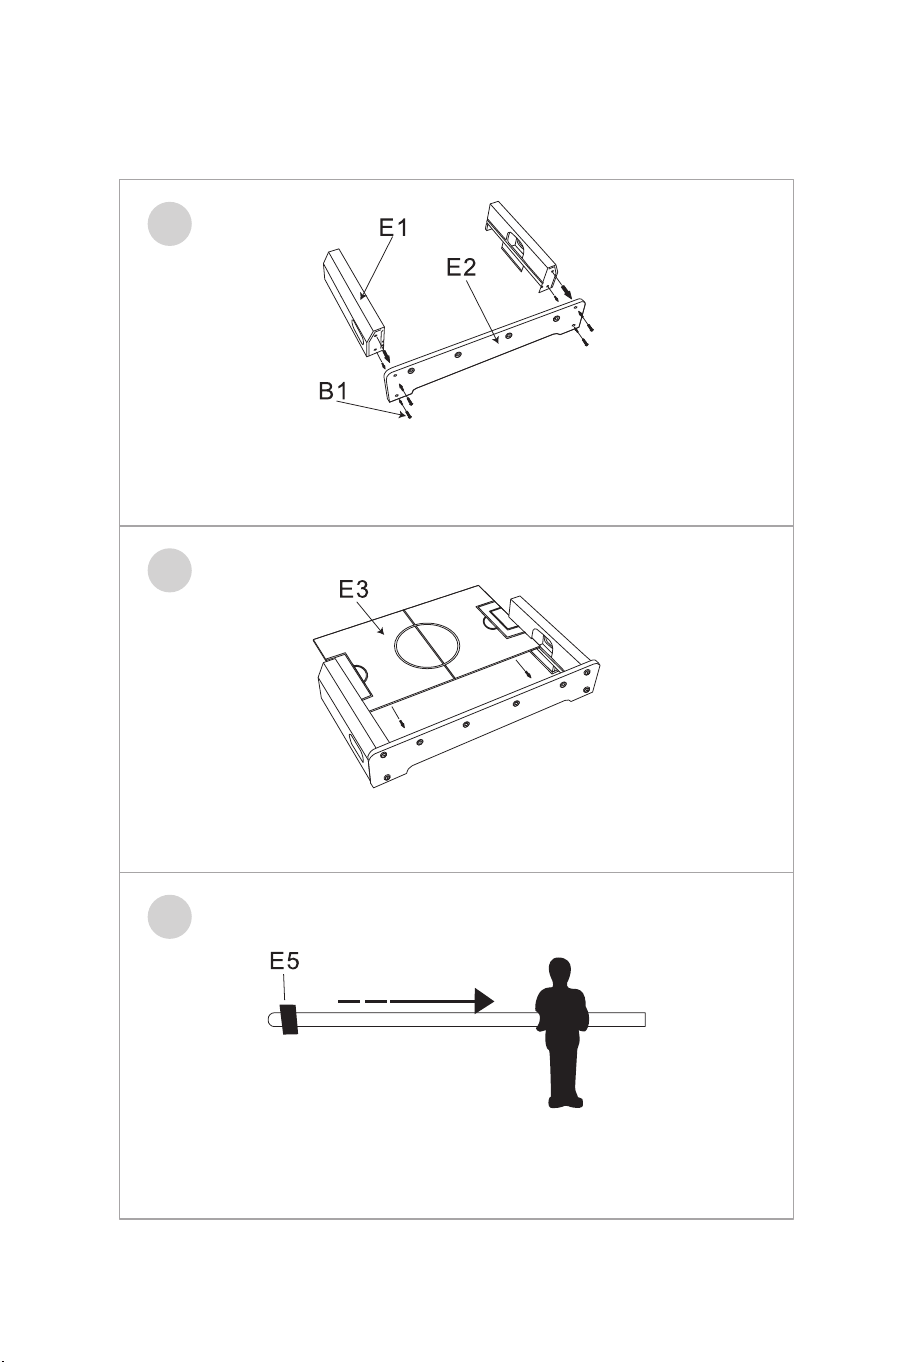
1. Przymocuj dwa krótsze elementy ramy (E1) do dłuższego
elementu ramy (E2) za pomocą śrub (B1).
2. Wsuń dolny panel (E3) w szczeliny w zmontowanej w
poprzednim kroku ramie.
3. Nasuń gumowe ochraniacze (E5) na oba końce każdej
prowadnicy z piłkarzykami.
1
2
3
34 35
Pierwsza drużyna :
T1*2
Druga drużyna : T2*2
T1
x2
T2
x2
A1 x2 A2 x4 B1 x8 B3 x4
C1 x1 E1 x2
E2 x2 E3 x1
E4 x2 E5 x8 E7 x2 E8 x4

Lista części: Montaż piłkarzyków:
1. Przymocuj dwa krótsze elementy ramy (E1) do dłuższego
elementu ramy (E2) za pomocą śrub (B1).
2. Wsuń dolny panel (E3) w szczeliny w zmontowanej w
poprzednim kroku ramie.
3. Nasuń gumowe ochraniacze (E5) na oba końce każdej
prowadnicy z piłkarzykami.
1
2
3
34 35
Pierwsza drużyna :
T1*2
Druga drużyna : T2*2
T1
x2
T2
x2
A1 x2 A2 x4 B1 x8 B3 x4
C1 x1 E1 x2
E2 x2 E3 x1
E4 x2 E5 x8 E7 x2 E8 x4

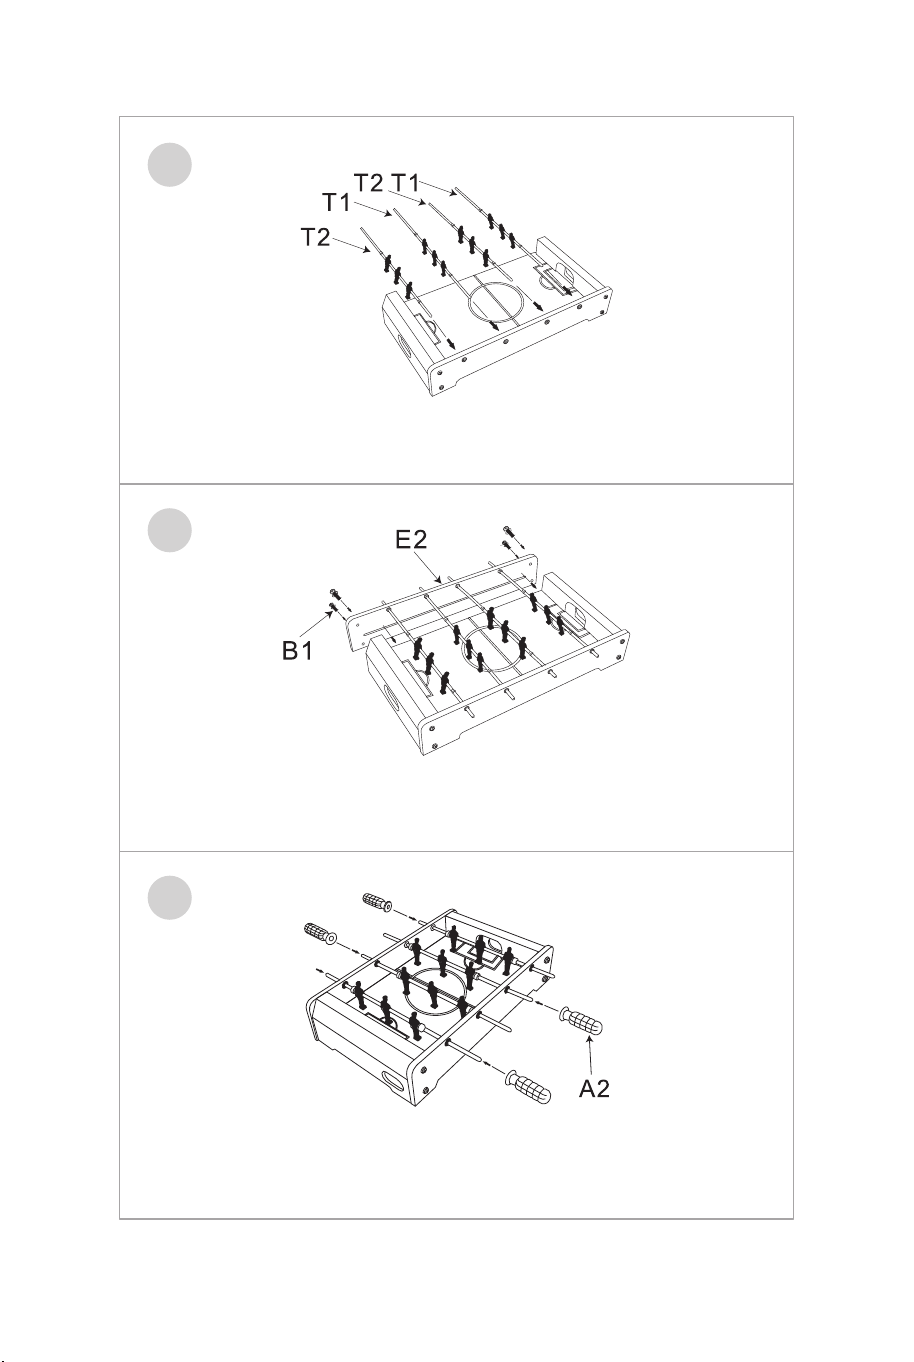
4. Zamocuj prowadnice z piłkarzykami (T1-T4) w otworach w
dłuższym elemencie ramy (E2).
4
5. Przymocuj drugi dłuższy element ramy (E2) za pomocą śrub
(B1), wyrównując otwory z prowadnicami z piłkarzykami.
5
6. Załóż i dokręć uchwyt (A2) na końcu każdej prowadnicy z
piłkarzykami.
6
7. Zamocuj 4 uchwyty za pomocą wkrętów (B3).
7
8. Połącz poszczególne części liczników punktów (E4, E7, E8).
8
9. Zamocuj liczniki punktów po obu stronach stołu.
9
36 37
In case a return is required, the item must be returned in original box. Without this
your return will not be accepted.
DO NOT discard the box / original packaging.
Take a photo of the box markings.
Take a photo of the damaged part (if applicable).
Send us an email with the images requested.
A photo of the markings (text) on the side of the box is required in case a part is
needed for replacement. This helps our staff identify your product number to
ensure you receive the correct parts.
A photo of the damage is always required to file a claim and get your replacement
or refund processed quickly. Please make sure you have the box even if it is
damaged.
Email us directly from marketplace where your item was purchased with the
attached images and a description of your claim.
Falls eine Rücksendung erforderlich ist, muss der Artikel in der
Originalverpackung zurückgeschickt werden. Andernfalls wird Ihre Rücksendung
nicht angenommen.
Werfen Sie den Karton / die Originalverpackung NICHT weg.
Machen Sie ein Foto von der Beschriftung des Kartons.
Machen Sie ein Foto des beschädigten Teils (falls zutreffend).
Schicken Sie uns eine E-Mail mit dem gewünschten Foto.
Für den Fall, dass ein Ersatzteil benötigt wird, benötigen wir ein Foto der
Beschriftung (Text) auf der Seite des Kartons. So können unsere Mitarbeiter Ihre
Artikelnummer identifizieren und sicherstellen, dass Sie die richtigen Teile
erhalten.
Ein Foto des beschädigten Teils ist immer erforderlich, um eine Reklamation
einzureichen und eine schnelle Bearbeitung Ihres Ersatzteils oder Ihrer
Rückerstattung zu gewährleisten. Bitte stellen Sie sicher, dass Sie den Karton
haben, auch wenn er beschädigt ist.
Schicken Sie uns eine E-Mail direkt vom Marktplatz, auf dem Sie den Artikel
gekauft haben, mit den angehängten Fotos und einer Beschreibung Ihrer
Reklamation.
EN
DE
Return / Damage Claim Instructions
Rücksendung / Beschädigung Anweisungen
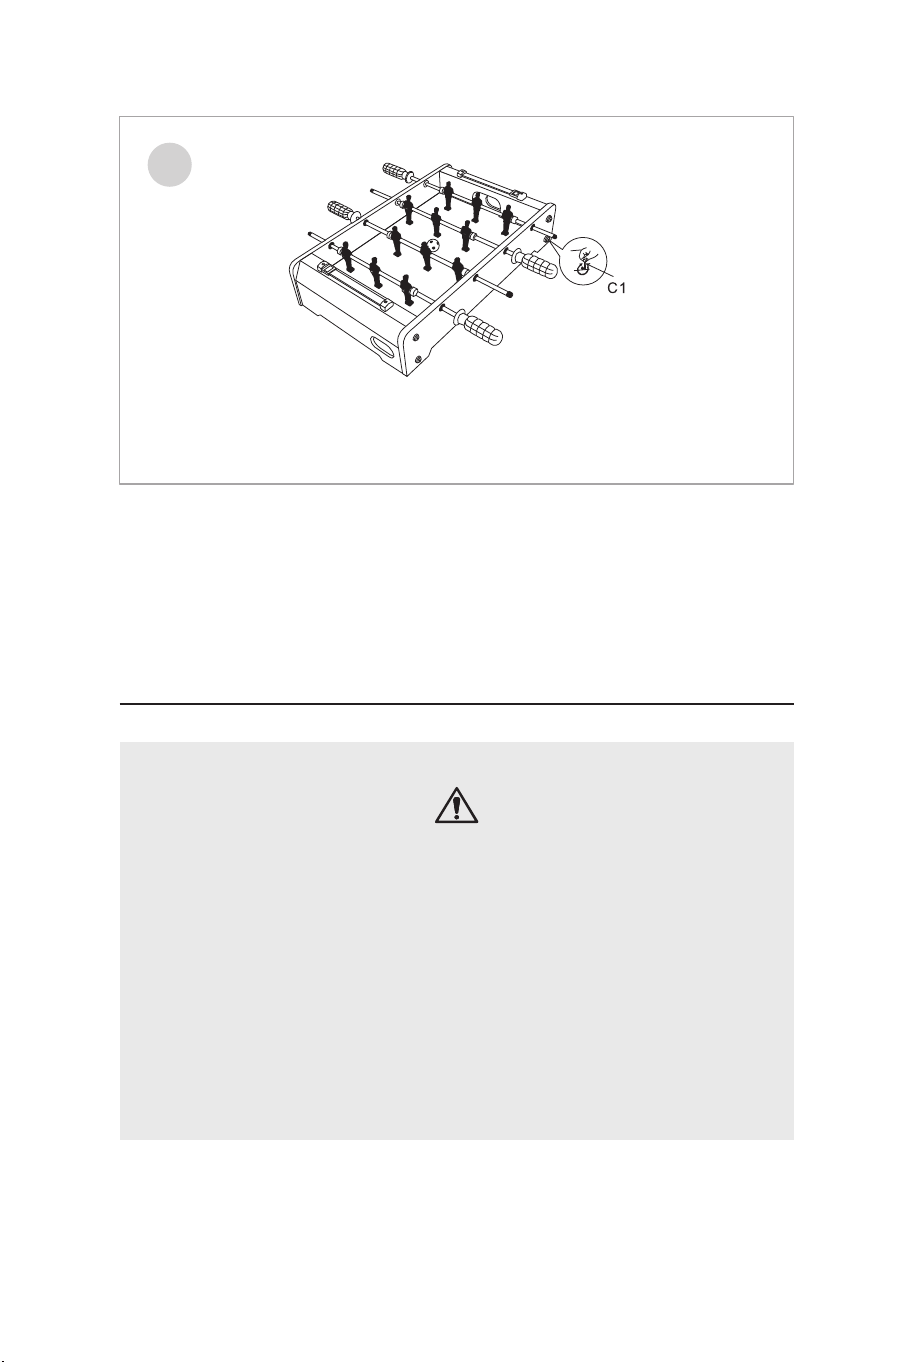
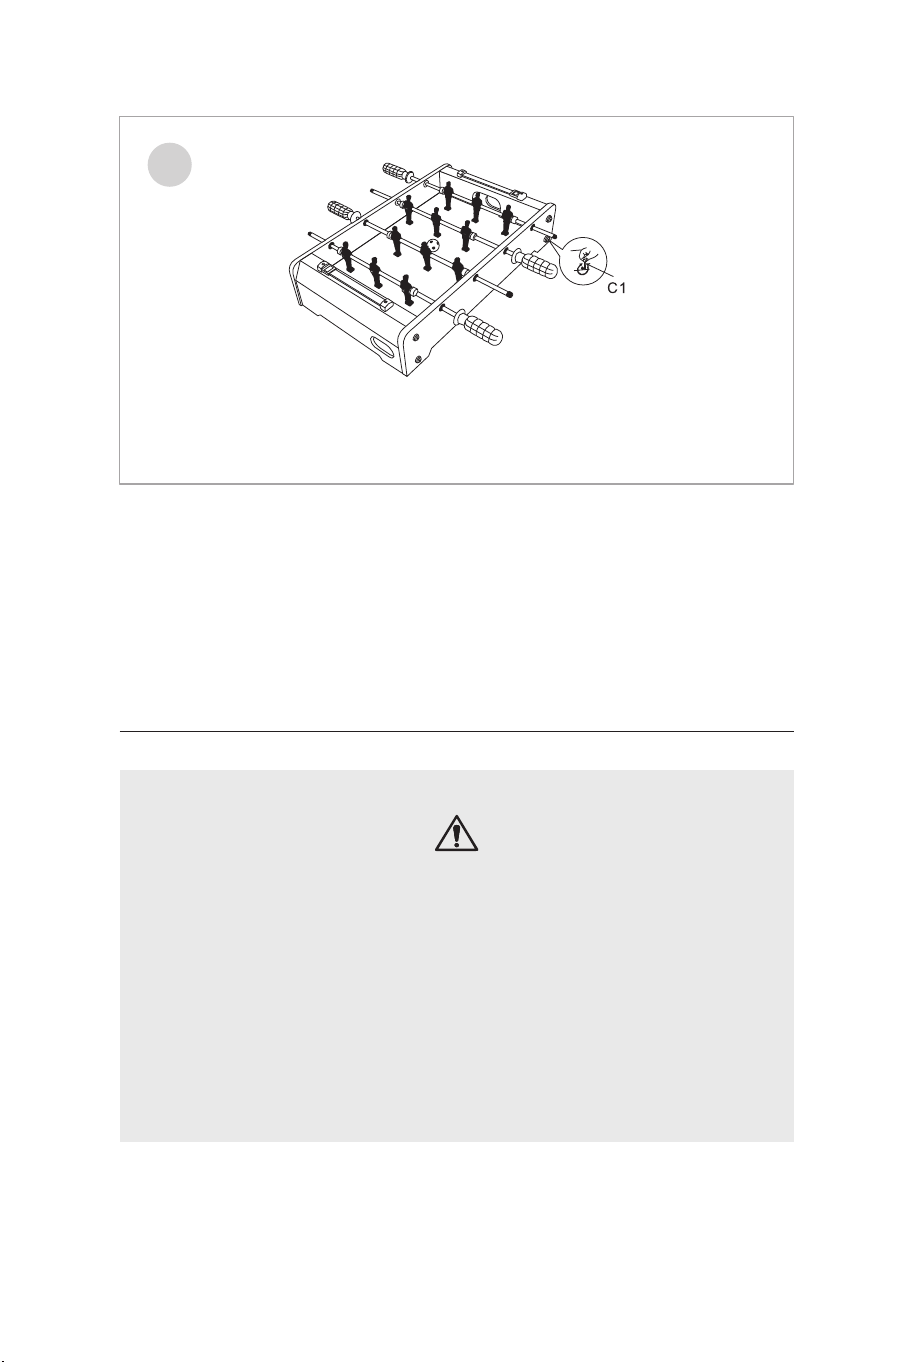
10. Sprawdź, czy stół stoi stabilnie. Dokręć śruby za pomocą
klucza imbusowego (C1).
10
38 39
In case a return is required, the item must be returned in original box. Without this
your return will not be accepted.
DO NOT discard the box / original packaging.
Take a photo of the box markings.
Take a photo of the damaged part (if applicable).
Send us an email with the images requested.
A photo of the markings (text) on the side of the box is required in case a part is
needed for replacement. This helps our staff identify your product number to
ensure you receive the correct parts.
A photo of the damage is always required to file a claim and get your replacement
or refund processed quickly. Please make sure you have the box even if it is
damaged.
Email us directly from marketplace where your item was purchased with the
attached images and a description of your claim.
Falls eine Rücksendung erforderlich ist, muss der Artikel in der
Originalverpackung zurückgeschickt werden. Andernfalls wird Ihre Rücksendung
nicht angenommen.
Werfen Sie den Karton / die Originalverpackung NICHT weg.
Machen Sie ein Foto von der Beschriftung des Kartons.
Machen Sie ein Foto des beschädigten Teils (falls zutreffend).
Schicken Sie uns eine E-Mail mit dem gewünschten Foto.
Für den Fall, dass ein Ersatzteil benötigt wird, benötigen wir ein Foto der
Beschriftung (Text) auf der Seite des Kartons. So können unsere Mitarbeiter Ihre
Artikelnummer identifizieren und sicherstellen, dass Sie die richtigen Teile
erhalten.
Ein Foto des beschädigten Teils ist immer erforderlich, um eine Reklamation
einzureichen und eine schnelle Bearbeitung Ihres Ersatzteils oder Ihrer
Rückerstattung zu gewährleisten. Bitte stellen Sie sicher, dass Sie den Karton
haben, auch wenn er beschädigt ist.
Schicken Sie uns eine E-Mail direkt vom Marktplatz, auf dem Sie den Artikel
gekauft haben, mit den angehängten Fotos und einer Beschreibung Ihrer
Reklamation.
EN
DE
Return / Damage Claim Instructions
Rücksendung / Beschädigung Anweisungen
10. Sprawdź, czy stół stoi stabilnie. Dokręć śruby za pomocą
klucza imbusowego (C1).
10
38 39
Instructions De Retour / Réclamation De Dommages
Dans le cas où un retour est requis, l'article doit être retourné dans sa boîte
d'origine. Sans cela, votre retour ne sera pas accepté.
NE PAS jeter la boîte/l'emballage d'origine.
Prenez une photo des marquages de la boîte.
Prenez une photo des dommages (le cas échéant).
Envoyez-nous un e-mail avec les images demandées.
Une photo des marquages (texte) sur le côté de la boîte est requise au cas où une
pièce serait nécessaire pour le remplacement. Cela aide notre personnel à
identifier votre numéro de produit pour s'assurer que vous recevez les bonnes
pièces.
Une photo des dommages est toujours requise pour déposer une réclamation et
obtenir rapidement votre remplacement ou votre remboursement. Assurez-vous
d'avoir la boîte même si elle est endommagée.
Envoyez-nous un e-mail directement depuis le marché où votre article a été
acheté avec les images ci-jointes et une description de votre réclamation.
Instrucciones de Devolución / Reclamación de Daños
En caso de que se requiera una devolución, el artículo debe ser devuelto en la
caja original. Sin esto su devolución no será aceptada.
NO deseche la caja/embalaje original.
Tome una foto de las marcas de la caja.
Tome una foto de los daños (si procede).
Envíenos un correo electrónico con las imágenes solicitadas.
Se requiere una foto de las marcas (texto) en el lado de la caja en caso de que se
necesite una pieza para reemplazarla. Esto ayuda a nuestro personal a identificar
su número de producto para asegurarse de que recibe las piezas correctas.
Una foto de los daños es siempre necesaria para presentar una reclamación y
conseguir que su reemplazo o reembolso sea procesado rápidamente. Por favor,
asegúrese de tener la caja aunque esté dañada.
Envíenos un correo electrónico directamente desde el mercado donde se compró
su artículo con las imágenes adjuntas y una descripción de su reclamación.
FR
ES
Nel caso in cui sia richiesto un reso, l'articolo deve essere restituito nella scatola
originale. Senza la scatola originale il tuo reso non sarà accettato.
NON scartare la scatola / confezione originale.
Fare una foto dei contrassegni sulla scatola.
Fare una foto di Danno (se è applicabile).
Inviarci una mail con le immagini richieste.
È necessaria una foto dei contrassegni (testo) sul lato della scatola nel caso in
cui la parte debba essere sostituita. Questo aiuta il nostro staff a identificare il
numero del tuo prodotto per assicurarti di ricevere le parti corrette.
Una foto del danno è sempre necessaria per presentare un reclamo e ottenere
rapidamente la sostituzione o il rimborso. Assicurati di avere la scatola anche se
è danneggiata.
Inviarci un’e-mail direttamente dal mercato in cui è stato acquistato il tuo articolo
con le immagini allegate e una descrizione del tuo reclamo.
Jeśli chcesz zwrócić produkt, musi znajdować się on w oryginalnym opakowaniu.
Towar zwrócony w nieoryginalnym opakowaniu nie zostanie przyjęty.
Nie wyrzucaj oryginalnego opakowania.
Zrób zdjęcie oznaczeń na opakowaniu.
Zrób zdjęcie uszkodzonej części (jeśli dotyczy).
Skontaktuj się z nami.
Jeśli jakakolwiek część wymaga wymiany, zrób zdjęcie oznaczeń kodu produktu,
który znajduje się na opakowaniu. Pozwoli nam to zidentyfikować produkt i
dostarczyć ci właściwą część.
Jeśli chcesz złożyć reklamację, zrób zdjęcie uszkodzonej części. Pozwoli nam to
zatwierdzić reklamację i zlecić zwrot środków na twoje konto. Do złożenia
reklamacji potrzebne będzie oryginalne opakowanie.
Skontaktuj się z nami telefonicznie, mailowo lub poprzez formularz kontaktowy.
Załącz zdjęcia produktu i opis roszczenia.
IT
PL
Istruzioni Per La Restituzione / Reclamo Per Danni
Zwroty i reklamacje
40 41

TY343181
If you're having difficulty, our friendly
customer team is always here to help.
THIS INSTRUCTION BOOKLET CONTAINS IMPORTANT SAFETY INFORMATION. PLEASE READ AND KEEP FOR FUTURE REFERENCE.
Table Top Football Game
Tischfußballspiel
Jeu de Football de Table
Futbolín
Calcio Balilla
Piłkarzyki stołowe
AUS:cs.au@costway.com
FRA:cs.fr@costway.com
DEU:cs.de@costway.com
ITA:cs.it@costway.com ESP:cs.es@costway.com
POL:sklep@costway.com
GBR:cs.uk@costway.com
DEU office: FDS GmbH, Neuer Höltigbaum 36, 22143 Hamburg, Deutschland
ITA office: Milano
FRA office: Saint Vigor d'Ymonville
POL office: GdańskGBR office: IpswichAUS office: TruganinaUSA office: Fontana