100000862 10/2023
❶
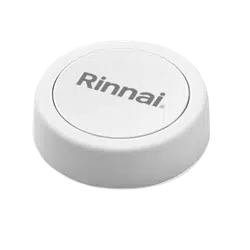
Thank you for purchasing a Rinnai RPB200 Recirculaon Push Buon! Please read the instrucons below
for installaon and operang instrucons.
VERIFY COMPATIBALITY
Ensure you have a compable Rinnai product
(wireless module, tankless water heater, boiler,
etc.) before installing this buon. If you are unsure,
scan the QR code at the end of this guide for a
complete list of compable products.
❷ PAIR: Pair the push buon to your Rinnai product:
• Water Heaters/Boilers: Press and hold the Bluetooth
buon on the controller unl the Bluetooth LED
starts ashing. Then, release the buon.
RWM200 Wireless Module: Press and hold the
“Connect” buon on the module unl the top LED
light starts ashing green. Then, release the buon.
• Press and hold the push buon unl the LED on the
push buon ashes GREEN.
Having trouble? Scan the QR code at the end of this
guide for detailed pairing instrucons.
To unpair the push buon from one Rinnai product and
pair to a dierent Rinnai product, repeat the above
pairing process with the new Rinnai product.
THIS DEVICE COMPLIES WITH PART 15 OF THE FCC RULES.
OPERATION IS SUBJECT TO THE FOLLOWING TWO
CONDITIONS: (1) THIS DEVICE MAY NOT CAUSE HARMFUL
INTERFERENCE (2) THIS DEVICE MUST ACCEPT ANY
INTERFERENCE RECEIVED, INCLUDING INTERFERENCE THAT
MAY CAUSE UNDESIRED OPERATION. FCC ID: 2ACR9-FLIC2
IC: 12180a-FLIC2
ATTACH PUSH BUTTON TO A SURFACE
1. Pair the push buon and verify operaon in the
desired locaon prior to aaching the buon to
a surface.
2. Clean and dry the surface area.
3. Remove the paper on the back of the push
buon to expose the adhesive.
4. Aach the push buon to the desired locaon.
NOTE: To remove the push buon, gently pull the
push buon from the surface. Gently clean the
adhesive on the back of the push buon with a
damp cloth if needed before aaching the push
buon to a new surface.
❹
REPLACE BATTERY (WHEN NEEDED)
1. Twist the push buon counter-clockwise
to expose the baery.
2. Gently remove the baery and replace with a
new CR2023 baery.
3. Twist the push buon back onto the buon back
clockwise.
❺
OPERATE:
Press the push buon to acvate the Rinnai product’s
recirculaon system. The recirculaon system
deacvates aer ve minutes from the last acvaon
or when the water has reached the set temperature.
NOTE: If the recirculang pump has recently been
acve and the recirculaon loop is sll warm, there
may be a delay in pump acvaon. To minimize any
delay in pump acvaon, set the Rinnai product to
Comfort Mode (refer to the “Recirculaon Mode”
secon in the Rinnai product Installaon and Operaon
Manual for more informaon on Comfort Mode).
Push Buon LED Indicator Lights:
• FLASHING RED: Push buon is not yet paired.
• FLASHING YELLOW: Push buon is aempng to
connect to the paired Rinnai product.
• FLASHING GREEN: Push buon has successfully
paired and requested recirculaon.
❸
Quesons? Call Rinnai at 1-800-621-9419
Scan the code for
detailed push buon
installaon and
operang instrucons.
❶
Merci d’avoir fait l’acquision du bouton-poussoir de recirculaon Rinnai RPB200! Veuillez lire les
instrucons ci-après pour son installaon et son ulisaon.
VÉRIFIER LA COMPATIBILITÉ
S’assurer d’avoir un produit Rinnai compable
(module sans l, chaue-eau instantané, chaudière,
etc.) avant d’installer ce bouton. Si vous avez des
doutes, scannez le code QR à la n de ce guide pour
obtenir la liste complète des produits compables.
❷
CET APPAREIL EST CONFORME À LA PARTIE 15 DES RÈGLES
DE LA FCC. SON FONCTIONNEMENT EST SOUMIS AUX
DEUX CONDITIONS SUIVANTES: (1) CET APPAREIL NE DOIT
CAUSER AUCUNE INTERFÉRENCE NUISIBLE, ET (2) IL DOIT
ACCEPTER TOUTE INTERFÉRENCE REÇUE, NOTAMMENT
CELLES POUVANT PROVOQUER UN FONCTIONNEMENT
INDÉSIRABLE. FCC ID: 2ACR9-FLIC2 IC: 12180a-FLIC2
FIXER LE BOUTON-POUSSOIR SUR UNE SURFACE
1. Coupler le bouton-poussoir et vérier son
fonconnement à l’endroit souhaité avant de le
xer sur une surface.
2. Neoyer et sécher la surface choisie.
3. Rerer le papier au dos du bouton-poussoir pour
révéler l’adhésif.
4. Fixer le bouton-poussoir à l’endroit souhaité.
REMARQUE: Pour rerer le bouton-poussoir, rer
doucement dessus pour le libérer de la surface.
Neoyer délicatement l’adhésif au dos du bouton-
poussoir à l’aide d’un chion humide
❹
❺
❸
COUPLER: Coupler le bouton-poussoir avec le produit
Rinnai:
• Chaue-eau/chaudières: Appuyer sur le bouton
Bluetooth du contrôleur et le maintenir ainsi jusqu’à ce
que le voyant LED Bluetooth commence à clignoter.
Ensuite, relâcher le bouton.
Module sans l RWM200: Maintenir le bouton
« Connect » enfoncé jusqu’à ce que le voyant LED
clignote.
• Appuyez et maintenez le bouton-poussoir jusqu'à ce
que la LED du bouton-poussoir clignote en VERT.
Un problème? Scannez le code QR à la n de ce guide
pour obtenir des instrucons détaillées sur le couplage.
Pour annuler le couplage du bouton-poussoir à un
produit Rinnai et l'appairer à un autre produit Rinnai,
recommencer le processus ci-dessus.
UTILISER: Appuyer sur le bouton-poussoir pour acver le
circuit de recirculaon de l’appareil Rinnai. Le système de
recirculaon se désacve cinq minutes après la dernière
acvaon, ou lorsque l’eau a aeint la température
programmée.
REMARQUE: Si la pompe de recirculaon a été
récemment acve et que la boucle de recirculaon est
encore chaude, il peut y avoir un retard dans l’acvaon
de la pompe. Pour minimiser tout retard dans l’acvaon
de la pompe, régler le produit Rinnai sur le mode confort
(Comfort Mode) (voir la secon « Mode de
recirculaon » dans le manuel d’installaon et
d’ulisaon du produit Rinnai pour plus d’informaons
sur ce mode).
Voyants du bouton-poussoir:
• ROUGE CLIGNOTANT: Le bouton-poussoir n’est pas
encore couplé.
• JAUNE CLIGNOTANT: Le bouton-poussoir essaie de se
connecter au produit Rinnai couplé.
• VERT CLIGNOTANT: Le bouton-poussoir a été couplé
avec succès et a demandé la recirculaon.
Des quesons? Appelez Rinnai au 1-800-621-9419
REMPLACER LA PILE (LE CAS ÉCHÉANT)
1. Tourner le bouton-poussoir dans le sens inverse
des aiguilles d’une montre pour accéder à la pile.
2. Rerer délicatement la pile et la remplacer par
une pile CR2023 neuve.
3. Tourner le bouton-poussoir dans le sens des
aiguilles d’une montre pour le remere en place.
Scannez le code pour obtenir
des instrucons détaillées sur
l’installaon et l’ulisaon des
boutons-poussoirs.
