
Loading ...
Loading ...
Loading ...
GAS CONVERSION
STEP 4: BROILER BURNER
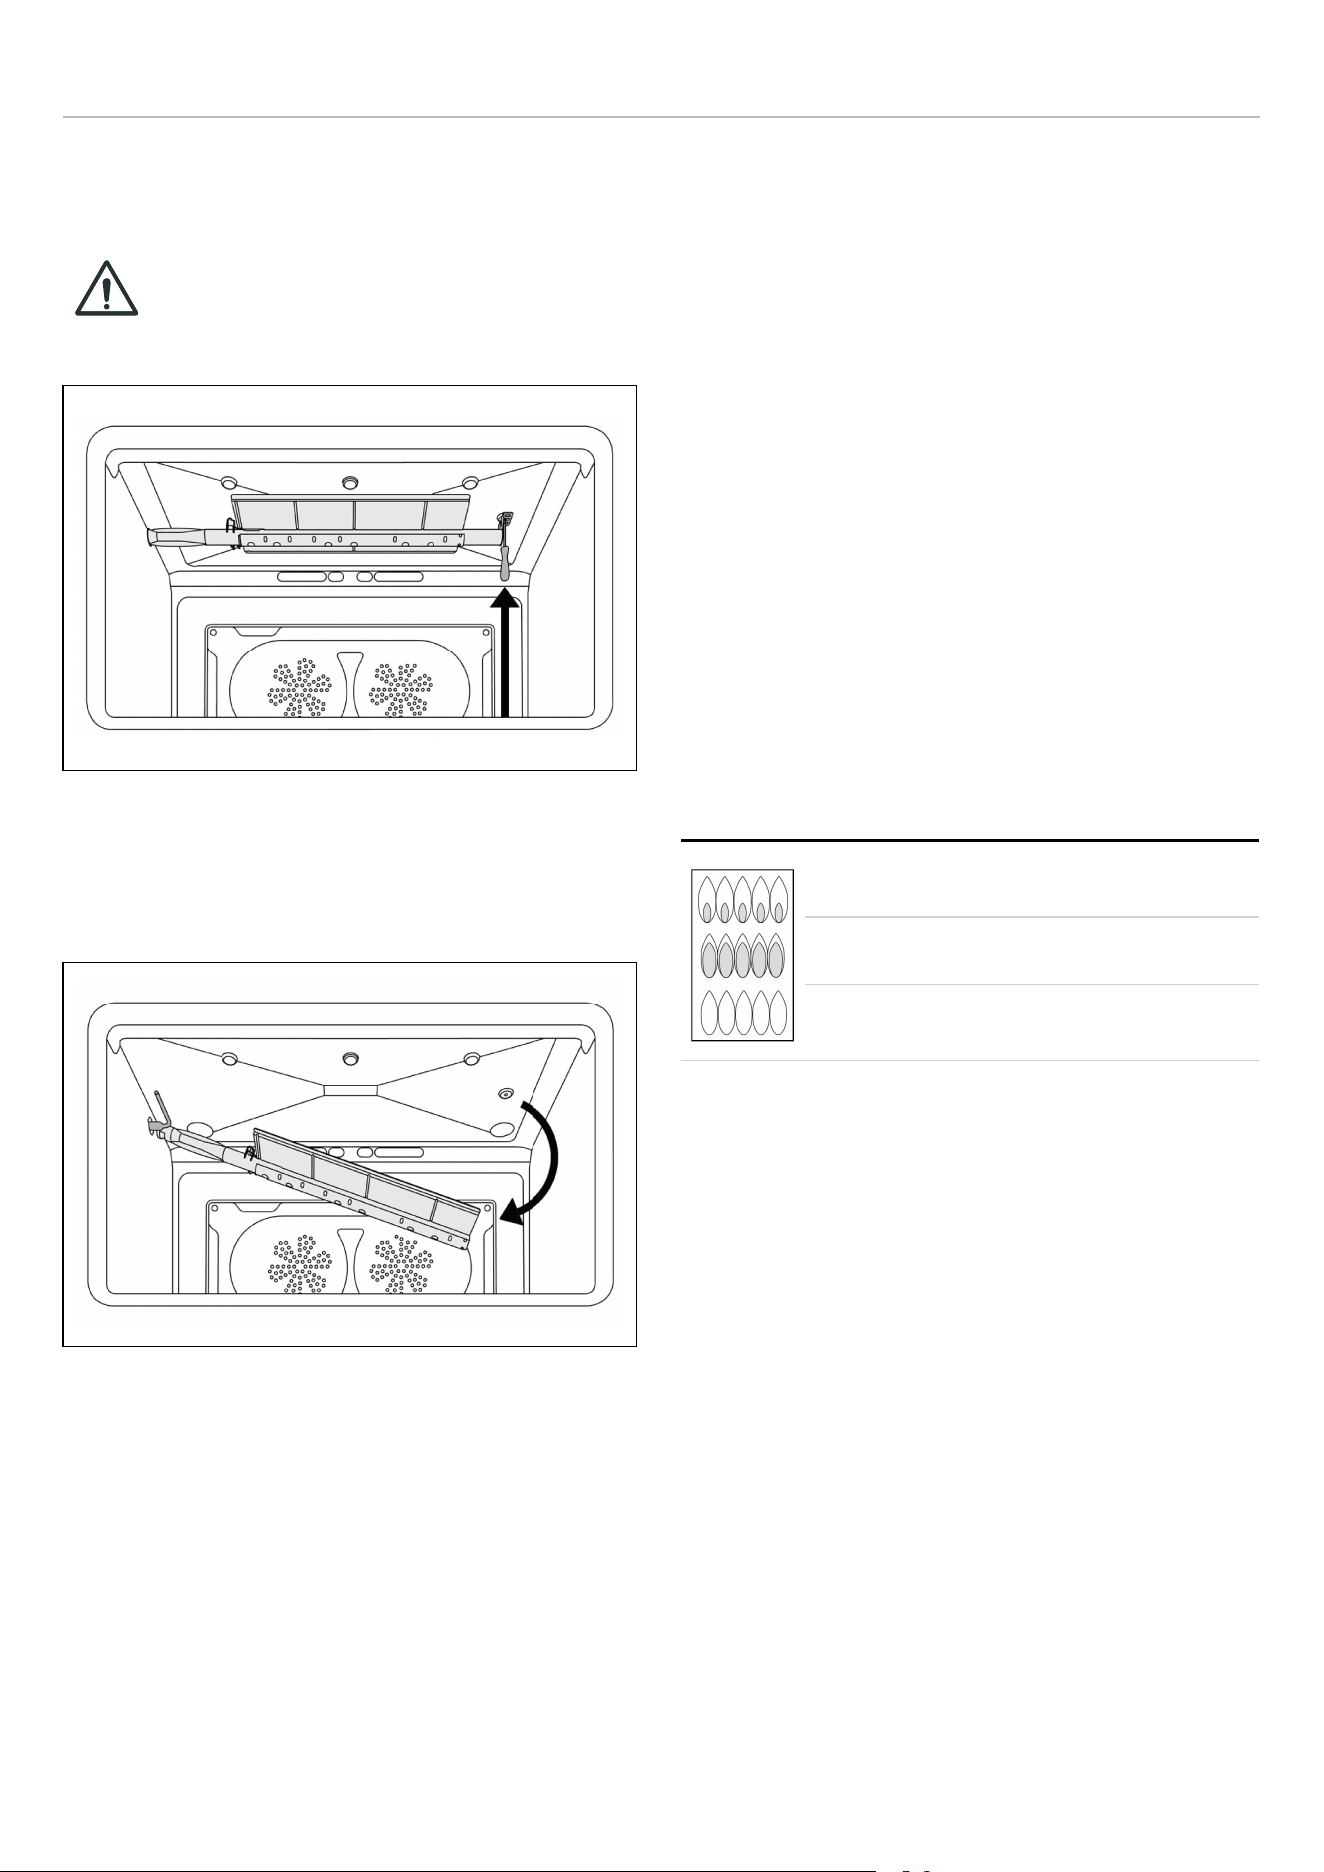
Remove the screw and pull out the burner from its support.
CAUTION
ATTENTION: pay extra attention to avoid
damage to the igniter and thermocouple.
Fig. 28
Unscrew the nozzle located inside the gas fitting using a 7
mm [socket wrench].
Replace the nozzle as table number 1.
Fig. 29
STEP 5: VISUAL CHECKS
OVEN
Before reinstalling the bottom panel, the following visual
check must be performed to ensure that the conversion has
been carried out properly and without damage to other
components of the range.
Verify that the flame of the oven/broiler burner be
completely blue and with regular aspect as shown below.
SURFACE BURNERS
The burner flame color should be blue with no yellow on the
tips. It is not uncommon to see orange in the flame color;
this indicates the burning of airborne impurities in the gas
and will disappear with use. With propane (LP) gas, slight
yellow tips on the primary icon are normal.
The flame should burn completely around the burner cap. If
it does not, check that the cap is positioned correctly on the
base and that the ports are not blocked.
The flame should be stable with no excessive noise or
fluttering.
yellow flames: further adjustment is required
yellow tips on outer cones: normal for LP
gas
soft blue flames: normal for natural gas
After performing all these visual checks, reinstall the
bottom panel of the oven compartment and proceed to
setting the minimum for each burner.
29
Loading ...
Loading ...
Loading ...