Loading ...
Loading ...
Loading ...

10 C6659M (10/21)
Product Overview
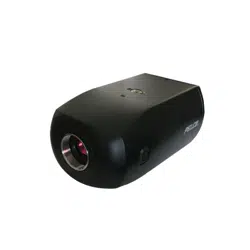
Figure 1. Sarix Enhanced III IXE Series Box
1. Status LED Indicators:
a. Solid red for more than 5 seconds indicates there is a booting error. Flashing green indicates booting is
normal.
b. Flashing orange indicates a firmware update is in progress.
c. LED will turn off after a successful boot up.
d. Solid amber indicates the camera is in a cold start state (warming up before fully booting).
2
. Alarm/Relay/Audio Port: Connects to alarms, relays, and audio in/out.
3. Power Connector: A two-pin connector for 12 VDC or 24 VAC.
4. RJ-45 Network Port: Connects the camera to the IP network. Also supplies power to the camera (POE), through
the same connector. (NOTE: To purchase a power supply, please contact Pelco for further information.)
a. Green LED: With solid green, the LED indicates a live con
nection is established.
b. Orange LED: With flashing orange, the LED indicates data is being transmitted/received between camera and
switch.
5. Defaults Button: Press and hold the button for 4 seconds to restore the camera to factory default settings.
6. Reset Button: Cycles power to the camera and initiates a reset. Press and release the reset button once to reboot
the camera.
7. Micro SD Slot: Install t
he SD card into the card slot to store videos and snapshots. Do not remove the micro SD
card when the camera is powered on.
8. iCS Lens Connector: Insert the 5-pin connector from the iCS lens into this connector.
9. Microphone: Microphone for capturing sound.
Loading ...
Loading ...
Loading ...