Loading ...
Loading ...
Loading ...

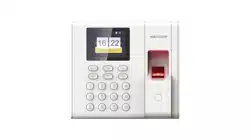
DS-K1A8503 Series Fingerprint Time Attendance Terminal User Manual
43
Caution
The password strength of the device can be automatically checked. We highly recommend
you change the password of your own choosing (using a minimum of 8 characters, including
at least three kinds of following categories: upper case letters, lower case letters, numbers,
and special characters) in order to increase the security of your product. And we recommend
you reset your password regularly, especially in the high security system, resetting the
password monthly or weekly can better protect your product.
Proper configuration of all passwords and other security settings is the responsibility of the
installer and/or end-user.
6. Optional: Check Synchronize Time to synchronize the device time with the PC running the client
after adding the device to the client.
7. Optional: Check Import to Group to create a group by the device name.
Note
You can import all the channels of the device to the corresponding group by default.
8. Finish adding the device.
– Click Add to add the device and back to the device list page.
– Click Add and New to save the settings and continue to add other device.
9. Optional: Click on Operation column to view device status.
6.1.4 Add Device by EHome Account
For areas where devices using dynamic IP addresses instead of static ones, you can add access
control device connected via EHome protocol by specifying the EHome account.
Before You Start
Set the network center parameter first. For details, refer to Set Network Parameters.
Steps
Note
For the devices added by EHome don't support uploading events with captured pictures to the
client.
1. Enter Device Management module.
2. Optional: Click on the right of Device Management and select Device.
The added devices are displayed in the list.
3. Click Add to open the Add window.
4. Select EHome as the adding mode.
5. Enter the required information.
Device Account
Loading ...
Loading ...
Loading ...
