Loading ...
Loading ...
Loading ...
20
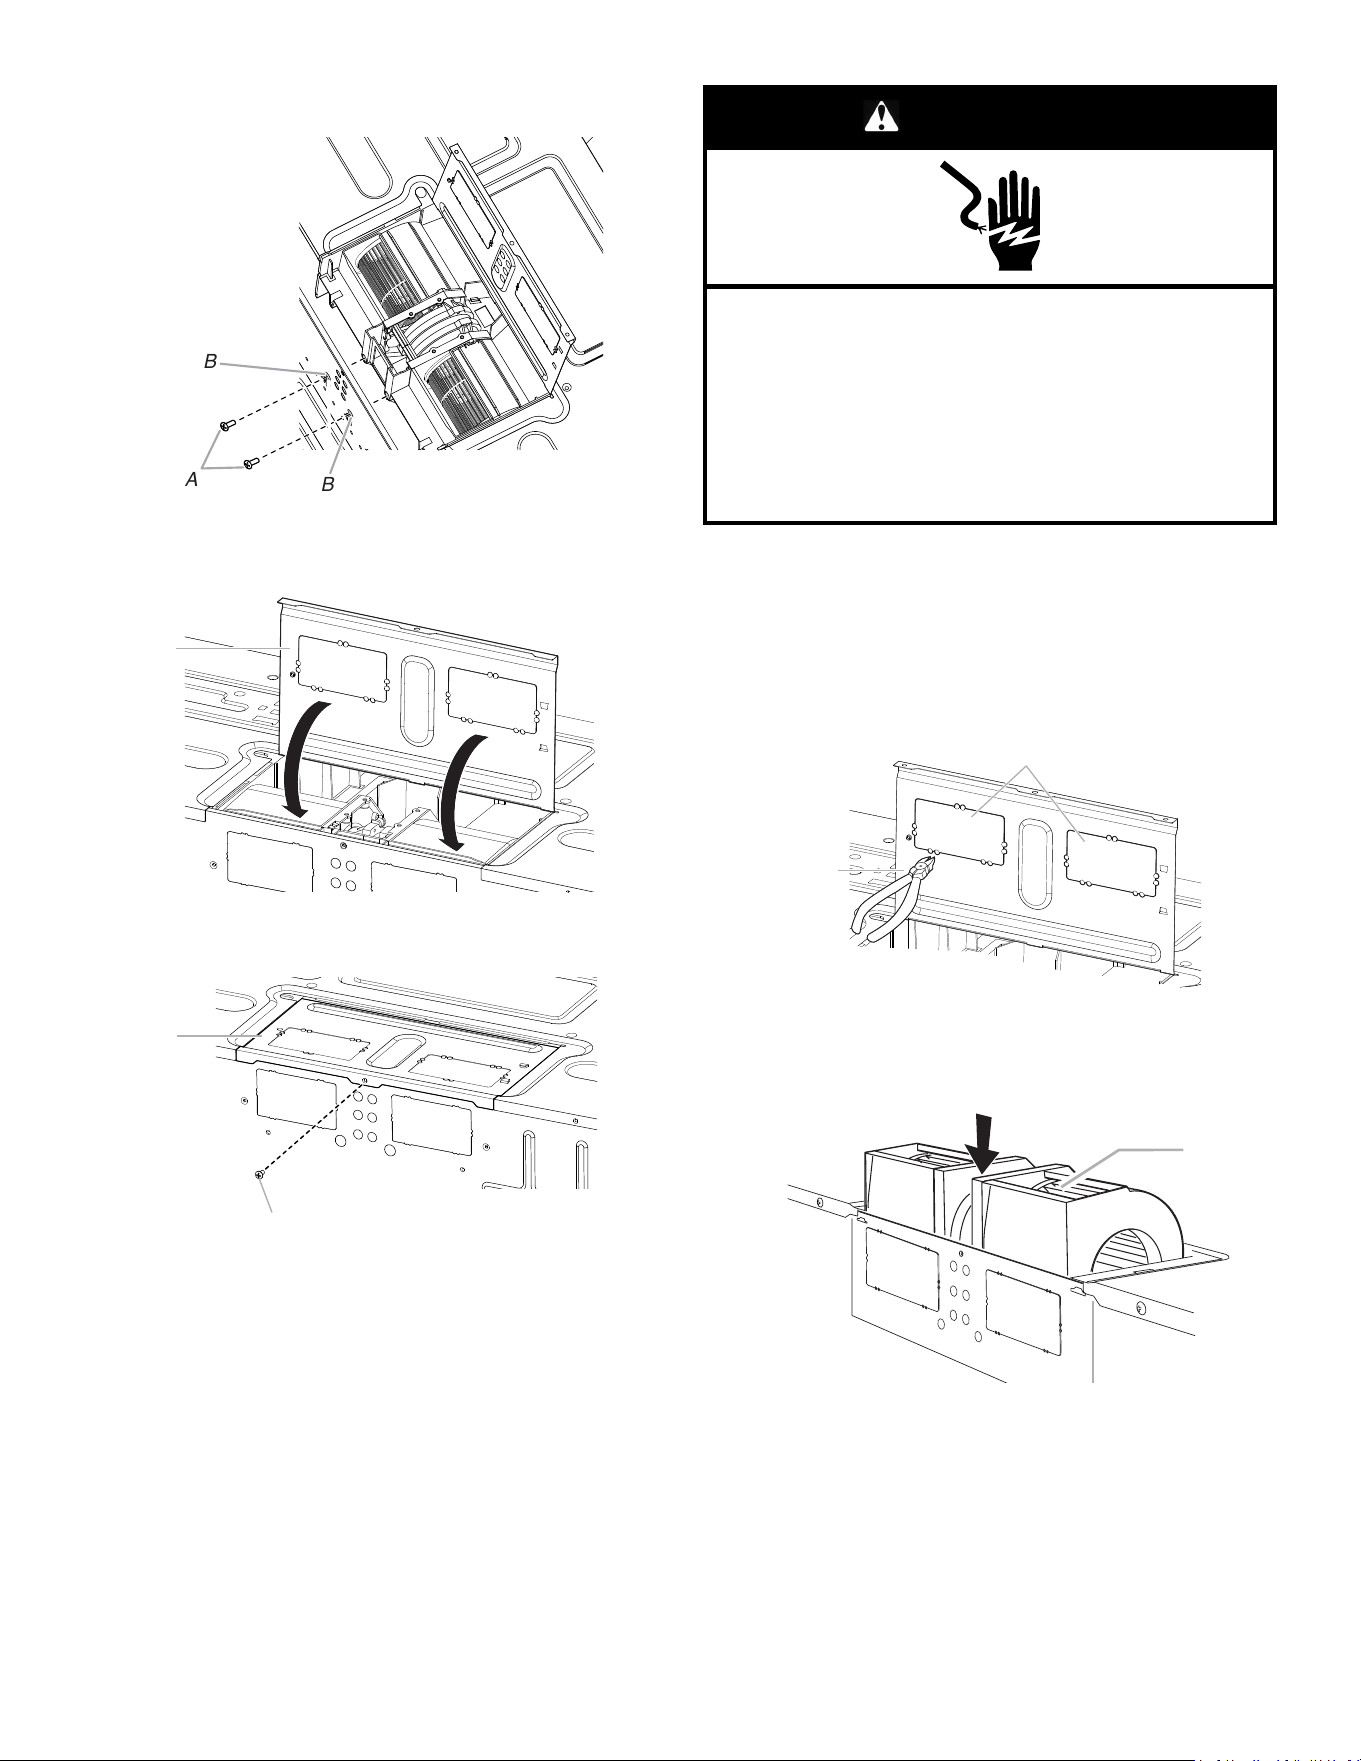
11. Check to make sure the 2 screws are secured properly in the
blower motor screw holes, so that the motor cannot move.
A
B
B
A. Screws
B. Blower motor screw holes
12. Return the damper plate to its original horizontal position.
A
A. Damper plate
13. Secure damper plate with 2 screws removed in Step 1.
A
B
A. Damper plate
B. Screw
WARNING
Electrical Shock Hazard
Plug into a grounded 3 prong outlet.
Do not remove ground prong.
Do not use an adapter.
Do not use an extension cord.
Failure to follow these instructions can result in death,
fire, or electrical shock.
14. Plug in the microwave oven. Check if the vent fan runs with
abnormal sounds, go back through the steps to see which
step was skipped.
Rotate Blower Motor for Roof Venting Installation
1. Repeat Steps 1 to 5 from “Wall Venting Installation Only.”
2. Using diagonal wire cutting pliers, gently snip out the
rectangular vent covers on the damper plate at the
perforations.
B
A
A. Rectangular vent covers
B. Diagonal wire cutting pliers
3. Lower blower motor back into microwave oven. Exhaust ports
face the top of microwave oven.
A
A. Exhaust port
IMPORTANT: If blower motor is not positioned with flat side
facing the back of the microwave oven (as shown),
performance will be poor.
4. Reconnect the blower motor wire into the connector.
5. Reattach the 2 blower screws into the recessed holes in the
back of the microwave.
6. Check to make sure the 2 screws are secured properly in the
blower motor screw holes, so that the motor cannot move.
Loading ...
Loading ...
Loading ...