Loading ...
Loading ...
Loading ...

SMFT-1000
Users Manual
16
For IV Curve measurements, synchronize the PV Analyzer with the IRR2-BT at the start of the
work day:
1. Turn on the PV Analyzer and the Irradiance Meter.
2. Make sure the PV Analyzer and the Irradiance Meter are within the wireless range (<50 m) of
each other.
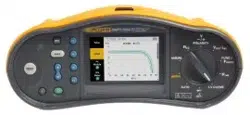
3. On the PV Analyzer, turn the rotary switch to I-V CURVE.
4. Press
.
5. Follow the on-screen directions on the PV Analyzer to synchronize both devices.
shows on the PV Analyzer display to indicate that the PV Analyzer and the Irradiance
Meter are connected.
During synchronization, the PV Analyzer matches all the data from the Irradiance Meter to the
recordings on the PV Analyzer from the previous sessions. The real-time clocks on both
devices synchronize and the Irradiance Meter clears its memory. The Irradiance Meter
continuously records data for up to 17 hours.
An option to manually enter irradiance and temperature measurements is available. For more
information, see I-V Curve Test.
Note
If the Irradiance Meter is installed on the panel, move the PV Analyzer within the
wireless range.
IEC 62446-1 Category 1 Tests
Visual Inspection
IEC regulations require a visual inspection of the Solar System. The PV Analyzer provides a
checklist with each task and then records and saves the results of the visual inspection to the
internal memory. All results can be downloaded to the PC software and used for final reports.
To d o a vi su a l i n s p e c t io n :
1. Turn on the PV Analyzer.
2. Turn the rotary switch to VISUAL and follow the on-screen prompts.
3. If a scroll bar shows on the right side of the display, use
to show more information about
the checklist.
4. Use
or to select a result.
5. Push
to store results to memory.
A confirmation message shows on the display.
1.888.610.7664 sales@GlobalTestSupply.com
Fluke-Direct.com
Loading ...
Loading ...
Loading ...