Loading ...
Loading ...
Loading ...

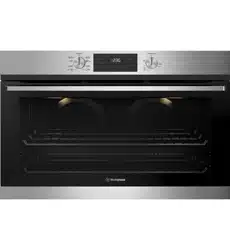
14 15cookING tEStUSING yoUR ovEN
USING YOUR OVEN (continued)
Setting the cooking duration
1. Check the clock displays the correct time of day.
2. Select the desired oven function and temperature.
The oven indicator light will glow and the heating
sour
ce will come on.
3. Press
until the cook time icon begins
flashing.
4. Set the cooking duration you want by using
or
.
5 seconds after the last change, the c
ook time
icon will stop flashing, and the time of day will be
displayed.
NOTE: Do not forget to add preheating time if necessary.
To check or cancel settings
1. To check settings, touch the symbol until
the desired setting is displayed. The relevant icon
will flash.
2. To cancel ‘auto shut off’, touch the
symbol
until the cook time
icon flashes. Touch and hold
the
symbol until the clock no longer reverses
(at 0:00 a beep will be heard). This automatically
cancels ‘auto shut off’. If the temperature and
function knobs are still at a setting, the oven will
start once the cook time
icon stops flashing.
Because ‘auto off’ is cancelled the oven will continue
to heat until it is manually turned off.
On completion of cooking
The oven will turn off, the timer will beep and the cook
time
icons will flash.
1. Turn the function and temperature controls to
the off position.
2.
Press
or
or
to stop the timer from
beeping.
Switching the clock display ON and OFF
1. Press together and
for 2 seconds to switch
’off’ the display.
2.
Press together
and
for 2 seconds to switch
the clock display ’on’ again.
NOTE: If a timer mode is set, then it is not possible
to switch the display off.
Get to know your new oven with this
‘Simple Test Cake’
Although we strive for a perfect performing oven, it’s
possible that there will be some variation in colour
when baking. Therefore, we suggest this simple, easy
and delicious to make Simple Test Cake, it can help you
understand your new oven. All ovens do sometimes have
hot or cold spots, therefore it is important to judge with
your eye as you may require to rotate during baking.
‘Simple Test Cake’
125g butter, softened to room temperature
1 cup caster sugar
1 teaspoon pure vanilla essence
4 large eggs
2 cups self-raising flour
pinch of salt
4 tablespoons (80ml) full-cream milk
Method:
1. Butter base and sides of two 20cm straight-sided
round or square cake pans. Then line the base with
grease proof or baking paper.
2. Preheat oven to moderate ‘180ºC’ (170ºC fan forced)
and ensure oven shelf is in the centre position of oven.
3. Cream softened butter and sugar until light in colour.
4. Add vanilla essence.
5. Then eggs one at a time, beating well after each
addition.
6. Sift flour and salt into the mixture and beat until
well combined.
7.
Add milk and beat or stir to combine.
8. Spoon mixture equally between prepared cake pans.
9. Bake in preheated oven, middle shelf for about 25
to 35 minutes or until when tested with a fine cake
skewer it comes out clean, or the edges of the cakes
have come away slightly from the sides of the
cake pans.
10
. Remove from oven to wire cake rack and rest for 5
minutes before removing from cake pans.
Cool completely.
T
o Serve: sandwich together with your favourite jam or
conserve, and dust top with pure icing sugar.
NOTE: If desired substitute butter for either margarine
or olive oil spread. Recipe is based on the Australian
standard metric 250ml cup and 20ml tablespoon sets.
• For best baking results preheat oven for 30 minutes.
• Select the correct shelf location for food being cooked.
• The grill tray can be used in the oven as a baking dish.
• Make sure dishes will fit into the oven before you
switch it on.
• Keep edges of trays at least 40mm from the side
of the oven. This allows free circulation of heat and
ensures even cooking.
• Do not open the oven door more than necessary.
• Do not place foods with a lot of liquid into the oven
with other foods. This will cause food to steam and
not brown.
•
After the oven is turned off it retains the heat for
some time. Use this heat to finish custards or to dry
bread.
• Do not use a lot of cooking oil when roasting. This will
prevent splattering oil on the sides of the oven and
the oven door. Polyunsaturated fats can leave residue
which is very difficult to remove.
• For sponges and cakes use aluminium, bright finished
or non-stick utensils.
• Remove unnecessary trays or dishes when roasting
or baking.
Ov
en shelf location
Your oven has 5 positions for mounting the shelves or
grill dish carrier. These are numbered from 1 (the lowest
shelf position) to 5 (the highest shelf position). See
diagram.
5
4
3
2
1
To give maximum space above and below the shelves,
load them in this way:
• When cooking with 1 shelf, use position 2 or 3.
• When cooking with 2 shelves, use position 1 and 3.
• When grilling use position 4 or 5.
NOTE: Use the oven efficiently, by cooking many trays of
food at the same time e.g. 2 trays of scones, small cakes
or sausage rolls.
COOKING TEST COOKING GUIDE
Loading ...
Loading ...
Loading ...