Loading ...
Loading ...
Loading ...
12 13USING yoUR ovENUSING yoUR ovEN
USING YOUR OVEN USING YOUR OVEN (continued)
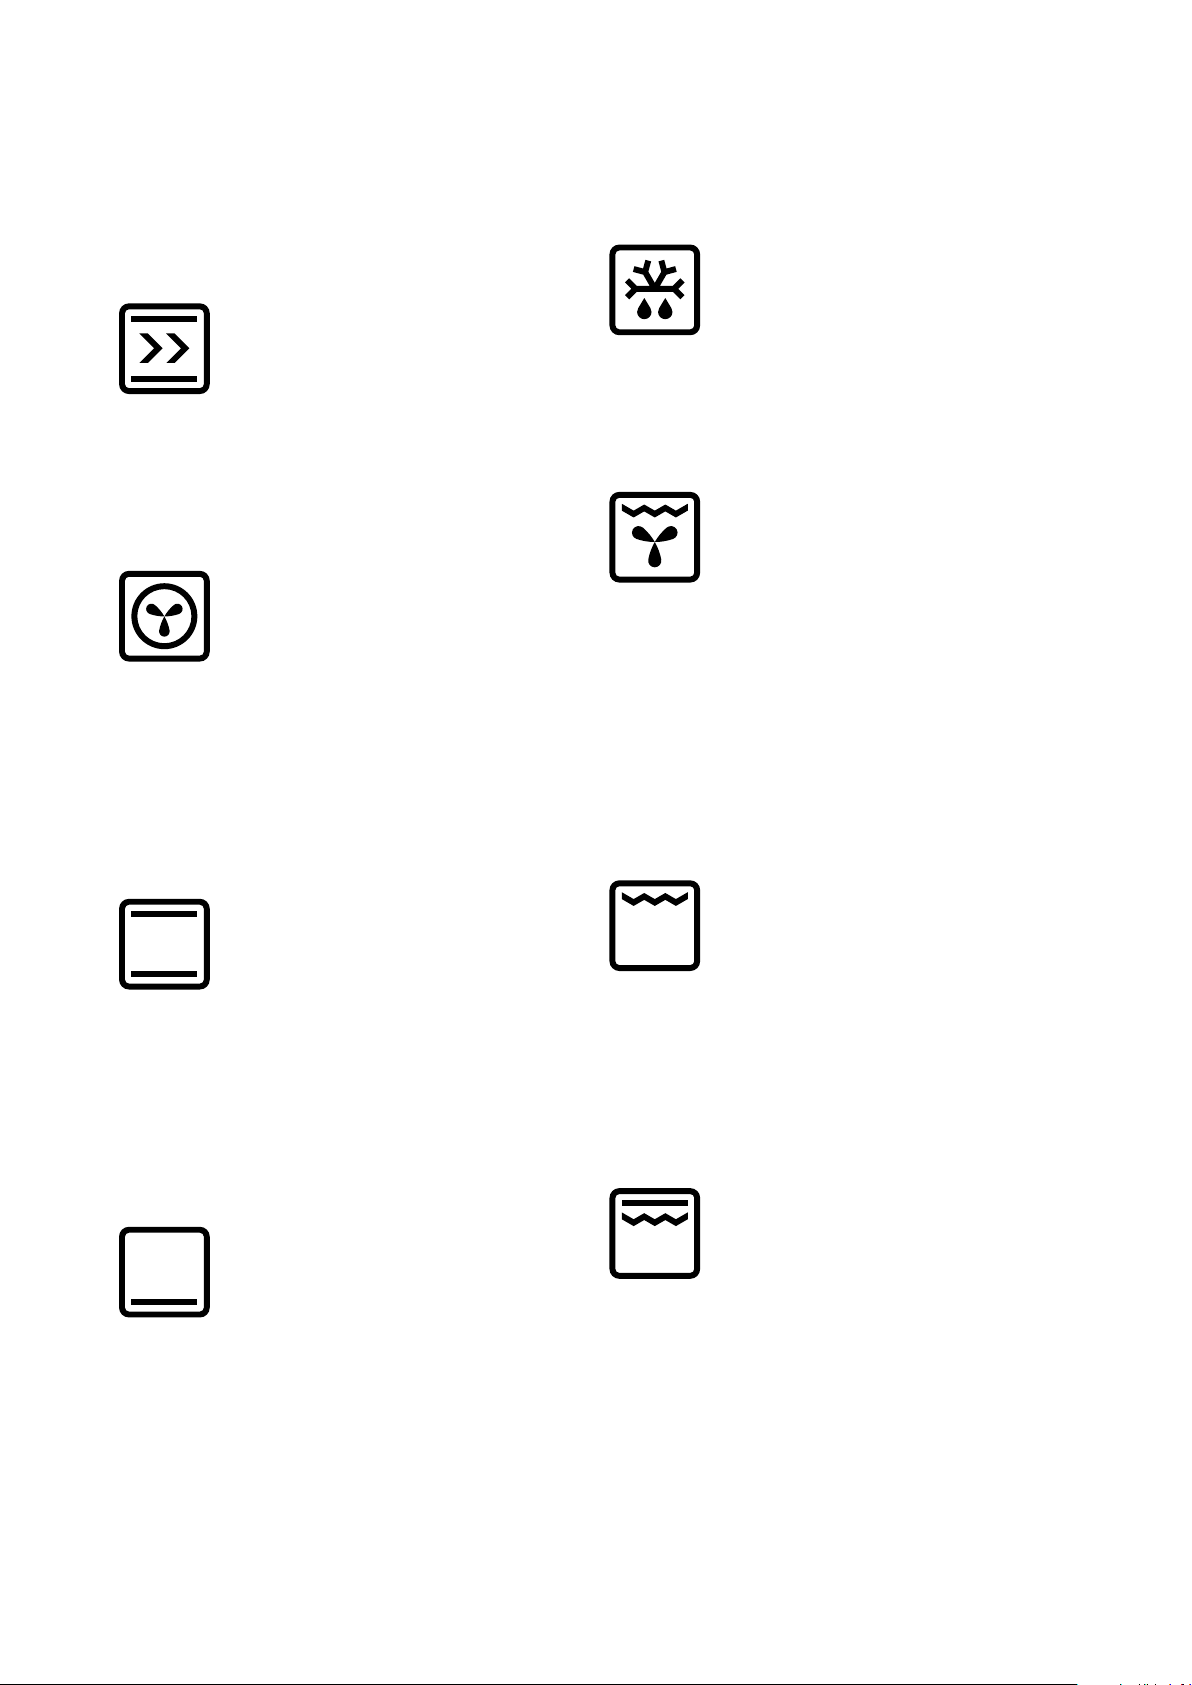
Understanding your oven functions
Rapid Heat/AirFry
This function can be either used for a quicker pre-heat
of your oven or used to turn your oven into an AirFry
for your frying needs. Heat comes from the elements
surrounding the fans as well as the smaller element
above the food. This will heat up your oven 30% faster.
Fan Forced
Heat comes from the elements surrounding the fans. The
fans circulate the hot air around the oven cavity so that
you can put your food in different places in the oven and
still cook them at the same time. You can use the “Fan
Force” function for multi-shelf cooking, reheating cooked
foods, pastries and complete oven meals. It will cook at
a lower temperature and be faster than baking. Please
note that some variation in browning is normal.
Bake/Pizza
Heat comes from two elements, one above and one
below the food. The bottom element is a clean heat
element and is below the floor of the oven. Both
elements are controlled by the thermostat and will turn
on and off to maintain the set temperature. You can use
the “Bake/Pizza” function for pizza and single trays of
biscuits, scones, muffins, cakes, slices, casseroles, baked
puddings, roasts and delicate egg dishes.
Base Heat
Heat comes from the element below the floor of the
oven. The Element is controlled by the thermostat and
will turn on and off to maintain the set temperature. The
“Base Heat” function can be used to add extra browning
to the bases of pizzas, pies and pastries. Cook in the
lower half of the oven when you are using only one shelf.
For best results, use silver or shiny trays.
Defrost
The “Defrost” function uses low temperature air that is
circulated by the fans. You can defrost (thaw) your food
before you cook it. You can also use “Defrost” to raise
your yeast dough and to dry fruit, vegetables and herbs.
Fan & Grill
“Fan&Grill” offers you the benefits of both “Bake” and
traditional “Grill” functions. The grill element turns on
and off to maintain the set temperature while the fans
circulate the heated air. The oven door remains closed
for fan grill. You can use “Fan&Grill” for large cuts of
meat to give you a result that is similar to “rotisserie”
cooked meat. Put your food on a shelf in the second
lowest shelf position. Put the grill dish on the lowest shelf
position to catch any spills. When using “Fan&Grill” it is
not necessary to turn the food over during the cooking
cycle. Set the temperature to 180°C.
Grill
The “Grill” directs radiant heat from the powerful upper
element onto the food. You can use the “Grill” function
for tender cuts of meat, steak, chops, sausages, fish,
cheese toasties and other quick cooking foods. Grill with
the oven door closed. Preheat your grill for 3 minutes
to get the best results. This will help seal in the natural
juices of steak, chops etc. for a better flavour.
Maxi Grill
“Maxi Grill/Full Grill” directs radiant heat from 2 powerful
upper elements onto the food. You can use the “Maxi
Grill/Full Grill” function for tender cuts of meat, steak,
chops, sausages, fish, cheese toasties and other quick
cooking foods. Grill with the oven door closed. “Maxi
Grill/Full Grill” allows you to take full advantage of the
large grill dish area and will cook faster than normal
“Grill”. For best results it is recommended to preheat
your grill for 3 minutes. This will help seal in the natural
juices of steak, chops etc. for a better flavour.
Operating the touch control clock model
WVE9515SD
Select the cooking function
Turn the function selector in any direction to the desired
cooking function. The oven cavity light will come on.
Select the temperature
To set the temperature, turn the temperature selector in
a clockwise direction to the desired setting. An indicator
light in the display will come on.
A thermostat controls the temperature in your oven.
When the temperature is reached, the heating source
switches itself off and the indicator light goes out. When
the oven temperature falls below the desired setting, the
heating source switches on and the indicator light comes
on again.
Once the food is cooked, turn the temperature selector
back in an anti-clockwise direction. Do not force it
right round in a clockwise direction as this will result in
damage to the thermostat.
NOTE: The desired cooking function must be selected
before the oven will operate.
Cooking with timer
1
1
1
2
1
3
1
4
1
5
1
6
1. On when timer is set
2. Time of day icon
3. Cook time icon
4. Minus
5. Touch to toggle through timer modes
6. Plus
Setting the time of day
Before the appliance can be used, the time must be set.
After the appliance has been electrically connected,
‘12:00’ will be displayed and the clock
icon will flash.
To set the time of day in hours and minutes touch
the
or
symbols. Refer to the diagram above.
5 seconds after the last change, the clock
icon will
disappear, confirming the time has been set. Once the time
has been entered, the clock advances minute by minute.
NOTE: The clock has a 24 hour display.
Change the time of day (Daylight saving)
1. Press until the clock icon begins flashing.
2. Press
or
to change the time. 5 seconds after
the last change, the clock
icon will disappear,
confirming the time has been set.
Setting the timer
1. Touch the symbol until the timer icon
begins flashing.
2. Set the countdown time you want by using
and
. 5 seconds after the last change the timer icon
will stop flashing and the countdown will start in
minutes.
3. To stop the beeper, touch any symbol.
4. Maximum countdown time is 2hrs 30mins.
Loading ...
Loading ...
Loading ...