
Loading ...
Loading ...
Loading ...
8
TM
• Remove the tape holding the cutting line
to the spool housing.
OPERATION
WARNING:
ALWAYS USE PROPER
EYE PROTECTION THAT CONFORMS
TO ANSI Z87.1 (CAN/CSA Z94.3) WHILE
OPERATING THIS APPLIANCE.
WARNING:
Remove the battery before
making any assembly, adjustments, or
changing accessories. Such preventive safety
measures reduce the risk of starting the
trimmer accidentally.
CAUTION: Before you begin trimming,
only use the appropriate type of cutting line.
CAUTION: Inspect area to be
trimmed and remove any wire, CORD, OR
STRING-LIKE OBJECTS WHICH COULD
BECOME ENTANGLED IN THE rotating line
or spool. Be particularly careful to avoid any
wire which might be bent outwardly into the
path of the appliance, such as barbs at the
base of a chain link fence.
SWITCHING ON AND OFF
• To switch the appliance on, push the lock-
off button (2), and squeeze the trigger (1).
• To switch the appliance off, release the
trigger.
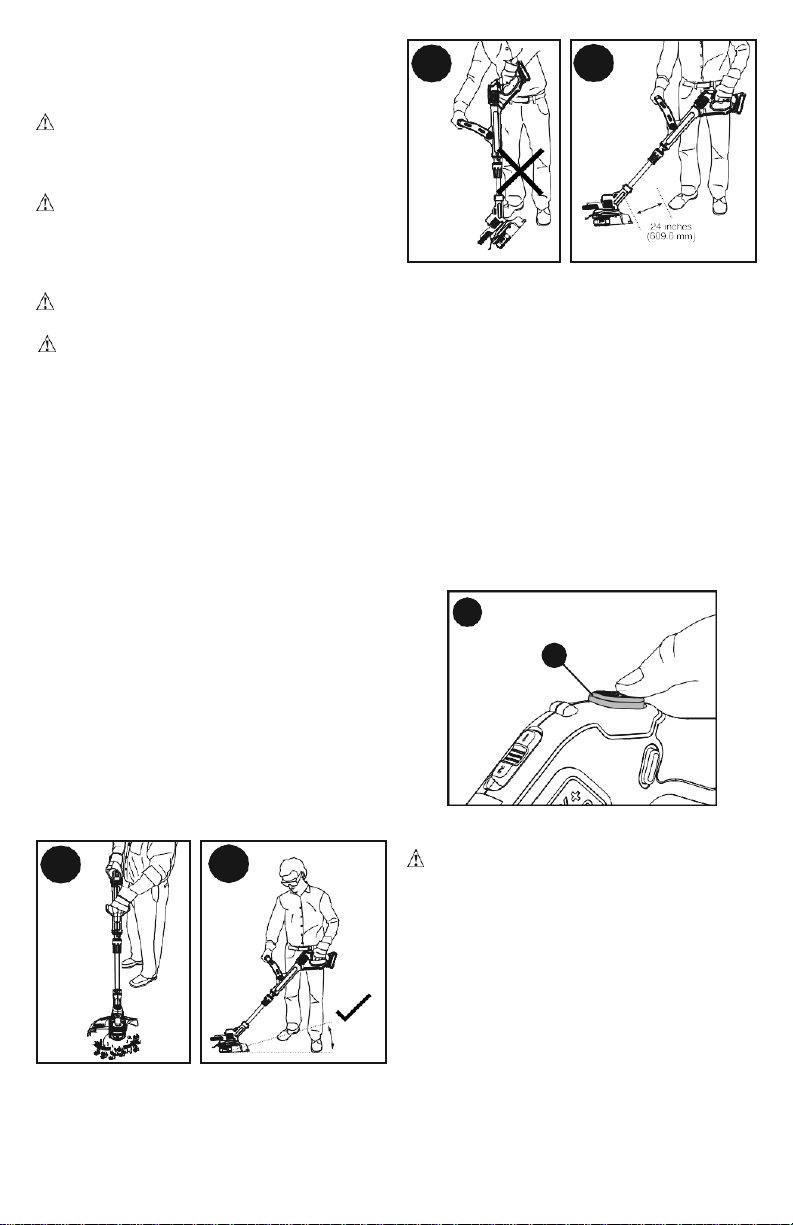
OPERATING THE TRIMMER
• With the unit on, angle unit and slowly
swing the trimmer side to side as shown in
figure J.
•
Maintain a cutting angle of 5° to 10° as shown
in
figure J1
. Do not exceed 10°
(figure J2)
.
Cut with the tip of the line. To keep distance
from hard surfaces use edge wheel (10).
• Maintain a minimum distance of 24 inches
(609.6 mm) between the guard and your
feet as shown in figure J3. To acheive
this distance adjust the overall height of
the trimmer as shown in figure I.
EASYFEED BUTTON
The
EASYFEED
TM
feature
allows
you
to
advance the length of cutting line available
while trimming.
• To extend the cutting line, fully depress
the EASYFEED
TM
button (4)
while
trimming and then release (figure K).
NOTE: The trimmer will stop cutting when
the EASYFEED
TM
button
is
pressed and
will
resume cutting when released.
• For maximum line length, press the
button multiple times until you hear the
cutting line hitting the guard.
NOTE: Do not continue to press the
EASYFEED
TM
button once the
maximum
length is reached. This will result in
overfeeding and will consume string quickly.
CONVERT TO EDGING MODE
CAUTION:
The wheeled edge guide
should only be used when in the edging mode.
The trimmer can be used in trimming mode
or edging mode to trim overhanging grass
along lawn edges and flower beds.
For edging, the trimmer head should be in
the position shown in figure M. If it is not:
•
Remove the battery from the trimmer.
•
Grasp the flip-to-edge collar (8) and push
down as shown in part 1 of figure L.
• Rotate the flip-to-edge collar 180°
counterclockwise as shown in part 2, until
the handle snaps back into the upper half
of the trimmer.
K
4
J3
J2
J1
5
O
-
10
O
J
Loading ...
Loading ...
Loading ...