Loading ...
Loading ...
Loading ...
en Appliance door
22
Top oven – Fitting and removing the glass
panels
To facilitate cleaning, you can remove the glass panels
from the appliance door.
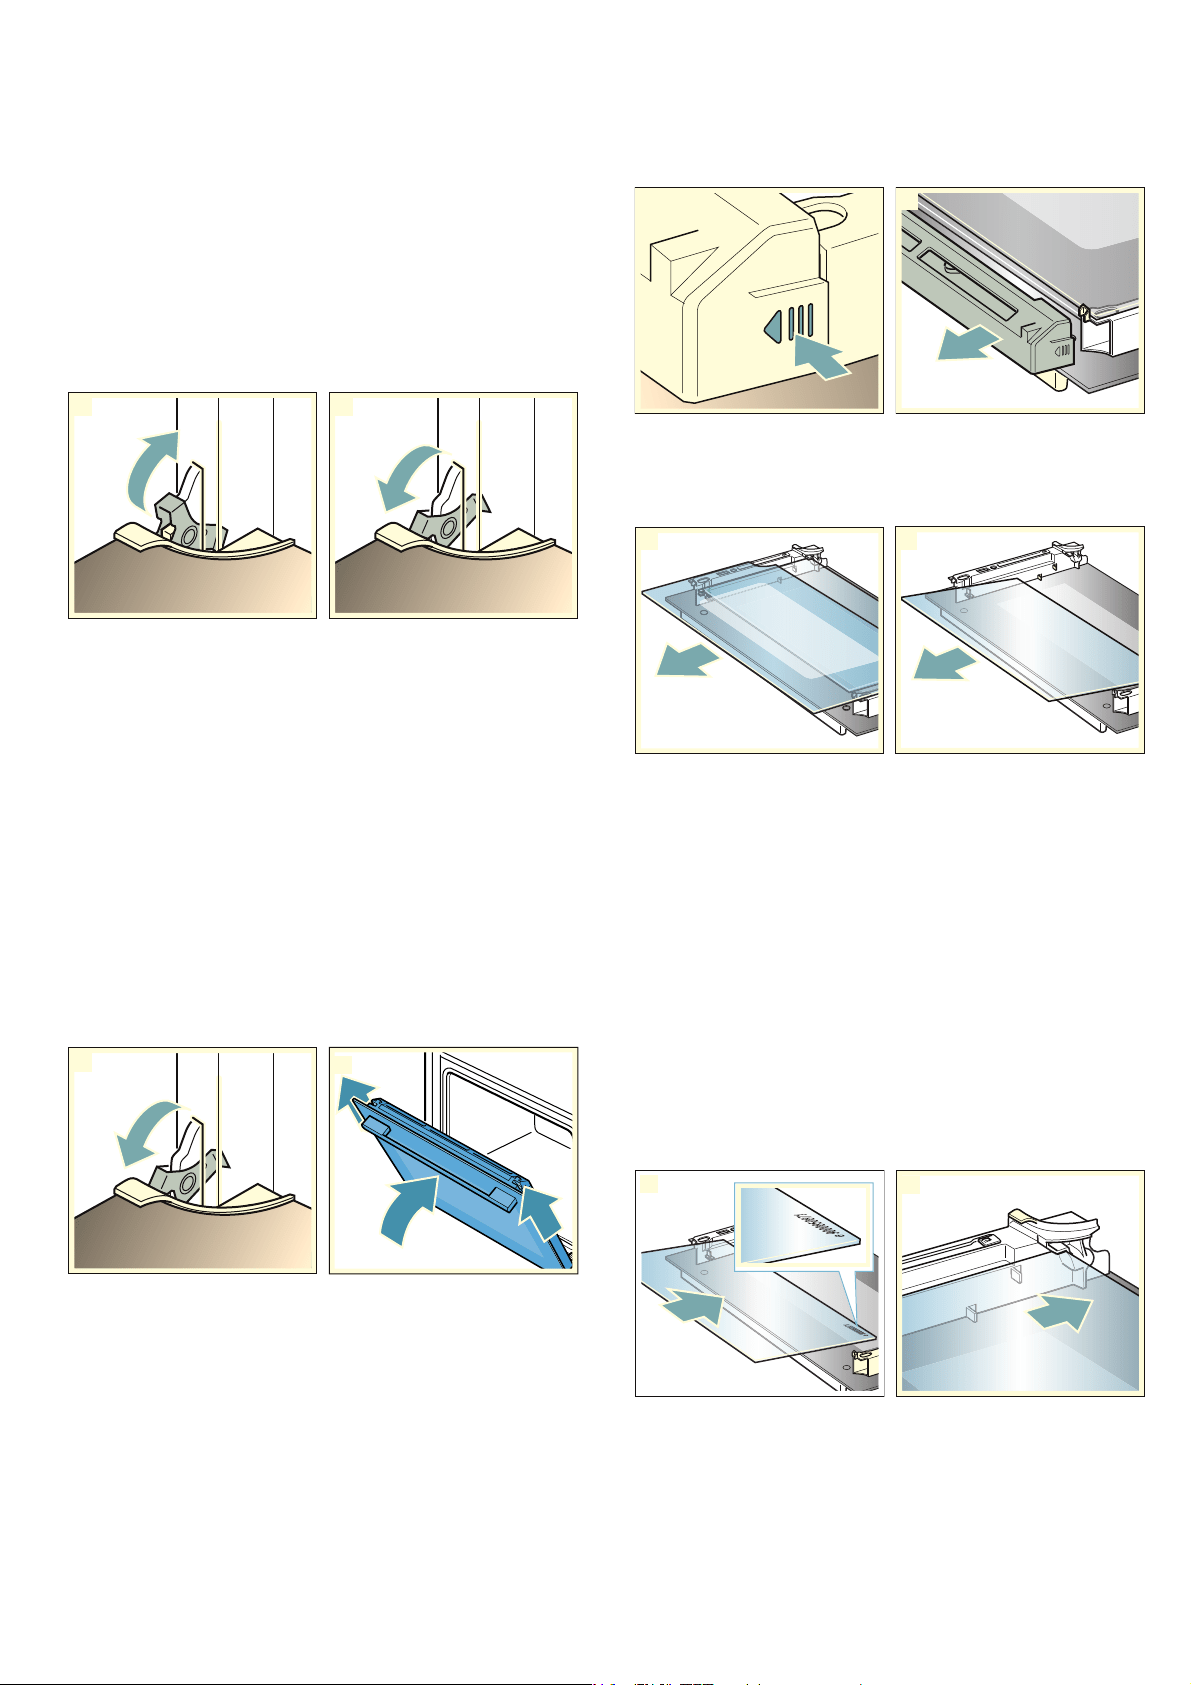
The appliance door hinges each have a locking lever.
When the locking levers are closed (fig. !), the
appliance door is secured in place. It cannot be
detached.
When the locking levers are open in order to detach the
appliance door (fig. "), the hinges are locked. They
cannot snap shut.
:Warning
Risk of injury!
■ If the hinges are not locked, they can snap shut with
great force. Ensure that the locking levers are always
fully closed or, when detaching the appliance door,
fully open.
Risk of injury!
■ The hinges on the appliance door move when
opening and closing the door, and you may be
trapped. Keep your hands away from the hinges.
Removing panels
1. Open the appliance door fully.
2. Open the two locking levers on the left and right
(fig. !).
3. Close the appliance door fully ‚. Take hold of the
appliance door with both hands, one on the left and
one on the right ƒ, and pull it up and out (fig. ").
4. Set the appliance door down carefully on a level
surface.
5. Press the left- and right-hand sides of the cover
(fig.°#).
6. Remove the cover (fig. $).
7. Lift out the outer panel (fig. %) and set it down
carefully on a flat surface.
8. Lift out the inner panel (fig. &) and set it down
carefully on a flat surface.
Clean the panels with glass cleaner and a soft cloth.
:Warning
Risk of injury!
■ Scratched glass in the appliance door may develop
into a crack. Do not use a glass scraper, sharp or
abrasive cleaning aids or detergents.
Risk of injury!
■ The hinges on the appliance door move when
opening and closing the door, and you may be
trapped. Keep your hands away from the hinges.
Fitting panels
1. Slide each inner panel back in and make sure that
the number on the inner panel is to the bottom right
(fig. !).
2. Ensure that the inner panel is in the bottom right of
the retainer (fig. ").
2
1
2
E
E
D
1
2
1
Loading ...
Loading ...
Loading ...