Loading ...
Loading ...
Loading ...
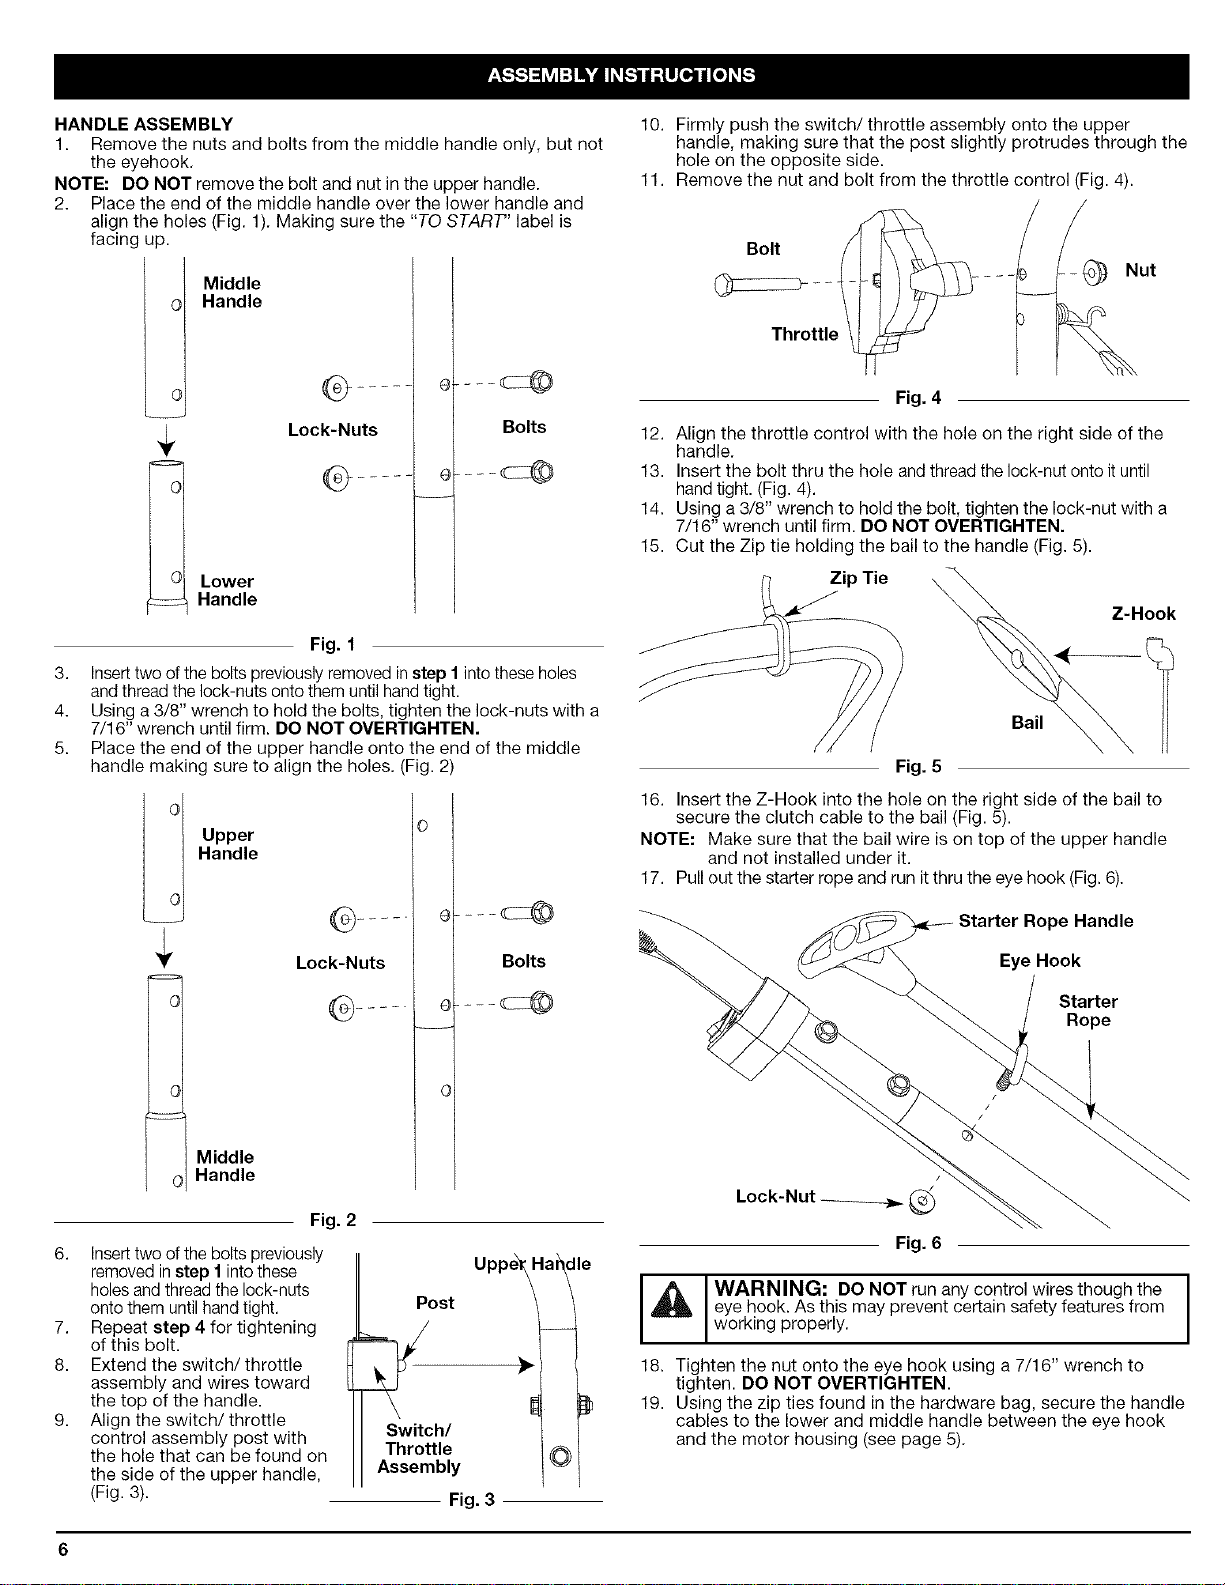
HANDLEASSEMBLY
1. Remove the nuts and bolts from the middle handle only, but not
the eyehook.
NOTE: DO NOT remove the bolt and nut in the upper handle.
2. Place the end of the middle handle over the lower handle and
align the holes (Fig. 1). Making sure the "TO START' label is
facing up.
Middle
Handle
Lower
Handle
G .....
Lock-Nuts
G ....
Fig. 1
Bolts
3. Insert two of the bolts previously removed instep 1into these holes
and thread the lock-nuts onto them until hand tight.
4. Using a 3/8" wrench to hold the bolts, tighten the lock-nuts with a
7/16" wrench until firm. DO NOT OVERTIGHTEN.
5. Place the end of the upper handle onto the end of the middle
handle making sure to align the holes. (Fig. 2)
.....
Lock-Nuts
.....
==:=:=_
ol
o
Bolts
@.... @
o
Post
Switch/
Throttle
Assembly
Fig. 3
Uppe_ _dle
÷
©
Upper
Handle
ol
_0 Middle
Handle
Fig. 2
6. Insert two of the bolts previously
removed in step 1 into these
holes and thread the lock-nuts
onto them until hand tight.
7. Repeat step 4 for tightening
of this bolt.
8. Extend the switch/throttle
assembly and wires toward
the top of the handle.
9. Align the switch/throttle
control assembly post with
the hole that can be found on
the side of the upper handle,
(Fig. 3).
10. Firmly push the switch/throttle assembly onto the upper
handle, making sure that the post slightly protrudes through the
hole on the opposite side.
11. Remove the nut and bolt from the throttle control (Fig. 4).
Bolt
Throttle
Fig. 4
12. Align the throttle control with the hole on the right side of the
handle.
13. Insert the bolt thru the hole and thread the lock-nut onto it until
handtight. (Fig. 4).
14. Using a 3/8" wrench to hold the bolt, tighten the lock-nut with a
7/16" wrench until firm. DO NOT OVERTIGHTEN.
15. Cut the Zip tie holding the bail to the handle (Fig. 5).
Z-Hook
4---
Bail
Fig. 5
16. Insert the Z-Hook into the hole on the right side of the bail to
secure the clutch cable to the bail (Fig. 5).
NOTE: Make sure that the bail wire is on top of the upper handle
and not installed under it.
17. Pull out the starter rope and run it thru the eye hook (Fig. 6).
Starter Rope Handle
Eye Hook
Starter
Rope
/
Lock-Nut _
Fig. 6
WARNING" DO NOT run any control wires though the
eye hook. As this may prevent certain safety features from
work ng proper y.
18. Tighten the nut onto the eye hook using a 7/16" wrench to
tighten. DO NOT OVERTIGHTEN.
19. Using the zip ties found in the hardware bag, secure the handle
cables to the lower and middle handle between the eye hook
and the motor housing (see page 5).
Loading ...
Loading ...
Loading ...