Loading ...
Loading ...
Loading ...
D. PRE-OPERATION CHECKS
I A . J
.Reflew all Warnings and Safety Instructions in[
this manual. ]
1. Before operating your tool, always:
Inspect the entire tool before each use. Re-
placedamaged parts.Make sureallfastenersare
in place and securely fastened.
b. Replace trimmer head parts that are
cracked, chipped, broken, or damaged in
any other way before using the tool.
i i _ tJl ii i i
E.EXTENSION CORD ATTACHMENT
1. Use only a 120 A.C. voltage supply as shown
on tte nmneplate of the unit.
2. The extension cord used to reach the power
source must be:
a. Specifically marked as suitable for out-
dooruse. The _rd wa_t bemarJ_ed with the sv_f-
b. Heavy enough to carry the current from
the power source the full length of the ex-
tension cord to the unit. Otherwise, 10ss of
power _andoverheating can occur causing dam-
age to the unit. Refer to Figure 2 for minimum
r_threcommendations. The cord m_t be
theproper wi_. _e. (Approprl-
ate extensivncordssreavailable.)
c. In good condition, Cord insulationmust be
intactwithno cracksordeterioration.Plugcon-
nectorsmust beundmusged_
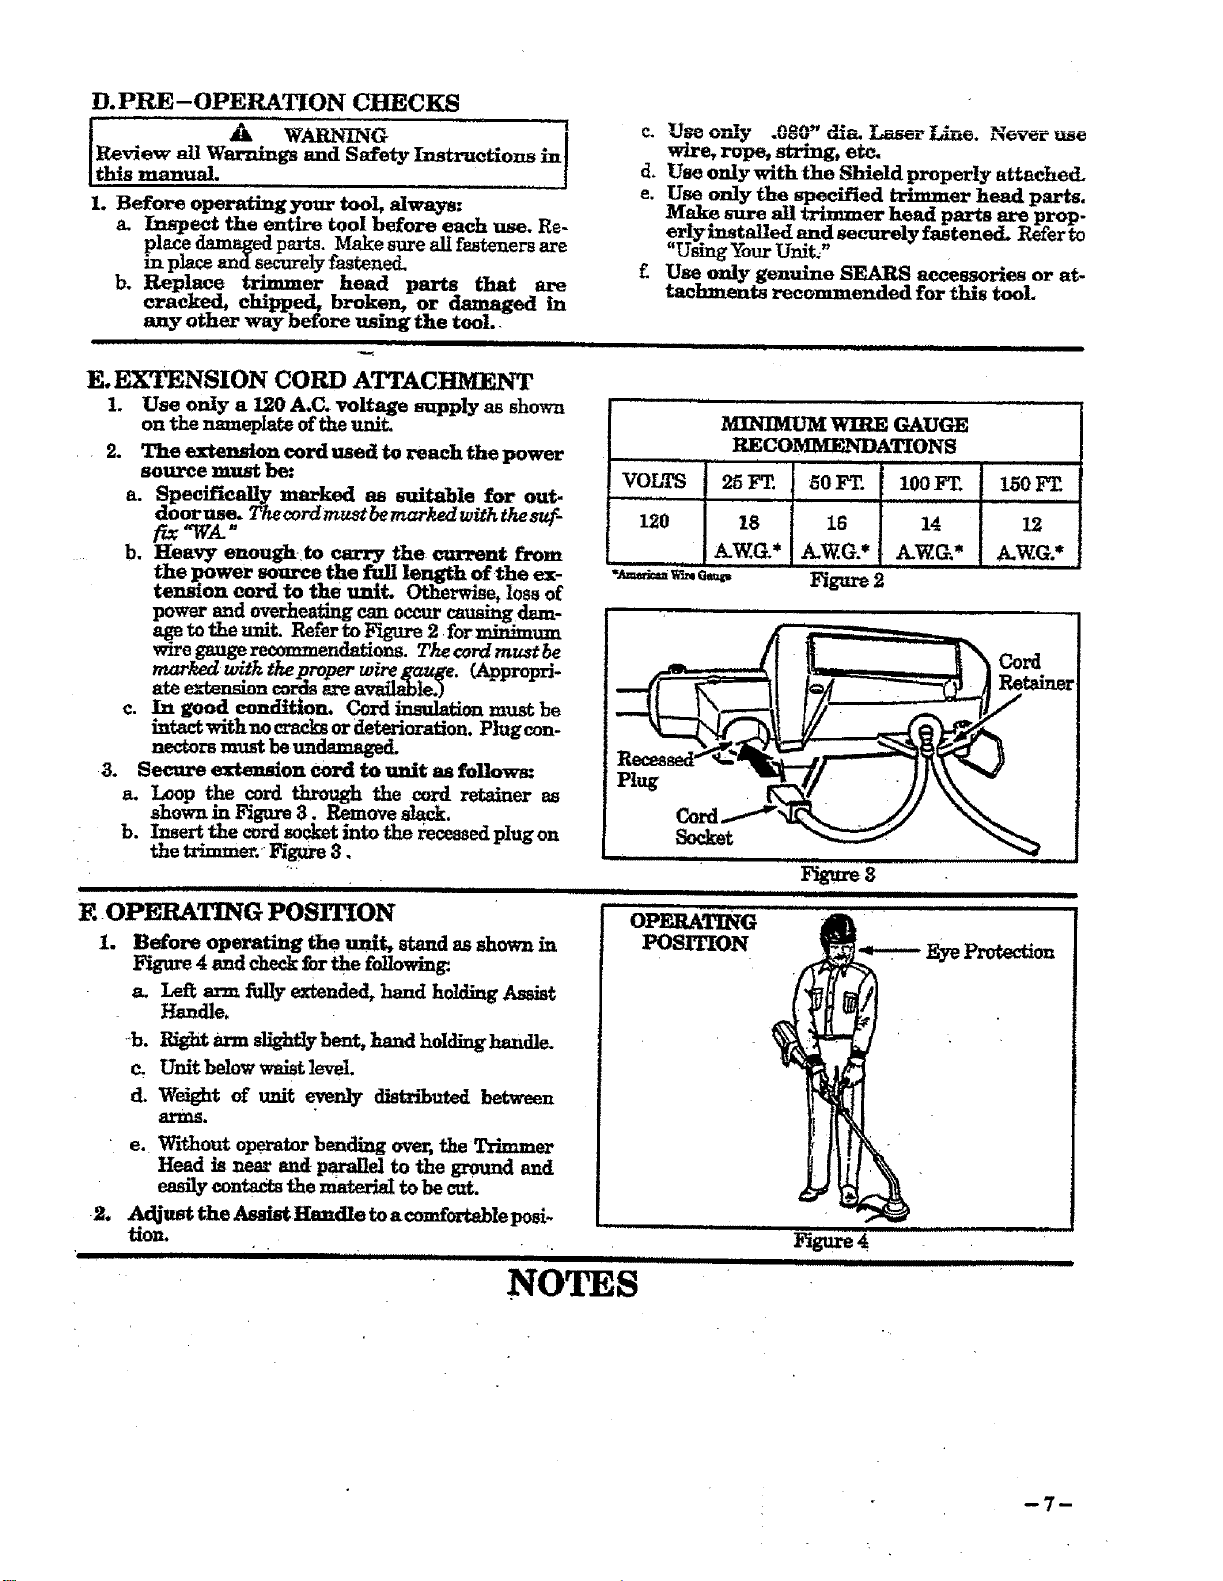
3. Secure extension cord to unit as follow_
a. Loop the cord through the cord retainer as
shownlnF_tre3. Remove slack.
b. Insert the cord socket into the recessed plug on
the trimmer. FigUre3.
wire, rope, string, etc.
d, Use only with the Shield properly attache&
e. Use only the specified trimmer head parts.
Makp sure all trimmer head parts are prop-
erly installed and securely fastened. Refer to
"Using Your Unit;"
£ Use only genuine SEARS accessories or at-
taclnnents recommended for this tool.
,IIII_,IL . I I
WIRE GAUGE
RECO_ATIONS
ii
VOLTS 25 FT. _0 FT. i00F_ 150 FE
120 18 16 14 12
A.W.G.* A.W.G.* A.W.G,* A.W.G.*
"__ Figure 2
Plug
j j ii iii • IIIII ii i1" I i ii iiii i
E OPERATING POSITION
1. Before operating the unit, stand as shown in
lr_ure4 ard checkfor the tonowin_
s. Leftarm fullyextended_hand holdingAssist
b. Rightarm sllghtlybent,handholding handle.
c, Unit helow waist level.
d_ Weight of unit evenly distr_uted between
arms.
e. Without o_rator bendingover,the Trhnmer
Head is near and parallel to the ground and
easily conta,L_ the matexiaI to he cut.
2.
Adjust the Assist Handle to acomf0rtable posi-
tion°
]1ii _1 i
NOTES
I i iiiiiiii iiiiii I iiiiiiiii
........ OP_NG ......
POSITION
i iii
Plgure4
II I Ill I
Cord
Retalne_
Eye Protection
i i ,iml
Hill IIIIIIIIIIIIIIIII
-7-
Loading ...
Loading ...
Loading ...