Loading ...
Loading ...
Loading ...

English | 17
Bosch Power Tools 1 609 92A 0L0 | (16.5.14)
Assembly
Inserting/Replacing the Batteries
Alkali-manganese batteries are recommended for the
measuring tool.
To open the battery lid 6, press on the latch 7 and fold the
battery lid up. Insert the batteries. When inserting, pay
attention to the correct polarity according to the repre-
sentation on the inside of the battery compartment.
When the battery indication
8
flashes, the batteries are
weak. When the battery indication flashes for the first time,
the measuring tool can still be operated for approx.
2
h.
When the battery indication 8 lights up constantly, meas-
uring is no longer possible. The measuring tool automati-
cally switches off after a short time.
Always replace all batteries at the same time. Only use
batteries from one brand and with the identical capacity.
Remove the batteries from the measuring tool
when not using it for extended periods. When stor-
ing for extended periods, the batteries can corrode
and self-discharge.
Operation
Initial Operation
Protect the measuring tool against moisture and
direct sun light.
Do not subject the measuring tool to extreme tem-
peratures or variations in temperature. As an exam-
ple, do not leave it in vehicles for a long time. In case of
large variations in temperature, allow the measuring
tool to adjust to the ambient temperature before put-
ting it into operation. In case of extreme temperatures
or variations in temperature, the accuracy of the meas-
uring tool can be impaired.
Avoid hard knocks to the measuring tool or drop-
ping it. Damaging the measuring tool can cause accu-
racy to be compromised. Following a hard knock or
fall, carry out a check by comparing the laser lines or
plumb beams with a known horizontal or vertical refer-
ence line or verified perpendicular points.
Switching On and Off
To switch on the measuring tool, press the On/Off button
3 once briefly. Immediately after the switching on, the
measuring tool projects the three laser lines 0°, 45° and
90° from the exit openings 1. Furthermore, the battery
indication 8 lights up for 3 s.
Do not point the laser beam at persons or animals
and do not look into the laser beam yourself, not
even from a large distance.
When the On/Off button 3 is pressed a second time, the
measuring tool switches over from 3-line operation to
2-line operation: Only the 0° and the 90° laser lines are
projected.
To switch off the measuring tool, press the On/Off button
3 a third time.
Deactivating the Automatic Shut-off
The measuring tool switches off automatically after an
operating duration of 30 minutes.
To deactivate the automatic switch-off, press the On/Off
button 3 for 3 s when you switch on the measuring tool.
When the automatic switch-off is deactivated, the laser
lines flash briefly to confirm after the switching on.
Do not leave the switched-on measuring tool unat-
tended and switch the measuring tool off after use.
Other persons could be blinded by the laser beam.
Dimensions
156x102x98mm
Degree of protection
IP 54 (dust and splash water protected)
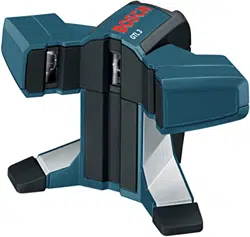
Tile laser GTL 3
Professional
1) The working range can be decreased by unfavourable environmental conditions (e.g. direct sun irradiation).
2) The angular accuracy between the 45° laser line and the 90° laser line is max. ±0.4 mm/m.
The measuring tool can be clearly identified with the serial number 5 on the type plate.
OBJ_BUCH-828-004.book Page 17 Friday, May 16, 2014 1:02 PM
Downloaded from www.ManualsFile.com manuals search engine
Loading ...
Loading ...
Loading ...