Loading ...
Loading ...
Loading ...
English■
3
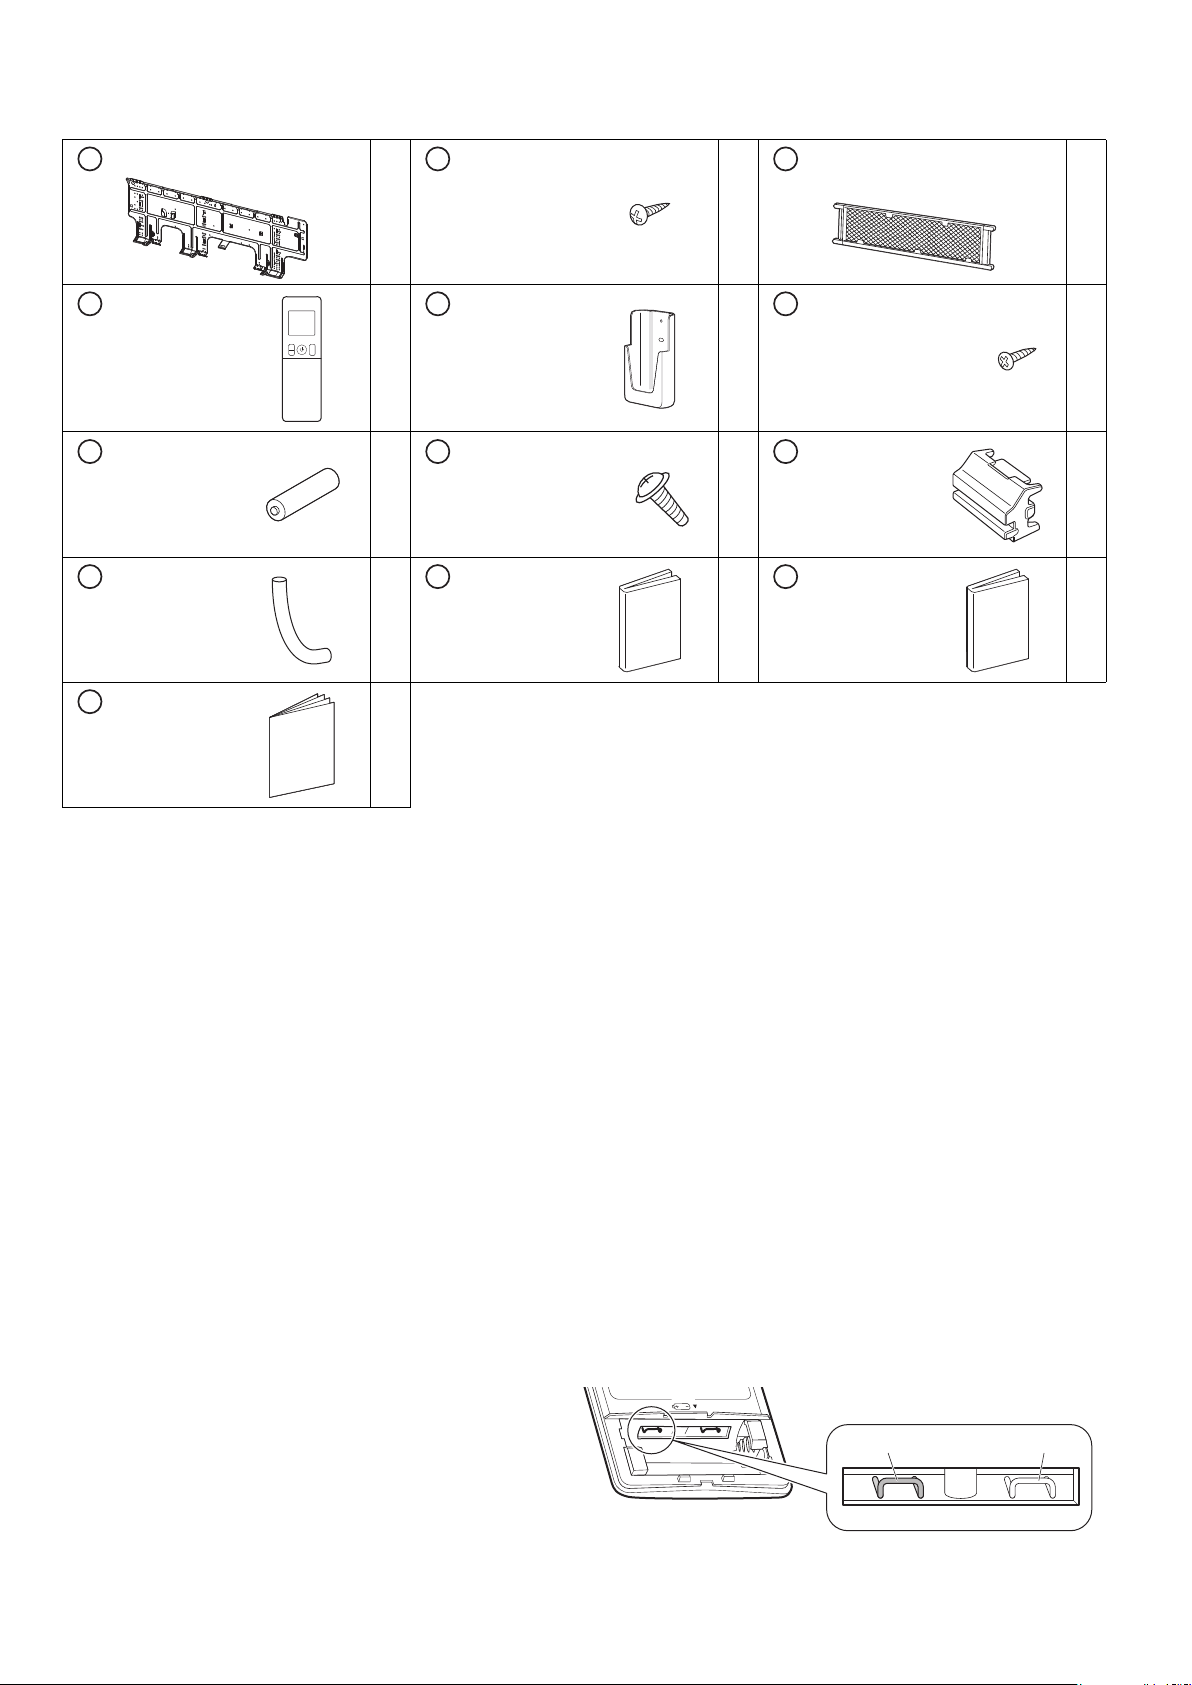
Accessories
Choosing an Installation Site
Before choosing the installation site, obtain user approval.
1. Indoor unit
The indoor unit should be positioned in a place where:
1) the restrictions on the installation requirements specified in “Indoor Unit Installation Diagram” on page 4 are met,
2) both the air inlet and air outlet are unobstructed,
3) the unit is not exposed to direct sunlight,
4) the unit is away from sources of heat or steam,
5) there is no source of machine oil vapor (this may shorten the indoor unit service life),
6) cool/warm air is circulated throughout the room,
7) the unit is away from electronic ignition type fluorescent lamps (inverter or rapid start type) as they may affect the remote
controller range,
8) no laundry equipment is nearby.
2. Wireless remote controller
1) Turn on all the fluorescent lamps in the room, if any, and find a location where the remote controller signals are properly
received by the indoor unit (within 23ft (7m)).
2) Configure the jumper. Configure according to the
type of unit (heat pump or cooling only) the user
purchased. The default setting is heat pump.
• For heat pump (outdoor unit model: RX)
No change to jumper setting is required.
• For cooling only (outdoor unit model: RK)
Cut the address jumper (J8) inside the remote
controller.
Mounting plate
1
Mounting plate
fixing screw
M4 × 1”
(M4 × 25mm)
9
Titanium apatite photocatalytic
air-purifying filter
3
Wireless remote
controller
1
Remote
controller holder
1
Remote
controller holder
fixing screw
M3 × 13/16”
(M3 × 20mm)
2
Dry battery
AAA. LR03
(alkaline)
2
Indoor unit
fixing screw
M4 × 1/2”
(M4 × 12mm)
3
Screw cover
3
Tube
1
Operation
manual
1
Installation
manual
1
Warranty
1
A
B
C
D
E
F
G
H
J
K
L
M
N
Jumper (J8) (J4)
Loading ...
Loading ...
Loading ...