Loading ...
Loading ...
Loading ...
Front Installation
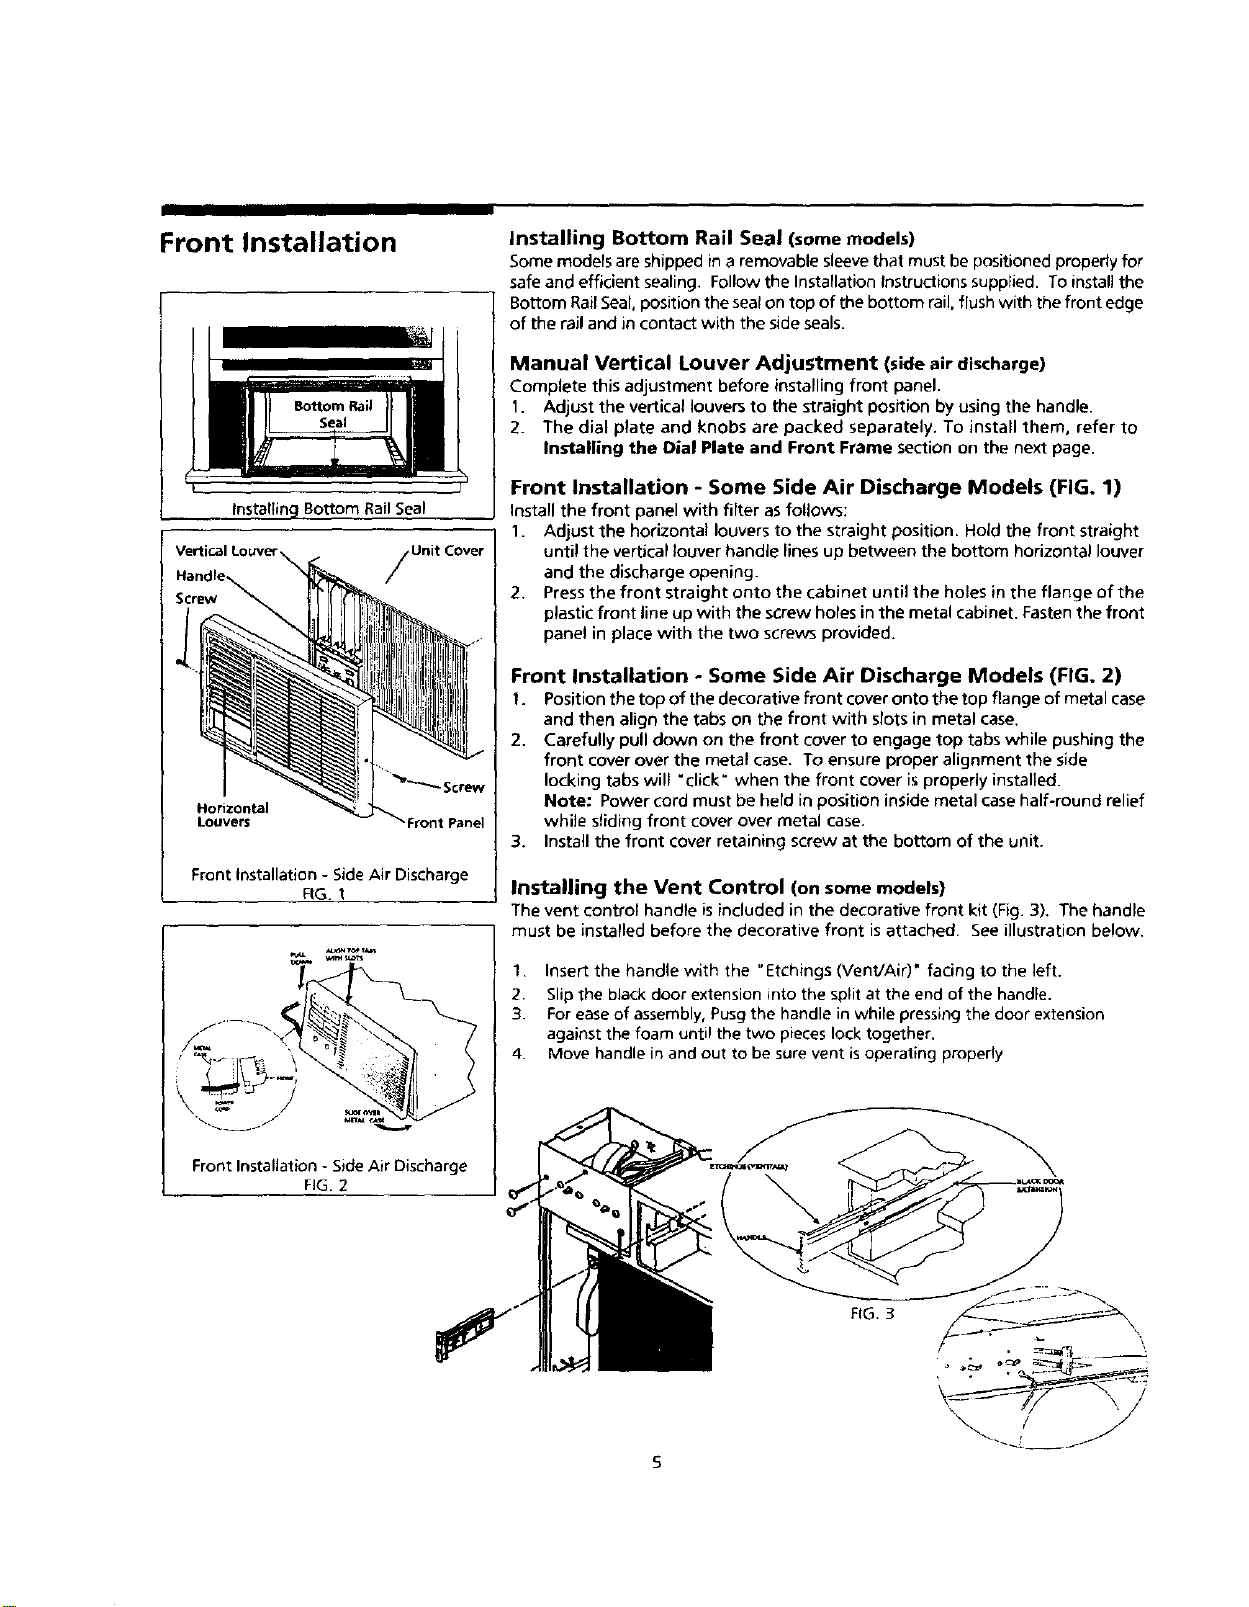
Installing Bottom Rail Seal
Vertical louver_ /Unit Cover
/
Horizontal
Louvers
Front Installation - Side Air Discharge
FIG.
Front Installation - Side Air Discharge
FIG. 2
Installing Bottom Rail Seal (some models)
Some models are shipped ina removable sleeve that must be positioned propedy for
safe and efficient sealing. Follow the Installationinstructions supplied. To installthe
Bottom RailSeal, position the sealon top of the bottom rail, flush with the front edge
of the rail and in contact with the side seals.
Manual Vertical Louver Adjustment (side air discharge)
Complete this adjustment before installing front panel.
1. Adjust the vertical louvers to the straight position by using the handle.
2. The dial plate and knobs are packed separately, To install them, refer to
Installing the Dial Plate and Front Frame section on the next page.
Front Installation - Some Side Air Discharge Models (FIG. 1)
Install the front panel with filter as follows;
1. Adjust the horizontal louvers to the straight position. Hold the front straight
until the vertical louver handle lines up between the bottom horizontal louver
and the discharge opening.
2. Press the front straight onto the cabinet until the holes in the flange of the
plastic front line up with the screw holes in the metal cabinet. Fasten the front
panel in place with the two screws provided.
Front Installation - Some Side Air Discharge Models (FIG. 2)
1. Positionthe top of the decorative front cover ontothe top flange of metal case
and then align the tabs on the front with slots in metal case.
2. Carefully pull down on the front cover to engage top tabs while pushing the
front cover over the metal case. To ensure proper alignment the side
locking tabs will "click" when the front cover isproperly installed.
Note: Power cord must be held in position inside metal case half-round relief
while sliding front cover over metal case.
3. Install the front cover retaining screw at the bottom of the unit.
Installing the Vent Control (on some models)
The vent control handle isincluded in the decorative front kit (Fig. 3), The handle
must be installed before the decorative front is attached. See illustration below.
1. Insert the handle with the "Etchings (Vent/Air)" facing to the left.
2. Slip the black door extension into the split at the end of the handle.
3. For ease of assembly, Pusg the handle in while pressing the door extension
against the foam until the two pieces lock together.
4. Move handle in and out to be sure vent is operating properly
FIG, 3
Loading ...
Loading ...
Loading ...