Loading ...
Loading ...
Loading ...
Care and Cleaning cont.
--[ ]
Figure 2
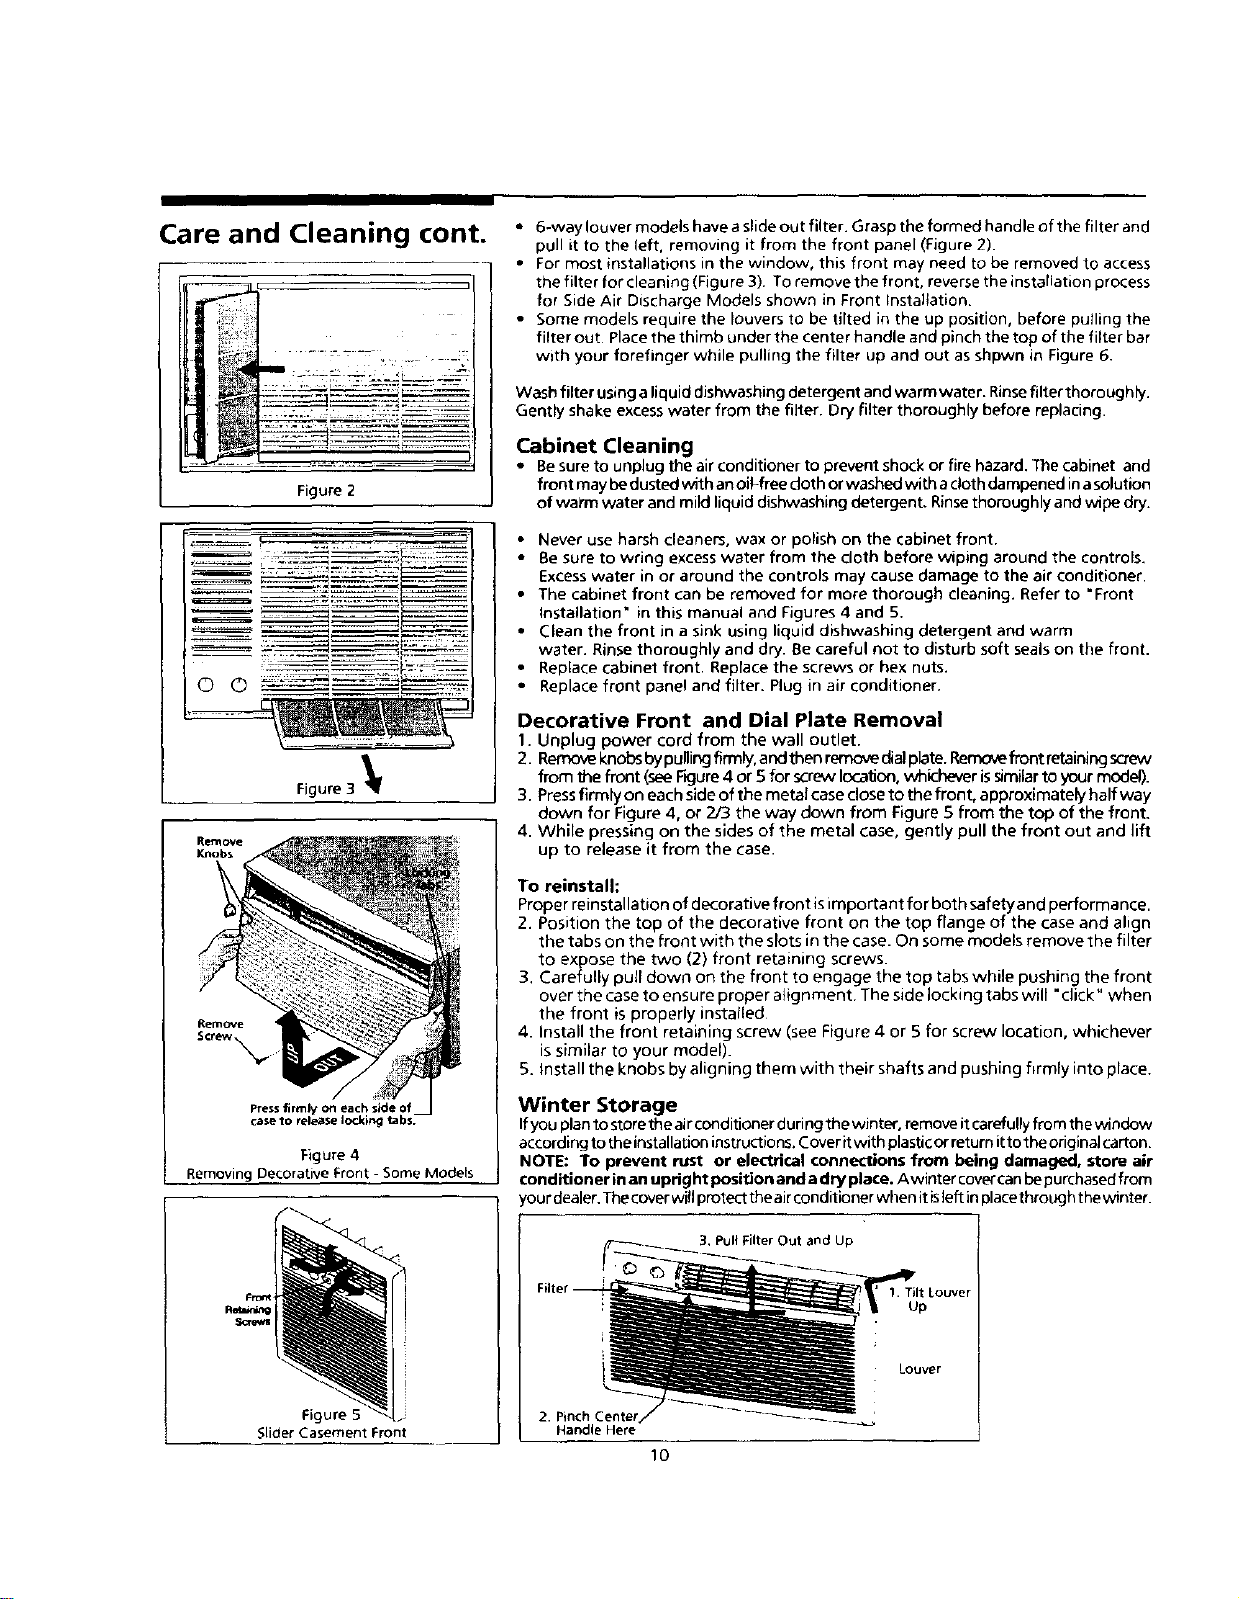
• 6-waylouver models have a slide out filter. Grasp the formed handle of the filter and
pull it to the left, removing it from the front panel (Figure 2).
• For most installations in the window, this front may need to be removed to access
the filter for cleaning (Figure 3). To remove the front, reverse the installation process
for Side Air Discharge Models shown in Front Installation.
• Some models require the louvers to be tilted in the up position, before pulling the
filter out Place the thimb under the center handle and pinch the top of the filter bar
with your forefinger while pulling the filter up and out as shpwn in Figure 6.
Wash filter using a liquid dishwashing detergent and warm water. Rinse filter thoroughly.
Gently shake excess water from the filter. Dry filter thoroughly before replacing.
Cabinet Cleaning
• Besure to unplug the airconditionerto prevent shock or fire hazard.Thecabinet and
front maybe dustedwith anoi!-free doth or washedwith acloth dampened inasolution
of warm water and mild liquid dishwashing detergent. Rinsethoroughly andwipe dry.
Figure 3
Remove
Screw\
Press firmly on each side of
case to release locking tabs_
• Never use harsh cleaners, wax or polish on the cabinet front.
• Be sure to wring excess water from the cloth before wiping around the controls_
Excess water in or around the controls may cause damage to the air conditioner.
• The cabinet front can be removed for more thorough cleaning. Refer to "Front
Installation" in this manual and Figures 4 and 5.
• Clean the front in a sink using liquid dishwashing detergent and warm
water. Rinse thoroughly and dry. Be careful not to disturb soft seals on the front.
• Replace cabinet front. Replace the screws or hex nuts.
• Replace front panel and filter. Plug in air conditioner.
Decorative Front and Dial Plate Removal
1. Unplug power cord from the wall outlet.
2. Removeknobsbypullingfirmly,andthenremovedialplate.Removefrontretainingscrew
from the front (seeFigure4 or 5for screw location,whicheverissimilartoyour model).
3. Pressfirmlyon each sideof the metal case closeto the front, approximately half way
down for Figure 4, or 2/3 the way down from Figure 5 from the top of the front.
4. While pressing on the sides of the metal case, gently pull the front out and lift
up to release it from the case.
To reinstall:
Proper reinstallation of decorative frontis important for both safetyand performance.
2. Position the top of the decorative front on the top flange of the case and align
the tabs on the front with the slots in the case. On some models remove the filter
to expose the two (2) front retaining screws.
3, Carefully pull down on the front to engage the top tabs while pushing the front
over the caseto ensure proper alignment. The side locking tabs will "click" when
the front is properly installed
4. Install the front retaining screw (see Figure 4 or 5for screw location, whichever
is similar to your model).
5. Install the knobs by aligning them with their shafts and pushing firmly into place.
Winter Storage
Ifyou planto storetheairconditioner duringthe winter, removeit carefullyfrom thewindow
according to the installation instructions. Cover it with plastic or return it to the original carton.
Figure 4 NOTE: To prevent rust or electrical connections from being damaged, store air
Removing Decorative Front- Some Models conditionerinan uprightpositionandadryplace. Awinter covercan bepurchased from
_ourdealer. The cover will protect the air conditioner when it isleft in placethrough the winter.
Filter i _ ' I. Tilt Louver
_ up
Louver
Figure 5 2. Pi ---
Slider Casement Front Handle Here
10
Loading ...