Loading ...
Loading ...
Loading ...
14
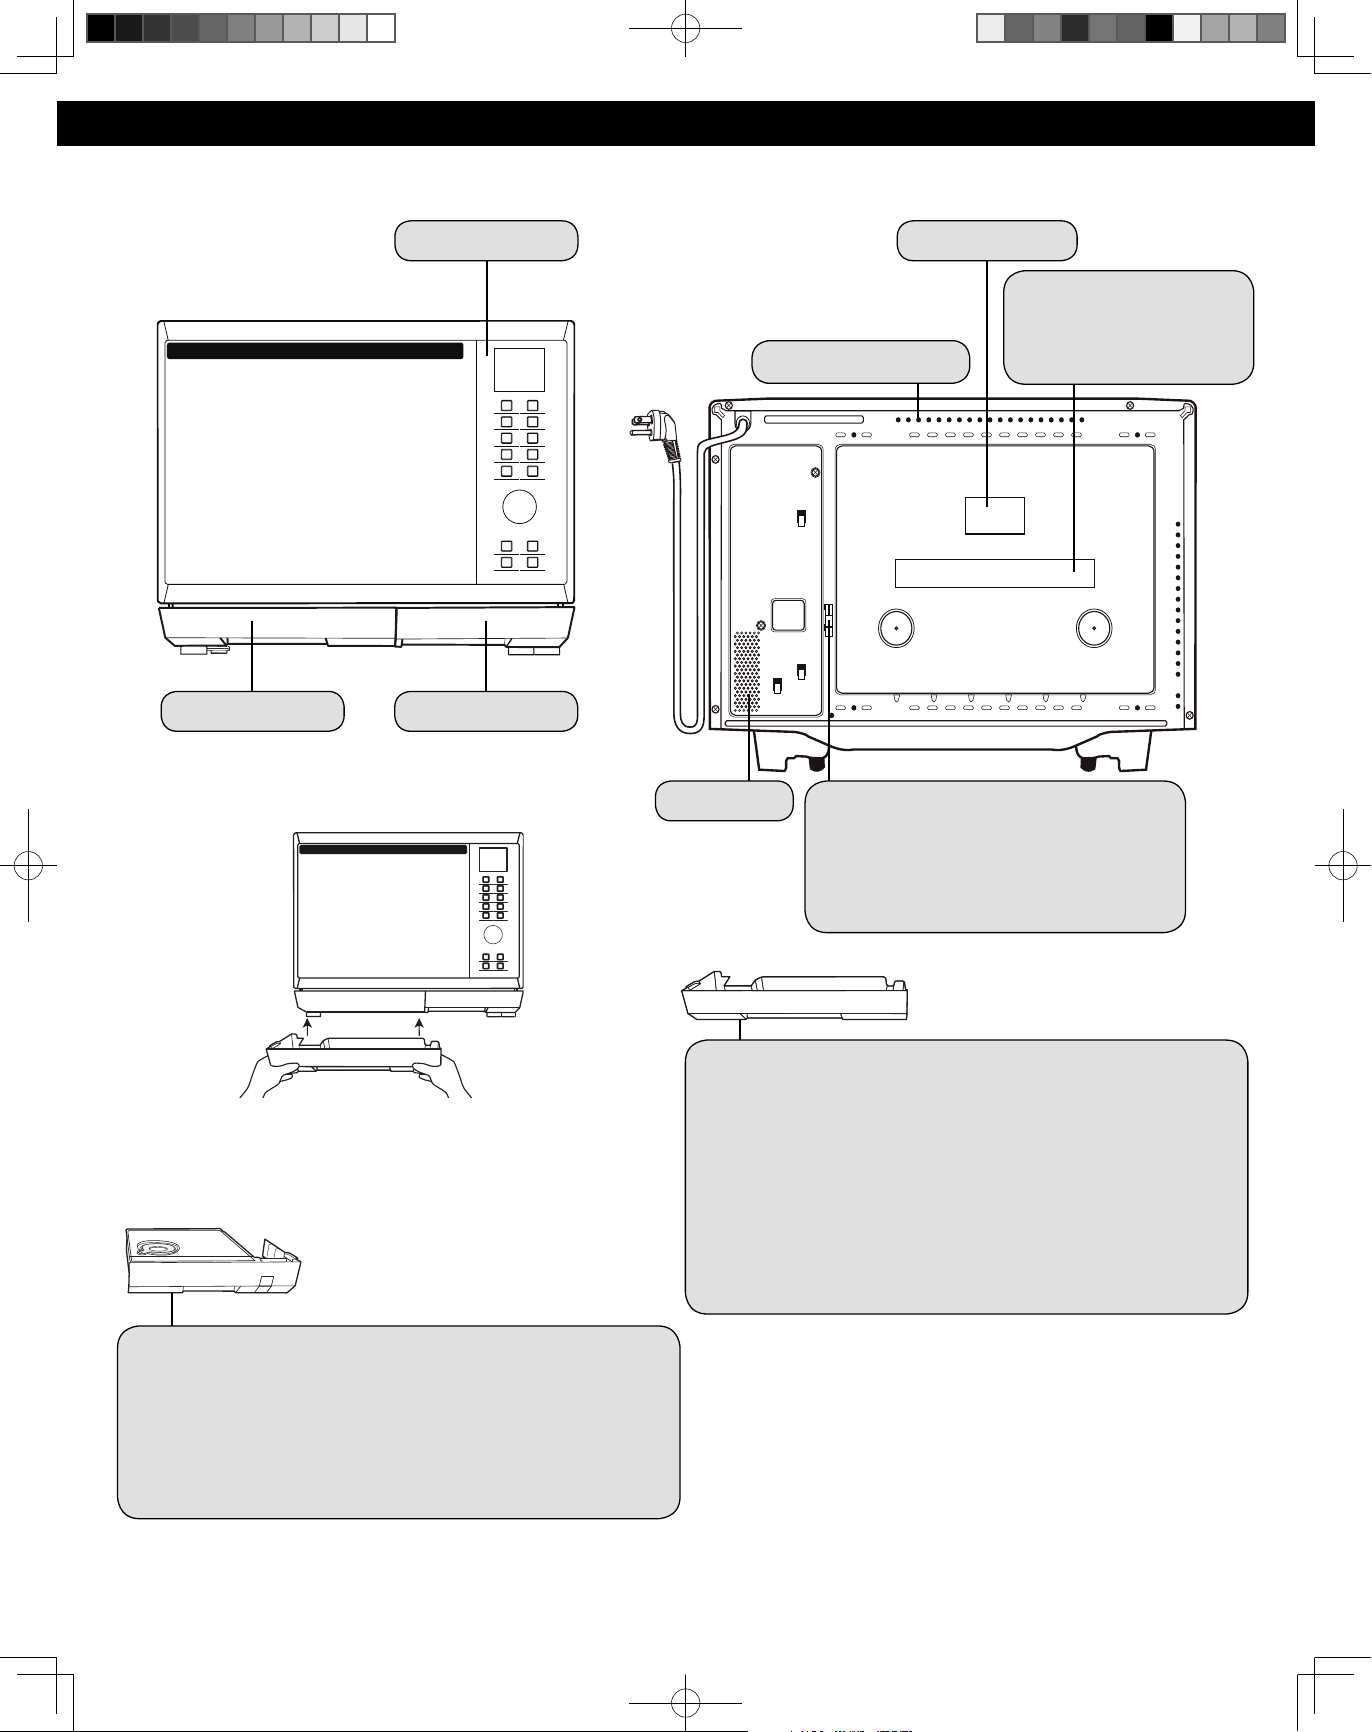
Location of Controls (continued)
NOTE:
The above illustration is for reference only.
Drip Tray
1. Before using the oven, the drip tray must be tted as it collects
excess water during cooking. The drip tray should be removed
and cleaned on a regular basis.
2. Fit the drip tray by holding with both hands and clicking onto
the front legs of the oven.
3. To remove the drip tray, hold with both hands and gently ease
forward. Wash in warm soapy water. Re-position the drip tray
by clicking back onto the legs.
4. DO NOT USE A DISHWASHER TO CLEAN THE DRIP TRAY.
Re-position the drip tray by clicking back onto the legs.
Water Tank
Carefully remove the water tank from the oven. Remove the
lid and ll with pure water (do not use mineral water). Replace
the lid and position back in the oven. Ensure the lid is closed
tightly and securely positioned, otherwise leakage may occur. It
is recommended to clean the water tank in warm water once a
week.
Front View
Rear View
Control Panel
Drip Tray Water Tank
Identi cation Label
The model number and
serial number are displayed
here.
Warning Label
Air Vents Exhaust
Air Inlet
Stopper (irremovable)
The stopper functions as a limit for ensur-
ing essential space between the back and
rear part of the oven and guarantee good
air ventilation.
F0003BU00CP_Eng_170301.indd 14 2017/3/1 15:45:38
Loading ...
Loading ...
Loading ...