Loading ...
Loading ...
Loading ...

ENGLISH
10
Cleaning
WARNING: Blow dirt and dust out of all air vents with
clean, dry air at least once a week. To minimize the risk
of eye injury, always wear ANSI Z87.1 approved eye
protection when performing thisprocedure.
WARNING: Never use solvents or other harsh
chemicals for cleaning the non‑metallic parts of the
tool. These chemicals may weaken the plastic materials
MAINTENANCE
WARNING: To reduce the risk of serious personal
injury, turn unit off and remove the battery pack
before making any adjustments or removing/
installing attachments or accessories. An
accidental start‑up can causeinjury.
Your DeWALT power tool has been designed to operate
over a long period of time with a minimum of maintenance.
Continuous satisfactory operation depends upon proper tool
care and regularcleaning.
Mode Application
Trigger Mode
(High Speed)
LED 2
19
illuminated
When the variable trigger is
pulled, the motor will spin in the
selected direction, with a speed
proportional to the amount of
trigger pull.
Trigger Mode
(Low Speed)
LED 1
18
illuminated
When the variable trigger is
pulled, the motor will spin in the
selected direction, with a speed
proportional to the amount
of trigger pull, with a lower
maximumspeed.
PushStart
LED 2
19
and
LED3
20
illuminated
When the tool is pushed against
the workpiece, the motor will
start automatically in the selected
direction at maximumspeed.
WARNING: In this mode, the
trigger wont turn the motor
on, however it will turn on the
LEDlight.
Lock-On
All 3LEDs illuminated
Fully pulling and releasing
the trigger will lock the tool
on, with the motor running at
maximumspeed.
Fully pulling the trigger a second
time will turn off themotor.
Mode Selection (Fig. G)
WARNING: Motor must be off for any mode change
to takeeffect.
The DCF630 is equipped with a mode selector button
8
used to cycle through the four screwdrivingmodes.
Screwdriving (Fig. A)
For best results, hold the screwgun directly inline with the
fastener. The screwgun is equipped with four driving modes
(refer to ModeSelection).
To drive the fastener, place it on the bit, press the variable
speed switch and push the fastener into the workpiece with
a smooth, continuous motion. When the fastener is seated,
the clutch will disengageautomatically.
Before driving screw:
1. Install bit tip in bitholder.
NOTE: The tool bit tip should match the head of screw
you aredriving.
2. Adjust depth locator
3. Check for correct direction
4. Place screw onbit.
5. Contact work surface applying forward pressure to drive
screw until depth locator contacts the work surface.
Screwgun will ratchet automatically disengaging bit from
screw.
6. This depth sensitive screwgun is suitable for driving
drywallscrews.
For this Depth Sensitive Clutch Please
Remember:
• The bit will not turn until pressure is applied to the unit.
Push toengage.
• Trigger switch will not depress unless tool is in either
forward or reverseposition.
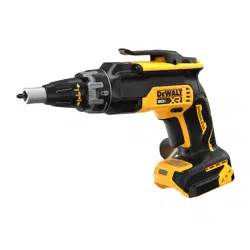
Worklight (Fig. A)
The worklight
10
is activated when the trigger switch is
depressed, and will stay illuminated for 20seconds provided
the trigger isn't depressed or the motor isntrunning.
PushStart mode does turn the LEDon.
NOTE: The worklight is for lighting the immediate work
surface and is not intended to be used as aflashlight.
NOTE: Continuous use in variable speed range is not
recommended. It may damage the switch and should
beavoided.
NOTE: The first time the tool is run after changing the
direction of rotation, you may hear a click on start up. This is
normal and does not indicate aproblem.
Loading ...
Loading ...
Loading ...