Loading ...
Loading ...
Loading ...
ASSEMBLY
Assembly requires the assistance of a second person. Set the treadmill in a cleared area and remove all
packing materials. Do not dispose of the packing materials until assembl_is completed. THE FOLLOWING
TOOLS ARE REQUIRED FOR ASSEMBLY: An adjustable wrench _ (not Included).
.
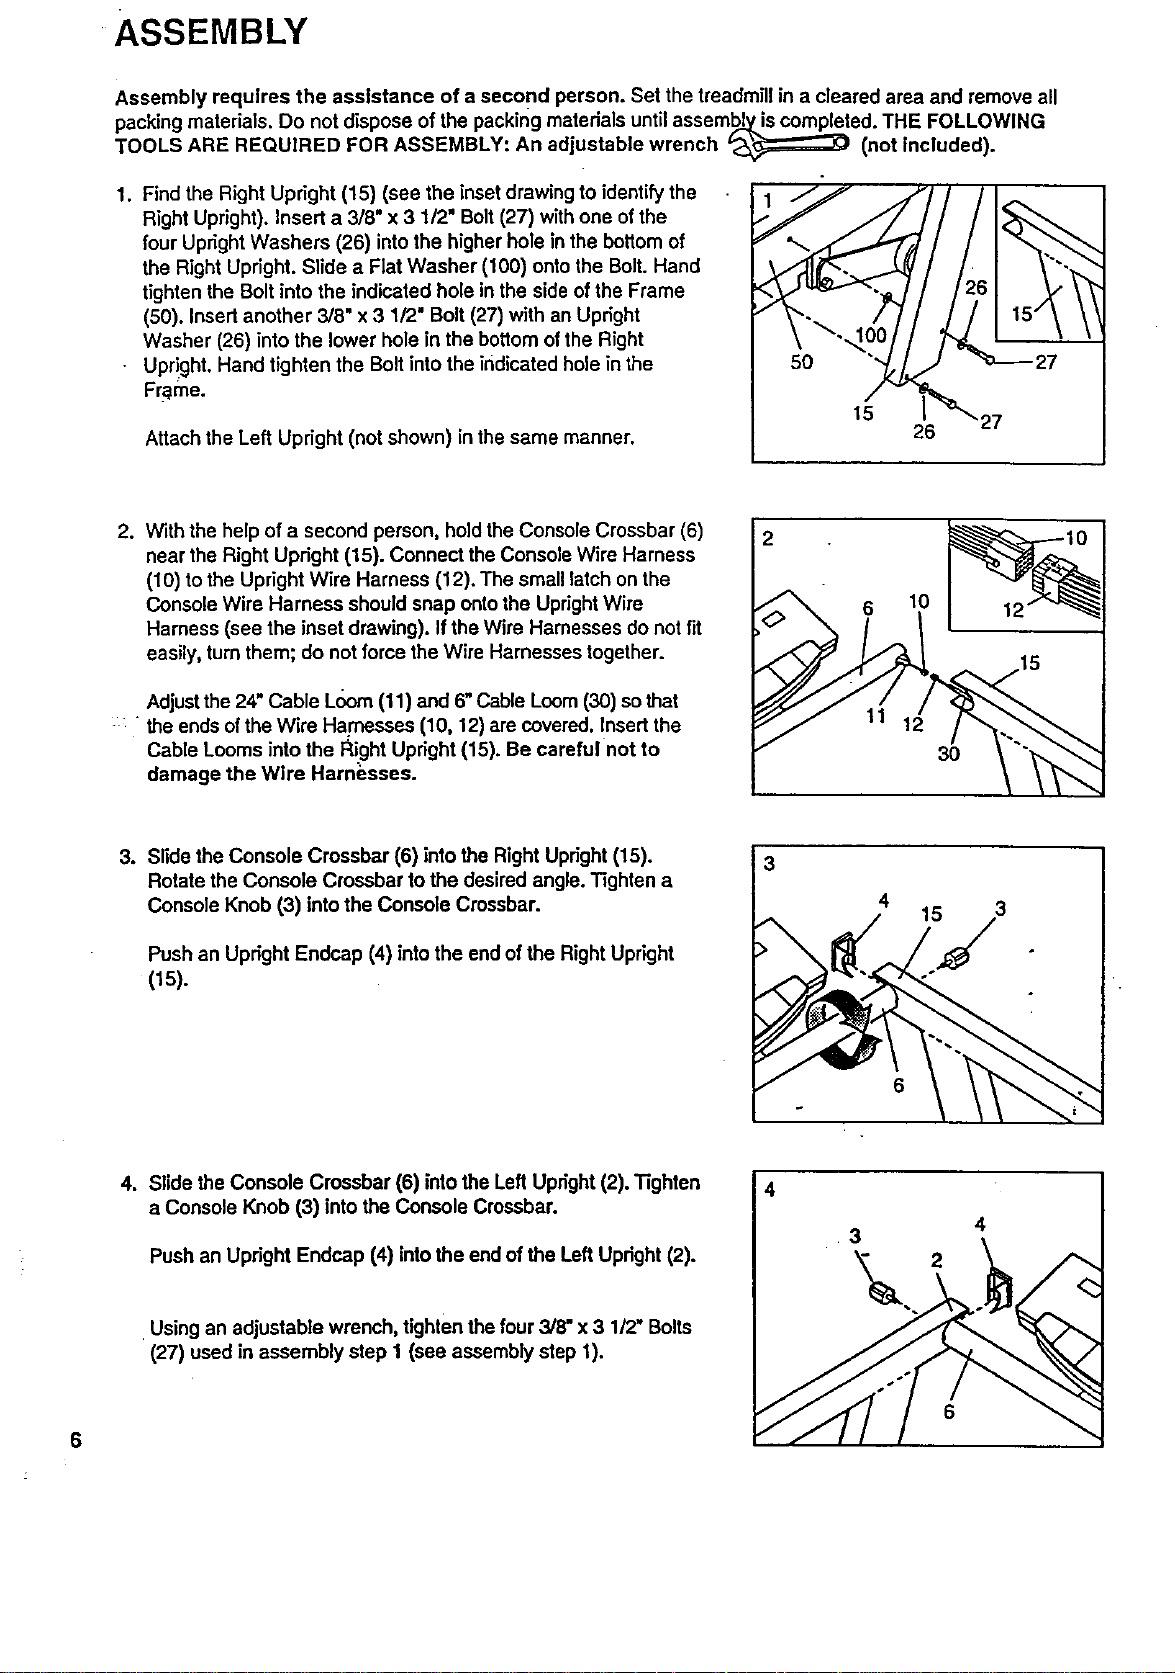
Find the Right Upright (15) (see the inset drawingto identify the
Right Upright). Insert a 3/8" x 3 1/2" Bolt (27) withone of the
four Upright Washers (26) into the higher hole in the bottom of
the Right Upright. Slide a Fiat Washer (100) onto the Bolt. Hand
tighten the Bolt into the indicated hole inthe side of the Frame
(50). Insert another 3/8" x 3 1/2" Bolt (27) with an Upright
Washer (26) into the lower hole in the bottom of the Right
Upright. Hand tighten the Bolt into the indicated hole in the
Frame.
Attach the Left Upright (not shown) in the same manner.
5O
15
26
27
27
. With the help of a second person, hold the Console Crossbar (6)
near the Right Upright (15). Connect the Console Wire Harness
(10) to the Upright Wire Harness (12). The small latch on the
Console Wire Harness should snap ontothe UprightWire
Harness (see the inset drawing). Ifthe Wire Harnesses do not fit
easily, turnthem; do not force the Wire Harnesses together.
Adjust the 24" Cable Lcorn (11) and 6" Cable Loom(30) so that
the ends of the Wire Harnesses (10, 12) are covered. Insertthe
Cable Looms into the I_ight Upright (15). Be careful not to
damage the Wire Harn;_sses.
2
6
11 12
3O
3. Slide the Console Crossbar (6) intothe Right Upright (15).
Rotate the Console Crossbar tothe desired angle. Tighten a
Console Knob (3) into the Console Crossbar.
Push an Upright Endcap (4) into the end of the Right Upright
(15).
3
4
15 3
S
4. Slide the Console Crossbar (6) into the Left Upright (2). Tighten
a Console Knob (3) into the Console Crossbar.
Push an Upright Endcap (4) intothe end of the Left Upright (2).
Using an adjustable wrench, tighten thefour 3/8" x 3 1/2" Bolts
(27) used in assembly step 1 (see assembly step 1).
4
3
4
2
6
6
Loading ...
Loading ...
Loading ...