Loading ...
Loading ...
17
A9 Power supply cable
A10 Drainage hose with 2 caps
A11 Remote control signal receiver
Description of accessories (See page 3 - B)
B1 Wall ange with cap
B2 Air exhaust hose
B3 Hose adapter (2 pieces)
B4 Wall mounting accessory
B5 Crosspiece grille
B6 Cap for crosspiece hole
B7 Crosspiece
B8 Screws
B9 Window outlet
B10 Remote control
AIR CONDITIONING WITHOUT INSTALLATION
Just a few simple steps and your air conditioner will ensure your
comfort:
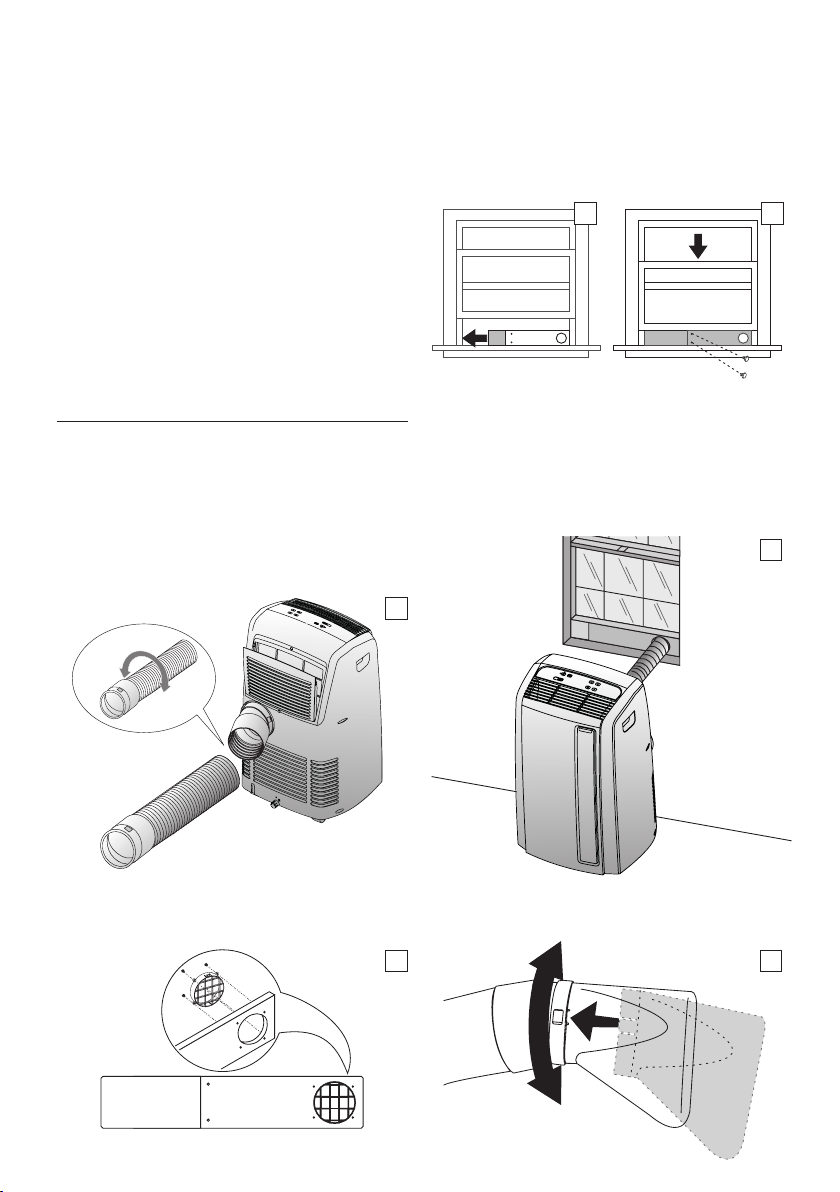
• Screw a hose adapter B3 to one end of the air exhaust hose
B2.
• Fit the other adapter B3 in the air exhaust hose housing A7
on the back of the appliance (see g. 1).
• Screw the end of the hose without an adaptor to the adap-
tor previously attached to the appliance (see g. 1).
Sash window
• Fit the crosspiece grille B5 to the crosspiece B7 and attach
it using 4 screws provided B8 (g. 2).
• Open the window.
• Put the crosspiece B7 in the window, extending it the en-
tire width of the window (g. 3).
• Once the crosspiece has been extended, it can be attached
by screwing in the remaining two screws provided.
• Lower the window (g. 4).
• Set the air conditioner near the window. Insert the air
exhaust hose B2 previously assembled in the grille on the
crosspiece B7 (g. 5). Make sure the air exhaust hose is not
obstructed.
• When not using the appliance, the crosspiece hole can be
covered with the cap B6 provided.
Double casement window
• Apply the window outlet B9 to the air exhaust hose B2 that
was previously assembled, as shown in g. 6.
2
1
1
2
43
5
6
Loading ...
Loading ...
Loading ...