Loading ...
Loading ...
Loading ...
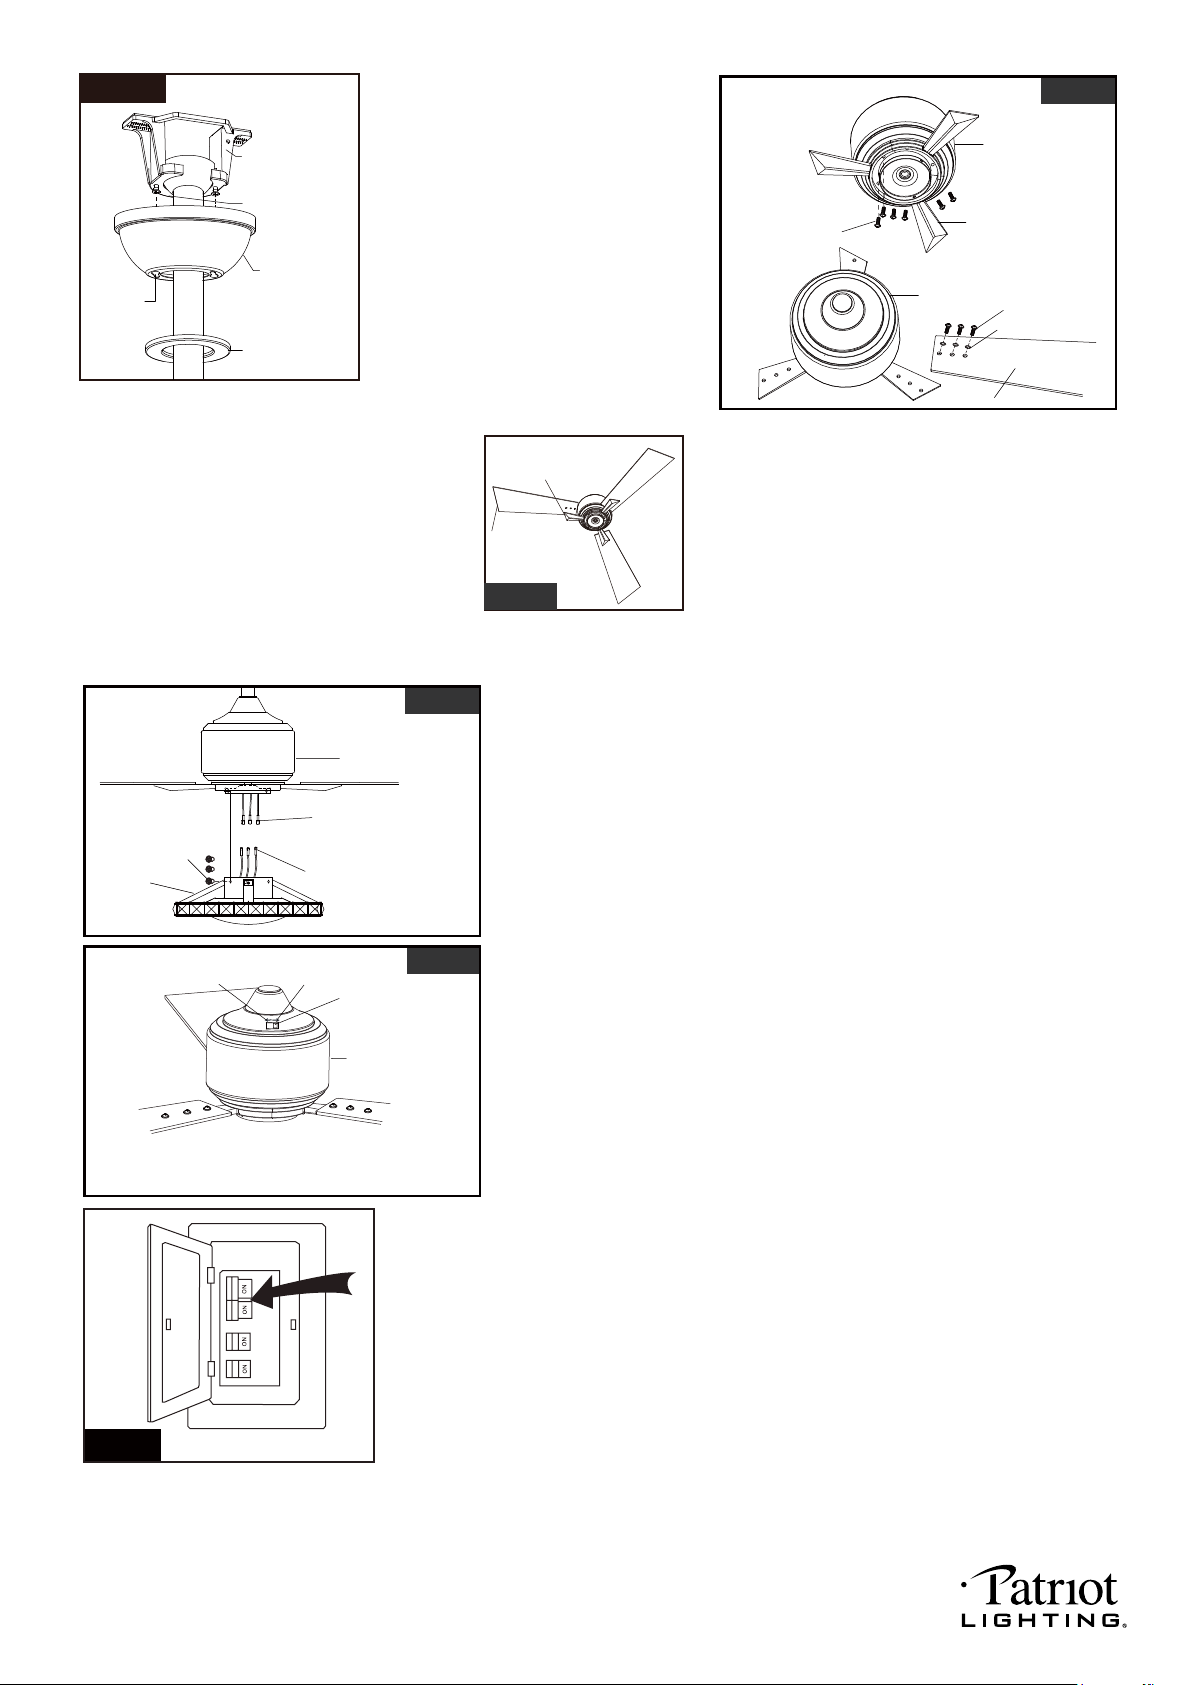
Connect the female terminals from motor to male terminals
from fan light kit.
secure the fan light kit to the motor by fan screws.
Note: 1). The blue fixture wire to blue motor wire;
2). The orange fixture wire to orange motor wire;
3). The white fixture wire to white motor wire;
Align holes and fasten blade holder to the
motor with screws. Then align holes and
fasten blade to the blade holder with rubber
washers and blade screws. Repeat for
remaining blades and blade holders (Fig.12a).
Suggest: Using magnetic Philips screwdriver.
NOTE: The blade outside edge angle and
blade holder outside edge angle
must be same(Fig.12b).
PAGE: 7 / 11
Fig.11
Blade Screw
Rubber Washer
Screw
Fan Blade
Fig.12a
Fig.12b
Fig.15
Turn ON the electric circuit at the
main fuse or circuit breaker box.
CAUTION :Handle the light kit gently during installing. In order
to avoid noise please keep crystalls tightly.
The slide switch on motor assembly sets direction of fan rotation.
Select the desired direction of fan rotation.
Push the slide switch left for " Forward" and right for "Reverse".
Note: Wait for fan to stop before reversing the direction of blade
rotation.
Canopy Screw
Key Hole
Slot
Hanger Bracket
Canopy
Decorative Cap
Motor
Motor
Blade Holder
Loose canopy screw and do not
remove it, push the canopy
upwards to cover hanger bracket by
inserting canopy screw into key
hole slot, then rotate the canopy till it
fixed on the hanger bracket. Finally,
Attach the decorative cap to canopy,
rotate it clockwise until tight.
Fig.13
Motor
Fan Light Kit
Fan Screw
Male terminal
Female terminal
Fig.14
Slide Switch
Reverse
Forward
Motor
Blade Angle Edge
Blade Holder Edge Angle
220104
Loading ...
Loading ...
Loading ...