Loading ...
Loading ...
Loading ...

Before conversion the cooktop must be disconnected
from the electricity and gas valves must be turned to the
OFF position.
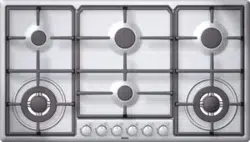
1 Remove the trivets, burner caps and burner heads.
2 Change the injectors using a 7-mm socket wrench
and be sure to tighten them down properly so that
3 Re-assemble the burner component parts in reverse
order.
To change injectors
All work involved in installation, setting and adaptation
to a different gas type must be carried out by authorised
personnel from our Service Centre and must comply
with current regulations and the conditions laid down by
the local gas company.
Request change-over injectors from our customer service
deparment (refer injector chart below for sizes).
Coverting the cooktop
from Nat.Gas to
NOTE: it is not necessary to adjust the primary air control
on these burners.
6
7 mm
Refer Fig. .
7
they are fully airtight. Refer Fig. .
8
8
7
Universal LPG
Natural Gas
InjectorInjectorHourly Gas
Comsumption
(MJ)
Small
Medium
Large
Hourly Gas
Comsumption
(MJ)
4,0
Big wok (Center
Burner
outer)
Big wok (Center
inner)
Universal LPG
11,5
15
14,6
6,5
included in
above
included in
above
3,25
6,25
9,5
11
5 To adjust the minimum flame for N.G. replace the
control knob onto the spindle, light the gas and turn
the adjustment screw anti-clockwise to estabilish a
minimum stable flame position. The flame should
remain alight and not burn back to the injector when
the valve is turned quickcly from ‘Full On’ to the
“Minimum flame” position and back a few times.
6
valve shaft: in the event of damage, change the entire
valve.
9
10
1
T
urn the control knob to minimum.
2Remove the control knob from the valve spindle.
3
4 The adjustment screw is positioned at the rear lower
Minimum flame adjustment.
efit the control knob. Never dismount the
R
Apply pressure with the tip of the screwdriver to
release the thread toward the tap's adjusting screw.
Refer Fig.10.
.Refer Fig.
9
section of the valve.
Do not remove the disk seal.
To adjust the minimum flame position for ULPG the
the control knob to the small flame position. Screw
screw must be fully tightened down clockwise.
12
mark
mark
90
118
155
110
85 43
68
85
67
50
Loading ...
Loading ...
Loading ...