Loading ...
Loading ...
Loading ...
Page 14
mrcool.com
Unit Installation
Drain Connection
2” Minimum
3” Minimum
Flexible Tubing
(Hose or Pipe)
Positive Liquid Seal
(Required)
Unit
Fig. 2.12
Condensate Removal
1. The condensate drain pipe should be connected into a special drain system for the unit.
2. The drain pan has primary and secondary drain connections. Condensate removal is performed by attaching a
3/4 in (19 mm) PVC pipe to the evaporator coil pan and terminated in accordance with local or state plumbing
and HVAC codes. The installation must include a “P” style trap that is located closely to the evaporator coil.
WARNING
DO NOT over-tighten the drain connection in order to prevent damage to the evaporator drain
pan. See the following figure for details of a typical condensate line “P” trap.
DO NOT connect the condensate drain pipe into the waste pipe or other pipelines that are likely
to produce corrosive or peculiar smells. This will prevent odors from entering indoors or
corrupting the unit.
DO NOT connect the condensate drain pipe into the rain pipe. This will prevent rain water from
pouring in and causing property loss or personal injury.
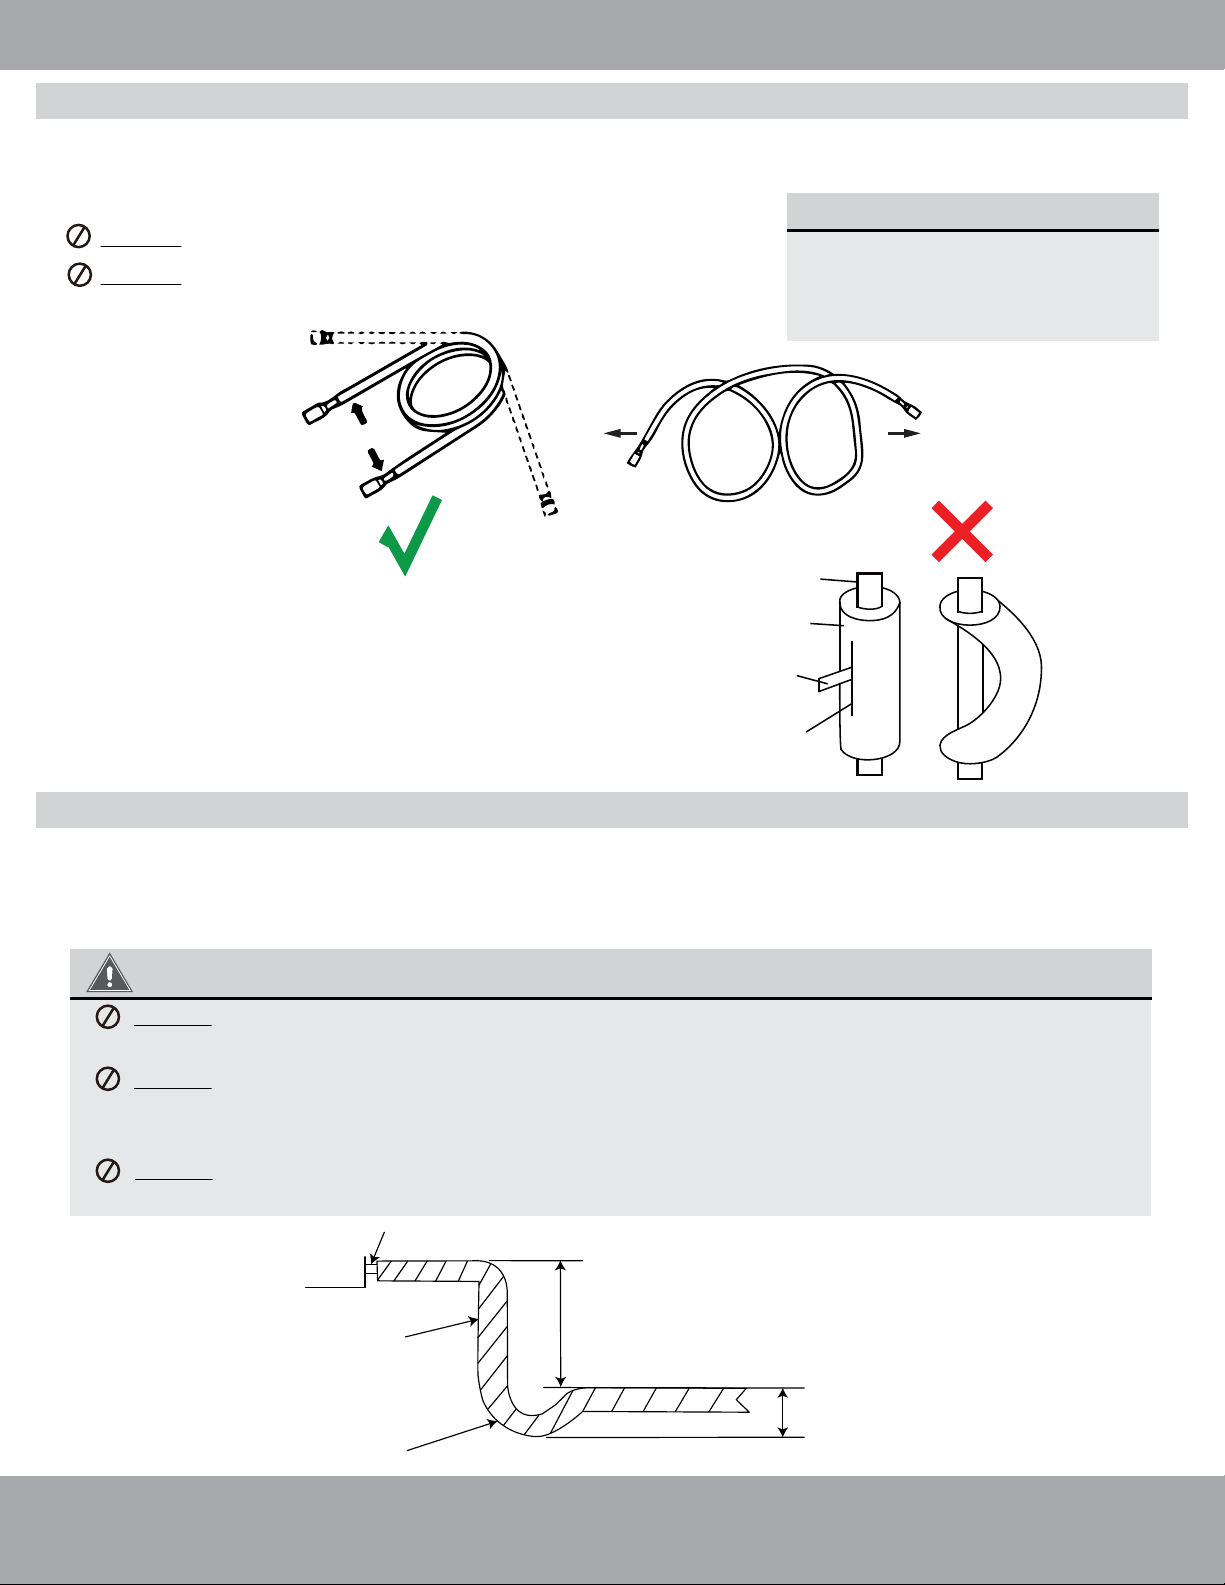
1. Use your hands to bend the pipes. Work carefully not to collapse the pipes during bending.
2. If the pipe is repeatedly bent or extended, it will become hard and difficult to manipulate. Avoid bending
or extending the pipe more than 3 times.
DO NOT bend the pipes in at an angle greater than 90°.
DO NOT bend the pipe excessively, otherwise it will break.
Please refer to Fig. 2.10
MINIMUM BEND RADIUS
When bending connective
refrigerant piping, the minimum
bending radius is 4 in (10 cm).
Refer to Fig. 2.10.
Extend the pipe by unwinding it
Fig. 2.10
3. As shown in Fig. 2.11, use a sharp cutter to cut the pipe
insulation and bend the pipe after it is exposed. After
bending, place the insulation back on the pipe and secure
it with adhesive tape.
Fig. 2.11
Pipe
Insulation
Pipe
Cutter
Cut line
≥4 in (10 cm)
Radius
Bending the Line Set
Loading ...
Loading ...
Loading ...