Loading ...
Loading ...
Loading ...
PSR-SX600 Owner’s Manual 89
Registration Memory/Playlist – Saving and Recalling Custom Panel Setups
7
4 If necessary, edit the added Record.
The newly added Playlist Record not only simply lets you recall the selected registration Bank file, but also
gives you tools for editing, if you want to set more detailed settings (such as directly recalling a specified
Registration Memory number).
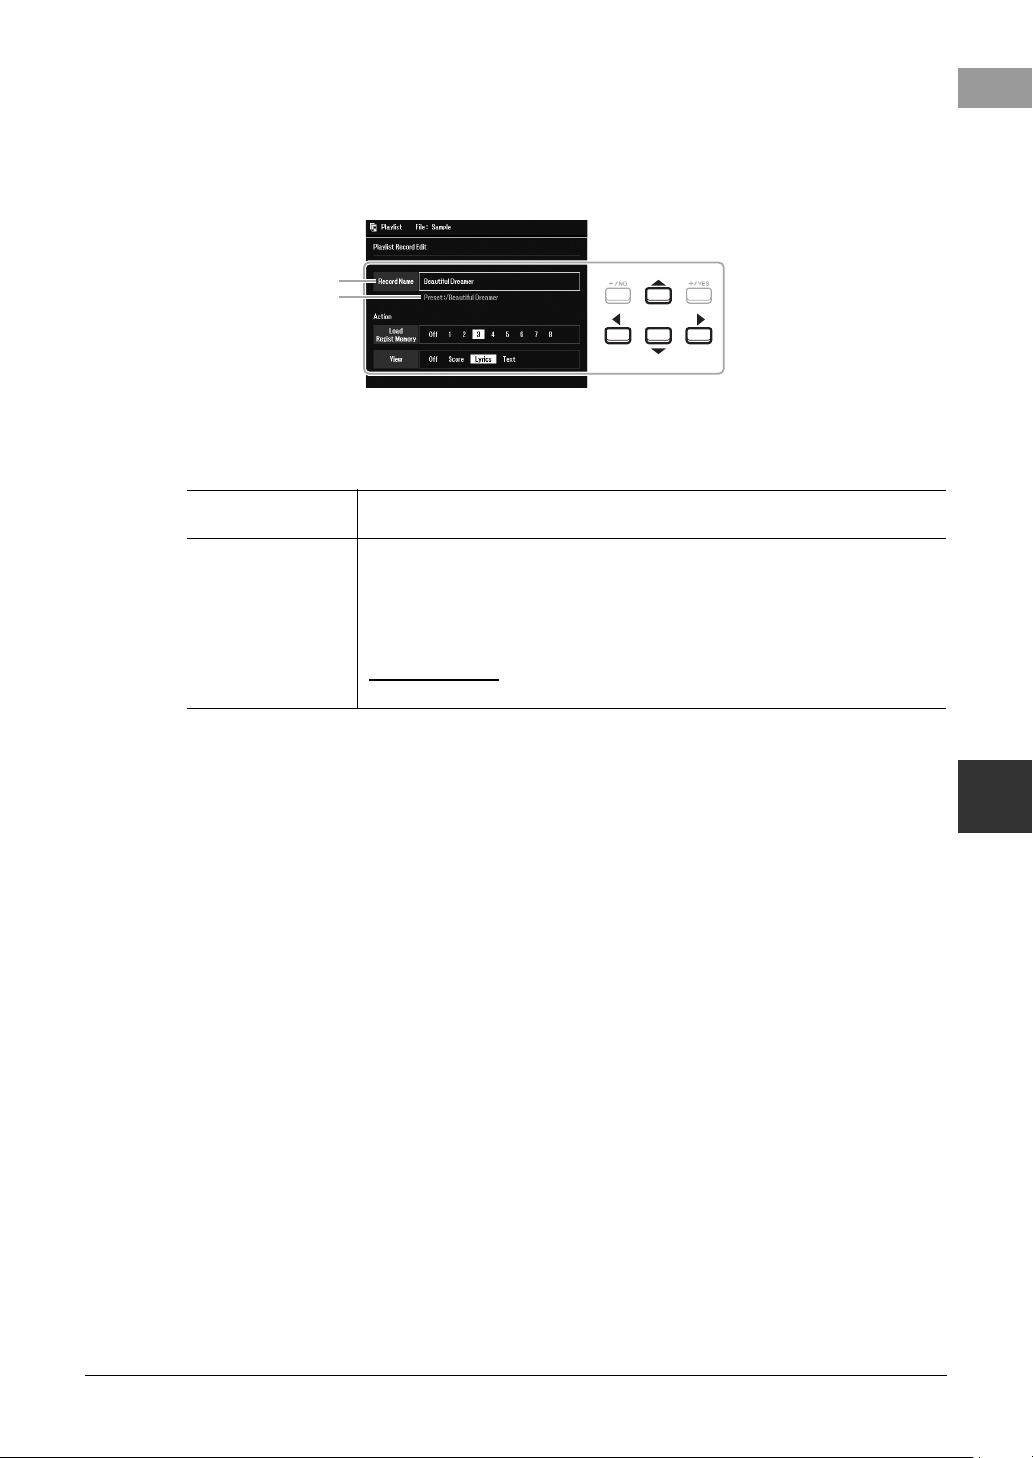
4-1 Press [5 ](Edit) button on the Playlist display to call up the Playlist Record Edit window.
4-2 Select the desired parameter to edit by using the Cursor buttons [][], and then use the [+/YES][-/NO]
buttons or the Data dial.
4-3 Press the [EXIT] button to close the Playlist Record Edit display.
5 Save all the added Records as a Playlist file.
5-1 Press the [8 ] (Option) buttons to call up the pop-up display, and then press the [7 ]
(Select&Save) buttons.
5-2 Select the appropriate tab (User or USB) to which you want to save the data by using the TAB [E][F]
buttons.
If you want to save the data within an existing folder, also select the folder here.
5-3 Make sure that Save is shown at the bottom of the display.
If it is not shown on the display, press the [8 ] (File) button to call it up.
5-4 Press the[6 ] (Save) button.
The Character Entry window is called up.
5-5 Enter the file name (page 31).
Even if you skip this step, you can rename the file at any time after saving it (page 28).
5-6 Press the [8 ] (OK) button to actually save the file.
If the file name already exists, a message appears asking you if you want to overwrite or not.
If not, press one of the [6 ] (No) buttons and enter another name.
5-7 Press the [8 ] (Close) buttons to close the pop-up display.
Record Name Determines the name of the Record. Pressing the [ENTER] button calls up the Character Entry
window, letting you change the RECORD NAME.
Action Select additional actions after recalling the Record, by using the [+/YES][-/NO] buttons or the
Data dial.
• Load Regist Memory: Recalls the Registration Memory corresponding to the number
selected here. When OFF is selected, no Registration Memory is recalled.
• View: Displays the view (score, lyrics or text) selected here. When OFF is selected, no view
is displayed.
NOTE
This setting is shown at right of the Record name on the Playlist display.
Record name
File path of the Registration
Bank file linked to the Record.
This file will be recalled by
selecting the Record.
Loading ...
Loading ...
Loading ...