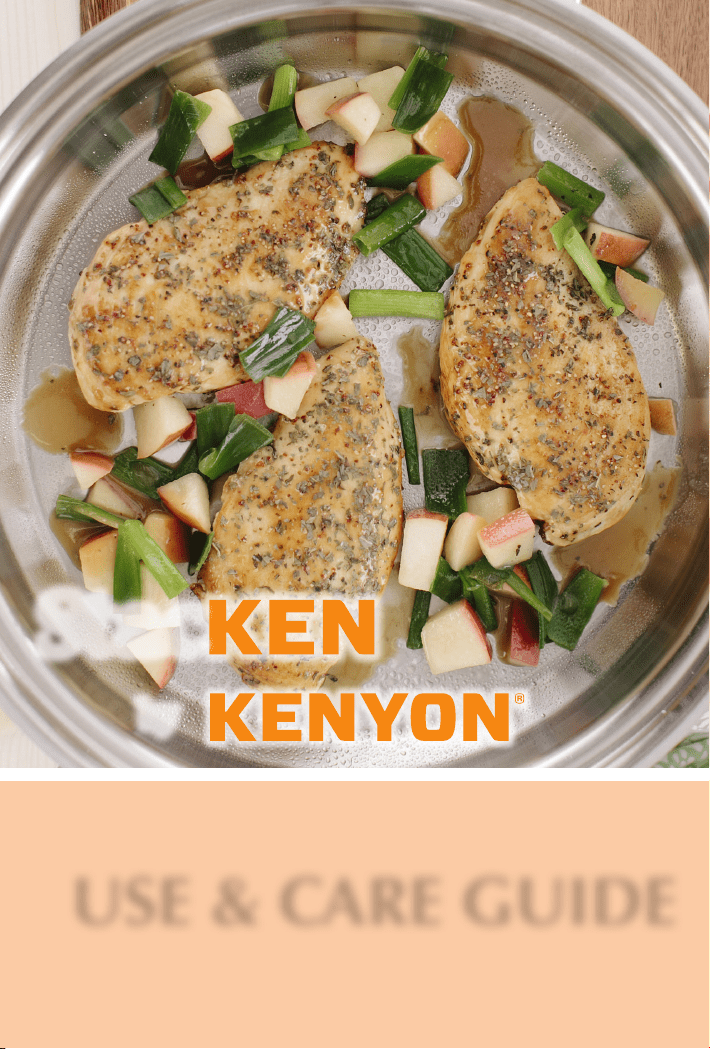
USE & CARE GUIDE
Get the best results from your investment by
following the use and care tips included in this booklet.
Stac
by


You’ve made the right choice.
Congratulations! You’ve invested in better health for your family. You
will appreciate the versatility, ingenuity and economy of this cookware.
You will save time, money and eort every time you use them.
This guide will walk you through the basics of
getting familiar with your cookware. You can
cook healthier meals using less fat and retain
more of your food’s benecial nutrients. Of
course you can cook as you always have
knowing that you have quality cooking
utensils that were made in America using
sustainable manufacturing processes.
Every piece of cookware is inspected before it
leaves the factory oor. Your cookware has a
lifetime warranty that will be honored even as
your children inherit it.
Thank you for your trust. We welcome you to a cleaner, greener,
healthier lifestyle.
Stac

Let’s get started!
Whether you’re new to using high-performance cookware with
Vapor® Technology or you’ve watched mom and dad do it for years,
it’s benecial to go through the basics. Once you’ve got a good
understanding of these few points, you’ll be enjoying your cookware in
no time!
1. ALWAYS cook on Low or Medium heat. The high quality
metals used in StacKEN Cookware make our pans great heat
conductors. If the food is burning, the heat is too high!
2. You may need to get reacquainted with your cooktop as
every burner is dierent. Whether gas, electric or induction, you
may need to adjust your burners for StacKEN’s quick and even
heating. The medium setting on one burner may be equivalent
to another burner’s low setting.
3. When utilizing the Vapor® Cooking Method, follow the recipes
exactly as written and trust the cookware! Please note that you
can use StacKEN Cookware for any cooking method, however,
to achieve the best results utilizing Vapor® Cooking, be sure to
follow the recipes as written.
4. We’re here to help! Our Customer Service Department is the
best in the industry. We’re available Monday through Friday
from 8:00 am to 5:00 p.m. EST to answer any questions. Our
phone number is 860-664-4906.
4

contents
Introduction ....................................................................................... 6
Vapor Cooking 101
What is Vapor Cooking? ................................................ 6
Knowing When It’s Hot Enough ................................ 8
Forming the Vapor Seal ................................................ 8
Size Matters ....................................................................... 9
Use & Care
Wash Before Use ............................................................. 10
Removing Stuck-on Food ............................................ 10
Removing Stains and Scratches ................................ 10
Use Low and Moderate Cooking Temperatures . 11
Varying Cooktops ........................................................... 11
Oven Cooking ................................................................... 11
Avoid Lifting Cover While Food is Cooking .......... 12
Tips for Using Salt ........................................................... 12
Clean After Every Use .................................................... 12
Vapor Cooking Basics
Vegetables ........................................................................... 13
Poultry ................................................................................... 16
Meat ....................................................................................... 17
Fish ......................................................................................... 20
Stove top Baking .............................................................. 23
Vapor Cooking Exceptions .......................................................... 24
Frying an Egg
Boil an Egg Without Water
Rice
Beans and Pasta
Pancakes, Hashbrowns and French Toast
Troubleshooting & FAQs ................................................................ 26
5

introduction
What is vapor
®
cooking?
Congratulations! Your investment in quality stainless steel Vapor®
Cookware will prove benecial for years to come. Your cookware has
been masterfully manufactured in America using an environmentally-
friendly production process.
This guide will help you get started with one of the best investments
you’ll ever make for your family’s health. Rest assured you can use all of
your current recipes, however, with a few slight alterations, you’ll begin
to prepare delicious meals using little or no fat or sodium. For optimal
results, read through this guide before you get started with your new
cookware.
Vapor Cooking is a revolutionary cooking method that will radically
change not just the way you cook food, but also how it tastes. Our
specially designed cookware lets you create delicious, intensely
avorful, naturally vitamin- and mineral-rich meals undiluted by water
or doused in oil, butter or other fat- and sodium-laden ingredients.
With StacKEN Cookware, meals practically cook themselves, using less
energy and fewer ingredients than with traditional cooking methods.
But make no mistake —Vapor Cooking isn’t a diet, it’s a lifestyle. Our
recipes and cooking techniques will teach you to cook any and all
types of foods - including baked goods - right on your stove top, using
little or no water or added fat. No more pots to ll and drain or
water to boil. No more limp, overcooked vegetables or bland, dry
meats. Vegetables are so vibrant and avorful that kids and die-hard
carnivores alike will be clamoring for more. Chicken, meats, and sh
are succulent enough to melt in your mouth. Even skinless, boneless
6

chicken breasts are juicy and tender
without adding so much as a drop of oil to
the pan.
The secrets to Vapor Cooking lie in
the multi-ply construction, gauge (or
thickness) consistency, and unique shape
of our cookware. Each piece is crafted
from multiple layers of highest-quality,
American-made metals, beginning with
a bonded core of aluminum. The core
provides superior heat conductivity and
retention and is sandwiched between an
interior and exterior layer of stainless steel creating cookware that is
as durable and easy to clean as it is beautiful. The cookware is so heat
responsive that you cook only over medium heat, or lower.
The gauge, or metal thickness, remains the same from the bottom of
the pan, all the way to the lip. This feature allows for even heat and
heat retention. No hot spots.
Another key to Vapor Cooking is the Vapor Seal. The Vapor Seal locks
in moisture, avor, and nutrients as opposed to traditional cookware,
which allows them to escape out of the pan or into the cooking
liquid. Vapor Cooking uses the natural moisture content of foods as
its cooking medium instead of added water and/or fat. Our multi-ply
construction allows for heat even enough to enable this moisture-
release without scorching. The moisture — or vapor — then collects
under the domed lid and circulates back down and around the food,
bringing with it all of the avor, and more of the healthful benets to
you and your family.
7
Knowing When It’s Hot Enough
Many of our recipes call for
pre-heating your pans. This is
particularly important when
cooking chicken, meats and sh
as they are usually seared in a
hot, dry pan without any kind of
cooking fat. However, without
anything melting or spluttering
away in there it can be tricky to
know just when it’s hot enough.
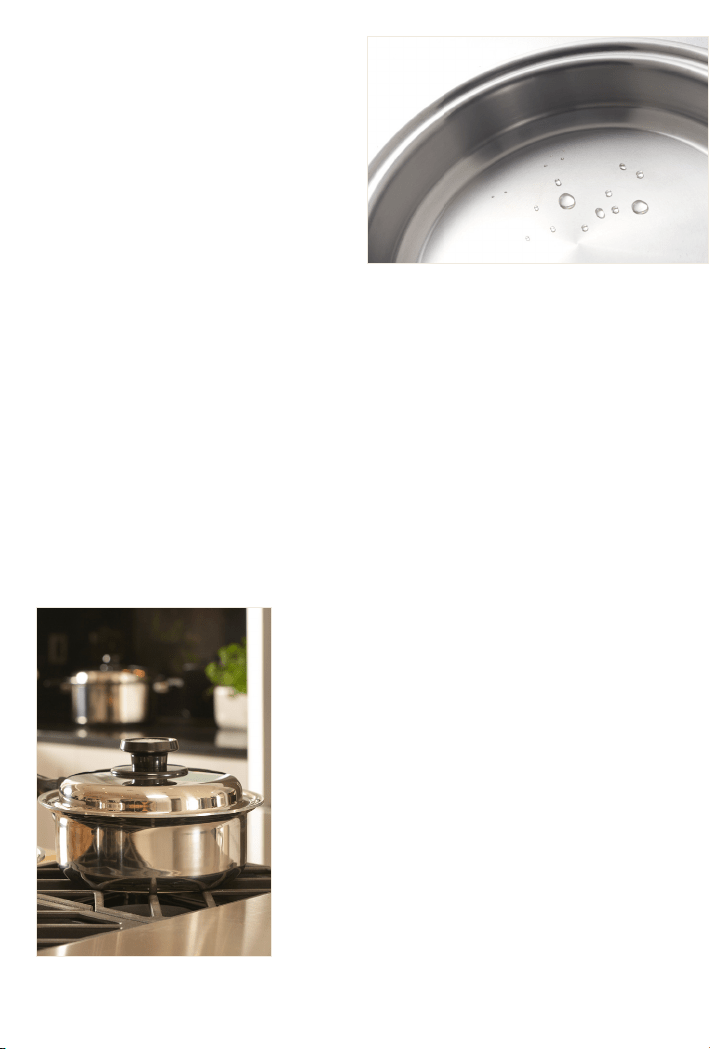
We nd a few drops of water to
be the perfect indicator: set the
empty pan over medium heat
for 3 to 5 minutes, then ick in some water with your ngertips. If
the droplets bead up and roll across the pan’s surface you’re ready
to proceed with cooking. If the water sizzles away slowly, it’s not hot
enough. Continue heating the pan, then test again with water droplets.
Forming the Vapor Seal
Forming a proper Vapor Seal is key to
successful Vapor Cooking. Once the lid
is in place, it’s virtually impossible not
to reach the Vapor Seal stage. However,
there’s more to it than just plunking
down the lid. It’s important to read and
follow our recipes carefully. They have
been specially developed and written to
teach you the Vapor Cooking method
and are loaded with lots of helpful tips on
engaging and relying on the Vapor Seal
during cooking.
8
To gauge your cookware’s heat
level, drip water droplets into the
heated utensil. When the water
beads up and rolls across the
surface, the pan is at the correct
temperature to begin cooking.

9
With the lid on, foods will begin to release their natural moisture and
condensation will form between the lid and pan. Once you see steam
beginning to escape, give the lid a spin — it should do so freely, and
almost oat. Then, reduce the heat to low — or in some cases, remove
the pan from the heat altogether — and proceed with the recipe. Try
to resist the urge to lift the lid frequently by following the cooking
times and other clues listed in the recipes. It may seem strange at rst
not seeing or hearing foods cook. But, when properly engaged, the
Vapor Seal is a clear indicator that your food is cooking. It helps to be
patient and cook methodically until you get the hang of it — which
won’t take long. Vapor Cooking will soon become second nature.
Size Matters
For the best results, ll your pots and pans at least two-thirds full with
food. An insuciently lled pan won’t generate enough vapor to form
a proper Vapor Seal. Always match up the lids and pans or you won’t
be able to achieve a proper Vapor Seal.
In addition, use the proper size range element. The diameter of the
range cooking element should correspond to the diameter of the
utensil. If you are cooking on a gas range, the ame should not extend
up the sides of the utensil.

use & care
Wash Before Use
Before using your cookware for the rst time, we recommend washing
it in hot, soapy water. StacKEN Cookware is dishwasher and oven safe.
We recommend removing the handles before putting your cookware
in the dishwasher. Stainless steel is durable and easy to clean, and we
nd hot water and a soapy sponge or a non-abrasive, nylon, scouring
pad is usually sucient.
Removing Stuck-on Food
For stubborn, stuck-on foods we recommend making a paste of
ordinary baking soda or your favorite eco-friendly, non-abrasive
scouring powder mixed with just enough hot water to form a gritty
paste. Gently work the paste over the food stains with a sponge or non-
abrasive, scouring pad until the debris is removed. Rinse completely
with hot water. Or, for truly tough jobs try “deglazing” the pan much
the way you would during cooking. Add enough water to the empty
pan to cover the stuck-on foods. Bring to a boil over medium heat, and
gently stir up all the bits with a wooden spoon. Discard the water, allow
the pan to cool, then wash in hot, soapy water.
Removing Stains and Scratches
White or light-colored stains are due to mineral deposits from certain
foods. Our scouring powder/paste tip is the best way to remove them.
Minor scratches can be removed using stainless steel cleanser.
10

11
Use Low or Moderate Cooking Temperatures
To ensure the success of minimum moisture cooking, it is important
that only medium and low heat be used. Always begin cooking over
medium heat, and then reduce to low for remainder of the cooking
period. High heat will cause moisture to be driven out of the cookware
preventing the water seal from forming and resulting in shrinkage,
sticking and burning of foods. Electric range owners, remember that
burners retain heat longer, therefore it may be necessary to remove the
utensil until vapor subsides. Gas range owners, remember to turn the
ame down.
Varying Cooktops
Though you may need to get reacquainted with your range as it
relates to heat settings, StacKEN Cookware can be used on ANY
kind of cooktop — gas, electric, induction and ceramic ranges work
perfectly. As long as the heat source is kept to a moderate or minimum
temperature, any type of range will work just ne.
Oven Cooking
StacKEN Cookware can withstand oven temperatures up to 350
degrees Fahrenheit (204 degrees Celsius). Oven temperatures up to
350 degrees Fahrenheit (177 degrees Celsius) will not damage the
phenolic handles and cover knobs on our cookware line if the broiler
unit is not on. We recommend removing the handles when cooking in
the oven. The direct heat from the broiler unit in a gas or electric oven
will cause the handles and knobs to blister. Before placing a utensil in
the oven, make certain the oven is completely preheated. During the
preheating period the oven temperature may exceed 350 degrees.

Avoid Lifting Cover While Food is Cooking
Lifting the cover means breaking the Vapor Seal. Cooking time will
be lengthened each time this happens. Lift the cover just enough
to insert a fork to see if food is suciently cooked. If food is not
completely cooked, replace the cover and turn heat up to medium for
about a minute to reform the Vapor Seal. If the pan is dry, add 1 to 2
tablespoons of water before reforming the Vapor Seal. Reset to low and
continue cooking.
Tips for Using Salt
Although stainless steel is very durable, it is not indestructible. Pitting
may result if undissolved salt is allowed to remain in the bottom of the
unit. This pitting takes the form of small white spots that may appear.
These spots do not aect the performance of the cookware, nor are
they a defect in the metal or workmanship. If salt is needed, add to
boiling liquid in the unit, then stir to completely dissolve. Do not allow
acidic foods or foods that have been seasoned to remain in utensils for
long periods of time.
Clean After Every Use
To maintain the attractive appearance and cooking eciency of the
cookware, it is important that it be cleaned thoroughly after each use.
Food lms left on the cooking surface will cause discoloration when
the utensil is reheated.
12

cooking vegetabLes
Fresh Vegetables
Place the vegetables in the pot. Rinse with cold water then drain. (Do
not add any water or liquid to the pot.) Cover the pot and cook over
medium heat until steam just begins to escape from under the lid. Spin
the lid to engage the vapor seal then immediately reduce the heat to
low. Follow the cooking times listed on the following pages for each
type of vegetable. Times may vary with dierent cooktops.
FRESH VEGETABLES CRISP - TENDER SOFT
Asparagus (medium) 5 min. 8 min.
Asparagus (thick) 6 to 7 min. 8 to 10 min.
Beans (green, string, wax) 5 min. about 8 min.
Beets (cubed or sliced) about 10 min. 12 to 15 min.
Beets, medium (whole) about 20 min. 25 to 30 min.
Broccoli (orets) about 5 min. 8 to 10 min.
Brussel Sprouts (whole) 8 min. 12 to 15 min.
Brussel Sprouts (halved) about 6 min. 10 to 12 min.
Carrots (baby, chopped, sliced, sticks) about 6 min. 8 to 12 min.
Corn (kernels) 4 min. about 6 min.
Onions (whole baby, pearl) 10 to 12 min. about 15 min.
Parsnips (chopped, sliced, sticks) about 6 min. 8 to 12 min.
Parsnips (whole) about 10 min. 12 to 20 min.
Peas 3 to 5 min. 5 to 8 min.
Rutabaga (cubed) 10 to 12 min. 12 to 15 min.
Spinach about 3 min. 3 to 5 min.
Squash, summer (cubed, sliced) 3 to 5 min. 5 to 7 min.
Squash, hard (cubed) 12 to 15 min. 15 to 20 min.
Sweet Potatoes (cubed, quartered) 8 to 10 min. 10 to 15 min.
Turnips (whole, small) 15 to 20 min. 20 to 25 min.
Yams (cubed, quartered) 8 to 10 min. 10 to 15 min.
Zucchini (cubed, sliced) 3 to 5 min. 3 to 5 min.

Cauliower and corn don’t release their natural moisture as quickly as
other vegetables so you will need to line the pot with a few clean outer
leaves or husks. Place the cauliower or corn on top of them, cover
with water, then drain and proceed cooking using the times below. (If
leaves or husks are not available, add 1/4 cup of water.)
Potatoes release lots of gummy starch during cooking. To help absorb
the starch, line the pot with a few sheets of wet paper towel and place
the potatoes on top. Proceed cooking using the times listed below.
FRESH VEGETABLES CRISP - TENDER SOFT
Cauliower (orets) 5 to 8 min. 8 to 10 min.
Cauliower (whole head) 20 to 30 min. about 35 min.
Corn on the Cob about 8 min. 10 to 12 min.
Potatoes, small (halved) 15 to 20 min.
Potatoes, small (whole) 15 to 20 min.
Potatoes, white (cubed, quartered) 8 to 15 min.
14

Frozen Vegetables
Individually quick-frozen (IQF) vegetables’ quality and condition are
far superior to those frozen in solid blocks. IQF vegetables and fruits
usually come frozen in bags and should feel loose in the package.
Frozen vegetables may contain more water than fresh and therefore
may require straining before serving.
Place frozen vegetables in the pot. Rinse with cold water then drain.
Cover the pot and cook over medium heat until steam just begins
to escape from under the lid. Spin the lid to engage the Vapor Seal
then immediately reduce the heat to low. Follow the cooking times
listed below for each type of vegetable. Times may vary with dierent
cooktops.
FROZEN VEGETABLES CRISP - TENDER SOFT
Broccoli 5 min. about 7 min.
Carrots 5 min. about 8 min.
Cauliower 5 min. about 8 min.
Corn (kernels) 2 min. about 4 min.
Edamame (shelled) 2 min. about 4 min.
Edamame (in pods) 2 min. about 5 min.
Green Beans 5 min. about 8 min.
Lima Beans 10 to 12 min. about 18 min.
Mixed Vegetables (depends on
combination)
5 min. about 7 min.
Peas 5 min. about 8 min.
Pearl Onions 10 min. about 13 min.
Spinach 5 min. about 7 min.
15
cooking pouLtrY
Use the utensil that will best t the amount of chicken you’re preparing
and pre-heat over medium about 2 minutes — until it’s hot enough for
water droplets to bead and dance across the surface.
Type: Skin-on, bone-in breasts, legs or thighs
Pre-heat the pan according to the instructions above. Place the chicken
skin-side down in the hot, dry pot, and cook until the chicken comes
away from the bottom of the pan with no resistance, and the skin is
nicely browned about 3 to 5 minutes. Turn the chicken, cover and cook
over medium heat until steam just begins to escape from under the lid,
3 to 5 minutes. Spin the lid to engage the Vapor Seal then immediately
reduce the heat to low. Cook for 10 to 15 minutes, or until the juices
run clear.
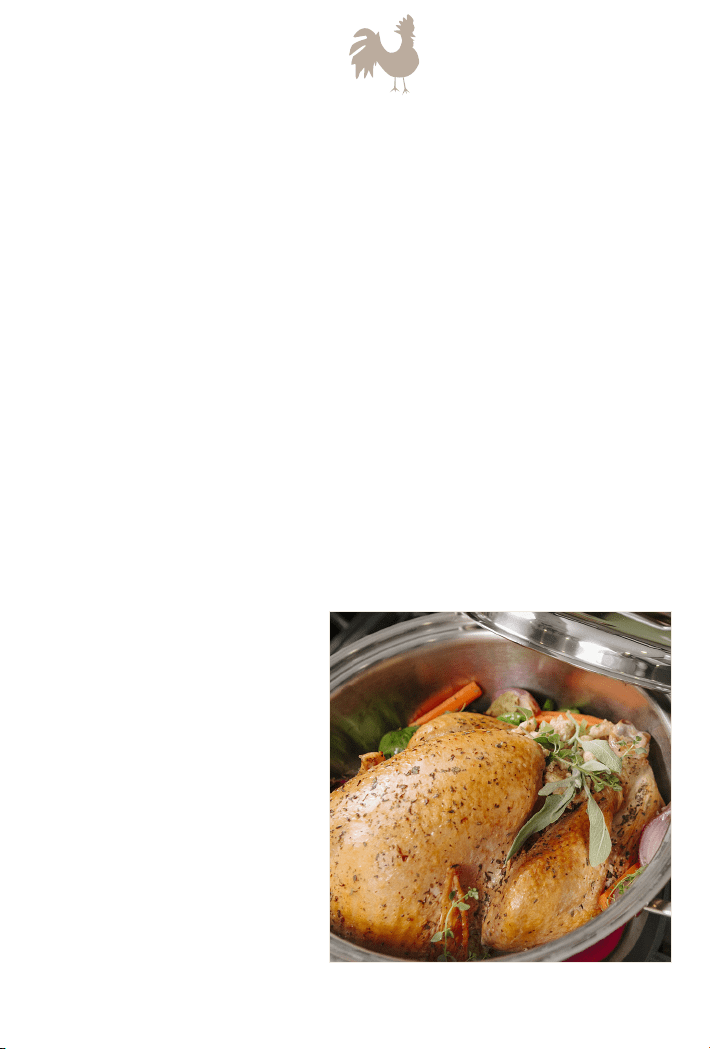
Type: Whole Chicken
Pre-heat the pan according to the instructions above. Place the chicken
breast-side down in the hot, dry pot, and cook until the chicken comes
away from the bottom of the
pan with no resistance, and the
skin is nicely browned. Turn
the chicken breast-side up.
Cover and cook over medium
heat until steam just begins
to escape from under the lid,
about 5 minutes. Spin the lid
to engage the Vapor Seal then
immediately reduce the heat to
low. Cook for 50 to 60 minutes,
or until the juices run clear.
Chicken in a Pot prepared in the 4 Quart
Stock Pot
16

17
cooking meat
The quality of the meat and the tenderness of the cut are the two
factors that determine the cooking method to be used in meat
preparation. All cuts, regardless of the cooking method, should be
cooked at medium to low temperatures.
Braising
Less tender cuts of meat may be braised. Some tender cuts may also
be braised such as pork steaks and cutlets, pork liver, veal chops, steaks
and cutlets.
1. Preheat unit over medium heat. Heat for 2 to 4 minutes and then
test with a few drops of water sprinkled on the cooking surface. If
the water scatters or dances, the unit is hot enough to place the
meat in.
2. Place meat in unit. The meat will stick to the pan at rst, but
as soon as it browns it will loosen. Sear one side then turn and
brown the other.
3. Cover unit. When a vapor seal is formed and the lid spins, reduce
heat to low. Cook until you’ve reached your desired level of
doneness.
4. Vegetables may be added if desired. Be sure to coordinate
cooking time of the vegetables with that of the meat.

Simmering and Stewing
Large, less tender cuts of meat such as beef brisket, veal, lamb and
variety of meats such as heart, kidney and tongue are prepared by
simmering. Leave meat in one piece unless it is very large, then cut in
half. Stewing is much the same as simmering, except that the meat is
cut into small uniform pieces, usually 1- to 2-inch cubes.
1. Preheat unit over medium heat. Heat for 2 to 4 minutes and then
test with a few drops of water sprinkled on the cooking surface. If
the water scatters or dances, the unit is hot enough to place the
meat in. Place meat in unit and brown well on both sides.
2. Season meat with salt, pepper, herbs and spices, as desired. Add
amount of liquid specied in recipe but not more than 1 to 1 1/2
cups.
3. Cover unit and cook over medium heat until a vapor seal is
formed and the lid spins, then reduce heat to low. Simmer; do
not boil, over low heat until the meat is done.
4. Vegetables may be added if desired. Be sure to coordinate
cooking time of vegetables with that of the meat.
Roasting
Meat becomes juicy and avorful when roasted on top of the range.
Select chunky cuts of beef, veal, pork or lamb and use unit suitable for
size and shape of roast.
1. Preheat unit over medium heat. Heat for 2 to 4 minutes and then
test with a few drops of water sprinkled on the cooking surface. If
the water scatters or dances, the unit is hot enough to place the
meat in. Brown meat evenly on both sides and season to taste.
Do not add water.
2. Cover unit. When a vapor seal is formed and the lid spins, reduce
heat to low. Cook suciently.
3. Vegetables may be added if desired. Gravy may be made from
juices that accumulate.
18

Pan Broiling
Tender cuts of meat that are one-inch thick or less such as beef steak,
beef patties, ham slices and lamb chops, may be pan broiled with no
shortening or liquid in a skillet on top of the range.
1. Fat on meat may be removed or scored at 1-inch intervals to
prevent curling. Do not cut or pound tender cuts of meat, as
juices will be lost.
2. Preheat unit over medium heat. Heat for 2 to 4 minutes and then
test with a few drops of water sprinkled on the cooking surface.
If the water scatters or dances, the unit is hot enough to place
the meat in. Place meat in utensil. Meat will stick. Do not cover or
add shortening or liquid.
3. Sear meat until it can be removed from utensil. Turn meat and
brown, then reduce heat to low and cook suciently. Pour o fat
as it accumulates.
4. Season to taste. Serve at once.
MEAT CUT
APPROX. COOKING TIME
(MIN/SIDE)
Club or Rib Steaks 3/4-inch thick
2 min. - Rare
3 min. - Medium
4 min. - Well
Minute Steak Less than 1-inch thick
2 min.
Ham Steaks 1/2-inch thick
5 min.
Lamb Chops 3/4-inch thick
5 to 6 min.
Pork Chops 3/4-inch thick
7 min.
Veal Chops 3/4-inch thick
8 to 10 min.
Hamburgers 1/2-inch thick
3 min. - Rare
4 min. - Medium
4 min. - Well
19

cooking Fish
When buying fresh sh, select sh whose esh appears moist and rm.
If the cut you are buying has the skin on, it should be clear, smooth,
and shiny. The sh should smell briny and slightly sweet like the sea
and not at all shy or o-putting. Store fresh sh in the coldest part of
your refrigerator (usually bottom or middle shelf, in the back) and cook
it the same day it’s purchased. If buying frozen sh, it should look as
though it had been frozen fresh from the sea. Discard if the sh looks
cloudy or murky or if there is even the slightest hint of freezer burn.
Be sure to defrost frozen sh thoroughly in the refrigerator (not the
microwave, which partially cooks it). Pat the sh dry with paper towels
before cooking. This chart is a guideline for basic cooked sh. Create
easy and delicious one-pot meals by Vapor Cooking sh on a bed of
fresh, aromatic vegetables.
20

TYPE OF FISH CUT COOKING METHOD & TIME
Arctic Char,
Bluesh, Catsh,
Flounder, Halibut,
Sole, Tilapia, Sea
Bass or Trout
Thin Fillets (3/4-
to 1-inch thick)
Spray pan lightly with cooking spray.
Season sh then place in cold pan.
Cover and place over medium heat;
cook until Vapor Seal has formed.
Spin lid to engage seal; reduce heat
to low then cook 1 minute. Let stand,
covered, o-heat for 5 to 7 minutes
until sh akes easily and is just
opaque at its thickest part.
Cod, Salmon,
Snapper or
Grouper
Thick Fillets (1
1/2- to 2-inches
thick)
Spray pan lightly with cooking spray.
Season sh then place in cold pan.
Cover pan and place over medium
heat; cook until Vapor Seal has
formed. Spin lid to engage seal;
reduce heat to low then cook 2
minutes. Let stand, covered, o-heat
for 7 to 9 minutes until sh akes
easily and is just opaque at its thickest
part.
Halibut, Salmon,
Swordsh or Tuna
Thick Fillets (1
1/2- to 2-inches
thick)
Heat pan over medium heat until
hot enough that water droplets
bead across the surface. Lightly coat
pan with cooking spray. Season sh;
cook uncovered for 2 to 3 minutes.
Carefully turn sh. Cover and cook
until Vapor Seal has formed; spin to
engage seal. Remove from heat and
let stand for 5 to 8 minutes until sh
akes easily and is just opaque at its
thickest part.
22
Finishing Tips for Fish
• Drizzle with extra virgin olive oil, fresh lemon juice and fresh
herbs
• Stir minced shallots, lemon juice, salt, and fresh herbs if desired
into softened butter. Dot a teaspoon of the mixture over each
piece of sh
• Dollop with homemade or prepared pesto or olive tapenade
• Toss diced fresh tomatoes or diced roasted peppers with minced
garlic, basil, and a splash of red wine vinegar and extra virgin
olive oil; season with salt and pepper. Spoon over cooked sh
• Drizzle with homemade or bottled vinaigrette (microwave
refrigerated vinaigrette in a microwave safe bowl for a few
seconds to get rid of the chill)
• Drizzle with lemony hollandaise sauce
• Drizzle with your favorite Asian or Southwestern marinade
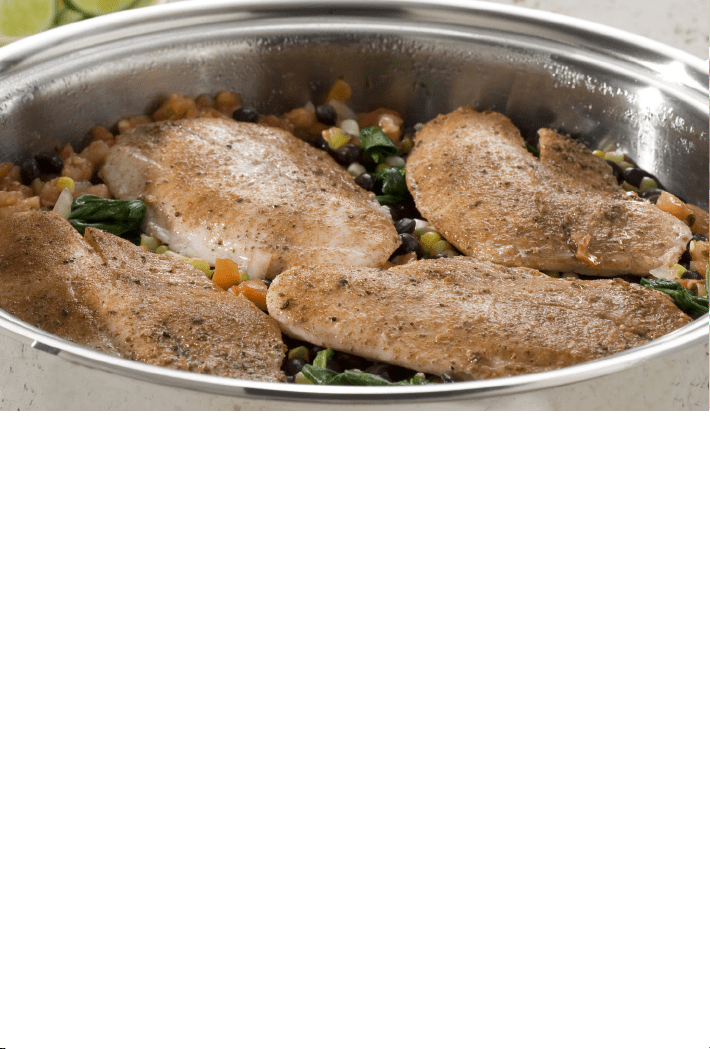
Tilapia with Fresh Salsa, Corn & Baby Spinach prepared in the 3.5 Quart
Sauté Pan
stovetop baking
Top of the range baking is economical and convenient. The uniform
heat distribution of your cookware turns the pans into small “ovens.”
1. Prepare the skillet and cover by spraying with a light coating of
vegetable cooking spray. Place a circle of waxed paper, cut to
t on the bottom.
2. Pour the mixed batter into the cold skillet and cover.
3. Bake at low heat until nearly done - about 15 to 20 minutes.
Remove the cover to test for doneness. Wipe away any excess
moisture on the cover; then replace the cover. Do this about
every 5 minutes until a toothpick inserted in the center of the
cake or bread comes out clean, indicating the food is done.
You may nd that slight adjustments need to be made in the
baking.
4. When the cake or bread
is fully baked, remove
the skillet from the heat
and allow to cool in the
pan for a few minutes.
Carefully run a knife
around the edge. Invert
the pan over a cooling
rack until the cake or
bread comes out of the
skillet.
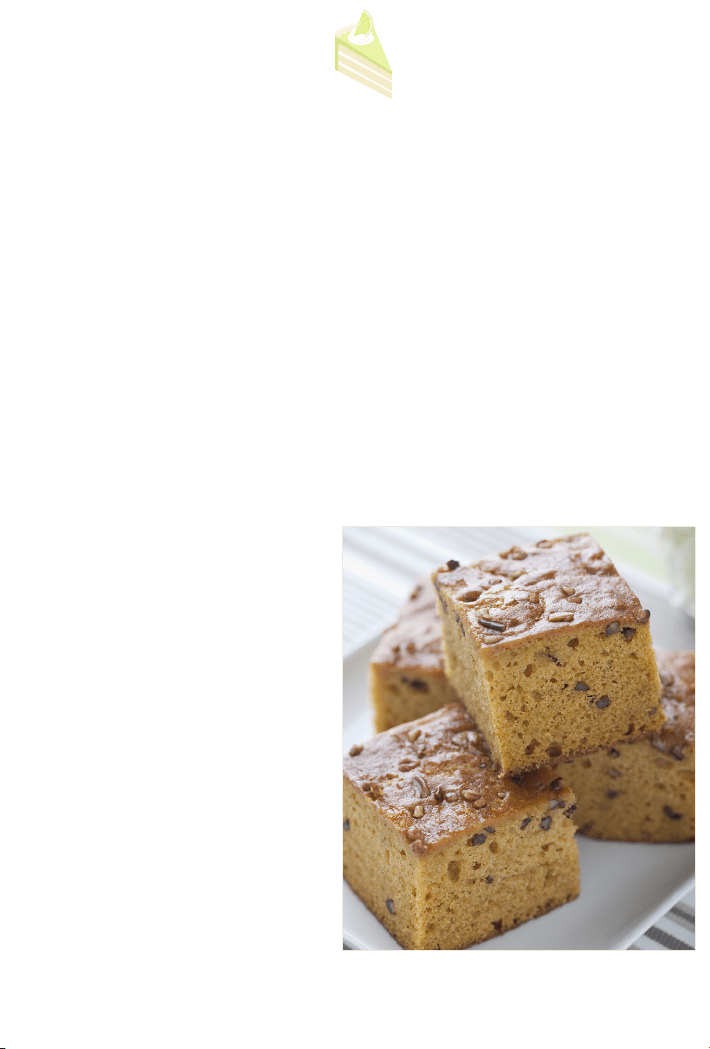
Pumpkin Bread prepared in the
2.3 Quart Casserole.
24
You will love the versatility of your new cookware. You can still cook
all of your old recipes the way you always have. As your StacKEN
Cookware becomes your cookware of choice, you will nd that there
are some foods that require traditional cooking methods as well as
foods that can be prepared in a way you never thought possible. We’ve
listed a few below:
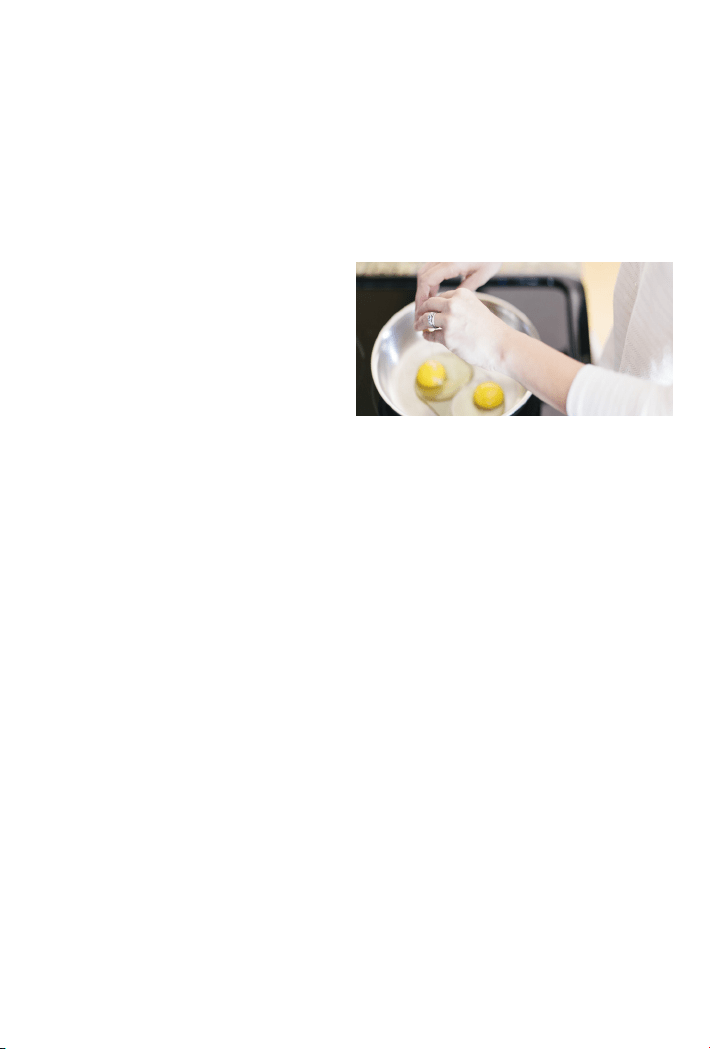
Frying an egg: When frying an
egg, you will need to preheat your
empty skillet on medium-low.
After preheating, add butter, oil or
cooking spray and continue to heat the pan for about 2 minutes. Add
eggs and fry as usual.
Boil an egg without water: Place a wet paper towel in the bottom of
small pan. Insert eggs and place the lid on the unit. Cook on medium
heat until a water seal is formed and the lid spins, then turn to low.
Cook for 13 to 15 minutes on low for hard eggs, 7 to 8 minutes for
medium and 5 minutes for soft (never lift cover). Pour cold water over
eggs, leave a bit of water and remove the paper towel. With the cover
on, shake the eggs to crack the shells. Peel and serve. NOTE: No green
ring on yoke!
Rice: Pour 1 3/4 cups of water and 1 cup of rice into unit - no need to
bring water to a boil rst. Place the unit on medium heat and cover.
When you see vapor escaping from under the lid, turn to low and cook
for 8 minutes and remove the unit from heat. Let it stand covered for
25-30 minutes. The rice will not over cook.
vapor cooking exceptions

Beans and Pasta: You can cook beans and pasta just like you always
have, but in 30% less time - on medium to low heat. NOTE: Beans and
Pasta have no moisture, so you must add water. Do not worry about
soaking the beans all night. It is not necessary with your new cookware.
Pancakes, Hashbrowns and French Toast: Pre-heat the pan and check
to see if it’s hot enough by sprinkling with water droplets. Spray the
pan with a non-stick vegetable spray or use a little butter. Place the
items in the pan and prepare as usual.
25
notes:

troubLeshooting & FaQs
The Issue
The lid won’t come o the pot; got stuck on the countertop.
The Reason
As the pans and lids cool, a vacuum will form rendering the lid
immovable.
The Fix
Simply place the pan over medium heat for a few minutes. The lid
will lift o once the metals have warmed.
Should your lid get stuck on your countertop or other surface, soak
a dish towel in hot water, wring out excess water and place the dish
towel over the lid. The heat from the damp towel should be sucient
to remove the lid from any at surface.
NOTE: Never place the lid at on a glass cooktop. It may cause the
glass to crack. When cooking, be mindful to not let the lid sit on any
at surface.
The Issue
I can’t get the Vapor Seal to form; the lid isn’t oating freely during
cooking.
The Reason
Heat is too low (or o) or the pot is too large for the amount of food;
vapors haven’t been fully released by foods.
The Fix
Increase the heat to medium to re-engage the Vapor Seal then try
cooking over medium-low. Be sure pot is at least two-thirds full.

27
The Issue
Excessive steam and spattering during cooking; liquid is pooling
around the lid.
The Reason
Heat is too high; too much food in the pot.
The Fix
Remember to reduce the heat to low as soon as you see steam begin
to escape from under the lid. If your burners run hot no matter how
low you go, try using a Flame-Tamer which are available at many
department stores. Be sure the utensils are no more than two-thirds
full.
The Issue
Foods burn or stick to the pot; cooking vapors boil away during
cooking; persistent stains, blue tint or discoloration on the inside or
outside of cookware.
The Reason
Heat is too high or the lid is lifted too frequently during cooking.
The Fix
Remember to only heat cookware over medium heat (unless
otherwise specied) and to reduce the heat to low once the Vapor
Seal has formed. Discoloration is due to persistent overheating. Use
one of our recommended cleaners and cleaning methods to remove
stains.

The cookware you’ve invested in is warranted against defects in
workmanship and materials for the lifetime of the cookware. The
original purchase will be registered in our database as proof of
purchase. Retail purchases can be registered by sending an email to
[email protected] with a copy of your purchase
receipt. Any heir to the cookware must provide a copy of the original
purchase for replacement.
If your cookware is damaged or destroyed by re, abuse, accident,
theft, or natural disaster, all original purchases may be replaced at 50%
of the retail price at the time of replacement. A police/re report, or a
letter explaining the accident, must be submitted.
The manufacturer’s liability under this warranty is limited to the repair
or replacement of the defective product at the manufacturer’s sole
option. The manufacturer shall not be liable for any incidental or
consequential damages, whether direct or indirect. This warranty is
expressly granted in lieu of all other warranties including the implied
warranties of merchantability and tness for a particular purpose.
All warranty issues should be directed to:
Kenyon Customer Service Department
Phone: 860-664-4906 | Fax: 860-664-4907
www.CookWithKenyon.com
LiFetime WarrantY
Stac

notes:
date purchased: ______________
item(s) purchased: _____________

notes:
date purchased: ______________
item(s) purchased: _____________

Kenyon International, Inc.
P.O. Box 925
Clinton, CT 06413 USA
Phone: 860-664-4906
Fax: 860-664-4907
www.CookWithKenyon.com
©2018 StacKEN COOKWARE
All rights reserved. No part of this
publication may be reproduced or
transmitted in any form or by any
means, electronic or mechanical,
including photocopy, recording, or
any information storage and retrieval
system without the written permission
of StacKEN COOKWARE.
Stac
by