Loading ...
Loading ...
Loading ...
65
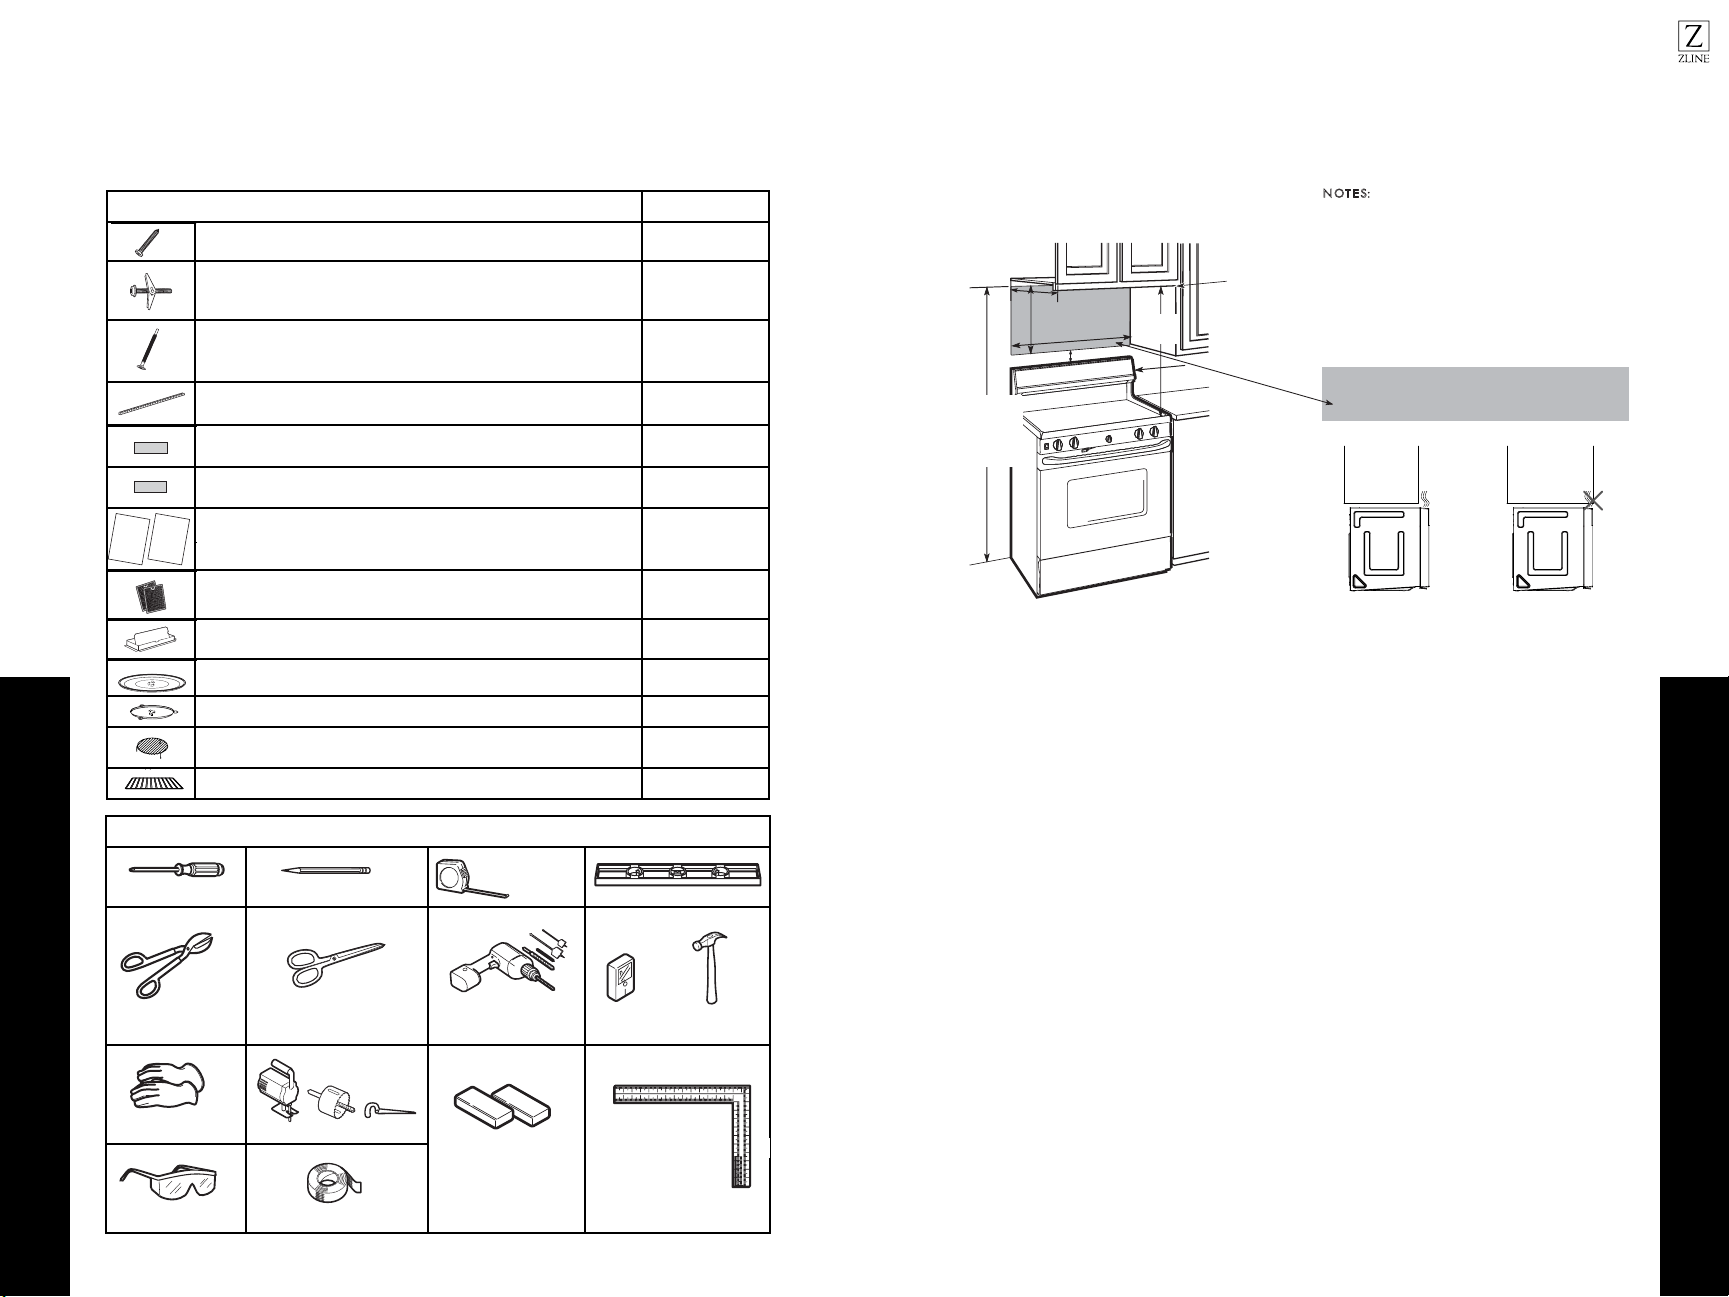
PARTS INCLUDED QUANTITY
Wood Screws (¼” and 2”) 2
Toggle Bolts (& Wing Nuts) (¼ ” x 3”) 2
Self-Aligning Machine Screws (¼-28” x 3¼”) 3
Nylon Grommet (for Metal Cabinets) 1
Top Cabinet Template 1
Rear Wall Template 1
Manual 1
Separately Packed Grease Filters 2
Exhaust adapter 1
Glass tray 1
Turntable ring 1
Convection Wire Rack 1
Shelf 1
PART
INSTALLATION
INSTRUCTIONS
USE & CARE
MANUAL
For some models
For some models
W
(
T
wing
Self-Aligning
Screws
Nylon
(for
16
Mounting Space
Parts & Tools
BEFORE INSTALLATION
.
BEFORE INSTALLATION
MOUNTING SPACE
N
OT E S:
•The space between the cabinets must be
30“ wide and free of obstructions.
•If you are going to vent your microwave oven
to the outside, see Hood Exhaust Section for
exhaust duct preparation.
•When installing the microwave oven beneath
smooth, flat cabinets, be careful to follow the
instructions on the top cabinet template for
power cord clearance.
Bottom Edge of
Cabinet Needs to
be 30”or More
from the Cooking
Surface
Backsplash
66”o
r More from
the Floor to the
Top of the
Microwave
30“
2”
18” min.
16
1
⁄2
“
13“ Maximum
As a guide to installation, see page 25 for Mounting
Template Information.
•
•
If the cabinet depth including the cabinet doors is more
than 13”, then the unit must be spaced out from wall
using adequate materials supporting 150 Ibs to allow
proper top vent air exhaust/intake.
TOOLS NEEDED
# 1 Phillips screwdriver
Tin snips (for cutting
damper, if required)
Gloves
Safety goggles
screwdriver
Pencil
Ruler or tape measure
and straight edge
Electric drill with
3
⁄16“,
1
⁄2“ and
5
⁄8“
drill bits
Hammer (optional)
Stud finder or
Duct and masking
tape
Scissors
(to cut template, if necessary)
Saw (saber, hole or keyhole)
Level
Filler blocks or scrap
wood pieces, if needed
for top cabinet spacing
(used on recessed bottom
cabinet installations only)
Carpenter square
(optional)
3
Loading ...
Loading ...
Loading ...