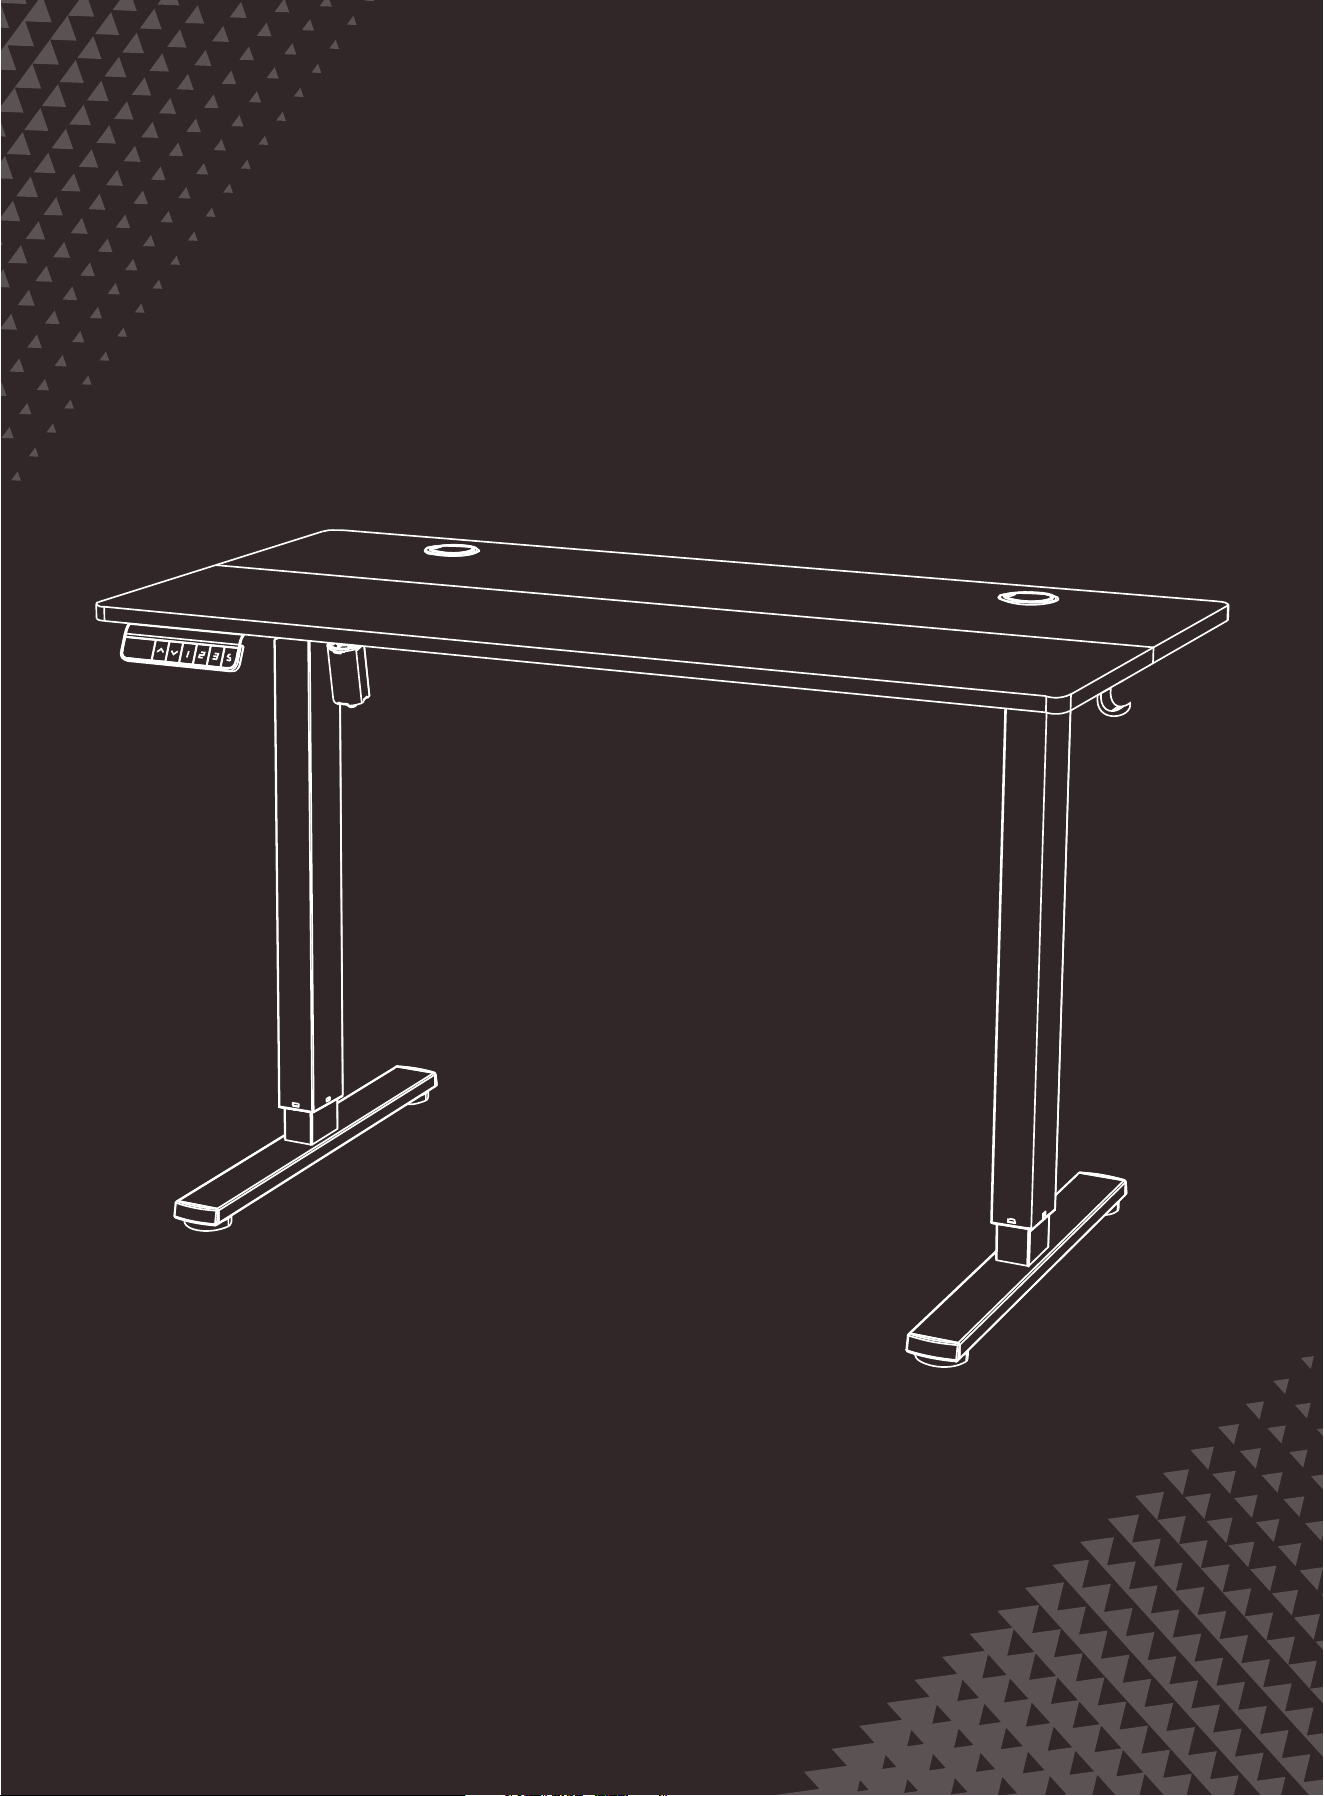
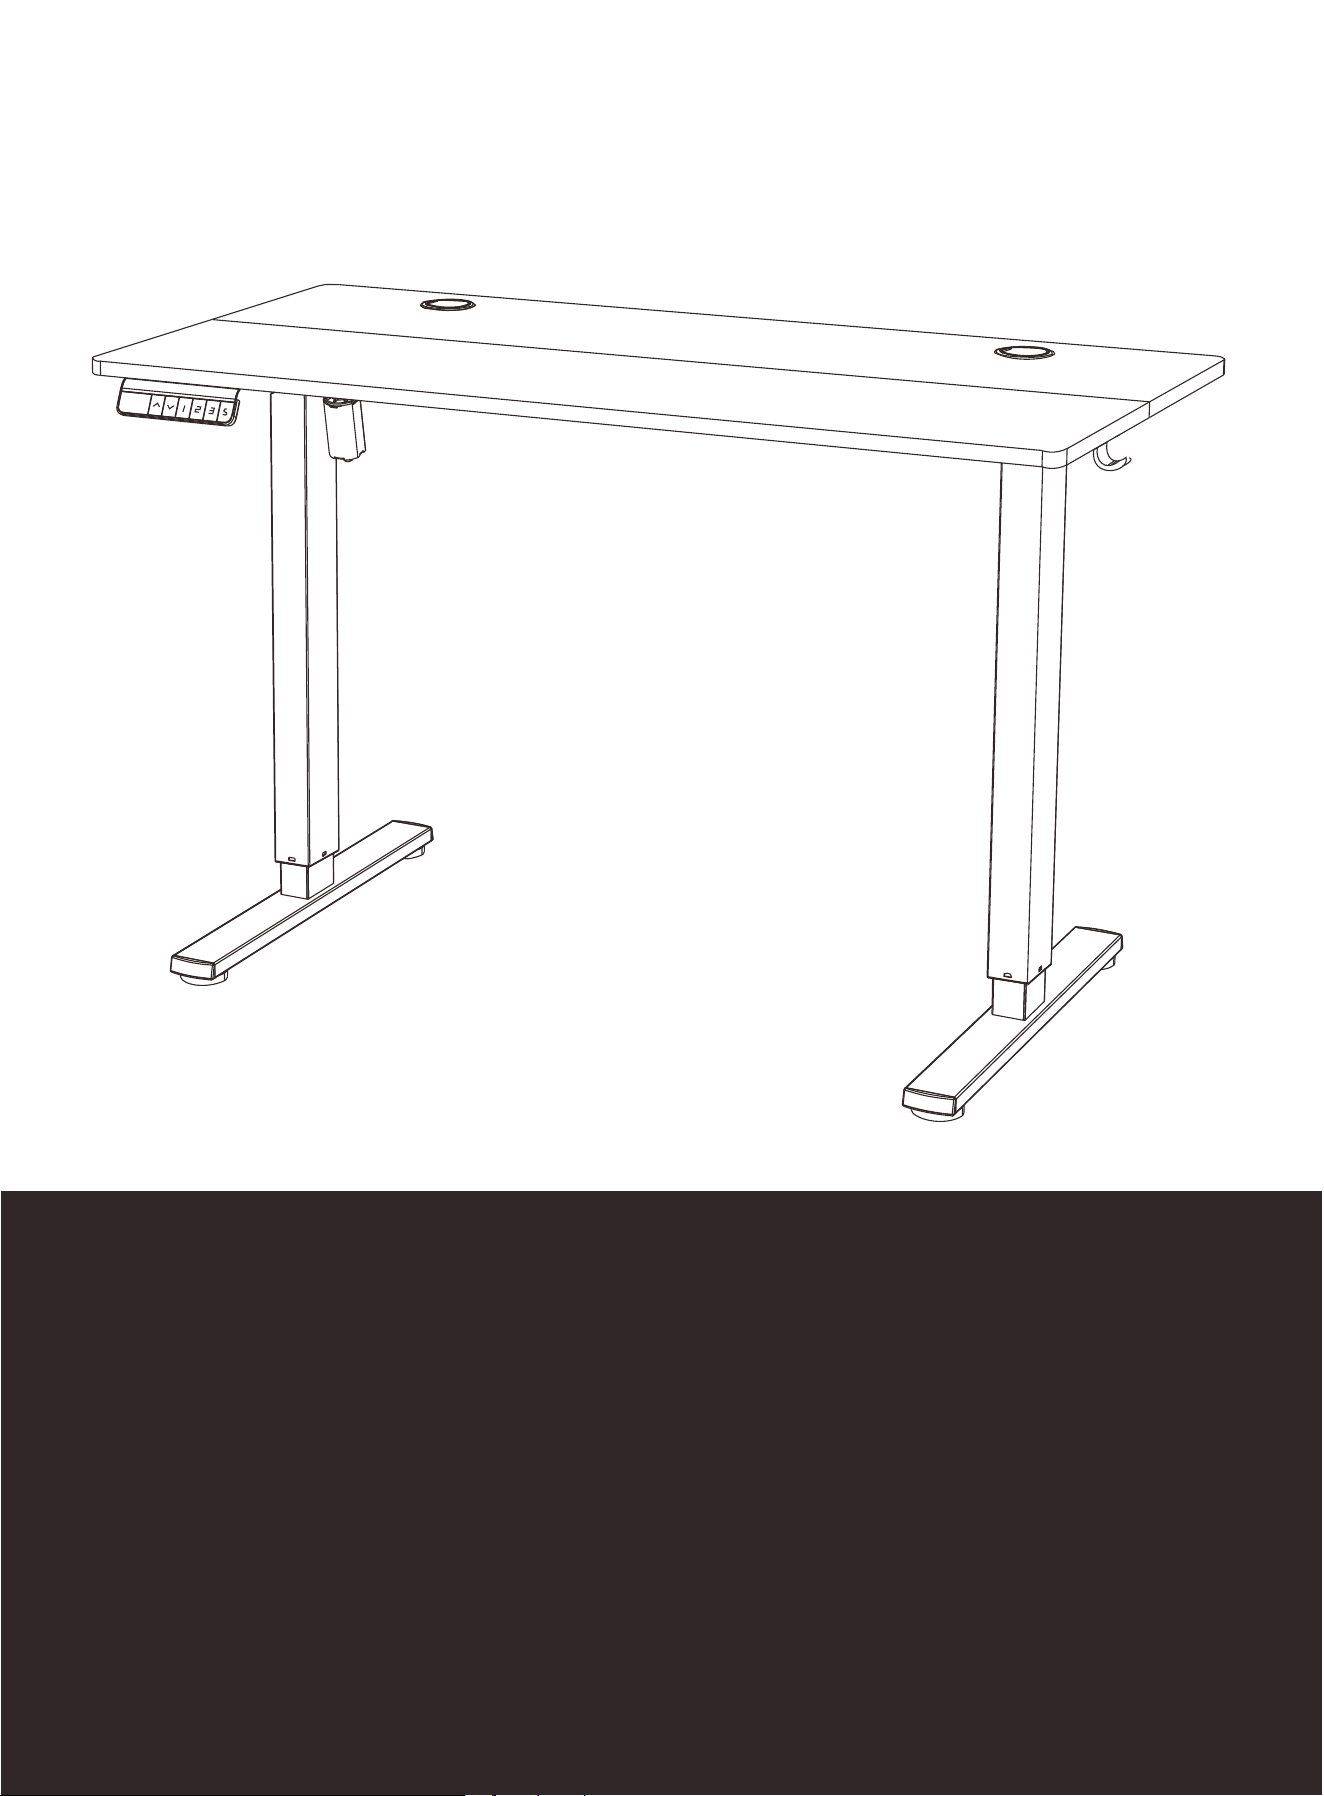
Electric Standing Desk
Instruction Manual
D-THO-4024
Specifications
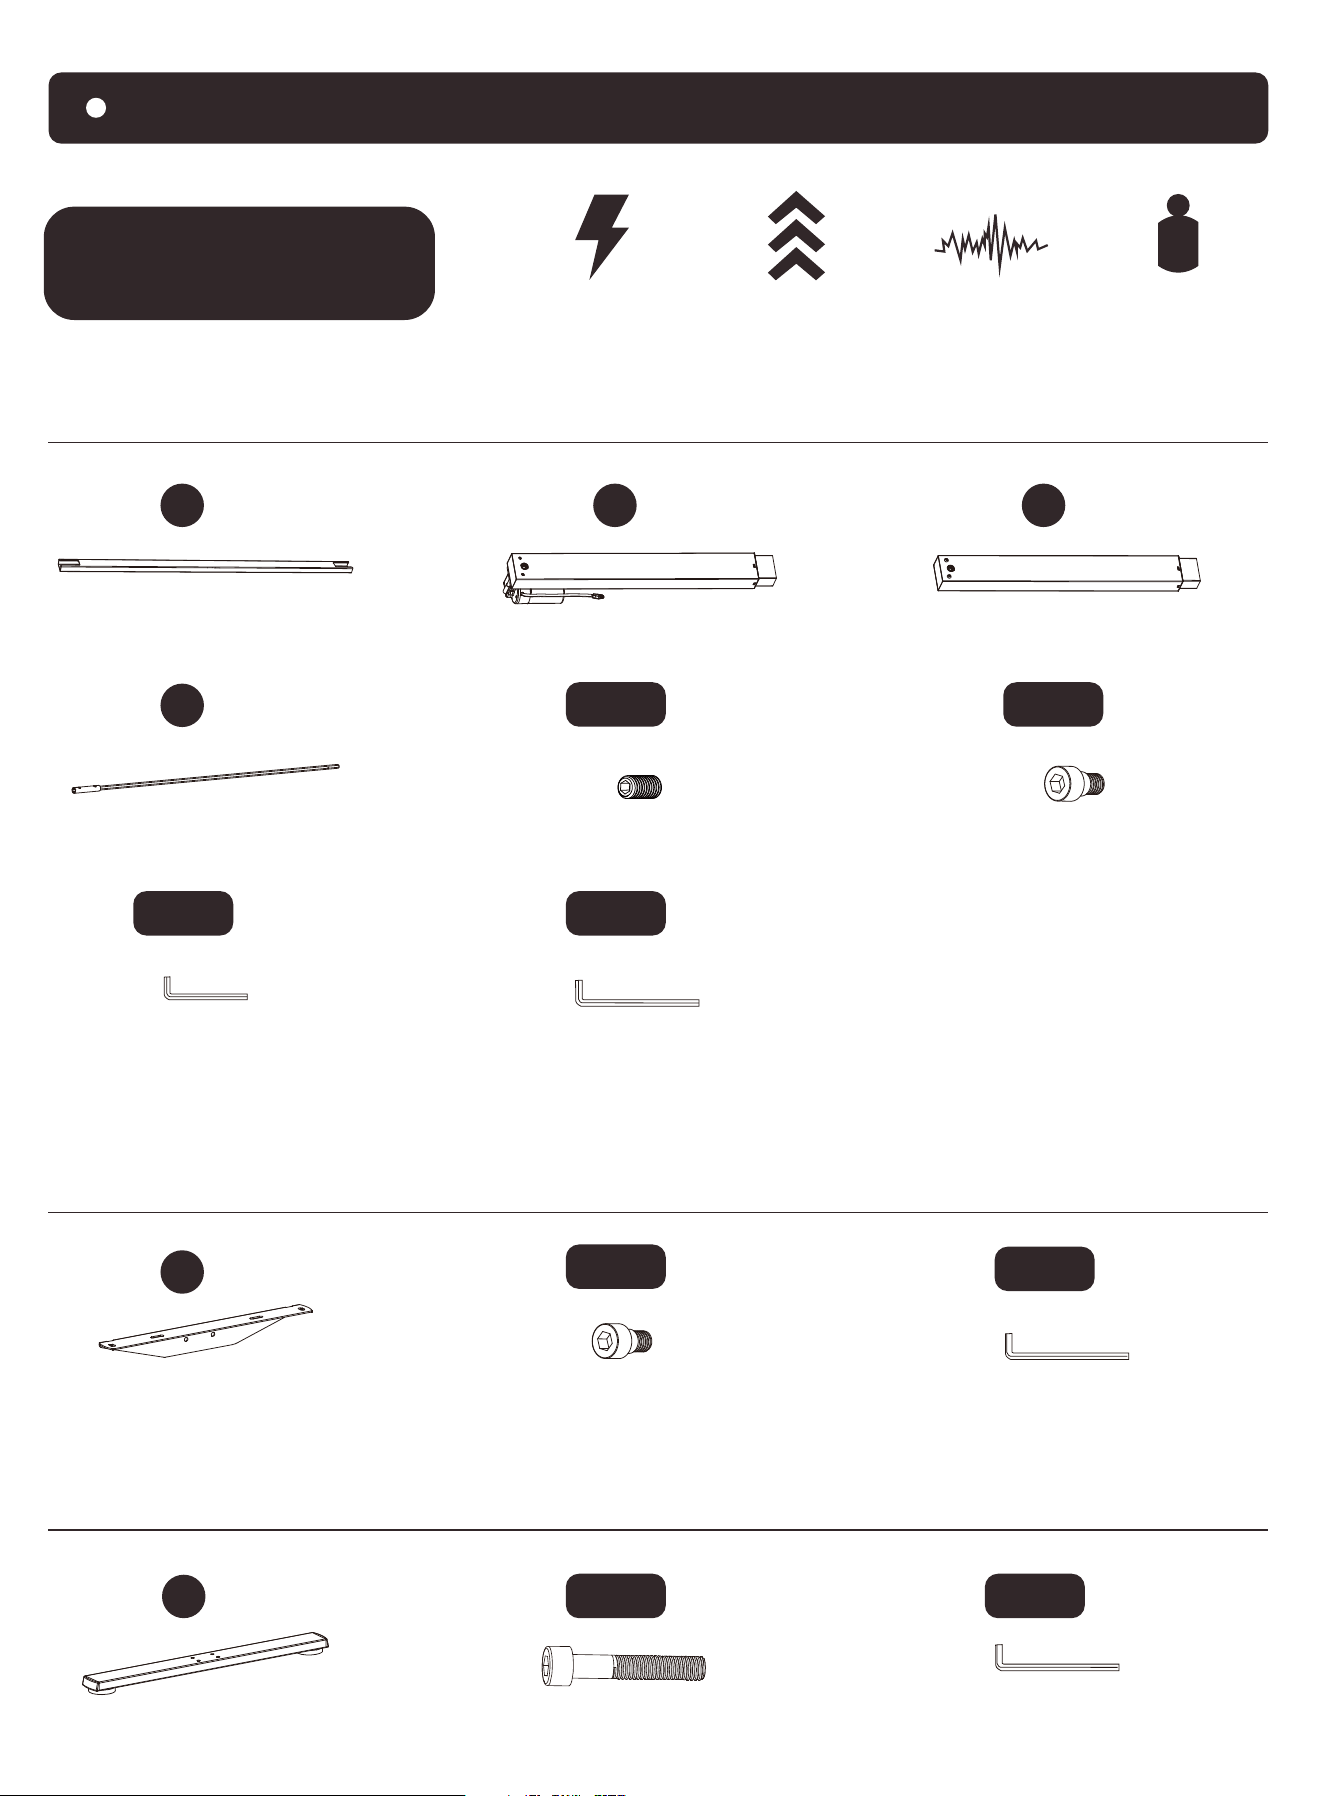
Supplied Parts and Hardware
Step 1
Crossbar
X1
01
Supplied Parts and Hardware
Step 2
X1
02
Left Desk Leg
X1
03
Right Desk Leg
X1
04
Transmission Rod
Set Screw
M-A
X1
Small Allen Wrench
3/32” (2.5mm)
M-E
X1
Large Allen Wrench
3/16” (5mm)
M-F
X1
X2
05
Side Plate
Bolt
M-B
X4
Large Allen Wrench
3/16” (5mm)
M-F
X1
Large Allen Wrench
3/16” (5mm)
M-F
X1
Supplied Parts and Hardware
Step 3
X2
06
Leg Base
Height Adjustment Range
28.7”–48” (73–122cm)
Power Input
100V–240V
Max. Load
176 lbs / 80kg
Max. Speed
24mm/s
Operating Noise
<55dB
Bolt
M-C
X8
Bolt
M-B
X6
Supplied Parts and Hardware
Step 4
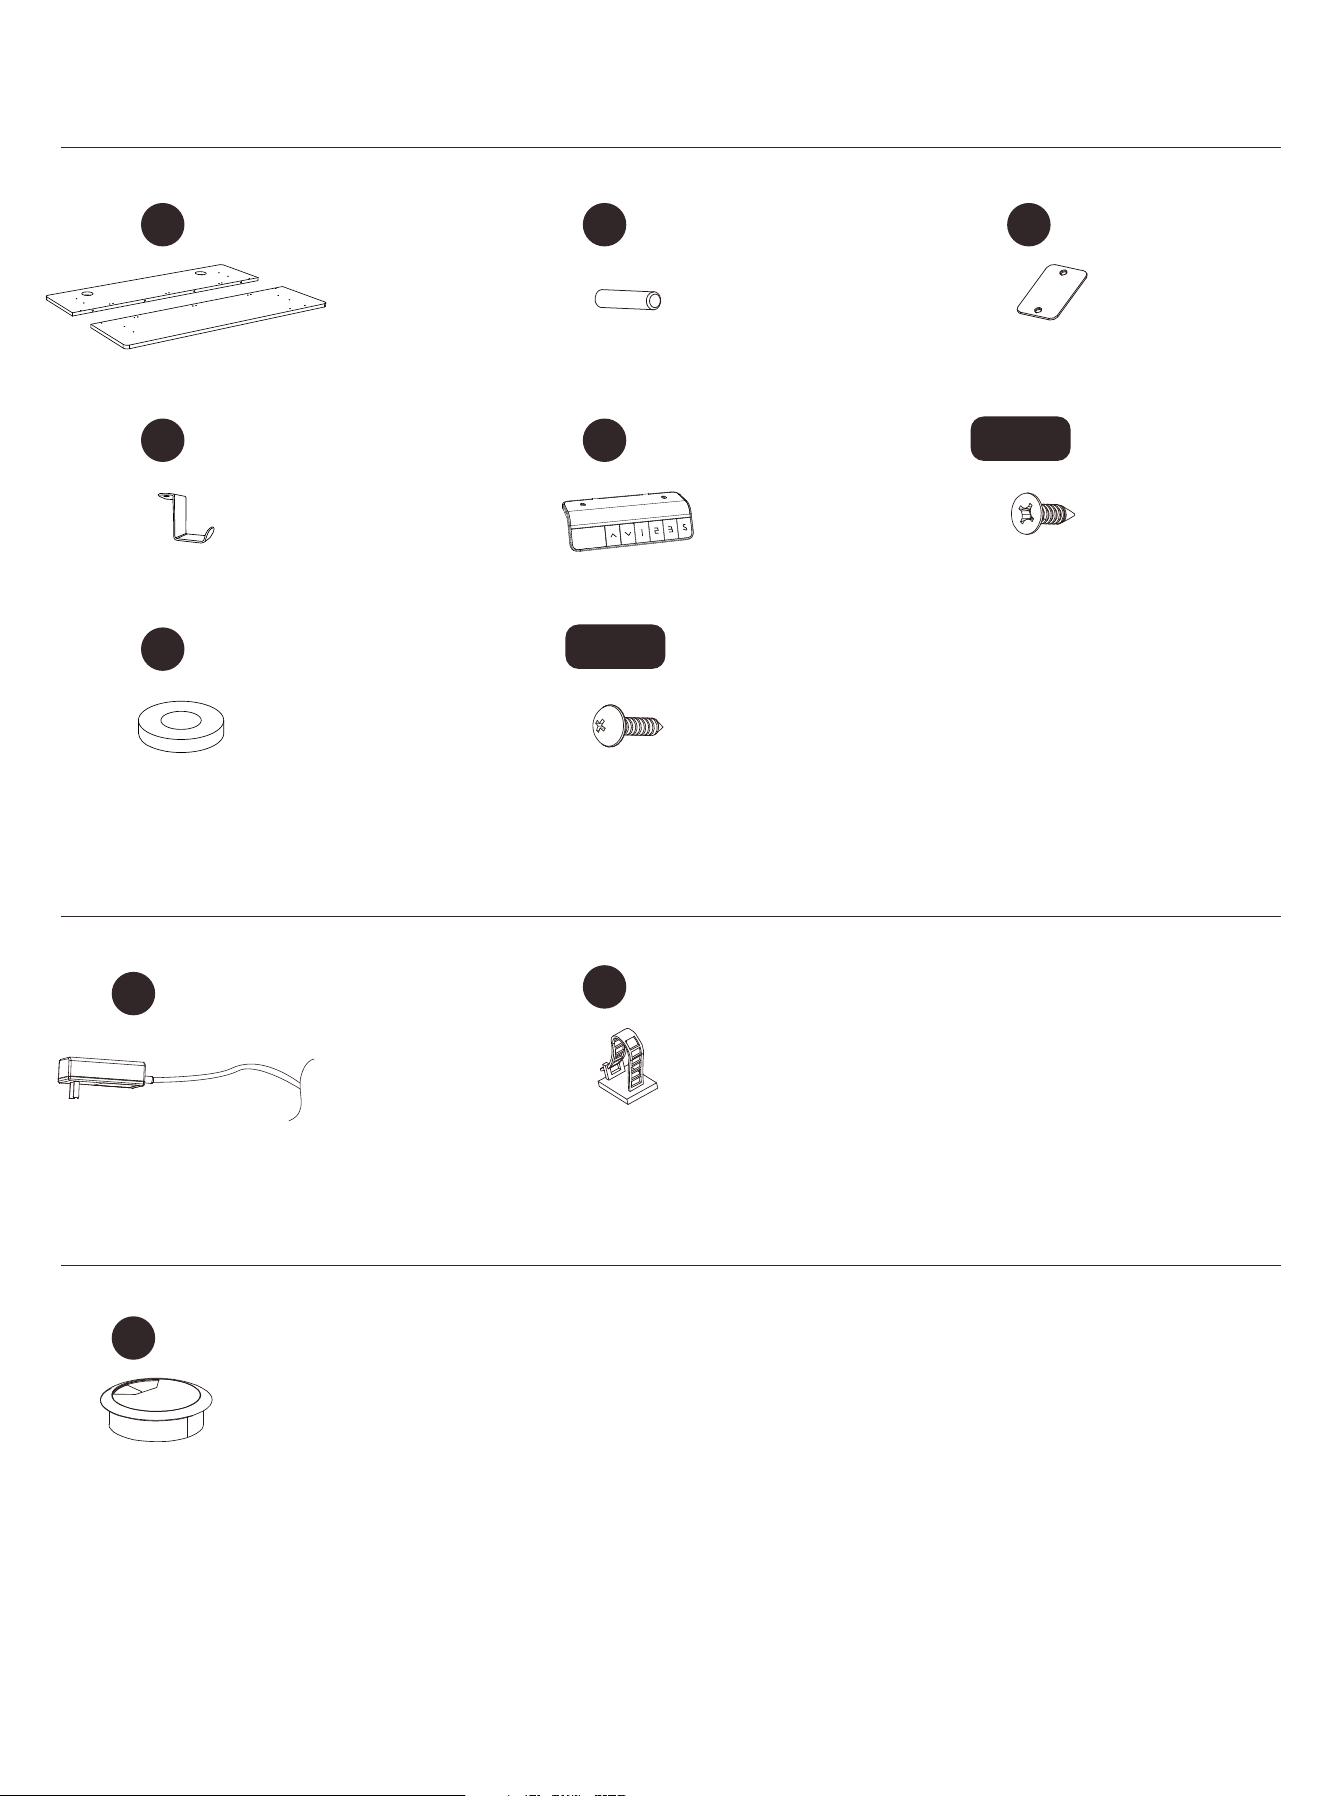
Supplied Parts and Hardware
Step 5
Supplied Parts and Hardware
Step 6
Desktop
X1
07
X4
A
Wood Dowel Pin
X3
B
Desktop Panel Connector
Headset Hook
X2
08
Screw
M-D
M-G
X12
X1
09
Controller
Rubber Pad
X10
C
X8
Screw
AC Adapter
X1
10
Cable Hole Cover
X2
12
X2
11
Cable Clip
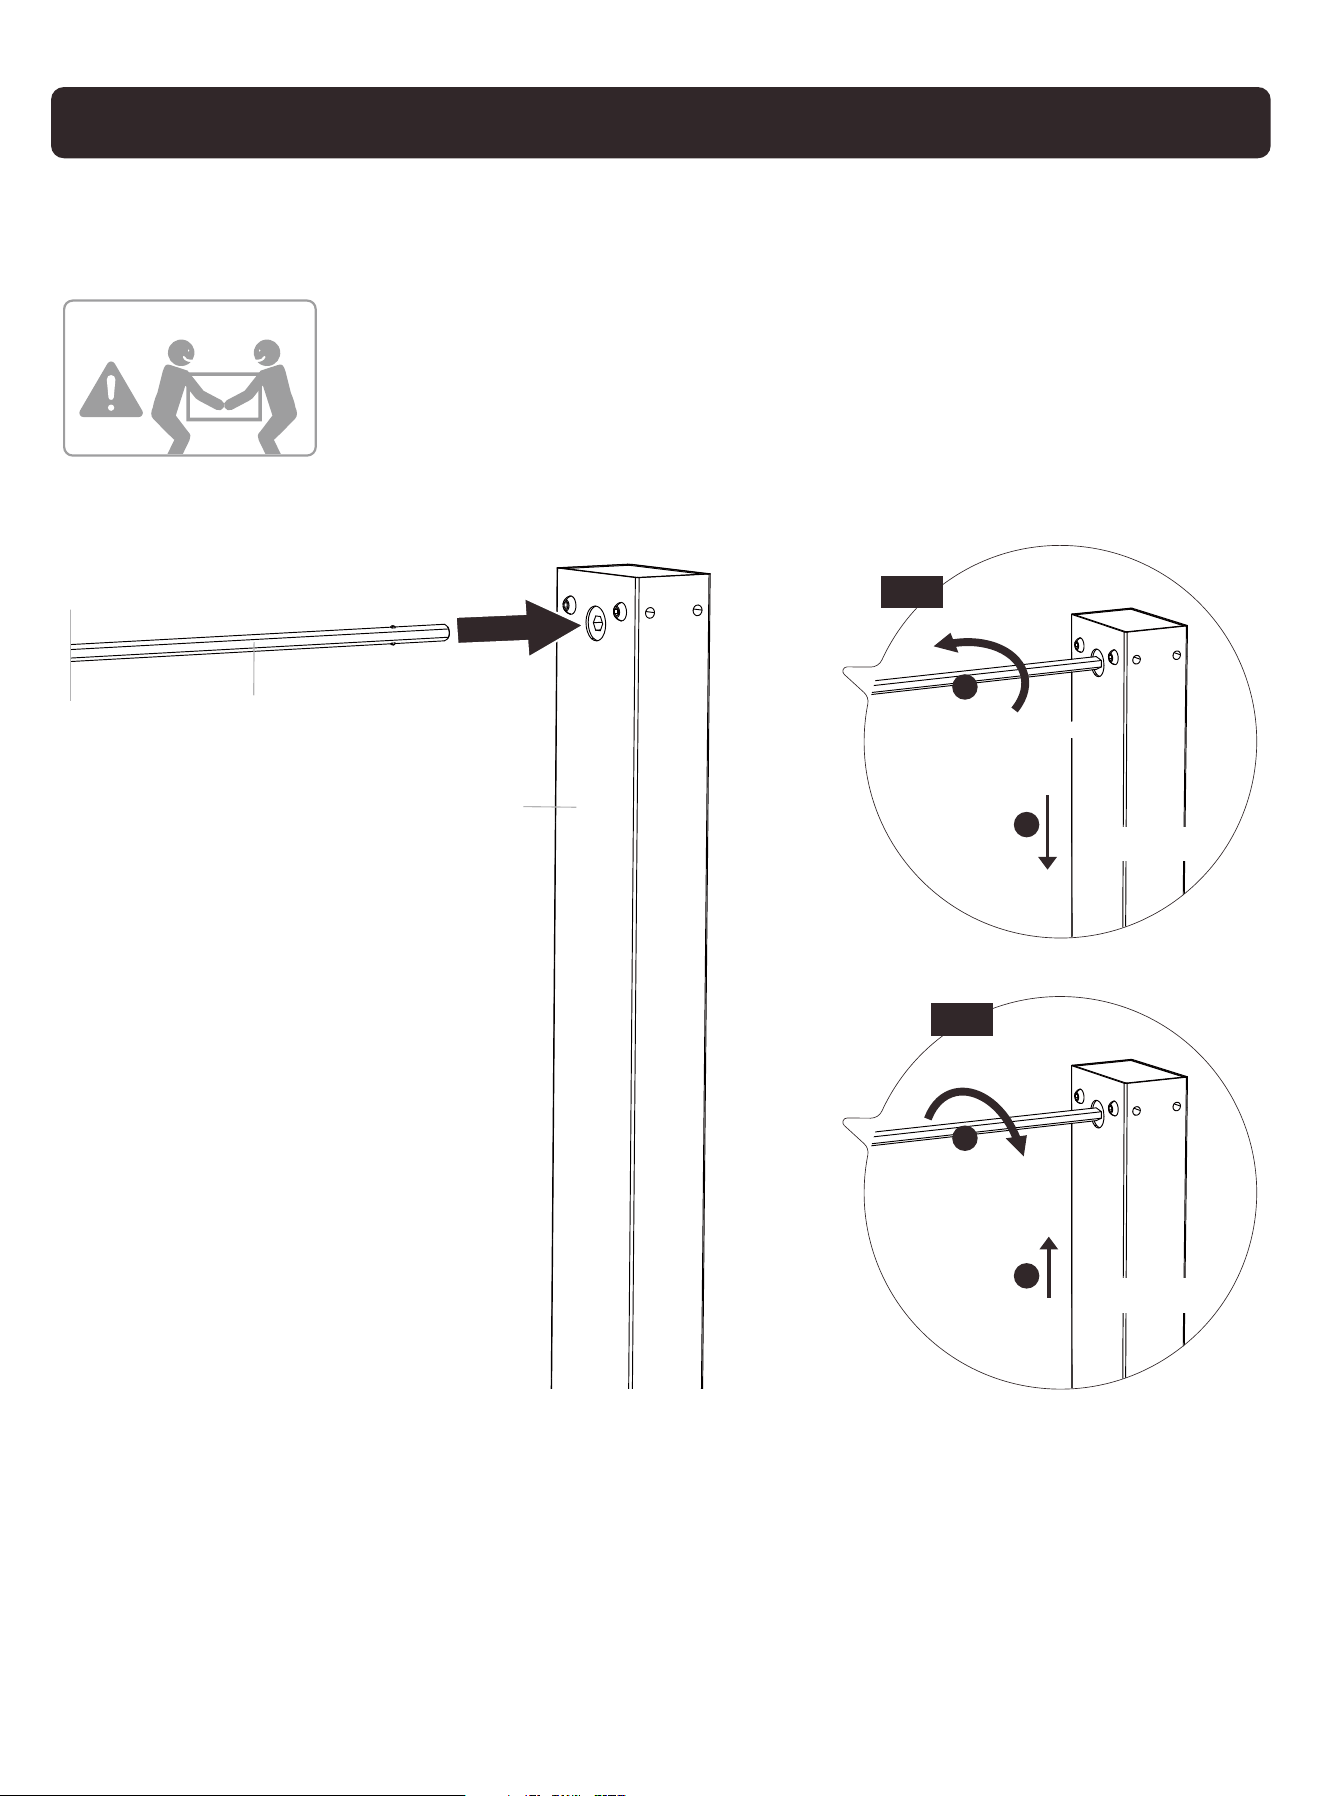
Setting the Desk Legs to the Same Height
Before attaching the transmission rod, measure the heights of the two desk
legs to see if they are set at the same level. If not, insert the transmission
rod into the hole in the right leg. Turn the rod to adjust the right leg so
it's level with the left leg. Turn the rod clockwise to lower the
right leg or anti-clockwise to raise it.
b
a
Turn
anti-clockwise
Right Leg
b
a
Turn clockwise
Right Leg
Fig 1
04
03
HEAVY! You may
need assistance
with this step.
Fig 2
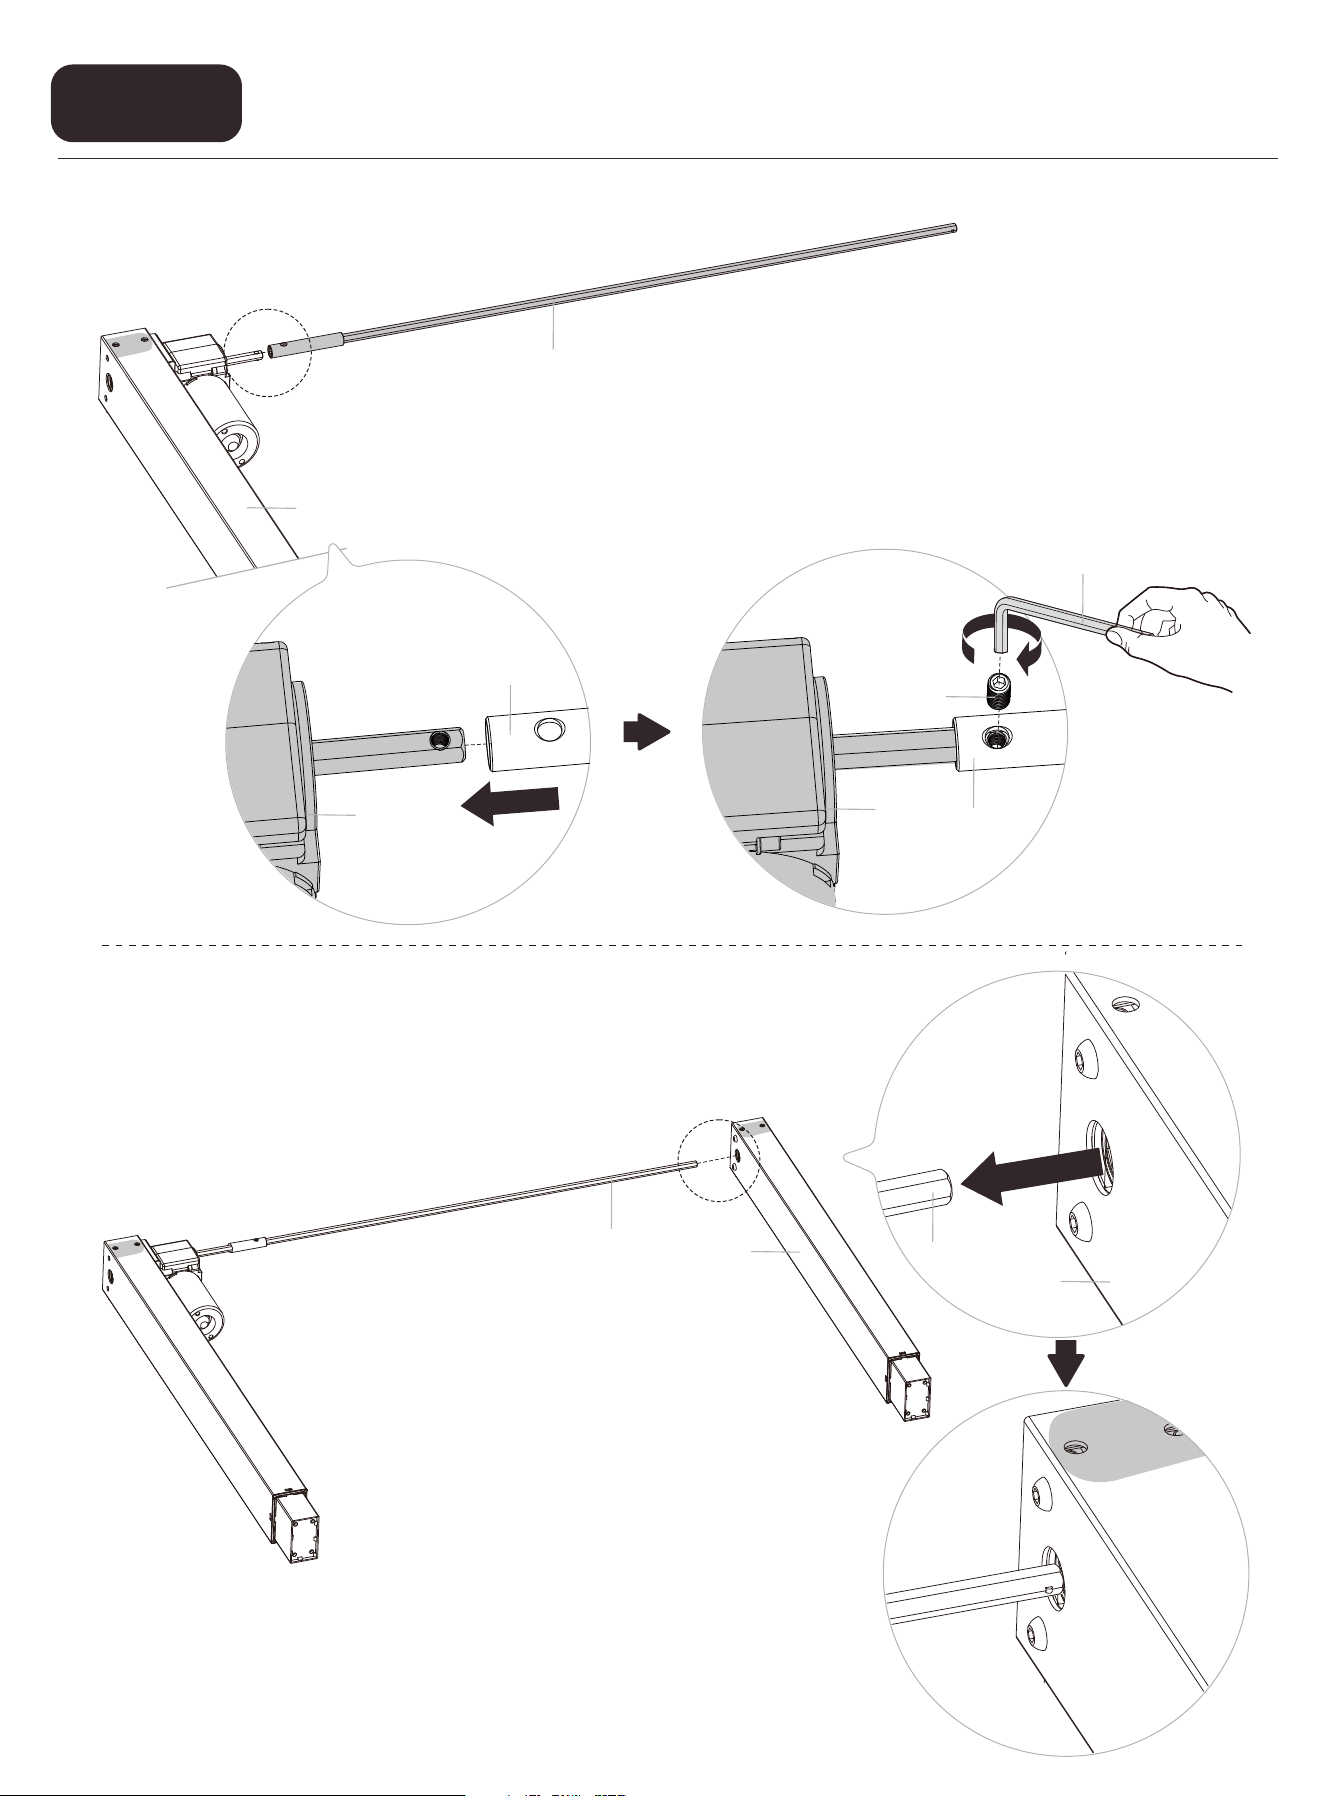
Setting the Desk Legs to the Same Height
Step 1
04
04
04
M-E
02
02
02
M-A
04
04
03
03
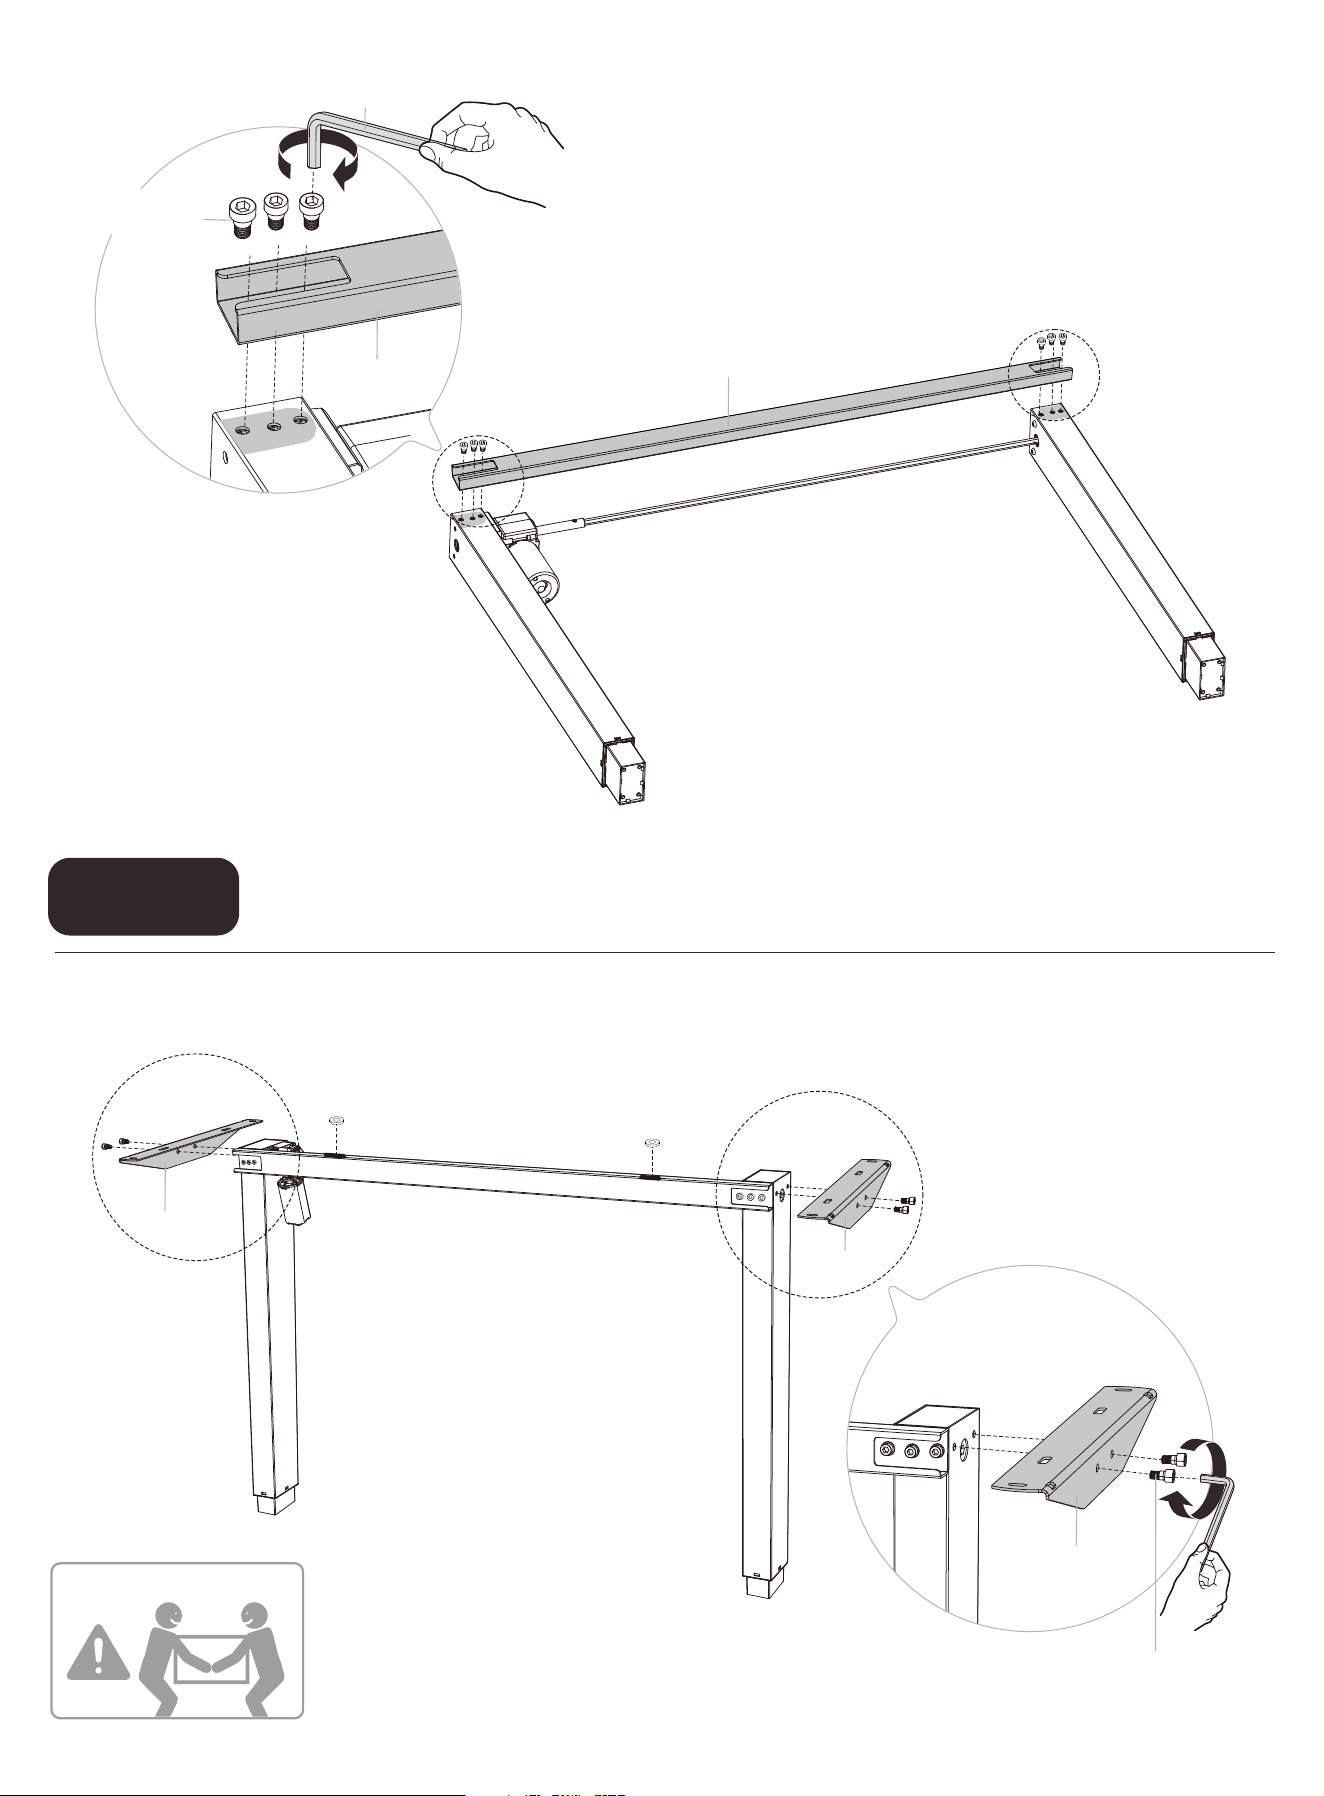
Setting the Desk Legs to the Same Height
Step 2
You may need
assistance with
this step.
05
05
05
M-Bx4
M-F
01
01
M-Bx6
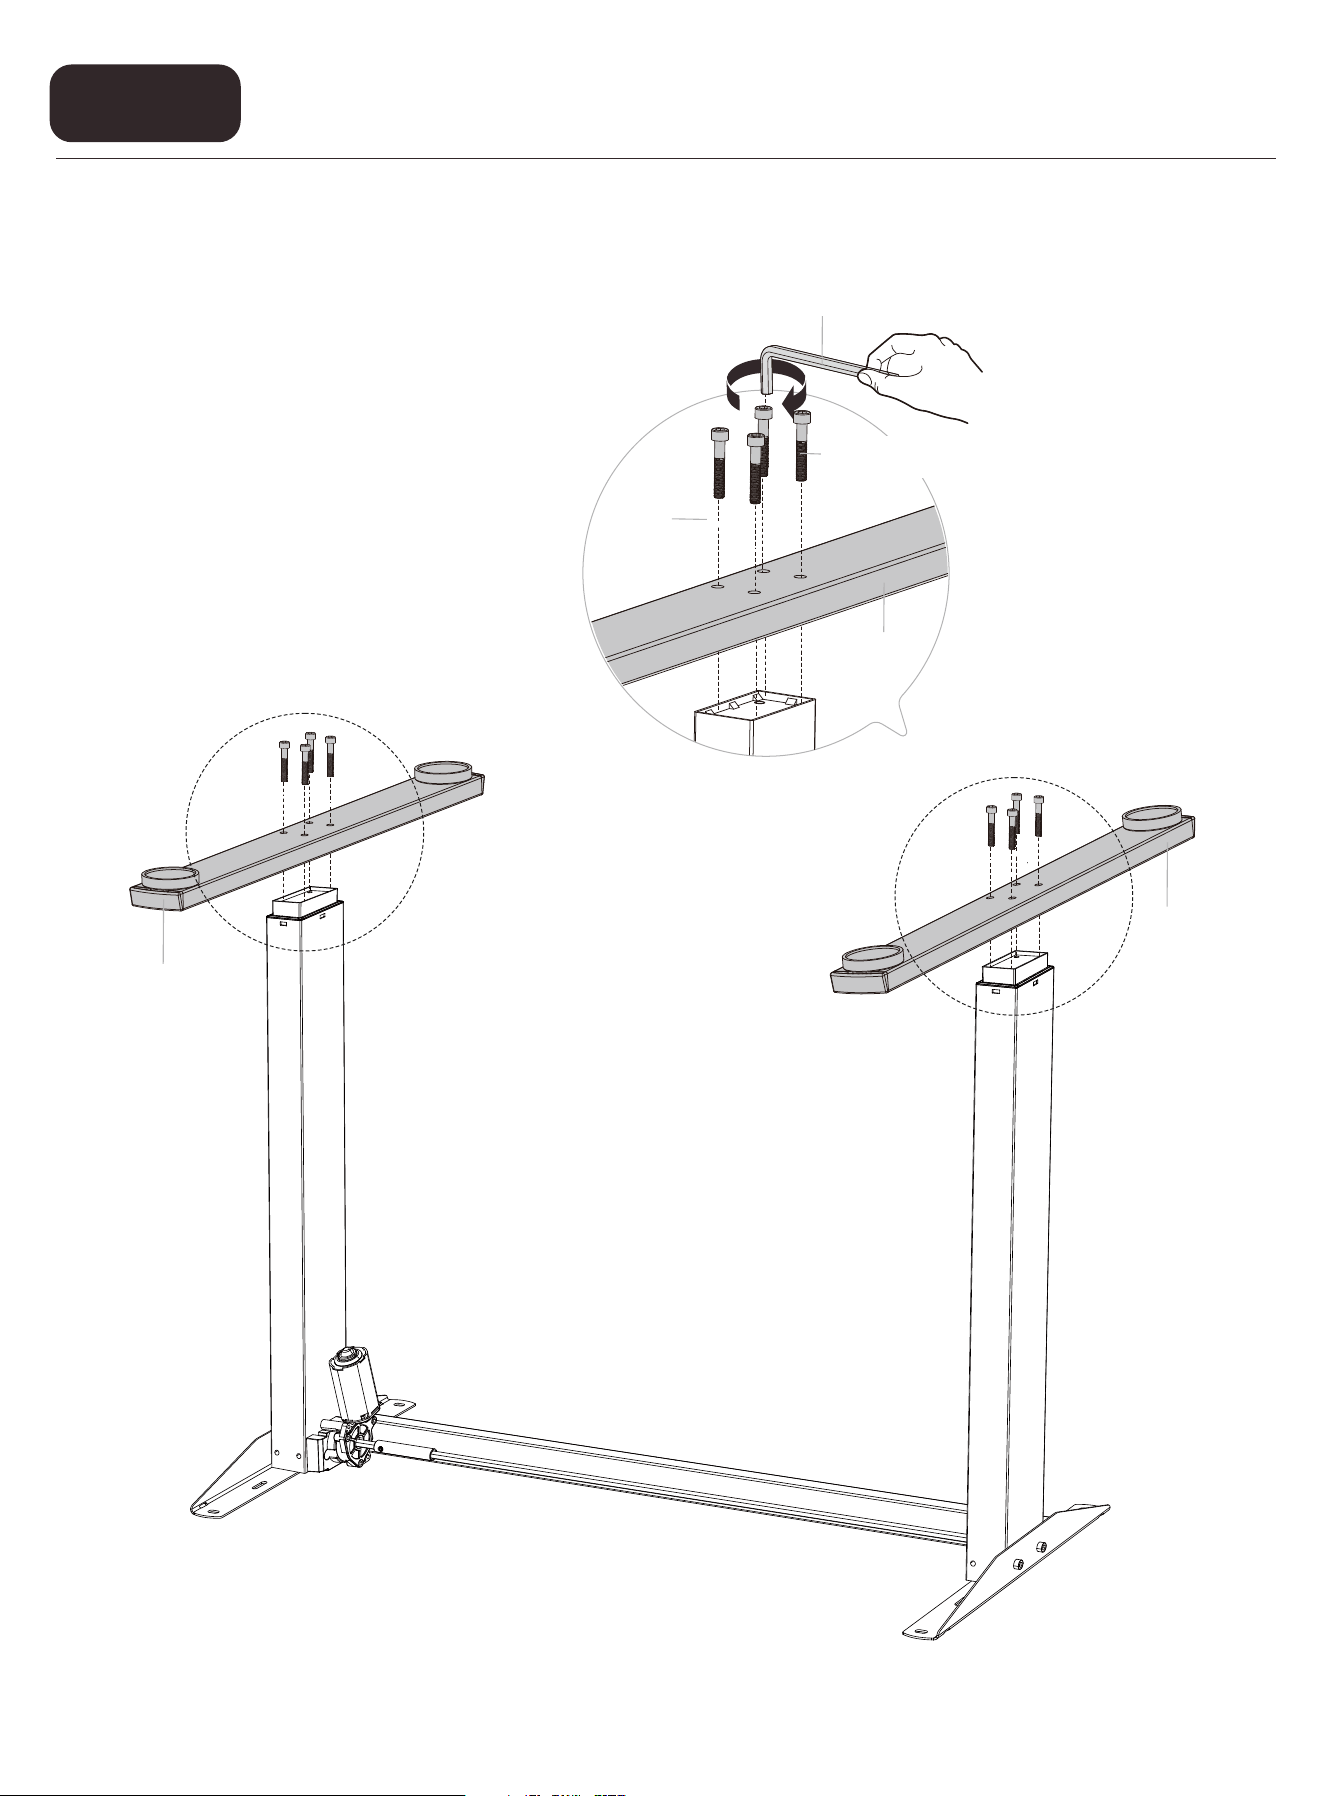
Attaching the Leg Bases
Step 3
06
06
M-F
06
C
M-CX8
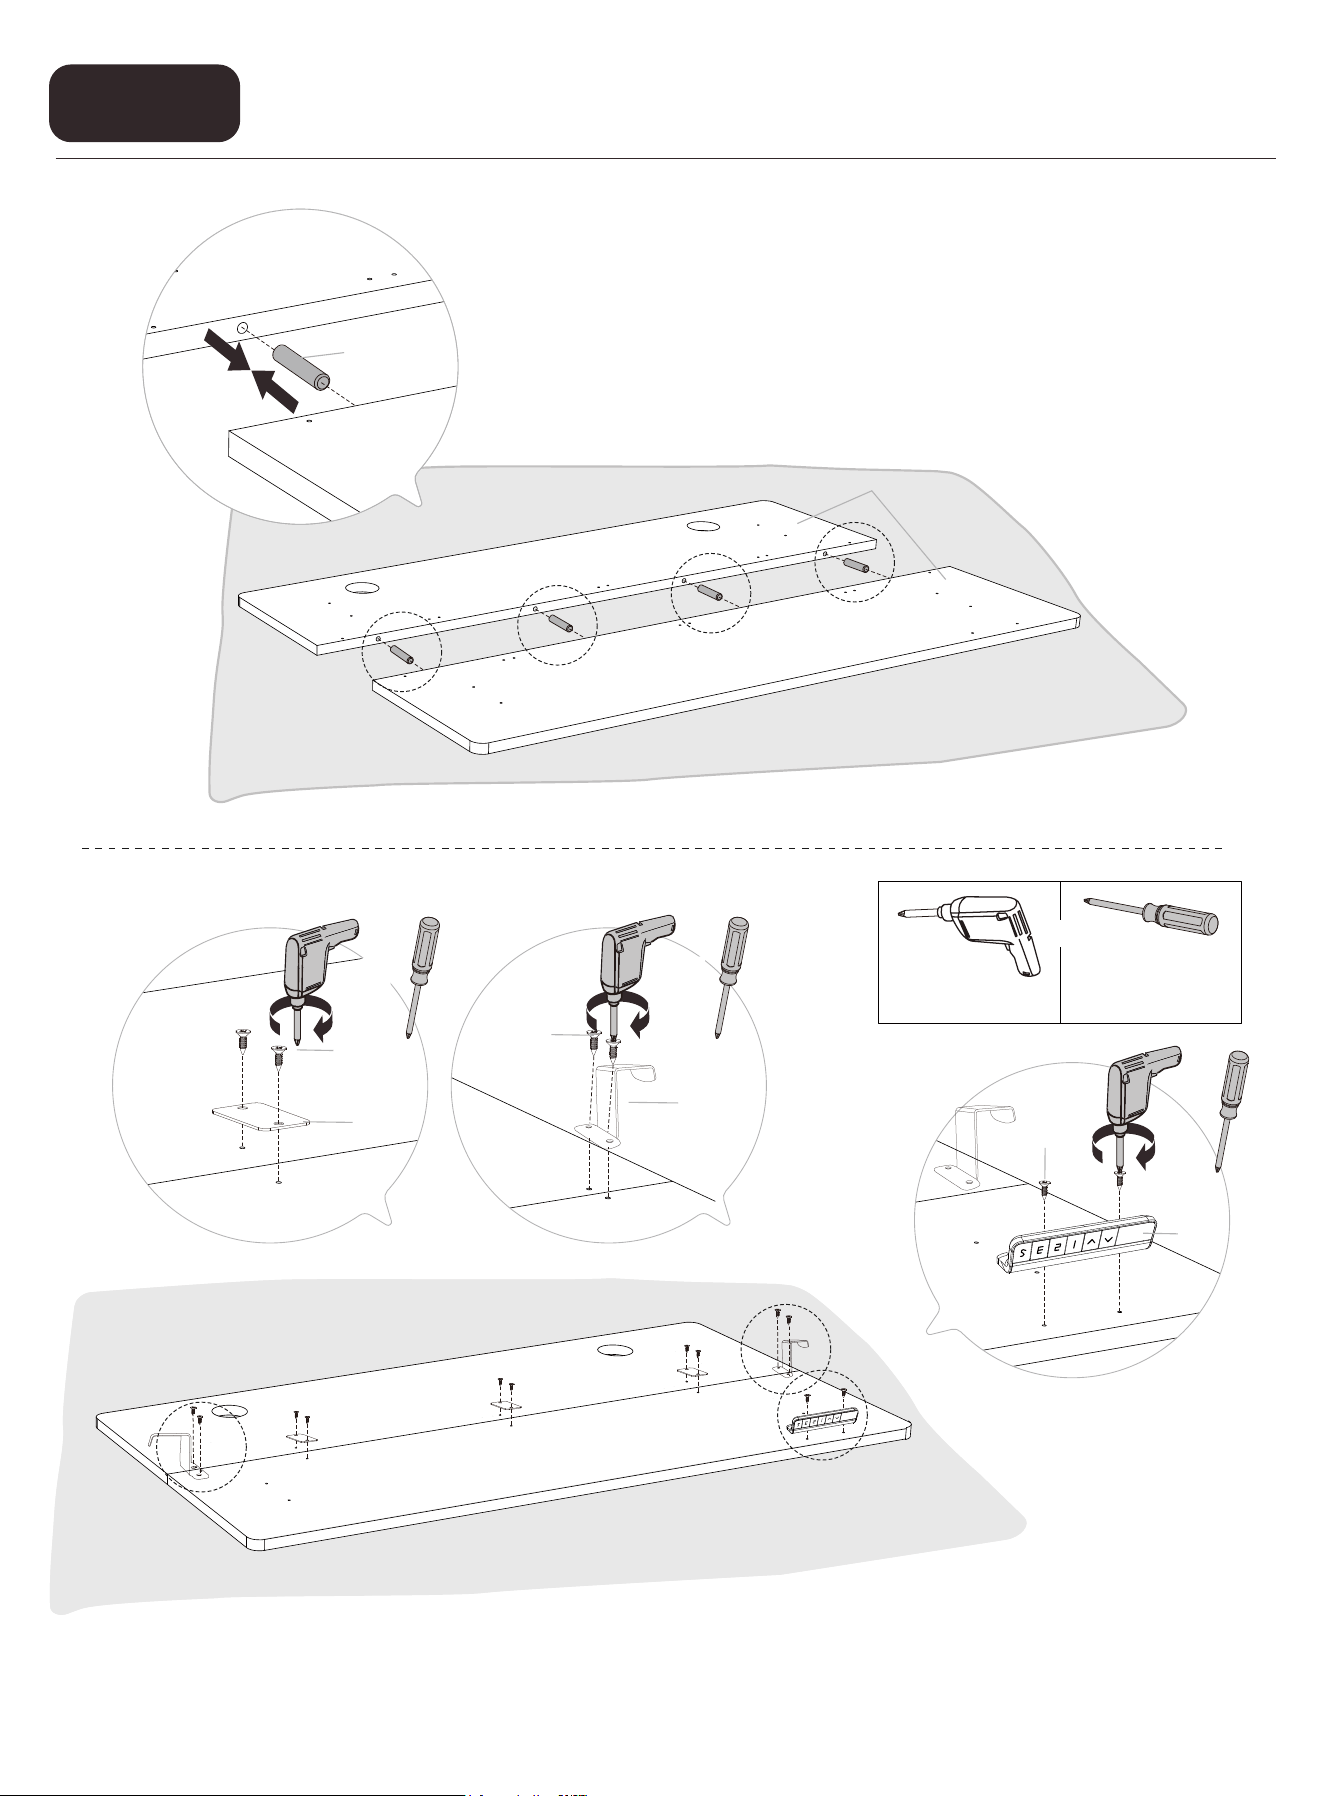
Assembling and Attaching the Desktop
Step 4
07
07
07
A
Secure the desktop panels with the connectors. Then attach the hooks and
controller to the desktop.
Philips
Screwdriver
(not included)
Drill
(not included)
08
09
M-D
M-D
07
07
M-D
B
07
or
or
or
or
Assemble the desktop.
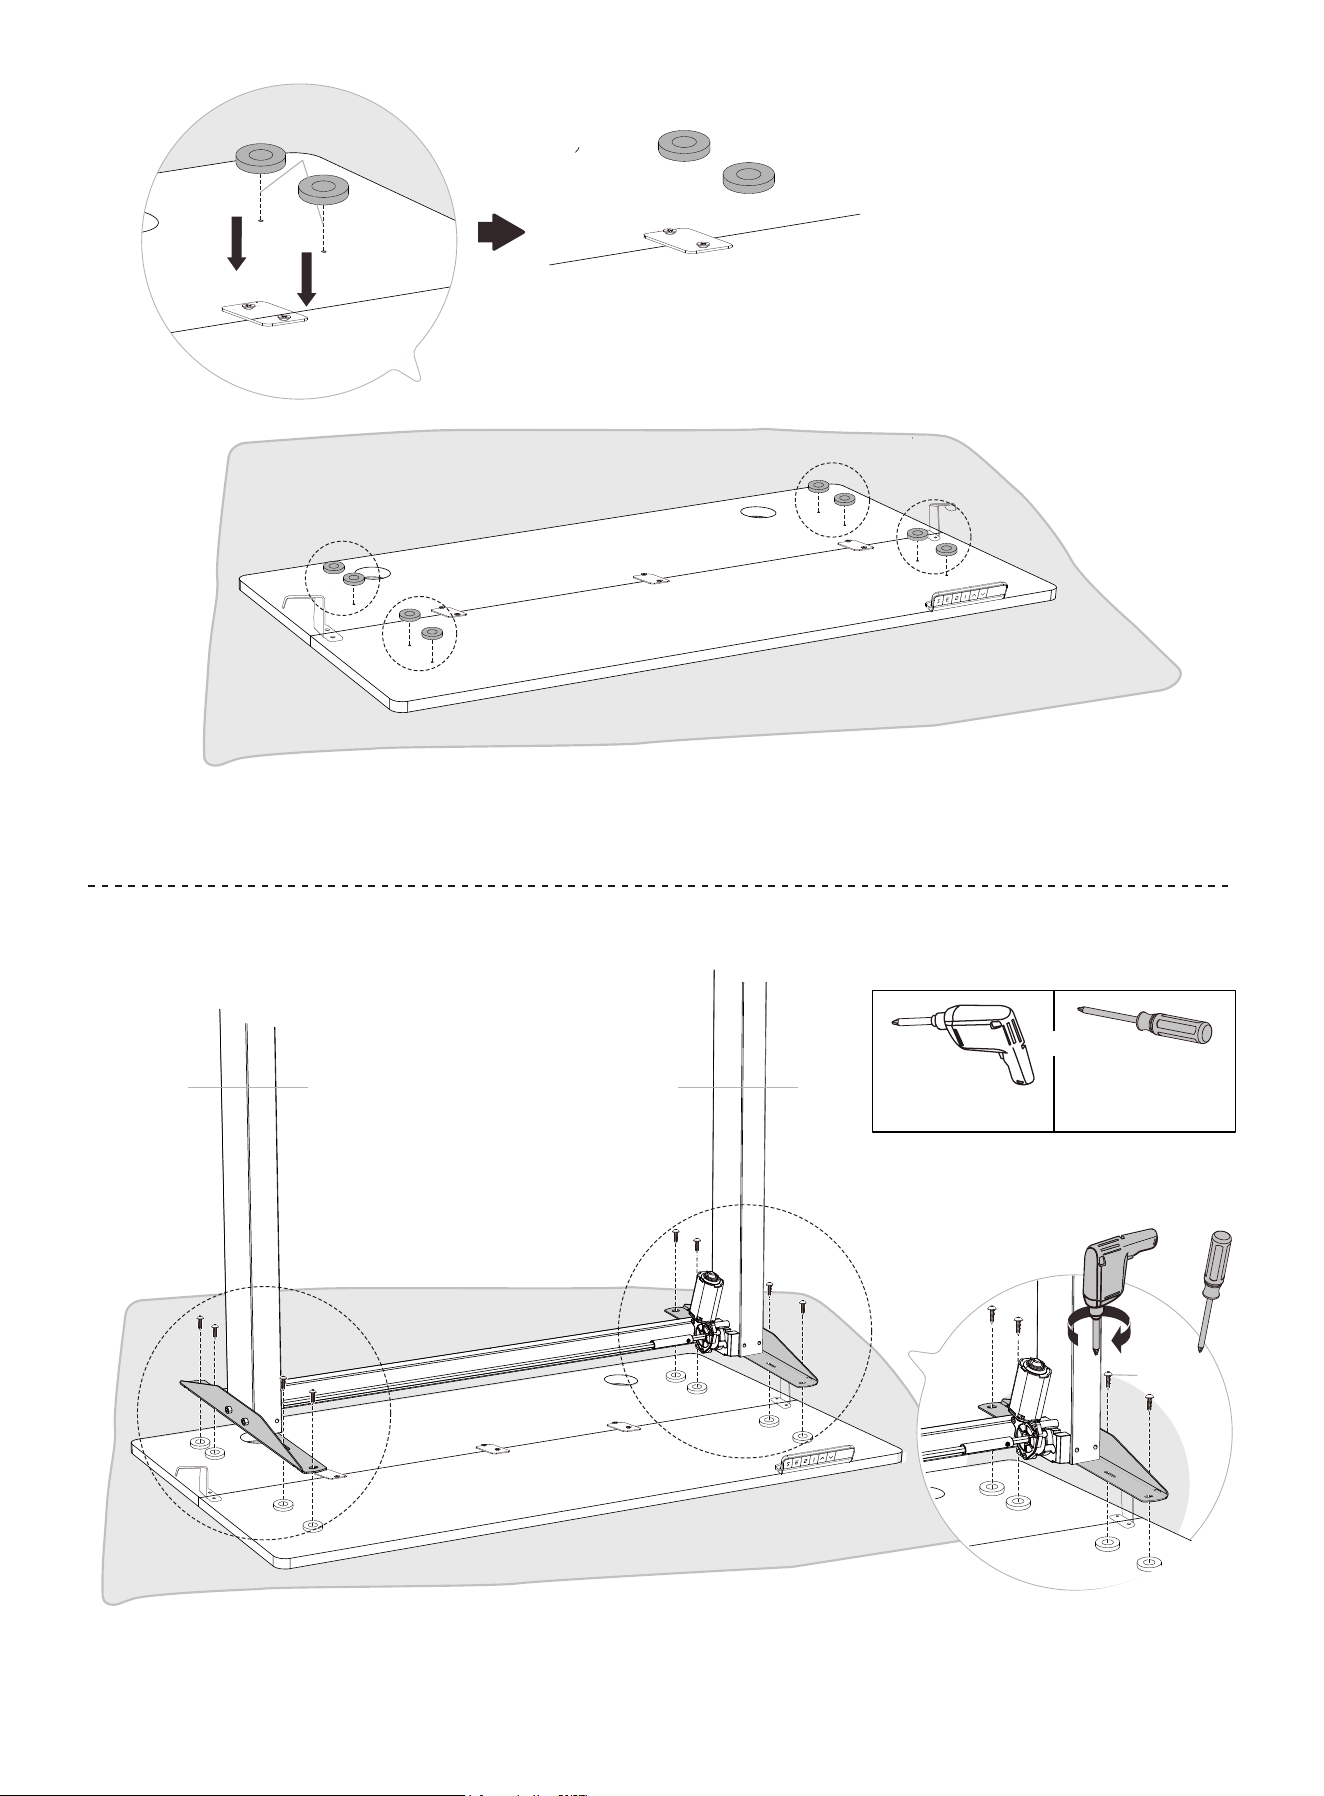
Place rubber pads on the desktop screw holes.
Attach the frame to the desktop.
07
C
Philips
Screwdriver
(not included)
Drill
(not included)
or
M-G
or
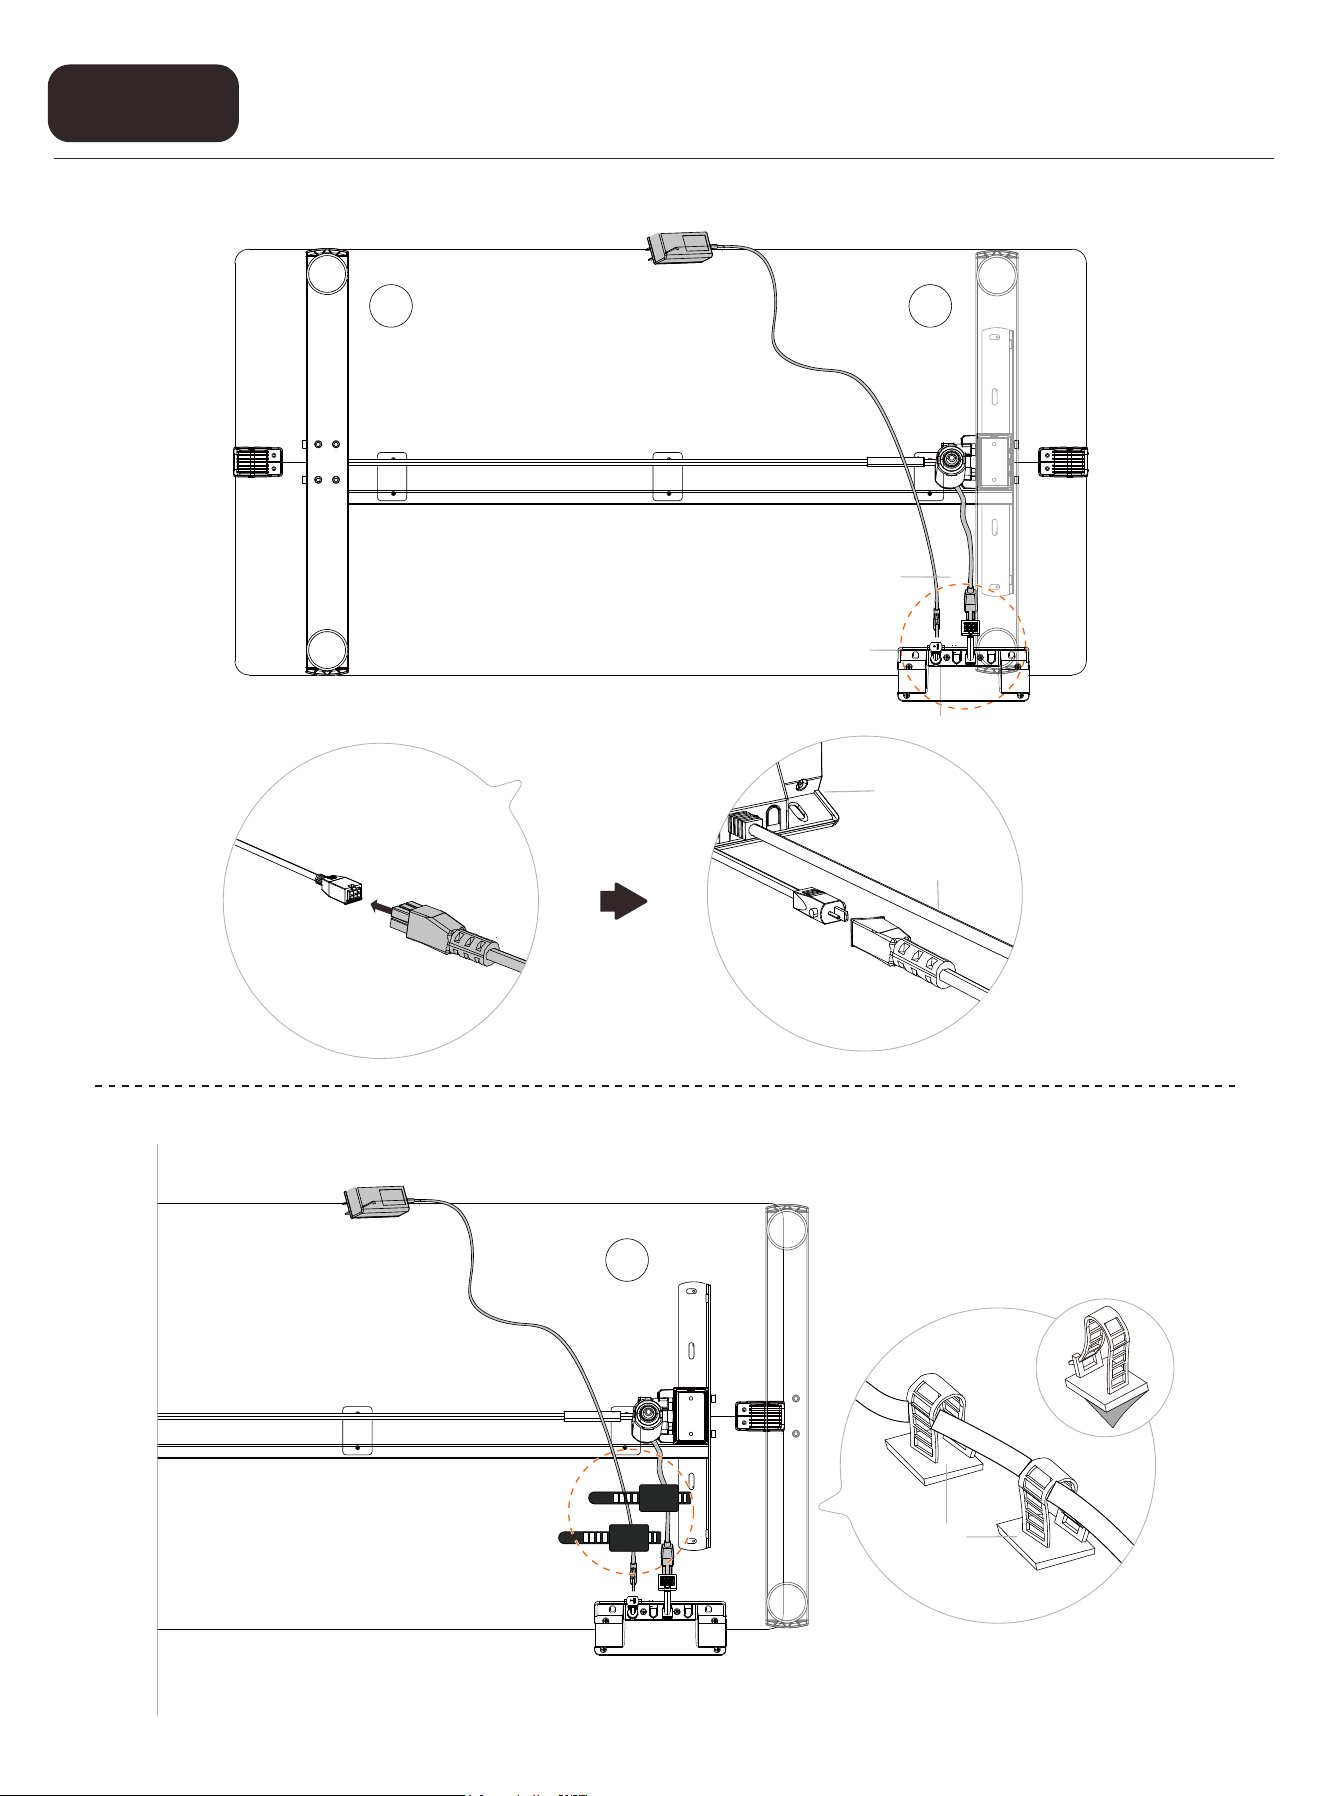
Connecting the Cables
Step 5
09
10
09
11
10
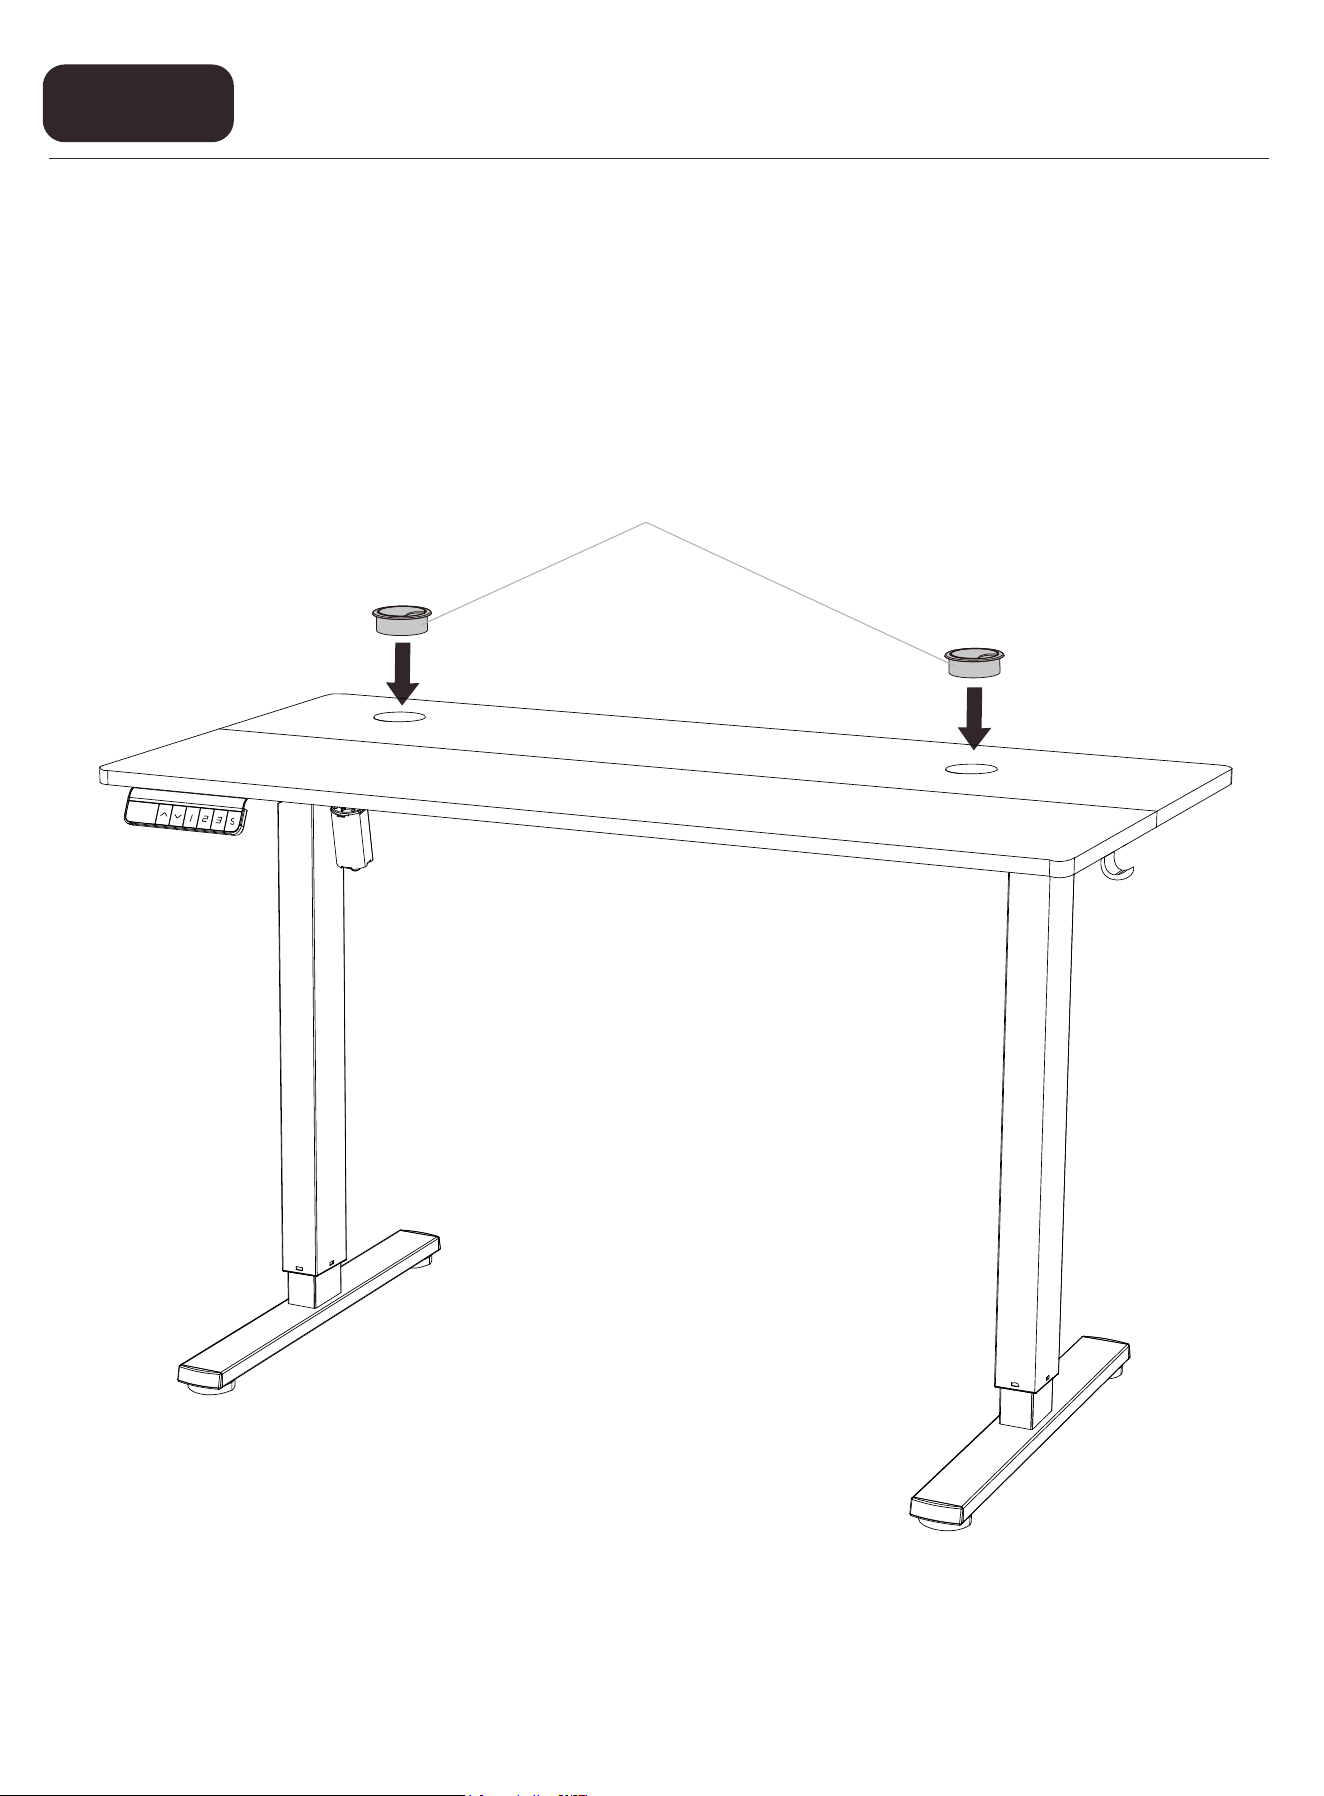
Installing the Cable Hole Covers
Step 6
12
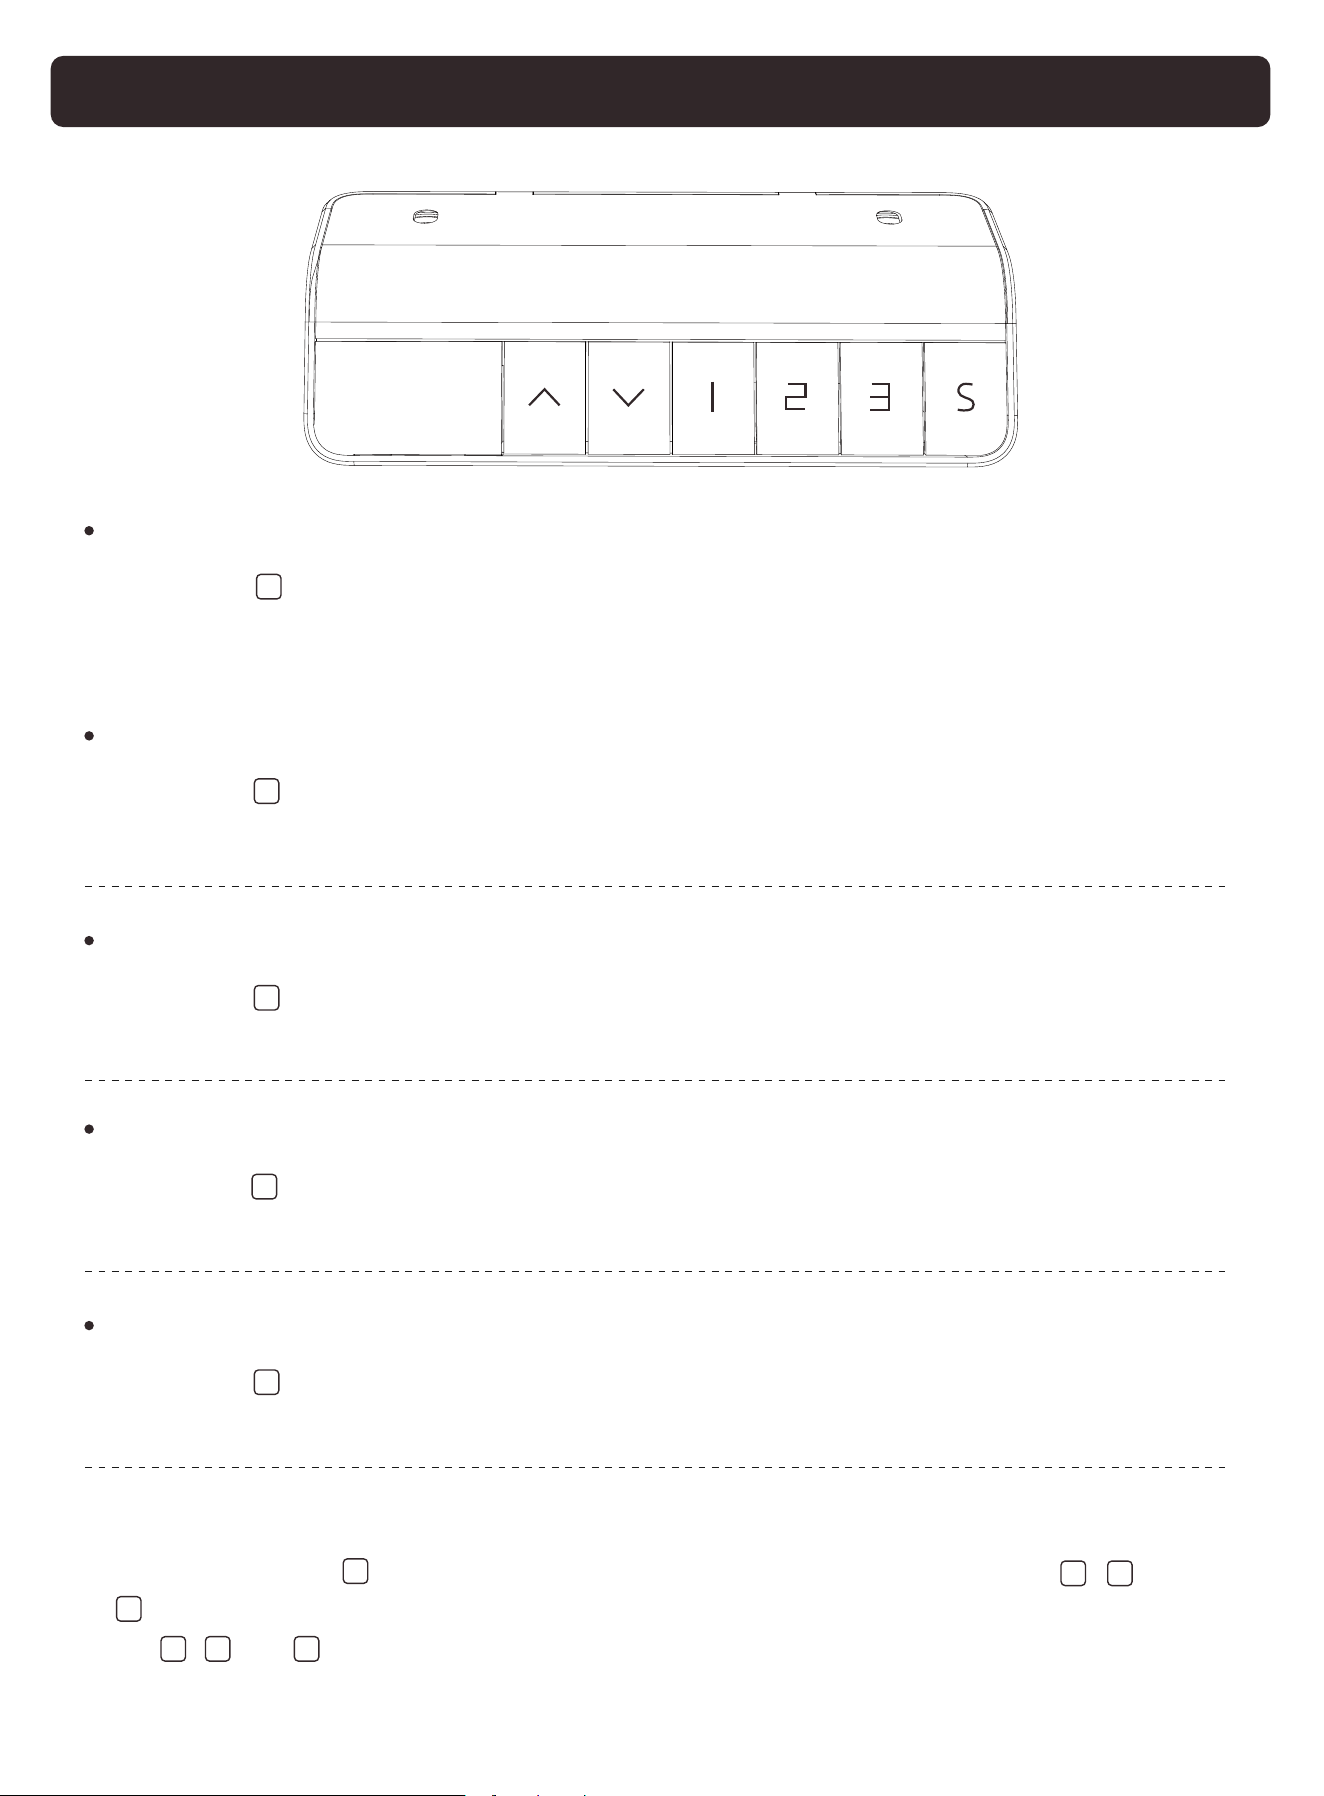
Using the Controller
Select Height Setting 1
Press the button, and the desk will move to the height that was
previously set for that button.
Select Height Setting 2
Press the button, and the desk will move to the height that was
previously set for that button.
Select Height Setting 3
Press the button, and the desk will move to the height that was
previously set for that button.
Raise the Desk
Press the button to raise the desk continuously until it reaches the
highest position or the button is released.
Lower the Desk
Press the button to lower the desk continuously until it reaches the
lowest position or the button is released.
Save Current Height Setting
Short-press the button, and the screen will show. ‘S-’ Press the , , or
button to save the current height setting to that button. When you press
the , , or button, the desk will move to the height that was
previously set for that button. Any button-press will stop the desk.
v
v
1
2
3
S
1 2
3
1 2 3
Reset
Press and hold the button until 'rst' is displayed. Continue holding
until the desk goes down to its lowest level and comes back up slightly.
Release the button, and reset is complete. If the button is released
during the reset procedure, reset will stop. The desk won't work until
reset is done correctly.
Settings
v
Child Lock
Press and hold the and buttons together for 5 seconds to turn
child lock on. The screen will show 'LOC' and the buttons will be disabled.
Turn child lock o the same way.
v
v
Settings Menu
Press and hold the button for 5 seconds to enter the settings
menu. Short-press the button to navigate through the menu.
Short-press the or button to adjust the settings. Long-press the
the button again to save the changes. 'SUS' will be displayed if
saving is successful (or 'FAL' if saving fails). If there is no button-press
for 10 seconds, the settings menu will be exited automatically.
or button to quickly adjust the height settings. Press and hold
S
S
v
v
v
v
S
Power-Saving Mode
The screen will turn o if there is no button-press for a minute. Any
button-press will turn the screen on again.

Protection Mode Error Codes
SC0
SC1
SC4
hot
r-6
Standby Overvoltage Protection: Standby voltage too high.
Power o the desk, check the connection between power
and the controller, and power on again. If error code
persists, please contact technical support.
Power Supply Overvoltage Protection: Input voltage too high.
If the correct AC adapter is being used, power o the desk,
check the connection between power and the controller,
and power on again. If error code persists, please contact
technical support.
Operating Overvoltage Protection: Operating voltage too
high. Power o the desk, check the connection between
power and the controller, and power on again. If error
code persists, please contact technical support.
Overheating Protection: When the motor has been working
continuously for too long, it will stop operating to prevent
overheating. Wait for at least 18 minutes (until error code
disappears) before making any further height adjustment.
Power Supply Overvoltage Protection (during use): Input
voltage too high. Error clears when power supply voltage
returns to normal. If error code persists, please contact
technical support.
rst
E10
Reset Warning: Continue to complete reset.
Short Circuit Protection: Power o, check the cable
connections, and power back on again. If error persists,
please contact technical support.

E11
E12
E13
Overloading Protection: Max load exceeded. Error code will
persist for 20 seconds (DO NOT operate). Take the things o
the desk and confirm there is no mechanical damage
before trying again.
Motor Phase Error Protection: Power o, check the cable
connection between the motor and the controller, and
power back on again. Then follow the reset instructions. If
error code persists, please contact technical support.
Sensor Malfunction Warning: Motor sensor can’t be
detected. Power o, check the cable connection between
the motor and the controller, and power back on again.
Then follow the reset instructions. If error code persists,
please contact technical support.
E14
Anti-Collision System Warning: Impact detected. The desk
will move 2" (50mm) in the opposite direction and stop.
E16
Cable Disconnection Warning: Check motor and controller
cable connections. Normal operation should return once all
connectors are properly connected. If error code persists,
please contact technical support.
E17
Mechanical Failure Warning: Check if there is any structural
damage or motor fault.
Thank you for choosing this product. We strive to provide you with the
best quality products and service in the industry. Should you have
any issues, please don't hesitate to contact us.