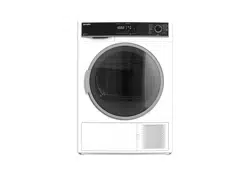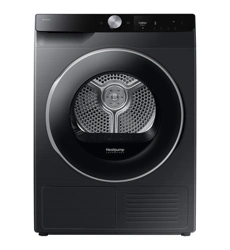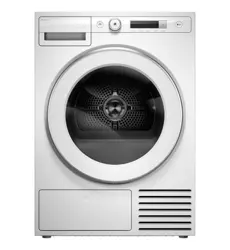
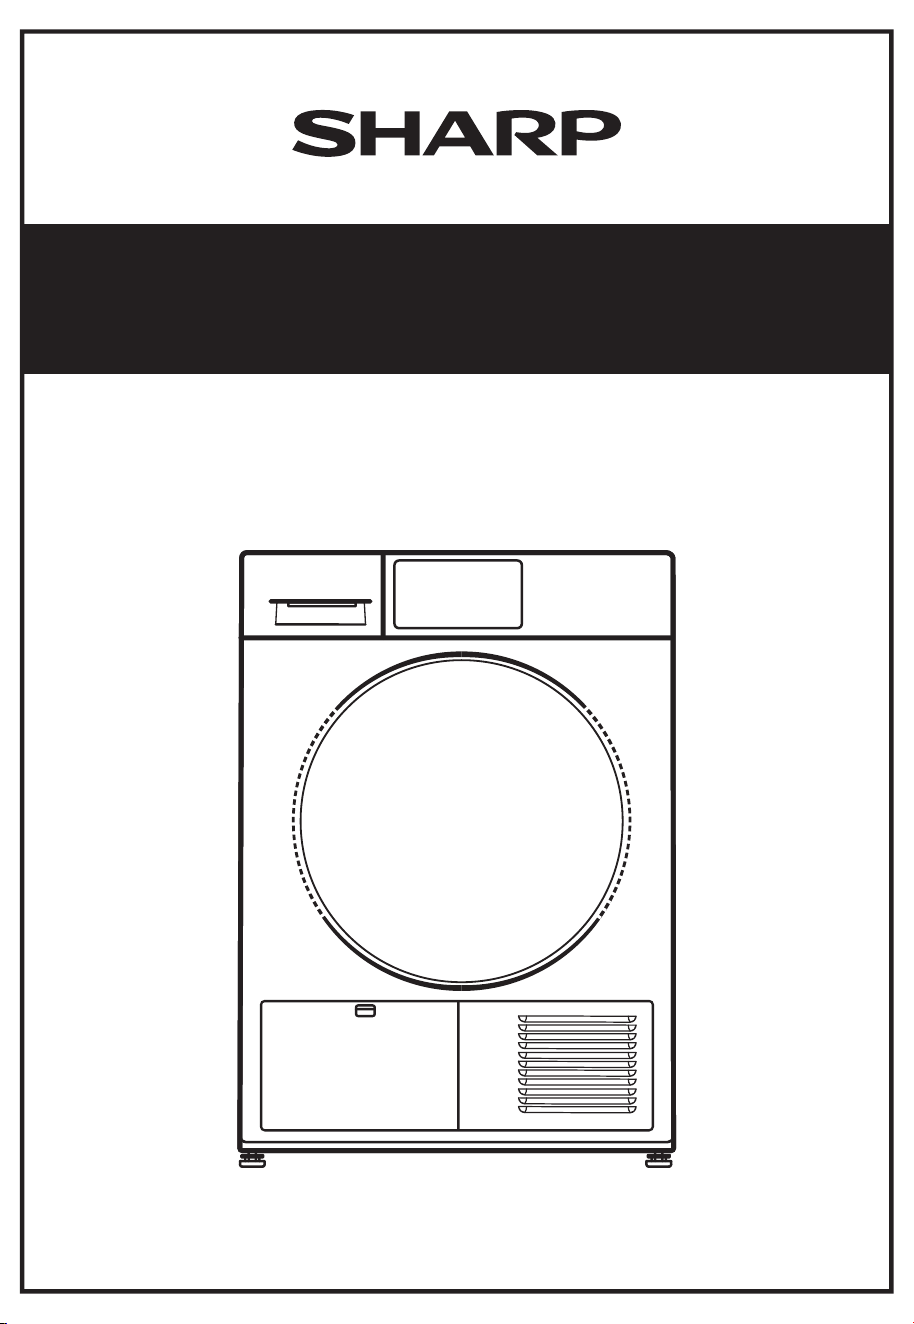
Operation Manual
Heat Pump Dryer
Please read this manual carefully before operating the machine.
KD-HT9JP-G
KD-HT10JP-G
Contents
Safety precautions
Installing Clothes Dryer
Pre-installation considerations
Change the direction of the door
Adjust horizontal foot
Connecting drain hose
08
02
Specification
Troubleshooting
22
21
09
09
10
10
Use a clothes dryer
Name of each part
Pre-use confirmation
Use steps
Instructions for use
12
12
13
14
15
Maintenance of clothes dryer
Cleaning of clothes dryer
Empty Water Container
Clean the filter
Clean heat exchanger
Cooling air inlet cleaning
Humidity sensor
Door Cleaning
Freezing treatment in winter
17
17
18
18
19
20
20
20
21
Error code
Troubleshooting
22
23
01
Don't try. Do not remove. Don't touch it.
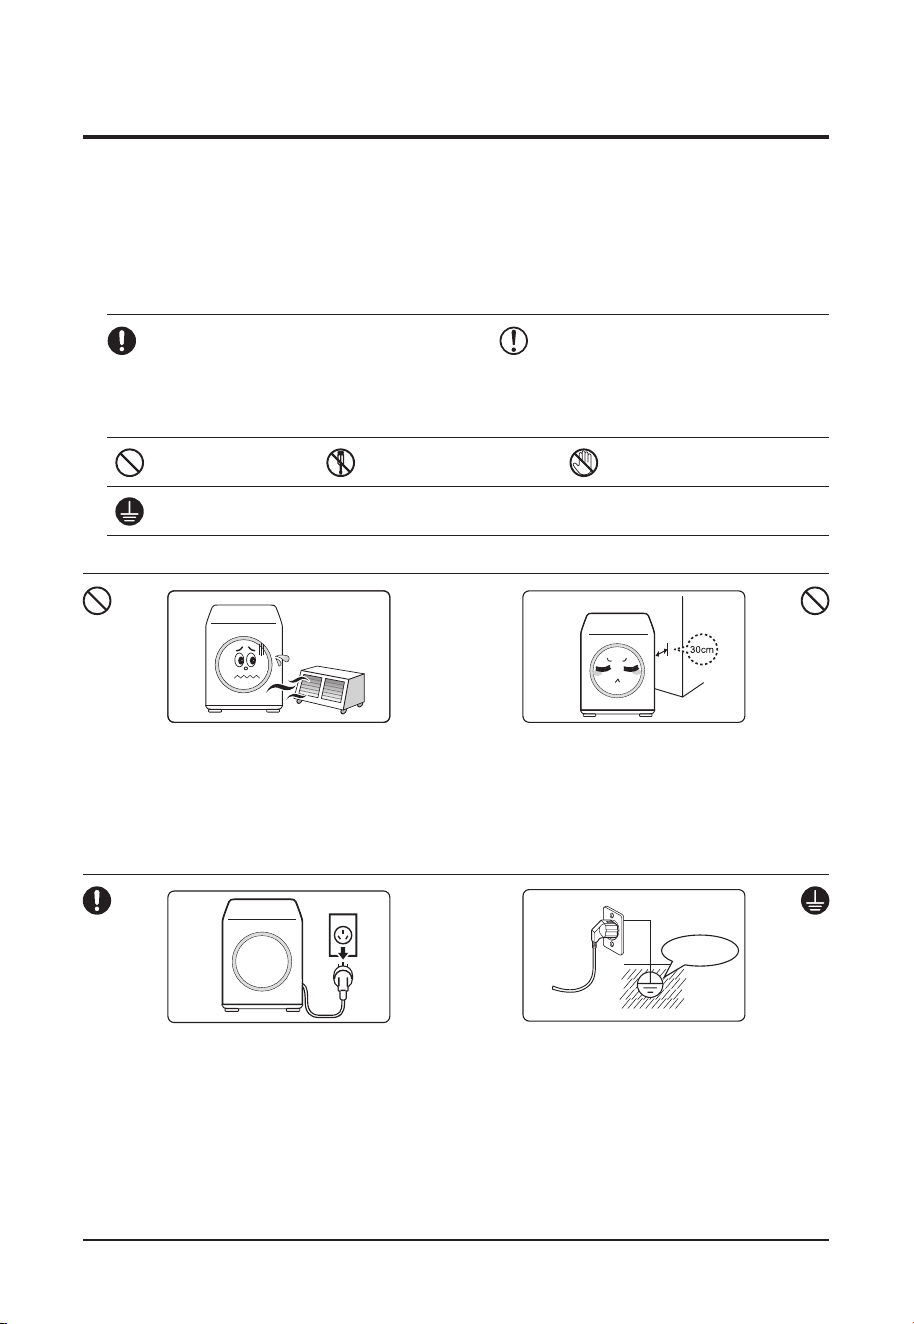
Make sure the dryer is grounded effectively to prevent electric shock.
grounding
When installing, maintaining and using the dryer, please read these instructions
carefully and operate with caution so as to make full use of the functions of the dryer
and prolong the service life of the dryer. The Company shall not be liable for any loss
caused by improper use.
Important Safety Symbols and Precautions:
Warning:Dangerous or unsafe
behaviour may result in serious
bodily injury, death or property
damage.
Be careful:Dangerous or unsafe
conduct that may result in
personal injury or loss of proper-
ty.
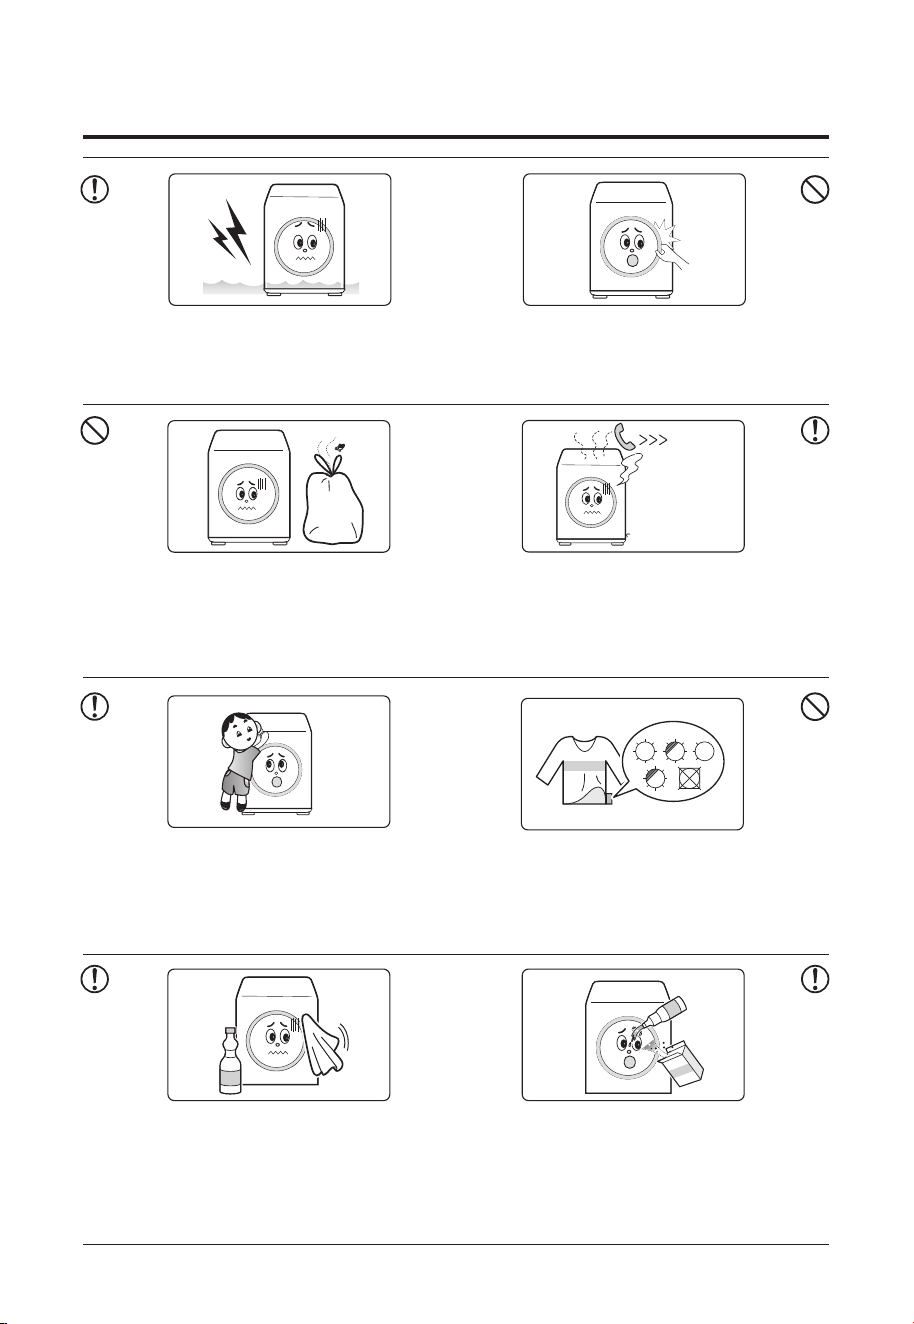
Keep the dryer away from heat sources,
open fires (e.g. Mosquito coils, candles,
cigarettes, hairdryers, etc.).
• May cause fire or product distortion.
Do not place this product against the
wall.
• It can damage power plugs or power
cords, causing hazards such as fire or
electric shock.
Please install the product in a place
where the plug can be easily plugged in,
remove the power supply when cleaning
the product or shelving the product for a
long time.
• Failure to do so may result in fire or
electric shock.
This product is only applicable to
220V-240V~. To ensure your safety, you
must use a three-core socket and be
careful to check that your socket is
properly and reliably grounded.
• Electric shock can result from product
failure or leakage.
Safety precautions
02
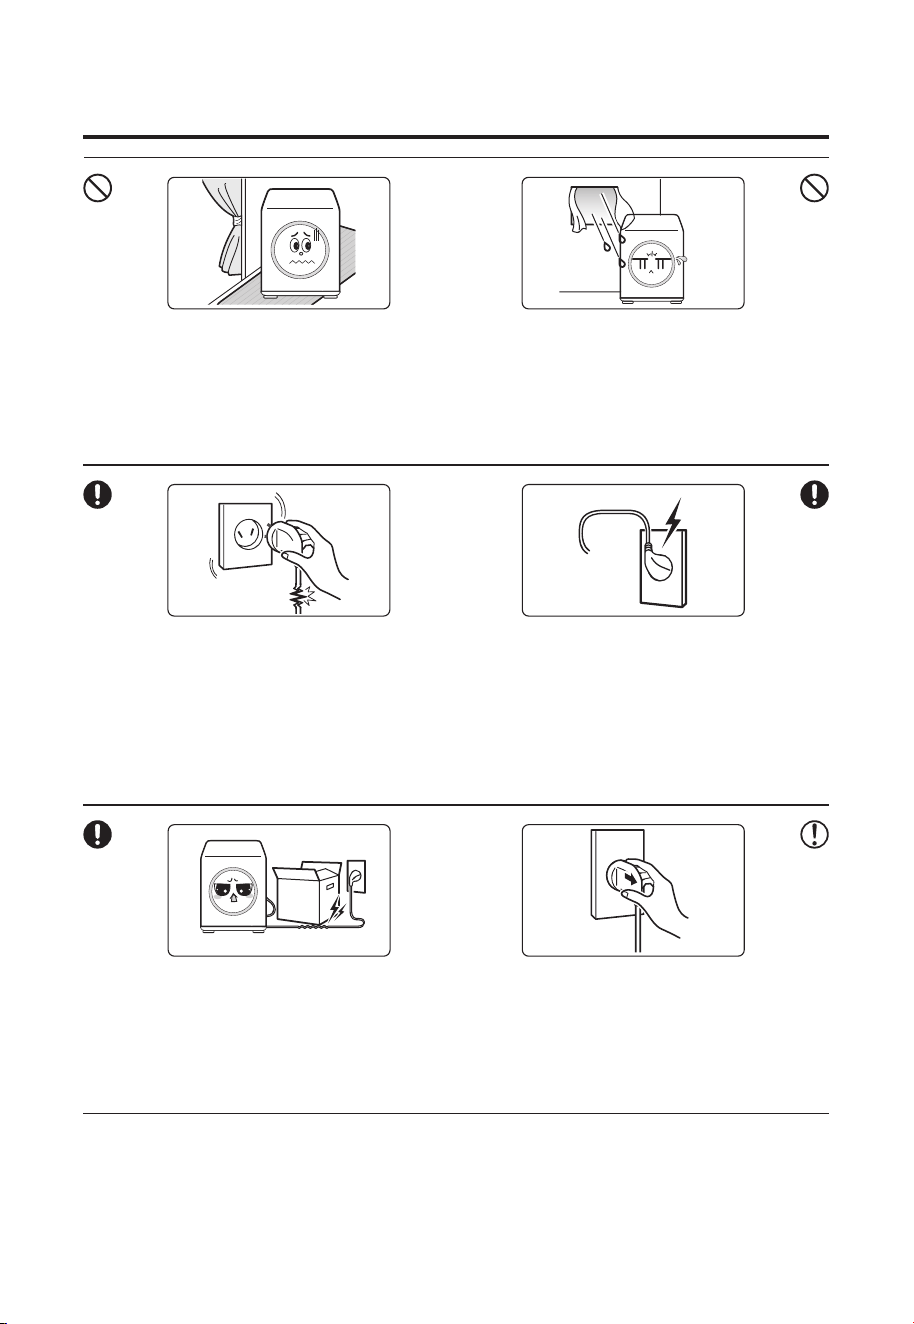
Do not leave the dryer in a damp place
such as the bathroom or in a windblown
or rainy place.
• May cause fire or electric shock.
Do not install flammable goods, such as
curtains or carpets.
• Hot gas emitted from the product may
cause damage to the object or cause
hazards such as fire.
Please protect the power cord. Do not
place the power cord arbitrarily so as not
to be trampled on or pressed or clamped
by other objects.
• Possible fire or electric shock.
Connect the power cord of the power
plug connection downwards.
• If the power supply is connected in the
reverse direction, the power supply cable
may be disconnected internally, causing
a fire or electric shock.
Power cord, power plug damaged, or
power socket hole loose, please immedi-
ately stop using and contact profession-
als to replace.
• Poor contact can lead to hazards such
as electric shock, leakage or fire.
Please grab the plug board by hand and
pull the plug.
• If the power cord is forced, it may result
in fire or electric shock caused by a
broken power cord.
03
Safety precautions
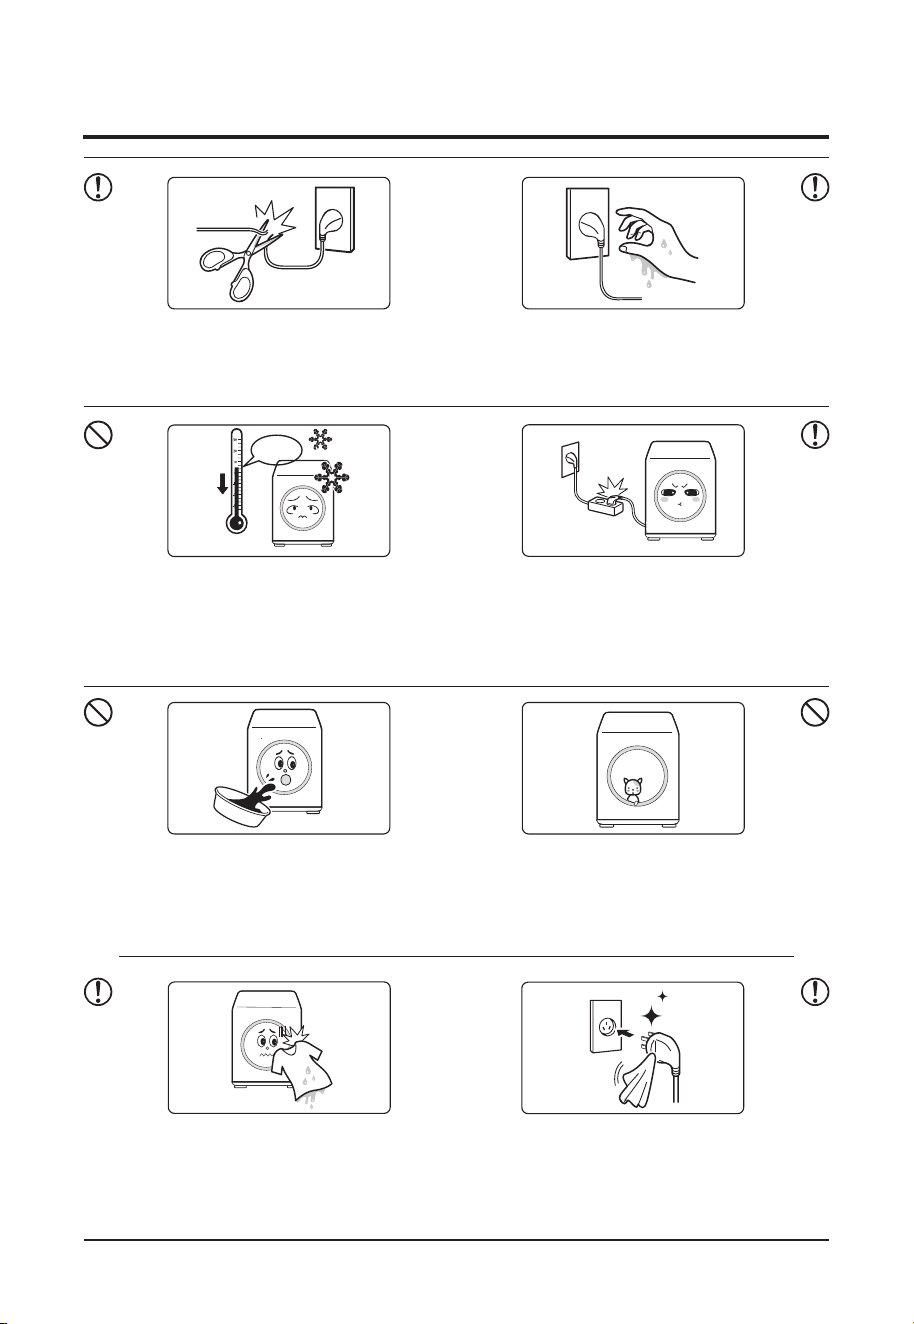
Subzero
Do not install the product below zero
degrees Celsius.
• The freezing of parts may cause the
product to malfunction or damage.
Do not use an expansion socket, use a
dedicated socket to connect the power
supply.
• Possible fire or electric shock.
If dirt is attached to the power plug,
please wipe it clean before using it.
• Possible fire or electric shock.
Do not alter the power cord without
authorization.
• Can cause fire or electric shock.
Do not plug in or unplug the power supply
with a wet hand.
• Risk of electric shock.
Please be careful not to allow pets or
children to enter in the machine.
• May cause suffocation or other injury.
Do not sprinkle water directly on the
product during cleaning.
• May result in short circuits or electric
shocks.
Do not put clothes that have not been
dehydrated by the washing machine into
the product.
• May cause fire or electric shock.
04
Safety precautions
Do not attempt to repair the dryer
yourself or allow inexperienced and
unqualified personnel to do so.
• May cause serious damage to the dryer
and personal injury.
If there is a gas leak, ventilate immedi-
ately and do not touch the power plug.
• Possible sparks leading to explosions
or fires.
05
Do not touch the dryer door or the upper
part of the product with your hands while
the product is running.
• May cause burns.
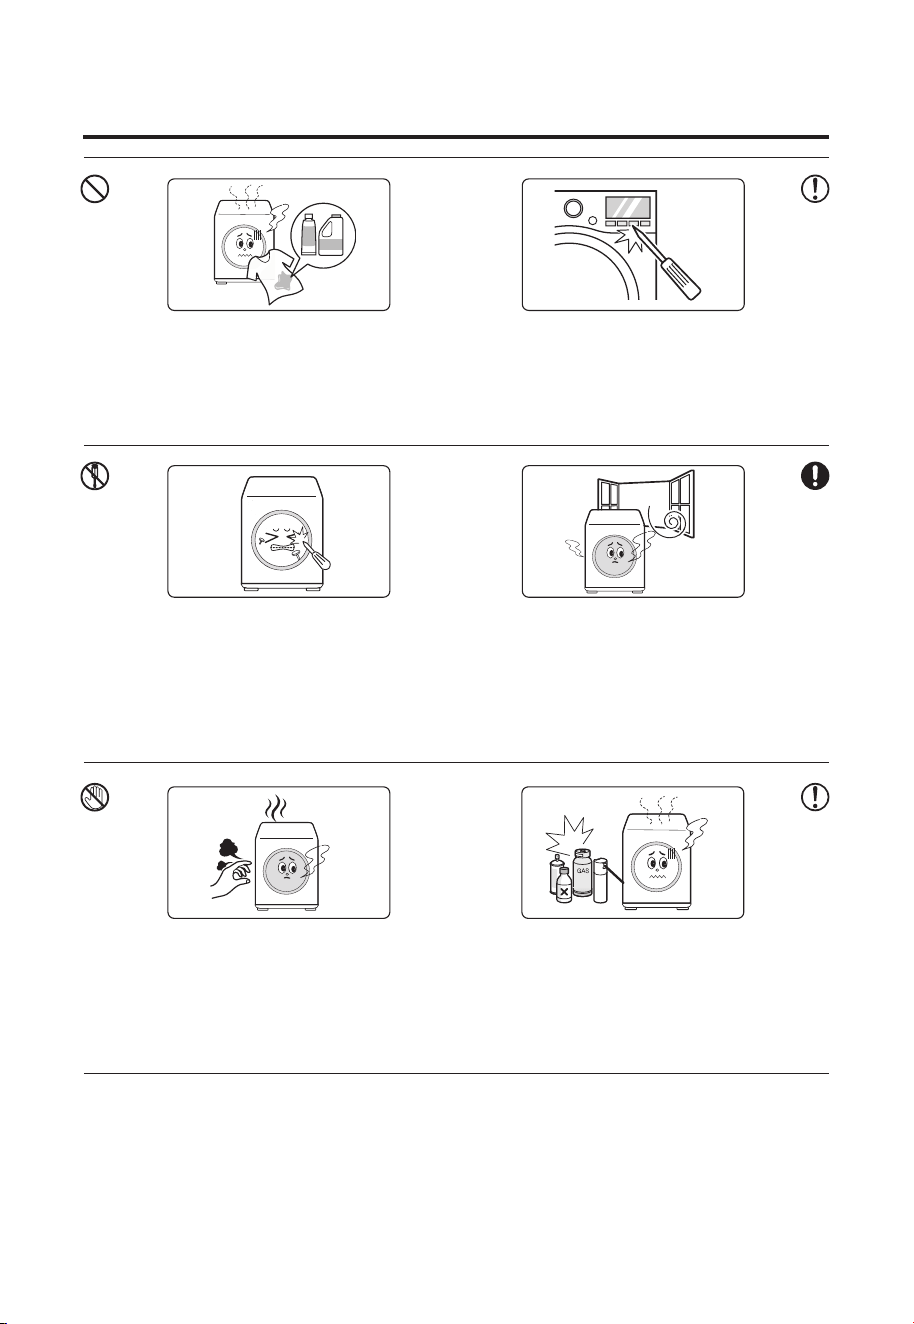
Do not use flammable gases or
substances (benzene, gasoline, petro-
leum, alcohol, etc.) near the product.
• There may be explosions or fires.
Do not dry clothes stained with
kerosene, gasoline, alcohol and other
combustible substances.
• Could lead to an explosion or fire.
Do not press the touch key on the panel
with a cone or other sharp object.
• Possible electric shock.
Safety precautions
telephone
Bleach
漂白
Please manage your surroundings to
prevent pets, rats, insects, etc. from
entering the product.
• Risk of damage to power cords or fires.
Please be careful not to allow children
access to this product.
• Possible harm.
roducts have abnormal sound, taste,
smoke and other phenomena, please
contact after-sales.
• May cause fire or electric shock.
Please make sure that the clothes can
be dried with a dryer.
• May cause damage to the product or
dry goods.
Do not wipe the product with liquid deter-
gent, bleach (bleach, etc.).
• Bleach spatter on product surfaces can
cause paint to fall off or surface discolor-
ation.
Do not put detergent or bleach in the
Water container and drying drum.
• Can cause product malfunctions or
electric shocks.
06
When the product is flooded, be sure to
contact after-sales processing.
• May cause fire or electric shock.
Please be careful not to get caught in the
door of the dryer, Water container, etc
• Possible harm.
Safety precautions
Do not place objects on top of the
product because of the high temperature
on the top and door when the product is
running.
• Please do not place objects on them,
which may cause deterioration or distor-
tion of the product.
• Falling objects can cause bodily harm.
This product is only used for drying.
• For purposes other than clothing,
abnormal vibrations may result in
damage and injury to products, floors,
walls, etc.
07
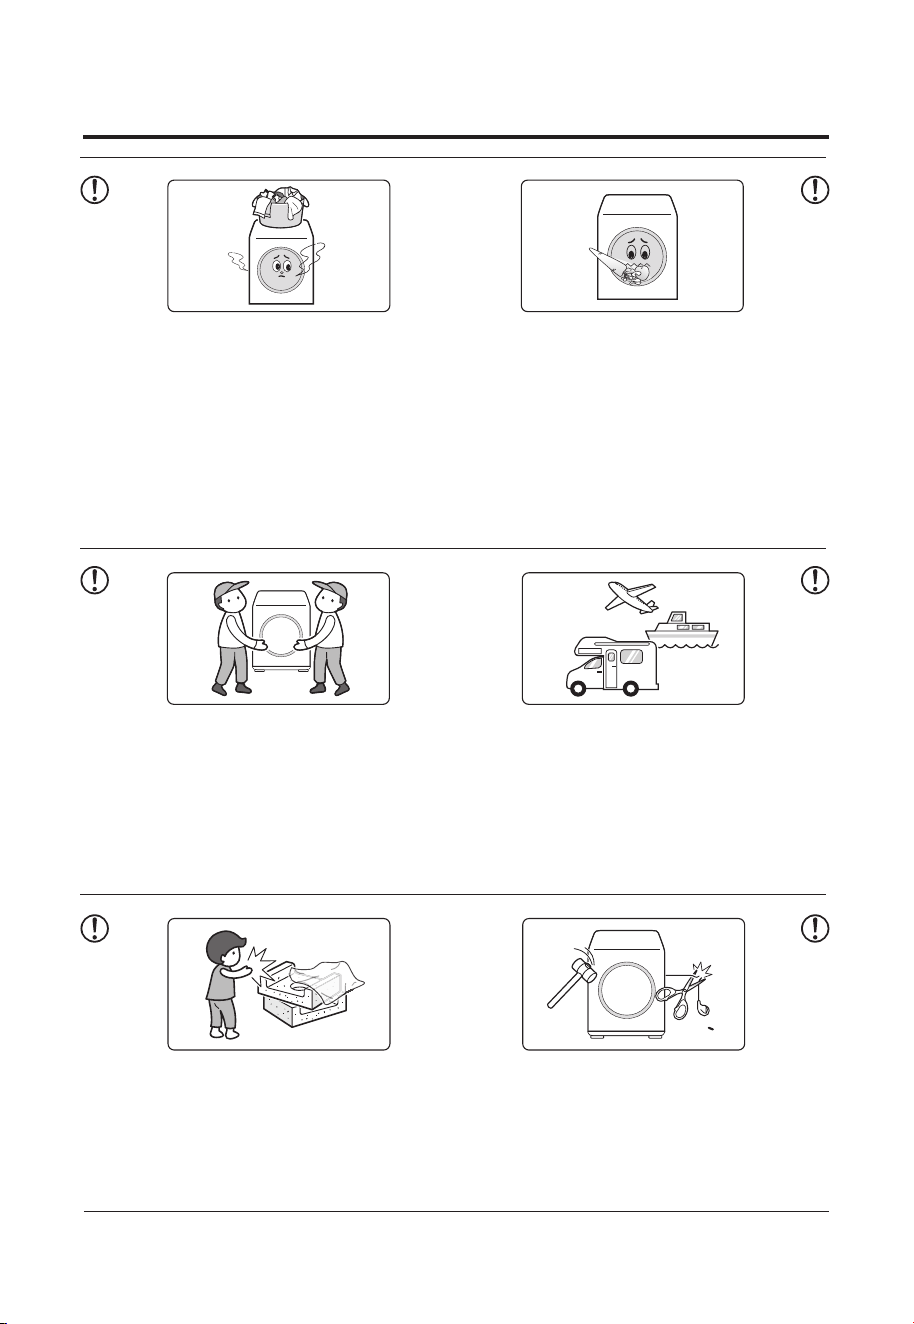
Please dispose of the packaging materi-
als (plastic, foam, etc.) in time to avoid
children touching them.
• Packaging materials can cause
asphyxiation.
Cut the power cord when you scrap the
product, and destroy the control panel.
• Reuse can lead to fire or electric shock.
When the product is installed or moved, it
must be handled by more than 2 people.
• Product drop or product impact may
result in personal injury or product
damage.
Do not install the product inside a moving
vehicle (RV), ship or aircraft, etc.
• Please make sure to consult the
nearest after-sales service store if you
can install it in a special place.
Safety precautions
08
Pre-installation considerations
In order to avoid unnecessary fire, electric shock or personal injury hazards, all electri-
cal wiring and grounding must be set in accordance with national electrical standards.
When preparing for installation, ensure that your power supply is:Fuses or circuit
breakers for 220V-240V~, 50Hz, 15A.
To ensure your safety, you must use a three-core socket and ensure that your socket
is properly and reliably grounded.
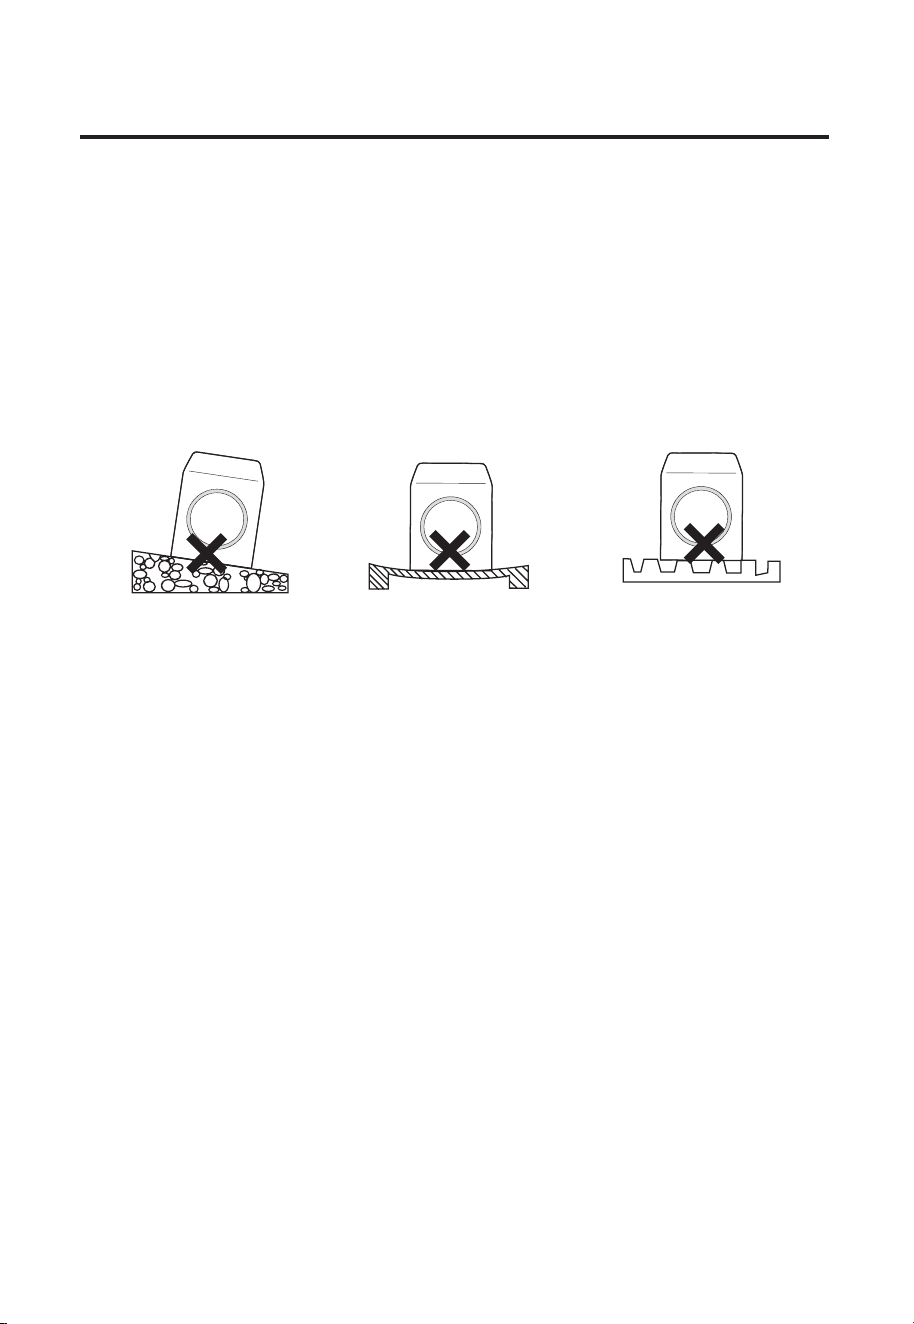
• Please install on a hard, flat, level floor. (otherwise, abnormal vibration and noise, or
even malfunction, may result.)
• After installing the equipment in the desired position, adjust the horizontal foot of the
dryer if the ground is uneven (do not insert wood chips or any other items under the
foot).
• Avoid direct sunlight and good ventilation.
• Model products with ventilation openings at the bottom should not be placed on floor
materials such as carpets that can block ventilation openings.
• Cotton chips are not allowed to pile up around the drum dryer.
• Please install at 5 ~ 35 °C.
• In an environment where the temperature is too high or too low, the product perfor-
mance may be degraded or damaged.
• Distance between product and wall
Upper end of product : 25mm
Product side : 25mm
Rear of product/wall : 50mm
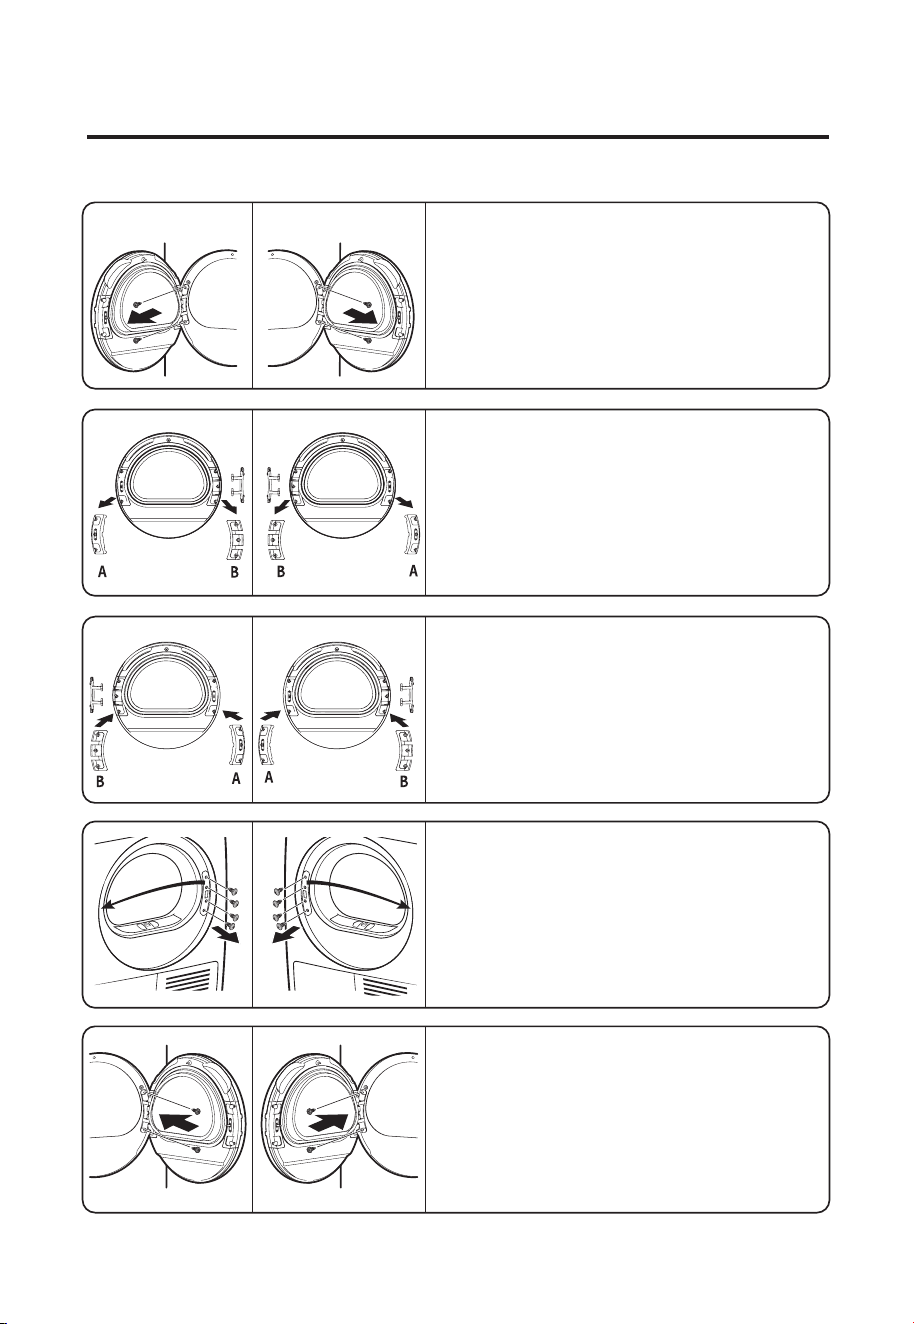
If the door is on the left.
If the door is on the right.
Hinge Hinge
Hinge Hinge
Change the direction of the door
Installing Clothes Dryer
09
1. Remove the door by unscrewing the 2
screws with a cross screwdriver.
2. Unscrew 5 screws with a crosshead
screwdriver and separate the mounting
brackets (A) and (B) at the left and right of
the clothes dryer door.
3. Switch door hinge, part (B) and part (A)
and tighten 5 screws with a cross screw-
driver.
4. Remove the four screws in the door
lock position, remove the door lock and
install to the other side.
5. Fit door on the other side and screw
down with 2 screws.
10
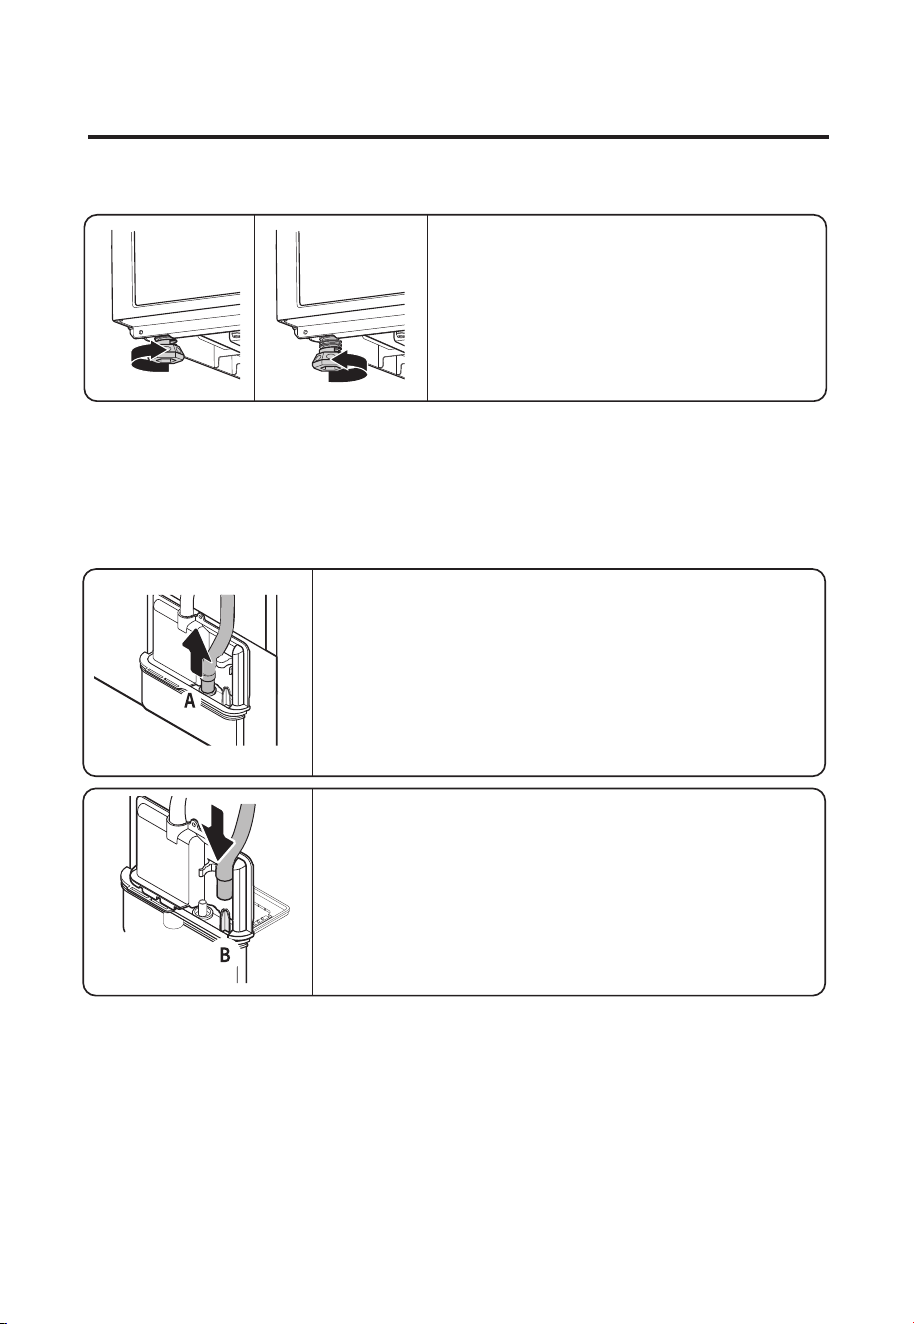
• Use a level to confirm that the dryer is
installed horizontally. If not, adjust the
horizontal foot as required.
Adjust horizontal foot
Installing Clothes Dryer
1. Pull the short drain hose out of the(A) pump outlet.
Connecting drain hose
• Water container inside the dryer.
In case of not using the water container inside the dryer or the dryer being stacked
on a washer.
2. Plug the short hose into (B) pillar and make it fixed.
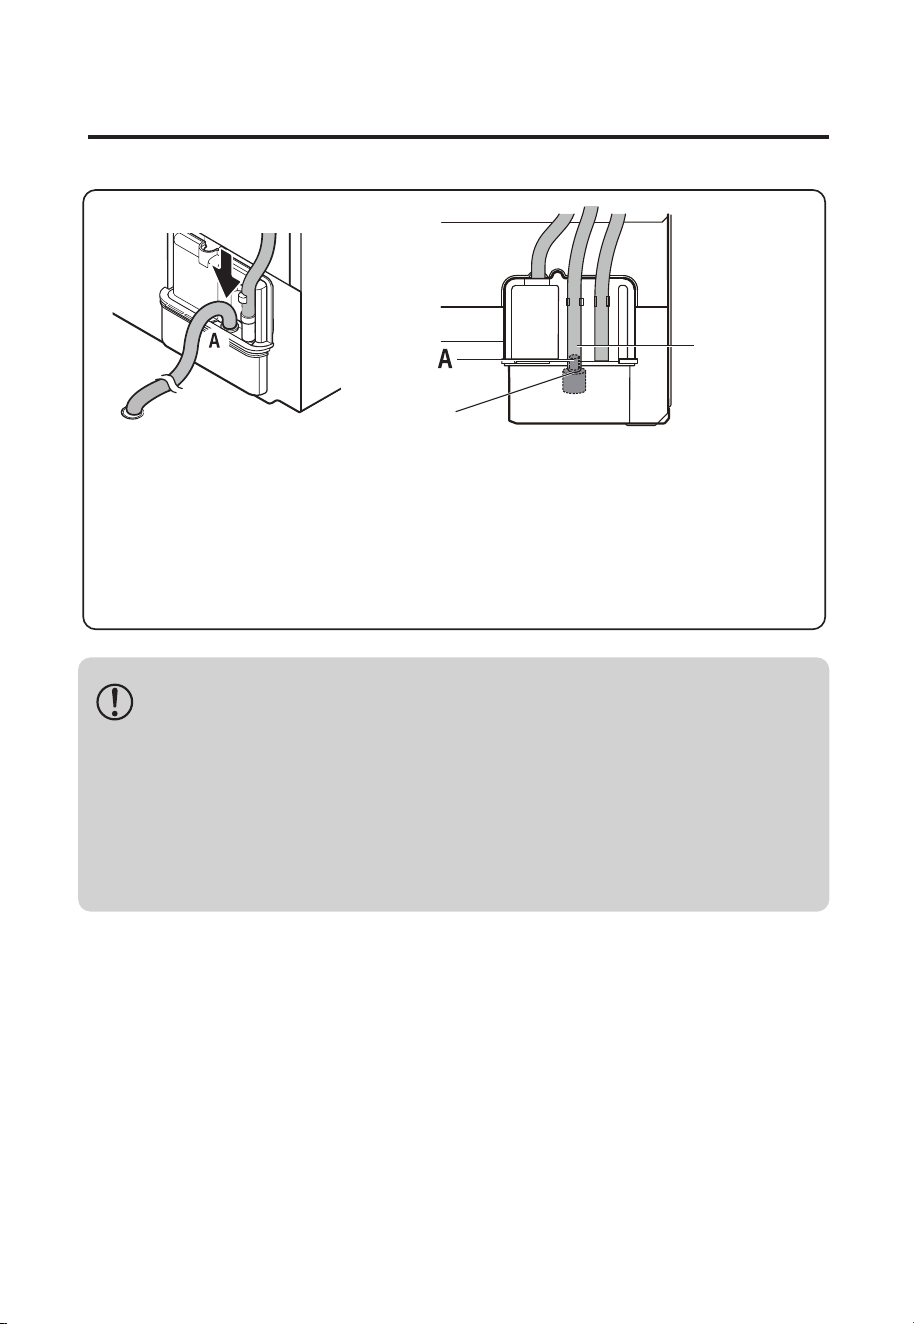
11
• When connecting drains, make sure that the highest point of the hose
does not exceed the product top cover.
• Install the attached drain hose and insert the ends into floor drains or other
drains to allow direct drainage.
• The end of the drain pipe should not be immersed in water.
External water may flow back into the product.
• Water may leak if the pipe is loosened.
Installing Clothes Dryer
3. Plug the long drain hose included as an accessory into (A) pump outlet and
make it fixed.
Please make sure the hose is inserted deep enough until it reaches the stopper
inside the unit so that it does not come off easily.
Put the other end of the hose into floor drain.
Stoper
Hose
Water container
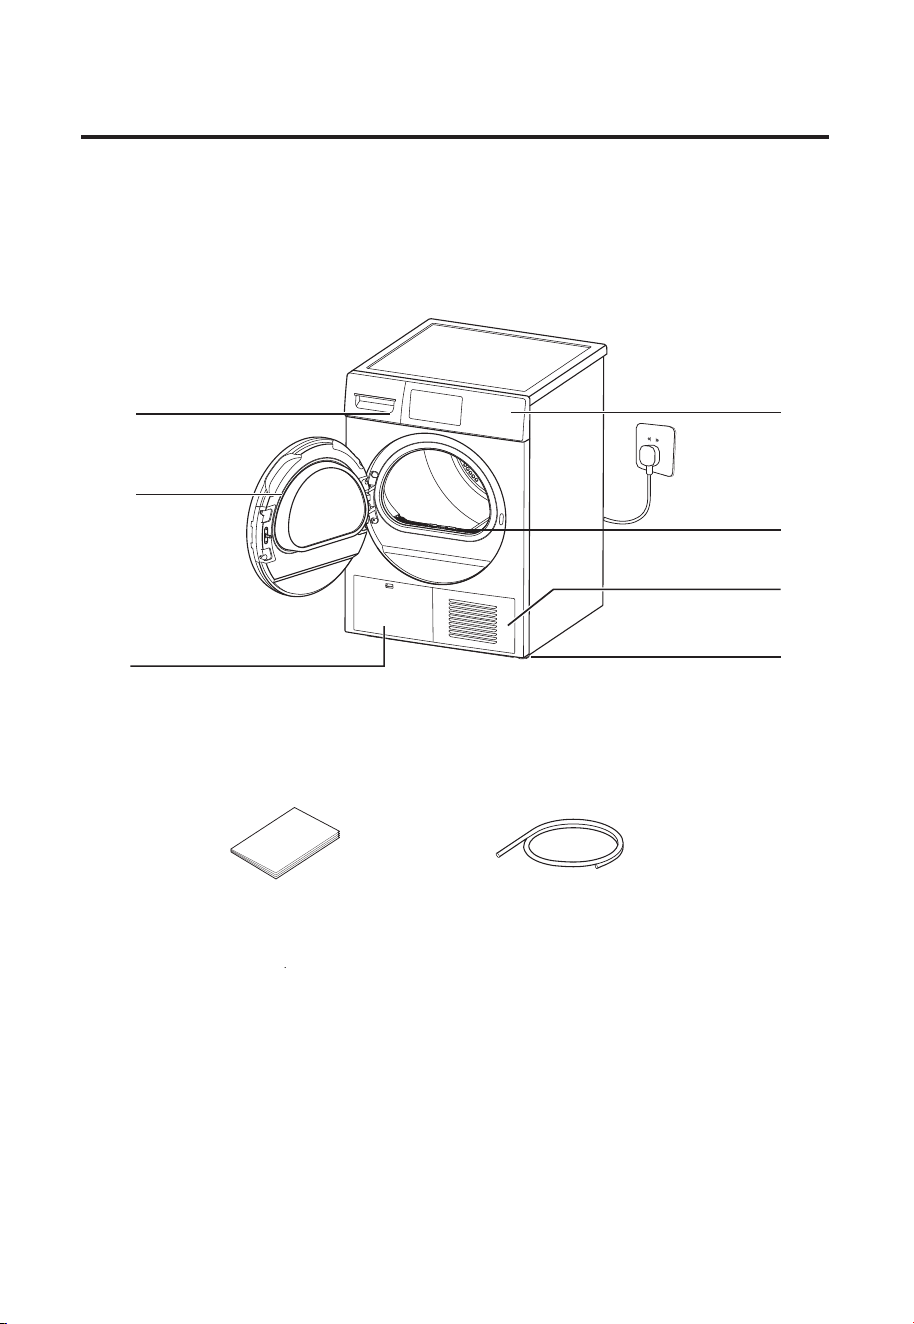
Operation Panel
Door
Cooling-air inlet
filter
Heat exchange cover plate
Horizontal foot
Accessories
Operation Manual × 1 Drain Hose × 1
Name of each part
Use a clothes dryer
12
Note:The figure of the instruction manual may be inconsistent with the prod-
uct you purchased, please refer to the real product.
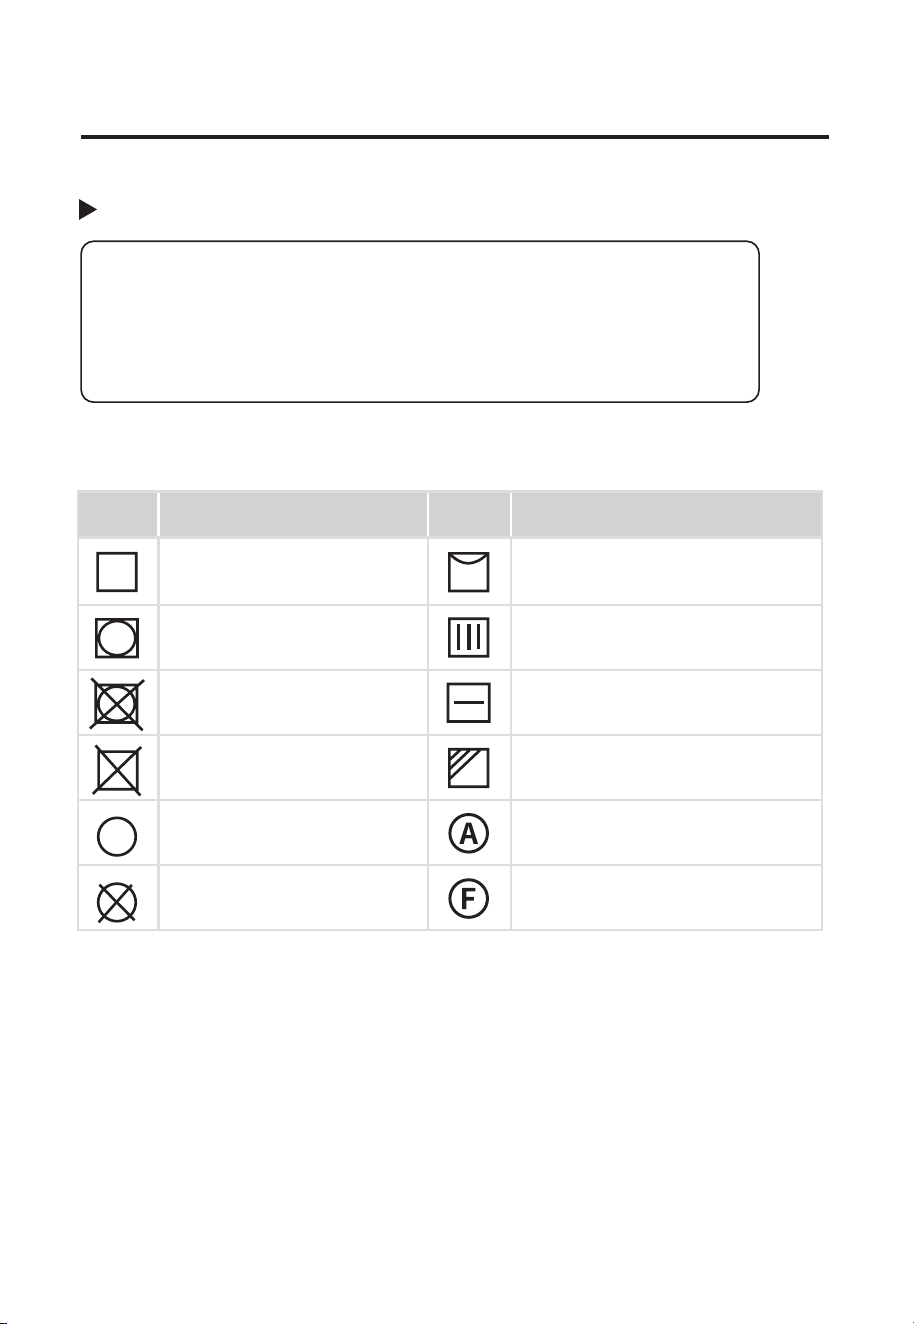
Check the following:
Pre-use confirmation
Classification of clothe
Dry cleaning
Non-dry cleaning
Standard Dry Clothes
Spread dry clothes evenly
Put it on the rope.
Put it on the hanger.
Dry in the shade
Available in various solvents
for dry cleaning
Dry cleaning:With gasoline,
Pure alcohol
Drying
Do not use clothes dryer
Non-drying
Description Description
13
1. Make sure that the power plug is plugged in.
2. Please make sure that the drain hose is installed properly.
3. Make sure the dryer is placed horizontally.
(Vibration and noise if not placed horizontally.)
If your clothes contain the following logo, use the dryer according to the instructions.
·Please confirm the laundry label and select the drying mode as recommended.
·Drying times and level depending on the type of clothing.
·Do not dry clothes that will shrink.
·Please classify clothes according to their type, size, color and material.
·New towels or synthetic fibres will fluff. Please dry separately.
·Clothes with zippers or buttons, it is recommended to flip the clothes, pull the zippers
and fasten the buttons to reduce noise during drying.
Use a clothes dryer
Symbol Symbol
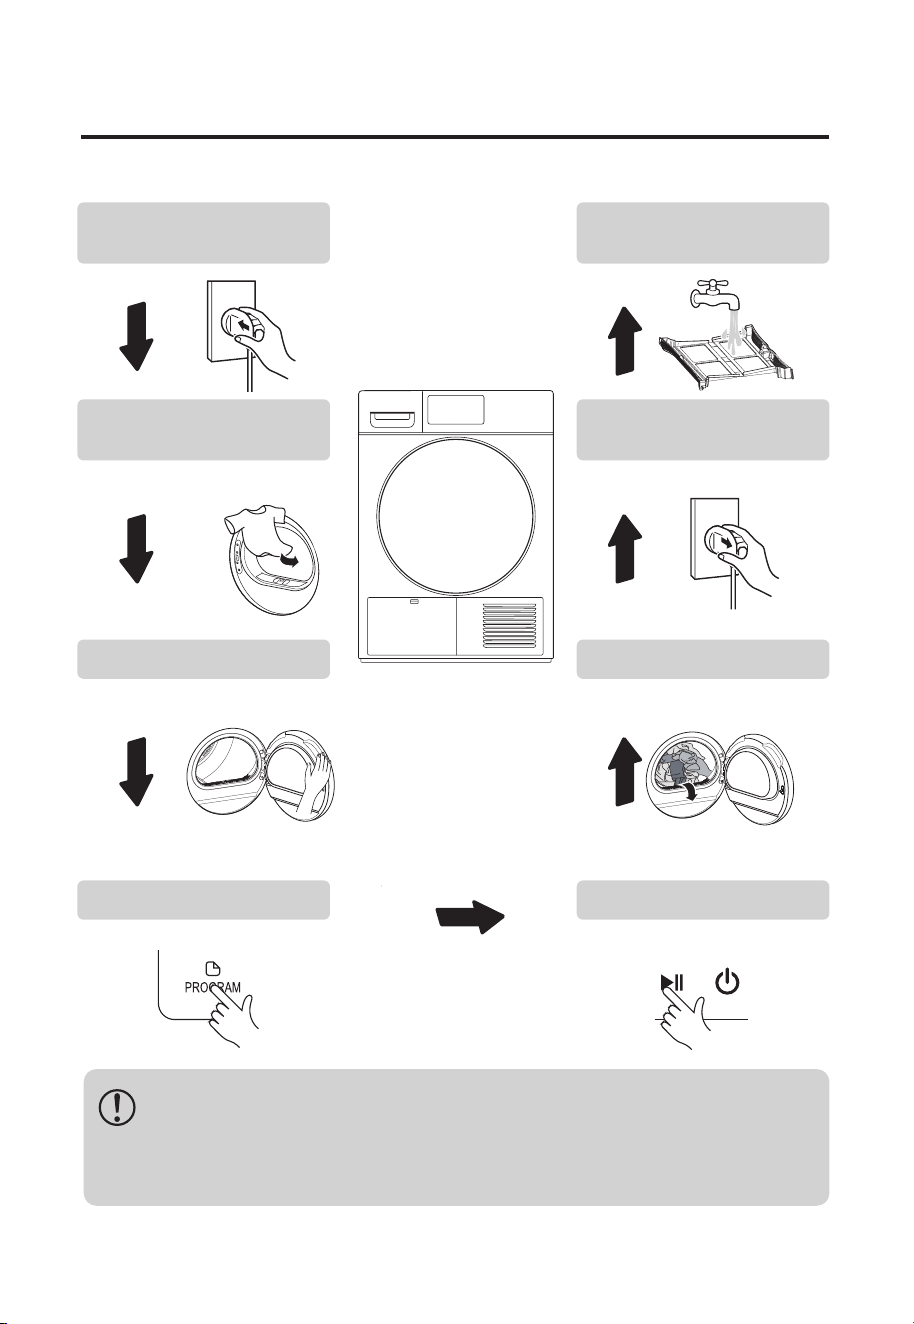
4. Select the program .
6. Take out the clothes.
5. Press the Start/Pause.
7. Pull off power plug.
2. Open the door and put
in clothes.
8. Clean the filter and empty
the Water container.
1. Plug in the power plug.
3. Close the door.
• Please make sure the filter is clean before using.
• Please classify the drying clothes.
• Do not drink condensation water.
• Make sure no clothes between the door and the rubber sealing ring.
14
Use steps
Use a clothes dryer
• Press this key to start or pause the drying process.
• Drying time can be delayed to start.
1. Power
2. Start/Pause
3.DELAY
4. DRY Lv.
Anti crease
5. TIME
Buzzer
6.PROGRAM
Child lock
5
6 4 3 2 1
15
Instructions for use
Use a clothes dryer
• The power key switches the power supply. If the dryer is turned on
and left idle for 5 minutes, the power is automatically switched off.
• Press the power key for 3 seconds to turn the machine off.
Choice of dry level:very, normal,iron.
Anti crease setting method:
Press the key for 3 seconds to select or turn off anti crease.
At that same time, the key indicator light is ON or OFF.
Apply to Warm air and Cool air programs, adjust the programme
duration.
Mute Setting Method:
The buzzer function can be turned on or off by pressing the time
key for 3 seconds.
Press the key to select the drying program.
Child lock setting method:
During operation, the child lock function can be activated by
pressing the Program for 3 seconds. This feature locks all keys
except the power key so that the drying program you choose
does not change due to a child's incorrect operation.
Setting method:In the standby state, press this key to set the delay
time.
Select Drying Procedure
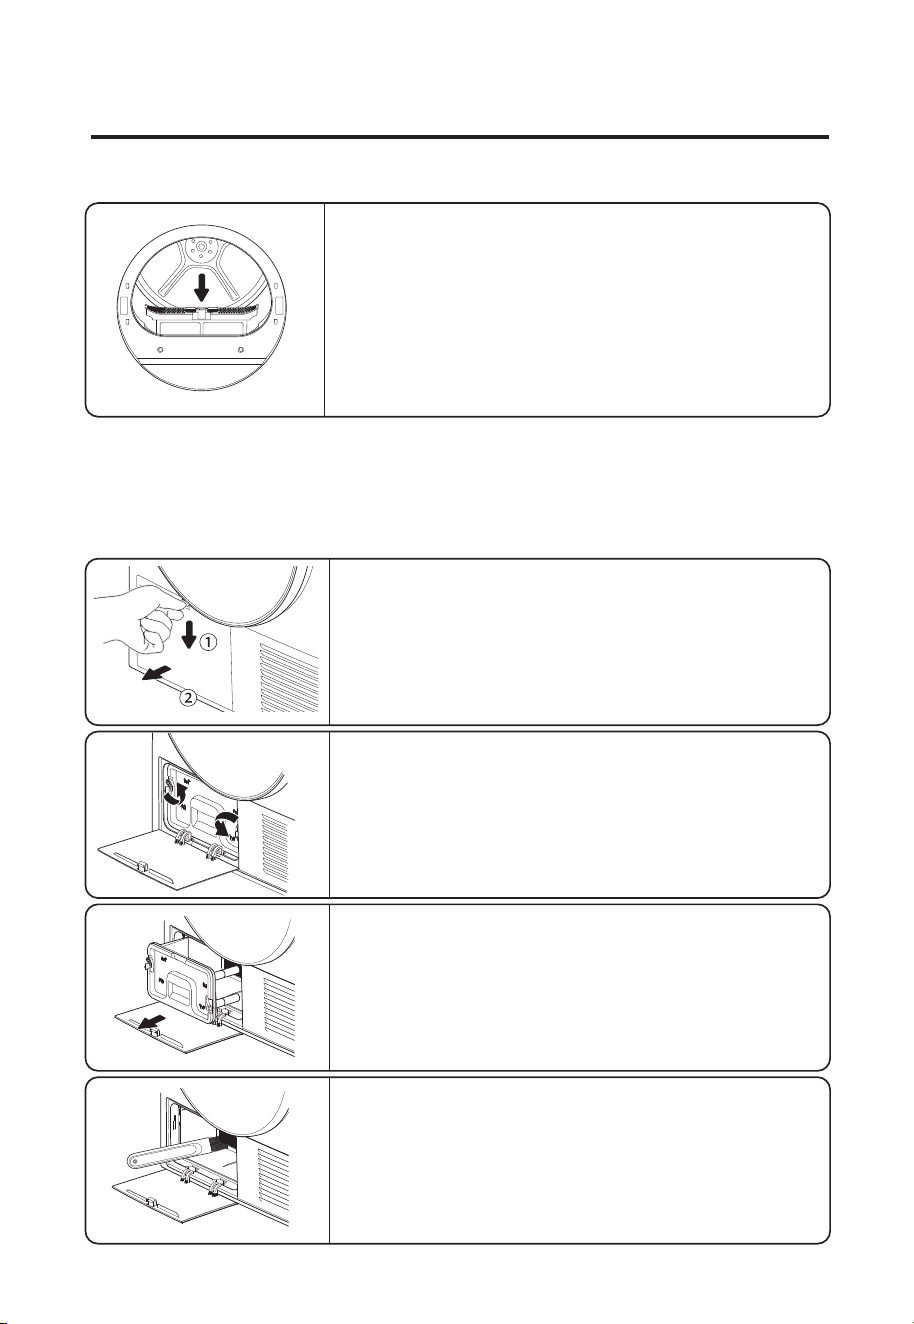
Empty Water Container
•The icon flashes, prompting the user to empty the Water container.
Clean the filter
• The icon flashes, prompting the user to clean the filter.
• Working process:The icon flash during operation.
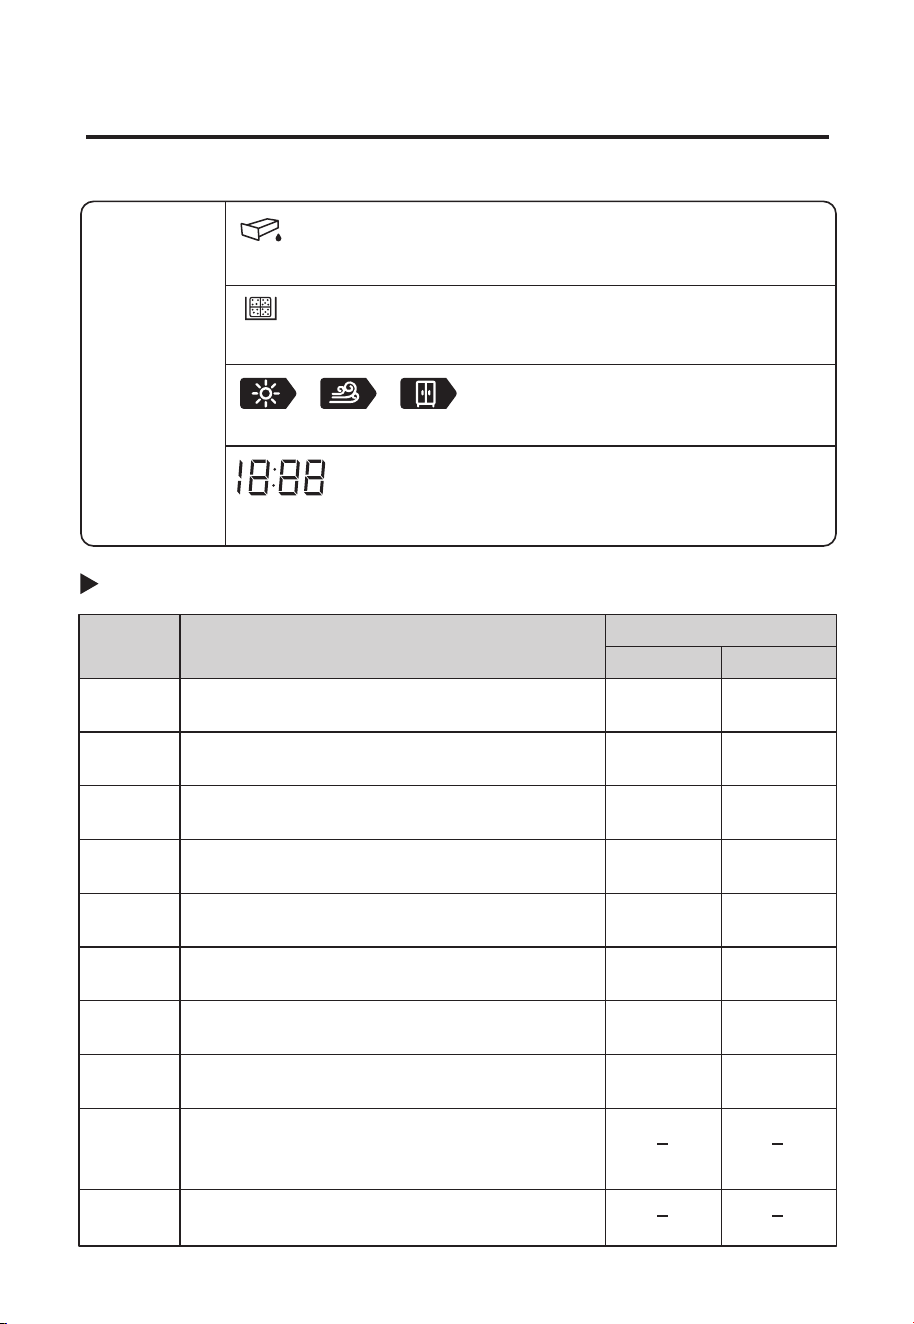
Display
Screen
program
Mix
Cotton
Baby care
Synthetic
Bedding
Quick
Down
Warm air
Hygiene
Cool air
Cotton, linen or blended fabrics.
Cotton and linen fabric.
Baby clothes, small clothes.
Synthetic or blended fabrics.
Sheets pillowcase and bed spread.
Two or three shirts.
Down clothes.
Cotton, linen, blended, etc.
Refresh fabric with cool air.
Ratedcapacity
Clothes
4 kg
9 kg
4 kg
0.8 kg
2 kg
5 kg
2 kg
2.5 kg
4 kg
10kg
4 kg
0.8 kg
2 kg
5 kg
2 kg
2.5 kg
KD-HT10JP-G
KD-HT9JP-G
16
Instructions for use
Use a clothes dryer
Displays the remaining time, delay time and error
code.
Note:The remaining time decreased gradually with drying.
Apply to Hygiene,Down,Warm Air and Cool
Air programs, adjust the programme duration.
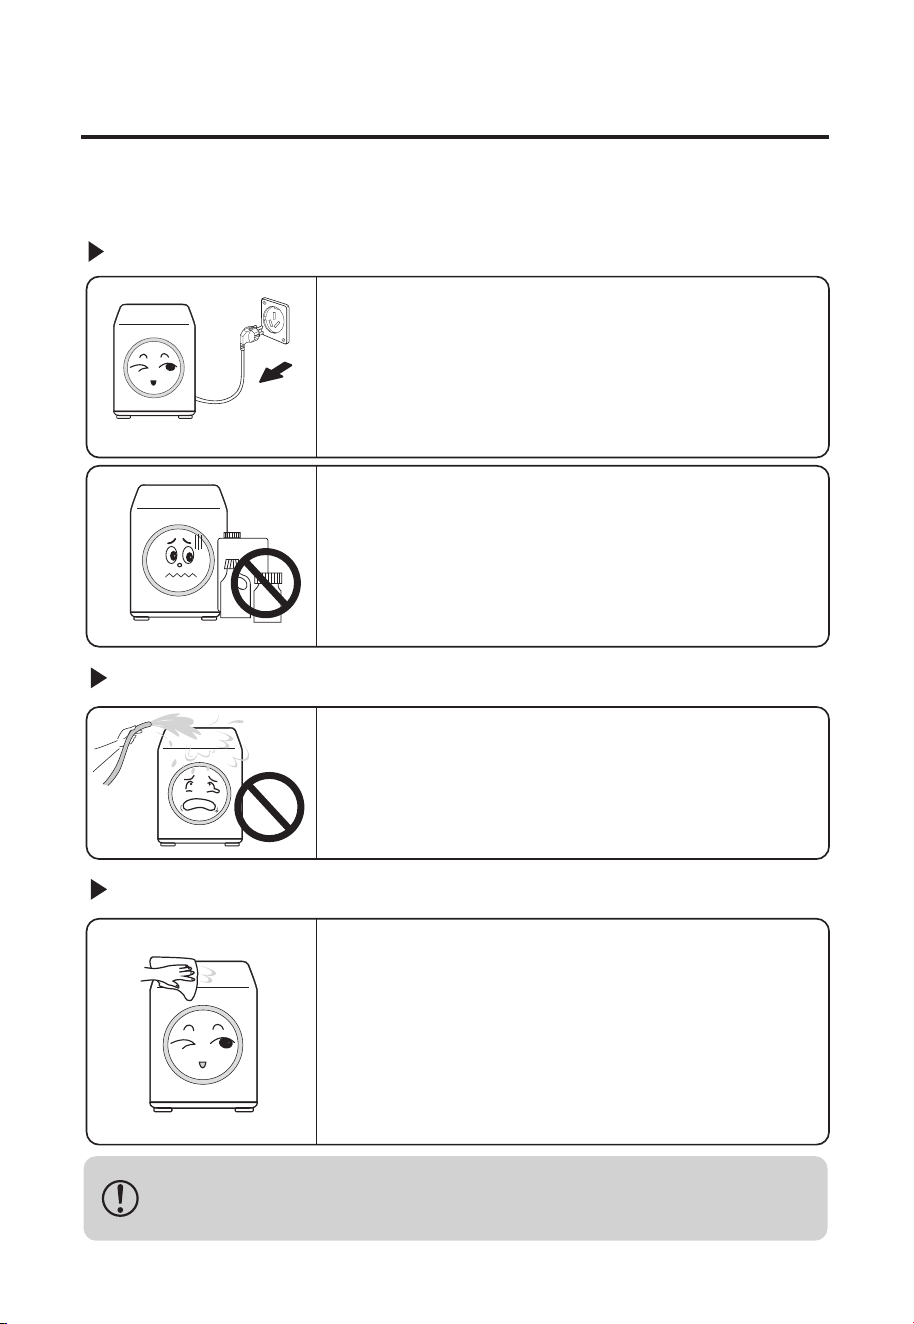
Unplug the power supply before servicing or cleaning the dryer.
Cleaning of clothes dryer
About Power Supply
About Products
How to Maintenance
Maintenance of clothes dryer
17
1. Remove the plug connection after power is switched
off for safety.
2. Do not touch with wet hands.
• For safety, do not touch power cords, plugboards, etc.
with wet hands.
3. Do not use volatile substance.
• Use of diluents, gasoline, bleach, etc. can cause
discoloration or damage to the product.
• Do not use synthetic detergents, benzene-containing
detergents, diluents, etc.
4. Do not sprinkle water on the machine surface.
• Do not clean the product directly with water, which can
lead to electric shock and product failure.
• Do not spray mild detergent directly on the product, spray it on a clean
cloth and wipe it.
5. Clean the top of the dryer.
·Clean the dryer with wet cleaning cloth,avoid using
detergent.
Clean the filter
Internal filter, external filter
18
• Do not drink condensate water.
• After each use, please empty the Water container in time.
• When the flash and dryer paused during operation, empty the water
container and press the Start.
• When the Water container is full, remove the Water container with both
hands. (Falling Water container can cause injury.)
Empty Water Container
Maintenance of clothes dryer
1. Use both hands to hold and pull out the Water
container.
2. Pour out the water and put it back in place.
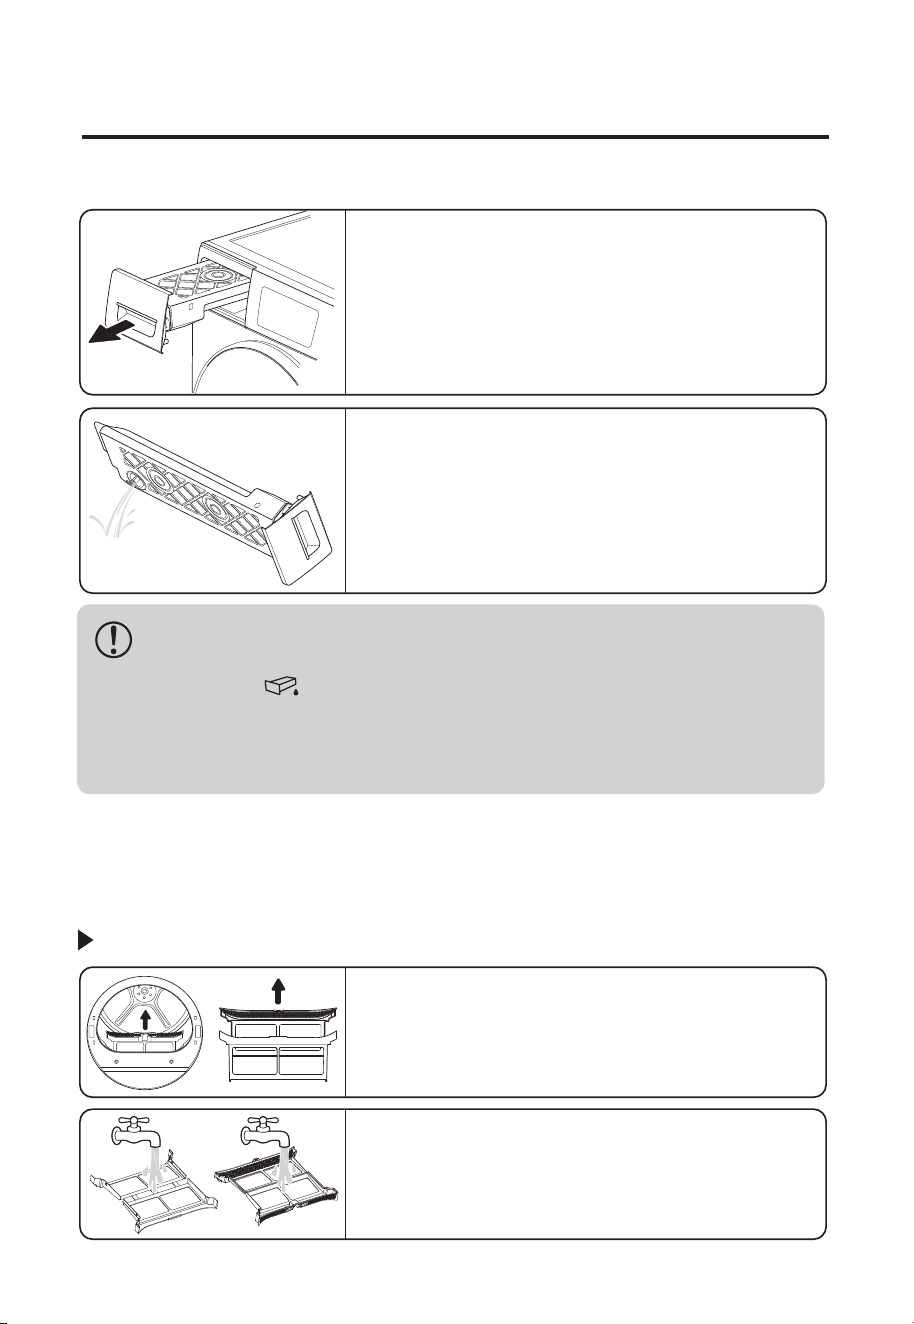
1. Open the door and pull the filter up and out.
2. Pull the internal filter up and out.
3. Each filter is cleaned with a brush and then
washed with clean water.
In order to reduce drying time and save energy, please clean the filter before and after
use.
Clean heat exchanger
3. Pull out that handle ;
19
4. Assemble the dried filter and put it back in place.
· filter may be damaged, please pay attention to the
direction when installing.
· Do not use clothes dryers without filters!
The color of the filters may change, which does not
affect the normal use.
1. Open the heat exchanger cover under the machine.
(Open the lid by pressing it with your hand and pulling
it outward.)
4. Clean the surface of the heat exchanger with a
brush, and the working efficiency of the dryer can be
greatly improved after the pile-up fluff is cleaned.
2. Rotate the two locking fasteners.
It is recommended that the heat exchanger be cleaned once a month. Too much dust
on the heat exchanger can cause product performance to degrade, so please clean
the heat exchanger on time.
Clean the filter
Maintenance of clothes dryer
Cooling air inlet cleaning
Humidity sensor
Door Cleaning
• Do not remove rubber from the door.
20
In order to reduce drying time and save energy, please clean up before and after use.
Clean heat exchanger
Maintenance of clothes dryer
• The surface of the heat exchanger is sharp, do not clean directly by hand.
Please wear protective gloves.
• Exerting pressure on the heat exchanger causes the fins to deform.
• Please do not sprinkle water directly to clean up.
1. If dust accumulates at the air inlet on the front of the
product, clean with a wet cloth.
• Dust accumulates and flows into the product, which
may cause in abnormal operation or fire, so please
clean it up in time.
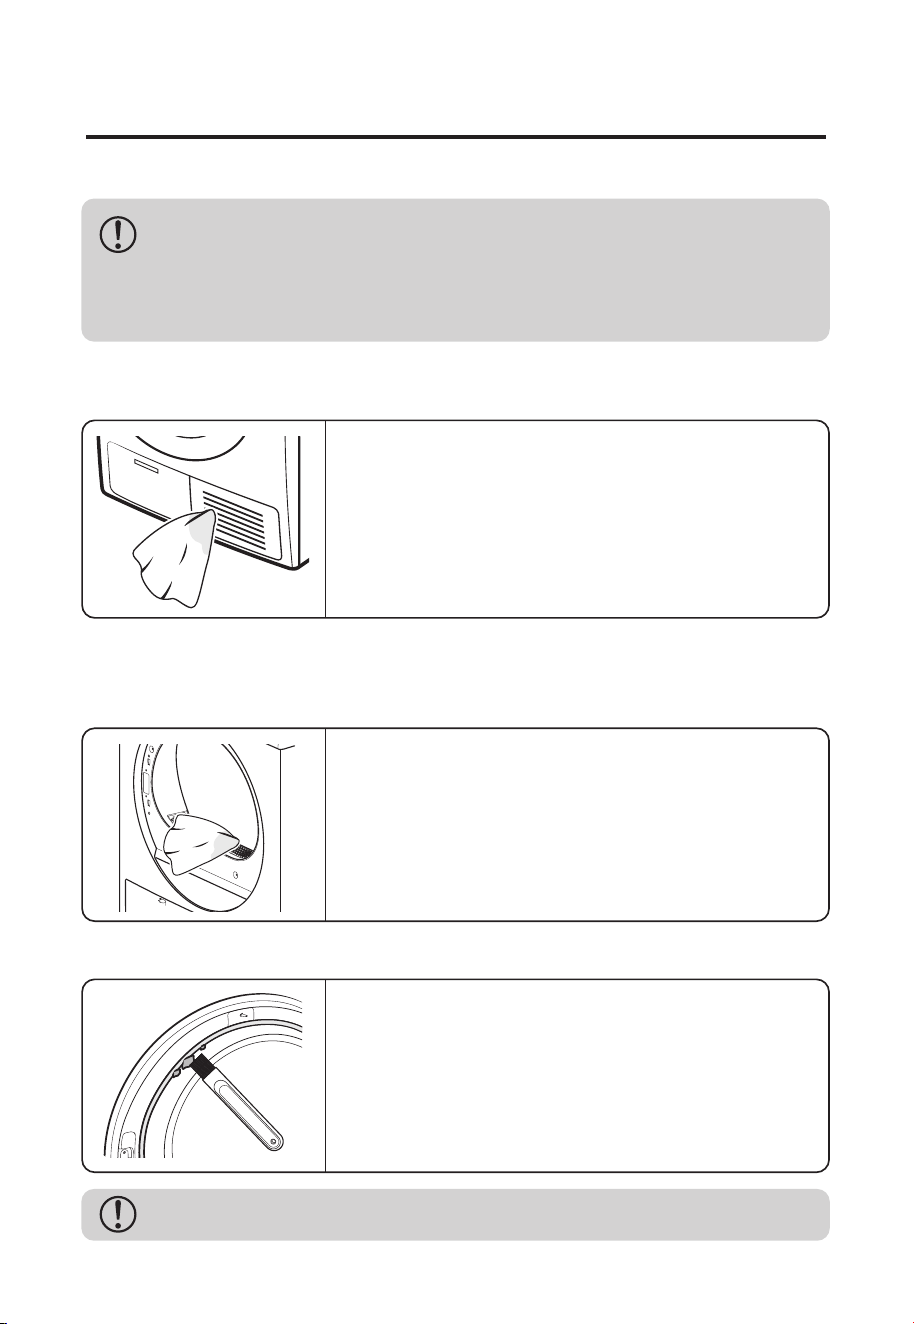
1. Clean the sensor surface with a soft cloth.
• To ensure good use effect, periodically clean the
sensor surfaces on time.
• Dust buildup on the sensor interferes with the opera-
tion of drying, resulting in increased drying time.
1. Dust or fluff may accumulate inside the door. Please
clean with a soft cloth and brush.
Water freezing treatment in Water container
• Please put the Water container in warm water.
Model
Parameters
Rated voltage
Rated frequency
KD-HT10JP-GKD-HT9JP-G
50Hz
220V-240V~
5~35°C
680W
10.0kg9.0kg
50kg
850 x 598 x 660mm
R134a
310g
50Hz
220V-240V~
5~35°C
680W
50kg
850 x 598 x 660mm
R134a
310g
Rated Power
Operating ambient temperature
Rated dry clothing capacity
Net weight
Dimensions
Refrigerant
Quantity of refrigerant
Specification
21
Freezing treatment in winter
Maintenance of clothes dryer
• The condensate water in the hose freezes when the temperature is too
low, causing the product to fail.
If the temperature is below zero degrees Celsius and your dryer is frozen, you can:
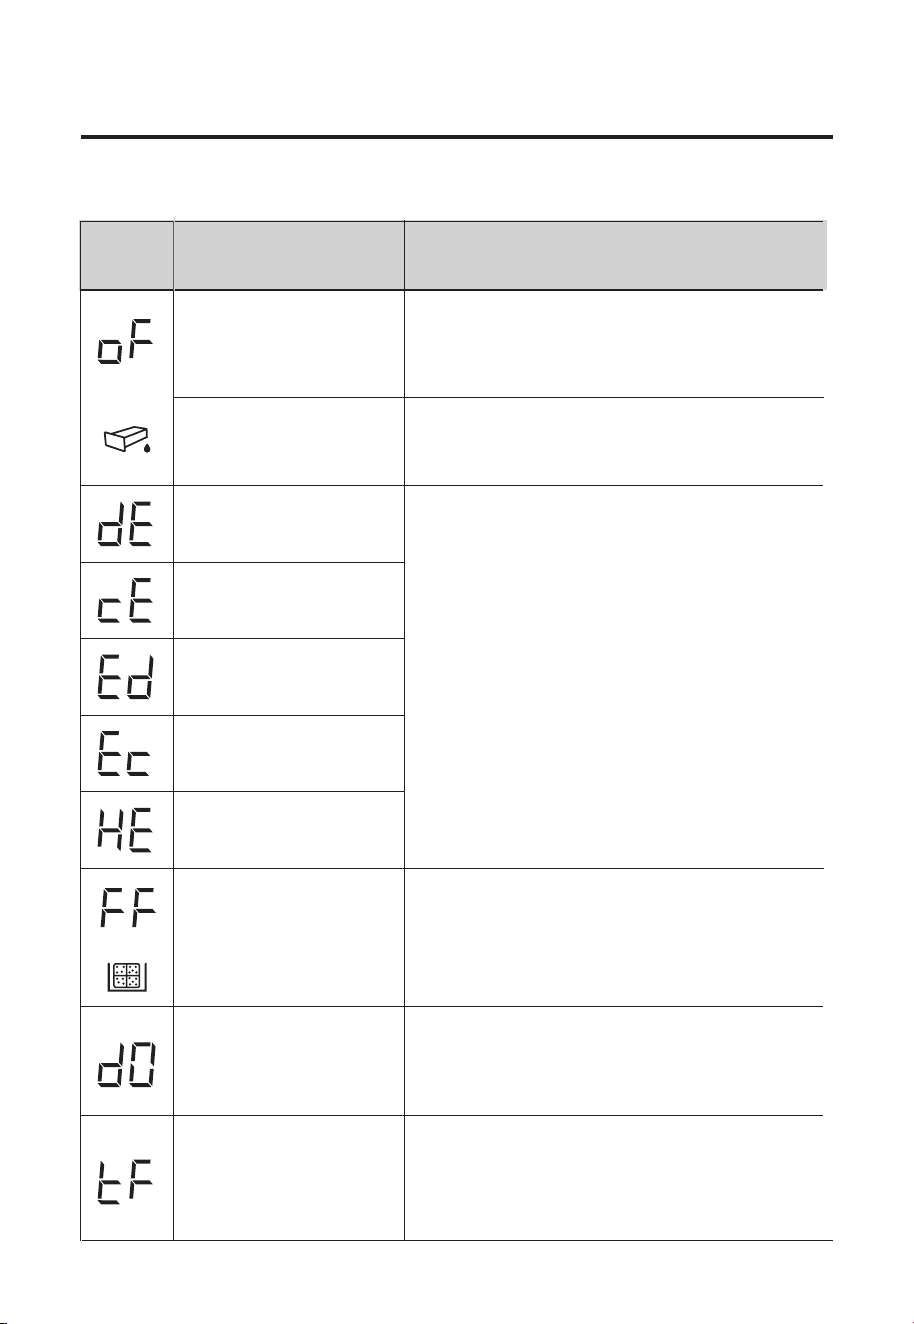
During freezing, "oF" error and "empty water container" prompt for freezing.
Treatment of drain hose:
• Put it on with a hot towel.
• The residual water in the pipe will freeze in winter, so please clean the water after
the dryer is used.
22
Troubleshooting
Error
Code
Code Description Resolution
Sometimes it may not be a fault if the following conditions occur. Before call service,
please check and confirm according to the following list.
The Water container is full,
the condensate water is
frozen, and the drainage
pump operates improperly.
If the environment where
the product is installed
below zero?
Compressor exhaust pipe
temperature sensor error
Condenser exhaust pipe
temperature sensor error
If the door open during
operation of the dryer?
Empty the water container and start the dryer.
If the problem occurs repeatedly, please contact
the after-sales service.
Refer to Winter Freezing Treatment.
If the problem occurs repeatedly, please contact the
after-sales service.
Clean the filter and restart.
If the problem occurs repeatedly, please contact the
after-sales service.
Is the ambient temperature below 0 °C? Pls transfer
to the temperature of 5~35°C for use.
If the problem occurs repeatedly, please contact the
after-sales service.
Close the door and restart.
Appropriately reduce the amount of clothes dried.
If the problem occurs repeatedly, please contact the
after-sales service.
Unplug and wait for a while before restarting.
If the problem occurs repeatedly, please contact
the after-sales service.
Motor abnormity alarm
Drying heating abnormality
Filter blockage or motor failure
The abnormality of ambient
temperature
or
or
Motor communication
failure
Please confirm the following before contacting customer service.
Problem Troubleshooting
The dryer is not
working.
Distortion of
clothes
lint on the
clothes
Clothes wrinkled
No heating
Drying time is
too long
Noise
Unevenly and
residual moisture
moisture residues
Has a smell
23
• Check that the power plug is plugged into the power supply.
• Check home's circuit breaker and fuse.
• Check that the dryer door is closed.
• Press the Start.
• Empty the water container.
• Clean the filter.
• Select the drying program according to the type of fibre.
• Do not overload.
• Whether the heat exchanger is clean.
• Whether the dryer is in the right environment.
• Whether the cooling air inlet of the dryer is unblocked.
• Clean the filter.
• Check home's circuit breaker and fuse.
• Check that the filters and heat exchangers are clean and clean them if
necessary.
• Choose the heat program except Cool air.
• Some clothes can be washed, but not properly dried.
• Check the laundry Washing mark on the clothes before drying.
• Select the drying program according to the type of fibre.
• Reduce the amount of clothes.
• Reduce the amount of clothes.
• Select Warm air program to dry again.
• Clothes of close thickness are put together to dry.
• Odorous items such as strong detergents, paints, or varnishes may enter
the dryer with the air around them. If there is such smell in the air, please
ventilate before using the dryer.
• Check that the filter is cleaned before placing the clothes.
• Clothes that are prone to get lint and easy to stick lint should be
dried separately.
• Make sure the pocket is empty.
• Check that objects such as nails, coins, keys, etc. are inside
drum. Please remove them promptly.
• Check that the dryer is positioned horizontally.
• A buzz like a hairdryer is a normal sound.
Troubleshooting
1 76543S7
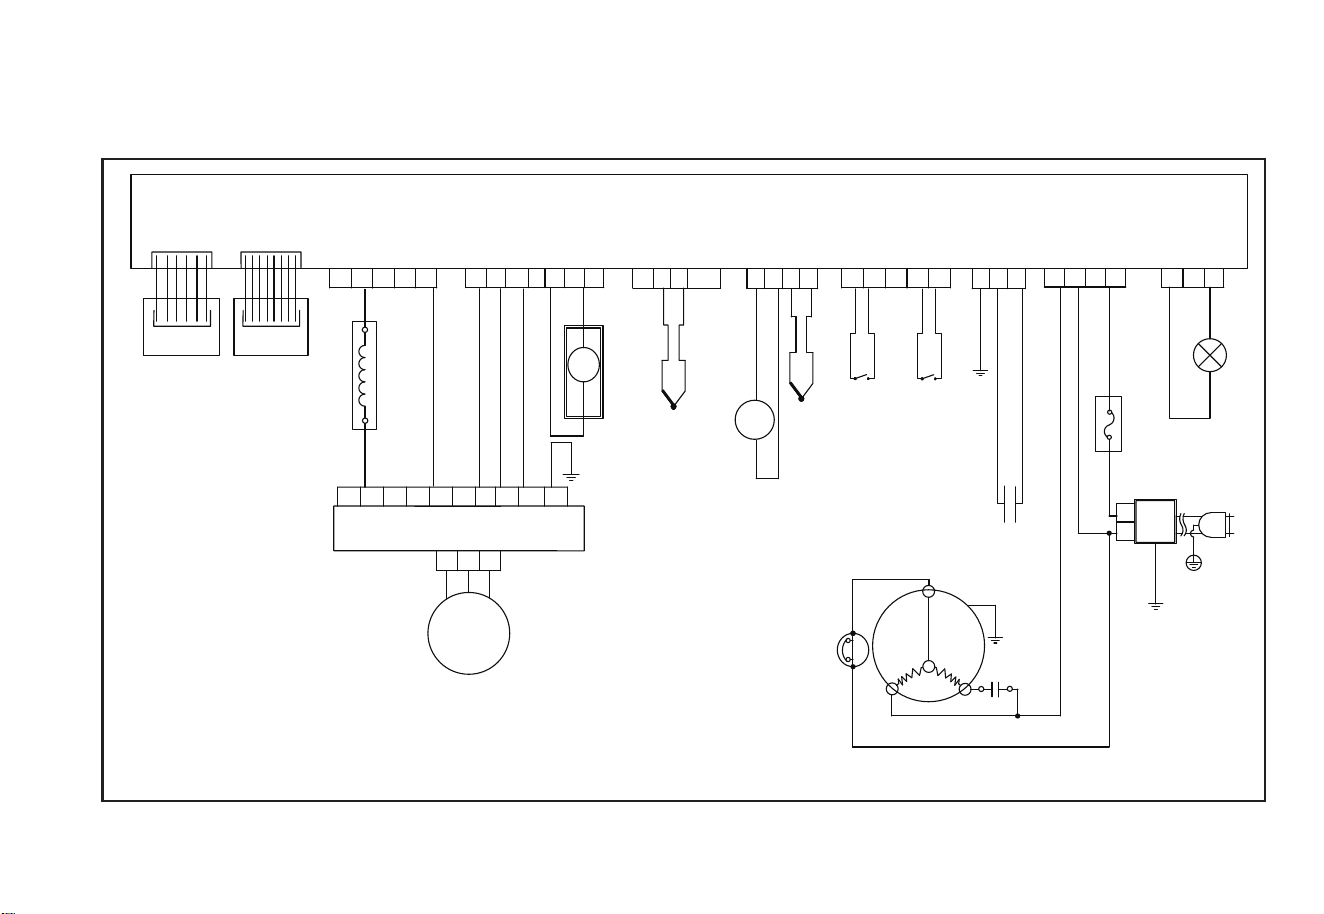
MAIN PCB
DRAIN PUMP
M
BLK[9P]
WHT[4P]
1
4
2
3
S1
WHT[5P]
MAIN SUB
COMMON
RUNNING
CAPACITOR
SR
C
COMPRESSOR
2
S2
WHT[7P]
S6
MOTOR
PROTECTOR
LAMP
3
1 2S12
WHT[3P]
WHT[7P]
5 24S10
3 1
1
2
NOISE FILTER
N.F
PE
L
N
FUSE
DRUM MOTOR
INVENTER PCB
M
1 2 3
8 4 762 1 93
10 5
REACTOR
2 3
5
S9
2
1
4
S14
3 4
1 2
CN4
WHT[5P]
1
3
DOOR SWITCH
FAN
DISCHARGE NTC
HUMIDITY
SENSOR
COND-OUT NTC
7
1~6
8
9~10
CN3
WATER SWITCH
WHT[4P]
WHT[10P]
WHT[3P]
LEDMTOUCH
24