ge.com
Safety Instructions ... 9-4
Operating Indru_ions
Clock and Timer . ...... ] 0
Conuols ............. 6, 7
()yen ................ 8, 9
Power Outage .......... 7
Sabbath Feaune ..... 13, 14
Self-Cleaning ....... 15, 16
Special Features ........ 19
SurPace Units ........... 5
Thermostat ........... ] 4
Timed Baking and
Roasting Features ...... 11
Care and Cleaning
Broiler Pan and Grid ... 20
Conuol l_obs ......... 17
Drip Pans ............. 21
Heating Elements ...... 17
I Jft-Off Oven Door . .... 19
Lift-Up Cooktop ....... 21
Light ................. 20
Sheh'es ............... 18
Storag> Drawer . ....... 20
Surl_ace Units .......... 21
Vent ................. ] 8
Troubleshooting
Tips .............. 29-24
Accessories ........... 30
Consumer Support
Consumer
Support ...... Back Coxer
Product
Registration ........ 95, 96
Wanantv ............. 31
JBP22
JBP24
JBP25
JBP27
Write the model and serial
numbers here:
Model #
Serial #
You can find them on a label
behind the storage drawer on
the fl'ont of the range fl'ame.
49-80368 !1-05Jfl
iMPORTANTSAFETYiNFORMATiON.
READALLiNSTRUCTiONSBEFOREUSING.
!
Foryoursafety,the informationin this manualmustbe followed tominimizetherisk of fire,electricshock,orto
preventpropertydamage,personalinjury,or lossoflife.
A WARNINGANti-TIPDEVICE
All rangescantip andinjurycouldresult
Topreventaccidentaltippingoftherange,attachitto thewaftandfloor byinstallingtheAnti-tip devicesupplied.
If theAnti-tip device suppliedwith therangedoesnotfit this application,usethe universa/Anti-Tipdevice
WB2X7909.
Tocheckifthe deviceisinstalledand engagedproperly,removethestoragedrawer andinspecttherear
levelingleg.Make sureit fitssecurelyintotheslot.
Ifyou pull tile range out fiom tile wallfor any reason, make suie tile defice is properly engaged when
you push the range back against the wall. If it is not, theie is a possible ,isk of tile range tipping over
and causing i,_u U if you or a child stand, sit or lean on all open door.
Please ,efbr m the Anti-Tip defice infbnnation ill this manual. Failu,e to rake this precaution could
result ill tipping of tile range and inju, T
IMPORTANTSAFETYNOTICE
TheCaliforniaSafeDrinking Waterand ToxicEnforcementAct requiresthe Governorof Californiatopublisha
fistofsubstancesknowntothe statetocause cancer,birthdefectsor otherreproductiveharm,andrequires
businessesto warn customersofpotential exposuretosuch substances.
Thefiberglassinsulationin self-dean ovensgives off a verysmallamountofcarbonmonoxideduringthe
cleaningcycle. Exposurecanbe minimizedbyventingwith an openwindow orusinga ventilationfan orhood.
SAFETYPRECAUtiONS
2
Whenusingelectricalappliances,basicsafe_/precautionsshouldbe followed,includingthefollowing:
!?:Use this appliance only %r its intended puq)ose
as desc,ibed ill this Owner's Manual.
iJi;:iBe sure your appliance is proped) installed and
grounded b} a qualified installer ill accordance
with tile provided installation instructions.
iJi;:iHave tile installer show xou tile location
of the circuit breaker or fllse. Mark it for easx
reference.
Do not attempt to repair or replace any
part of your range/mless it is specifically
recommended ill this manual. All other
servicing should be referred to a qualified
technician.
iJii:iBetbre perfbmling ally serdce, disconnect
the range power supply at the household
distribution panel by removing the fuse or
switching off the ci,vuit breaker
_: Do not leave children alone---children should
not be left alone or unattended ill all area
where all appliance is ill use. They should never
be allowed to sit or stand on ally part of tile
appliance.
iJii:iDo not allow anyone to climb, stand or hang
on tile dooI; storage drawer or cooktop. They
could damage tile i('angeand even tip it oveI,
causing severe pe,sonal i,_u,>
iJii:iIa,ge scratches or impacts to glass doo,s call
lead to broken or shattered glass.
iJii:iDo not store flammable mate,ials ill all oven or
near the cooktop.
_ CAUTION:I[ell]S Of in[eles[ [o childien
should not be stored ill cabinets above a range
or on the backsplash of a range---children
climbing on the range to reach items could be
se,iously injured.
iJi;:iNever weal loose-fitting or hanging ga,lnents
while using the appliance. Be carefifl when
reaching fbr items stored over the range.
Flammable material could be ignited if brought
ill contact with hot surfilce units or heating
elenlents and may cause severe buIns.
iJii:iUse only d U pot holde*s--moist or damp pot
holdeIs on hot surfi_ces may result ill burns
fiom steam. Do not let pot holdeis touch hot
surfi_ce units or heating elements. Do not use
a towel or other bulky cloth ill place of pot
holdeIs.

ge.com
WARNING!
SAFETYPRECAUTIONS
_ For your safety, never use your appliance %r
wa,ming or heating the morn.
_ Teach children not to play with the controls or
any other part of the range.
_ .MwayskeeI) dish towels, dish cloths, pot holders
and other linens a safe distance flom your
i'ange.
iJii:iAlways keeI) wooden and plastic utensils and
canned fbod a safe distance flom your _'ange.
iJii:i.Mwayskeq) combustible wall coverings,
cu_*ains or &'apes a safe distance fiom your
Fange.
_: Do not let cooking grease or other flammable
materials accumulate in or near the _'ange.
_: Keep the hood and grease filte_s clean to
maintain good venting and to avoid grease fires.
_: Do not use water on grease fires. Nexvr pick up
a flaming pan. Turn the controls off_Smother a
flaming pan on a surfi_ce unit by coveting tile
pan completely with a well-fitting lid, cookie
sheet or flat tin> Use a multi-pu,pose d_"
chemical or fbamwpe fire extinguisher
lqaming g_ease outside a pan can be put out by
coveting it with baking soda o_, if available, by
using a mulfi-puq)ose dU chemical or
fbam-type fire extinguisher
Flame in the oven can be smothered completely
by closing tile oven door and turning tile oven
of{or by using a muhi-puq)ose dU chemical or
foamWpe fire extinguisher.
iJii:iDo not touch tile surfi_ce units, the heating
elements or tile interior surfilce of tile oven.
These surfilces may be hot enough to burn
even though they are dark in color During and
after use, do not touch, or let clothing or other
flammable materials contact tile surfilce units,
areas nearby the surfilce units or any interior
area of tile oven; allow sufficient time for
cooling fi_st.
Potentially hot surfilces include the cooktop,
areas fi_cing the cooktop, oven vent opening,
surfilces near the opening, crevices around the
oven door
REMEMBER:Tile inside surfi_ce of the oven Inav
be hot when the door is opened.
_ Do not store or use combustible materials,
gasoline or other flammable vapo,s and liquids
in tile vicinity of this or any other appliance.
COOKMEATANDPOULTRYTHOROUGHLY...
Cookmeatandpoultrythoroughly--meattoat leastanINTERNALtemperatureof 160°Fandpoultrytoatleastan
INTERNALtemperatureof I80°ECookingtothesetemperaturesusuallyprotectsagainstfoodborneillness.
SURFACECOOKINGUNITS
Useproperpansize--select cookwarehavingfiat bottomslargeenoughtocover thesurfaceunitheating
element.Theuseofundersizedcookwarewill exposea portionofthe surfaceunitto direct contact andmay
resultin ignitionof clothing.Properrelationshipof cookwareto surfaceunitwill alsoimproveefficiencf.
_: Never leave tile surfi_ce units unattended
at high heat settings. Boilove_s cause smoking
and greasy spillove_s that may catch on fire.
_: Do not use aluminum fbil to line the drip pans
or anywhere in the oven except as described in
this manual. Misuse could result in a shock, fire
hazard or damage to the _'ange.
iJii:iBe sure the drip pans and the vent duct are not
covered and are in place. Their absence during
cooking could damage _'ange parts and wiring.
_: Only certain t}pes of glass, glass/ce,_amic,
earthenware or other glazed containers are
suitable fbr cooktop service; others may break
because of the sudden change in tempemt/ue.
_: To minilnize the possibility of burns, ignition of
flammable materials and spillage, the handle of
a container should be turned toward tile center
of the _'ange without extending over nearby
surfilce units.
iJii:iAlways turn tile sur[iace units off befbre
removing cookware.
3
IMPORTANTSAFETYINFORMATION.
READALLINSTRUCTIONSBEFOREUSING.
4
SURFACECOOKINGUNITS(cont.)
iJii:iDo not imme,se or soak the removable suifi]ce
units. Do not put them in a dishwasher. Do not
self clean the surfi)ce units in the oven.
When preparing flaming fbods under the hood,
ttlFn the fire on.
To axoid the possibility of a burn or electric
shock, always be certain that the controls fbr all
surfi_ce units are at the OFFposition and all coils
are cool befbre attempting to lift or remove
a unit.
f_:Foods fbr flying should be as d,_' as possible.
Frost on flozen fbods or moistu{e on flesh
foods can cruise hot fi_tto bubble up and over
the sides of the pan.
f_:Use little fi_tfbr effective shallow or deep fi/t
flying. Filling the pan too fldl of lilt can cause
spillove,s when food is added.
f_:If a combination of oils or fi_tswill be used in
flying, stir together befbre heating, or as lilts
melt slowly.
!_:Clean the cooktop with caution. If a wet sponge
is used to wipe spills on a hot cooktop, be
carefld to avoid steam burns.
!:_:Reep an eve on foods being flied at high or
medium high heat settings.
A WARNING'!
OVEN
f_:Always heat lilt slowly, and watch as it heats.
_: Use a deep filt the_lnometer whenever possible
to prexvnt overl_eating lilt beyond the smoking
point.
Standawayfrom therange whenopeningtheovendoor.Hotair orsteamwhich escapescancauseburnsto
hands,faceand/or eyes.
iJii:iDo not heat unopened food containe,s.
Pressure could build up and the container
could bu,st, causing an injm>
!_::Ree I) the oven xvnt unobstructed.
i_))Ree I) the oven flee flom grease buildup.
iJii:iPlace the oven shelf in the desired position
while the oven is cool. If shelves must be
handled when hot, do not let pot holder
contact the heating elements.
iJii:iPulling out the shelf to the stop-lock is a
convenience in lifting heaw floods. It is also a
precaution against burns flom touching hot
surfilces of the door or oven walls.
iJii:iWhen using cooking or roasting bags in the
oven, follow the manufi_cturer's directions.
_: Do not use the oven to dU newspape,s.
If overheated, they can catch on fire.
iJii:iDo not use the oven fbr a storage area. Items
stored in an oven can ignite.
iJii:iDo not leave paper products, cooking utensils
or fbod in the oven when not in use.
iJii:iDo not use aluminum foil to line oven bottoms,
except as suggested in this manual. Improper
installation of aluminum foil ma_ resuh in a risk
of electric shock or fire.
SELF-CLEANINGOVEN
Donot useovencleaners.Nocommercialovencleaneror ovenlinerprotective coatingof anykindshouldbe
usedin or aroundanypart ofthe oven.Residuefromovencleanerswill damagetheinsideof theovenwhenthe
self-cleaningcycleis used.
_: Do not clean the door gasket. The door gasket
is essential fbr a good seal. Care should be
token not to rub, damage or move the gasket.
iJii:iBefbre self cleaning the oxen, remove the
broiler pan, grid and other cookware.
iJii:iBe su,e to wipe up excess spillage befbre
starting the self cleaning operation.
_: If the selfkleaning mode malflmcdons, mrn the
oven off and disconnect the power suppl}: Have
it serficed by a qualified technician.
iJi;:iClean only parts listed in this Owner's Manual.
READANDFOLLOWTHISSAFETYINFORMATIONCAREFULLY.
SAVETHESEINSTRUCTIONS
Usingthesurface units, ge.com
Throughout this manual, features and appearance may vary from your model.
i "/ 9
2
Be sure you turn the control knob to
OFFwhen you finish cooking.
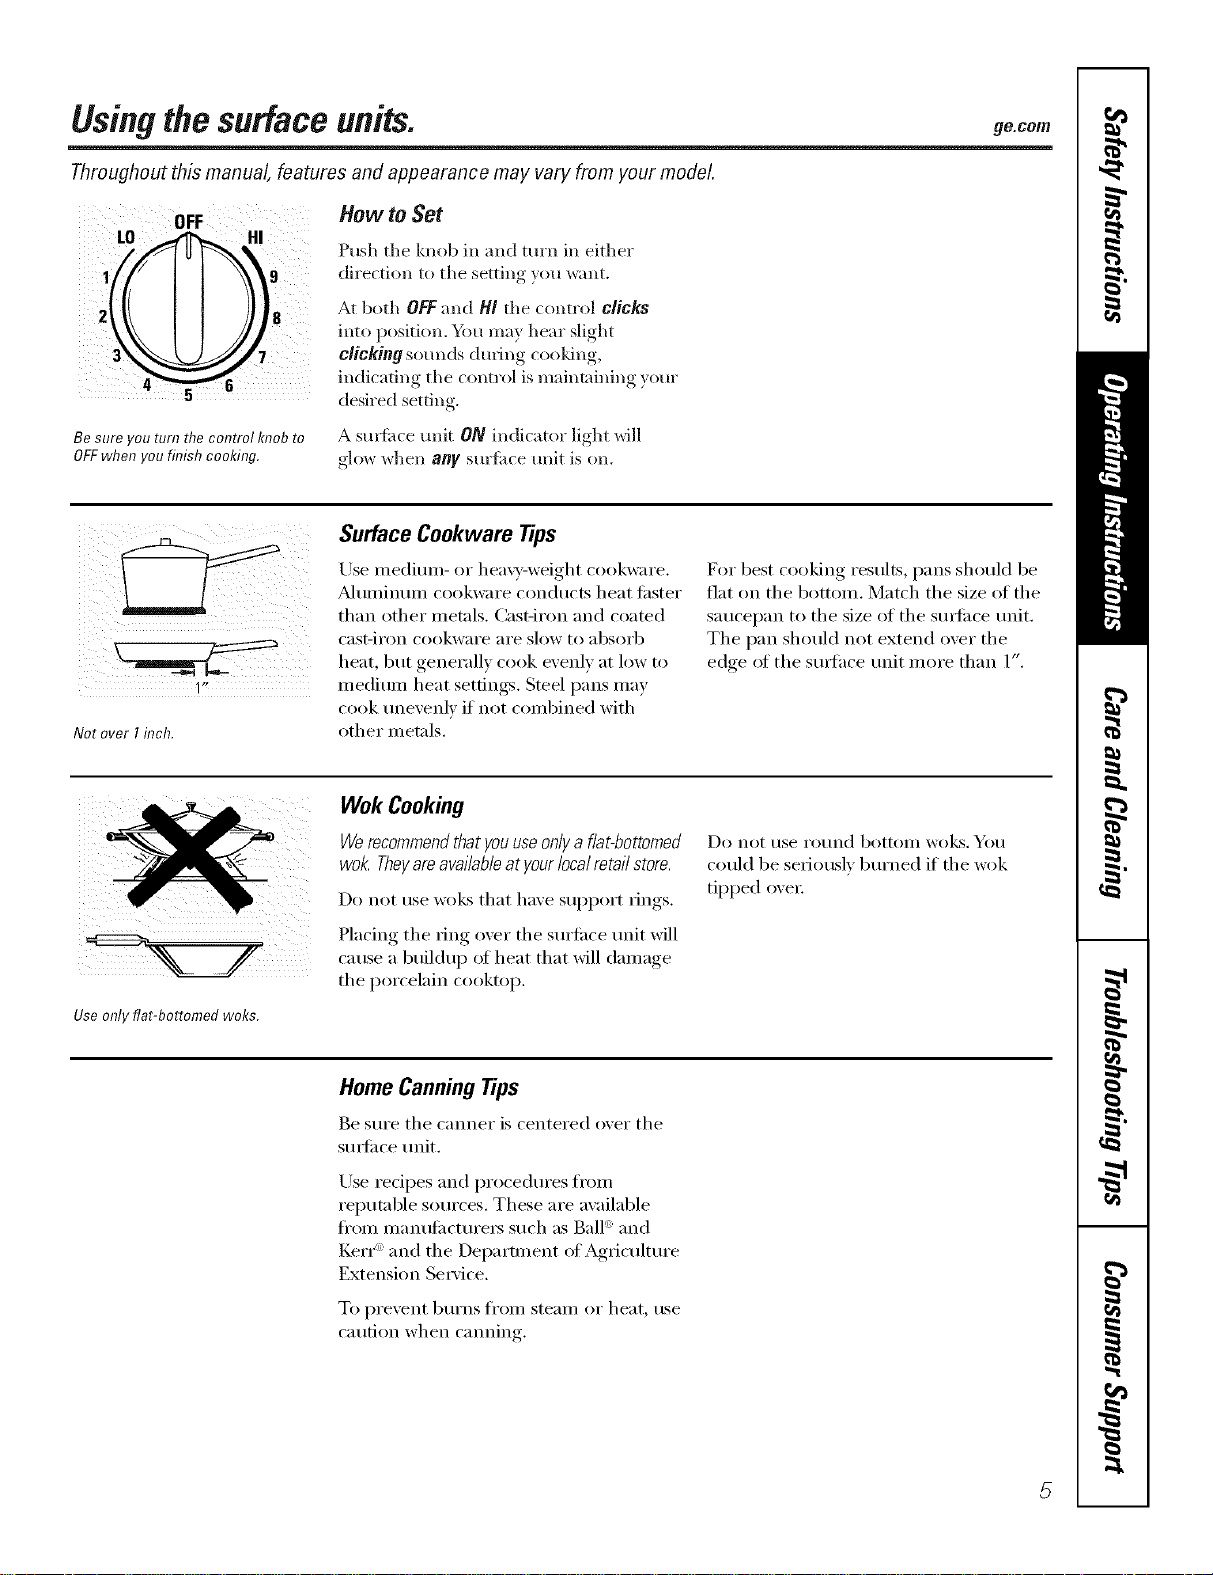
How to .get
Push the knob in and turn in either
direction to the setting you want.
At both OFFand/4/the control clicks
into position. Y_u may hear slight
clicking sounds dining cooking,
indicating tlle control is maintaining your
desired setting.
A suFIi_ce trait ON indicator light will
glow when any surlilce unit is on.
NotoverIinch.
Surface Cookware tips
Use medimn- or hea\y-weight cookware.
_dtllllintllll cookware condtlcts heat filster
than other metals. Cast-iron and coamd
cast-iI'on cookware ai'e slow t(:,absorb
heat, but generally cook evenly at low to
medium heat settings. Steel pans may
cook ullevelflV if not combined with
other metals.
For best cooking results, pans shouM be
fiat on tile bottom. Match tile size of tile
saucel)an to tile size of tile sm_li_ce refit.
The pan should not extend over the
edge ot the s/mfhce refit more than 1".
Use only flat-bottomed woks.
Wok Cooking
Werecommendthat youuseonlya flat-bottomed
wok. Theyareavailableatyour localretail store.
Do not rise wo]¢s that have suI)port rings.
Placing the ring over the surtilce unit will
cause a buildu l) of heat that will damage
the porcelain cooktop.
Do not t/se I'ot/nd bottoill Wo!cs. roll
could be serioush, bm'ned if tile wok
tipped oxer.
Home Canning Tips
Be sm'e tile canner is centered o_er tile
stmfi_ce refit.
Use redpes and procedures fl'om
reputable sources. These are available
fl'om manufi_ctm'e_ such as Ball': and
Kerr": and the Department ot Agricultm'e
Extension Service.
To pi'e'_ent b/lYns fi'oill steaill oi" heat, rise
caution when canning.
5
Usingtheovencontrols.
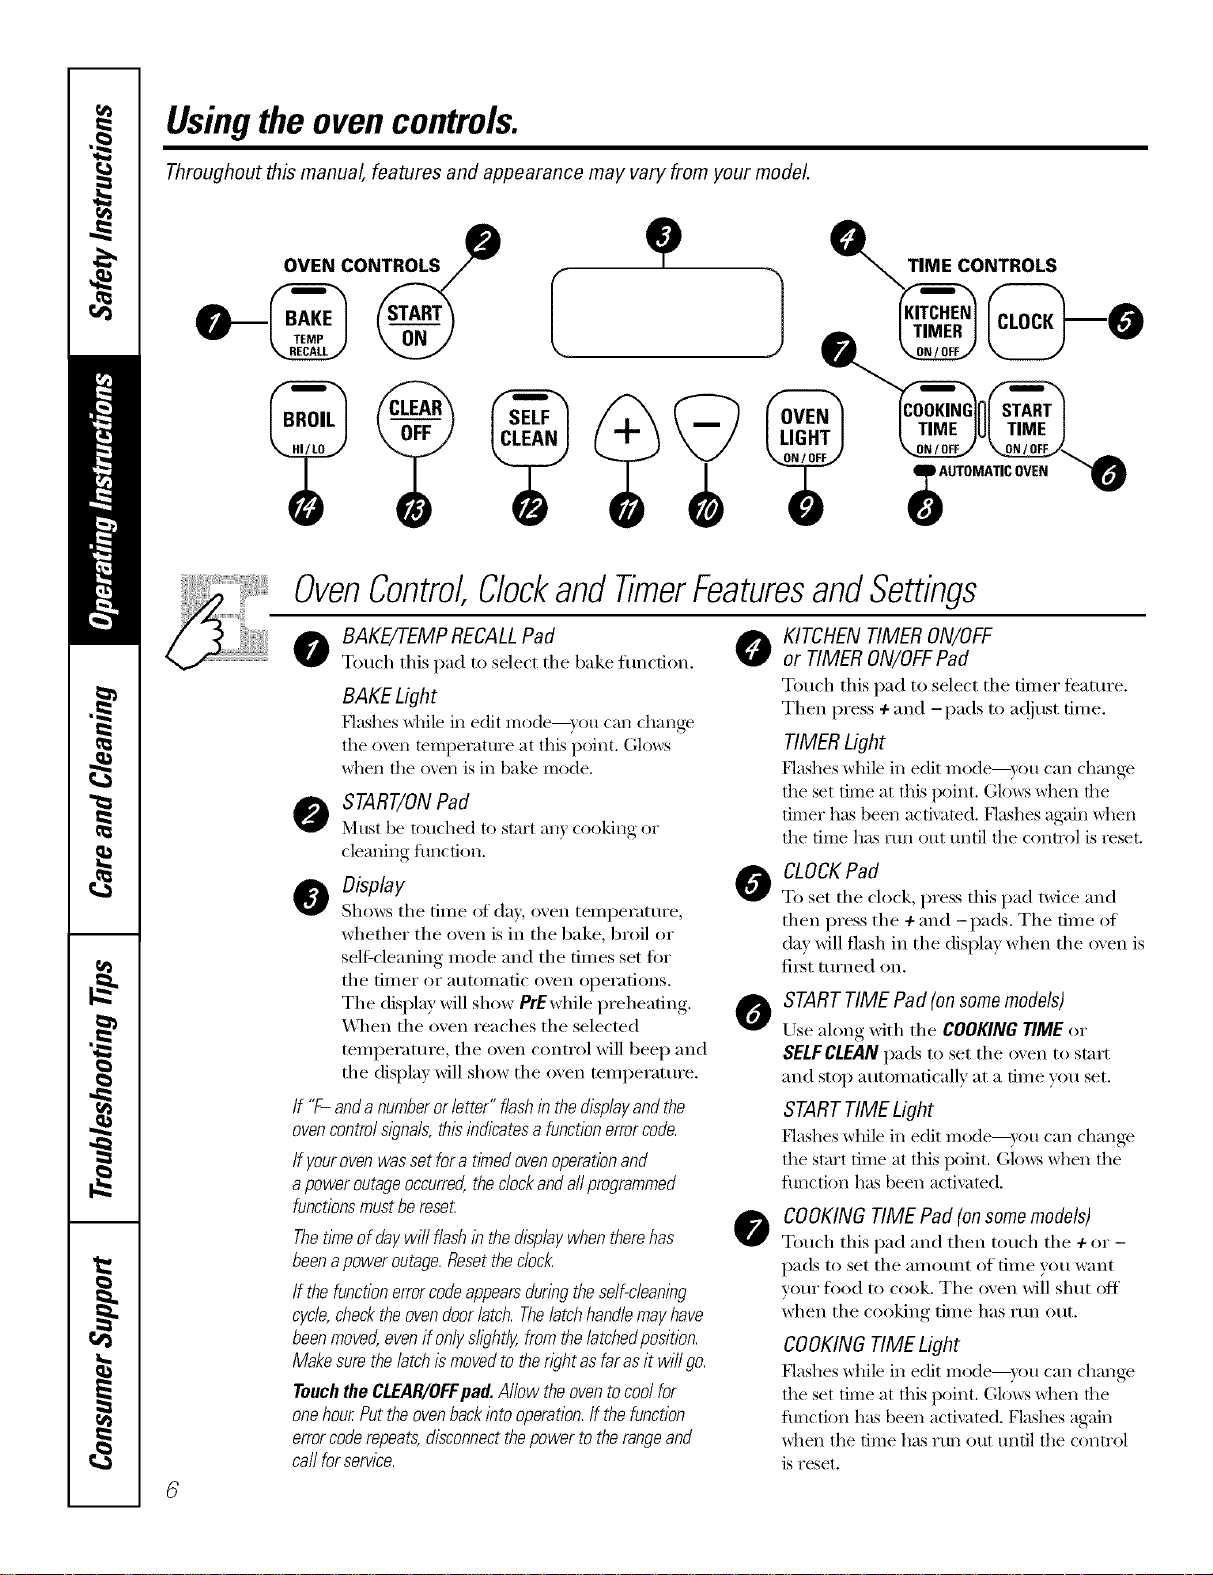
Throughout this manual, features and appearance may vary from your model.
OVEN CONTROLS
0
-}
,J
TIME CONTROLS
OvenControl,ClockandTimerFeaturesandSettings
o BAKE/7-EMPRECALLPad @
Touch tiffs pad to select tile 1lake function.
BAKE Light
Hashes _hile in edit I]'lode--}rO[l (-'_lIl (-h_lIl_e
the oven temperatt_re at this i/oint. Glows
_hen the o\en is in bake mode.
START/ONPad
_'ltlS[ be touched to start all} cooking or
cleaning function.
O Display
Shows tile tiIlle of day, oven teillperattlre,
whether the ()veil is in the bake, broil or
self=cleaning nlode and tile tiines set fi:,r
tile till/er or atltOlllatic ()Veil operations.
Tile display will show PrEwhile preheating.
_,_]/en tile oven reaches tile selected
ten/perature, tile oven control will beep and
tile display will show tile oven ten/perature.
If "F- and anumberor letter" flashin the displayandthe
ovencontrol sl)_na/s,this indicatesa functionerrorcode.
If yourovenwas set fora timedovenoperationand
apower outageoccurred,the clockand aftprogrammed
functionsmustbe reseL
Thetithe of day wi// flash in the displaywhen there has
beena power outage.Resetthe c/oc/_
If the function errorcodeappearsduring the self-cleaning
cycle,checkthe ovendoorlatch. Thelatchhandle mayhave
beenmoved,even if onlys/i)ht/y, from the/atchedposition.
Makesure the latch ismoved to then)ht as far asit wi// go.
Touchthe CLEAR/OFFpad.Allow the oven tocool for
onehour.Put the ovenbackinto operation./f the function
errorcoderepeats, disconnectthepower to the rangeand
ca//for service.
0
0
0
KITCHEN TIMER ON/OFF
or TIMER ON/OFFPad
Totlcb this pad to select tile tilller t_'attlI'e.
Then press + and -pads to a(!iust tin/e.
TIMERLight
_'lashes while ill edit nlode--yotl tail challge
the set dine at this I/oint. Glows when the
timer has been activated. Nashes again _]lei1
the tiine has rtm out until the control is reset.
CLOCK Pad
To set tile clock, press this pad twice and
then press tile 4-and -pads. Tile time of
day will flash in tile display when tile oven is
fiI_t turned Oil.
START TIME Pad (on some models)
Use along with tile COOKING TIME or
SELFCLEAN pads to set tile oven to start
and stop auton/aficallv at a time you set.
STARTTIME Light
Hashes wllile ill edit Illode--yotl tail challge
the start tiIne at this i/oint. (;lo_vs _hen the
fimction has been activated.
COOKINGTIME Pad (onsomemodels)
Touch this pad and then touch tile + or-
pads to set tile ai//otlnt of tiIne you want
your food to cook. Tile oven will shut off
when tile cooking tilne has run out.
COOKINGTIME Light
P'lashes while in edit Illode--}r()tl {-'_lI1change
the set time at this point. (;lo_:s _]leI1 the
flmction has been activated. Flashes again
_]leI1 tile time has run out until tile control
is reset.
ge.com
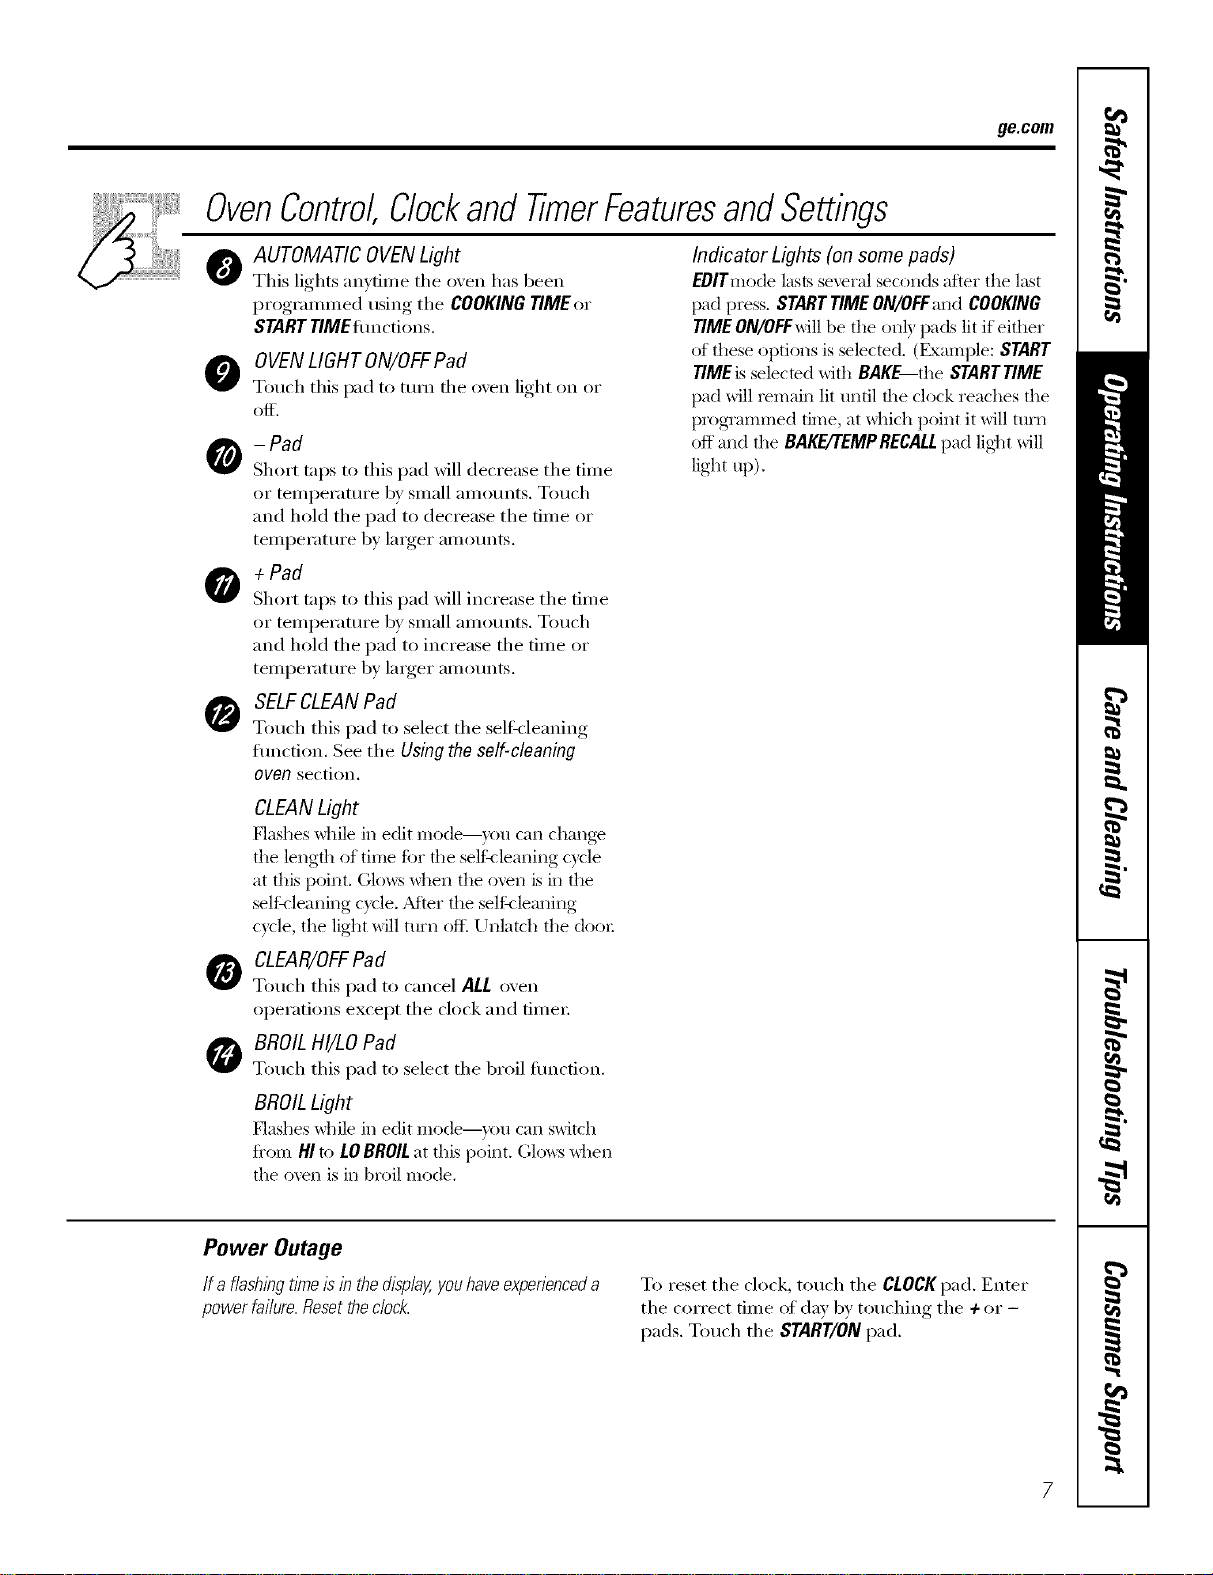
OvenControl,ClockandTimerFeaturesandSettings
O
AUTOMATIC OVENLight
This lights anytime the oven has been
progrannned using the COOKING TIME or
STARTTIMEflmctions.
O OVENLIGHTON/OFFPad
Touch this pad to turn the oxen light on or
Of[.
- Pad
Short taps to this pad will decrease the time
or temperature by small amotmts. Touch
and hold the pad to decrease the time or
teilll)ei'attli'e by larger aI//Otlnts.
+ Pad
Short taps to this pad will increase the time
or temperature by small amotmts. Touch
and hold the pad to increase the time or
temperatm'e by larger amounts.
SELFCLEANPad
Touch this pad to select the selfkleaning
fimction. See the Using the self-cleaning
oven section.
Indicator Lights (on some pads)
EOlTmode lasts several seconds after tile last
pad press. StaRT TIMEON/OFFand COOKING
TIMEON/OFFwill be the on b pads lit if either
of these options is selected. (Example: START
TIMEis selected with BAKE the STARTTIME
pad will remain lit until the clock reaches the
programmed time, at _hich point it will ttlI'I1
off and the BAKE/'rEMPRECALLpad lig]_t will
light up).
O
CLEANLight
[:lashes while in edit Illode--yotl c_lI1 changv
the length of trine ti)r the selth lemlfilg cycle
at this point. (;lcm:s when tile oven is in tile
selth leaning cycle. AJier the selth lemlfi_g
cycle, tile light will ttlI'I1 oit_ Unlatch the dooI:
CLEAR/OFFPad
Touch this pad to cancel ALL oven
operations except the clock and fime_;
BROIL HI/LO Pad
Touch this pad to select the broil flmcfion.
BROILLight
[:lashes while in edit Illode--yotl C_lI1 switch
fi'om HI to LOBROILat this point. Glows _hen
the oven is in broil mode.
Power Outage
If a flashlbgtl?neIslb the display,youhave experienceda
power fai/ure.Resetthe dock.
To reset the clock, touch the CLOCKpad, Enter
the correct time of day by touching the + or -
pads. Touch the START/ONpad.
Usingtheoven.
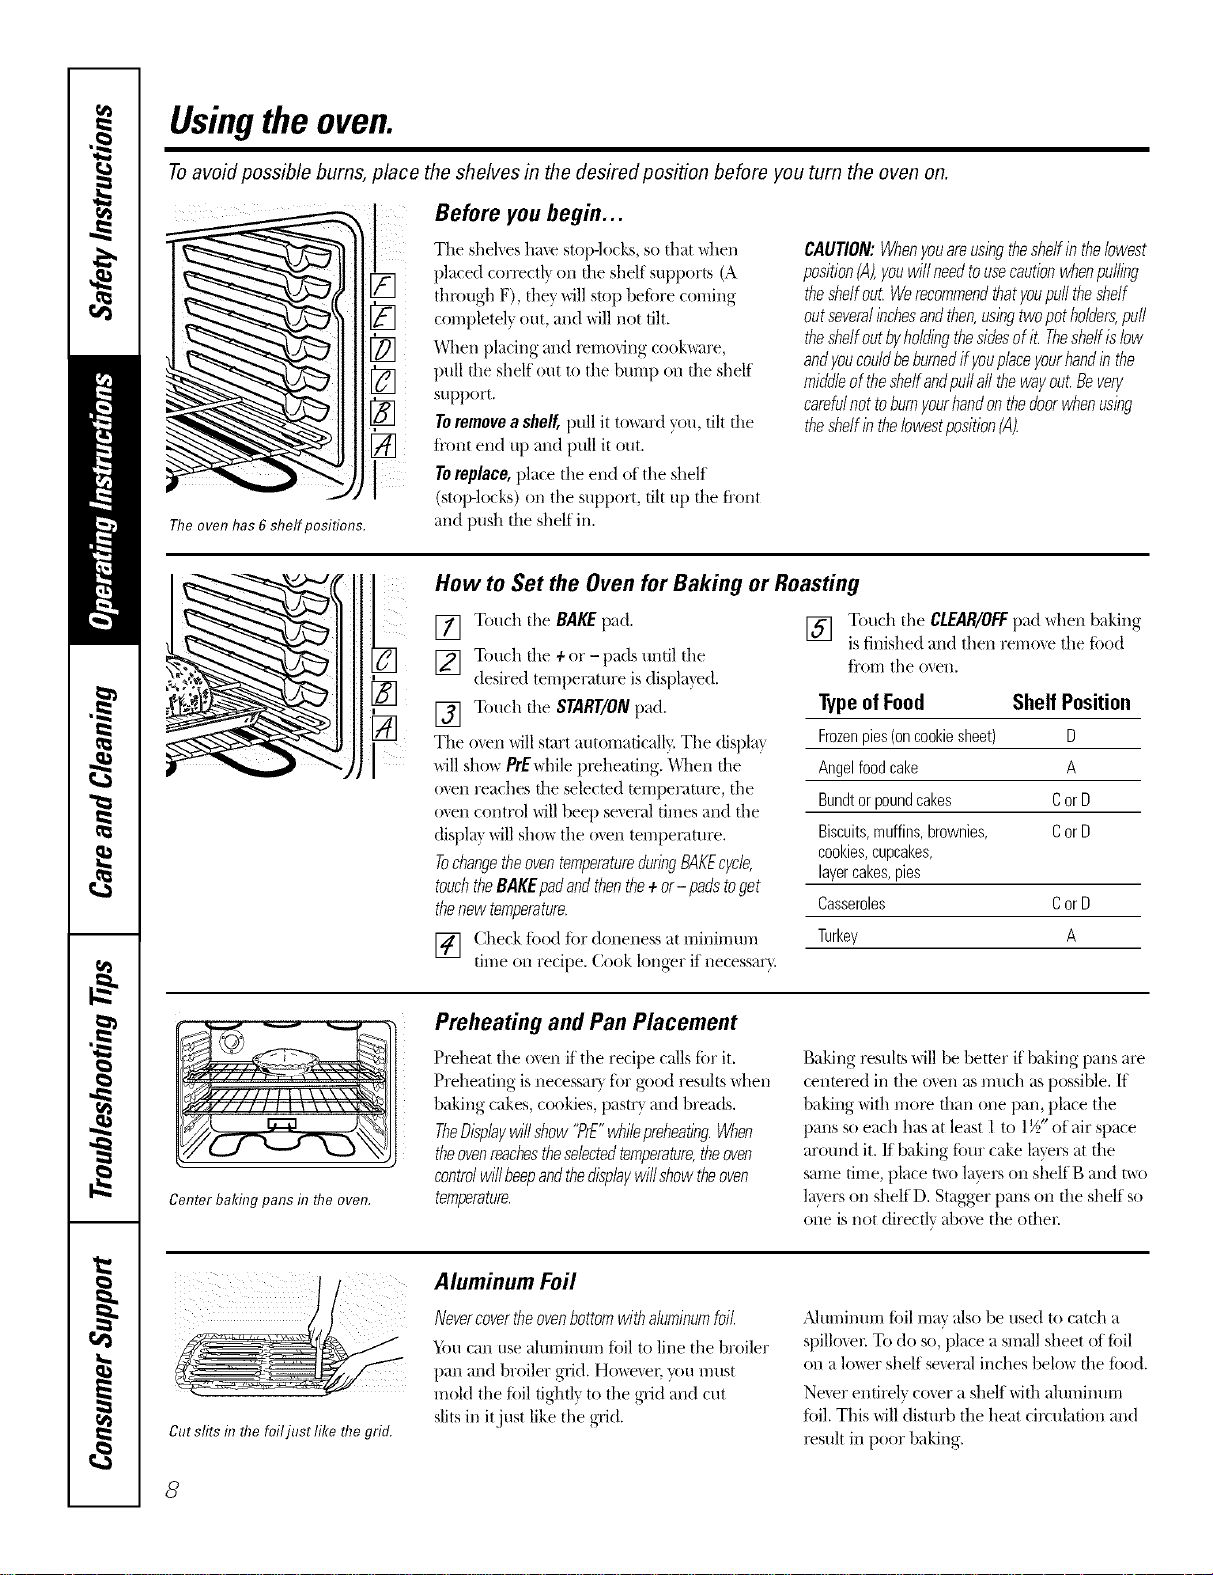
Toavoid possible bums, place the shelves in the desired position before you turn the oven on.
The oven has 6 shelf positions.
Before you begin...
The shelves have stop-locks, so that \_hen
placed correctl} on file shelf supports (A
through F), they will stop beiiwe coming
completely out, and will not tilt.
When placing and l_mo_ing cook\_are,
pull file shelf out to tile bump on file shelf
support.
Toremove a shelf, pull it to_trd you, tilt file
ti'ont end up and pull it out.
Toreplace, place the eil(] of the shelf
(stop-locks) on tile support, tilt up file fl'ont
and push file shelf ill.
CAUTION:Whenyouare,usingthesheffinthebwest
position(A),youwill needtousecautionwhenpulling
theshelfout.Werecommendthatyoupufftheshelf
outseveralinchesandthen,usingtwopotholders,puff
theshelfoutbyholdingthesidesofit. Theshelfislow
andyoucouldbeburnedif youplaceyourhandinthe
middleof theshelfandpuffaftthewayout.Bevery
carefulnot toburnyourhandonthedoorwhenusing
theshelfintheIowestposition(A).
I
i?.
How to Set the Oven for Baking or Roasting
[] Touch the BAKE pad.
[] Touch tile + or - pads until tile
desired temperature is displa_ed.
[] Touch tile START/ONpad.
The men _ill start automatically. The displa}
_dll show PrEwhile preheating. When tile
oven reaches file selected temperatmv, the
o\en control will beep several times and the
displa} will sho_ tile oven tempenmlre.
TochangetheoventemperatureduringBAKEcycle,
touchtheBAKEpadandthenthe+or- padstoget
thenew temperature.
[] (._heckf_>odf_>rdoneness at minimum
tnne on recipe. Cook longer if necessar).
[] Touch the CLEAR/OFFpad when baking
is finished and then remme the ti_od
fl'orri tile oven.
TypeofFood Shelf Position
Frozenpies(oncookiesheet) D
Angelfoodcake A
Bundtorpoundcakes CorD
Biscuits,muffins,brownies, CorD
cookies,cupcakes,
layercakes,pies
Casseroles CorD
Turkey A
ll,, It
Center baking pans f17the oven.
Preheating and Pan Placement
Preheat tile oven if tile recipe calls tiw it.
Preheating is necessar_ ti)r good results \_hen
baking cakes, cookies, pastr?, and breads.
TheDisplaywillshow"PrE"whilepreheating.When
theovenreachestheselectedtemperature,theoven
controlwillbeepandthedisplaywillshowtheoven
temperature.
Baking resuhs will be better if baking palls are
centered ill tile o_en as much as possible. If
baking with more than one pan, place tile
pans so each has at least 1 to 1½" of air space
around it./f baking ti_ur cake layers at die
same time, place t\_o layers on shelf B and me
laver.s on shelfD. Stagger palls on file shelf so
one is not directly above the Drier.
Cut stirs d7the foiljust like the grid.
Aluminum Foil
Nevercovertheovenbottomwithaluminumfoil
'_im can use ahm-limn;q tiff] to lille tile broiler
pan and broiler grid. Howe_en _u must
mokl tile fi)il tightly to the grid and cut
slits ill itjust like tile grid.
,Jdtnl/intlrri foil rril:iv _IlSO be tlsed to catch a
spillo_er. To do so, place a small sheet of tidl
on a lo_er shelf se_er_flinches belo_ file ti_od.
Ne_er entirely cover a shelf with almninm-rl
ti)il. This will disturb tile heat circulation and
l_sult in poor baking.
8
ge.com
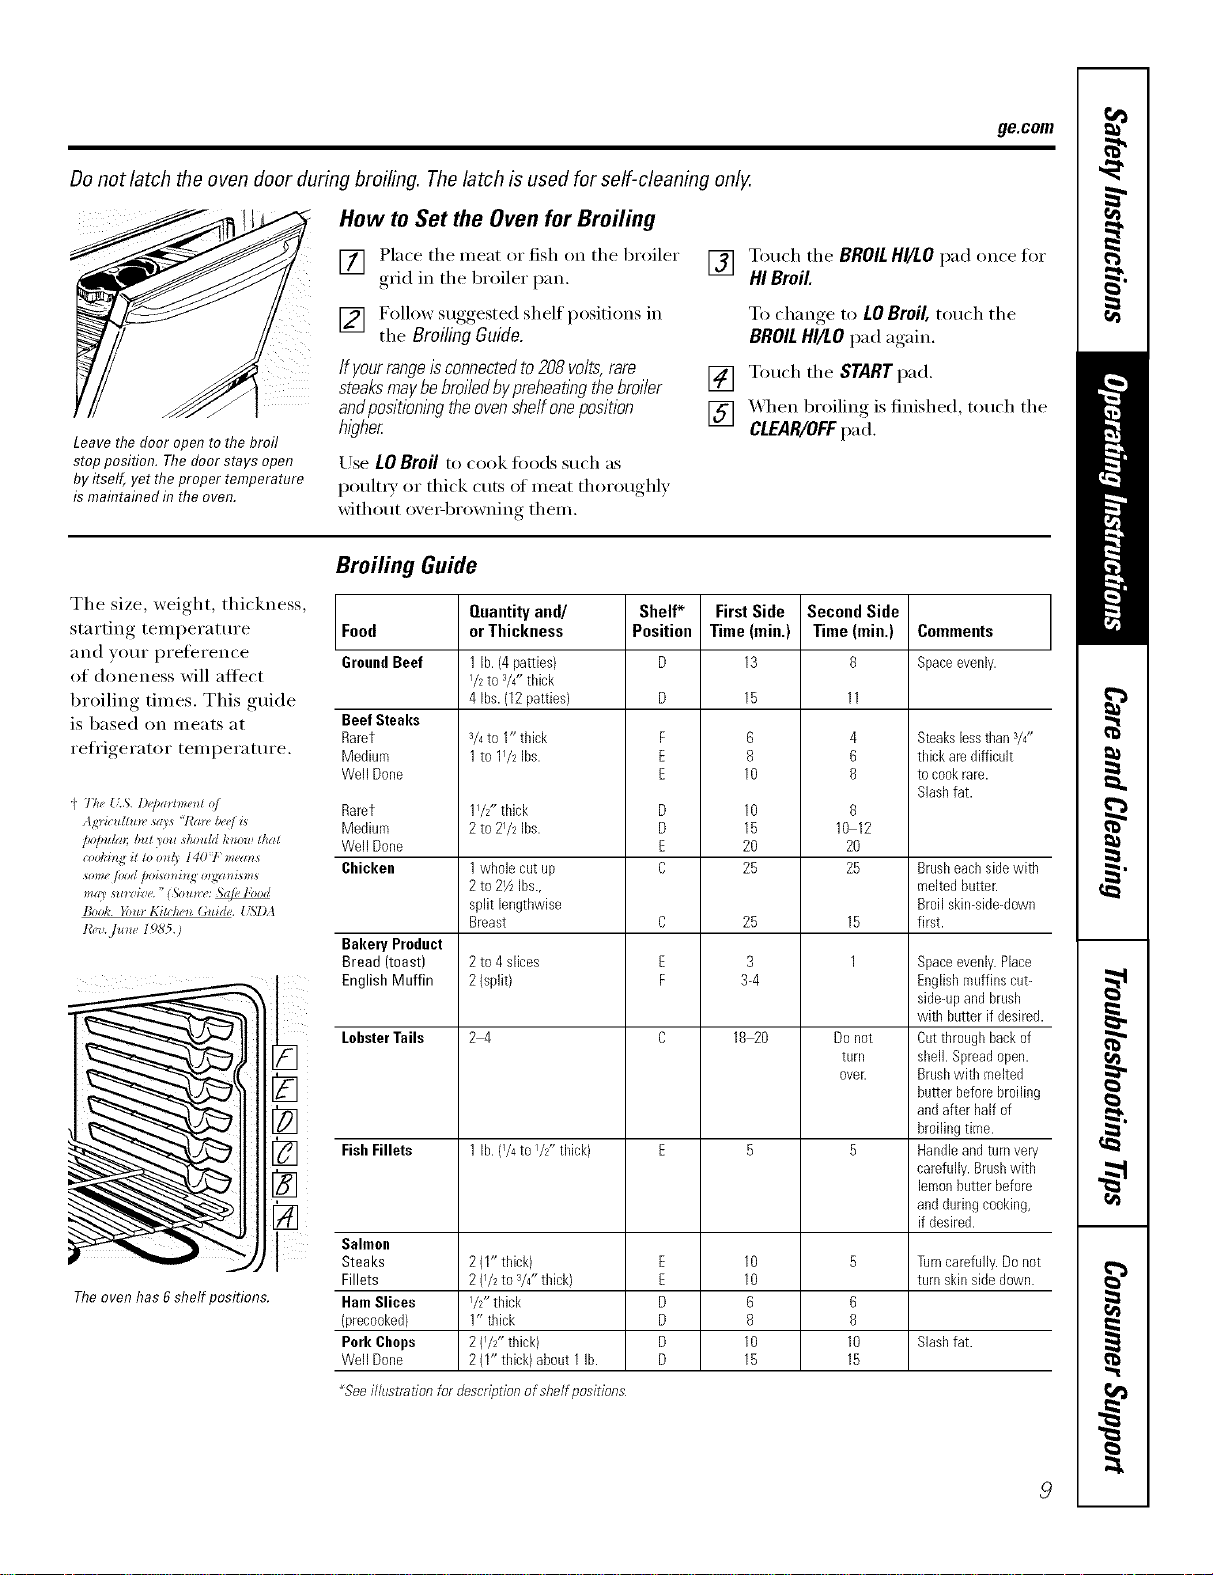
Donot latch the oven door during broiling. The latch is used for self-cleaning only.
Leave the door open to the broil
stop position. The door stays open
by itself, yet theproper temperature
is maflTtaflTedf17the even.
How to Set the Oven for Broiling
[] Place the meat or fish on the broiler
grid in the broiler pan.
[] F°lh)w suggested shelf I)°siti°ns in
the Broiling Guide.
Ifyourrangeisconnectedto208volts,rare
steaksmaybebroiledbypreheat/}Tgthebroiler
andposifiom}Tgtheoven#eft oneposition
hl_?her
Use LOBroil to cook fi_ods such as
poult_ T or thick cuts of ineat thoroughly
xdthout oxe>browning them.
[] Touch the BROILHI/LOpad once for
HI Broil
To change,to LOBroil,touch the
BROILHI/LOpad again.
[] Touch the STARTpad.
[] XAq_enbroiling is finished, touch the
CLEAR/OFFpad.
The size, weight, thickness,
starting temperature
and your preference
of aloneness will altect
broiling times. This guide
is based on meats at
refligerator temperature.
(' The {kS. D@a*hne_d o/
Ag_'ictdtu_z, says "l'a_, Iv,elL*
/*o/m/m [nzt _otz shou/d t,'_*0wthat
some /ood pog_o_*i_J_m_gw_i_m_
m_U s*w_iz e. "(N,u*_,: _e lbod
B,,&. Ibm l,Titc,',_,_(add(,. USI)A
I&_,..]um 196'5.)
Theoven has 6shelf positions.
Broiling Guide
Food
GroundBeef
Beef Steaks
Rarer
Medium
Well Done
Rarer
Medium
Well Done
Chicken
Bakery Product
Bread (toast)
EnglishMuffin
LobsterTails
FishFillets
Salmon
Steaks
Fillets
HamSlices
(precooked)
Pork Chops
Well Done
Quantityand/
orThickness
1lb. (4patties)
I/2 to a/4"thick
4 Ibs.(12patties)
3/4to 1" thick
1to 11/2 Ibs.
11/2"thick
2 tO 21/2 Ibs.
1whole cat up
2to 21/zIbs.,
split lengthwise
Breast
2to 4 slices
2(split)
2_
1lb. (74to I/z" thick)
2(1" thick)
2 (I/2 to V4"thick}
I/2" thick
1" thick
2(I/£, thick)
2(I" thick)about 1lb.
Shelf*
Position
F
E
E
D
D
E
C
C
E
F
E
E
D
D
D
D
First Side
Time(min,)
13
15
6
8
10
10
15
2O
25
25
3
3-4
18_0
10
10
6
8
10
15
Second Side
Time (rain.)
8
4
6
8
8
10 12
20
25
15
1
Do not
tarll
ovelt
6
8
10
15
Comments
Spaceevenly.
Steakslessthan3/4"
thick aredifficult
tocookrare.
Slashfat.
Brasheachsidewith
meltedbatter.
Broil skin-side-down
first.
Spaceevenly.Place
Englishmuffins cut-
side-upandbrash
with hatter if desired.
Oatthroughbackof
shell. Spreadopen.
Brashwith melted
butter beforebroiling
andafter half of
broilingtime.
Handleandturnvery
carefully.Brashwith
lemonbatterbefore
andduringcooking,
if desired.
Turncarefully.Donot
tam skinsidedown.
Slashfat.
_Seeilhlstration for descriptionofshelfpositions
9
Usingthe clock andtimer.
Not all features are on all models.
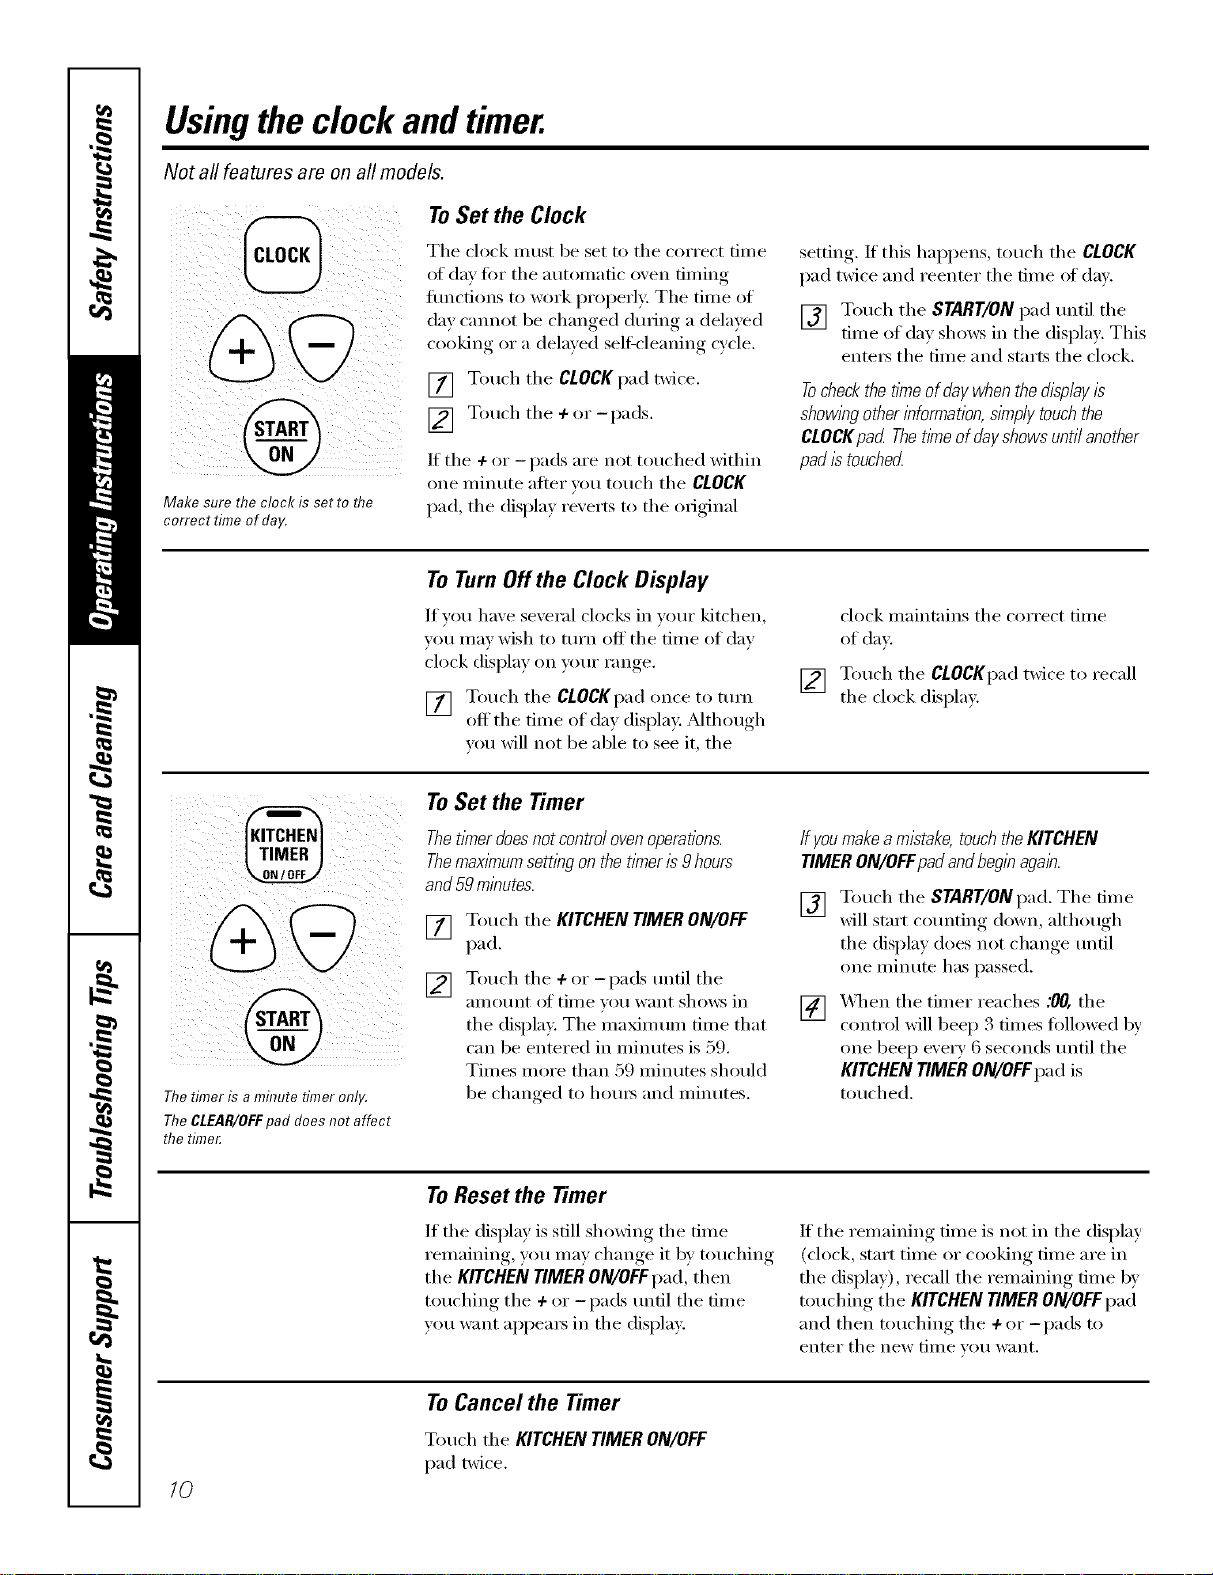
Make sure the clock is set to flTe
correct time of day.
To Set the Clock
The clock must be set to the correct time
of day tot tile autonmtic oxen tinting
tractions to work properly: Tile time of
da} cannot be changed during a dela}ed
cooking or a delmed selfXcleaning cycle,
[] Touch the CLOCKpad twice,
[] T°uch the + °r -I_ads"
If the 4- or - pads are not touched within
one ininute after _,t>/]touch the CLOCK
pad tile displm rexerts to tile original
,setting, If this hal)pens, touch tile CLOCK
pad twice and reenter the time of din.
[] Touch the START/ON pad until the
time of day shm_s in tile display. This
ente_ tile time and starts tile clock.
Tocheckthetitheofdaywhenthedisplayis
showl)_gotherinformation,simplytouchthe
CLOCKpad Thet/meofdayshowsuntilanother
padistouched
ToTurnOffthe Clock Display
If w>u have several clocks in veto" kitchen,
you Inay wish to turn off tile tilne of day
clock display on your range.
[] Touch tile CLOCKpad once to tuiil
off tile time of day display. _Mthough
you will not be able to see it, the
[]
clock maintains tile correct time
of day.
Touch the CLOCKpad twice to recall
the clock display.
Thetimer is a minute timer only.
Thegl£4R/OFF pad does not affect
the time_
To Set the Timer
Thenmerdoesnot control ovenoperations.
ThemaxlYnumsetting on the timeris 9 hours
and59 minutes.
[]
[]
Touch the KITCHEN TIMER ON/OFF
pad.
Touch the + or-i/ads until the
_lI//ot/nt of ti/ne VOt/want shows ill
the display, The maxim um time that
C;lIl be enteI'ed ill lllintltes is _)9.
Times more than 59 minutes should
be changed to ho/u_ and minutes.
ffyoumakeamistake, touchthe KITCHEN
TIMER ON/OFFpad and beginagain.
[] Touch the START/ON pad. Tile time
will stnrt Cotlnting down, althot/oh
tile display does not change until
one minute has passed.
[] X4q/en the timer reaches :00, the
control will beep 3 times followed by
one beep every 6 seconds/mtil the
KITCHEN TIMER ON/OFFpad is
touched.
To Reset the Timer
If tile display is still showing tile time
remaining, you may change it by touching
tile KITCHEN TIMERON/OFFpad, then
touching tile + or -pads until tile time
you want appeax_ in tile display.
If tile remaining time is not in tile display
(clock, start time or cooking time are in
the display), recall the remaining time by
touching tile KITCHEN TIMER ON/OFF pad
and then touching tile + or -pads to
enter tile new tiille veil \\'_ln[,
/0
ToCancel the Timer
Touch the KITCHEN TIMER ON/OFF
pad twice.
Usingthetimedbakingandmastingfeatures,tonsomemodels) gecom
Donot lock the oven door with the latch during timed cooking. Thelatch is used for self-cleaning only.
NOTE: Foods that spoil easily--such as milk, eggs, fish, stuffings, poultry and pork--should not be allowed to s# for
more than 1hour before or after cooking. Room temperature promotes the growth of harmful bacteria. Be sure that
the oven light is off because heat from the bulb will speed harmful bacteria growth.
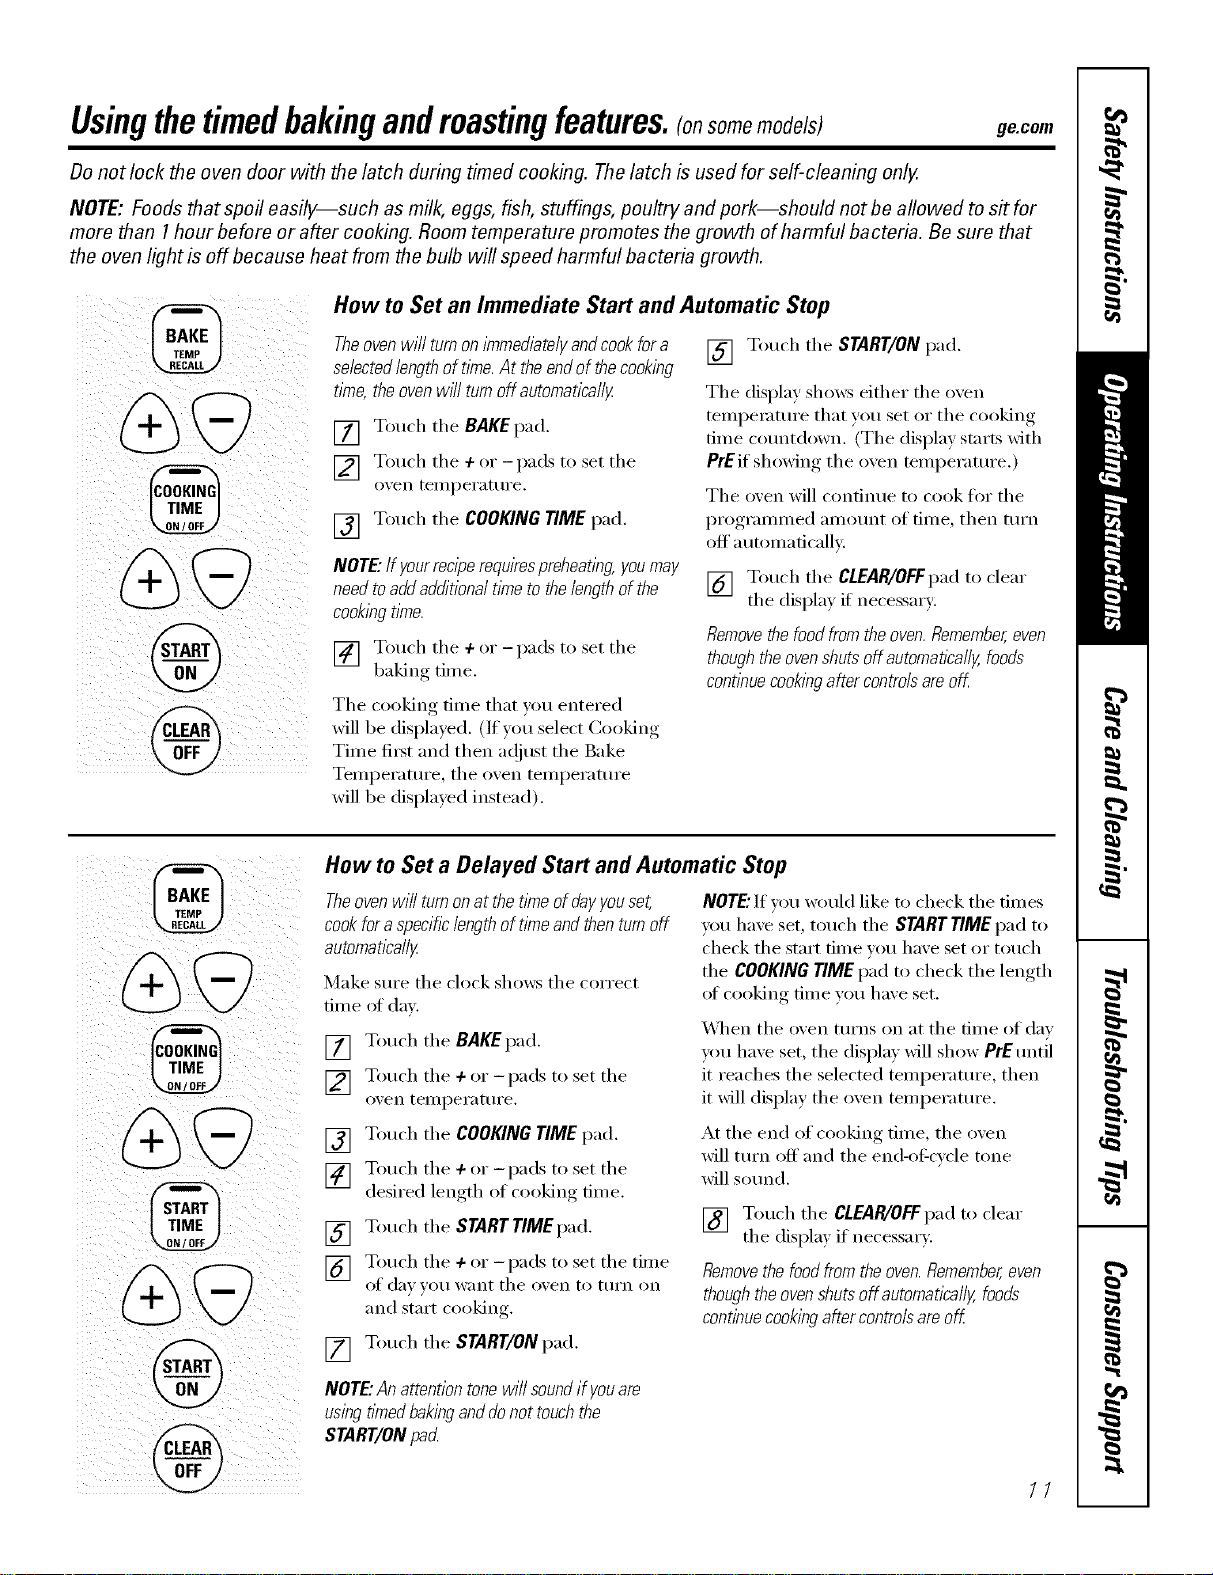
How to Set an Immediate Start and Automatic Stop
Theovenwill turnonimmediatelyandcookfora
selectedlengthoftime.At theendofthecooking
tlfne,theovenwfflturnoffautomatically
[] Touch the BAKEpad.
] Touch the + or -pads to set the
o_,en teillpei'attli'e.
[] Touch the COOKING TIME pad.
NOTE"If yourreciperequirespreheating, youmay
need toadd additional time to the length of the
cookingtime.
] Touch the ÷ ,% -pads to set the
baking tim e.
The cooking time that you entered
will be displayed. (If you select Cooking
Time fi_5t and then a(!just the Bake
Temperatm'e, tile oven temperature
will be displayed instead).
[] Touch tile START/ONpad.
Tile display shows either tile oven
temperature that you set or tile cooking
time countdown. (Tile display starts with
PrEif showing tile oven telnl)erature. )
Tile oven will contintle [O cook tor tile
programmed alllOtlnt of tii/le, then ttlI'II
off a utomaficallv.
[] Touch tile CLEAR/OFFpad to clear
tile displa) if necessary:
Removethe food fromthe oven.Remember,even
thoughthe ovenshuts off automaflcally, foods
contlbuecooklbgafter controlsare off
%
@
@
@
How to Set a Delayed Start and Automatic Stop
Theoven will turn onat the t/Yneof dayyouset,
cookfor a specihclength of time and thenturnoff
automatically
Make stlI'e tile clock shows tile ('oFi'e('t
time oI daz
[] Touch tile BAKEpad.
] Touch tile 4-or -pads to set tile
oven teillpei'att ii'e.
[] Touch the COOKING TIME pad.
] Touch tile 4-or -pads to set tile
desired length of cooking time.
[] Touch tile STARTTIMgpad.
] Touch the + or _ l)ads to set the tim e
of (lax _O/I want tile ox, en to ttÀI'II (Ill
and start cooking.
[] Touch tile START/ONpad.
NOTE"If you _muld like to check tile times
you have set, touch tile STARTTIME pad to
check tile start time w_u have set or touch
tile COOKINGTIMEpad to check tile length
ot cooking time vou have set.
_]/en tile oven turns on at tile time of day
you have set, tile display will show PrE tmtil
it reaches tile selected temperature, then
it will display the oven temperature.
At the end of cooking time, the oven
will turn off and the end-of cycle tone
will sotmd.
[] Touch the CLEAP_/OFfpad to clear
tile displa) if necessar).
Removethe foodfrom the oven.Remember,even
thoughthe ovenshuts off automatlcally, foods
continuecookingafter controlsare off
NOTE"An attention tone wi// soundif you are
using tlYnedbakingand donot touchthe
START/ON pa_
11
Special featuresofyourovencontrol
Yournew touch pad control has additional features that you may choose to use. Thefollowing are the features and
how you may activate them.
Thespecial feature modes can only be activated while the display is showing the time of day. They remain in the
control's memory until the steps are repeated.
When the display shows your choice, touch the START/ONpad. The special features will remain in memory after
a power failure.
NOTE: TheSabbath feature and the Thermostat Adjustment feature are also Special Features, but they are
addressed separately in the foflowing sections.
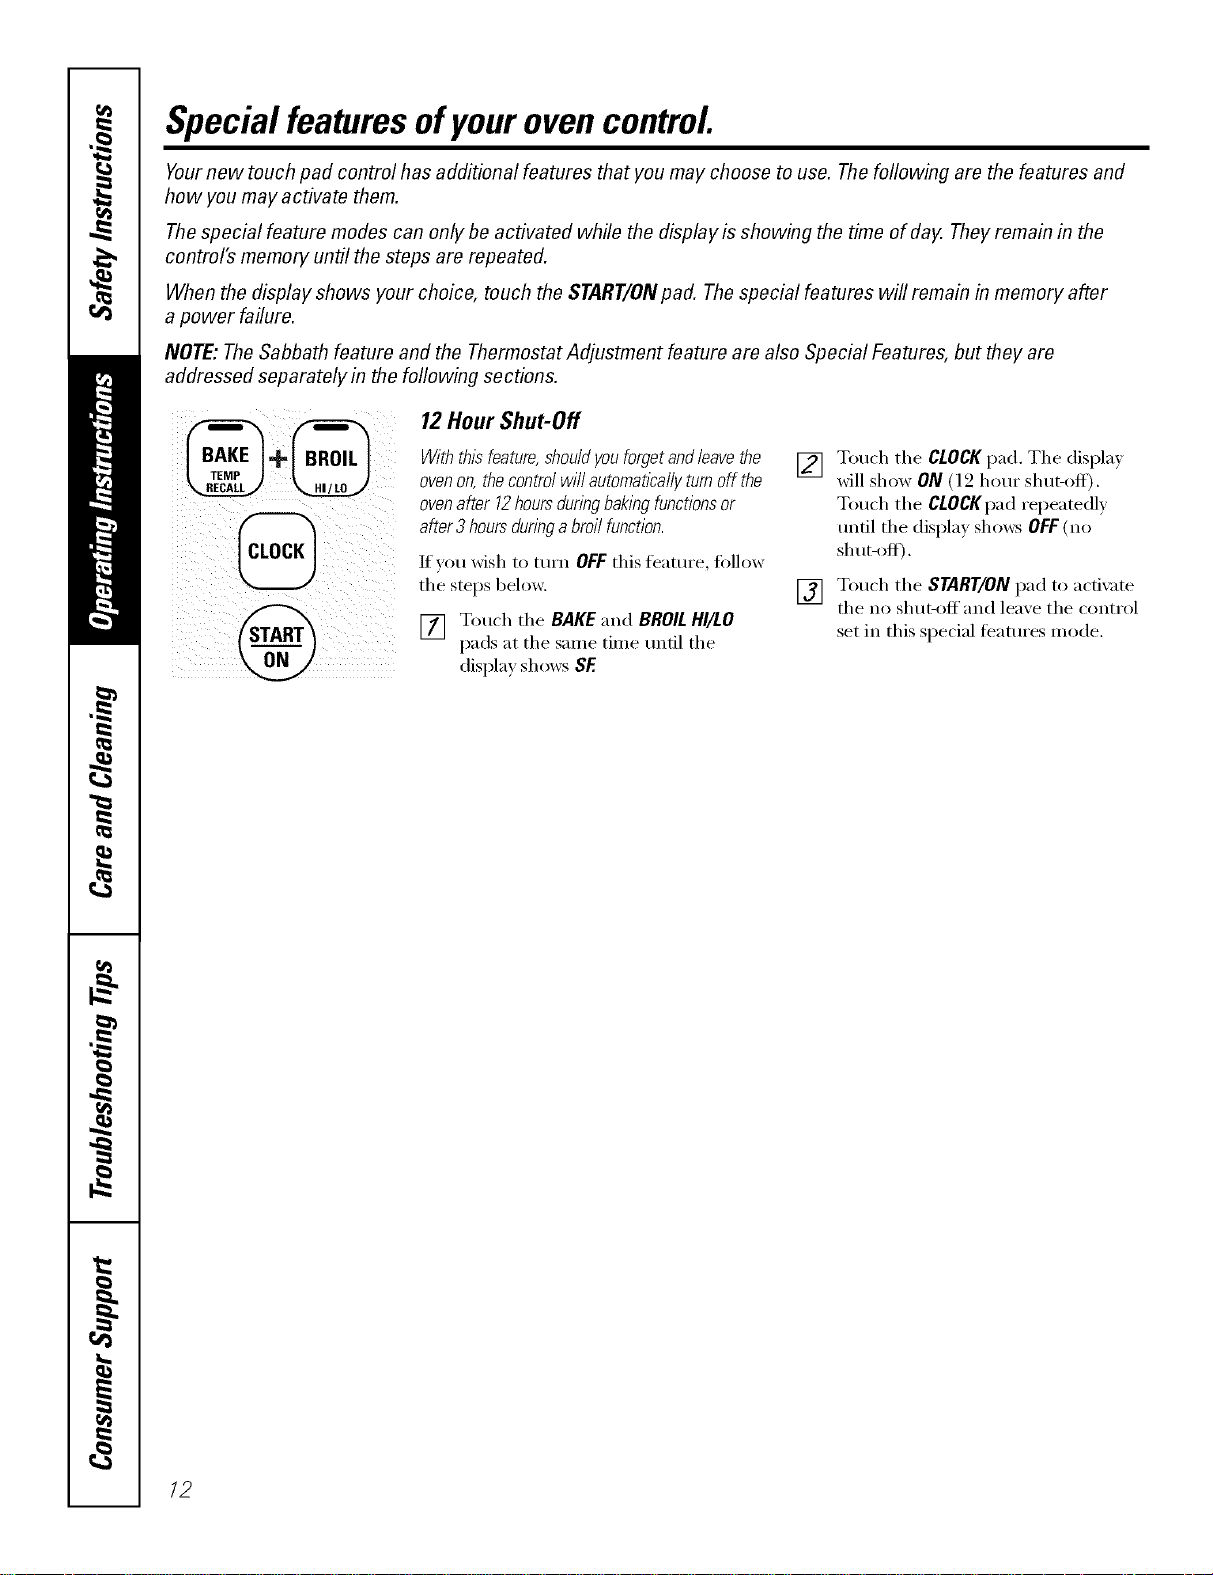
12 Hour Shut-Off
Withthisfeature,shouldyouforgetandleavethe
ovenon,thecontrolwi//automaticallyturnoff the
ovenafter12hoursduringbakingfunctionsor
after3 hoursduringabroilfunction.
]I'VOII wish to ttlYn OFFthis J[e_lttlI'e, tollow
the stops below.
[] Touch the BAKE and BROILHI/LO
pads at the same time until the
display shows SE
[] Touch the CLOCK pad. The displa)
will show ON (l 2 horn" shut-off).
Touch the CLOCKpad repeatedly
tmtil the display shows OFF(no
shut-off).
[] Touch the START/ONpad to acfix _te
the no shut-off and leaxe the control
set in this special teatures mode.
12
Usingthe SabbathFeature.
(Designed for use on the Jewish Sabbath and Holidays) (onsomemodels)
ge.com
The Sabbath feature can be used for baking/roasting only. It cannot be used for broiling, self-cleaning or
Delay Start cooking.
NOTE,"Theoven light comes on automatically (on some models) when the door is opened and goes off when the
door is closed. Thebulb maybe removed. See the Oven Light Replacement section. Onmodels with a light switch
on the control panel, the oven light may be turned on and left on.
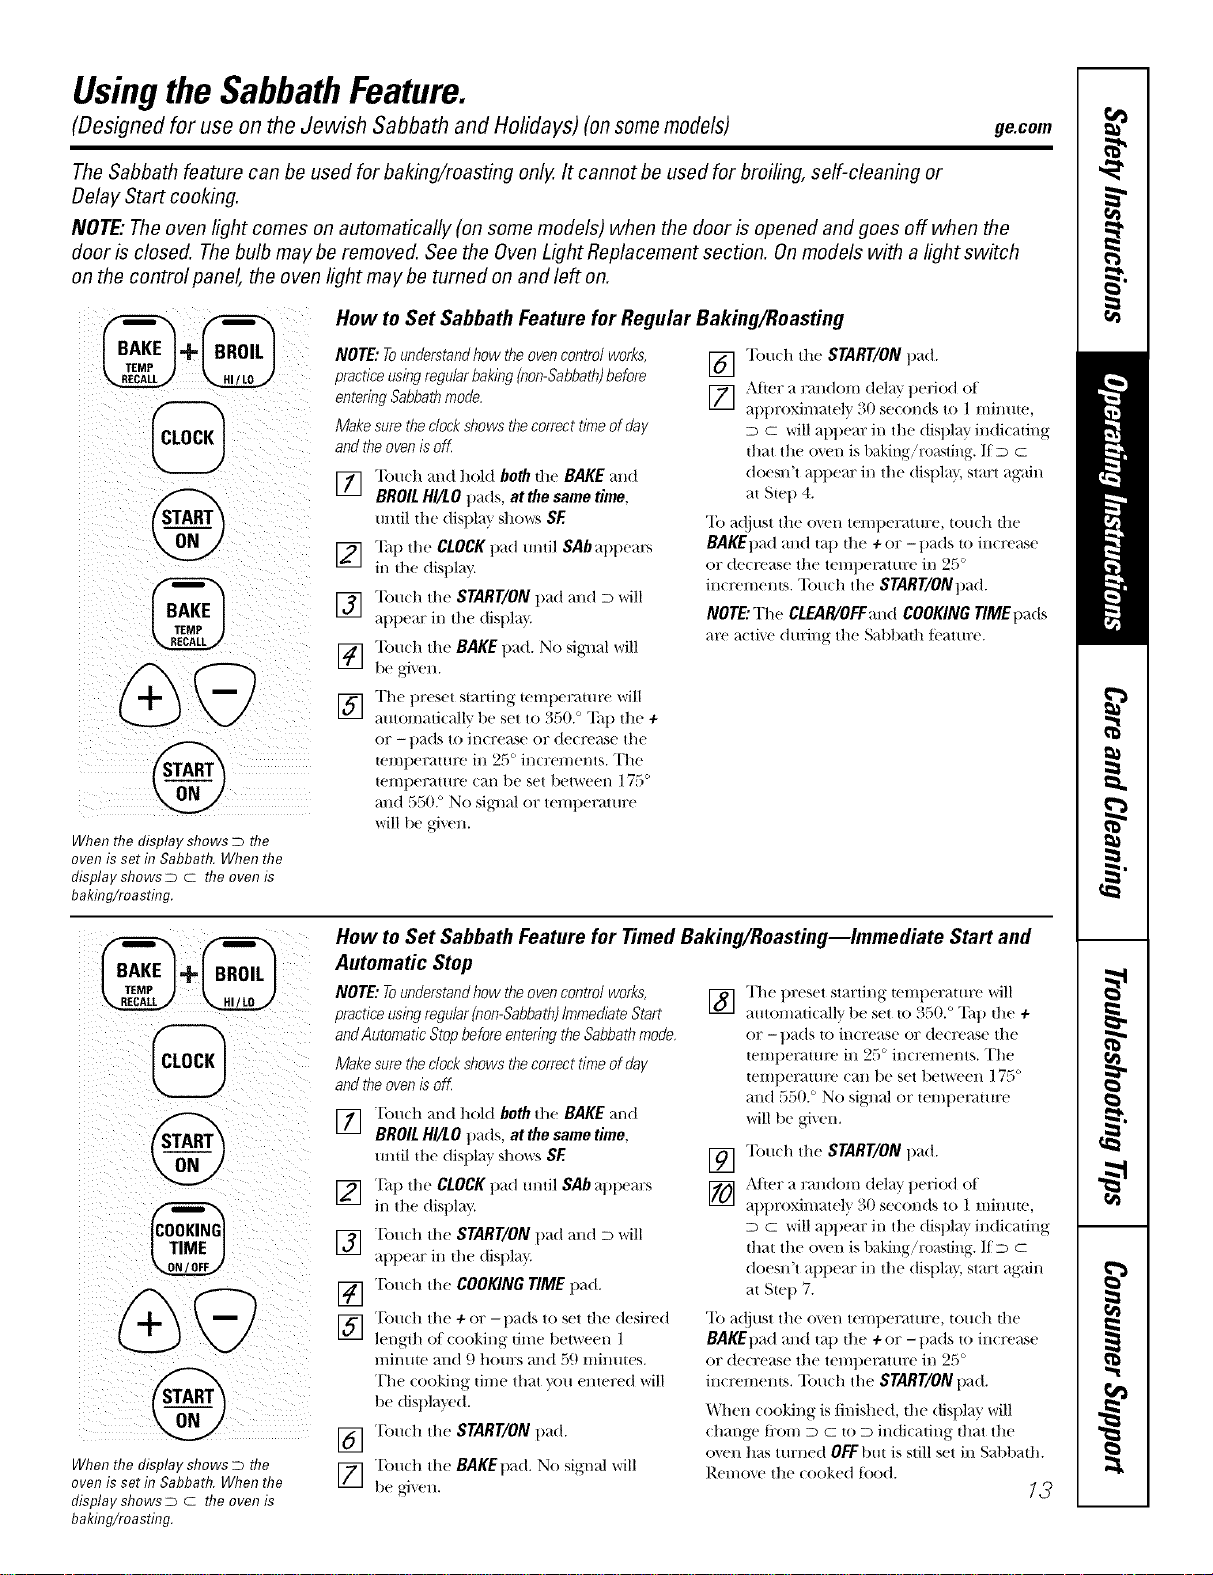
When the display shows D the
oven is set in Sabbath. When the
display shows D c the oven is
baking/roasting.
How to Set Sabbath Feature for Regular Baking/Roasting
NOTE: Tounderstandhow theoven control works, Tou(h the START/ON t)ad.
practice usingregularbaking (non-Sabbath)before []
entedng Sabbathmode. [] After a random delay period of
attl)l:oxil/t_ttely _0 se(oltds to ] IIlilltlte,
Make sure theclockshows thecorrect time of da}/ D C will apt)era: in the display indicating
and the oven is off that the o_en is baking/r(msdng. If m c
"lbu(h mtd hold both the BAKE and doemFt appear in the disttla}, start again
"_J BROIL HI/LO t)ads, at the same time,
mltil d_e disltlay shows SE
] "lhlt the CLOCKpad tmtil SAb attttears
in tlte dist)lav.
[_] "lbtmh the START/ON pad and D will
appear in the disttla }
] "lbu(h tit(: BAKE pad. No siglml will
be aixen.
] The t)reset staNil/g telllllel;_tHiFe will
automatically 1)e set to 550. ° Ta l) tit(? +
or -pads to increase or dect'ease the
telIll)el:_tHIt'e ill 25 ° ill€tell/elliS. The
temperature cmt be set between 175 °
and 550. ° No sigllal or temt)eramre
will be given.
at Step 4.
"Ib adjust the oven temperature, touch the
BAKEt)ad and tap the + or -pads to increase
or decrease tile tel/ll)el_lttll;e ill 2,_) °
increments. Touch the START/ONt)ad.
NOTE:TheCLEAR/OFF'andCOOKINGTIMEttads
at'(' active dining the Sabl>ath tcamre.
%
When the display shows D the
oven is set f17Sabbath. When the
display shows D c the oven is
baiting/roasting.
How to Set Sabbath Feature for Timed Baking/Roasting--Immediate Start and
Automatic Stop
NOTE: Tounderstandhow theoven control works,
practice usingregular(non-Sabbath)ImmediateStart
andAutomatic Stop before entering the Sabbathmode,
Make sure theclockshows thecorrect time of day
and theoven is oK
] "['ouch mtd hold both the BAKE and
BROIL HI/LO pads, at the same time,
tmtil the disttla }' S]_()_rsSE
] "[:,tit the CLOCKpad tmtil SAb al)ttem:s
in the disl)lay.
] Tou(h the START/ON pad and D will
attttear in the (tisltla _
[_] "['ou(h the COOKING TIME pad+
] "['(m(h the + or -ltads to set the (lesired
length oI (ooking time 1)etweel/ l
minute mid 9 hom:s mtd 59 minutes.
The (ooking + tiH/e that VOtl elltered will
1)e disltla_ed.
[_] "['(m(h the START/ON ttad.
] T(m(h the BAKEtt_,d. No signal I+'vrill
be _i_en.
] The t)reset starting temtteraulre will
automati(allv t)e set to 350. ° "Ihl) the +
or - t)ads to increase or dect'('ase the
temlteratm'(' in 25 ° increments. The
teliiperattlt'(' c_ttl be set between ] 75 °
and 550. ° No signal or temttemture
will be given.
[_ "lbu(h the START/ON ltad.
[_ Al_er a rmldom delay ttedod of
_ltt)roximatel} ' 30 se(onds to 1 miDut(_,
D C will appear in the (tist)la } indicating
that the o_vn is baking/roasting. If D C
doestFt appear in the (tisltla }, start again
at Ste l) 7.
"Ib a(!just the oven temperature, much tlte
BAKEt)ad and mt) dte+ or -pads to in(_'('ase
or decrease the teml)emmre in 25 °
inct'('ments. "Ibuch the START/ONpad.
When (()()king is/inished, the display will
( hmtge ti:om D C to D indicating that the
oven has turned OFFlint is still set in Sal)l)adL
Remo_e the cooked tood.
13
Usingthe SabbathFeature.
(Designed for use on the Jewish Sabbath and Holidays) (onsomemodels)
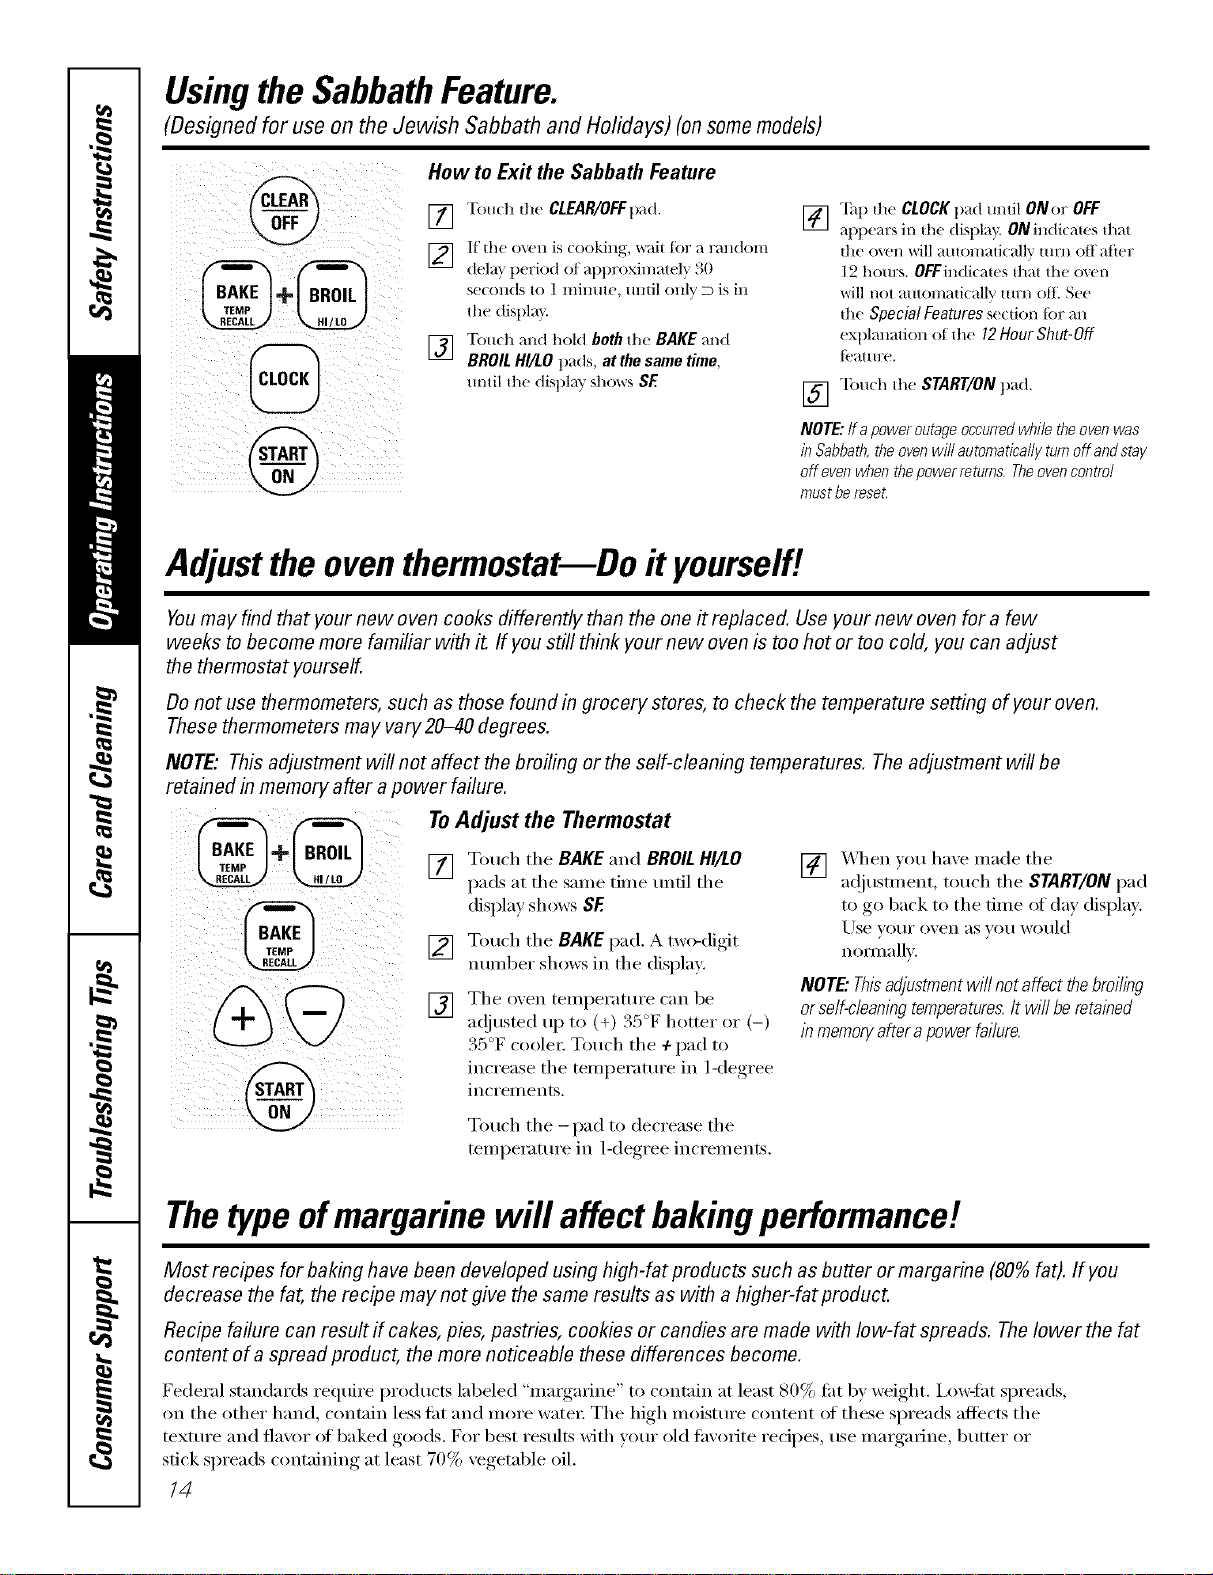
How to Exit the Sabbath Feature
[] Tou(h the CLEAR/OFFpad.
]
dela} period at approxhnatel_ 30
seconds to 1 minute, until only D is in
the displa}:
] "[buch and hold both the BAKE and
BROIL HI/LO pa(ls, at the same time,
m)til the display SI_()_rsSE
] "lh1) the CLOCKpad m_til ONor OFF
appears in d_e disl)lay. ON indi(ams fllat
die oven will muomati(allv mrn off atier
1,2 hours. OFFindicates fllat the oven
_ill not automa{icallv {urn oil S('("
die Special Features section Jar an
explanation of the 12Hour Shut-Off
{('at Ill?e.
[] "lbud_ the StaRT/ONpad.
NOTE:Ira power outage occurred while theoven was
in Sabbath, theoven will automaticaflg turn off and stag
off even when thepower returns, Theoven control
must bereset.
Adjust the oven thermostat--Do it yourself!
Youmay find that your new oven cooks differently than the one it replaced. Use your new oven for a few
weeks to become more familiar with it. If you still think your new oven is too hot or too cold, you can adjust
the thermostat yourself.
Do not use thermometers, such as those found in grocery stores, to check the temperature setting of your oven.
These thermometers may vary20-40 degrees.
NOTE,"This adjustment will not affect the broiling or the self-cleaning temperatures. The adjustment will be
retained in memory after a power failure.
To Adjust the Thermostat
[] Touch the BAKE and BROIL HI/LO
pads at the same time until the
display shows SE
[] Touch the BAKEpad, A two-digit
number shows in the display:
[] The oxen temperature can be
a(!justed uI) to (+) 35°F hotte_ ()_ (-)
35°F coole_: Touch the + pad to
increase the temi)erature.... in l<legree,
inci'ei//ents.
[] X_qmn }ou have made the
a(!justment, touch the START/ON pad
to go 1)ack to the time of (la_ displa,L
Use x, OHI" o;en ;:IS veil would
n Ollll;:lllx,.
NOTE."Thisadjustment will not affect thebroiling
orse/f-c/eant))gtemperatures.It wi// be retat))ed
1)_memoryafter apower failure.
Touch the -pad to decrease the
temperature in 1-deoree_ increments.
Thetypeofmargarine will affect bakingperformance!
Most recipes for baking have been developed using high-fat products such as butter or margarine (80% fat). If you
decrease the fat, the recipe may not give the same results as with a higher-fat product.
Recipe failure can result if cakes, pies, pastries, cookies or candies are made with low-fat spreads. Thelower the fat
content of a spread product, the more noticeable these differences become.
Federal standards require products labeled "margarine" to contain at least 80% fi_t 1)y _vight. i,(mqht spreads,
on the other hand, contain less ti_t and more water: The high moisture content (ff these spreads aflb'cts the
texture and flavor (ff baked goods. For best results with vour old favorite recipes, use nlaigarine, butter or
stick spreads containing at least 70% vegetable oil.
14
Usingtheself-cleaning oven. gecom
Before a Clean Cycle
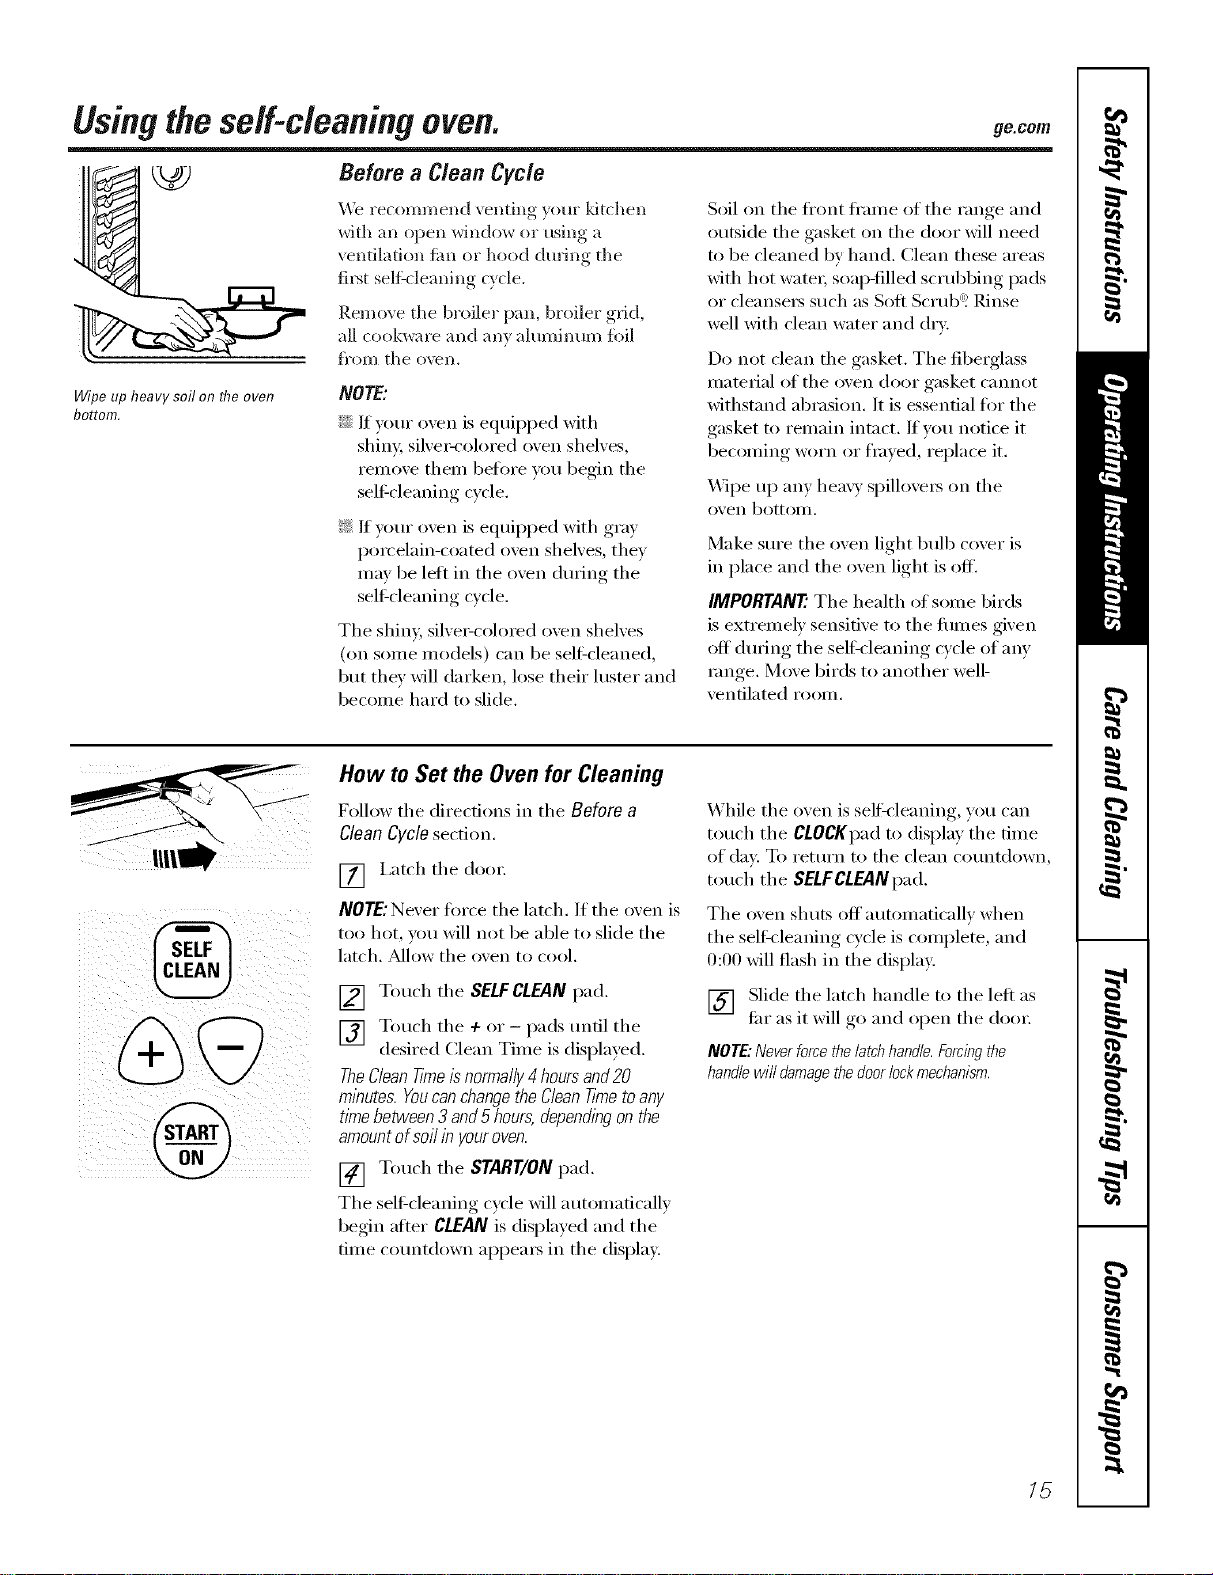
Wipe up heavy soil on the oven
bottom.
We recommend venting y(>m"ldtchen
with an open window or using a
ventilation tim or hood during tile
fil_t self:cleaning cycle.
Remove tile broiler pan, broiler grid,
all cookware and any aluminum fi>il
fi'om tile ()\_Ii,
NOTE'.
_Ji::If your, oven is eqmpped with
shim; siher-col()red oxen shehes,
relnove theln befl)re you begin tile
self cleaning cycle.
_ If y(mr oven is equipped with gray
porcelain-coated oven shelves, they
may be let* ill tile oven durhlg tile
sel6cleaning wcle.
The shin> silve>colomd oven shelves
(on some models) can be sel6cleaned,
but they will darken, lose their luster and
becolne hard to slide.
Soil on tile fl'ont fl'alne of tile range and
outside tile gasket on tile door will need
to be cleaned by hand. Clean these areas
with hot watei; soap-filled scrubbing pads
or cleansei_ such as Soft Scrub"! Rinse
well with clean water and dry.
Do not clean tile gasket. Tile fibelglass
material of the oven door gasket cannot
withstand abrasion. ]t is essential fl)r the
gasket to relnain intact. If vou notice it
beconfing worn or fl_ye(l, replace it.
Wipe up any hea\ 3' spillovei_ on tile
()x'ell bottolll,
Make sure tile oven light bulb cover is
in place and the oven light is off.
IMPORTANE The health of some birds
is extrelnelv sensitive to the flunes given
off durhlg the self:cleaning cycle of any
range. Move birds to another well-
ventilated rOOlll,
How to Set the Oven for Cleaning
Follow tile directions ill tile Before a
Clean Cycle section.
[] i,atch tile dool:
NOTE:Never fl)I'ce tile latch. If tile oven is
too hot, you will not be able to slide tile
latch. Mlow the oven to cool.
[] Touch tile SELFCLEAN pad.
[] Touch tile + or - pads until tile
desired Clean Tilne is displayed.
TheCleanT/Yneis normally4 hoursand20
minutes. Youcan changethe CleanTknetoany
time between 3 and 5hours, dependingon the
amountof soil in youroven.
[] Touch tile START/ON pad.
Tile sel6cleaning cycle will auton_atically
begin afier CLEAN is displayed and tile
tilne countdown appea_ in tile display.
While tile oven is selfk'leaning, you can
touch tile CLOCKpadto display tile tilne
of day. To return to tile clean countdown,
touch tile SELFCLEANpad.
The ()yen shuts off a utolnaticallv wh ell
the selt_leaning cycle is complete, and
0:00 will flash in the display.
[] Slide the latch handle to the left as
flu" as it will go and open tile dool:
NOTE: Never force the latch handle.Forcing the
handle will damage thedoor lock mechanism.
/5
Usingtheself-cleaning oven.
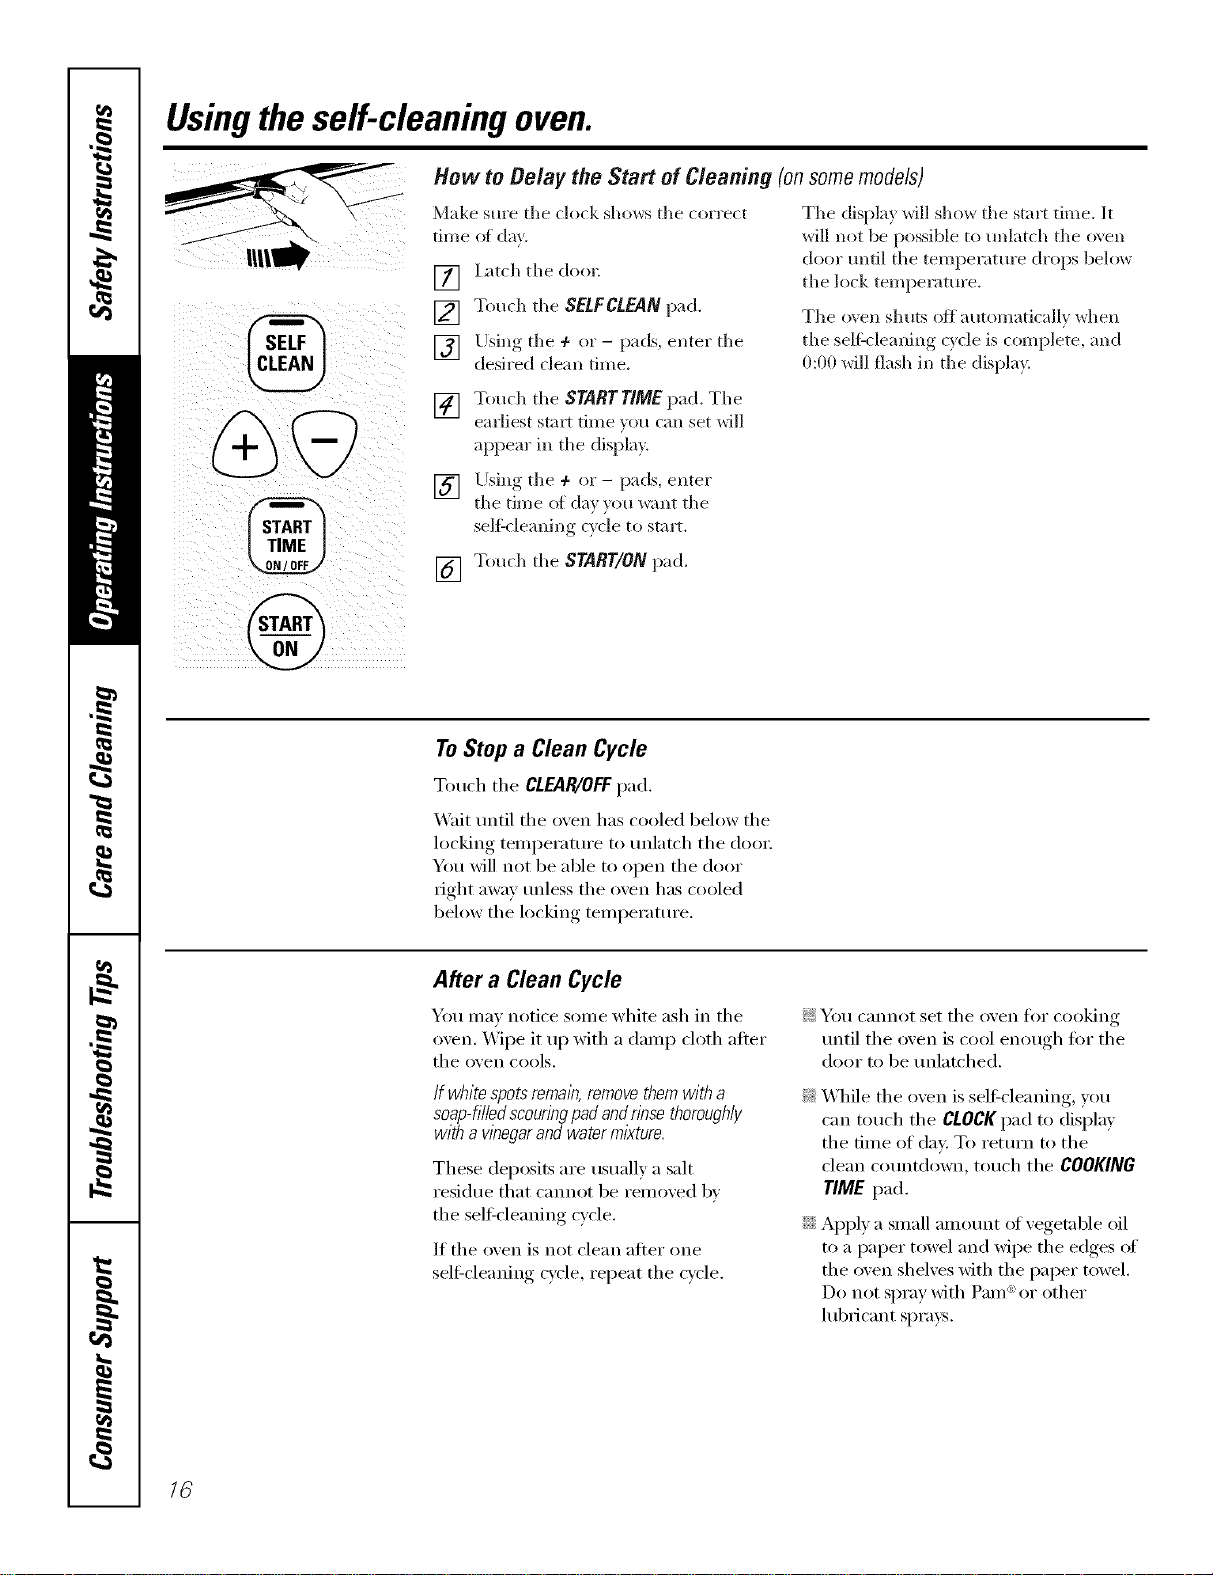
How to Belay the Start of Cleaning (onsome models)
Make sure the clock sho_s the con'ect
time of da_.
] I_ach the (1oo_:
[] Touch the SELFCLEANpad.
] Using the 4- or - pads, enter the
desired clean time.
The display will show the start time. It
will not be possible to tmlatch the oxen
door tmfil the temperature drops below
the lock temperature.
The oven shuts off automatically when
the sell'cleaning cycle is complete, and
0:00 will flash in the display.
[] Touch the STARTTIMEpad. The
earliest stai_ time _ou can set will
appear in the display.
] Using the 4- or - pads, enter
the time of da_ _ou want the
selgcleaning Qcle to start.
[] Touch the START/ONpad.
ToStop a Clean Cycle
Toud_ the CLEAR/OFF pad.
Wait tmtil the oven has cooled below the
locking temperature to tmlatch the door
You will not be able to open the door
right away tmless the oven has cooled
below the locking temperature.
After a Clean Cycle
You may notice some white ash in the
oven. Wipe it up with a damp ch)th alter
the oven cools.
If whitespotsremain,removethemwitha
soap-filledscouringpadandrinsethoroughly
witha wnegarandwatermixture.
These deposits are usually a salt
residue that cannot be removed bv
the self cleaning cycle.
If the oven is not clean alter one
sel6cleaning cycle, repeat the cycle.
!i_:You cannot set the oven flw cooking
tmtil the oven is cool enough fiw the
door to be tmlatched.
9_:While the oven is sel6cleaning, you
can touch the CLOCKpad to display
the time of day. To retm'n to the
clean countdown, touch the COOKING
TIME pad.
_Ji::Apply a small amotmt of vegetable oil
to a paper towel and wipe the edges of
the oven shelves with the paper towel.
Do not spray with Pare e>or other
lubricant spra D.
16
Careand cleaningofthe range, gecom
Be sure all controls are off and all surfaces are cool before cleaning anypart of the range.
If your range is removed for cleaning, servicing or any reason, be sure the anti-tip
device is re-engaged properly when the range is replaced. Failure to take this
precaution could result in tipping of the range and cause injury.
How toRemoveProtectiveShippingFilmand Packaging Tape
Caretidly grasp a corner ot the protective
shipping fihn with your fingers and slowly
peel it from the appliance surli_ce. Do not
use any shaI]) items to remove the film.
Remove all ot the fihn before using the
appliance for the first time.
To assure no damage is done to the
finish of the product, the safest way to
remove the adhesive ti'om packaging tape
on new appliances is an application of a
household liquid dishwashing detergent.
Apply with a soft cloth and allow to soak.
NOTE."Theadhesivemustberemoved fromall
parts. Itcannot be removedif it is bakedon.
Control Knobs
Thecontrol knobsmaybe removedfor easier
cleaning.
Make sure the knobs are in the OFF
positions and pull them straight oft the
stems for cleaning.
The knobs can be cleaned in a
dishwasher or they may also be washed
with soap and water; Make sure the inside
of the knobs are (h_' before replacing.
Replace the knobs in the OFFposition to
ensure proper placement.
Control Panel
It's a good idea to Mpe the control panel
after each use of the oven. Use a damp
cloth to clean or rinse, I_))r cleaning, use
mild soap and water or a 50/50 solution
oI vinegar and water For _insing, use
clean water. Polish dry with a soft cloth.
Do not use abrasive cleanset_, strong
liquid cleane_, plastic scouring pads or
oven cleane_ on the control panel--
they will damage the finish.
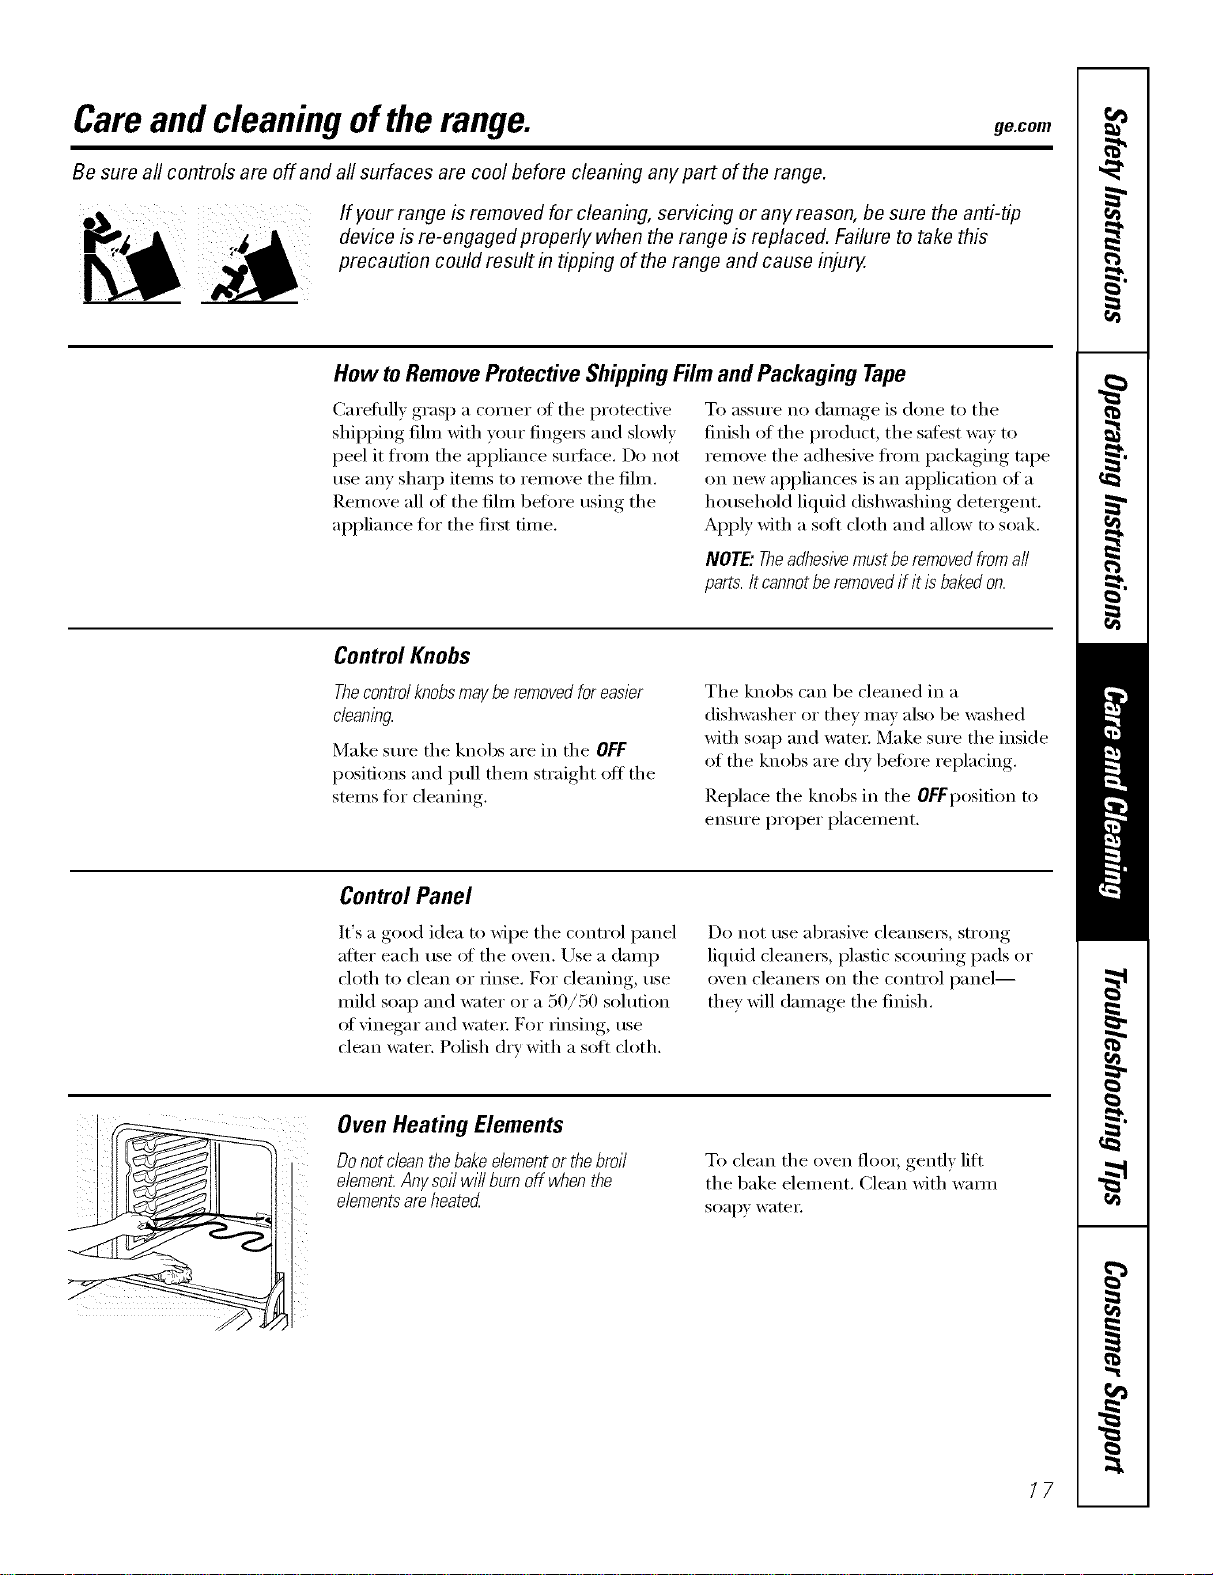
Oven Heating Elements
Do not clean thebake elementor thebroil
elemen_Anysoil will burn off when the
elementsare heated
To clean the oven floo_; gendy lift
the bake element. Clean with wama
soap)' water:
/7

Careand cleaningofthe range.
Oven Shelves
If _ mr oven is equipped with shiny,
silve>colored oven shelves, they should
be removed fl'om the oven betore
beginning the selfcleaning cycle.
Clean with an abrasive cleanser or plastic
scrubbing pad. _Mter cleaning, rinse the
shelves with clean water and chw with a
clean cloth.
If veto" oven is equipped with gray
porcelain-coated oven shelves, they
may be cleaned in tile oven during
the self-cleaning cycle.
NOTE."Theshiny,silver-coloredovenshelves(on
somemodels)maybe cleanedin the self-cleaning
oven.However,the shelveswill darkenincolor,
losethek lusterand becomehardto slide if
cleaneddunbg the self-cleaningwc/e.
To make the shelves slide more easily,
apply a small amomlt of vegetable oil
to a paper towel and wipe the edges
of the oven shelves with the paper towel.
Do not spray with Pare <'_or other
lubricant spra):s.
Porcelain Enamel Cooktop
The porcelain enamel finish is sturdy but
breakable if misused. This finish is acid-
resist;rot. However, any acidic foods
spilled (such as fl'tfitjuices, tomato or
vinegar) should not be pemlitted to
remain on the finish.
If acids spill on the cooktop while it is
hot, use a (liT paper towel or cloth to
wipe it up right away: _]_en the stm'hce
has cooled, wash with soap and wam_:
Rinse well.
For other spills such as tilt spatterings,
wash with soap and water or cleansing
powclei_ alter the sui_hce has cooled.
Rinse well. Polish with a dry cloth.
Painted Surfaces
Painted surfi_ces include the sides, top
of backguard and the drawer fl'ont.
(:lean these with soap and wamr or
a ;'inegar and water solution.
Do not rise COlIllI/eI'cial ()veil cleallei3_
cleaning powders, steel wool or hmsh
abrasives on any painted sm_hce.
Oven Vent
The oven is vented through an opening
trader the right rear sm'fi_ce trait.
Thisarea couldbecomehot during ovenuse.
It is noi_/nal for steanl to con/e out of the
\'ent and moisture inav collect underneath
when the oven is in use.
The vent is important tOTproper air
circulation.
Neverblock this vent
/8
ge.com
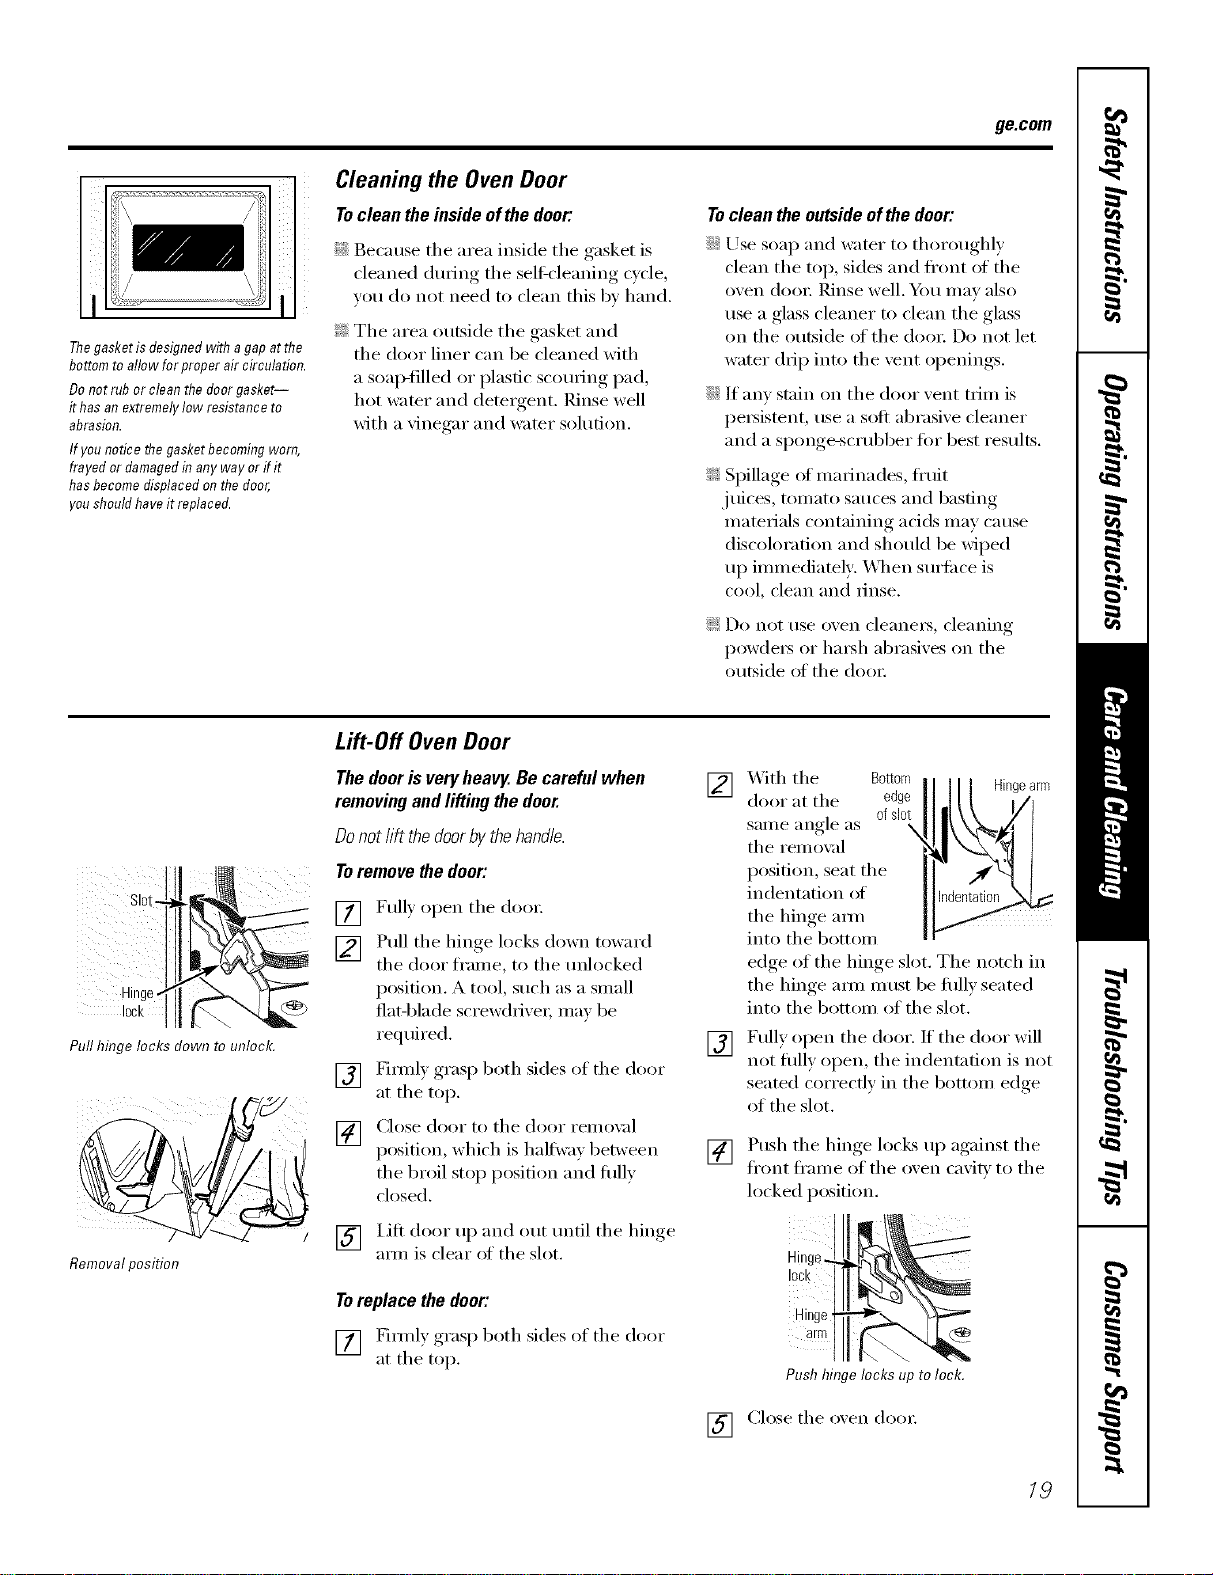
Thegasket is designed with a gap at the
bottom to allow for proper air circulation.
Do not rub or clean the door gasket--
it has an extremely low resistance to
abrasion.
If you notice the gasket becoming worn,
frayed or damaged in any way or if it
has become displaced on the door,
'ou should have it replaced.
Cleaning the Oven Door
To clean the inside of the door:
Because the area inside the gasket is
cleaned during the sel6cleaning c_cle
you do not need to clean this b_ hand.
?_:The area outside the gasket and
the door liner can be cleaned with
a soap-filled or plastic scotwing pad,
hot water and detergent. Rinse well
with a vinegar and water solution.
To clean the outside of the door:
iJi::Use soap and water to thoroughly
clean tile top, sides and front of tile
oven doo_: Rinse well. _m may also
use a glass cleaner to clean tile glass
on tile outside of tile door. Do not let
water drip into the vent openings.
iJi::If any stain on tile door vent trim is
persistent, use a soft abrasive cleaner
and a sponge-scrubber fin" best results.
_: Spillage of marinades, fl'uit
.juices, tomato sauces and basting
materials containing acids may cause
discoloration and should be wiped
up immediately: _._l/en sm'ti_ce is
cool, clean and IllIse,
!i>Do not use oxen cleanei_, cleaning
powde_ or ha_h abrasixes on the
outside of the doo_:
sl0
Hint
lack i
Pull hinge locks down to unlock.
I /
Removalposition
Lift-Off Oven Door
Thedooris veryheavy.Becarefulwhen
removingandlifting thedoor.
Donotlift thedoorbythehandle.
Toremovethedoor:
[] Fully open tile doo_:
[] Pull tile hinge locks down toward
tile door fl'ame, to tile tmlocked
position. A tool, such as a small
fiat-blade screwdriver, may be
reqtfired.
[] Firefly grasp both sides of tile door
at tile top.
[] Close door to tile door remox fl
position, which is halfwa_ between
the broil stop position and flfllv
closed.
[] lift door up and out tmtil tile hinge
am/is clear of the slot.
Toreplace the door."
[] Firefly grasp both sides of tile door
at tile top.
] X4ith tile Bottom Hingearm
door at tile edge
same angle as ofdot
tile remox:d
position, seat tile
indentation of
the hinge am/
into tile bottom
edge of tile hinge slot. Tile notch in
the hinge aml must be fifllv seated
into tile bottom of tile slot.
[] Fully open tile door. If tile door will
not fiflly open, tile indentation is not
seated correctly in tile bottom edge
of the slot.
[]
Push tile hinge locks up against tile
fl'ont fi'ame of the oxen cavity to the
locked position.
10ck
Hinge
arm
Push hinge locks up to lock.
[] Close tile oven do()):
/9
Careand cleaningofthe range.
i¸¸¸¸¸¸7¸¸¸¸
i!Iii! !i:!@ i
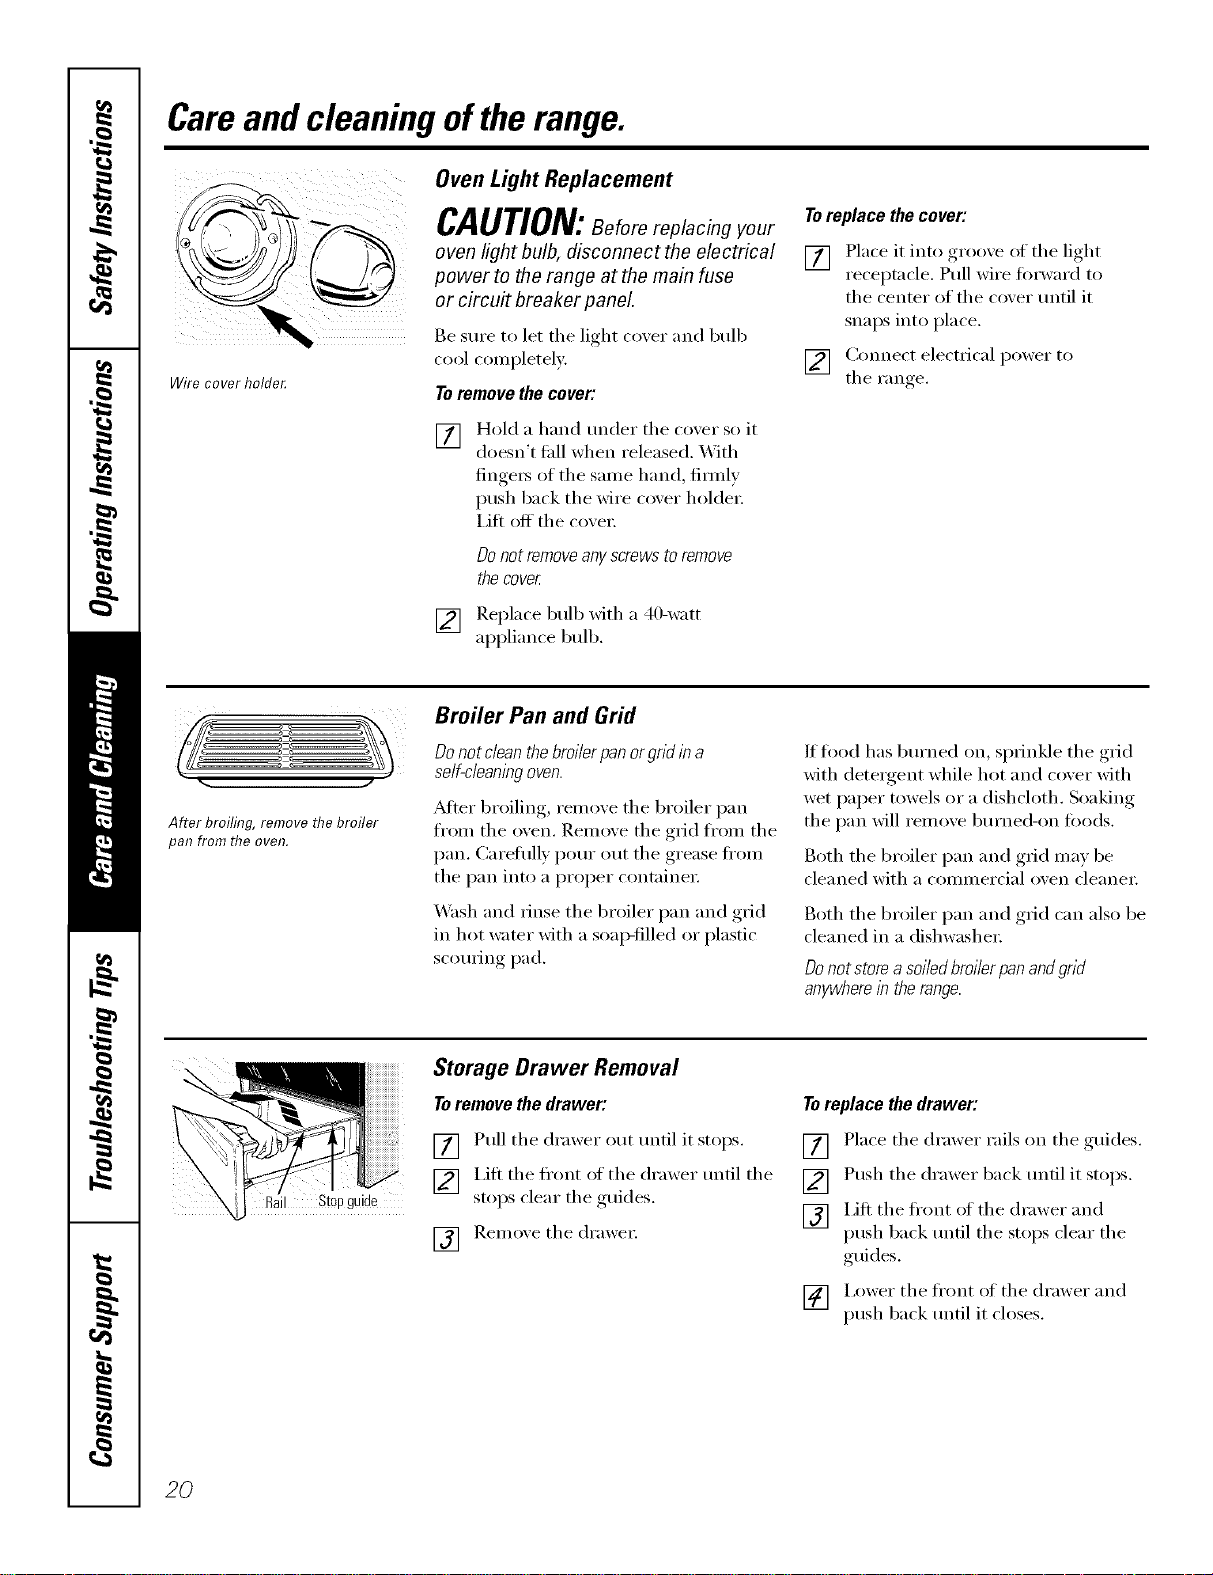
Wire cover holde_
Oven Light Replacement
CAUTION:Beforereplacing our
oven light bulb, disconnect the electrical
power to the range at the main fuse
or circuit breaker panel
Be StlI'e to let the light co_,er and bulb
cool completely:
Toremovethecover:
[]
Hold a hand under the coxer so it
doesn't thll when released. With
finge_ of the same hand firefly
push back the wire coxer holder:
Lift off the coxei:
DOnot renTove any screws to renTove
the cover
[] Replace bull) with a 40-watt
appliance bull).
To replace the cover:
[] Place it into groove of the light
receptacle. Pull wire forward to
the center of the cover until it
snaps into place.
[] Connect electrical power to
the Fan _e
After broiling, remove the broiler
pan from the oven.
Broiler Pan and Grid
Do not clean the broiler pan or grid in a
self-cleaning oven.
_Mter broiling, remove the broiler pan
fl'om the oven. Remove the grid fl'om the
pan. Carefully pour out the grease ti'om
the pan into a proper containe_:
Wash and rinse the broiler pan and grid
in hot water with a soap-filled or plastic
scorning pad.
If fi_od has bm'ned on, sprinkle the grid
with detergent while hot and cover with
wet paper towels or a dishcloth. Soaking
the pan will remove bm'ned-on foods.
Both the broiler pan and grid may be
cleaned with a commercial oven cleane_:
Both the broiler pan and grid can also be
cleaned in a dishwasher;
Donotstoreasoiledbroilerpanandgrid
anywhereintherange.
il Stopguide
Storage Drawer Removal
To remove the drawer:
[] Pull the drawer out tmtil it stops.
V2] I,ifl the fl'ont of the drawer tmtil the
stoi)s clear the ,guides.
r_q Remoxe the (h'awe_:
iOl
Toreplace the drawer:
[] Place the drawer rails on the guides.
[] Push the drawer back tmtil it stops.
[] I,ift the fl'ont of the drawer and
push back tmfil the stops clear the
guides.
[] i,ower the fl'ont of the drawer and
push back tmtil it closes.
20
ge.com
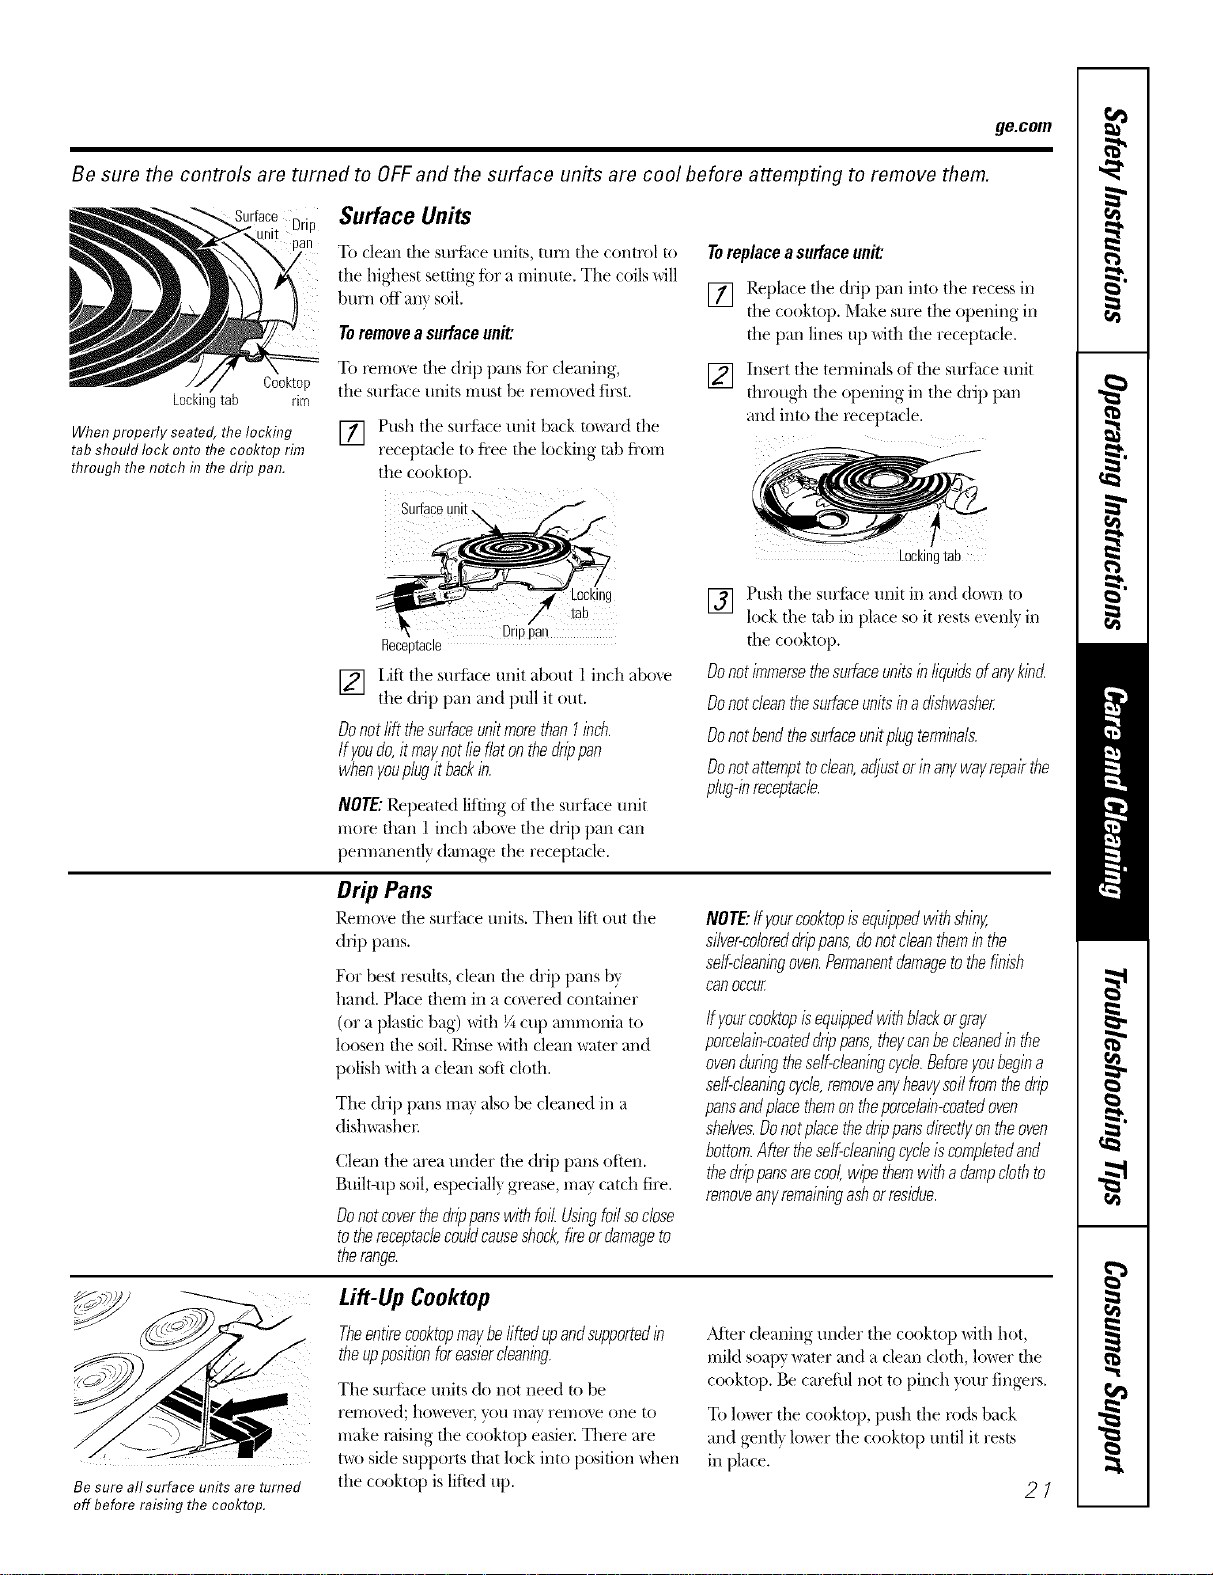
Be sure the controls are turned to OFFand the surface units are cool before attempting to remove them.
Drip Surface Units
To clean tile suriilce units, tunl tile control to
tile highest setting fi)r a minute. Tile coils MII
burn off am soil.
To remove a surface unit:
To YerllO_<ethe drip pans for cleaning,
tile surfitce til/JtS rritlst be i'emoved first.
[] Push tile surf:ace unit back to_lrd tile
receptacle to fl'ee the lockin_ tab fi'om
tile cooktop,
To replace a surface unit:
[]
Cooktop
Lockingtab rim
When properly seated, the locking
tab should lock onto flTecooktop rim
through the notch in flTedrip pan.
Surfa
[]
Be sure all surface units are turned
off before raising the cooktop.
LOCKIng
Drio 3an
Receo[acle
[] I Jfi tile sul_ktceunit about l inch above
tile drip pan and pull it out.
DonotliftthesurfaceunitmorethanI inch.
Ify,oudo,itmay,notlieflatonthedrippan
whenyouplugitbackin.
NOTE: Repeated lifting of tile surf{ice unit
n/ore than 1 inch above tile drip pan can
pennanentl) dan/age tile receptacle.
Replace tile drip pan into tile recess ill
tile cooktop. Make sure tile o})ening< ill
tile pan lines up with tile receptacle.
Insert tile terminals of tile surface unit
through tile opening ill tile drip pan
aim into tile receptacle.
Drip Pans
Rerrlo_,e tile surlhce units. Then lifi out tile
drip pans.
For best results, clean file drip pans by
hand. Place tberrl ill ti co',ered container
(or a plastic bag) with ¼ cup anunoni;_l to
loosen file soil. Rinse with clean water and
polish with a clean soft cloth.
Tile drip pans ma_ also be cleaned ill a
dish_lshel:
Clean tile area under file drip palls often.
Btfilt-up soil, especially gl_ase, may catch fire.
Donotcoverthedrippanswithfoil.Usingfoilsoclose
tothereceptaclecou/dcauseshock,fireordamageto
therange.
Lockingtab
Push tile stlrfhce unit ill and do_an to
lock tile tab ill place so it rests exenlv ill
fly,ourcod<topisequippedwithblackorgray,
porcelain-coateddrippans,they,canbecleanedin the
ovenduringtheself-cleaningcy,de.Beforeyoubegina
serf-cleaningcy,cle,removeany,heavy,soilfromthedrip
pansandplacethemontheporcelain-coatedoven
shelves.Donotplacethedrippansdirectly,ontheoven
bottom.Aftertheself-cleaningcycleiscomplatedand
thedrippansare,cool,wipethemwithadampclothto
removeany,remainingashorresidue.
Lift-Up Cooktop
Theentirecooktopmay,beliftedupandsupportedin
theuppositionforeasiercleaning.
Tile sllri;tce units do not need to be
YelTlOved; howe_eE you Ilia\ rel//o_e olle 1o
make l_dsing file cooktop easier. There are
t\m side supports dial lock into position Mien
tile cooktop is lifted tip,
_Mter cleaning under tile cooktop Mth hot,
mild soapy water and a clean clofll, lo_er file
cooktop. Be careflfl not to pinch )_)ur fingers.
To lower tile cooktop, push tile rods back
and gentl_ lo_r tile cooktop until it rests
ill place.
27
NOTE:Ifyourcooktopisequippedwithshiny,
silver-cobreddrippans,donotcleantheminthe
self-cleaning oven.Permanentdamage to thefinish
can occur
[]
file cooktop.
Do not immersethe surface units in liquids of any,kind
Do notclean the surface units in a dishwasher
Do notbend thesurface unit plug terminals.
Do notattempttoclean,adjustor in any,way,repairthe
plug-inreceptacle.
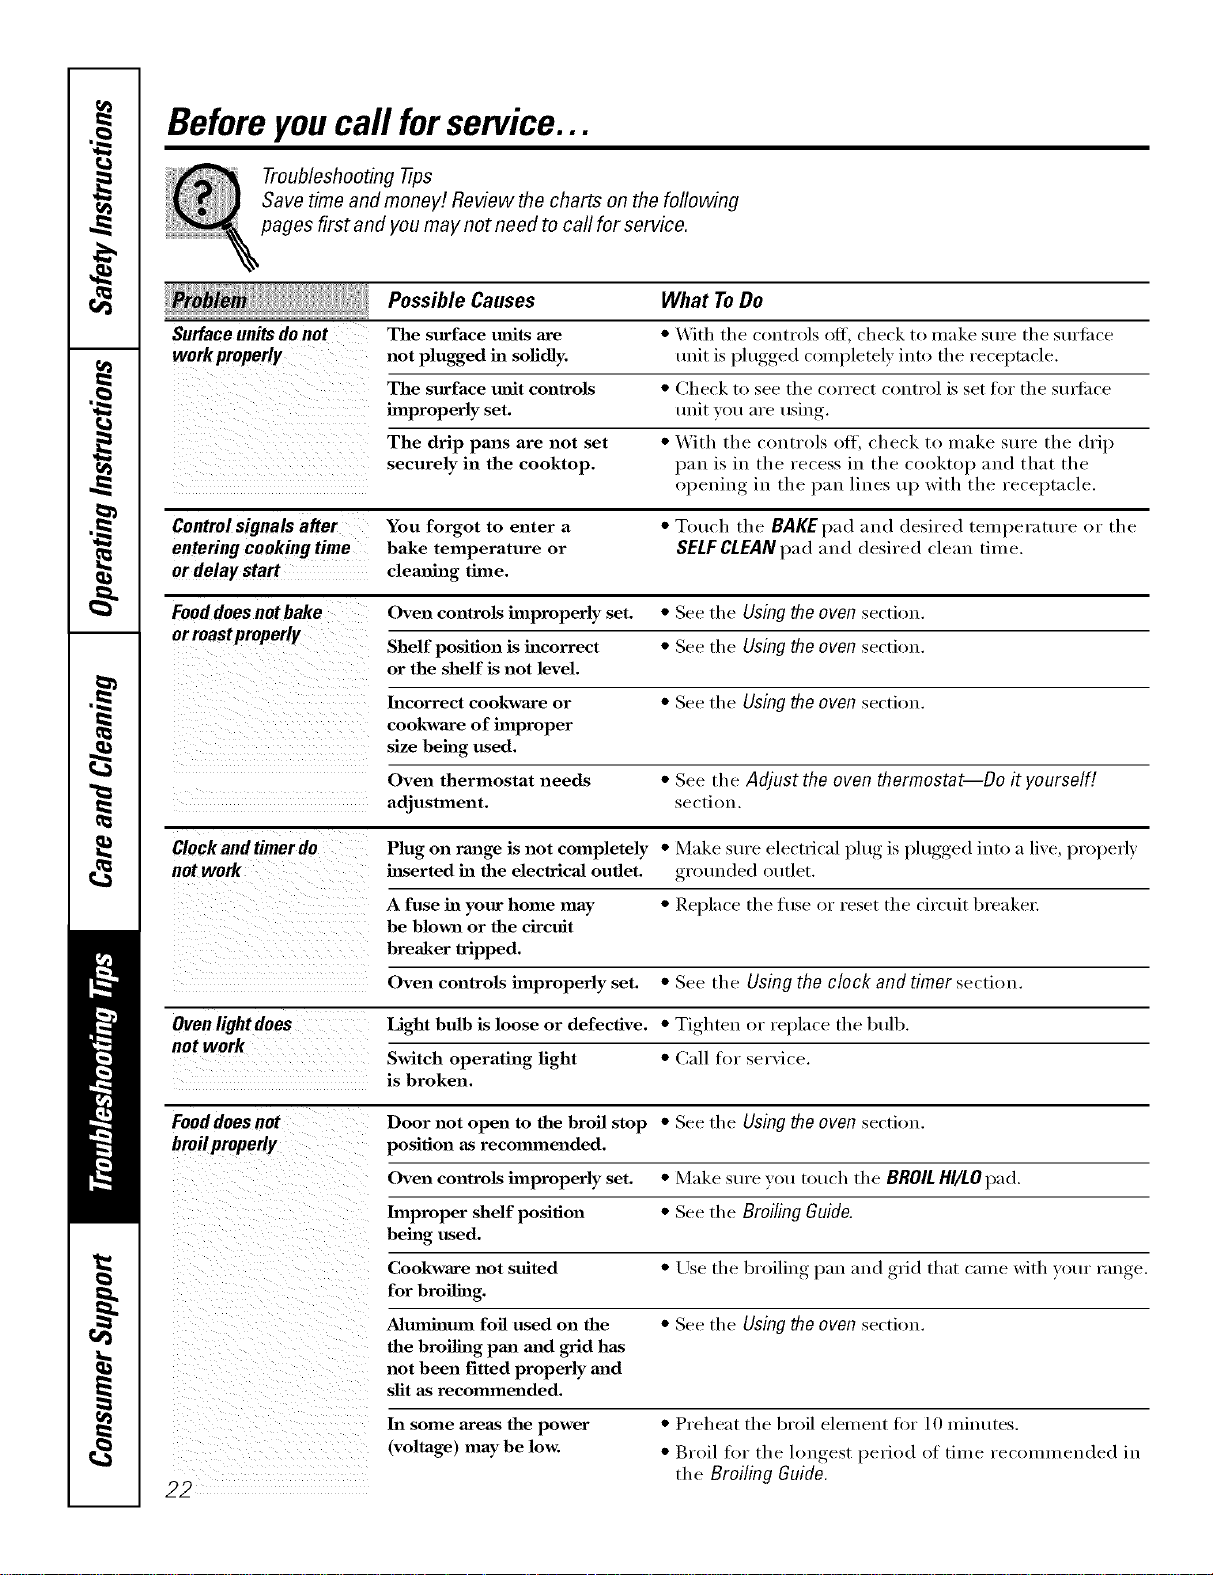
Beforeyoucall forservice...
Troubleshooting -tips
Save time and money! Review the charts on the following
pages first and you may not need to call for service.
Surfaceunitsdonot
workproperly
Possible Causes
The surface milts axe
not plugged in solidly.
The surface refit controls
improperly set.
The drip pans are not set
securely in the cooktop.
What ToDo
• With the controls off, check to make sure the surii_ce
unit is plugged completely into the receptacle.
• Check to see the correct control is set fin" the stusfilce
unit you are using.
• With the controls off, check to make stlre the drip
pan is in the recess in the cooktop and that the
opening in the pan lines up with the receptacle.
Controlsignals a#er You forgot to enter a • Touch the BAgEpad and desired temperature or the
enteringcookingtime bake temperature or SELFCLEANpad and desired clean time.
or delay start clemfing time.
Fooddoes not bake Oven controls improperly set. • See the Using the oven section.
orroastpreperly
Shelf position is incorrect • See the Using the oven section.
or the shelf is not level.
Incorrect cookware or • See the Using the oven section.
cookware of improper
size being used.
Oven thermostat needs • See the Adjust the oven thermostat--Do it yourself!
adjustment, section.
Clock and timer do Plug on range is not completely • Make sure electrical l)lug, is l)lugged,, into a live, properly
not work hlserted in the electricaJ outlet, grounded outlet.
A fuse in your home may • Replace the fl/se or reset the circuit breakel:
be blown or the circuit
breaker tripped.
Oven controls improperly set. • See the Using the clock and timer section.
Ovenlight does Light bulb is loose or defective. • Tighten or replace the btdb.
not work
Switch operating light • Call tor service.
is broken.
Fooddoes not Door not open to the broil stop • See the Using the oven section.
broilproperly position as recommended.
Oven controls improperly set. • Make sure you touch the BROILHI/LO pad.
lmpmper shelf position • See the Broiling Guide.
being used.
Cookware not suited • Use the broiling, laan mad ,grid that came with your hinge.
for broiling.
Aluminum foil used on the • See the Using the oven section.
the bmilhag pan mad grid has
not been fitted properly mad
slit as recommended.
22
ha some areas the power
(voltage) may be low.
• Preheat the broil element fin" 10 minutes.
• Broil for the hmoest_, period of time recommended in
the Broiling Guide.

ge.com
: :, Possible Causes
Oven temperature too Oven thermostat
hot or too cold needs adjustlnent.
What ToDo
• See the Adjust the oven thermostat--Do it yourself!
section.
Oven will not work Plug on range is not • Make sm'e electrical plug is plugged into a live,
completely inserted ha properly grouu(led outlet.
the electrical outlet.
A fuse in your home may • Replace tile fl/se or reset tile circuit breaker.
be blown or the circuit
breaker tripped.
Oven controls improperly set. • See the Using the oven section.
Door left in the locked position. •/f uecessary, allow the oven to cool; then mdock the
d ( )( )1",
Storagedrawer Rear drawer support is • Repositiou the drawer. See the Storage Drawer
is crooked on top of the guide rail. Removalinstructions in the Careand cleaning of your
range section.
Storage drawer Power cord may be • Reposifiou the drawer and power cord. See the
won't close obstructing drawer Storage Drawer Removal instructions in the Care and
in the lower back cleaning of your range section.
of the range.
Rear drawer support is • Repositiou the drawer. See the Storage Drawer
on top of the guide rail. Removaliustructious in the Care and cleaning of your
range section.
Oven will notself-clean The oven temperature is • _A]low the oven to cool to room temperature mad
too high to set a self-clean l'eset the COlltI'ols.
operation.
Oven controls improperly set. • See the Usingthe self-cleaning oven section.
Oven door is not in the locked • Make sure votl move the door latch hauclle all the
position, way to the right.
"Crackfing" or This is the sound of the • This is normal.
"popping" sound metal heating and cooling
during both the cooking mad
cleaning functions.
Excessivesmoking Excessive soil. • T(mch the CLEAR/OFFpad.Ol)eu the windows to
during a self-cleaning rid the room of smoke. Wait tmtil the light on the
cycle SELF CLEAN pad goes off. Wipe u l) the excess soil and
reset the sell:cleaning cycle.
Oven door will not Oven too hot. • Allow the oven to cool below locking telnl)el'att/l'e.
unlock
Oven not clean after Oven controls not properly set. • See the Using the self-cleaning oven secti(m.
a self-cleaning cycle
Oven was heavily soiled. • Clean up heavy spillovers before starting the
sell:(leauiug cycle. Heavily soiled ovens InaV need to
self'clean again or tor a longer period of time.
23
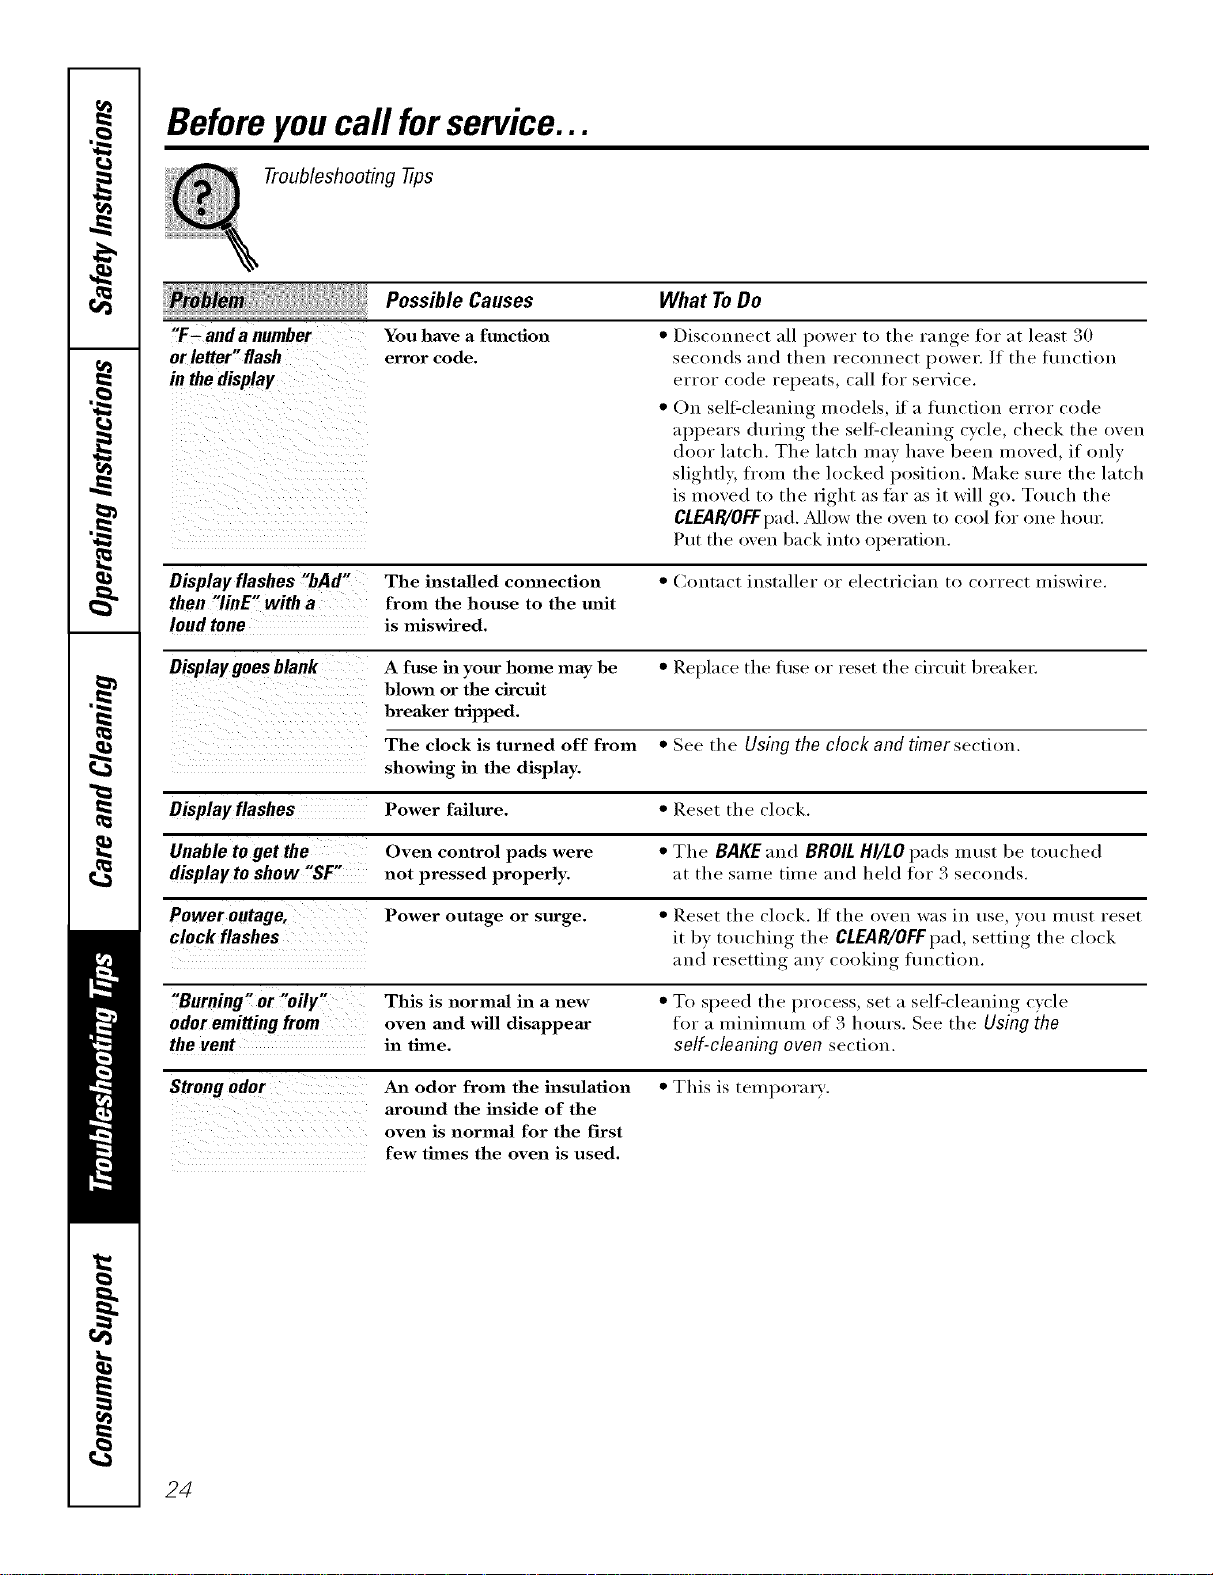
Beforeyoucall forservice...
Troubleshooting tips
"F- anda number
or letter"flash
in thedisplay
Possible Causes
You have a function
error code,
What ToDo
• Disconnect all power to the range for at least 30
seconds and then reconnect power. If the flmction
error code repeats, call fin" service.
• On sell=cleaning models, if a flmction error code
appears during the sell=cleaning cycle, check the oven
door latch. The latch may have been moved, if only
slightl 5 fl'om the locked position. Make sure the latch
is moved to the right as tar as it will go, Touch the
CLEAR/OFFpad. Mlow the o'_en to cool fin" one hour.
Put the oven back into operation.
Display flashes "bAd" The installed cmmection • Contact installer or electrician to correct miswire.
then "linE" with a from the house to the unit
loud tone is miswired.
Display goe s blank A fuse in your home may be • Rel)lace the tuse or reset the circuit breaker:
blown or the circuit
breaker tripped.
The clock is turned off from • See the Using the clock and timer section.
showing in the display.
Displayftashes Power failure. • Reset the oh)ok.
Unable to get the Oven control pads were • The BAKEand BROILHl/LOpads must be touched
display to show "SF" not pressed properly, at the same time and held for 3 seconds.
Power outage, Power outage or surge. • Reset the clock. If the oven was in use, you must reset
clock flashes it by touching the CLEAR/OFFpad,setting the clock
and resetting any cooking flmction.
"Burning" or "oily" This is normal in a new • To speed the process, set a sellZcleaning c)cle
odor emitting from oven mzd will disappear for a minimum of 3 hours. See the Using the
the vent in time. self-cleaning oven section.
Strongodor An odor from the insulation • This is temporary.
aromad the inside of the
oven is normal for the first
few times the oven is used.
24
GE Service Protection Plus 'M
GE, a name recognized worldwide fbr quality and dependability, offers you
Service Protection Plus'_'--comprehensive protection on all yore appliances--
No Matter What Brand!
Benefits Include:
• Backed by GE
• All brands covered
• Unlimited service calls
• All parts and labor costs included
• No out-of-pocket expenses
• No bidden deductibles
• One 800 number to call
We TICover Any Appliance.
Anywhere. Anytime.
You _dll be completel) satisfied with our service protection or )ou ma) request )our mone) back
on the remaining value of your contract. No questions asked. It's that simple.
Protect yore" refrigerator, dishwasher, washer and dryer, range, TV_ VCR and much more--a_y brand!
Plus there's no extra charge flw emergency service and low monthly financing is available. Even icemaker
coverage and toed spoilage protection is offered. You can rest easy, knowing that all your valuable
household products are protected against expensive repairs.
Place ,our confidence in GE and call us in the U.S. toll-free at _UU._Z_.ZZZ_
for l//Ol'e infol'I//atiOll.
:_,_*]1 hi}in(Is (o_.{!l_{!(L tip t(t _0 ){!iris Ill(I, ]11 the (on[lllenl tl [.S.
_ (Jill here
Please place in envelope and mail to:
GeneralElectricCompany
Warranty Registration Department
P.O. Box 32150
Louisville, KY 40232-2150
25

Consumer Product Ownership Registration
Dear Customer:
Thank you for purchasing our product and thank you for placing your confidence in us.
We are proud to haxe you as a customer!
Follow these three steps to protect your new appliance investment:
Complete and mail
your Consumer
Product Ownership
Registration today.
ttaw' tim l)eacu of
mind of knowing we
CHII COIItacl VOII ill
the tmlikelx (x(nt of a
saI_T, modification.
After mailing tile
registration below,
store this document
ill a sati place. It
contains inl_rmation
you will need should
you require setwice.
Our serxice ll/llllber is
800.(;E.CARES
(800.432.2737).
Read your Owner's
Manual carefully.
It will help you
operate yore- new
appliance properl>
Model Number Serial Number
I I
Important: If you did not get a registration card with your
product, detach and return the form below to
ensure that your product is registered, or register
online at ge.com.
._ (_111 here
Consumer Product Ownership Registration
Model Number Serial Number
I I I I I I I I I I I I I I , , , , , ,
MI: Ms. M_s. Mi_s
Firsl I I Lasll
Nanl( I I I I I I I I I Nanle I I I I I I I I I I I I
Sl r(!(!l I
Addr( ss I I I I I I I I I I I I I I I I I I I I I I I
, I
I
I
Apt. #, I I I I I I I I I E-nlail m(l(lress :{
(_,,I I , i I i I I I I I I I I I S,a,,_l
l)a_ Pla(ed
Number I , I
Month
Zip I
I ] Code I I I I I
I-I , , II , , , I
GE Consumer& Industrial
Appliances
General ElectricCompany
Louisville, KY40225
ge.com
26
* Please provide your e-mail address to receive, via e-mail, discounts, special ottbr,, and ()tiler important
communicalions from (;E Appliances (GI_\).
Check here if you do not wm_t to rcceixe communications trom GEA's carefillly select(d partner',.
FAIIX RI{TO COMPI],TFE AND RETI JRN TIIIS C_\RD D()ES NOT DIMINISII YOIR
W.\I_L \N'IY RI(;t ITS.
For more information about G1LVs privacy and data usage polic), go to ge.com and click on
"Priv_y Policy" or call 81,q).626.2224.

Notes.
I
m
m.
w
w
m
27
Notes.
,0
q_
1
---
1
1
_rJ
m
I
r --
28

Notes.
I
m
m.
w
w
m
29
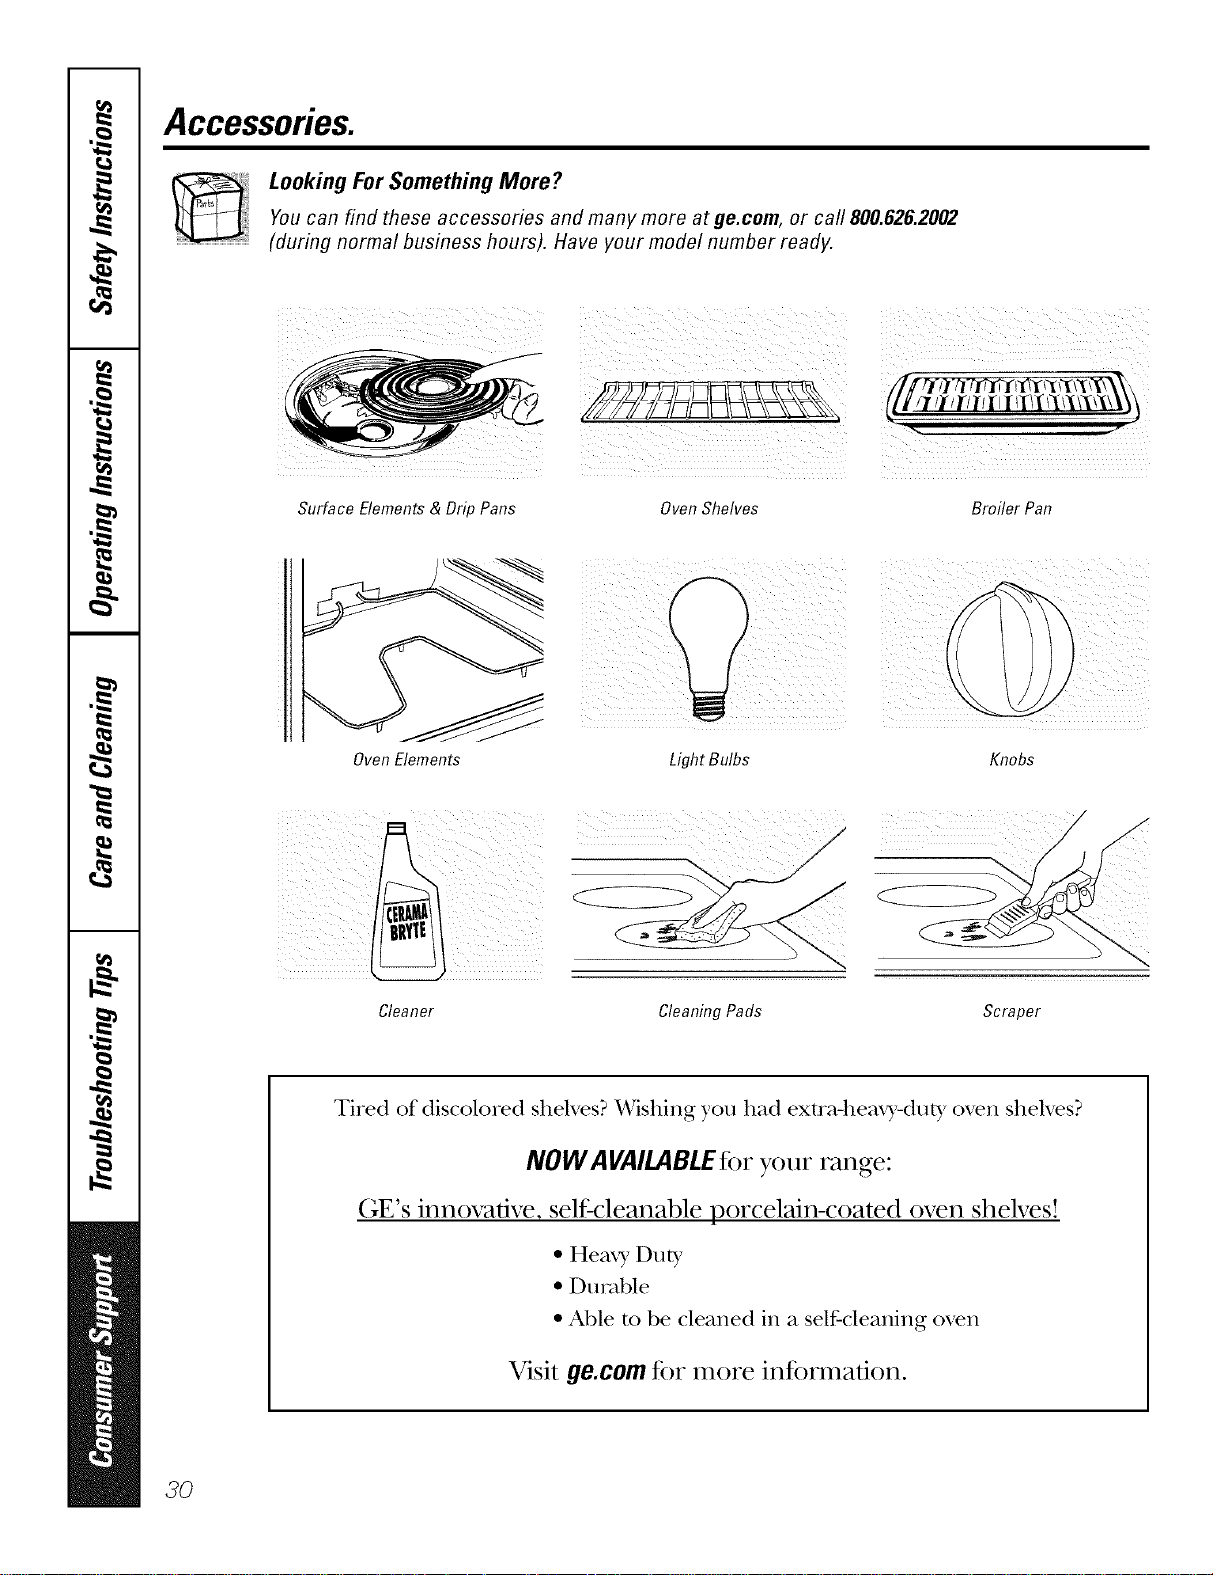
Accessories.
Looking For Something More?You can find these accessories and many more at ge.com, or call 800.626.2002
(during normal business hours). Have your model number ready.
Surface Elements & Drip Pans OvenShelves Broiler Pan
Oven Elements
Light Bulbs
Knobs
Cleaner Cleaning Pads Scraper
Tired of discolored shelves? Wishing you had exm_-heax3,-dut ), oven shelves?
NOW AVAILABLE for your range:
(;E's innovative, selfk:leanable porcelain-coated oven shelves!
• Hea_ 3,Duty
• Du_wble
• Able m be cleaned in a self-cleaning oven
Visit ge.com for more infbnnafion.
3O
GEElectricRange Warranty.
All warranty service provided by our Factory Service Centers,
or an authorized Customer Care® technician. Toschedule service,
on-line, 24 hours a day, visit us at ge.com, or call 800.GE.CARES
(800.432.2737).Please have serial number and model number
available when calling for service.
Staple your receipt here.
Proof of the original purchase
date is needed to obtain service
under the warrantz
GE Will Provide:
Fromthedate ofthe
origina!purchase
0 o" • " " "
Anypart f the range v,,]nch fails due to a defect in materials or workmanship.
During this limited one-year warranty, GE will also proxide, free of charge, all labor
and in-home serxice to replace the defectixe part.
::Ji_:Service trips to your home to teach you how to use
the product.
iJi_:hnproper h_staJlation, delivery or maintenance.
_: Failure of the product if it is abused, misused, or used
for other thaal the intended purpose or used
commercially.
::Ji::Replacement of house fuses or resetting of circuit
breakers.
iJi::Damage to the product caused by accident, fire, floods
or acts of God.
::Ji::h_cidentaJ or consequentiaJ damage caused by possible
defects with this appliance.
)_:Damage caused after delivery.
iJi::Product not accessible to provide required service.
EXCLUSIONOFIMPLIED WARRANTIES--Your sole and exclusive remedy is productrepair as provided hi this Limited
Warranty. Any implied warranties, including the implied warranties ofmerchantability or fitnessfor a particular purpose,
are limited toone year or theshortestperiod allowed by law.
This warranty is extended to the original purchaser and any succeeding owner for products purchased for
home use within the USA. If the product is located in an area where service by a GEAuthorized Servicer is not
available, you may be responsible for a trip charge or you may be required to bring the product to an Authorized GE
Service location for service. In Alaska, the warranty excludes the cost of shipping or service calls to your home.
Some states do not allow the exclusion or limitation of incidental or consequential damages. This warranty
gives you specific legal rights, and you may also have other rights which vary from state to state. Toknow
what your legal rights are, consult your local or state consumer affairs office or your state's Attorney General
Warrantor." General Electric Company.Louisville,KY40225
3/
ConsumerSupport.
GEAppliancesWebsite ge.com
Have a question or need assist;race with your appliance? Try the (;E Al)pliances Website 24 hom_ a (la);
any day of the vear'. For greater convenience and faster se_Mce, you can now download Owner's Manuals,
order parts, catalogs, or even schedule service onqine. You can also "_sk Our Team of Experts ......
}'O/lI" questions, and so I/lllch I/loI'e...
ScheduleService
Expert (;E repair setMce is onlx one step awa) fl'om your door; Get on-line and schedule your service at
your comenience 24 hom_ am dm of the _ear! Or call 800.GE.(_ARES 800.432.2737) during nomml
business hom_.
ge.com
RealLifeDesignStudio ge.com
GE supports the Uni\'e_al Design concept--products, services and enviromnents that can be used b)'
people of all ages, sizes and capabilities. We recognize the need to design fi)r a wide range of i)hysical and
ment;d abilities and impaim_ents. For details of GE's ILrnive_al Design applications, including kitchen
design ideas for people with disabilities, check out O/li" X.Vebsite today. For the hearing impaired, please call
800.TDD.GEAC (800.833.4322).
ExtendedWarranties
ge.com
Pro'chase a (;E extended warranty and learn about special discounts that are available while your warranty
is still in effect. You can imrchase it on-line anytime, or call 800.626.2224 during nomml business hom_.
(;E (_onsuiner Hoine Serxices will still be there after )our warrant} expires.
PartsandAccessories
ge.com
Individuals qualified to sei_'ice their own appliances can have parts or accessolJes sent directly to their
homes (VISA, MasterCard and Discover cards are accepted). Order on-line today, 24 hom_ eve_' day or
by phone at 800.626.2002 during nomml business hom_.
Instructions contained in thN manual cover procedures to be performed by any user. Otherservicing generally
should be referred to qualified service personnel Cautionmust be exercised, since improper servicing may cause
unsafe operation.
ContactUs
ge.com
If you are not satistied with the service you receive fl'om GE, contact us on our _,Vebsite with all the details
including yore" phone ntllllbeI; oi" wlJte to: General Manage_; CtlStOlllei" ]),elations
GE Appliances, Appliance Park
I,ouisville, KY 40225
RegisterYourAppliance
Register your new applim_ce on-lhle----at your convenience! Timely product registration will allow for
enhanced communication and prompt service under the temps of_our warrant); should the need arise.
You may also mail in the pre-p_inted registration card included in the I)ackiw"_ material.
ge.com
Printed in flTeUnited States

