Loading ...
Loading ...
Loading ...

ENGLISH
6
Connecting to Power Tools (Fig. F)
NOTE: Some brushless AC tools can start the vacuum in auto
mode without turning on the power tool.
1. Plug the vacuum power cord into an appropriateoutlet.
2. Plug the power tool into the outlet.
3. Turn on/off tool control switch
15
to the ACTIVATION
position
. This allows the vacuum to be turned on
and off automatically with the powertool.
NOTE: The vacuum cleaner starts automatically within
0.5seconds and continues to run for 7 seconds after the
power tool has been turnedoff. Afterrun can vary when
used with a power generator
To Operate the Vacuum (Fig. E)
1. Plug the power cord into an appropriateoutlet.
2. Turn the on/off/tool control switch
15
to the ON
position
).
3. Set the variable suction dial
14
to the desired position.
This feature allows the user to control the vacuum's
power, suction andnoise.
NOTE: This setting also controls the level of suction. This
is very useful in applications where the vacuum creates
unacceptable levels of drag to the workpiece.
4. Follow the direction under Connecting to Power Tools
to connect to the power tool to beused.
OPERATION
WARNING: To reduce the risk of serious personal
injury, turn unit off and disconnect it from power
source before making any adjustments or
removing/installing attachments or accessories.
An accidental start‑up can causeinjury.
WARNING: When using electric appliances, always
follow basic safety precautions to reduce the risk of fire,
electric shock and personalinjury.
WARNING: The filters
9
must always be in place while
vacuuming, except as described under Wet Pick Up
Applications under Operation. When vacuuming
fine dust, you may also use an additional paper bag or
fleece bag to make emptying the canistereasier.
1. If optional paper or fleece bag
18
is to be used, install as
shown in FigureB.
NOTE: Be careful not to tear the bag. Place bag securely
onto the backside of the inlet
10
to provide a tight seal
for maximum dust collectionperformance.
2. Place the vacuum head
3
onto the canister and secure it
by closing the canister latches
4
as shown in FigureC.
3. Insert end of hose
7
into twist‑lock hose inlet and rotate
counterclockwise to lock in place as shown in FigureD.
ASSEMBLY AND ADJUSTMENTS
WARNING:
To reduce the risk of serious personal
injury, turn unit off and disconnect it from
power source before making any adjustments or
removing/installing attachments or accessories.
An accidental start‑up can causeinjury.
Anti-Static Hose
The DWV015 is equipped with an anti‑static grounding
system. Some models have an anti‑static hose which will
prevent static shocks caused by vacuuming drydebris.
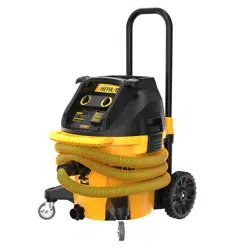
COMPONENTS FIG. A
WARNING: Never modify the power tool or any part of
it. Damage or personal injury couldresult.
Refer to Figure A at the beginning of this manual for a
complete list ofcomponents.
Motor
Be sure your power supply agrees with the nameplate
marking. Voltage decrease of more than 10% will cause loss
of power and overheating. These tools are factory tested; if
this tool does not operate, check powersupply.
NOTICE: Do not use this tool on DC current. Tool
damage can occur.
Grounding Instructions
This appliance must be grounded. If it should malfunction
or breakdown, grounding provides a path of least resistance
for electric current to reduce the risk of electric shock. This
appliance is equipped with a cord having an equipment‑
grounding conductor and grounding plug. The plug must
be inserted into an appropriate outlet that is properly
installed and grounded in accordance with all local codes
andordinances.
WARNING: Improper connection of the equipment‑
grounding conductor can result in a risk of electric
shock. Check with a qualified electrician or service
person if you are in doubt as to whether the outlet is
properly grounded. Do not modify the plug provided
with the appliance – if it will not fit the outlet, have a
proper outlet installed by a qualifiedelectrician.
This appliance is for use on a nominal 120‑volt circuit and
has a grounding attachment plug that looks like the plug
illustrated in Figure B. Make sure that the appliance is
connected to an outlet having the same configuration as the
plug. No adaptor should be used with thisappliance.
PESTICIDES. ALWAYS USE PROPER EYE AND RESPIRATORY
PROTECTION AS REQUIRED BY OSHA OR OTHER
GOVERNMENTAL/PROVINCIAL INSTITUTIONS FOR THE
APPLICATION BEING PERFORMED. TO REDUCE THE
RISK OF ELECTRICAL SHOCK, DO NOT EXPOSE TO RAIN.
STORE INDOORS. WHEN SERVICING, USE ONLY IDENTICAL
REPLACEMENT PARTS. NOT TO BE USED AS A STEP STOOL.
(THE USE OF THIS MACHINE IN CONJUNCTION WITH THE
PICK UP OF LEAD HAS NOT BEEN INVESTIGATED BY UL)
CAUTION: RISK OF FIRE AND INJURY. DO NOT EXCEED
15AMPS. THE RECEPTACLE IS ENERGIZED WHEN
THE VACUUM IS ON OR SET TO AUTO MODE. WHEN
SET TO AUTO MODE, THE VACUUM WILL TURN ON
AUTOMATICALLY WHEN THE APPLIANCE CONNECTED
TO THE RECEPTACLE IS TURNEDON.
SAVE THESE INSTRUCTIONS
Loading ...
Loading ...
Loading ...