Loading ...
Loading ...
Loading ...
)'0'4#.+056#..#6+10
+06'40#.2#%-#)+0)
1. Please remove all internal packaging material before use.
Any glue or tape residue or the like should be removed
with a solution of mild detergent and water.
2. Clean your appliance thoroughly following the instructions
on page 19 and wipe off any dust that has accumulated
during shipping.
WARNING
Before cleaning: Remove the power cord from the power
socket. This will make sure there is no chance of getting
an electric shock.
3. Install accessories such as the ice cube storage bin.
The accessories are packed together to prevent damage
during delivery.
4. Plug your appliance into the power point.
5. We recommend that you let your refrigerator run for two
to three hours before you put any food in it. This will
allow you to check that it is operating properly and that
enough cool air is circulating.
+%'#0&9#6'4/1&'.5
CAUTION
The water connection to your ice and water product
should only be done by a licensed refrigeration mechanic,
plumber or electrician.
All relevant information regarding the water connection is
detailed in the water kit provided with your product for use
by the professional installer only.
The automatic ice and water dispenser needs a drinkable
water supply with a pressure of:
s¬¬ -INIMUM¬¬K0A¬¬PSI¬¬KGFCM§
s¬¬ -AXIMUM¬¬K0A¬¬PSI¬¬KGFCM§
In some areas water pressure is significantly higher due to
local conditions. In such areas a pressure reducing valve
must be used. Ensure your plumber or installer checks your
water pressure when installing your refrigerator.
If you are using your refrigerator for the first time, or if you
have not used the dispenser for some time:
s¬¬ $ISCARD¬THE¬FIRST¬SEVEN¬OR¬EIGHT¬CUPS¬OF¬WATER
s¬¬ ¬$ISCARD¬ANY¬ICE¬THAT¬THE¬ICE¬MAKER¬PRODUCES¬IN¬THE¬
first 24 hours (contaminants could have settled in the
water pipes)
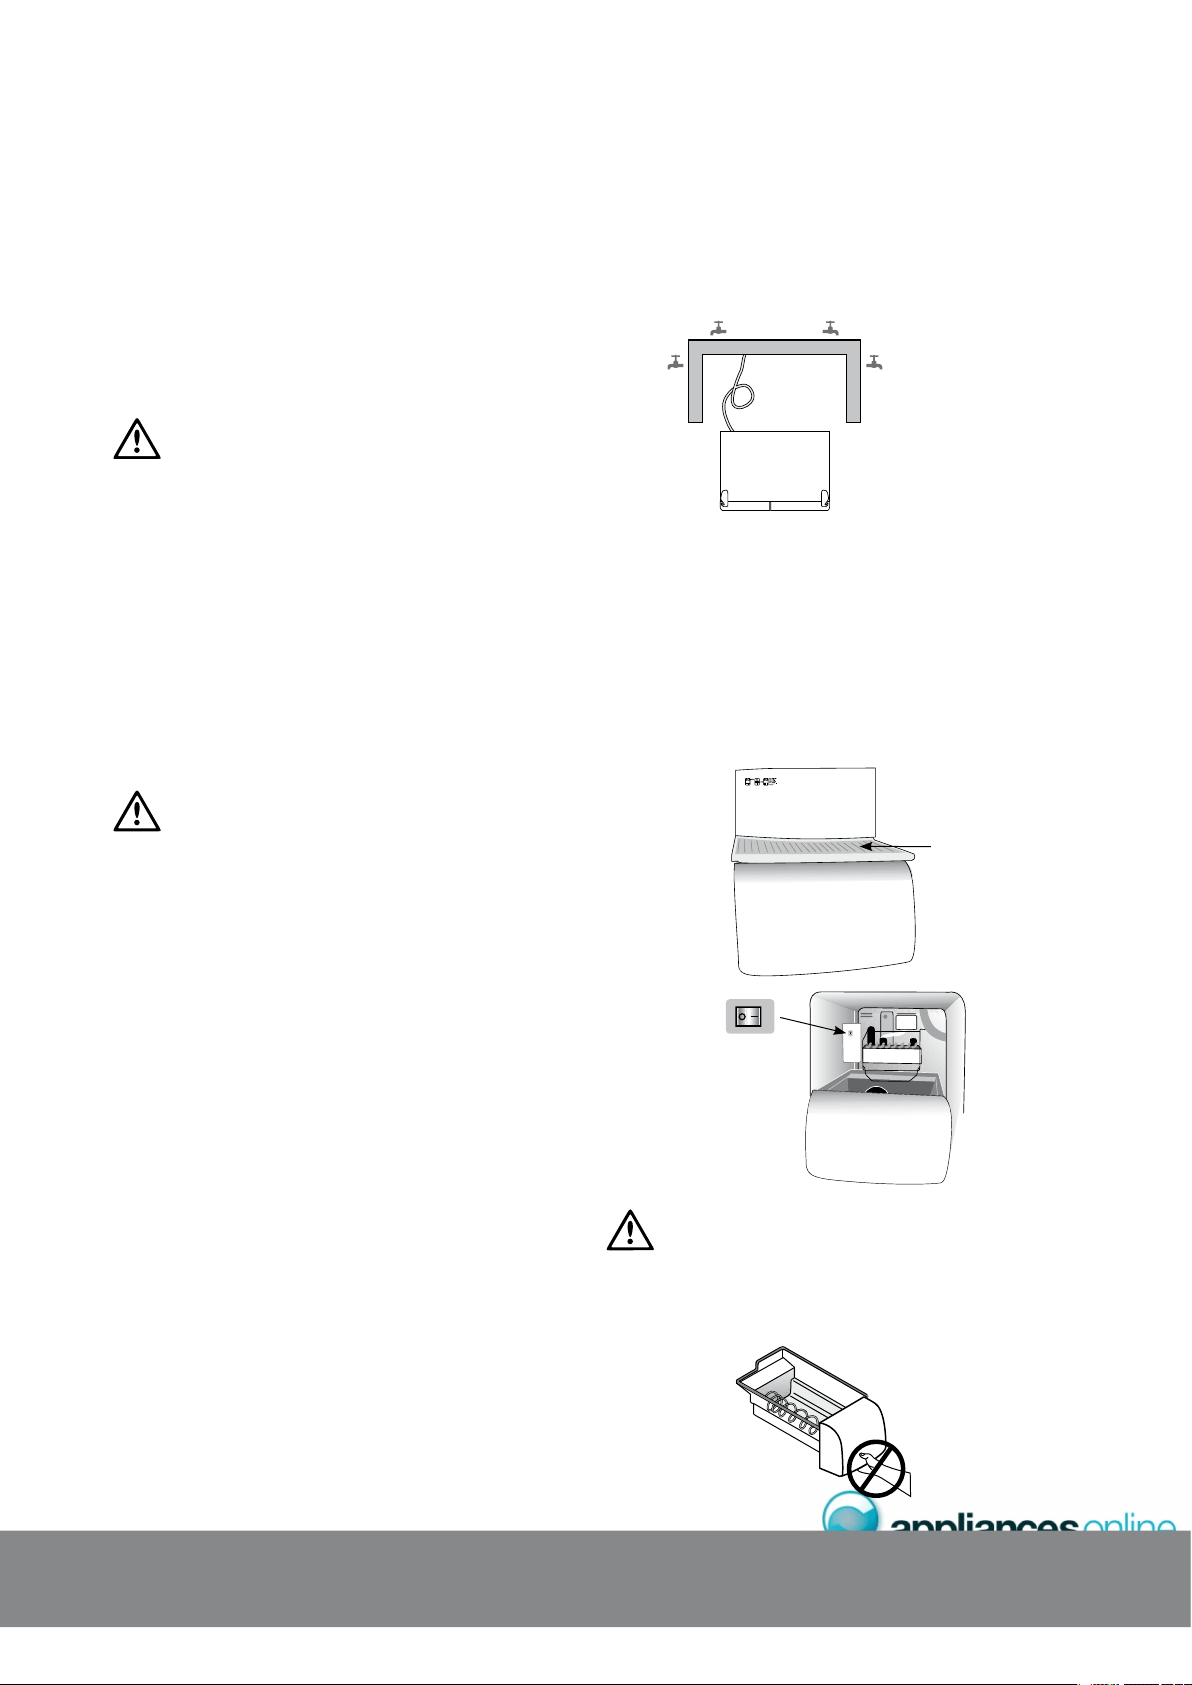
The water tap can be anywhere and there is no limit to
the amount of pipe between the tap and the refrigerator,
however, some points to note are:
1. It is better to have the tap accessible without having
to roll the refrigerator forward, so we recommend
putting it outside the cavity as shown by the taps
in the diagram below.
2. It is recommended, but not essential that the height
of the tap should be 400mm from the ground.
3. If the refrigerator is required to be pulled forward for
cleaning, the water pipe may need to be removed
from the tap.
+%'/#-'456#4672
If the ice maker is not connected to a water supply,
check that the ice maker is turned off. To do this remove
the ice cream shelf and put the switch in the ‘OFF’ position.
If you don’t do this a loud buzzing noise will be heard
intermittently if the icemaker is on but no water is being
supplied. If the ice maker is connected to a water supply,
check that the ice maker is turned on. To do this put the
switch in the ‘ON’ position.
ONOFF
WARNING
Connect to potable water supply only.Do not use the ice chute
as a handle when removing or replacing the ice storage bin.
Do not put fingers up the ice chute. Surfaces there may be sharp.
+
056#..#6+
1
0
ice cream shelf
Loading ...
Loading ...
Loading ...