
Loading ...
Loading ...
Loading ...
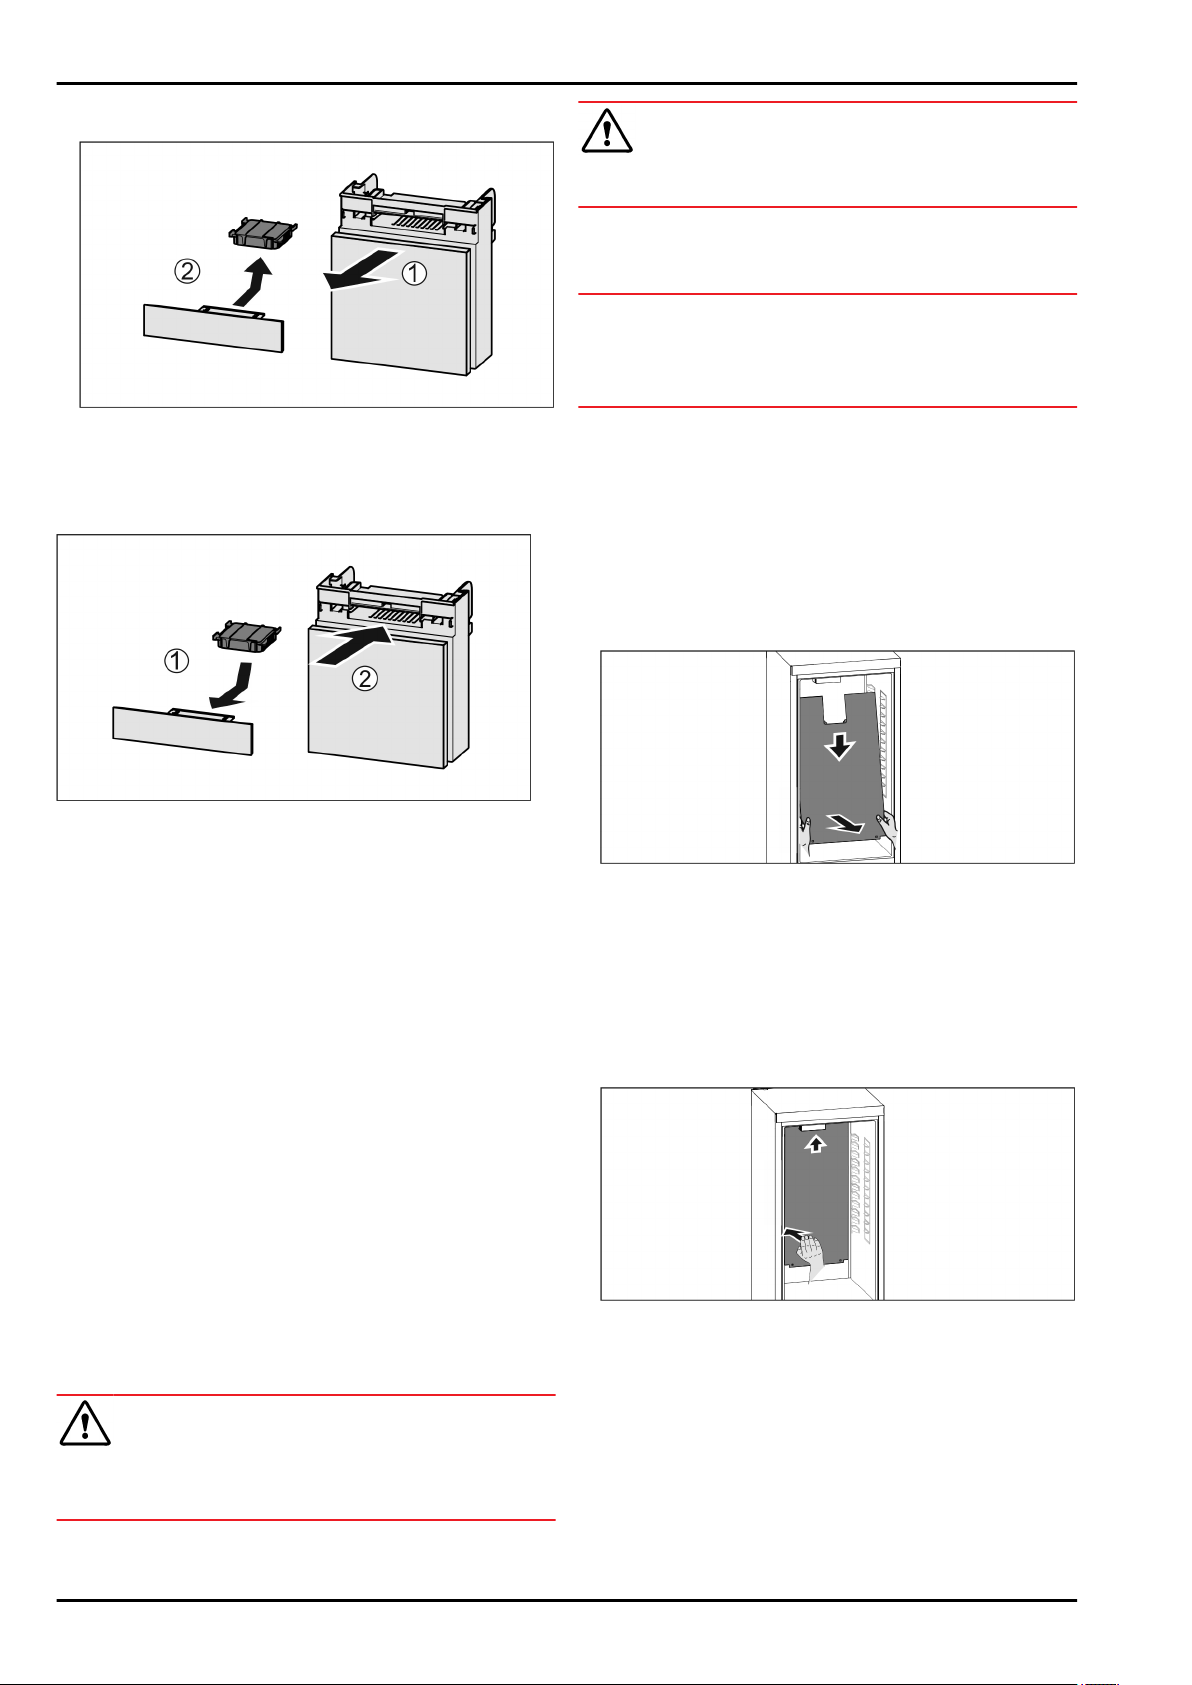
8.1.1 Removing the FreshAir carbon filter
Fig. 55
u
Pull out the compartment
Fig. 55 (1)
.
u
Remove the carbon filter
Fig. 55 (2)
.
8.1.2 Inserting the FreshAir carbon filter
Fig. 56
u
Insert the carbon filter as shown in the diagram
Fig. 56 (1)
.
w
The carbon filter clicks into place.
If the carbon filter is pointing downwards:
u
Push the compartment in
Fig. 56 (2)
.
w
The carbon filter is now ready for use.
8.2 Defrosting the appliance
8.2.1 Defrosting the fridge section
Defrosting is automatic. The thawing water drains through the
outlet and evaporates.
u
Clean the outflow opening regularly (see 8.3 Cleaning the
appliance) .
8.2.2 Defrost freezer section using the NoFrost
option
Defrosting happens automatically via the NoFrost system.
The moisture is deposited on the evaporator, is periodically
defrosted and evaporates.
The appliance does not need to be defrosted.
8.3 Cleaning the appliance
8.3.1 Ready
WARNING
Danger of electric shock!
u
Remove the refrigerator connector or interrupt the power
supply.
WARNING
Risk of fire
u
Do not damage the refrigeration circuit.
u
Empty the appliance.
8.3.2 Cleaning the interior
NOTICE
Improper cleaning!
Damage to the appliance.
u
Only use soft cleaning cloths and ph-neutral all-purpose
cleaners.
u
Plastic surfaces: clean by hand with a soft clean cloth, luke-
warm water and a little detergent.
u
Metal surfaces: clean by hand with a soft clean cloth, luke-
warm water and a little detergent.
u
Drain outlet
Fig. 1 (9)
: remove any deposits with a thin item
such as a cotton bud.
8.3.3 Cleaning stainless steel rear wall
You can remove the stainless steel rear wall for cleaning.
Remove stainless steel rear wall:
Fig. 57
When all equipment parts have been removed:
u
Hold the rear wall with both hands at the bottom and pull
downward vigorously at the same time.
u
Pull the rear wall down and out to the front.
w
Rear wall has been removed.
When operation of the appliance is continued with the rear
wall removed:
u
Set
D-Value
to D2 (see D-Value) .
Insert rear wall:
Fig. 58
When all equipment parts have been removed:
u
Slide in the rear wall from below to the top.
When the rear wall is inserted in the upper gap:
u
Press back vigorously on the left-hand side of the rear wall.
w
Rear wall clicks into place.
u
Insert the equipment parts.
u
Set
D-Value
to D1 (see D-Value) .
Maintenance
* Depending on model and options 19
Loading ...
Loading ...
Loading ...