
Loading ...
Loading ...
Loading ...
Page 9
OPERATION INSTRUCTIONS
NOTE: Before using the tool, read the
instruction book carefully.
Intended use
The power tool is intended for sawing
wooden materials, plastic, plaster, non-
ferrous metals and fasteners (e.g. nails) as
well as for working on drywall and for dry
grinding of small surfaces. It is especially
suitable for working close to edges and for
flush cutting.
ASSEMBLY
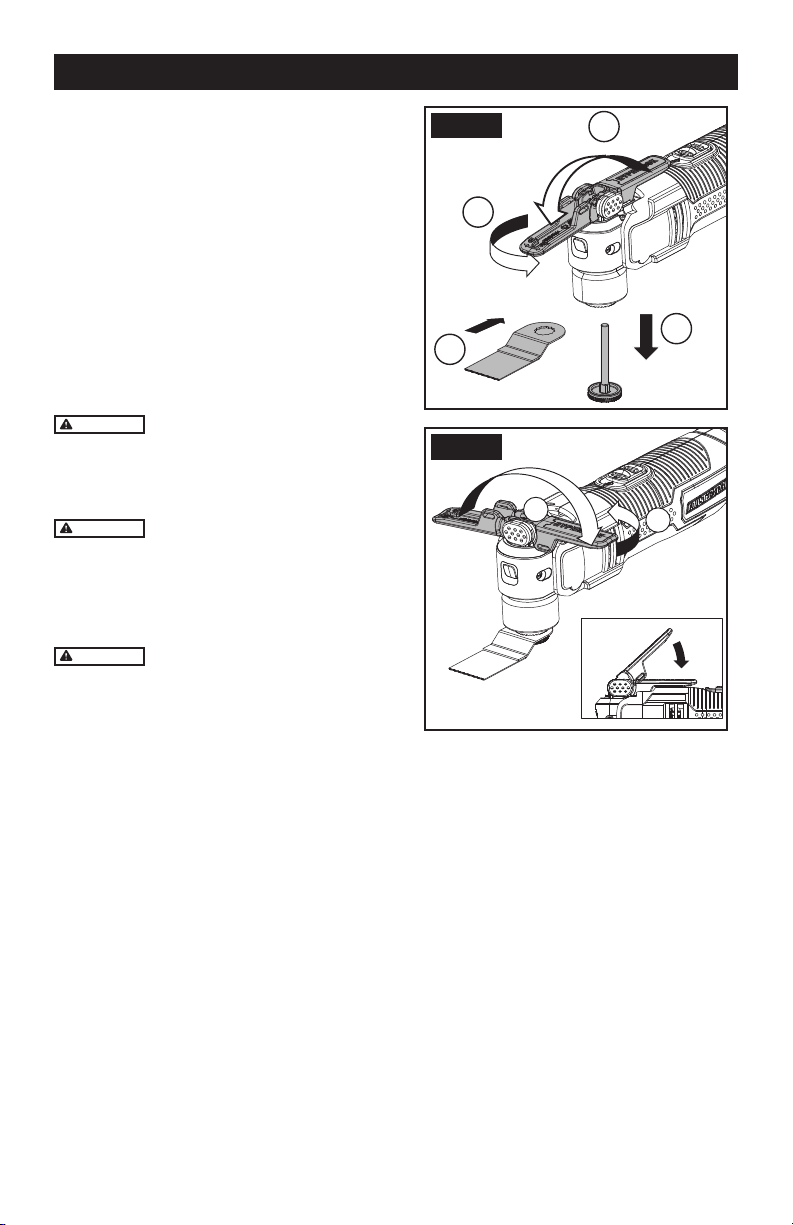
1. MOUNTING THE ACCESSORIES
WARNING
Before mounting or replacing
sanding pad or accessories, disconnect the
plug from power source. This preventative
safety measure eliminates danger from ac-
cidentally starting the power tool.
WARNING
Accessories can become
very hot while operating the tool, and many
accessories have sharp edges. To reduce
the risk of injury, always wear protective
gloves when operating the tool or changing
accessories.
WARNING
To reduce the risk of injury, do
not let the sharp side of the accessory face
back toward the user’s hand.
The tool free system allows you to change
accessories without the use of a hex key/
Allen wrench.
- Mounting the closed end accessories
(not included) (See Fig. A1-A2)
1) Flip the tool-less accessory clamping
lever forward to the open position and
rotate the lever counterclockwise until
flange is released, and can be removed
from the tool.
2) Insert the closed-ended cut blade onto
the accessory Interface, making sure the
accessory in the correct position on the
universal-fit accessory interface.
3) Re-insert the flange into the accessory
Interface, and press against the
accessory to temporarily hold in place
while rotating lever in clockwise direction
until accessory is tightened securely.
4) Flip the too-less accessory clamping
lever back to original position to secure
the accessory.
Fig. A1
1
4
2
3
Fig. A2
1
2
- Mounting the open-ended accessories
(See Fig. A3)
1) Flip the tool-less accessory clamping
lever forward to the open position.
2) Rotate the lever counterclockwise to
loosen the flange.
3) Insert the open-ended accessory into
the universal-fit accessory Interface,
make sure the accessory is in the correct
position of the universal-fit accessory
interface.
4) Rotate the lever clockwise until
accessory is tightened securely.
5) Flip the tool-less accessory clamping
lever back to original position to secure
the accessory.
OPERATION
Loading ...
Loading ...
Loading ...