Loading ...
Loading ...
Loading ...

18
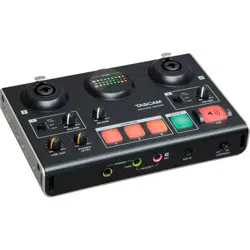
TASCAM MiNiSTUDIO CREATOR
EXPERT page
CAUTION
The EQUALIZER, COMPRESSOR and REVERB have
no effect on the external input jack (i).
NOTE
• Use the mouse to click and drag parameter
knobs up and down to adjust them.
• Click buttons with the mouse to turn them on
and off.
1 EQUALIZER area
This unit has a 4-band equalizer (with HIGH, HIGH
MID, LOW MID and LOW bands).
Use the equalizer to increase or decrease the levels
of specific frequency ranges. This can be used,
for example, to enhance the sound of individual
instruments, to adjust the balance of a wide
frequency range and to cut specific unwanted
frequencies. (See “EQUALIZER (4-band parametric
EQ) display area overview” on page 19.)
2 COMPRESSOR area
When the input volume exceeds the THRESHOLD
level, the input volume is compressed, reducing
output volume variation.
For example, by reducing the levels of loud sounds,
lower level sounds become relatively louder,
creating a more even volume level throughout
and a more sustained sound. (See “COMPRESSOR
display area overview” on page 20.)
NOTE
When the compressor is off, the compressor
curve will appear but the meters will not be
active.
3 RVB SEND display area
If a reverb type switches other than OFF is
selected, the mic reverb can be turned on/off.
Options: ON (default), OFF
4 EFFECT area
Use this to select a preset effect to apply to the
signals input through the inputs (1, 3, y and
u). Use the BALANCE knob to adjust the dry/
wet signal balance. (See “EFFECT display area
overview” on page 20.)
5 BUFFER SIZE setting area (Windows only)
The Windows driver for the unit stores the audio
signals sent to and from the computer tempo-
rarily in a buffer. This buffer size can be adjusted.
Smaller buffer sizes result in less audio signal
delay (latency), but require high-speed
processing by the computer.
If the processing cannot keep up, for example,
due to other system operations, clicking and
popping noises might occur and the audio signal
might even drop out.
Increasing the buffer size will stabilize operation
and suppress negative effects on audio signals,
but the delay in audio signals sent to the
computer will increase.
You can use the slider on the panel to adjust the
buffer size, according to the use conditions.
Use the slider to select fixed values that increase
from left to right.
Options: 1024, 512, 256, 128, 64
6 ASIO setting area (Windows only)
This turns ASIO use on or off.
Turn this ON when using a plug-in that supports
ASIO on signals being input to the unit.
Options: ON, OFF
CAUTION
If this is left ON when not using a plug-in that
supports ASIO, input signals will not be output.
7 Reverb type switches
Use to select the type of reverb.
Depending on the type, the density and level of
the reverb sound changes.
Options:
HALL, ROOM, LIVE, STUDIO, PLATE, OFF
8 PRE DELAY knob
Set the amount of delay until the first reverberations.
The larger the value, the larger the reverberations
make the room sound.
Range: 0–250 ms
9 REVERB TIME knob
Set the amount of time that the reverberations
continue.
The larger the value, the longer they continue.
Range: 0.1–10 s
0 DIFFUSION knob
Sets the breadth of the reverberations.
Range: 0–100
Loading ...
Loading ...
Loading ...