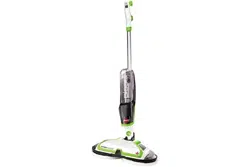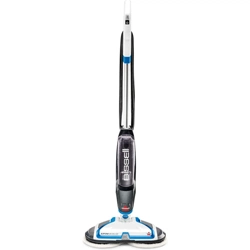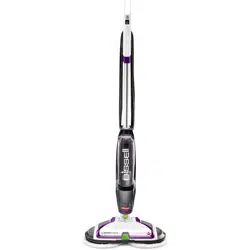
SPINWAVE®
_______________
USER GUIDE
2039 SERIES
www.BISSELL.com
2
IMPORTANT SAFETY INSTRUCTIONS
WARNING
TO REDUCE THE RISK OF FIRE,
ELECTRIC SHOCK OR INJURY:
» Connect to a properly grounded
outlet only. See grounding
instructions. Do not modify the
3-prong grounded plug.
» Do not leave appliance when it is
plugged in. Unplug from outlet when
not in use and before servicing.
» Use indoors only.
» Do not allow to be used as a toy.
Close attention is necessary when
used by or near children.
» Do not use for any purpose
other than described in this user
guide. Use only manufacturer’s
recommended attachments.
» Do not use with damaged cord or
plug. If appliance is not working
as it should, or has been dropped,
damaged, left outdoors, or
dropped into water, have it repaired
at an authorized service center.
» Do not pull or carry by cord, use
cord as a handle, close a door on
cord, or pull cord around sharp
edges or corners. Do not run
appliance over cord. Keep cord
away from heated surfaces.
» Do not unplug by pulling on cord.
To unplug, grasp the plug, not the
cord.
» Do not handle plug or appliance
with wet hands.
» Keep hair, loose clothing, fingers,
and all parts of body away from
openings and moving parts.
» Turn OFF all controls before
plugging or unplugging appliance.
» Use extra care when cleaning on
stairs.
» Do not use appliance in an
enclosed space filled with vapors
given off by oil-based paint, paint
thinner, some moth-proofing
substances, flammable dust, or
other explosive or toxic vapors.
» Use only BISSELL® cleaning
products intended for use
with this appliance to prevent
internal component damage.
» Do not immerse. Use only on hard
floor surfaces moistened by the
cleaning process.
» Keep appliance on a level surface.
» Do not carry the appliance while in
use.
READ ALL INSTRUCTIONS BEFORE USING YOUR SPINWAVE®.
When using an electrical appliance, basic precautions should be observed, including the following:
This model is for household use only. Commercial use of this machine voids the manufacturer’s warranty.
SAVE THESE INSTRUCTIONS
FOR FUTURE USE
WARNING
Improper connection of the equipment-grounding conductor can
result in a risk of electrical shock. Check with a qualified electrician or
service person if you aren’t sure if the outlet is properly grounded.
DO NOT MODIFY THE PLUG. If it will not fit the outlet, have a proper
outlet installed by a qualified electrician. This appliance is designed
for use on a nominal 120-volt circuit, and has a grounding attachment
plug that looks like the plug in the illustration. Make certain that the
appliance is connected to an outlet having the same configuration as
the plug. No plug adapter should be used with this appliance.
GROUNDING INSTRUCTIONS
This appliance must be connected to a grounded wiring system. If it
should malfunction or break down, grounding provides a safe path
of least resistance for electrical current, reducing the risk of electrical
shock. The cord for this
appliance has an equipment-grounding
conductor and a grounding plug. It must
only be plugged into an outlet that is
properly installed and grounded in
accordance with all local codes and ordinances.
Grounded
Outlets
Grounding Pin
WARNING
To Reduce The Risk Of Injury From Moving
Parts – Unplug Before Servicing.
WARNING
Risk Of Injury. Mop Pads May Start
Unexpectedly. Unplug Before Cleaning or
Servicing.

www.BISSELL.com 3
What’s In The Box?
NOTE: Standard accessories may vary by model. To identify what should be included with
your purchase, please refer to the “Carton Contents” list located on the carton top flap.
Safety Instructions. . . . . . . . . . . 2
Product View. . . . . . . . . . . . . . . .4
Assembly . . . . . . . . . . . . . . . . . . . 5
Operations . . . . . . . . . . . . . . . .6-8
Maintenance & Care . . . . . . . . . 9
Troubleshooting . . . . . . . . . . . . 10
Warranty . . . . . . . . . . . . . . . . . . . .11
Service . . . . . . . . . . . . . . . . . . . . . .11
Product Registration . . . . . . . . 12
Consumer Care . . . . . . . . . . . . . 12
(2) Scrubby
Pads
Handle
(2) Soft Touch
Pads
(2) 8 oz BISSELL
Multi-Surface
Formula (1) 8 oz BISSELL
Wood Floor
Formula
Body of
Machine
Thanks for buying a BISSELL® SpinWave®!
We love to clean and we’re excited to share one of our innovative products with
you. We want your SpinWave to work like new for the years to come, so this guide
has tips on how to use, maintain and, if there’s a problem, troubleshoot.
Your SpinWave needs a little assembly before getting to work, so flip to the
“Assembly” section and let’s get started!
www.BISSELL.com
4
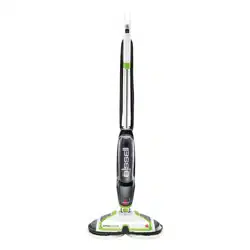
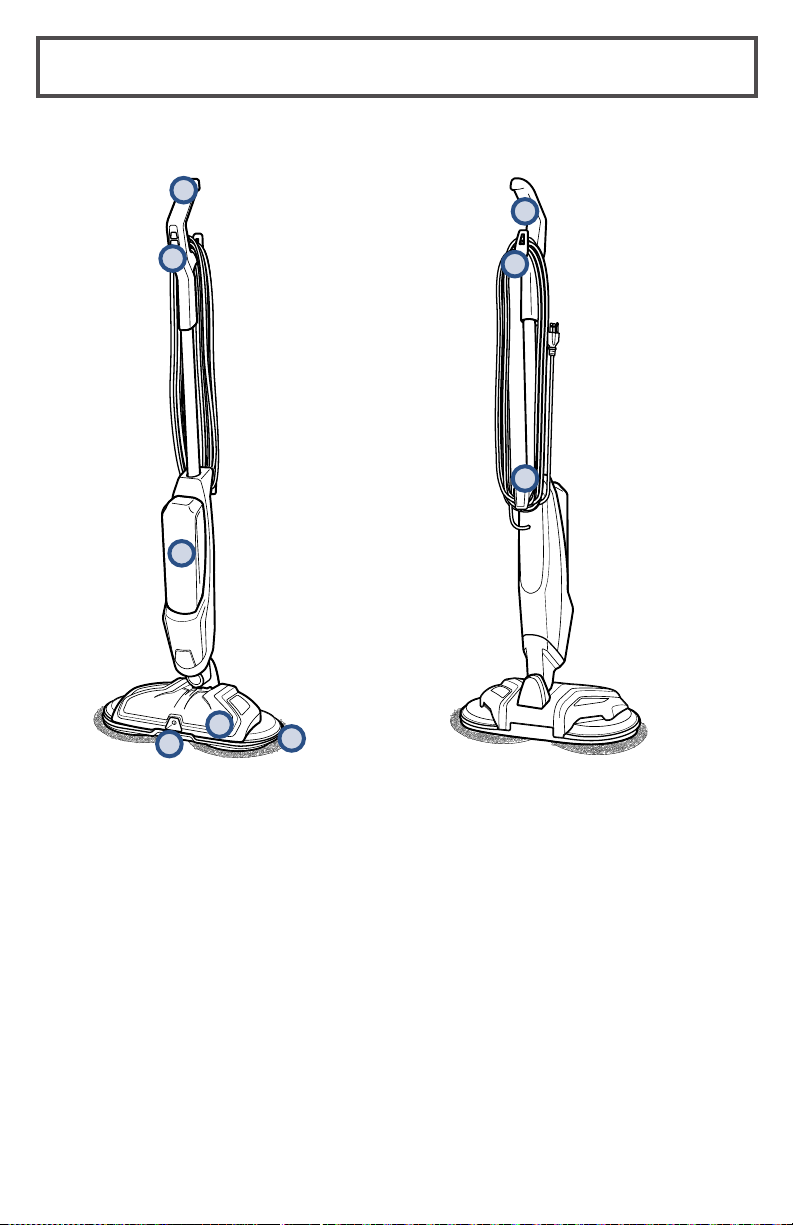
Getting to Know Your SpinWave®
3
2
1
9
4
7
8
1 Handle
2 Digital Controls
3 Clean Water Tank
4 Low Profile Foot
5 Power Spin Pads
6 Spray Nozzle
7 In-Use Cord Clip
8 Quick Release™ Cord Wrap
9 Lower Cord Wrap
5
6
www.BISSELL.com 5
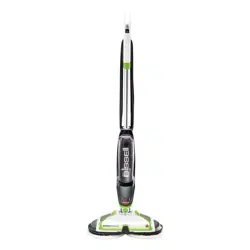
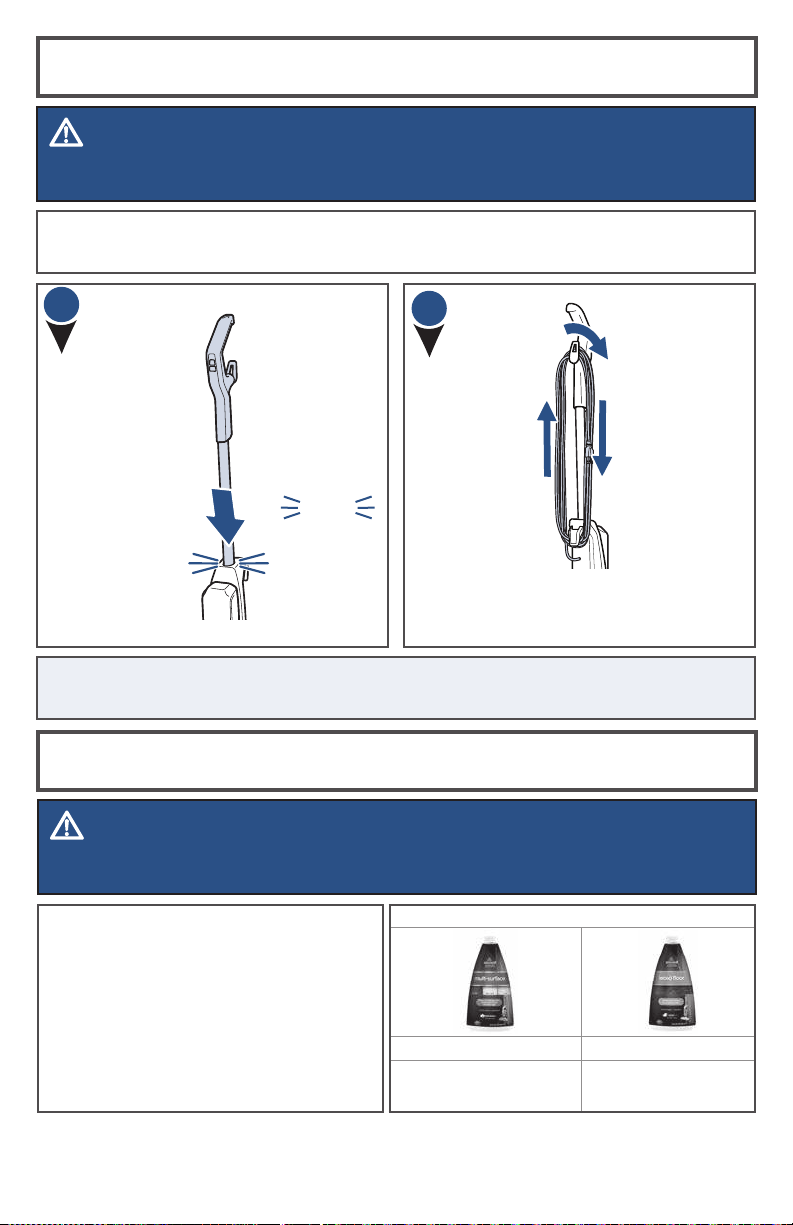
Assembly
Insert Handle
into body of
machine until
you hear a
“click”.
Then, wrap the cord around the Quick
Release™ Cord Wrap and the Lower Cord
Wrap. Your assembly is now complete!
WARNING
Do not plug in your SpinWave® until you are familiar with all instructions
and operating procedures.
Your BISSELL® SpinWave machine comes in two easy-to-assemble components and does
not require any tools to assemble.
click
NOTE: To easily unwrap the cord for use, just turn the Quick Release Cord Wrap
downward to remove the cord from the cord wrap.
12
SPINWAVE FORMULAS
Multi-Surface Formula Wood Floor Formula
Great for cleaning ALL
sealed hard floors Restore your sealed wood
floors’ natural shine
Cleaning Formulas
WARNING
To reduce the risk of fi re and electric shock due to internal component damage, use only
BISSELL® formulas intended for use with the hard fl oor device.
Keep plenty of SpinWave formulas
on hand so you can clean your
sealed hard floors whenever it fits
your schedule.
Always use SpinWave formulas in
your machine. Other solutions may
harm the machine and may void
the warranty.
www.BISSELL.com
6
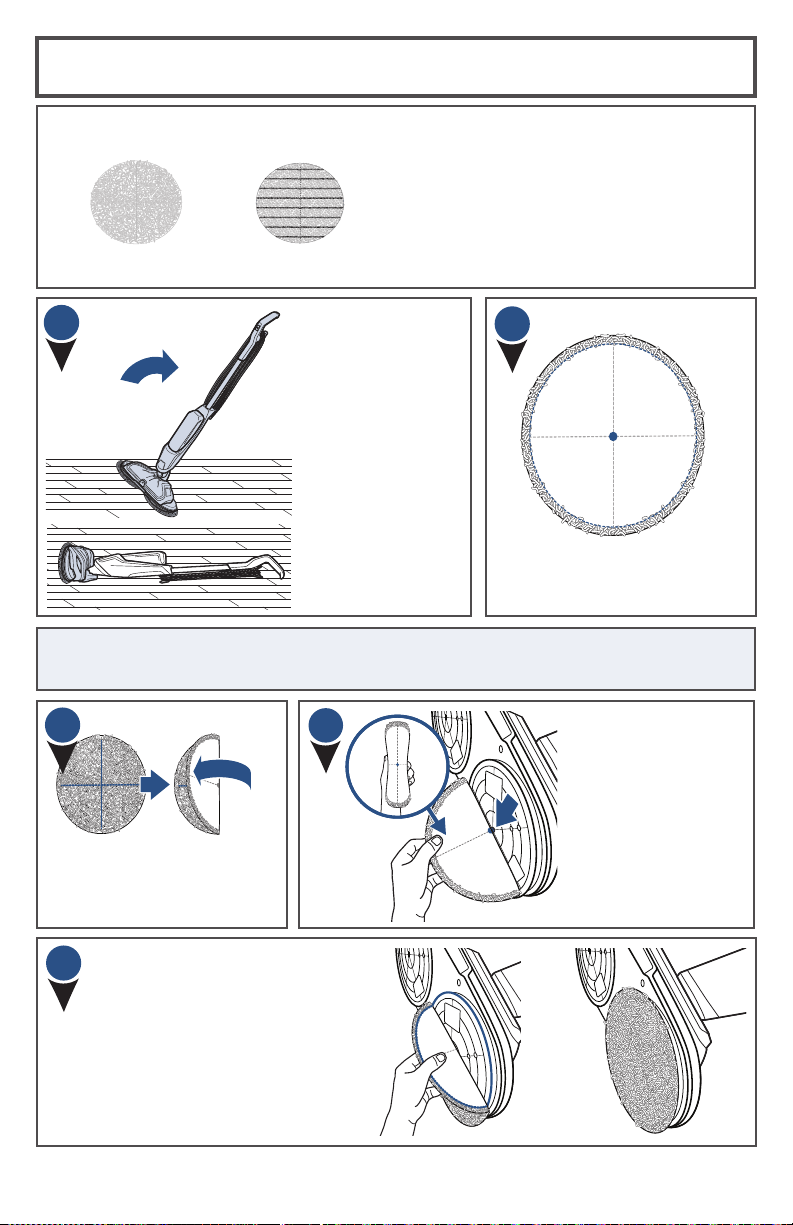
Attaching Your Mop Pads
1
Your BISSELL® SpinWave® may have come
with two different mop pads:
(2) Scrubby Pads(2) Soft Touch Pads
The Soft Touch Pad is best for
everyday use on delicate flooring like
sealed hardwoods and laminate.
The Scrubby Pad is best used to
power through tough, sticky messes.
Your SpinWave may
have come with
mop pads attached.
If not, to attach
mop pads, carefully
lay machine down
on the floor.
2
The back of the mop pad
has a small dot in the
center of the pad.
NOTE: These next steps are to help you apply the mop pads more accurately
onto the machine.
Then, with the mop
pad folded, line up the
small dot in the center
of the pad with the
middle screw on the
bottom of the foot.
First, fold the pad in half,
making sure the cloth
material is inside the fold.
Lastly, line up the edge of
the mop pad with the inner
ring on the foot, attaching
the mop pad to the hook
and loop material on the
bottom of the foot.
3
5
4
www.BISSELL.com 7
Filling Your Clean Water Tank
Lift the tank straight
up to remove from the
machine.
The Clean Water Tank is located
on the front of the machine.
Clean
Water
Tank
For small area cleaning
a. Fill tank with warm tap water to the
first water fill line.
b. Then add BISSELL SpinWave formula
to the first formula fill line.
A few notes about filling the Clean Water Tank:
• Fill with warm (140°F/60°C MAX) tap water and add the appropriate
BISSELL formula. DO NOT USE BOILING WATER. DO NOT HEAT WATER OR
TANK IN MICROWAVE.
Unscrew the cap from
the tank.
The tank has two
measuring volumes
depending on the
amount of space you
would like to clean.
For large area cleaning
a. Fill tank with warm tap water to the
second water fill line.
b. Then add BISSELL® SpinWave®
formula to the second formula fill line.
Slide the tank back
into place until you
hear a click.
Screw the cap
back onto the tank.
123
4
56
www.BISSELL.com
8
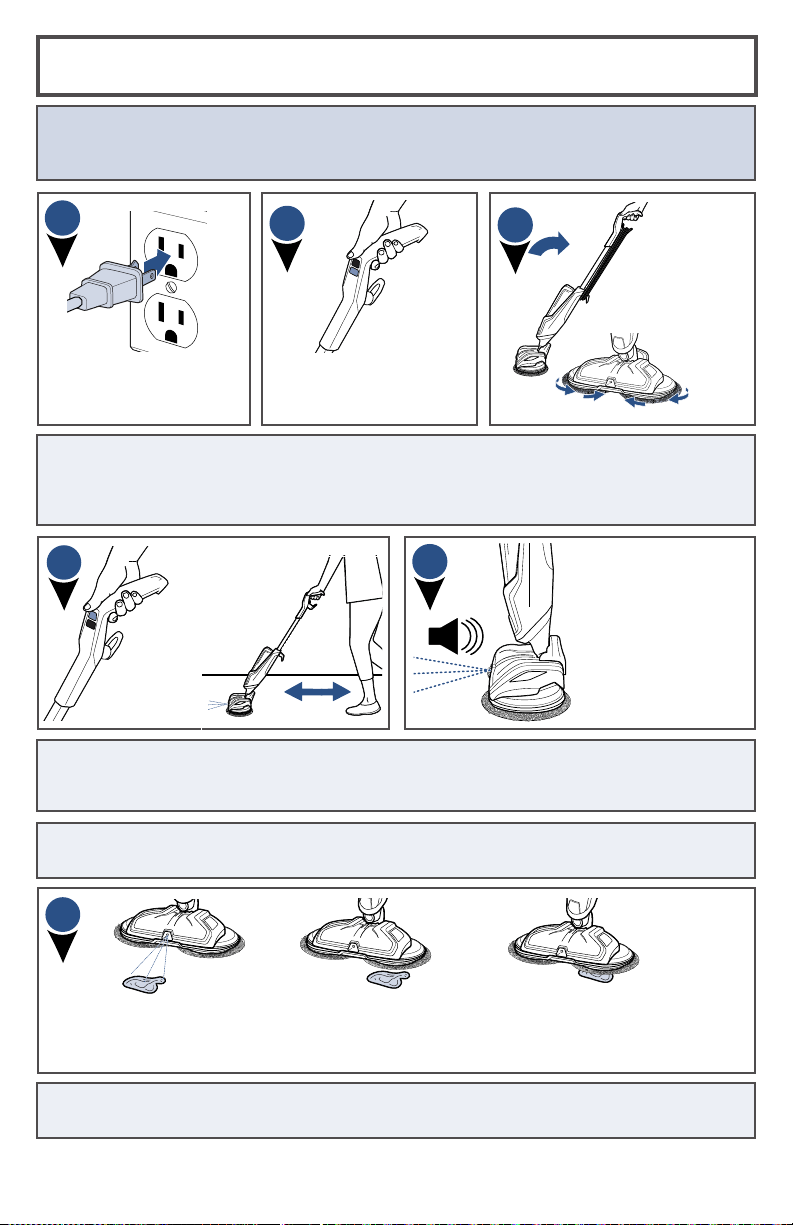
Cleaning Your Sealed Hard Floors
Press the ON/OFF
button to start cleaning
your sealed hard floors.
To clean,
push the
SPRAY
button to
dispense
solution.
Solution will spray
out of the nozzle on
the front of the foot.
You should hear a
soft buzzing noise
each time you press
the SPRAY button
to indicate solution
being dispensed.
For more difficult and stuck on messes, spray solution directly on mess and line
up one of the mop pads parallel to the mess. Move mop pad over mess and slowly
move machine back and forth to clean, continuing to spray solution as needed.
2
4
6
Recline the
body of the
machine
backward
to start the
rotating
mop pads.
3
Plug machine into a
properly grounded
outlet.
1
5
TIP: For optimum cleaning, perform overlapping cleaning strokes while dispensing
cleaning solution. Care should be taken to not overwet the floor surface, especially
when cleaning wood and other delicate floor surfaces.
ATTENTION: This machine is designed to be used only on sealed hard floors and should not be
used on carpet or rugs. Prior to cleaning, check flooring manufacturer specialized cleaning
instructions or cleaning compatibility.
TIP: You may feel a slight vibration when turning on the machine if the mop pads are
not aligned correctly. Wait a few seconds for the pads to adjust themselves. If this
doesn’t occur, turn the machine OFF and replace mop pads following the instructions
in “Attaching Your Mop Pads” section.
NOTE: When finished cleaning, make sure to push the OFF button before standing the
machine upright as the mop pads will continue to spin until the machine is turned OFF.
TIP: When cleaning near baseboards, edges, or furniture you may feel a slight pull
from the machine due to bouncing off the surface.
www.BISSELL.com 9
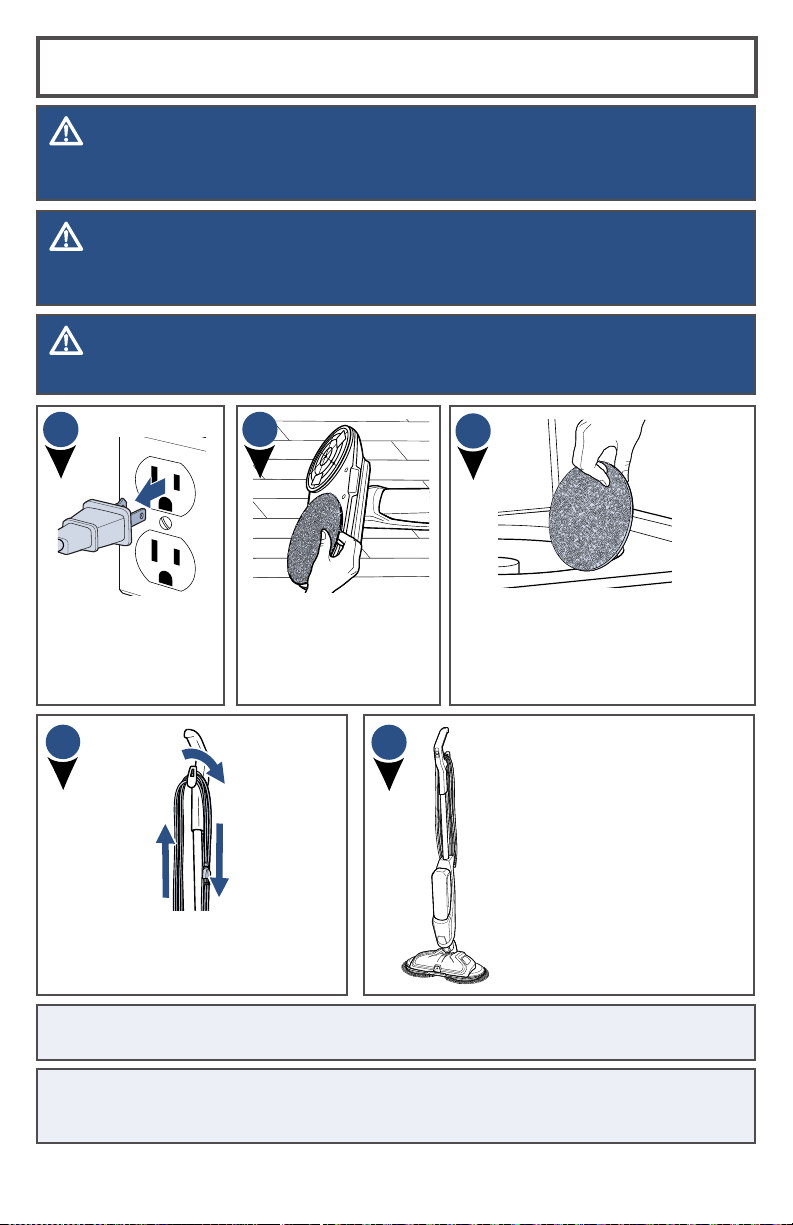
Cleaning Your SpinWave®
Turn machine OFF
and unplug the
machine from the
grounded outlet.
Machine wash separately in warm
water. Use only liquid detergents.
Do not use bleach or fabric
softener. Tumble dry on low. Do
not iron. Do not dry-clean.
Wrap cord around the Quick Release™
Cord Wrap and the Lower Cord Wrap.
Clip molded plug to power cord.
WARNING
To reduce the risk of fire, electric shock or injury, turn power OFF and disconnect plug from
electrical outlet before performing maintenance or troubleshooting.
To remove mop pads,
simply pull pads off the
hook and loop material
on the bottom of the
machine.
Store upright in a dry
protected area until the
next use. Since this product
uses water, it must not be
stored where there is danger
of freezing. Freezing will
damage internal components
and may void the warranty.
Store with dry mop pads.
Wet mop pads may damage
wood and other delicate,
sealed hard floors.
123
5
4
WARNING
Do not set the machine on carpet, rug, or other fabric surface when mop pad is removed as
hook and loop material on foot may damage them.
WARNING
Do not store machine on wet mop pads as they may damage wood or other delicate floors.
NOTE: Any liquid remaining in the Clean Water Tank should be emptied prior to
machine storage.
NOTE: Store cleaner in a protected, dry area. Since this product uses water, it must
not be stored where there is danger of freezing. Freezing may damage internal
components and void the warranty.

www.BISSELL.com
10
Problem Possible causes Remedies
Machine is
vibrating/
wobbling
Mop pads are not aligned with foot
Realign the mop pads on the foot
Cord is in
way when
cleaning
Cord is not clipped in In-Use Cord
Clip
Clip the cord in In-Use Cord Clip
Reduced
spray OR
no spray
Clean Water Tank may be empty
Refill tank
Clean Water Tank may not be
seated completely
Turn power OFF; Remove and
reseat tank
System isn’t completely primed Hold trigger for 10 to 15 seconds to
make sure the formula has flowed to
the spray tips
Not holding trigger to spray
solution
Hold trigger continuously while
using the machine
Spray tips on foot clogged Turn power OFF; Use a paper clip to
clean the spray tip located front and
center of the machine.
Spin plates
are not
turning or are
wobbling
Mop pads are not installed
properly
Turn Power OFF; Unplug machine
and follow instructions on page 6 for
replacing mop pads
Machine is standing upright Recline machine
No power
Cord damage While unplugged, inspect the full
length of the cord for damage and
refer to a qualified technician if there
is damage
Handle not properly in place Remove handle and click back into
body; To remove handle:
1. Hold base of machine with your
foot, then insert screwdriver into
the slot beneath the cord wrap to
disengage handle tab from body
2. Use other hand to hold metal pole
and pull upward to take handle off
3. To click handle back into body, see
page 5
Outlet not working Test outlet with a small appliance like
a cell phone charger, and use another
outlet if needed
Fuse/breaker outlet blown Reset the breaker
Machine is
leaking
Cap of Clean Water Tank is not
closed properly
Remove the tank and reapply the cap
Troubleshooting
WARNING
To reduce the risk of electric shock, turn power OFF and disconnect plug from electrical
outlet before performing maintenance or troubleshooting checks.

www.BISSELL.com 11
If your BISSELL product should
require service:
Contact BISSELL Consumer Care to locate a
BISSELL Authorized Service Center in your
area. If you need information about repairs or
replacement parts, or if you have questions about
your warranty, contact BISSELL Consumer Care.
This warranty gives you specific legal rights,
and you may also have other rights which
may vary from state to state. If you need
additional instruction regarding this warranty
or have questions regarding what it may
cover, please contact BISSELL® Consumer
Care by E-mail or telephone as described
below.
It may be necessary to obtain some of your
personal information, such as a mailing
address, to fulfill terms of this warranty. Any
personal data will be handled pursuant to
BISSELL’s Privacy Policy, which can be found
online at www.BISSELL.com/privacy-policy.
Limited Two-Year Warranty
Subject to the *Exceptions and Exclusions
from the Terms of the Limited Warranty,
upon receipt of the product BISSELL will
repair or replace (with new, refurbished,
lightly used, or remanufactured components
or products), at BISSELL’s option, free
of charge from the date of purchase by
the original purchaser, for two years, any
defective or malfunctioning part.
See information below on "If your BISSELL
product should require service”.
This warranty applies to product used for
personal, and not commercial or rental,
service. This warranty does not apply to
fans or routine maintenance components
such as filters, belts or brushes. Damage or
malfunction caused by negligence, abuse,
neglect, unauthorized repair, or any other use
not in accordance with the user guide is not
covered. This warranty will only be valid if the
product is used in the same country in which
it was sold.
BISSELL is not liable for incidental or
consequential damages of any nature
associated with the use of this product.
BISSELL’s liability will not exceed the
purchase price of the product.
Some states do not allow the exclusion or
limitation of incidental or consequential
damages, so the above limitation or
exclusion may not apply to you.
*Exceptions and Exclusions from the
Terms of the Limited Warranty
This warranty is exclusive and in lieu of
any other warranties, either oral or written.
Any implied warranties, which may arise
by operation of law, including the implied
warranties of merchantability and fitness for
a particular purpose, are limited to the two-
year duration from the date of purchase as
described above.
Some states do not allow limitations on how
long an implied warranty lasts, so the above
limitation may not apply to you.
Warranty
NOTE: Please keep your original sales receipt. It provides proof of date of purchase in the
event of a warranty claim.
Service
Please do not return this product
to the store.
Other maintenance or service not included
in the manual should be performed by an
authorized service representative.
Website:
www.BISSELL.com/service-centers
E-mail:
www.BISSELL.com/email-us
Call:
BISSELL Consumer Care
1-800-237-7691
Monday – Friday: 8am - 10pm ET
Saturday: 9am - 8pm ET
Sunday: 10am - 7pm ET

12
©2019 BISSELL Inc.
All rights reserved. Printed in China
Part Number 162-1053 05/19
Visit our website at: www.BISSELL.com
Registering is quick, easy and offers you benefits over the lifetime of your product.
You’ll receive:
Visit www.BISSELL.com/registration!
Visit the BISSELL website: www.BISSELL.com
When contacting BISSELL, have model number of cleaner available.
Please record your Model Number: ___________________
Please record your Purchase Date: ___________________
NOTE: Please keep your original sales receipt. It provides proof of purchase
date in the event of a warranty claim. See Warranty page for details.
BISSELL® Rewards Points
Automatically earn points for
discounts and free shipping on
future purchases.
Faster Service
Supplying your information now
saves you time should you need
to contact us with questions
regarding your product.
Product Support
Reminders and Alerts
We’ll contact you with any
important product maintenance
reminders and alerts.
Special Promotions
Optional: Register your email
to receive notice of offers,
contests, cleaning tips, and more!
Love yr BISSELL® product?
Don’t keep it a secret.
Let us, and millions of others, know what you think!
Leave your star-rating on BISSELL.com
www.BISSELL.com
Parts & Supplies
For Parts and Supplies, go to www.BISSELL.com and enter your model
number in the search field.
Register your product today!