1 2
INSTALLATION INSTRUCTIONS
SPECIFICATIONS
DESCRIPTION
3
WARNING
• Turn the Load ON/OFF and switch between Automatic and Manual modes
by pressing the MODE button.
• The large and easy-to-read LCD screen displays the current day of week,
time, Auto/Manual mode, whether the Load is ON or OFF, and the
program settings.
• The Timer can be programmed up to 18 ON and 18 OFF settings.
• Random feature (RND) turns ON/OFF the Load at a random time, 30
minutes within the programmed time.
• DST: Daylight Savings Time
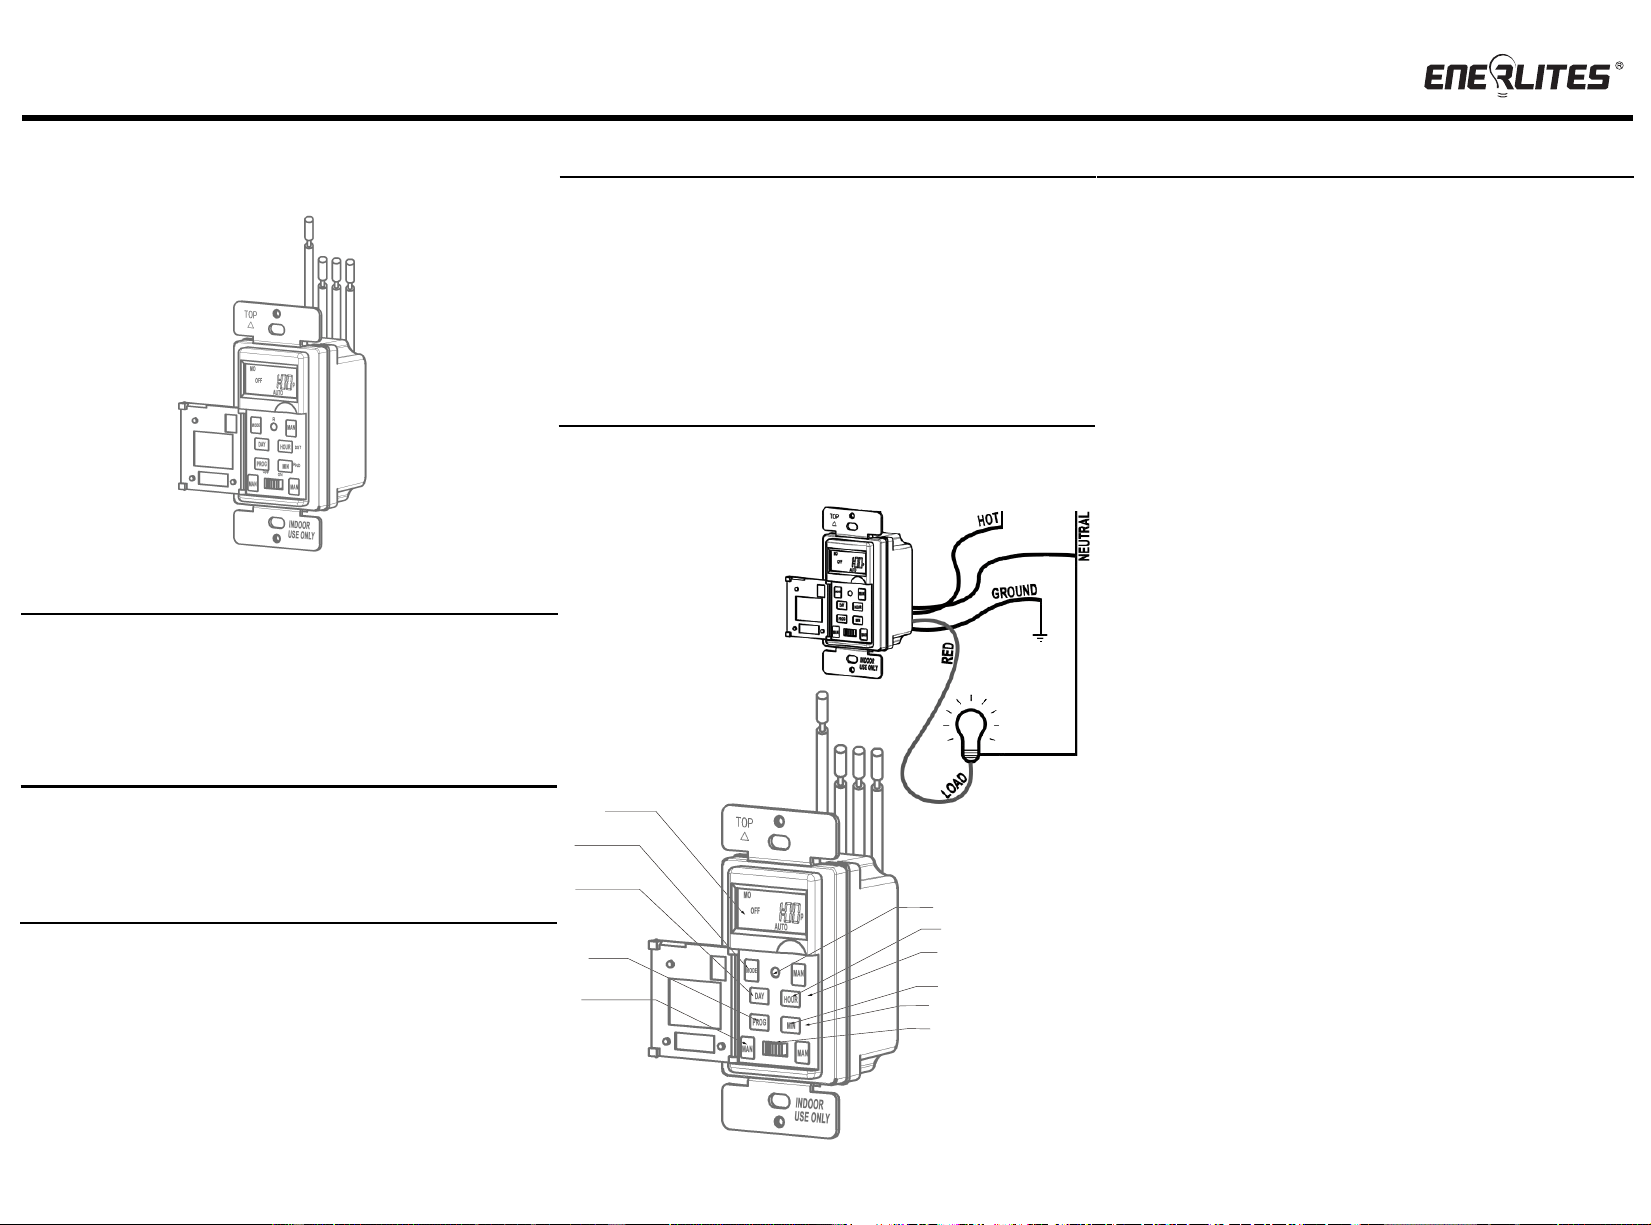
1. Connect BLACK wire on switch to the HOT wire.
2. Connect WHITE wire on switch to the NEUTRAL wire.
3. Connect the Red wire on switch to the LOAD wire.
4. Connect he GREEN wire on switch to the GROUND wire or
green GROUND screw on box.
PROGRAMMING
HET01
NOTE:
• This Timer has a built in rechargeable battery backup. The
programming will be stored during the event of a power outtage.
• The display has a Blue Backlight. Each time a button is pressed,
the light will come on for 14 seconds.
• In programming mode, there is a 12 seconds time-out. If no keys
are pressed within 12 seconds, the display will return to main
screen.
• The switch displays the time in 12-hour format.
Power-On
• Open the switch door from the right.
• Switch the Power switch to ON.
• Reset the switch using a small object such as paper clip or the tip of a
pen and press and release the "R" button located just below the LCD
Screen. The display will flash indicating a reset.
Setting the Clock
• Press the PROG button Once and the CLK icon will appear on the
bottom left of the screen.
• Set the time using the HOUR and MIN buttons, Ensure that P (for PM)
appears on the screen when an afternoon time is displayed.
• Set the day by using the DAY button.
• Press one of the MAN buttons or close the switch door to return to the
main screen.
Programming
• Press the PROG button twice to display a program and its ON time.
For example, when you first press PROG twice from the main screen,
program number 1 and its ON time will appear. 1ON PROG - -:- - will
appear instead of the time, if the program is not set (inactive).
• Press DAY button to select the day in which you want to apply to the
program.
o NOTE: if you want to apply the program to every day of the week,
press DAY
until ALL the days are displayed. (This still counts as
1 program, not 7)
• Press the HOUR and MIN buttons to set the ON time (time when you want
the lights to turn on).
• After you have programmed the ON time, press the PROG button to
display the OFF time (time when you want the lights to turn off).
o NOTE: If the program ON time is set for every day of the week,
the program OFF time will have to be the same.
• To set another program, repeat steps 4 through 7. Programs that are not
set will remain inactive.
• Press one of the MAN buttons or close the switch door to return to the main
screen.
• To ensure the programming takes place, "AUTO" must be displayed on the
LCD screen.
The 7-day digital timer is your solution to automated indoor and outdoor lighting.
The Timer is easy to program and is customizable for each day of the week.
The HET01 can replace a standard single pole wall switch. The Timer can
control incandescent lights, fluorescent lights, flood lights, stereos, or a heavy-
duty load.
FEATURES
Motor…….....…..…….................…….............................................................1/2HP
Voltage ……………………………………...........…….................….. 120VAC, 60Hz
Resistive………..........…...…….…………........................................15Amp, 1800W
Tungsten.......................................................................................................1200W
Flourescent.................................................................................................1200VA
Turn the POWER OFF at the circuit breaker before
installing the Timer
Read and understand these instructions before installing. It is recommended
that a qualified electrician performs this installation. Make sure to turn off the
circuit breaker or fuse(s) and make sure power is off before wiring the device.
This product is Listed to applicable UL Standards and requirements by
UL. This device is intended for installation in accordance with the
National Electric Code and local regulations.
Use copper wires ONLY.
WIRING DIRECTIONS
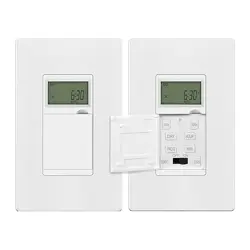
6.HOUR
3.
MAN
4.
PROG
1.DISPLAY
8.MODE/RCL
5.DAY
2.
RESET
7.
MIN
11.RND
POWER
10.DST
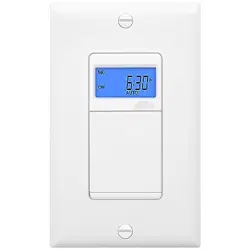
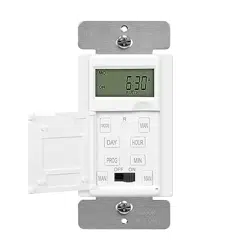
7-day Digital In-Wall Timer
MO
OFF
AUTO
P
DST
RND
OFF
ON
R
DST
RND
R
R
CL
R
CL
BLACK
WHITE
GREEN
WARRANTY INFORMATION
This device is warranted to be free of material and workmanship defects for 2 years from the
date of purchase. Original receipt or proof of purchase from an authorized retailer must be
presented upon warranty claim. ALL claims must be verified and approved by Enerlites, Inc.
Warranties from other Enerlites products may vary. This warranty is nontransferable and
does not cover normal wear and tear or any malfunction, failure, or defect resulting from
misuse, abuse, neglect, alteration, modification, or improper installation. To the fullest extent
permitted by the applicable state law, Enerlites shall not be liable to the purchaser or end
user customer of Enerlites products for direct, indirect, incidental, or consequential damages
even if Enerlites has been advised of the possibility of such damages. Enerlites’ total liability
under this or any other warranty, express or implied, is limited to repair, replacement or
refund. Repair, replacement or refund are the sole and exclusive remedies for breach of
warranty or any other legal theory.
4 5 6
© 2016 Enerlites Inc.
CA, U.S.A.
WWW.ENERLITES.COM
0206160022-04
SELECT THE OPERATING MODE
The Digital Timer has 2 operating modes:
Manual (MAN) and Automatic (AUTO). To
switch modes, open the control panel door and
press the MODE button until the desired mode
is displayed.
Automatic Mode
On the main screen, "AUTO" mode will be
displayed when switch is in AUTO mode along
with the current state of the Load (ON or OFF).
In this mode, the Timer WILL turn the lights
ON/OFF according to the programmed times
regardless of whether the Load is ON or OFF.
Manual Mode
On the main screen, "MAN" mode will be
displayed when switch is in MANUAL mode
along with the current state of the Load (ON or
OFF). In this mode, the Timer WILL NOT turn
the lights ON/OFF automatically.
PROGRAMMING (Cont.)
DELETING a Program:
• Press PROG button until the ON or OFF program you wish to
delete is displayed.
• Press the RCL button. The program is now deleted. Remember
to delete each OFF program for every ON program and vice
versa.
• When you are done deleting the undesired programs, press the
MAN button or close the switch door to return to the main screen.
Daylight Savings Time (DST):
• To Enter Daylight Savings Time, press and hold down the HOUR
(DST) button for five seconds while you're in the main screen. You
are now in DST and "DST" will be displayed on the LCD screen.
• To Exit Daylight Savings Time, press and hold down the HOUR
(DST) button for five seconds while you're in the main screen. You
are now in Standard Time and "DST" is no longer displayed on the
LCD screen.
Random Program mode:
This Timer has a Random Mode that may be used as a safety
feature. While in Random Mode, the Timer will randomly turn the
lights ON within a 30 minute window of each programmed ON time
and randomly turns the lights OFF within a 30 minute window of each
programmed OFF time.
• To Enter Random Mode, press and hold down the MIN (RND)
button for five seconds while you're in the main screen. You are
now in Random Mode and "RND" will be displayed on the LCD
screen.
• To Exit Random Mode, press and hold down the MIN (RND)
button for five seconds. You have exited Random Mode and
"RND" is no longer displayed on the LCD screen.
Reseting the Timer:
To reset the Timer back to Factory Default Settings, use a small
object such as paper clip or the tip of a pen and press and release
the "R" button located just below the LCD Screen. The display will
flash indicating a reset.