Loading ...
Loading ...
Loading ...
English 11
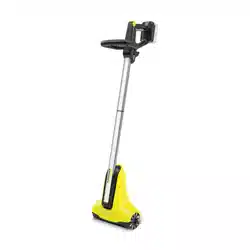
Description of the device
For the illustrations, refer to the graphics page
Illustration A
1 Splash guard with parking edge
2 Water nozzles
3 Gearbox casing
4 Rotating brushes
5 Handle
6 Handle
7 Trigger lockout button
8 Water volume regulation valve
9 Battery pack unlocking button
10 Power switch
11 Hook and loop fastener
12 Water connection (plug system)
13 Water filter seal
14 Water filter
15 Type plate
16 Cleaning head
17 Brush fastener (twist lock)
18 *Rechargeable battery pack
19 *Charger
* PCL 3-18 Battery Set
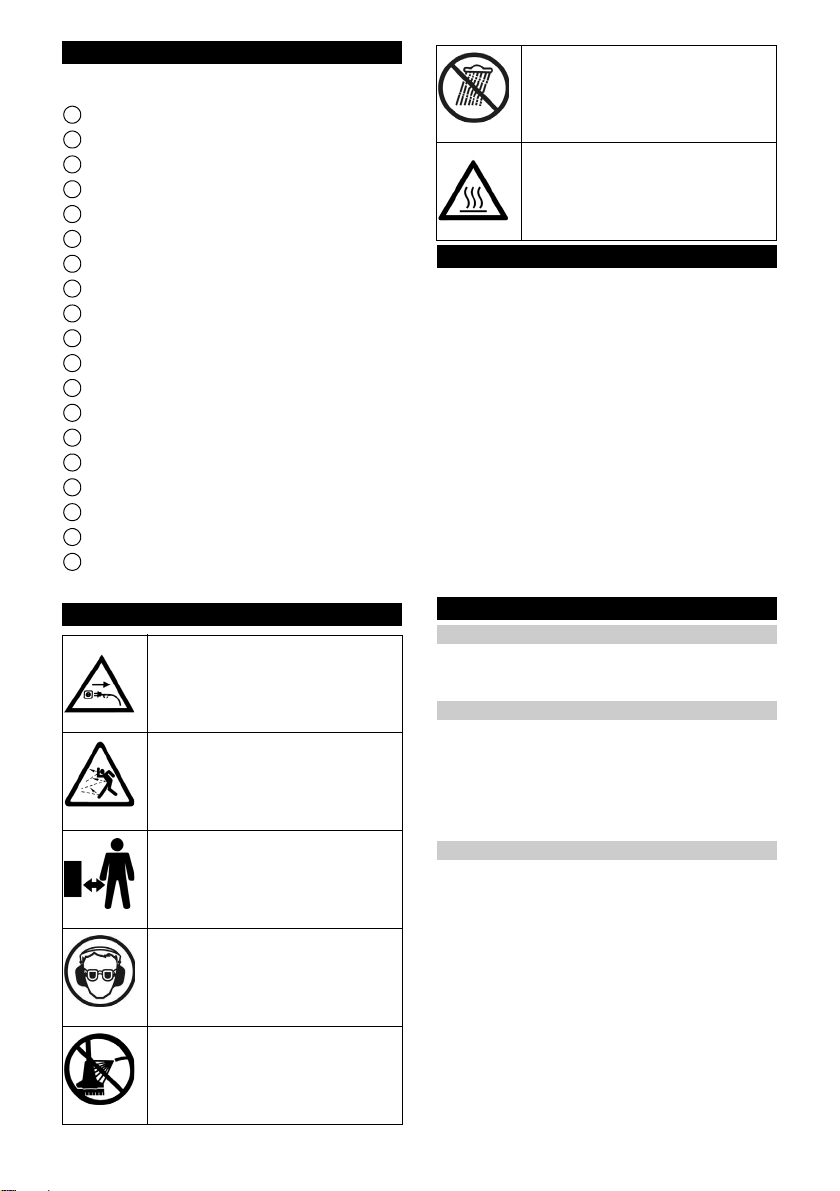
Symbols on the device
Assembly
Note
The handle is installed only once. The handle halves
may not be separated again after assembly. Ensure that
the water hose and the cable are not crushed during as-
sembly.
1. Ensure that the cable and the water hose are not
twisted.
2. Connect the handle until it audibly latches into
place.
Illustration C
3. First press the cable and then the water hose over
the cable from top to bottom (starting from the han-
dle) into the left groove of the cable duct.
Illustration D
4. Press any protruding cable and water hose firmly in-
to the brush head casing.
Illustration E
Note
The cable and water hose must not protrude out of the
device during operation!
Initial startup
Installing the battery pack
1. Push the battery pack into the mounting in the de-
vice until it audibly latches into place.
Illustration F
Removing the battery pack
Note
During longer work breaks, remove the battery pack
from the device and secure it against unauthorised use.
1. Press the battery pack unlocking button to unlock
the battery pack.
2. Remove the battery pack from the device.
Illustration G
Initial startup
1. Close the water volume regulation valve.
Illustration H
2. Connect the water hose to the device.
Illustration I
a Attach the water hose. The coupling must audibly
engage.
b Secure the water hose to the hand grip using a
hook and loop strip to provide strain relief.
3. Connect the water hose to the water tap and open
the water tap. Please observe the maximum water
pressure (see chapter Technical data).
Disconnect from the power supply.
Risk of injury due to flaying objects!
Risk of injury. Keep other persons away!
Risk of eye and hearing damage. Wear
safety goggles and hearing protection!
Risk of damage. Do not clean the device
with a hose or high-pressure water jet!
Risk of damage. Do not subject the de-
vice to rain!
Risk of burns from hot surfaces!
Loading ...
Loading ...
Loading ...