Loading ...
Loading ...
Loading ...
IMPORTANT NOTE: All electrical work and installation of this product must be performed
by a Registered Electrician in accordance with the latest edition of AS/NZS 3000.
We do not recommend additional exhaust fans to be connected into the system as noted
in some home installations.
If this is cannot be avoided, the installation must be performed by a Registered
Electrician.
Ensure power to the circuit to be used has been isolated at the power board before
carrying out any electrical work.
TECHNICAL SPECIFICATIONS
GHL255W
220-240VAC 50-60Hz
594W (Max)
GHL455W
220-240VAC 50-60Hz
1144W (Max)
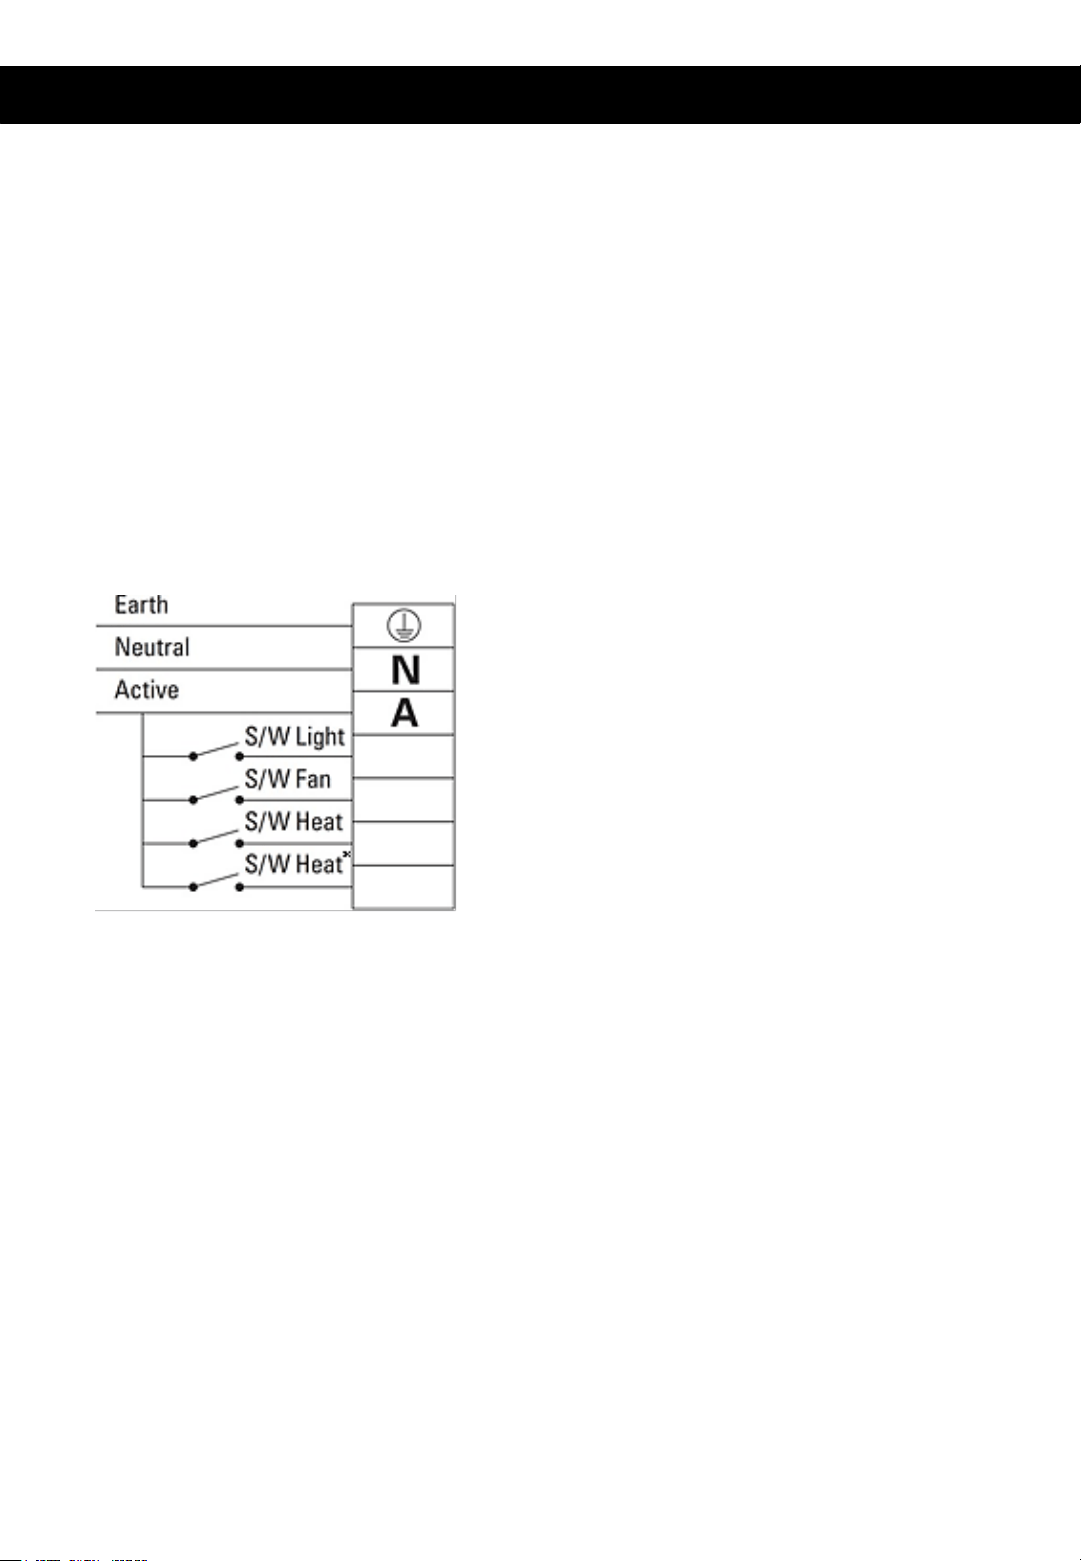
WIRING DIAGRAM
* Second heat switch not required
for model with 2 heat lamps
The unit requires ‘permanent active’. The
fitting is fitted with a thermal cut-out which
will turn the motor (FAN) ‘ON’ when the
internal temperature exceeds 80˚C.
1. Double pole disconnecting device must be
fitted in thecircuit.
2. Ensure the power is switched
“OFF” at the mains before
commencing installation.
3. Remove the cover on the back of the
enclosure to access the terminals.
4. Connect wires as per electrical wiring
diagram and markings adjacent to
terminalblock.
5. Replace the cover removedearlier.
(Green)
(Blue)
(Red)
Electrical Installation
Loading ...
Loading ...
Loading ...