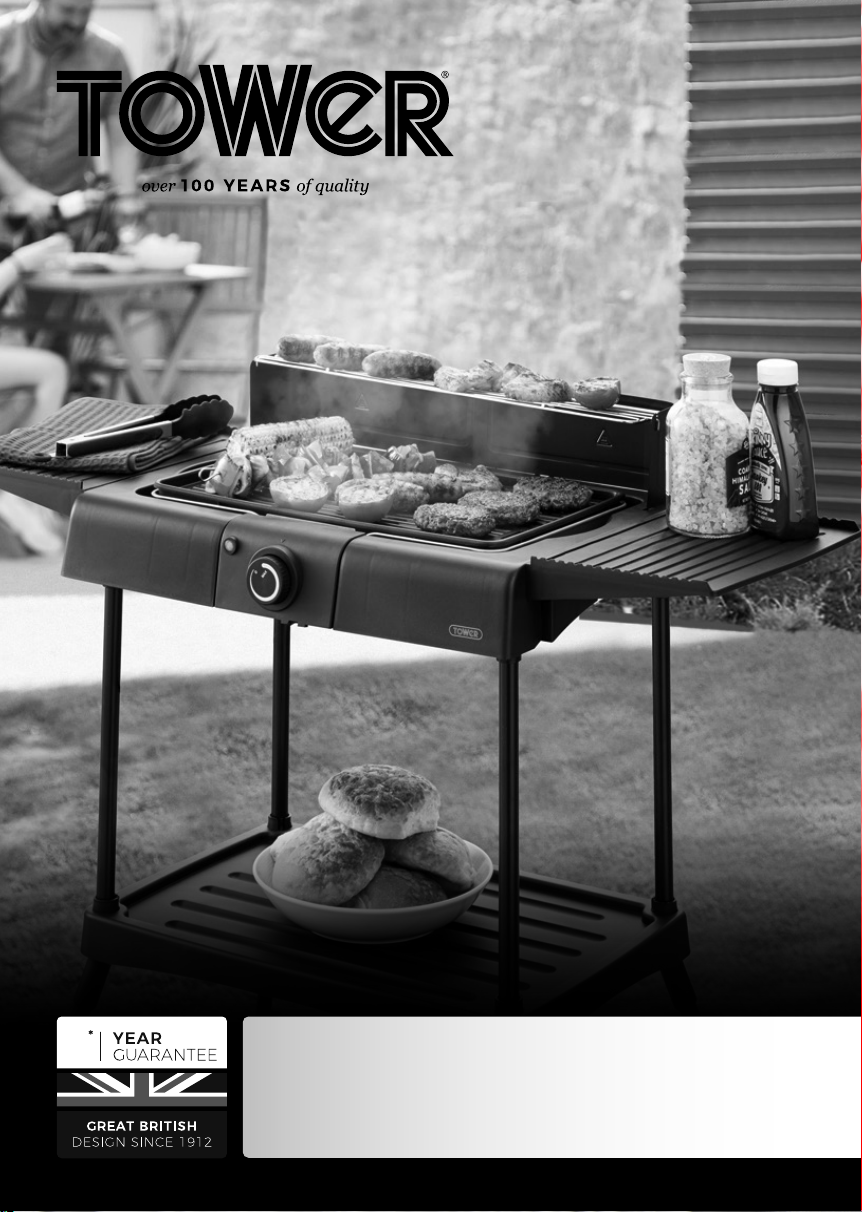
T14049BM
Indoor / Outdoor Health BBQ
SAFETY AND INSTRUCTION MANUAL
PLEASE READ CAREFULLY
*Subject to registering your Extended Guarantee online at www.towerhousewares.co.uk.
1

2
This box contains:
Instruction Manual
Indoor/Outdoor BBQ
4 x Legs
4 x Leg Connectors
Shelf
Grill Plate
2 x Side Tables
Warming Rack
Drip Tray
2 x Wind Shields
1 x Thermostat and Heating Element
4 x Feet
1. Warming rack
2. Wind shield
3. Wind shield
4. Grill plate
5. Heating element/Thermostat
6. Drip tray
7. Side table
8. Housing
9. Legs
10. Shelf
11. Leg connectors
12. Feet
Specifications:
Model: T14049BM
Rated Voltage: 220-240V
Frequency: 50-60Hz
Power Consumption: 2000W
Degree of protection: IPX4
Technical Data:
2
4
5
6
8
9
10
11
12
3
1
7
3
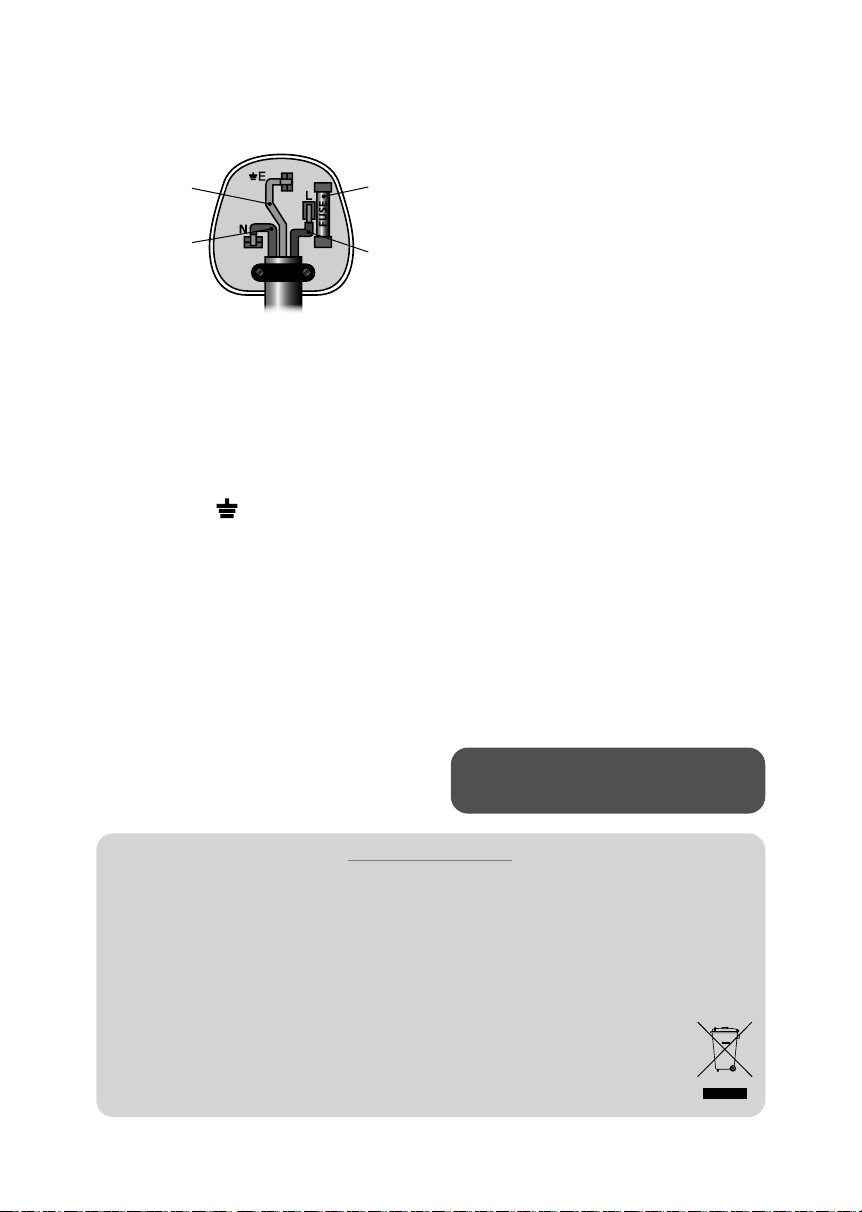
Wiring Safety for UK Use Only
IMPORTANT
As the colours in the mains lead of this
appliance may not correspond with the
coloured markings identifying the terminals in
your plug, please proceed as follows:
The wires in the mains lead are labelled in
accordance with the following code:
Blue neutral [N] Brown live [L] Green/
Yellow [EARTH]
Plug Fitting Details (Where Applicable).
The wire labelled blue is the neutral and must
be connected to the terminal marked [N].
The wire labelled brown is the live wire and
must be connected to the terminal marked [L].
The wire labelled green/yellow must be
connected to the terminal marked with the
letter [E].
On no account must either the brown or the
blue wire be connected to the [EARTH] terminal.
Always ensure that the cord grip is fastened
correctly.
The plug must be fitted with a fuse of the same
rating already fitted and conforming to BS 1362
and be ASTA approved.
If in doubt consult a qualified electrician who
will be pleased to do this for you.
Non-Rewireable Mains Plug.
If your appliance is supplied with a non-
rewireable plug fitted to the mains lead and
should the fuse need replacing, you must use
an ASTA approved one (conforming to BS 1362
of the same rating).
If in doubt, consult a qualified electrician who
will be pleased to do this for you.
If you need to remove the plug - disconnect it
from the mains - then cut it off of the mains
lead and immediately dispose of it in a safe
manner. Never attempt to reuse the plug or
insert it into a socket outlet as there is a danger
of an electric shock.
FUSE
Earth
(Green/Yellow)
Fuse
Neutral
(Blue)
Live
(Brown)
WARNING:
This appliance MUST be earthed!
DISPOSAL OF THE UNIT
Appliances bearing the symbol shown here may not be disposed of in domestic rubbish.
You are required to dispose of old electrical and electronic appliances like this separately.
Please visit www.recycle-more.co.uk or www.recyclenow.co.uk for access to information about the
recycling of electrical items.
Please visit www.weeeireland.ie for access to information about the recycling of
electrical items purchased in Ireland.
The WEEE directive, introduced in August 2006, states that all electrical items must be
recycled, rather than taken to landfill.
Please arrange to take this appliance to your local Civic Amenity site for recycling,
once it has reached the end of its life.

4
• Check that the voltage
of the main circuit
corresponds with the rating
of the appliance before
operating.
• This is a mains-powered
electric BBQ. DO NOT
use any igniter fuels or
substances with the unit.
• If the supply cord or
appliance is damaged,
stop using the appliance
immediately and
seek advice from the
manufacturer, its service
agent or a similarly qualified
person.
• WARNING! DO NOT let the
cord hang over the edge of
a table or counter, serious
burns may result from the
BBQ being pulled over.
• DO NOT carry the appliance
by the power cord.
• CAUTION! The BBQ can
ONLY be used with an
extension cord if it is
the ONLY APPLIANCE
that is plugged into the
extension, and if it is used
in conjunction with a circuit
breaker or an extension cord
that has a circuit breaker
built-in.
• DO NOT pull the plug out
by the cord as this may
damage the plug and/or the
cable.
• Switch off at the wall socket
then remove the plug from
the socket when not in use
or before cleaning.
• Switch off and unplug
before fitting or removing
tools/attachments, after use
and before cleaning.
• Close supervision is
necessary when any
appliance is used by or near
children.
• Children should not play
with the appliance.
• This appliance can be used
by children aged 8 years
and above and persons with
Read all of the instructions carefully and ensure that your
barbecue is properly installed, assembled, maintained and
serviced in accordance to these instructions. Failure to follow
these instructions may result in serious bodily injury and/
or property damage. If you have any questions concerning
the assembly or operation of this barbecue, please consult
customer services, the manufacturer or agent.
Important Safety Information:

5
reduced physical, sensory
or mental capabilities or
lack of experience and
knowledge if they have
been given supervision or
instruction concerning use
of the appliance in a safe
way and understand the
hazards involved.
• Cleaning and user
maintenance should not
be undertaken by children
without supervision.
• Take care when any
appliance is used near pets.
• DO NOT use this product
for anything other than its
intended use.
• This appliance is for
household use only.
• This appliance includes a
heating function.
• Please ensure that the
appliance is used on a
stable, level, and heat
resistant surface.
• DO NOT immerse cords,
plugs or any part of the
appliance in water or any
other liquid.
• WARNING! ALWAYS ensure
the drip tray is filled with
water to the MAX fill line
before attempting to use
the unit.
• DO NOT place the BBQ
on or near combustible
materials such as a
tablecloth or curtain.
• DO NOT place the BBQ
against a wall or against
other appliances. Leave at
least 10cm free space on
the back and sides and
10cm free space above the
appliance.
• Allow the BBQ to cool down
for approx 60 minutes before
you handle or clean it.
• Remove burnt remnants.
• Never use plates, trays or
aluminum foil beneath
the food. Always use oven
gloves when handling or
removing anything from
the BBQ.
• WARNING! This appliance
operates at high
temperatures, which may
cause burns. DO NOT touch
the hot surfaces of the
appliance (pan, air outlet,
etc.)
• DO NOT move the
appliance when it is full of
hot food.
• In the unlikely event the
appliance develops a fault,
stop using it immediately
and seek advice from the
Customer Support Team:
+44 (0) 333 220 6066

6
Before First Use:
WARNING: Read the following instructions carefully and be sure your barbecue is properly installed,
assembled and cared for. Failure to follow these instructions may result in serious bodily injury and/
or property damage.
1. Remove the parts from the packaging and lay out on an even surface.
2. Check that all parts are present and that there is no visible sign of damage.
3. Remove the protective sheet of paper.
4. Assemble the barbecue as per the assembly instructions.
5. Wash and rinse the grill racks and drip tray. Dry thoroughly before replacing.
6. WARNING! ALWAYS ensure the drip tray is filled with water to the MAX fill line before
attempting to use the unit.
7. Heat the appliance for 30 minutes, without food. This will stabilise the non-stick coating.
8. Your appliance is now ready for normal use.
9. Dispose of the packaging in a responsible manner.
Note: When your BBQ is heated for the first time, it may emit a slight amount of smoke or odour.
This is normal with many heating appliances due to small amounts of manufacturing oil or dust
particles that may have settled in transit. This does not affect the safety of your appliance.
Assembly:
Take care when handling parts during assembly. It is recommended to wear work gloves to protect
your hands from any rough or sharp part edges during assembly.
To assemble the BBQ, connect the parts together as follows:
1. Attach each of the 4 x feet supplied to one of the supplied legs, ensuring they are firmly
secured into place.
2. Attach each of the legs to one of the 4 x supplied connectors, ensuring the ridged grooves on
the outside of the connectors are on the top side.
3. Push each of the connectors into its corresponding slot on the shelf until it fits into place.
if necessary, twist the connector slightly until it is firmly secured into place.
4. Once the bottom half of the barbecue is assembled, push each of the remaining 4 x legs
supplied into one of the four slots on each corner of the shelf, until they fit into place. The base
of the barbecue should now be assembled.
5. Place the housing on top of the base and attach each of the four legs to the corresponding
slot on the underside of the housing. Ensure the housing is firmly connected to the legs before
proceeding with assembly.
6. Align each of the 2 x side tables provided with the corresponding slots on either side of the
housing, then push it down until it fits into place. Ensure each of the side tables is firmly
secured into place before proceeding with assembly.
7. Now align each of the 2 x supplied wind shields with the corresponding slots on the back side
of the housing, and push them in until each of the two notches on each wind shield slots into
the corresponding tab on the main body of the unit. Ensure each wind shield is firmly secured
into place before attempting to use the unit.
8. IMPORTANT! Ensure the drip tray is filled with water up to the MAX line before attempting to
use the unit.
9. The unit is now assembled and ready for normal use.

7
Using Your Appliance:
Note: This unit is suitable for both indoor and outdoor use. When using the appliance indoors,
remove the legs and place the unit on a countertop or other level, stable and heat-resistant surface.
Note: Turn the thermostat control to the “MIN” setting before you plug into a suitable mains socket.
1. Place the BBQ Grill on a level, stable, fireproof base in a suitable location.
2. Fill the water tray with water up to the ‘MAX’ line. This helps prevent fires caused by burning
grease or fat.
3. Connect the BBQ Grill to a suitable mains socket.
4. Turn the thermostat control to the “MAX” setting. The BBQ Grill will now automatically heat up.
5. As soon as the selected temperature setting is reached, the red indicator light will go out. The
heating process will automatically end.
6. As soon as the selected temperature setting has reduced, the red indicator light will
illuminate and the heating process will then resume until the BBQ Grill returns to the selected
temperature. For best results, let the BBQ Grill heat up for 10 to 15 minutes.
7. Place the food you would like barbecue on the grill plate. Never use plates, trays or aluminum
foil beneath the food. Always use oven gloves when handling or removing anything from the
BBQ. The grilling time depends on the thickness of the food. Turn the food from time to time.
8. To reduce the barbecuing temperature when cooking delicate foods, such as fish or
mushrooms, turn the thermostat control counter clockwise.
9. Turn the thermostat control to the “MIN” setting to stop barbecuing.
10. Take the food off the grill plate.
11. To switch the BBQ Grill off, first pull the mains plug out of the socket.
12. Always let the BBQ Grill cool off completely before cleaning and storing.
Note: Do not use any fuels such as charcoal in the BBQ Grill.
Note: Heat the BBQ Grill up for approx. 10 – 15 minutes before placing food on the grill plate. This will
help you achieve best cooking results.
CAUTION! The food will be hot. Handle with care.
Press the arrow direction
into the windshield and
warming rack respectively.
WARNING! Ensure
the drip tray is filled
to the MAX line with
water before use
Warming
rack
Wind shield
8
Energy Saving Tips:
1. Turn the grill off as soon as cooking is completed.
2. Pre heat the grill for 10 – 15 minutes. DO NOT preheat for longer than recommended.
3. Do not use a higher heat setting than required.
Cleaning & Care:
• Clean the appliance after each use.
• Allow the grill to cool completely before cleaning.
• Wash the racks with warm soapy water.
• Remove and empty the drip tray, clean with warm soapy water.
• Wash the interior surfaces of the grill housing cover with warm soapy water.
• DO NOT use abrasives as these could cause damage to the parts.
• DO NOT manipulate any parts sealed by the manufacturer. DO NOT modify this appliance.
Storage:
• Ensure the appliance is cool, clean and dry before storing.
• Store it in a cool, dry place.
• DO NOT leave the barbecue exposed to outside weather conditions or stored in damp, moist
areas.
• Even when your barbecue is covered for its protection, it must be inspected on a regular basis
as damp or condensation can form which may result in damage to the barbecue. It may be
necessary to dry the barbecue and the inside of the cover.
• It is possible for mould to grow on any fat remaining on parts of the barbecue. This should be
cleaned off smooth surfaces with hot soapy water.
• Any rust that is found that does not come into contact with the food should be treated with a
rust inhibitor and painted with barbecue paint or a heat resistant paint.
Troubleshooting:
Problem Possible cause Solution
The BBQ Grill does not
heat up.
The BBQ Grill is not connected to
the power supply.
Insert the mains plug in a socket
with earthing contact.
The BBQ Grill switches
off on its own.
The selected temperature setting
has been reached. The thermostat
will automatically switch off.
The thermostat will
automatically switch back on
once the selected temperature
setting is under-run.
Turn the thermostat control to a
higher temperature setting.
Spares:
T14049BM01 - Side Wing
T14049BM02 - Wind Guard Left Side
T14049BM03 - Wind Guard Right Side
T14049BM04 - Top Rack
T14049BM05 - Feet 2 Pack
T14049BM06 - Leg Tube 2 Pack
T14049BM07 - Leg Connectors 2 Pack

9
NOTES
10
NOTES
11
NOTES
thank you!
We hope you enjoy your appliance for many years.
This product is guaranteed for 12 months from the date of original purchase.
If any defect arises due to faulty materials of workmanship, the faulty products
must be returned to the place of purchase.
Refund or replacement is at the discretion of the retailer.
The Following Conditions Apply:
The product must be returned to the retailer with proof of purchase or a receipt.
The product must be installed and used in accordance with the instructions
contained in this instruction guide.
It must be used only for domestic purposes.
It does not cover wear and tear, damage, misuse or consumable parts.
Tower has limited liability for incidental or consequential loss or damage.
This guarantee is valid in the UK and Eire only.
*To receive your extra 1 years guarantee, register your appliance online within 28
days of purchase by visiting:
www.towerhousewares.co.uk
Should you have a problem with your appliance, or need any spare parts,
please call our Customer Support Team:
+44 (0) 333 220 6066
0522.V4
Your warranty becomes void should you
decide to use non Tower spare parts.
Spare parts can be purchased from
www.towerhousewares.co.uk
1