Loading ...
Loading ...
Loading ...

17
LIGHTING INSTRUCTIONS
SAFETY PRACTICES AND PRECAUTIONS
WARNING
Read the ‘User Manual/Installation Instructions carefully
and completely before using your grill or grill accessory
to reduce the risk of fi re, burn hazard or other injury.
Ensure that burner ties and all packing materials are
removed before lighting any new accessory.
REMOVE ALL
SHIPPING TIES
AT EACH NEW SEASON
At the start of each new grilling season you should
remove the cooking grates and check the burners,
venturis, orifi ces and valves for obstructions.
Spiders and insects often nest in these areas of the
acces sory and can disrupt air fl ow, causing damage to the
acces sory and personal injury.
Also, check all hoses and fi ttings for damage, abrasion,
wear and tear and repair, if necessary, before turning the
gas on.
For LPB models, replacement pressure regulators and
hose assemblies, must be the type specifi ed by Lynx.
The pressure regulator and hose assembly supplied
with the unit must be used. If the unit is LP, screw the
regulator into the tank and leak check the hose and
regulator connections with a soap and water solution
before operating the burner. Turn all knobs to OFF then
SLOWLY turn on the gas supply valve. Do not use any
grill accessory if you smell gas.
PURGING THE GAS LINES
You should purge the gas line of air before attempting to
light the grill accessory.
1. Make sure all grill controls are in the "OFF" position.
2. Slowly turn on the main gas supply.
3. Push in the control knob for the burner furthest from
the fuel source. Using the burner furthest from the
fuel source will completely purge the lines. It will take
several seconds for the burner to light.
4. Hold the knob ON for about 20 seconds to allow the
air in the system to purge and the burner to light
5. Wait at least 5 minutes after shutting o the control
before attempting to light the burners.
MATCH LIGHTING
If a burner fails to light after several attempts, it can be
match lit. If you've just attempted to light the burner with
the igniter, allow 5 minutes for any accumulated gas to
dis sipate before match lighting.
Make sure all knobs are in the OFF position. Keep your
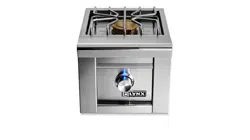
face as far away from the burner as possible. Side burners
can be lit by passing a lit match over the port of the
burner. The power burner requires the use of a lighting
rod with a lit match which is located in the drip tray.
LOW HEAT FLAME ADJUSTMENT
The burners on your Lynx accessory feature an adjustable
low setting. Fluctuations in gas pressure, gas conversion
and even in the quality of the gas itself may a ect burner
performance at the "LOW" or “MED” setting. It could be
either too high or too low causing the fl ame to turn o .
To adjust the burner setting:
1. Make sure the grill accessory is cool.
2. Remove the grates so that you can see the fl ame while
adjusting the burner.
3. Light the burner and set it to "LOW". (all the way
counter- clockwise).
4. Pull o the control knob.
5. While holding the valve shaft with pliers, insert a thin
fl at-blade
screwdriver
into the shaft
and, while
watching
the fl ame,
adjust it to
a minimum
stable
setting.
While holding the lit match next to the burner port, push
and turn the control knob of the burner to ‘Lite”. If the
burner does not light in 4 seconds, turn the knob o and
wait 5 minutes before attempting again.
Loading ...
Loading ...
Loading ...
