Loading ...
Loading ...
Loading ...
Installation Instructions
INSTALLING THE WATER LINE
BEFORE YOU BEGIN
The water line installation is not warranted bv the
refligerator or icemaker manufacturer. Follow these
recommendations careflfllv to minimize the risk of
expensive water damage.
_'ater hammer (water banging in the pipes) in house
i)lmnbing can cause damage to refl'igerator parts and
lead to water leakage or flooding. Call a qualified
plmnber to correct water hammer betore installing
the water sui)ply line to the refl'igerator.
To prevent burns and product damage, do not hook
up the water line to the hot water line.
If wm use wmr refl'igerator before connecting tile
water line, inake sure the icelnaker power switch is
in the 0 (off) position.
Do not install the icemaker tubing in areas where
temi)eratures tall below fl'eezing.
When using any electrical device (such as a power
drill) during installation, be sure the device is
insulated or wired in a maimer to i)revent the hazard
of electric shock.
All installations must be in accordm_ce with local
plmnbhlg code requirements.
Installation of the icemaker must be done by a
qualified service tech_ficim_.
a, WARNING!Connect to potable
water sui)plv only.
[] CONNECT THE TUBING TO THE
REFRIGERATOR
NOTES:
• Before making tile connection to tile refl'igerator,
be sure tile refl'igerator power cord is not
plugged into the wall outlet.
• We recommend installing a water filter ifwmr
water SUl)ply has sand or particles that could clog
the screen of the refrigerator's water wove. Install
it in tile water line near tile refl'igerator.
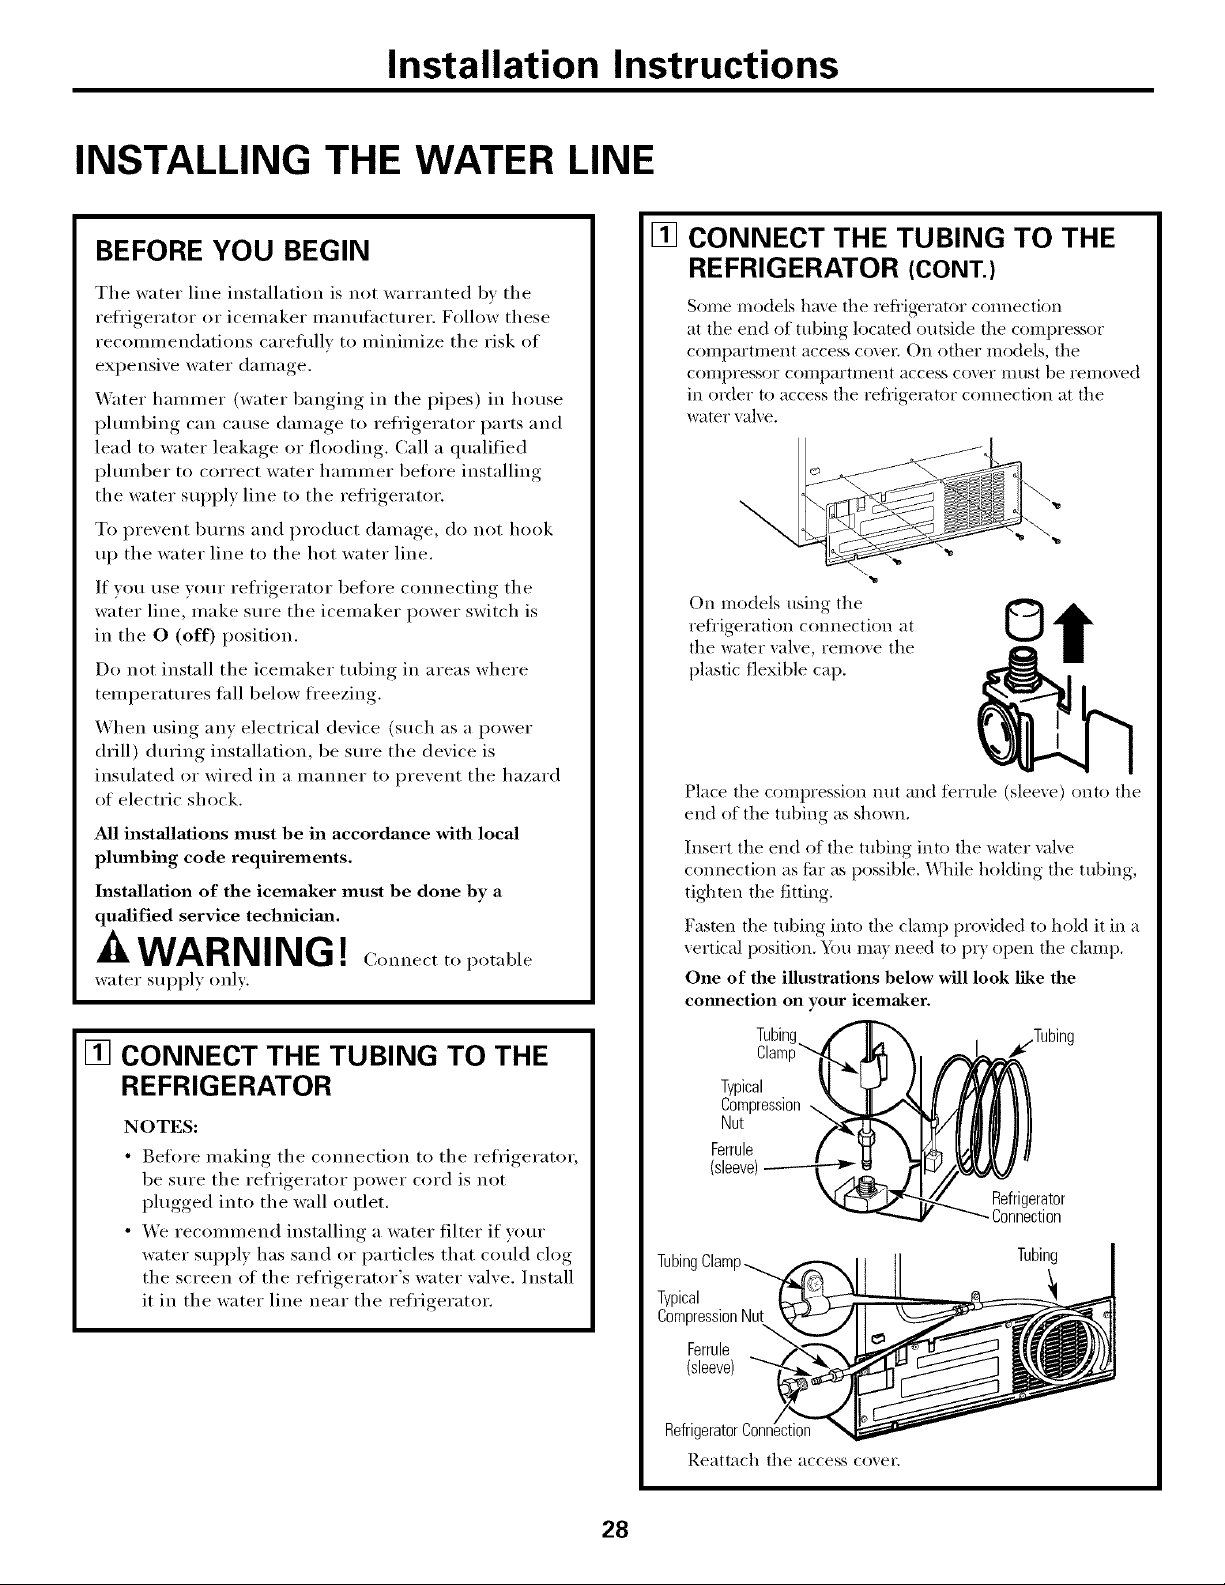
[]
CONNECT THE TUBING TO THE
REFRIGERATOR (CONT.)
Some models hm e file refl'igerator comlection
at the end of tubing located outside the compressor
compartment access cover, On other models, the
COllll)I'essor COml)artment access coveF IlltlSt be rellloved
in order to access the refi'igemtor c(mnection at the
water valve,
On models using the
refl'igeration connection at
the water valve, remove the
plastic flexible cap,
©
Place the compression nut and tbrmle (sleexe) onto the
end of the tubing as shown,
Insert the end of the tubing into the water xalxe
connection as tier as possible. While holding the tubing,
tighten the fitting,
Fasten the tubing into the clamp proxided to hold it in a
vertical position, _%u ma} need to i)i) open the clamp,
One of the illustrations below will look like the
connection on your icemaker,
Clam
Typical
Compression
Nut
Ferrule
Tubing
Typical
CompressionNut
Ferrule
(sleeve)
Refrigerator
onnection
Tubing
Refrigerator
Reattach the access coxec
28
Loading ...
Loading ...
Loading ...