Loading ...
Loading ...
Loading ...
ASSEMBLY
_oassemble tractor you will need:
(2) 7/16" Wrenches
(1) 1/2" Wrench
(1) 3/4" Wrench
Tire Pressure Gauge
Screwdriver
Utility Knife
4OTE: RIGHT HAND (R H,) AND LEFT HAND (L,H_) ARE
DETERMINED FROM OPERATOR'S POSITION
WHILE SEATED ON THE TRACTOR
WEAR EYE AND FACE SHIELD_
WASH HANDS OR CLOTHING IM-
MEDIATELY IF ACCIDENTALLY IN
CONTACT WITH BATTERY ACID,
DO NOT SMOKE; FUMES FROM
CHARGED BATTERY ACID ARE
EXPLOSIVE,
READ THE INSTRUCTIONS INCLUD-
ED WITH THE BATTERY VENT
CAPS IN THE BAG OF PARTS AL-
WAYS WEAR GLOVES, CLOTHING
AND GOGGLES TO PROTECT YOUR
HANDS, SKIN AND EYES.
2. Prepare Battery
Fill and charge battery (before installing). NOTE;' SEE
DETAILED INSTRUCTIONS PACKAGED WITH BATTERY
VENT CAPS FOUND IN BAG OF PARTS
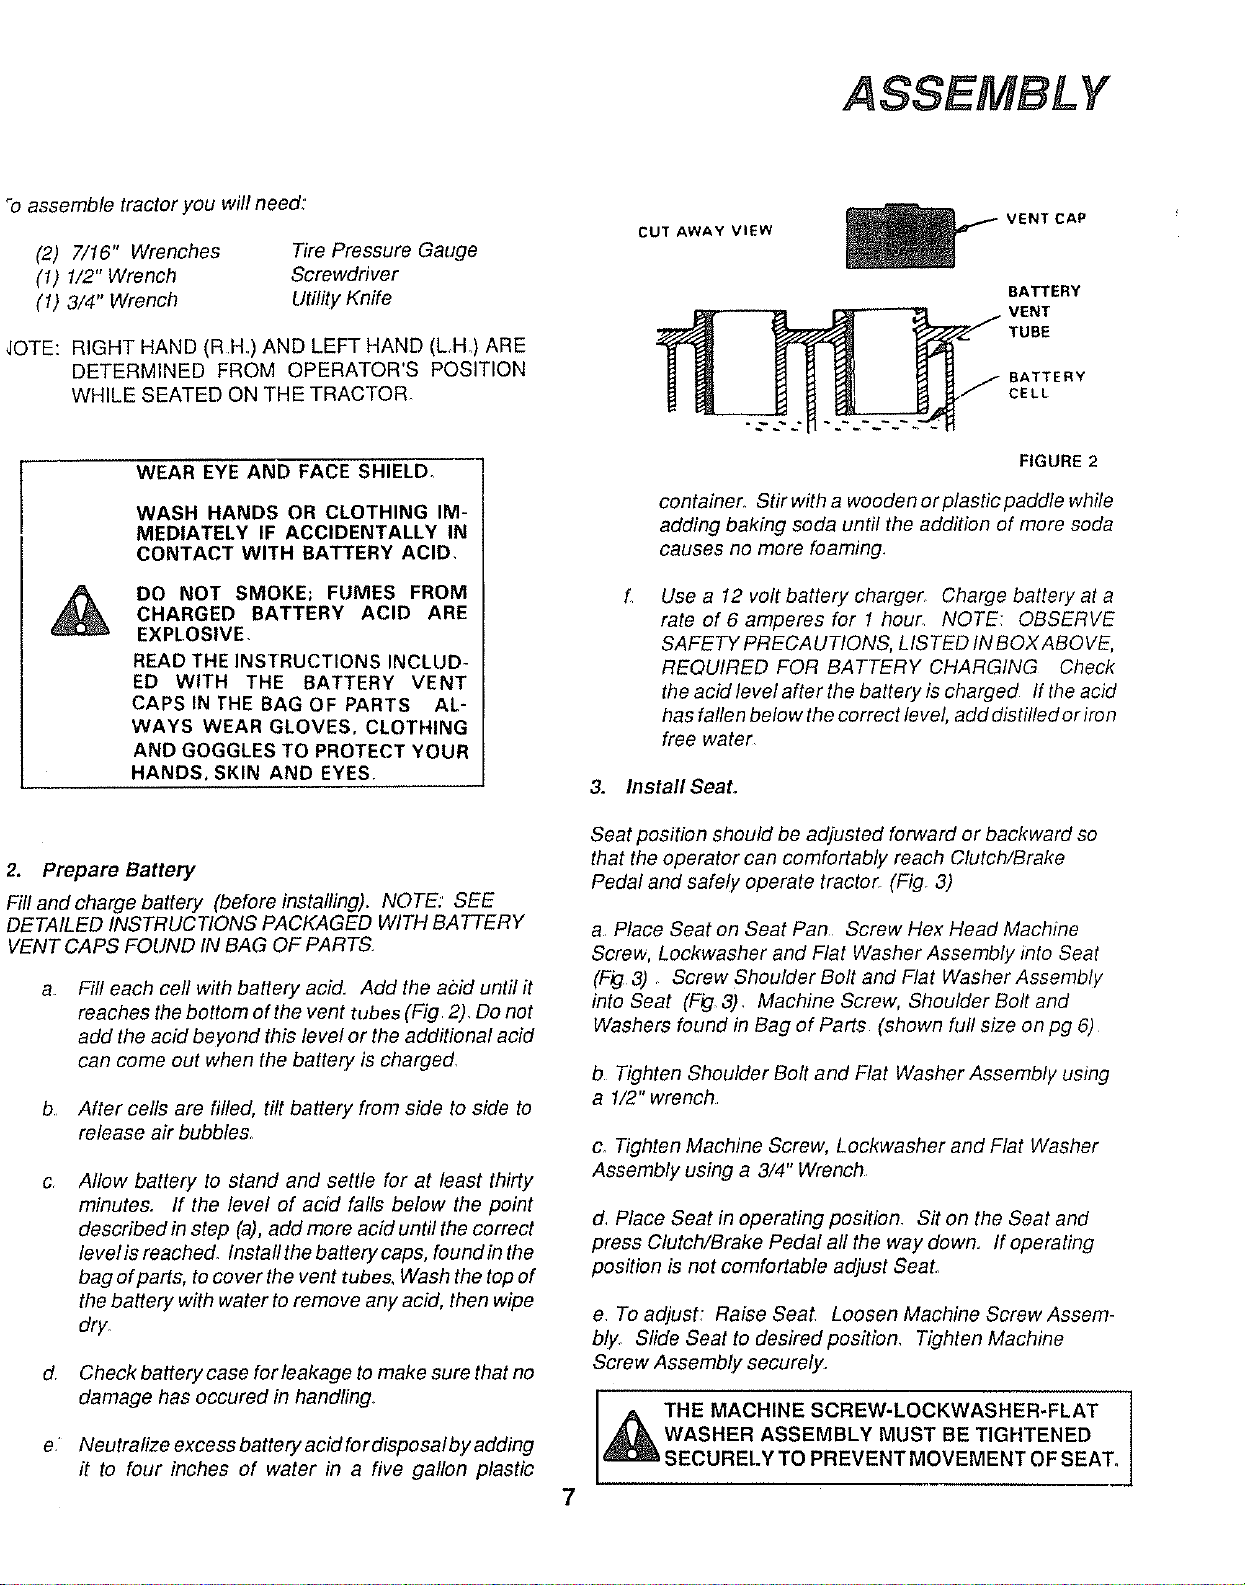
Fill each cell with battery acid. Add the acid until it
reaches the bottom of the vent tubes (Fig 2). Do not
add the acid beyond this level or the additional acid
can come out when the battery is charged,
b After cells are rifled, tilt battery from side to side to
release air bubble&
CAllow battery to stand and settle for at least thirty
minute& If the level of acid falls below the point
described in step (a),add more acid until the correct
level is reached. Install the battery caps, found in the
bag of parts, to cover the vent tube& Wash the top of
the battery with water to remove any acid, then wipe
dry
d Check battery case forleakage to make sure that no
damage has occured in handling_
eNeutralize excess battery acid for disposal by adding
it to four inches of water in a five gallon plastic 7
CUT AWAY VIEW VENTCAP
BATTERY
VENT
TUBE
BATTERY
CELL
FIGURE 2
container. Stir with a wooden or plastic paddle while
adding baking soda until the addition of more soda
causes no more foaming.
Use a 12 volt battery charger Charge battery at a
rate of 6 amperes for 1 hour NOTE OBSERVE
SAFETY PRECA UTIONS, LISTED IN BOX ABO VE.
REQUIRED FOR BATTERY CHARGING Check
the acid level after the battery is charged If the acid
has fallen below the correct level, add distilled or iron
free water
3. Install Seat.
Seat position should be adjusted forward or backward so
that the operator can comfortably reach Clutch/Brake
Pedal and safely operate tractor_ (Fig_ 3)
a Place Seat on Seat Pan Screw Hex Head Machine
Screw, Lockwasher and Flat Washer Assembly into Seat
(F# 3) _Screw Shoulder Bolt and Flat Washer Assemb(y
into Seat (F_I,3)_ Machine Screw, Shoulder Bolt and
Washers found in Bag of Parts (shown full size on pg 6)
b Tighten Shoulder Bolt and Flat Washer Assembly using
a 1/2" wrench
c. Tighten Machine Screw, Leckwasher and Flat Washer
Assembly using a 3/4" Wrench
d, Place Seat in operating position. Sit on the Seat and
press Clutch/Brake Pedal all the way down. If operating
position is not comfortable adjust Seat.
e. To adjust: Raise Seal Loosen Machine Screw Assem-
bly_ Slide Seat to desired position, Tighten Machine
Screw Assembly securely.
ATHE MACHINE SCREW-LOCKWASHER-FLAT
,_ WASHER ASSEMBLY MUST BE TIGHTENED
1_ SECURELY TO PREVENT MOVEMENT OF SEAT,
Loading ...
Loading ...
Loading ...