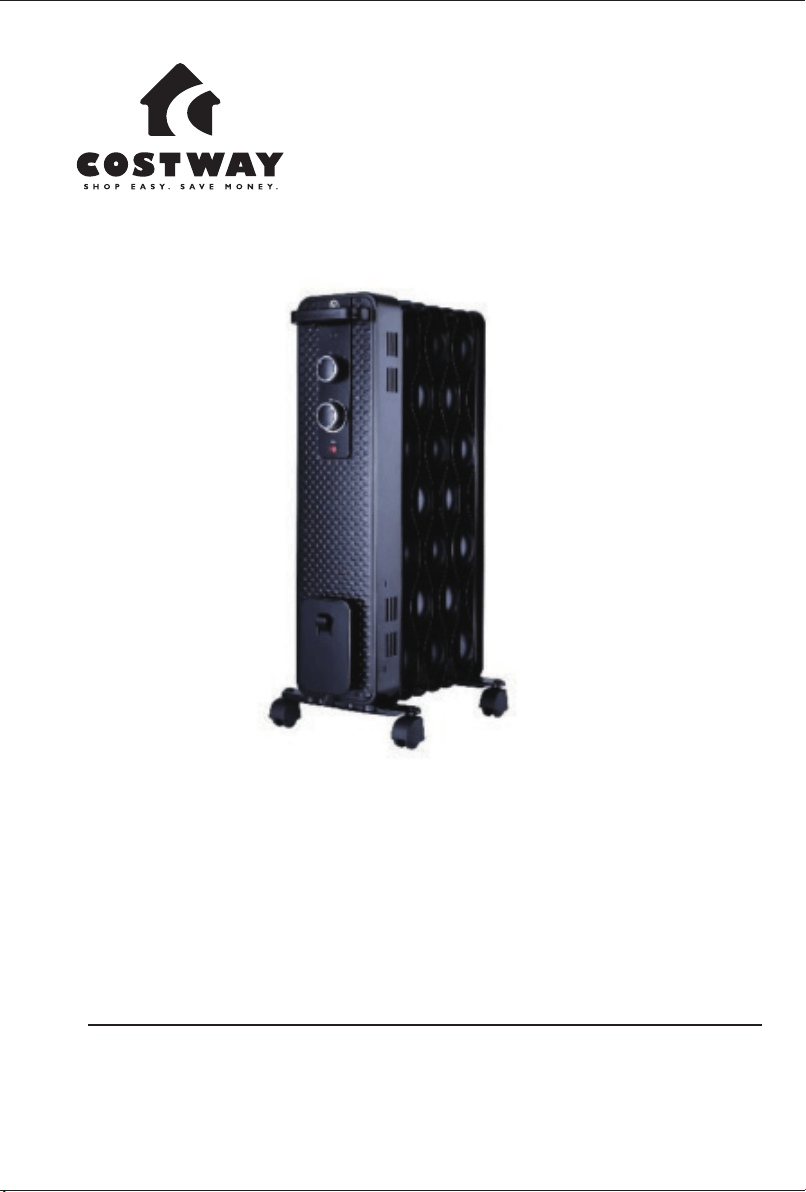
USER'S MANUAL
7 FIN OIL FILLED RADIATOR
EP24918US
UNITED STATES
CANADA
UNITED KINGDOM
GERMANY
FRANCE
ITALY
SPAIN
JAPAN
RUSSIA
AUSTRALIA
With your inspiring rating, COSTWAY will be more consistent to offer you EASY
SHOPPING EXPERIENCE, GOOD PRODUCTS and EFFICIENT SERVICE!
Mit Ihrer inspirierenden Bewertung wird COSTWAY konsistenter sein, um Ihnen
EIN SCHÖNES EINKAUFSERLEBNIS, GUTE PRODUKTE und EFFIZIENTEN
SERVICE zu bieten!
Avec votre évaluation inspirante, COSTWAY continuera à fournir une
EXPÉRIENCE D’ACHAT PRATIQUE, des PRODUITS DE QUALITÉ et un
SERVICE EFFICACE !
Con su calificación inspiradora, COSTWAY será más consistente para ofrecerle
EXPERIENCIA DE COMPRA FÁCIL, BUENOS PRODUCTOS y SERVICIO
EFICIENTE.
Con la tua valutazione incoraggiante, COSTWAY sarà più coerente per offrirti
ESPERIENZA DI ACQUISTO FACILE, BUONI PRODOTTI e SERVIZIO
EFFICIENTE!
Dzięki twojej opinii COSTWAY będzie mógł oferować jeszcze WYGODNIEJSZE
ZAKUPY, LEPSZE PRODUKTY i SPRAWNIEJSZĄ OBSŁUGĘ KLIENTA.
US office: Fontana
UK office: Ipswich
DE office: FDS GmbH, Neuer Höltigbaum 36, 22143 Hamburg, Deutschland
FR office : 26 RUE DU VERTUQUET, 59960 NEUVILLE EN FERRAIN, FRANCE

PRODUCT ASSEMBLY PRODUCT ASSEMBLY
WARM TIPS :This product is recommended for use in 108-162 square feet of
the room.
IMPORTANT INSTRUCTIONS
When using this appliance, basic precautions should always be followed to
reduce the risk of fire, electric shock and injury to persons, including the
following:
CAUTION- High temperature, keep electrical cords, drapery, and other
furnishings at least 3 feet (0.9m) from the front of the heater and away from the
side and rear.
1.Read all instructions before using the heater.
2.Remove the unit from its packaging and check to make sure it is in good
condition before using.
3.Do not let children play with parts of the packing (such as plastic bags).
4.Check the household voltage to ensure it matches the heater’s rated
specification.
5.Check the power cord and plug carefully before use to make sure that they are
not damaged.
6.Before unplugging the power cord, be sure to turn off the power. When touching
the unit, be sure your hands are dry to prevent from receiving an electric shock.
7.Do not use near to, or point the heater to, furniture, curtains, or other
inflammable objects. Keep combustible materials, such as furniture pillows,
bedding, papers, clothes, and curtains at least 3 feet (0.9m) from the front of the
heater and keep them away from the sides and rear.
8.Do not block air intakes or exhaust in any manner to prevent a possible fire.
9
.Extreme caution is necessary when any heater in used by, or near children or
invalids, and whenever the heater is left operating and unattended.
10.Always unplug the heater when not in use.
11.Prevent water from getting into the housing of the heater during operation or in
storage. Always store in a dry area free from potential moisture.
12.Do not use in places where gasoline, paint, or other inflammable liquids are
used or stored.
13.This heater is not intended for use in bathrooms, laundry areas, or similar indoor
locations. Never locate the heater where it may fall into a bath tub or other body of
water.
14.Do not run the cord under carpeting. Do not cover the cord with throw rugs,
runners, or the like. Arrange the cord away from traffic areas and where it will not
be tripped over.
15.Do not use on soft surfaces, like a bed, where openings may became blocked.
16.Do not operate any heater with a damaged cord, damaged plug, after the heater
malfunctions, or if it has been dropped or damaged in any manner. Return the
heater to an authorized service facility for examination, electrical or mechanical
adjustment, or repair.
17.Do not insert or allow foreign objects to enter any ventilation or exhaust
opening as this may cause an electric shock, fire, or damage the heater.
18.This heater is hot when in use. To avoid burns, do not let bare skin touch the hot
surfaces. If provided, use handles when moving this heater.
19.Use this heater only as described in this manual. Any other uses not
recommended by the manufacturer may cause fire, electric shock, or personal
injury and may void the warranty.
20.Always plug heater directly into a wall outlet/receptacle .Never use with
02 03

PRODUCT ASSEMBLY PRODUCT ASSEMBLY
SAVE THESE INSTRUCTIONS
SPECIFICATIONS
an extension cord or relocatable power tap (outlet/power strip)
21.Do not use outdoors.
22.To disconnect heater, turn controls to off, then remove plug from outlet.
WARNING: RISK OF FIRE Keep combustible material such as furniture, paper,
clothes, and curtains at least 3 feet (0.9m) from the front of the heater and keep
23.them away from the side and rear when the heater is plugged in.
24.Do not place any objects such as furniture, papers, clothes, and curtains closer
than 3 feet to the front of the heater and keep them away from the sides and rear
when the heater is plugged in.
25.Do not place the heater near a bed because objects such as pillows or blankets
can fall off the bed and be ignited by the h
eater.
26.Never clean this heater while it is plugged in. Do not immerse in water. To
disconnect, turn control to OFF, then remove the plug from the outlet by grasping it
and pulling it from the outlet. Never yank on the cord.
27.This appliance is not intended for use by persons (including children) with
reduced physical, sensory or mental capabilities, or lack of experience and
knowledge, unless they have been given supervision or instruction concerning use
of the appliance by a person responsible for their safety.
28.Children should be supervised to ensure that they do not play with the appliance
29.Do not use with wireless plug adapter or outlet that allows control remotely.
MODEL NO.
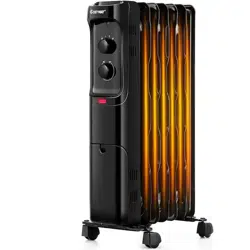
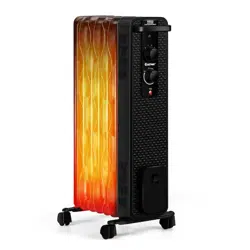
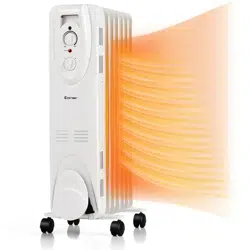
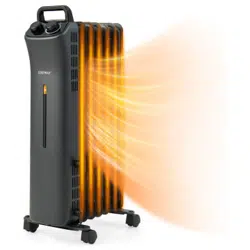
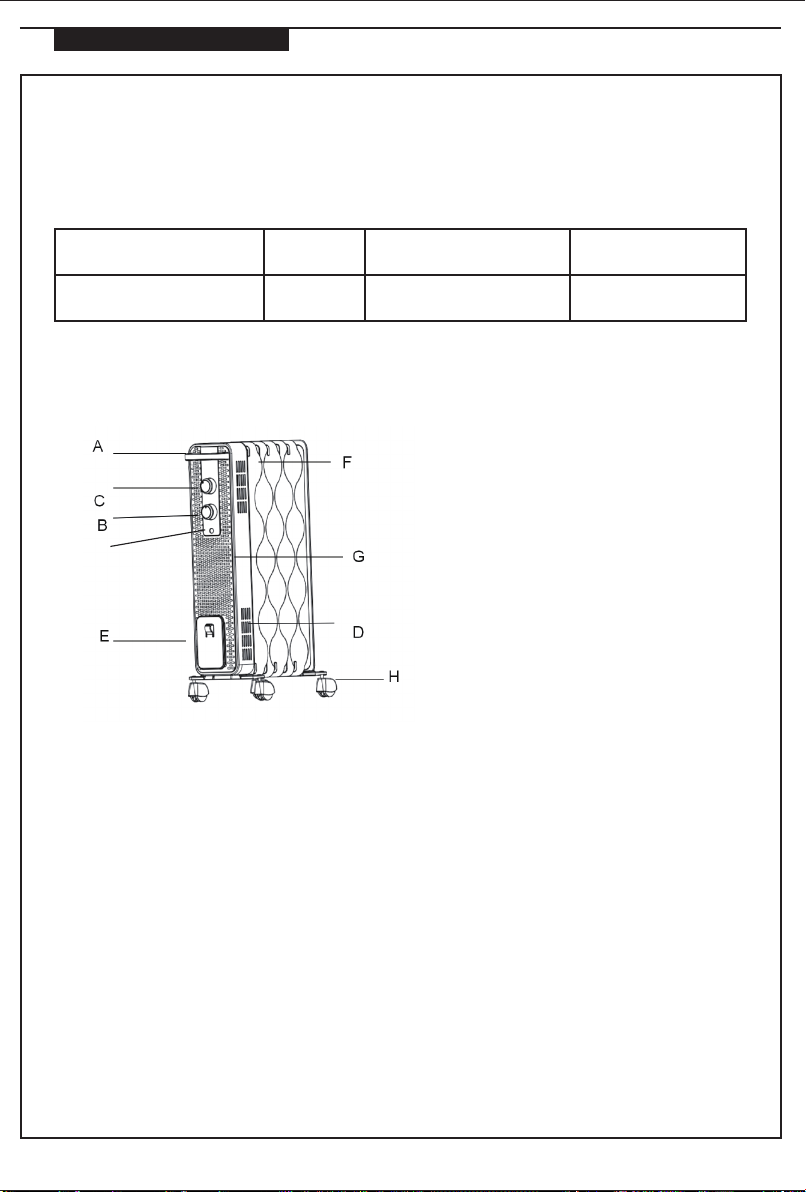
STRUCTURE AND PARTS
ASSEMBLY INSTRUCTIONS
EP24918US-BK/WH
A –Carry handle
B –Power switch
C –Thermostat knob
D –Exhaust openings
E –Cord warp
F –Radiator fins
G –Front cover
H –Caster wheels
I – Pilot light
The heater is packaged with the feet unattached. You must attach them before
operating the heater.
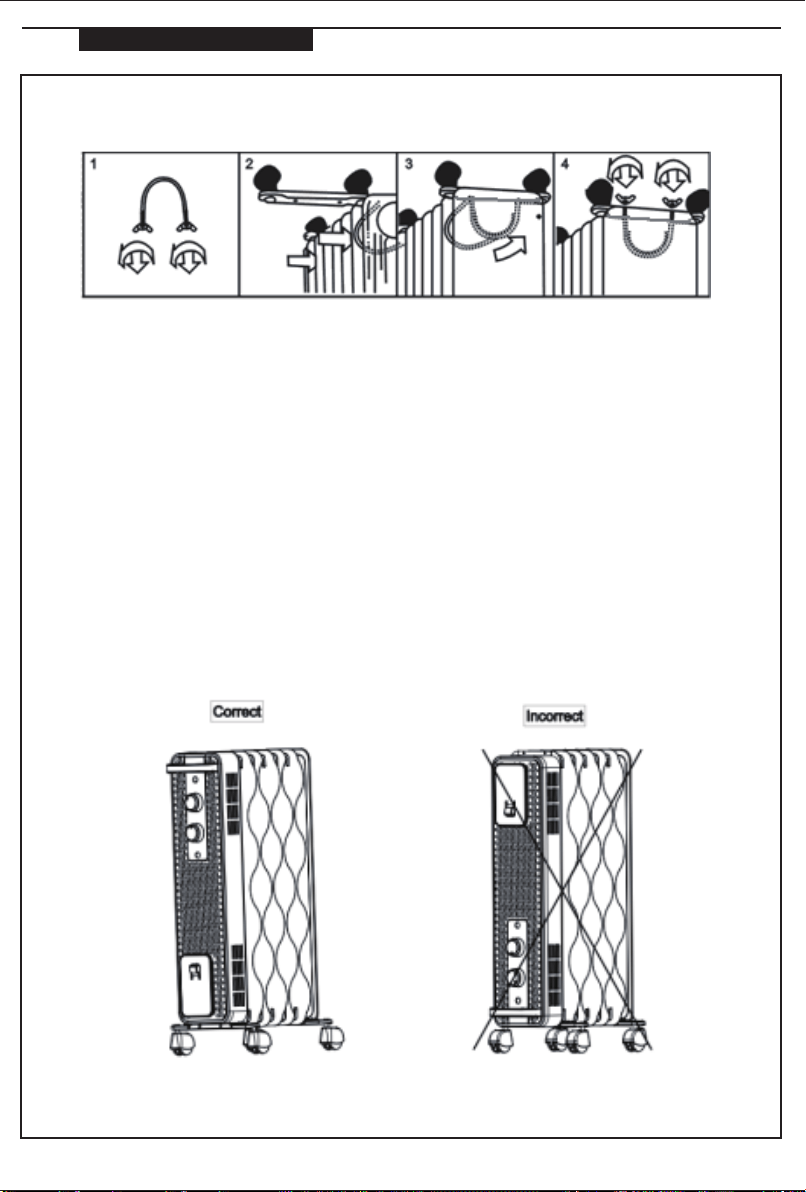
WARNING: Do not operate without feet attached. Do operate the heater only in
upright position (feet on the bottom, controls on the top), any other position could
create a hazardous situation.
FINS
7
RATED VOLTAGE
120V 60Hz
RATED POWER
1500W
04 05
I
PRODUCT ASSEMBLY PRODUCT ASSEMBLY
SAVE THESE INSTRUCTIONS
SPECIFICATIONS
an extension cord or relocatable power tap (outlet/power strip)
21.Do not use outdoors.
22.To disconnect heater, turn controls to off, then remove plug from outlet.
WARNING: RISK OF FIRE Keep combustible material such as furniture, paper,
clothes, and curtains at least 3 feet (0.9m) from the front of the heater and keep
23.them away from the side and rear when the heater is plugged in.
24.Do not place any objects such as furniture, papers, clothes, and curtains closer
than 3 feet to the front of the heater and keep them away from the sides and rear
when the heater is plugged in.
25.Do not place the heater near a bed because objects such as pillows or blankets
can fall off the bed and be ignited by the h
eater.
26.Never clean this heater while it is plugged in. Do not immerse in water. To
disconnect, turn control to OFF, then remove the plug from the outlet by grasping it
and pulling it from the outlet. Never yank on the cord.
27.This appliance is not intended for use by persons (including children) with
reduced physical, sensory or mental capabilities, or lack of experience and
knowledge, unless they have been given supervision or instruction concerning use
of the appliance by a person responsible for their safety.
28.Children should be supervised to ensure that they do not play with the appliance
29.Do not use with wireless plug adapter or outlet that allows control remotely.
MODEL NO.
STRUCTURE AND PARTS
ASSEMBLY INSTRUCTIONS
EP24918US-BK/WH
A –Carry handle
B –Power switch
C –Thermostat knob
D –Exhaust openings
E –Cord warp
F –Radiator fins
G –Front cover
H –Caster wheels
I – Pilot light
The heater is packaged with the feet unattached. You must attach them before
operating the heater.
WARNING: Do not operate without feet attached. Do operate the heater only in
upright position (feet on the bottom, controls on the top), any other position could
create a hazardous situation.
FINS
7
RATED VOLTAGE
120V 60Hz
RATED POWER
1500W
04 05
I
PRODUCT ASSEMBLY PRODUCT ASSEMBLY
1.Place the radiator body upside-down on a scratch-free location, make sure it is
stable and will not fall.
2.Screw off the wing nuts from the U-shaped bolt provided, attach the U-shaped
bolt to the U-facing flange between first and second fins(near the front cover).
3.To attach the castor mounting plate to the radiator body, you should insert the
threaded ends of the U bolt in the holes on the castor mounting plate.
4.Screw the wing nuts back to the U bolt and fasten the wing nut properly.
Note: do not over tighten, which may cause the damage of radiator flange.
5.Repeat 2, 3, and 4 on the rear of radiator for mounting of the rear Castors.
Note: the rear castors must be mounted between the end two fins.
INSTRUCTIONS FOR USE
1
.Before using the heater make sure that it is on a flat and stable surface.
Damage may occur if it is placed on an incline or decline.
2.Set the power switch to 0 (OFF) position and the thermostat to MIN position
Then insert the plug into a socket-outlet well grounded.
3.Rotate the thermostat knob clockwise to MAX position and rotate the power
switch of the heater as follows: LOW (1power-600 watts); MED (2 power-
900 watts); HIGH (3 power-1500 watts); 0 for power off.
4.When your room reaches the desired temperature, now slowly rotate the
thermostat knob counter clockwise until the clicks sound comes. The thermostat
can now be left at this setting. As soon as the room temperature has dropped below
the set temperature, the unit will switch on automatically until the set temperature
has been reached again. In this way the room temperature remains constant with
the most economical use of electricity.
5.If you want to change the room temperature setting, rotate the thermostat knob
clockwise to raise the temperature, or counter clockwise to lower it.
6.This heater includes an overheat protection system that shuts off the heater when
parts of the heater are getting excessively hot.
7.To completely shut the heater off, turn all the controls to OFF, and remove plug
from the socket-outlet.
06 07

PRODUCT ASSEMBLY PRODUCT ASSEMBLY
SAFETY FEATURES
TROUBLE SHOOTING TIPS
If your heater shuts off unexpectedly or fails to operate, one of the
above-mentioned safety features may have activated to prevent overheating.
1.Be sure the power cord is plugged into a working electrical outlet.
2.Check your thermostat setting. The heater may be off because it has reached
the desired temperature setting.
MAINTENANCE
WARNING: ALWAYS UNPLUG THE CORD BEFORE MOVING OR
SERVICING. DO NOT IMMERSE HEATER IN WATER!
WARNING: In case of malfunction or doubt, do not try to repair the radiator
yourself .It may result in a fire hazard or electric shock.
CLEANING: IMPORTANT! DO NOT IMMERSE HEATER IN WATER! Clear
the heater grills with the vacuum brush attachment on your vacuum cleaner. This
will r
emove lint and dirt from the inside of the heater. DO NOT ATTEMPT TO
TAKE HEATER APART. Clean the body of heater with a soft cloth.
CAUTION: Do not use gasoline, benzine, thinner, harsh cleaners, etc. as they
will damage the heater. NEVER USE ALCOHOL OR SOLVENTS.
STORAGE: wind the cable round the bobbin, and then store the heater with these
instructions in the original carton in a cool, dry place.
This product has protection safeguards that shut off the product when parts become
excessively hot or if it tips over. If the product shuts off, immediately turn the
Control to the "OFF" position and unplug it from the electric outlet.
If tipped over:
Place the product on a flat, level, stable surface in order to prevent the product from
tipping ove
r again.
TIP: Always install and maintain at least one smoke detector in good operating
condition on each floor of your home. Periodically check and/or replace the
battery in your smoke detector with a new battery.
08 09

USER'S MANUAL
7 FIN OIL FILLED RADIATOR
EP24918US
UNITED STATES
CANADA
UNITED KINGDOM
GERMANY
FRANCE
ITALY
SPAIN
JAPAN
RUSSIA
AUSTRALIA
With your inspiring rating, COSTWAY will be more consistent to offer you EASY
SHOPPING EXPERIENCE, GOOD PRODUCTS and EFFICIENT SERVICE!
Mit Ihrer inspirierenden Bewertung wird COSTWAY konsistenter sein, um Ihnen
EIN SCHÖNES EINKAUFSERLEBNIS, GUTE PRODUKTE und EFFIZIENTEN
SERVICE zu bieten!
Avec votre évaluation inspirante, COSTWAY continuera à fournir une
EXPÉRIENCE D’ACHAT PRATIQUE, des PRODUITS DE QUALITÉ et un
SERVICE EFFICACE !
Con su calificación inspiradora, COSTWAY será más consistente para ofrecerle
EXPERIENCIA DE COMPRA FÁCIL, BUENOS PRODUCTOS y SERVICIO
EFICIENTE.
Con la tua valutazione incoraggiante, COSTWAY sarà più coerente per offrirti
ESPERIENZA DI ACQUISTO FACILE, BUONI PRODOTTI e SERVIZIO
EFFICIENTE!
Dzięki twojej opinii COSTWAY będzie mógł oferować jeszcze WYGODNIEJSZE
ZAKUPY, LEPSZE PRODUKTY i SPRAWNIEJSZĄ OBSŁUGĘ KLIENTA.
US office: Fontana
UK office: Ipswich
DE office: FDS GmbH, Neuer Höltigbaum 36, 22143 Hamburg, Deutschland
FR office : 26 RUE DU VERTUQUET, 59960 NEUVILLE EN FERRAIN, FRANCE