Loading ...
Loading ...
Loading ...
English
8
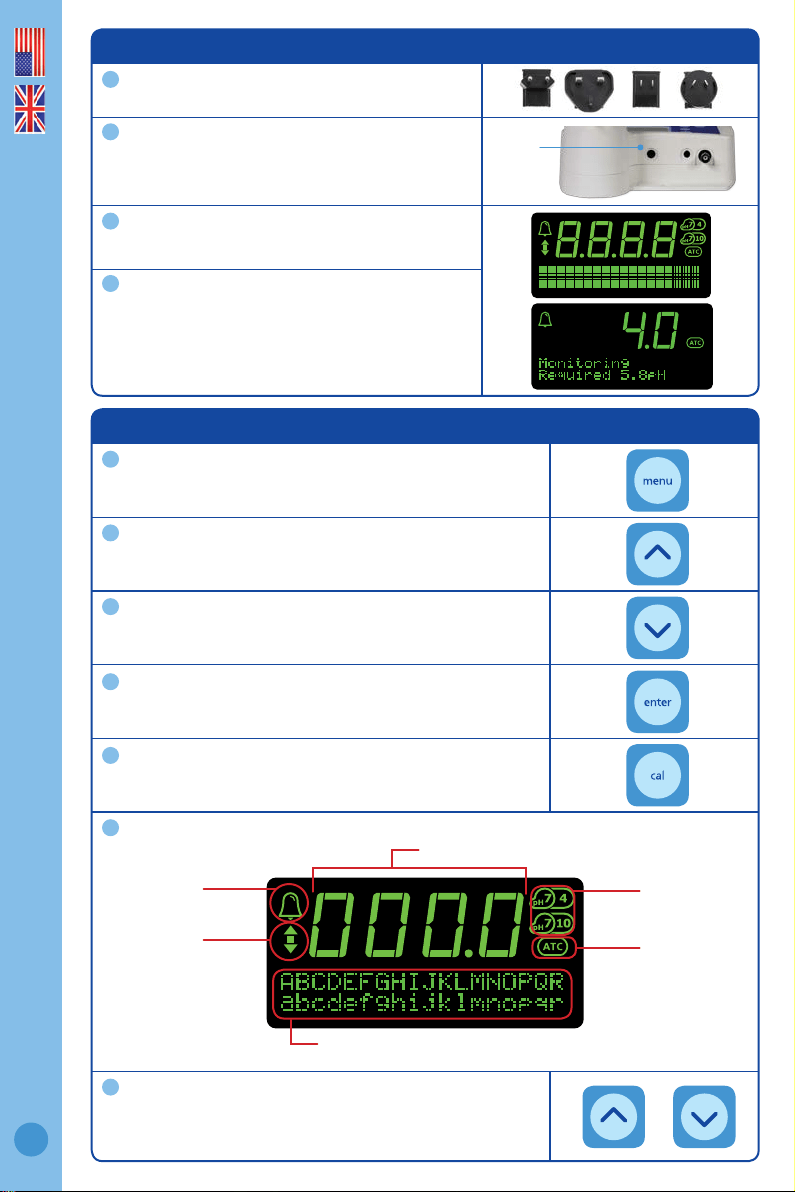
10.0 Display menu and buttons
One press of the ‘menu’ button will take you into the
menu. To exit the menu, press ‘menu’ again. Changes
will not be saved.
The ‘∧’ (up arrow) button allows you to move up the
menu items or increase a value shown.
The ‘∨’ (down arrow) button allows you to move down
the menu items or decrease a value shown.
The ‘enter’ button allows you to select the desired option
shown on the display, or save a chosen value.
The ‘cal’ button is used to calibrate your pH probe. A
long press enters the calibration sequence.
The following symbols, numbers or characters will show on the display to indicate:
To use the ‘Auto-repeat’ feature: Press and hold the ‘∧’
(up arrow) or ‘∨’ (down arrow) button to scroll through
options. Release when you see the desired option or
value on the screen.
1
2
4
3
5
6
7
Alarm is on
pH controller status, menu options
or instructions
Succesful pH
calibration
indicators
Reading display
Automatic
Temperature
Compensation if
Temperature Probe
is connected
pH control
direction -
up OR down
9.0 Connect power adaptor
Select and connect the appropriate mains plug
adaptor for your country to the power supply unit.
Connect the power adaptor into the base of the
pH controller where ‘PWR’ is labelled. Plug the
adaptor into mains power supply.
Switch on power adaptor at the mains. The pH
controller will complete a display test sequence.
The default setting, when the unit is rst
powered up, is ‘monitoring’ mode.
Note: pH calibration must be completed before
the rst use, see section 13.0.
1
2
3
4
connect
power
adaptor
Loading ...
Loading ...
Loading ...