M_AYI'AI3
Gas Smide-in Range
Precision Touch Contro_ 500
Form No. A/04/05
Table of Contents
Umportant Safety
instructions ............................... 1=4
Surface Cooking ...................... 5-6
Surtace Controis
Seabd Gas Burners
Oven Cooking ......................... 7=14
Baling
Cook & HoM
Dday Cook & HoM
Keep Warm
Broiling
Oven Racks
Part No 8113P499-60
Care & CJeaning ................... 15-18
Self-Clean Oven
Cleaning Procedures
Maintenance ......................... 19-20
Oven Whldow & Light
Removal ot Gas Appliance
Troubleshooting ................... 21-22
Warranty & Service .................... 23
Guide d'utilisation et
d'entretien ................................... 24
Guia de Use y Cuidado ............. 52
_2005 Maytag Appliances Sales Co Lithe U.S.A.
Installer: Please leave this guide with tMs appliance.
Model Number
Seria! Number
Date of purchase
Maytag Customer Assistance
1-800÷688-2002 Canada
1_800:688_2080 (U.S. _for hearing or Speech impaired}
In our continuing effortto improvethe qualityand performance
of our cooking products, it may be necessaryto make changes
For sendce i#fe_aden, see page 23.
Warning and Important Safety Instructions appearing in
this guide are not meant to cover all possible conditions
and situations that may occur. Common sense, caution,
and care must be exercised when installing, maintaining,
or operating the appliance.
Always contact the manufacturer about problems or
conditions you do not understand.
Recognize Safety Symbols, Words, Labels
technician. Do not attempt to adjust, repair, service, or
replace any part of your appliance unless it is specifically
recommended in this guide. All other servicing should be
referred to a qualified servicer, Have the installer show
you the location of the gas shut off valve and howto
shut it off in an emergency,
Always disconnect power to appliance before servicing,
if the information in this guide is not followed
e×actly, a fire or explosion may result causing
property damage, persona! injury or death.
Do not store or use gasoline or other
flammabme vapors and liquids in the vicinity
of this or any appliance.
UFYOU SMELL GAS:
o Do not try to light any appiianceo
o Do not touch any electrical switch°
o Do not use any phone in your building°
o immediately call your gas supplier from a
neighbor's phone. }:ollow the gas supplier's
instructions.
* If you cannot reach your gas supplier, call
the fire department.
mnstallation and service must be performed by
a qualified instalmer, service agency or the gas
sa pplier.
manufaoturer:s instructions,
Genera instructions
COULD result in severe personal injury or death,
CAUTnON - Hazards or unsafe practices which
COULD result in minor personal injury,
Read and follow aH instructions before using this
appliance to prevent the potential risk of fire, electric
shock, personal inju_ or damage to the appliance as a
result of improper usage of the appliance. Use appliance
only for its intended purpose as described in this guide.
To ensare proper and safe operation: Appliance
must be properly installed and grounded by a qualified
ALL RANGES (;AN Trip AN[}
CAUSE UNJURIES TO PER8
INSTALL ANTI-TIP [}[vlc[
PACKED WITH RANGE
o FOLLOW ALL INSTALLATUON
iii_i i i : iii_i _i
WARNnNG: To reduce risk of :
tipping of the appliance from
abnormam usage or by excessive loading of the
oven door, the appliance must be secured by a
propermy installed anti.tip device.
Tocheckif devbeb properlyinstalled,lookunderneath
rangewith aflashlightto makesureoneofthe rear
bvelinglegsisproperlyengagedinthe bracketslot.The
antPtipdevbesecurestherearlevelinglegto thefloor
whenproperlyengaged.Youshouldcheckthb anytime
the rangehasbeenmoved.
Donot usewateron greasefires.UsebaMngsoda,a
drychembalorfoam-typeexdngubherto smotherfire
or flame.
Child Safety
To Prevent Fire or
Smoke Damage
Be sure all packing materials are removed from the
appliance before operating it.
Keep area around appliance clear and free from
combustibb materiab, gasoline, and other flammable
vapors and materiab.
If appliance is instalbd near a window, proper
precautions should be taken to prevent curtains from
blowing over burners.
NEVER leave any items on the cooktop. The hot air from
the vent may ignite flammabb items and may increase
pressure in dosed containers which may cause them to
burst.
Many aerosol-type spray cans are EXPLOSIVE when
exposed to heat and may be highly fiammabb. Avoid
their use or storage near an appliance.
Many plastics are vulnerabb to heat. Keep plastics away
from parts of the appliance that may become warm or
hot. Do not leave plastic items on the cooktop as they
may melt or soften if left too close to the vent or a
lighted surface burner.
To eliminate the hazard of reaching over hot surface
burners, cabinet storage should not be provided directly
above a unit. If storage is provided, it should be limited
to items which are used infrequently and which are
safely stored in an area subjected to heat from an
appliance. Temperatures may be unsafe for some items,
such as volatile liquids, cleaners or aerosol sprays.
In Case of Fire
Turn off appliance and ventilating hood to avoid
spreading the flame. Extinguish flame then turn on
hood to remove smoke and odor.
Cooktop: Smother fire or flame in a pan with a lid or
cookie sheet.
NEVER pick up or move a flaming pan.
Oven: Smother fire or flame by closing the oven door.
NEVER store items of interest to children in cabinets
above an appliance Or`on backguard 0f a range.
items could be seriously injured.
NEVER leave children alone or unsupervised near the
appliance when it is in use or is still hot.
NEVER allow children to sit or stand on any part of the
appliance as they could be injured or burned.
Children must be taught that the appliance and utensils
in it can be hot. Let hot utensils cool in a safe place, out
of reach of small children. Children should be taught
that an appliance is not a toy. Children should not be
allowed to play with controls or other parts of the unit.
About Your Appliance
2
NEVER use appliance door as a step stool or seat as this
may result in possible tipping of the appliance and serious
injuries.
NEVER use this appliance as a space heater to heat oi
warm a room. Doing so may result in carbon monox-
ide poisoning and overheating of the oven.
NEVER cover any sJots, he les or passages in the oven
bottom or cover' the entire rack with materials such as
aluminum foil. Doing so blocks air flow through the
oven and may cause carbon monoxide poisoning.
Aluminum foil may also trap heat causing a fire
hazard.
NEVER obstruct the flow of combustion and ventilation
air by blocking the oven vent or air intakes. Doing so
restricts air to the burners and may result in carbon
monoxide poisoning.
The oven vent is located at the rear of the cooking
surface.
Avoid touching oven vent area while oven is on and for
several minutes after oven is turned off. Some parts of
theventandsurroundingareabecomehot enoughto
causeburns.Afterovenisturnedoff,donottouchthe
ovenventorsurroundingareasuntiltheyhavehad
sufficienttimeto cool
Otherpotentiallyhotsurfacesincludecooktop,areas
facingthecooktop,ovenvent,surfacenearthe vent
opening,ovendoor,areaaroundtheovendoorand
ovenwindow.
Do not touch a hot oven light bulb with a damp cloth as
the bulb could break Should the bulb break, disconnect
power to the appliance before removing bulb to avoid
electrical shock,
Do not use the cooktop or ovens as a storage area for
food or cooking utensils.
Cooking Safety
Always place a pan on a surface burner before turning it
on. Be sure you know which knob controls which
surface burner. Make sure the correct burner is turned
on and that the burner has ignited. When cooking is
completed, turn burner off before removing pan to
prevent exposure to burner flame.
Always adjust surface burner flame so that it does not
extend beyond the bottom edge of the pan. An exces-
sive flame is hazardous, wastes energy and may damage
the appliance, pan or cabinets above the appliance.
NEVER leave a surface cooking operation unattended
especially when using a high heat setting or when deep
fat frying. Boiiovers cause smoking and greasy spiiiovers
may ignite. Clean up greasy spills as soon as possible.
Do not use high heat for extended cooking operations.
NEVER heat an unopened container on the surface
burner or in the oven. Pressure build-up may cause
container to burst resulting in serious personal injury or
damage to the appliance.
Use dry, sturdy potholders. Damp potholders may cause
burns from steam. Dish towels or other substitutes
should never be used as potholders because they can
trail across hot surface burners and ignite or get caught
on appliance parts.
Always let quantities of hot fat used for deep fat frying
coo[ before attempting to move or handle.
Do not let cooking grease or other flammable materials
accumulate in or near the appliance, hood or vent fan.
Clean hood frequently to prevent grease from accumu-
lating on hood or filter. When flaming foods under the
hood turn the fan on.
NEVER wear garments made of flammable material or
loose fitting or long-sleeved apparel while cooking.
Clothing may ignite or catch utensil handles.
Always place oven racks in the desired positions while
oven is cool. Slide oven rack out to add or remove food,
using dry, sturdy potholders. Always avoid reaching into
the oven to add or remove food. If a rack must be
moved while hot, use a dry potholder. Always turn the
oven off at the end of cooking.
Use care when opening the oven door. Let hot air or
steam escape before moving or replacing food.
PREPARED FOOD WARNUNG: Follow food
manufacturer's instructions, if a plastic frozen food
container and/or its cover distorts, warps, or is otherwise
damaged during cooking, immediately discard the food
and its container. The food could be contaminated.
NEVER use aluminum foil to cover oven racks or oven
bottom. This could result in risk of electric shock, fire, or
damage to the appliance. Use foil only as directed in this
guide.
Utensil Safety
Use pans with flat bottoms and handles that are easily
grasped and stay cool. Avoid using unstable, warped,
easily tipped or loose-handled pans. Also avoid using
pans, especially small pans, with heavy handles as they
could be unstable and easily tip. Pans that are heavy to
move when filled with food may also be hazardous.
Be sure utensil is large enough to properly contain food
and avoid boilovers. Pan size is particularly important in
deep fat frying. Be sure pan will accommodate the
volume of food that is to be added as well as the bubble
action of fat.
To minimize burns, ignition of flammable materials and
spillage due to unintentional contact with the utensil do
not extend handles over adjacent surface burners.
Always turn pan handles toward the side or back of the
appliance, not out into the room where they are easily
hit or reached by small children.
Never let a pan boll dry as this could damage the utensil
and the appliance.
Follow the manufacturer's directions when using oven
cooking bags.
3
Only certain types of glass, glass/ceramic, ceramic or
glazed utensils are suitable for cooktop or oven usage
without breaking due to the sudden change in tempera-
ture. Follow manufacturer's instructions when using
glass.
This appliance has been tested for safe performance
using conventional cookware. Do not use any devices or
accessories that are not specifically recommended in
this guide. Do not use element covers for the surface
units, stovetop grills, or add-on oven convection sys-
tems. The use of devices or accessories that are not
expressly recommended in this manual can create
serious safety hazards, result in performance problems,
and reduce the life of the components of the appliance.
Cmeaning Safety
Turn off all controls and wait for appliance parts to cool
before touching or cleaning them. Do not touch the
burner grates or surrounding areas until they have had
sufficient time to cool.
Clean appliance with caution. Use care to avoid steam
burns if a wet sponge or cloth is used to wipe spills on a
hot surface. Some cleaners can produce noxious fumes
if applied to a hot surface.
Self-Clean Oven
It is normal for the cooktop of the range to become hot
during a self-clean cycle. Therefore, touching the
cooktop during a clean cycle should be avoided.
important Safety Notice
and Warning
The California Safe Drinking Water and Toxic Enforce-
ment Act of 1986 (Proposition 65_ requires the Governor
of California to publish a list of substances known to the
State of California to cause cancer or reproductive harm,
and requires businesses to warn customers of potential
exposures to such substances.
Users of this appliance are hereby warned that the
burning of gas can result in low-level exposure to some
of the listed substances, including benzene, formalde-
hyde and soot, due primarily to the incomplete combus-
tion of natural gas or liquid petroleum (LP} fuels. Prop-
erly adjusted burners will minimize incomplete combus-
tion. Exposure to these substances can also be mini-
mized by properly venting the burners to the outdoors.
Users of this appliance are hereby warned that when
the oven is engaged in the self-clean cycle, there may
be some low-level exposure to some of the listed
substances, including carbon monoxide. Exposure to
these substances can be minimized by properly venting
the oven to the outdoors by opening the windows and/
or door in the room where the appliance is located
during the self-clean cycle.
IMPORTANT NOTICE REGARDING PET BIRDS:
Donot leave food or cooking utensils, etc. in the Never keep pet birds in the kitchen or in rooms where
even during the self-dean cyc!e, the fumes from the kitchen could reach. Birds have a
Clean only parts listed in this guide. Do not clean door
gaskeL The door gasket is essential for a good seal
Care should be taken not to rub, damage, or move the
gaskeL Do not use oven cleaners of any kind in or
around any part of the self-clean oven.
very sensitive respiratory system. Fumes released during
an oven self-cleaning cycle may be harmful or fatal to
birds. Fumes released due to overheated cooking off, fat,
margarine and overheated non-stick cookware may be
equally harmful
Before self-cleaning the oven, remove broiler pan, oven
racks and other utensils and wipe up excessive
spillovers to prevent excessive smoke, flare-ups or
flaming.
Save These instructions for Future Reference
4
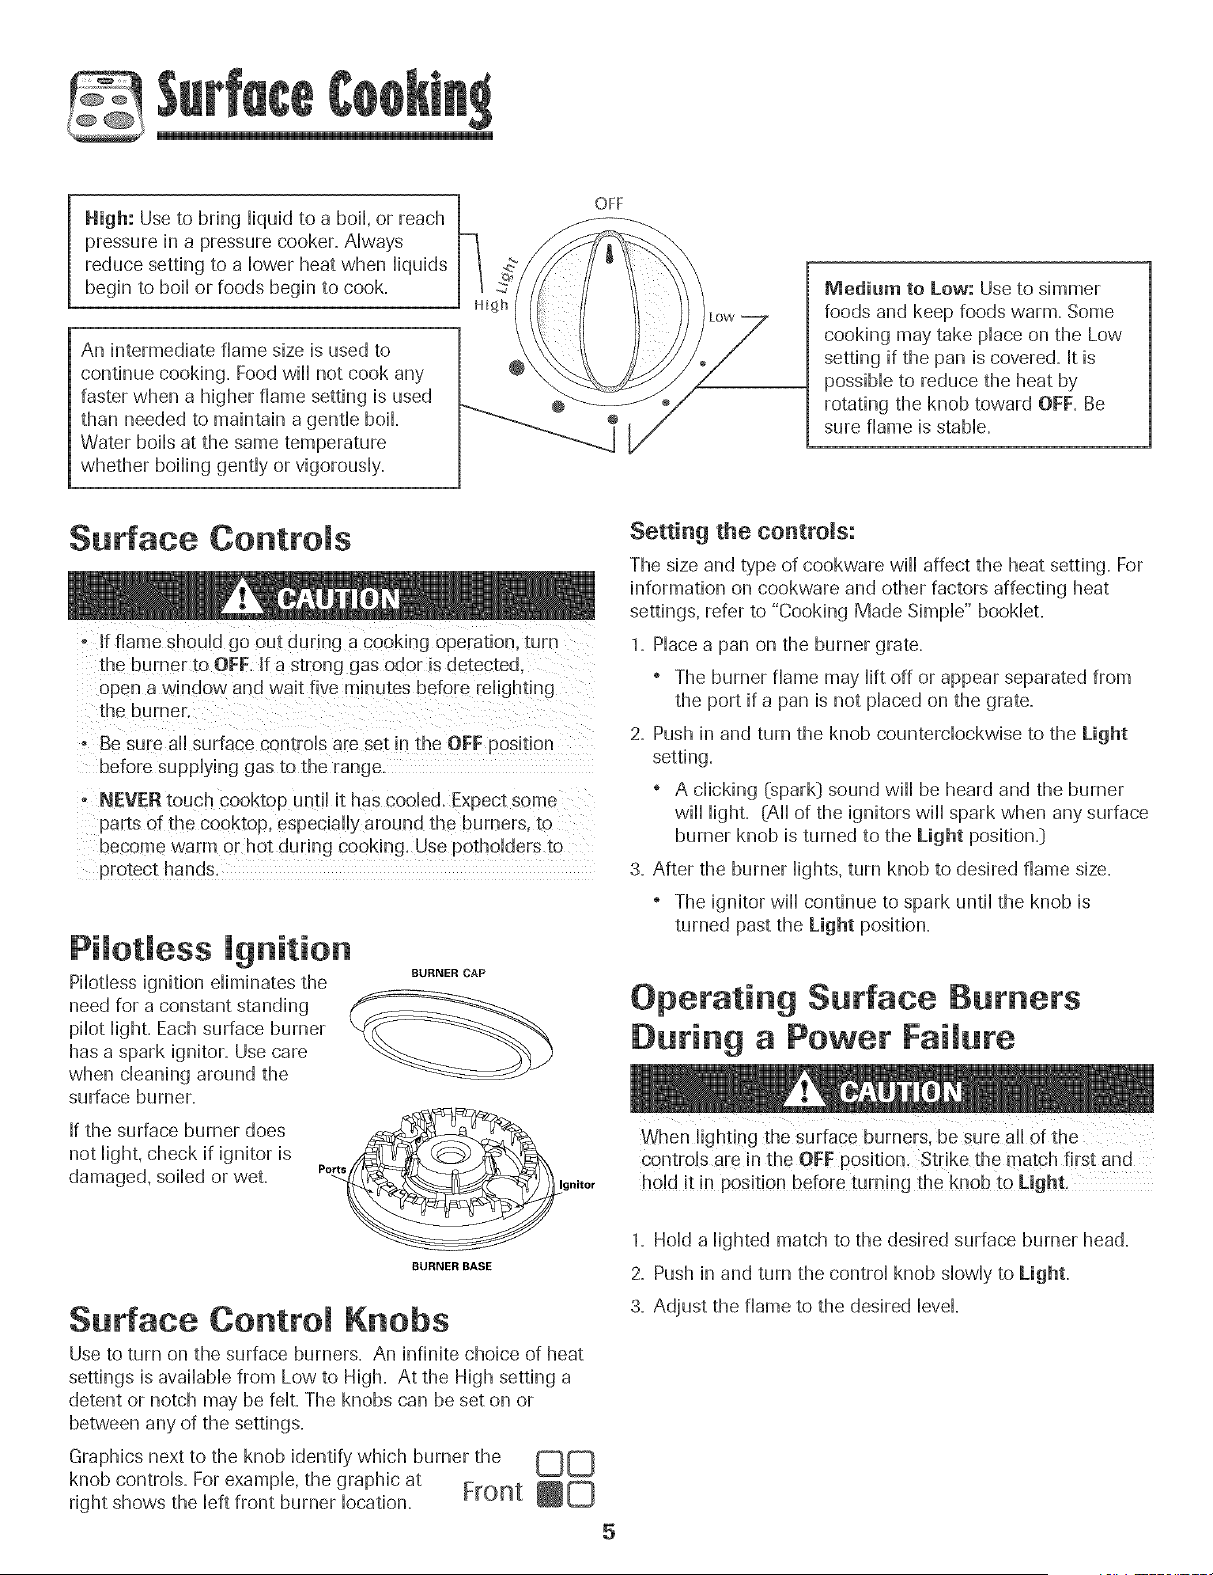
High: Use to bring iiquid to a boii+or reach 1 OFF
pressure in a pressure cooker. Aiways
reduce setting to a bwer heat when iiquids
begin to boii or foods begin to cook.
An intermediate flame size is used to
continue cooking. Food will not cook any
faster when a higher flame setting is used
than needed to maintain a gentb boil
Water boils at the same temperature
whether boiling gently or vigorously=
Medium to Low: Use to simmer
foods and keep foods warm. Some
cooking may take princeon the Low
setting if the pan is covered. It is
possible to reduce the heat by
rotating the knob toward OFF. Be
sure flame is stable+
Surface Controls
- Jfflame should go out during a cooking operation, turn
the burner to OFF. If a strong gas odor is detected.
open a window and wait five minutes before relighti ng
the burner
o Be sure all surface controls are set [n the O[:F position
before supplying gas to the range.
- NEVER touch cooktop until it has cooled. Expec_some
parts of the cooktop, especiaii) around the burners, to
become warm or hot during cooking. Use potholders to
Pilotless ignition
Pilotless ignition eliminates the
need for a constant standing
pilot light. Each surface burner
has a spark ignitor. Use care
when cleaning around the
surface burner.
If the surface burner does
not light, check if ignitor is
damaged, soiled or wet.
BURNER CAP
Ports
gnitor
BURNER BASE
Surface Control Knobs
Use to turn on the surface burners+ An infinite choice of heat
settings usavailable from Low to High+ At the High setting a
detent or notch may be felt+The knobs can be set on or
between any of the settings=
Graphics next to the knob identify which burner the
knob controls. For example, the graphic at
Front
right shows the left front burner location. W
Setting the contro!s:
The size and type of cookware will affect the heat setting. For
information on cookware and other factors affecting heat
settings, refer to "Cooking Made Simple" booklet.
1. Place a pan on the burner grate.
o The burner flame may lift off or appear separated from
the port if a pan is not placed on the grate.
2. Push in and turn the knob counterclockwise to the Light
setting+
o A clicking (spark} sound will be heard and tile burner
will lighL {All of the ignitors will spark when any surface
burner knob is turned to the Light position.}
3. After the burner lights, turn knob to desired flame size.
+ The ignitor will continue to spark until the knob is
turned past the Light position.
Operating Surface Burners
During a Power Failure
hold it in position before turning the knob to Light,
1. Hold a lighted match to the desired surface burner head.
2. Push in and turn the control knob slowly to Light.
3. Adjust the flame to the desired level.
5
Cooktop
To prevent the cooktop from discoloring
or staining:
* @ean cooktop after each use.
Wipe acidic or sugar}, s@Hsas soon as the cooktop has
_,_ cooHedas these s@Hsmay discoHorthe
porcdNn.
U@ike a range with standard gas burners,
this cooktop does not Hilt-up nor is it
removaMe. Do not attempt to lift the
cooktop for any reason.
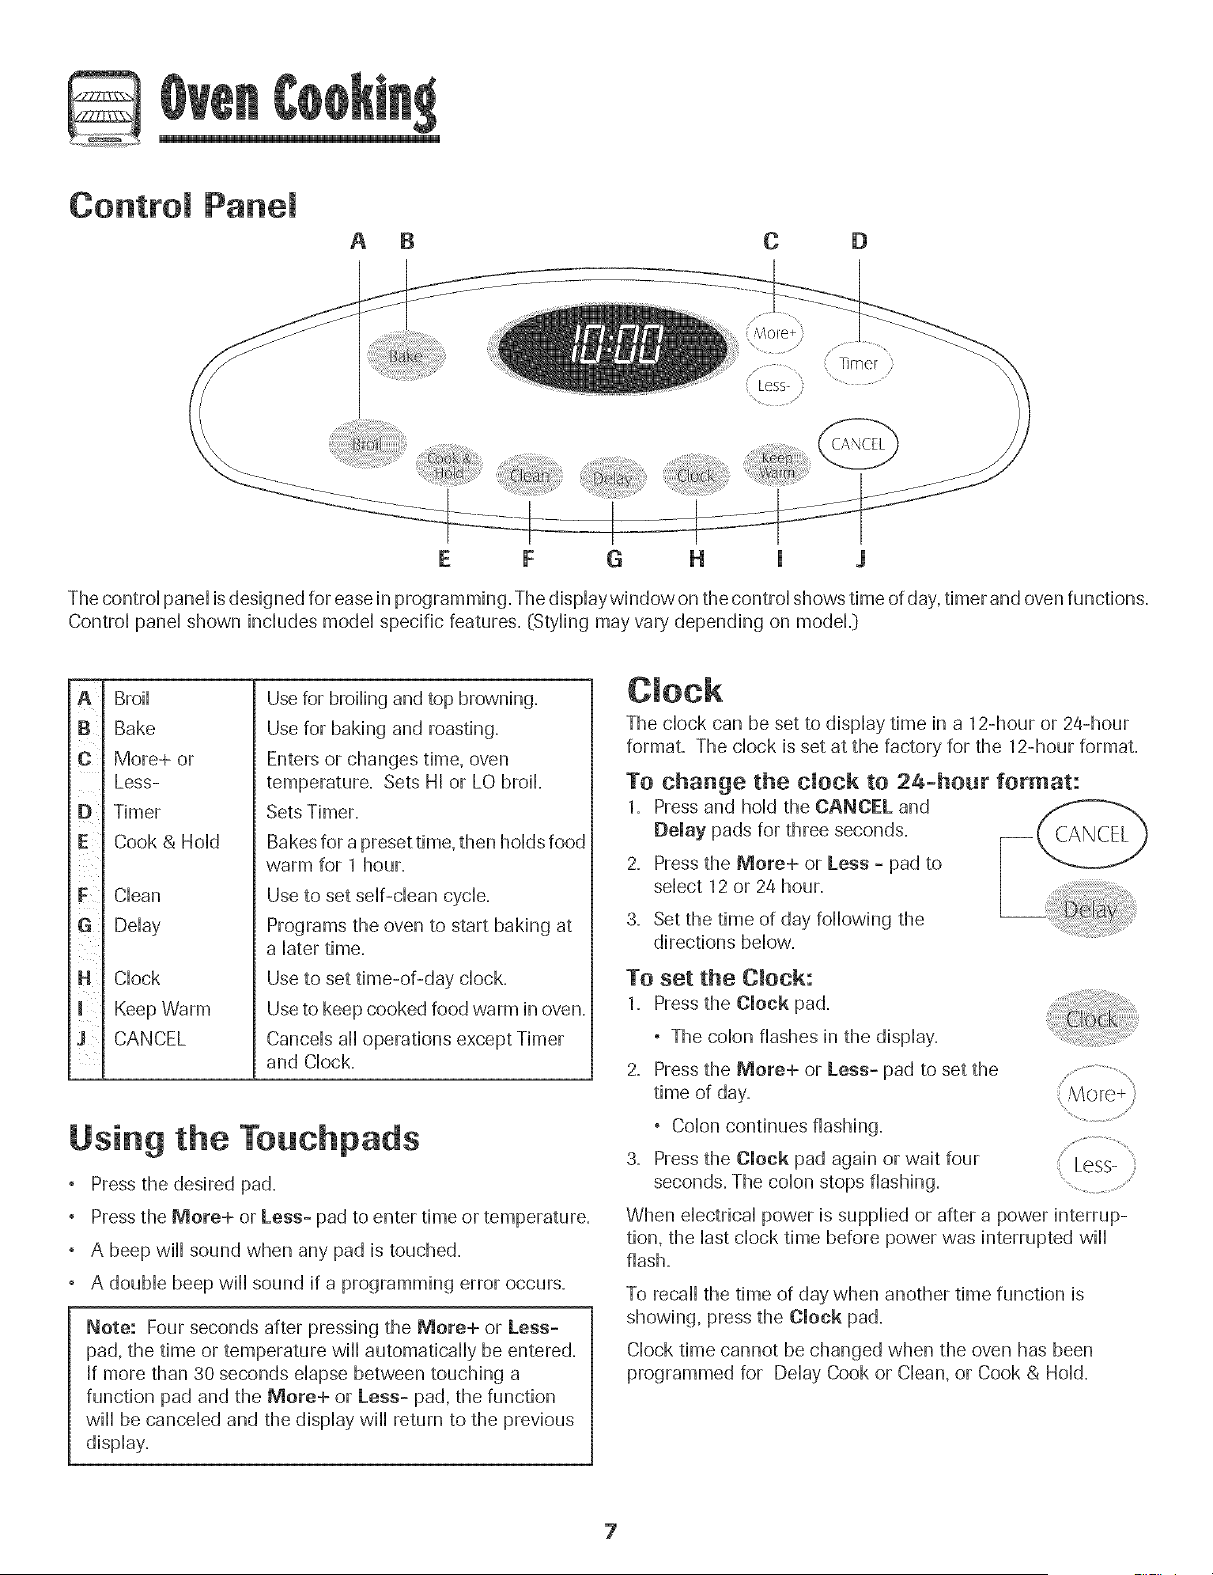
Burner Grates
The grates must be propedy positioned before cooking.
When installing the grates, place the tab ends toward the
center, matching the straight bars.
Improper installation of the grates may result in chipping of
the cooktop=
Seamed Gas Burners
The sealed burners of your range are secured to the cooktop
and are not designed to be removed. Since the burners are
sealed into the cooktop, boilovers or spills will not seep
underneath the cooktop=
However, the burner cap and base should be cleaned after
each use=The cap portion of the burner is easily removed for
cleaning. (See page 17 for cleaning directions.)
The burner caps must be correctly placed on the burner base
for proper operation of the burner.
Power Boost High
Performance Burner @2,000BTU*)
There is one high speed burner located in
the right front position on your range.
This burner offers higher speed cook-
ing that can be used to quickly bring _,,;::_t,
water to a boil and for large-quantity
cooking.
OFF
Simmer Burner*
O[3
[.jJ :ro_t
This burner is located in the left rear __2_%..
position. The simmer burner offers a _-_//_ _-
Melt setting with a lower BTU* flame _,
// _i ,,
forme,thgchoco,ateorb.tter. H,0 , ,,ilI! 'i
LP gas. _ .......
@
_ea N[3
[3[3
Do not operate the burners without a pan on the grate.
The grate's porcelain finish may chip without a pan to
absorb the heat from the burner flame.
Use care when stirring food in a pot/pan sitting on the burner
grate. The grates have a smooth finish for ease of cleaning.
The pot/pan will slide if the handle is not held. This may result
in spilling of hot food items and may be a burn hazard.
Although the burner grates are durable, they will gradually
lose their shine and/or discolor, due to the high temperatures
of the gas flame.
o A propedy adjusted burner with dean ports wi[[ fight
within a few seconds. [f using natural gas, the flame
will be blue with a deeper blue inner cone.
[f the burner flame is yellow or is noisy, the air/gas
mixture may be incorrect. Contact a service technician
to adjust. @djustments are not covered by the
warranty.)
With LPgas, slight yellow tips on the flames are
acceptable. This is normal and adjustment is not
necessary.
With some types of gas, you may hear a "popping"
sound when the surface burner is turned off. This is a
normal operating sound of the burner.
If the control knob is turned very quickly from High to
Low, the flame may go out, particularly if the burner is
cold. Jfthis occurs, turn the knob to the OFF position,
wait several seconds and rdight the burner.
The flame should be adjusted so it does not extend
beyond the edge of the pan.
6
@
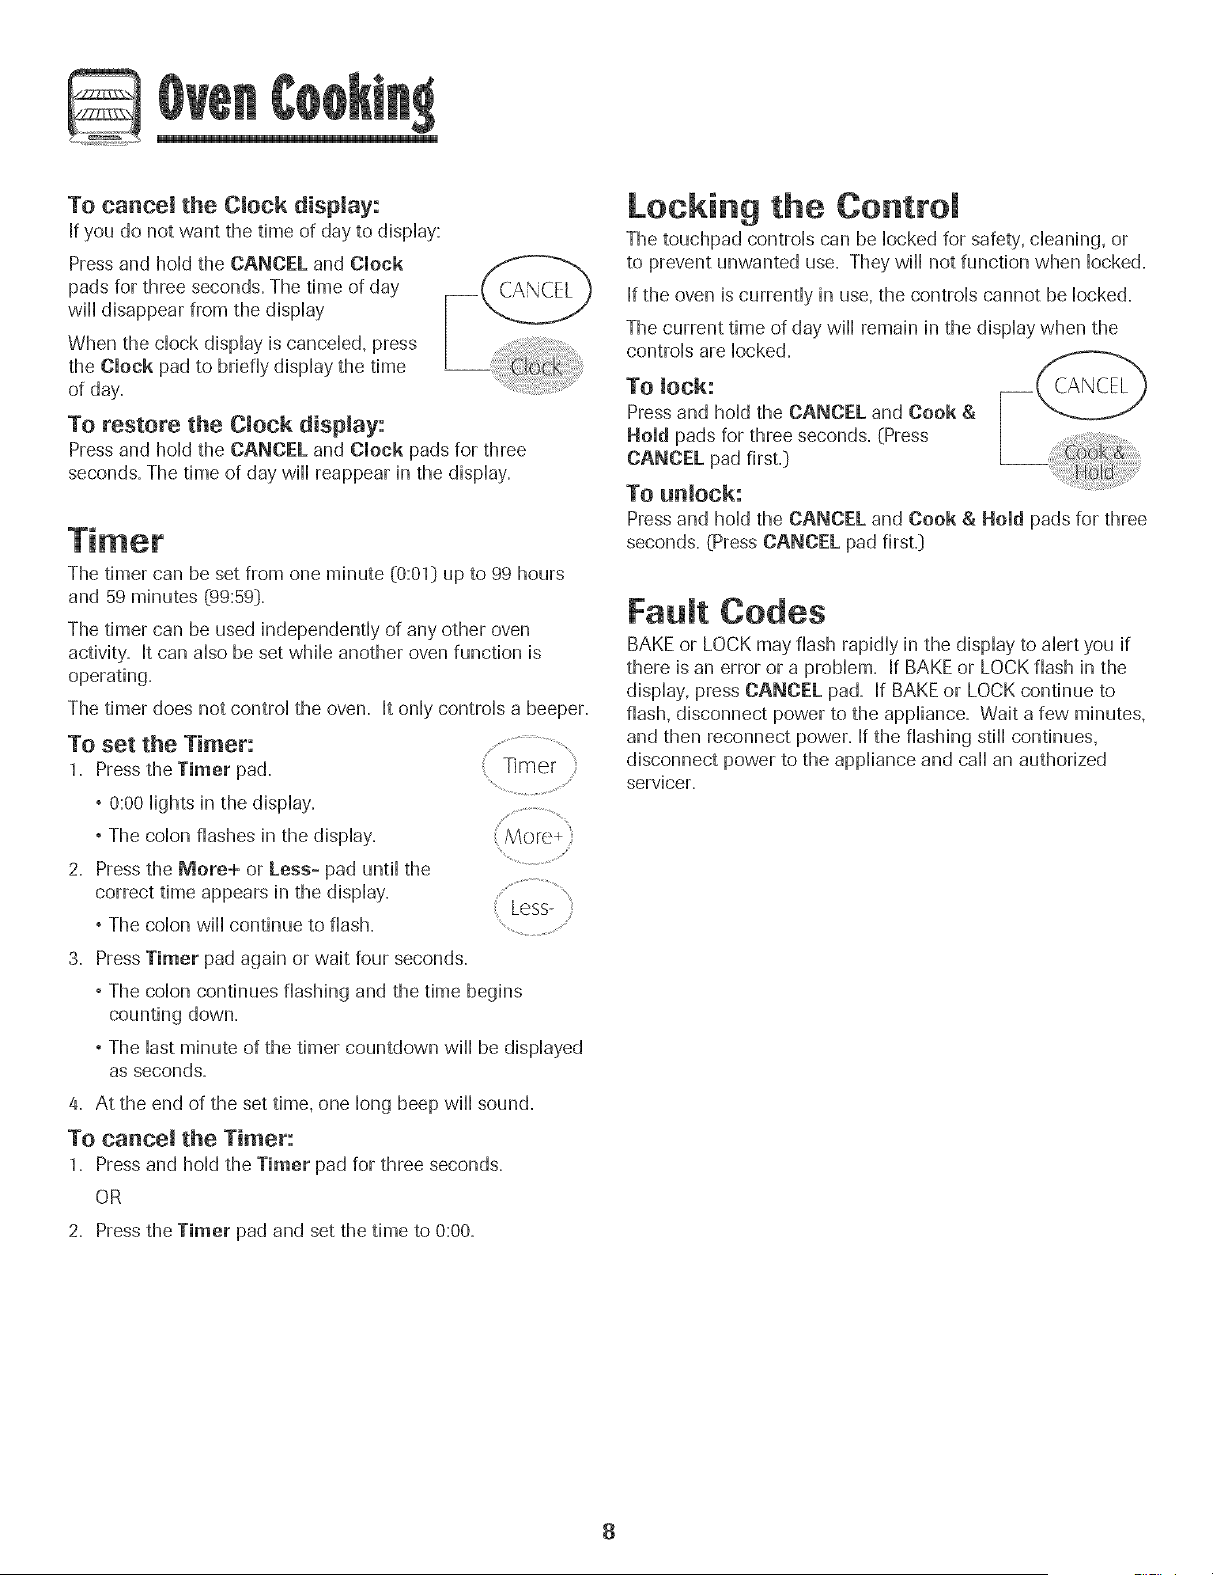
Control Panel
A B
C D
........... Thqqer ;
Less- ..................
G H 1 J
The control panel is designed for ease in programming. The displaywindow on the control shows time of day, timer and oven functions.
Control panel shown includes model specific features. (Styling may vary depending on modeL}
A
B
C
D
G!
N
!!4
Broil
Bake
More+ or
Less-
Timer
Cook & Hold
Clean
Delay
Clock
Keep Warm
CANCEL
Use for broiling and top browning.
Use for baking and roasting.
Enters or changes time, oven
temperature. Sets HI or LO broil
Sets Timer.
Bakes for a preset time, then holds food
warm for 1 hour.
Use to set self-clean cycle.
Programs the oven to start baking at
a later time.
Use to set time-of-day clock.
Use to keep cooked food warm in oven.
Cancels all operations except Timer
and Clock.
Using the Touchpads
Pressthe desired pad.
Pressthe More+ or Less- pad to enter time or temperature.
° A beep wiii sound when any pad is touched.
° A double beep wiii sound if a programming error occurs.
Note: Four seconds after pressing the More+ or Less=
pad, the time or temperature wiii automatically be entered.
If more than 30 seconds elapse between touching a
function pad and the Mere+ or Less- pad, the function
wiii be canceled and the display wiii return to the previous
display.
The clock can be set to display time in a 12-hour or 2a-hour
format. The clock is set at the factory for the 12-hour format.
To change the clock to 2a-hour format:
1. Press and hold the CANCEL and
Delay pads for three seconds.
2. Pressthe Mere+ or Less - pad to
select 12 or 24 hour.
3. Set the time of day following the
directions below.
To set the Clock:
1. Press the Clock pad.
, The colon flashes in the display.
2. Pressthe Mere+ or Less= pad to set the ........................
time of day.
, Colon continues flashing.
3. Pressthe cmoek pad again or wait four Less-
seconds. The colon stops flashing.
When electrical power is supplied or after a power interrup-
tion, the last clock time before power was interrupted wiil
flash.
To recall the time of day when another time function is
showing, press the Clock pad.
Clock time cannot be changed when the oven has been
programmed for Delay Cook or Clean, or Cook & Hold.
To cancei the Clock display:
If you do not want the time of day'to display:
Press and hold the CANCEL and Clock
pads for three seconds. The time of day
will disappear from the display
When the clock display is canceled, press
the Clock pad to briefly display the time
of day.
To restore the Clock display:
Press and hold the CANCEL and Clock pads for three
seconds. The time of day will reappear in the display.
The timer can be set from one minute (0:01) up to 99 hours
and 59 minutes (99:59).
The timer can be used independently of any other oven
activity. It can also be set while another oven function is
operating.
The timer does not control the oven. It only controls a beeper.
TO set the Timer:
1. Press the Timer pad.
° 0:00 lights in the display.
° The colon flashes in the display.
2. Press the More+ or Less- pad until the
correct time appears in the display.
Less-
, The colon will continue to flash.
3,
PressTimer pad again or wait four seconds.
° The colon continues flashing and the time begins
counting down.
° The last minute of the timer countdown will be displayed
as seconds.
4, At the end of the set time, one long beep will sound.
To cancel the Timer:
1. Press and hold the Timer pad for three seconds.
OR
2, Press the Timer pad and set the time to 0:00,
Locking the Contro
The touchpad controls carl be locked for safety, cleanhg, or
to prevent unwanted use. They will not function when locked.
If the oven is currently in use, the controls cannot be locked.
The current time of day will remain in the display when the
controls are locked.
To took:
Press and hoed the CANCEL and Cook &
Hold pads for three seconds, (Press
CANCEL pad first,]
To unlock:
Press and hold the CANCEL and Cook & Hold pads for three
seconds. (Press CANCEL pad first.]
FauJt Codes
BAKE or LOCK may flash rapidly in the display to alert you if
there is an error or a problem. If BAKE or LOCK flash in the
display, press CANCEL pad. If BAKE or LOCK continue to
flash, disconnect power to the appliance. Wait a few minutes,
and then reconnect power. If the flashing still continues,
disconnect power to the appliance and call an authorized
servicer.
8

To set Bake:
1. Press the Bake pad.
, BAKEwlil flash+
, 000 will light in the dbplay.
2. Select the oven temperature. The oven tempera- More+
ture can be set from 170° to 550°. Pressor press ................................
and hold the More+ or Less- pad...... ...................................
!
, 350° will[ Hightwhen either pad is first pressed. [ Less- :
, Press the More+ pad to increase the temperature+
, Press the Less- pad to decrease the temperature+
3. Press Bake pad again or wait four seconds.
, BAKEwill stop flasMng and light in the dbplay.
, 100° or the actual oven temperature will dbplay. The
temperature will rbe in 5 degree increments und] the
preset temperature is reached.
4. Allow the oven to preheat for 8-15 minutes.
, When the set oven temperature is reached, one long
beep will sound.
, To recall the set temperature during preheat, press the
Bake pad.
5. Place food in the oven.
6. Check cooking progress. Cook longer if needed.
7. When cooking is finished, press CANCEL+ SA_r-_
8. Remove food from the oven.
Baking Notes
, To change the oven temperature durin# cooking,
press the Bake pad, then the More+ or Less= pad until
you reach the desired temperature+
To change the oven temperature during preheat,
press the Bake pad twice, then press the More+ or
Less- pad until the desired temperature is displayed+
, If you forget to turn off the oven, it will automatically turn
off at the end of 12 hours. If you wish to deactivate this
feature, see page 13.
, For additional baking and roasting tips, see "Cooking
Made Simple" booklet+
Bak+ng Differences Between Your Old
and New Oven
It is normal to notice some baking time differences between a
new oven and an old one. See"Adjusting the OvenTemperature"
on page 13.
Cook & Ho d
Cook & Hold allows you to bake for a preset amount of time,
followed by a one-hour Keep Warm cycle.
To set Cook & Hold:
1. Press the Cook & Hold pad.
, BAKE and HOLD flash.
° 000 lights in the display.
2. Select the oven temperature. The oven tempera-
ture can be set from 170° to 550°. Pressor press ............................
and hold the More+ or Less- pad. + less-
° Pressthe More+ pad to increase the temperature.
° Pressthe Less- pad to decrease the temperature.
3. Press Cook & Hold again OR wait four seconds.
° HOLD flashes.
° 00:00 flashes in the display.
4. Enter the amount of time you want to bake by pressing the
More+ or Less- pad. Bake time can be set from ten
minutes (00:10} to 11 hours, 59 minutes (11:59}.
° BAKE and HOLD light in the display.
° The baking time will light in the display.
° The baking time will start counting down.
When the cooking time has elapsed:
° Four beeps will sound.
° BAKE will turn off.
, HOLD and WARM will light+
° 170°will display+
After one hour in HOLD WARM:
° "End" will display+
° The time of day reappears in the display.
To cancel Cook & Hold at any time: (, CANCFI )
Press the CANCEL pad. Remove food from oven.
9
Delay Cook & Hold
Do not use debyed baking for MgMy per!shaMe foods such
as dairy products, pork; pouUtry,or seafood.
When using Dday, the oven begins to cook Haterin the day.
Set the amount of time that you want to dday before the oven
turns on and how Hongyou want to cook. The oven begins to
heat at the sdected time and cooks for the specified Hengthof
time, then keeps food warm for up to one hour.
Dday time can be set from 10 minutes (00:10] to 11 hours, 59
minutes (11:59].
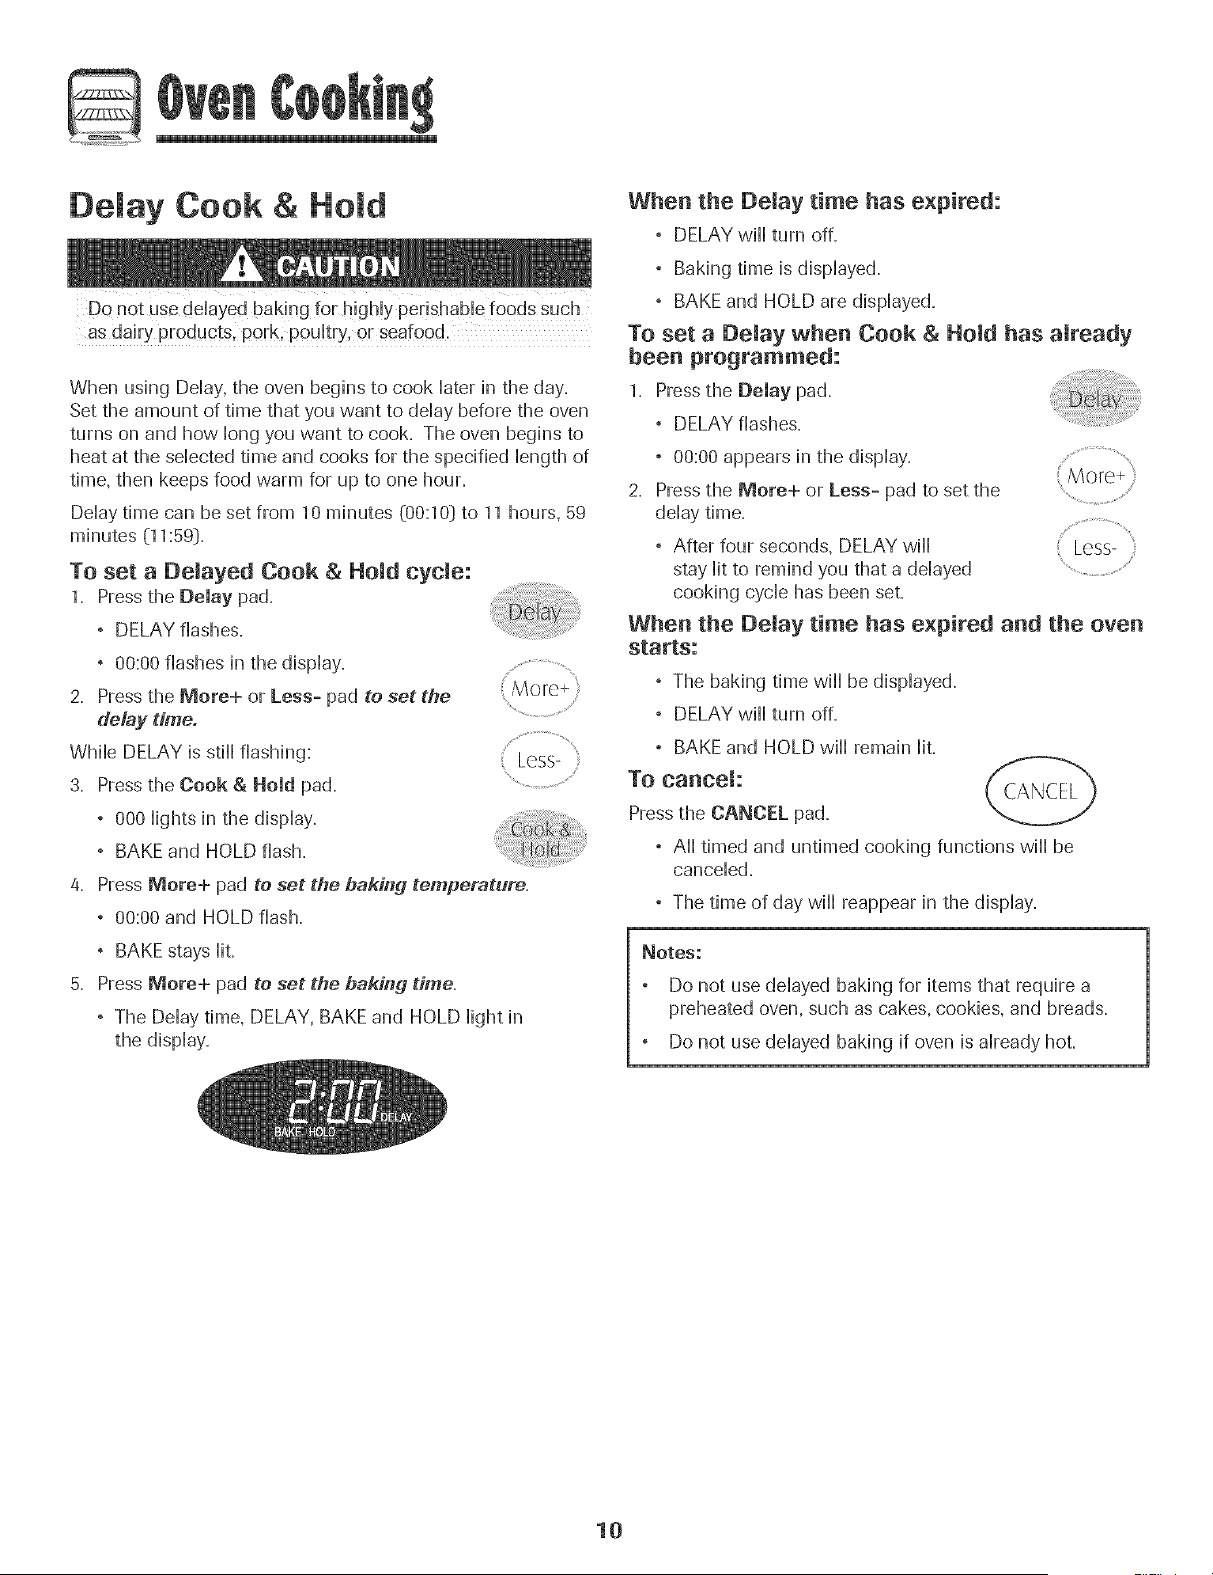
To set a DeJayed Cook & Hold eycJe:
1. Press the Delay pad.
, DELAY flashes.
, 00:00 flashes in the dispHay.
2. Press the More+ or Less- pad to set the
de/ay time.
While DELAY is stHHflashing:
3. Press the Cook & Hold pad=
, 000 lights in the display.
, BAKE and HOLD flash.
4.
(Mo e÷)
"%................................/
Less-
Press More+ pad to set the bakMg temperature,
, 00:00 and HOLD flash.
, BAKE stays lit.
Press More+ pad to set the baking time.
, The Delay time, DELAY, BAKE and HOLD light in
the display.
When the Delay time has expired:
° DELAY will turn off=
° Baking time is displayed.
, BAKE and HOLD are displayed.
To set a Demay when Cook & Hold has already
been programmed:
1. Press the Delay pad.
° DELAY flashes.
° 00:00 appears in the display. ..............................
2. Pressthe More+ or Less- pad to set the ............................................
delay time.
After four seconds, DELAY will Less- '
stay lit to remind you that a delayed
cooking cycle has been set.
When the Delay time has expired and the oven
starts:
° The baking time will be displayed.
° DELAY will turn off.
° BAKE and HOLD will remain lit.
To cance_:
Press the CANCEL pad.
° All timed and untimed cooking functions will be
canceled.
, The time of day will reappear in the display.
Notes:
Do not use delayed baking for items that require a
preheated oven, such as cakes, cookies, and breads.
Do not use delayed baking if oven is already hot.
10
@
Keep War
For safeHykeephg foods warm or for warmhg breads and
pHates.
To set Keep Warm:
1. Pressthe Keep Warm pad.
, WARM flashes.
,000 appears in the dispHay.
2. SeHectthe Keep Warm temperature. The Keep ..........................................
Warm temperature can be set from 145° to
190°- Pressor press and hoHdthe More+ or
Less= pad. Less-
....................................,
_ 170° wiHHHightwhen either pad is first pressed.
° Press the More+ pad to increase the temperature.
° Press the Less= pad to decrease the temperature.
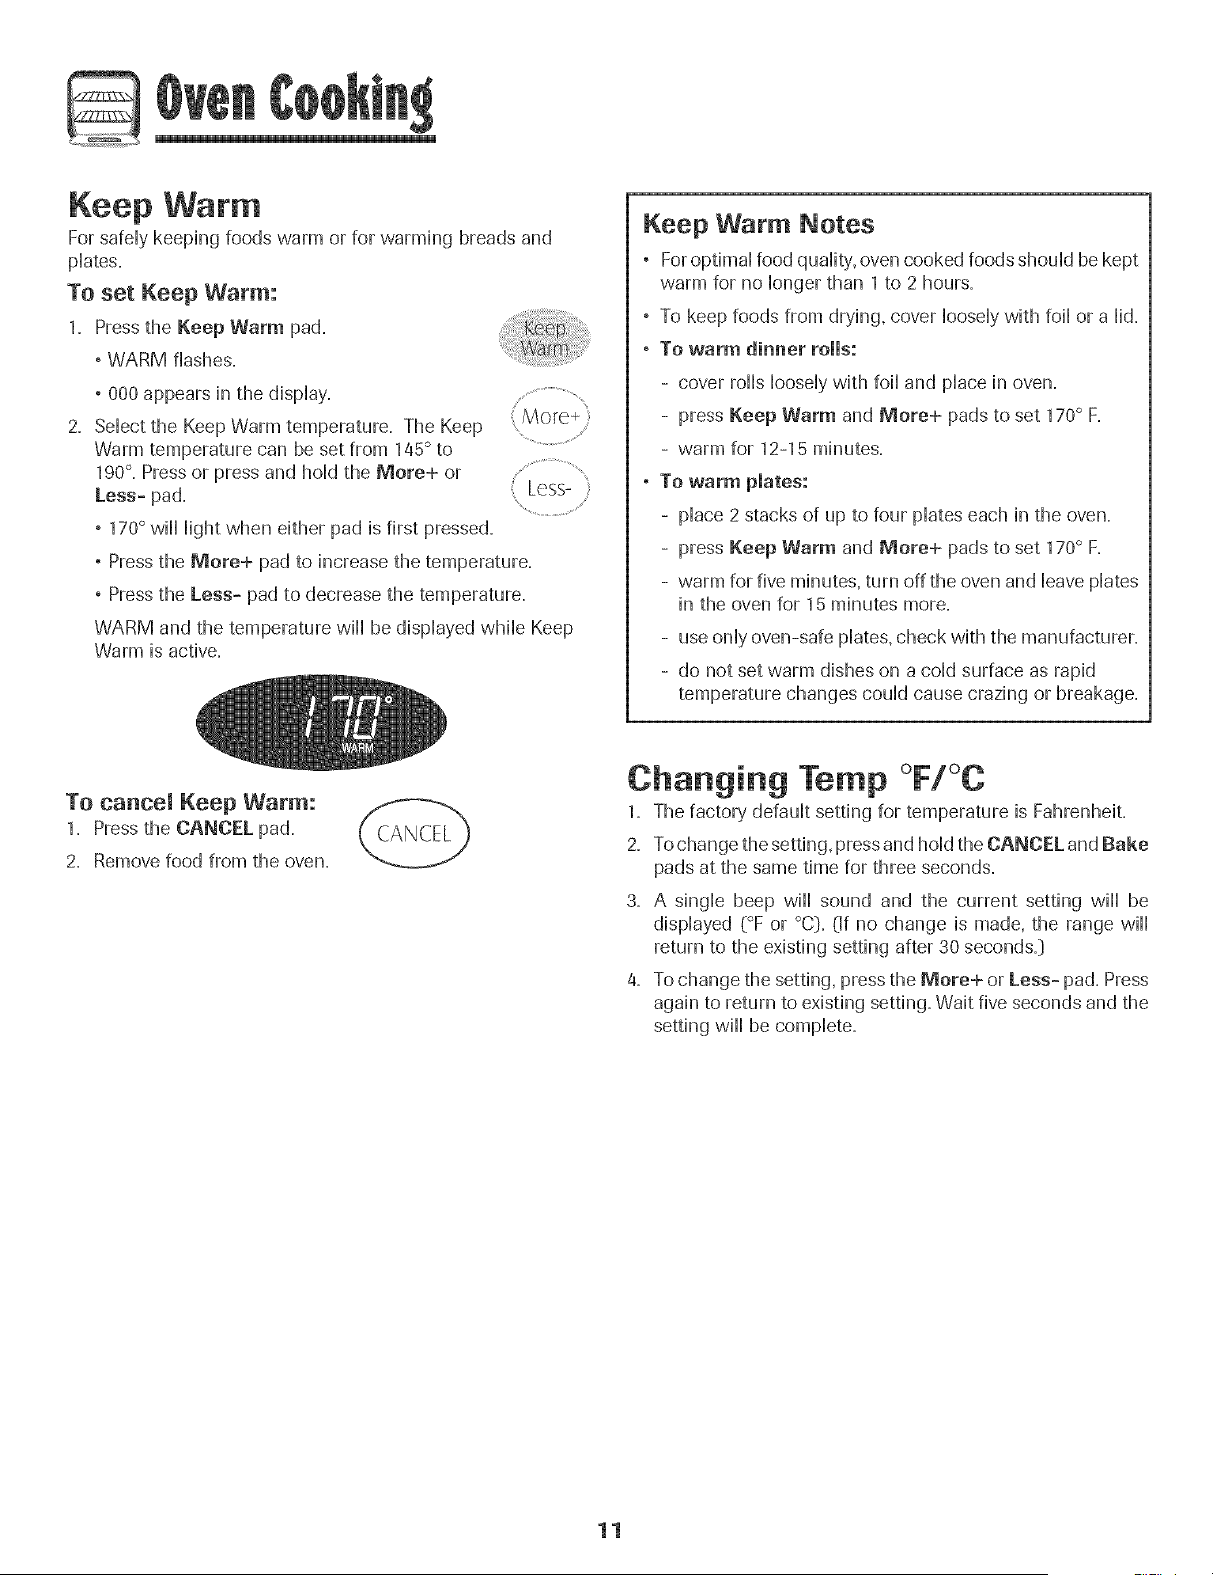
WARM and the temperature wiHHbe dispHayedwMHeKeep
Warm is active.
Keep Warm Notes
° For optimaHfood quaHity,oven cooked foods shouHdbe kept
warm for no Hongerthan 1 to 2 hours.
° To keep foods from drying, cover HooseHywith foiHor a Hid.
, To warm dinner rolls:
- cover roHHsHooseHywith foiHand pHacein oven.
- press Keep Warm and More+ pads to set 170° F.
- warm for 12-15 minutes.
° To warm plates:
- pHace2 stacks of up to four pHateseach in the oven.
- press Keep Warm and More+ pads to set 170° F.
- warm for five minutes, turn off the oven and HeavepHates
in the oven for 15 minutes more.
- use onHyoven-safe pHates,check with the manufacturer.
- do not set warm dishes on a coHdsurface as rapid
temperature changes couHdcause crazing or breakage.
To cancel Keep Warm:
1. Press the CANCEL pad.
2. Remove food from the oven.
Changing Temp °F/°C
1. The factory defauHtsetting for temperature is Fahrenheit.
2. To change the setting, press and hoHdthe CANC_:Land Bake
pads at the same time for three seconds.
3. A singHe beep wiHHsound and the current setting wiHHbe
dispHayed (°F or °C:).(If no change is made, the range wiHH
return to the existing setting after 30 seconds.:)
4. To change the setting, press the More+ or Less= pad. Press
again to return to existing setting. Wait five seconds and the
setting wiHHbe compHete.
11
Use CAUTION when cooking with the Broil feature. The
grease fr0 m fatty foods may ignite.!f a fire should occur,
not extinguish, DO NOT put water on the fire, Use baking
To set Broil:
1. Pressthe Broil pad.
, BROIL flashes.
, SEt is dispiayed.
2. Pressthe More+ pad to set Hmbroii or press the Less-
pad to set LO broil
, HI or LO wiii be dispiayed.
, Seiect Hmbroil (550° F} for normai broihng. Seiect
LO broil (450° F} for How-temperature broihng of ionger
cooking foods such as pouitry.
3. After four seconds, the oven wiii start.
, BROIL wiii remain Hit.
4. For optimum browning, preheat for 2-3 minutes before
adding food.
5. Place food in the oven. Close oven door.
6. Turn meat once about halfway through cooking.
7. When food is cooked, press the CANCFL /_,, r,_,_
pad. Remove food and broiler pan from the
ove n.
, The time of day wiii reappear in the
display.
Broil Notes
, For best results when broiling, use a pan designed for
broiling.
, HI is used for most broiling. Use LO broil when broiling
longer cooking foods. The lower temperature allows
food to cook to the well done stage without excessive
browning.
, Te chan_#e the oven temperature during broiling,
press the Broil pad and then press the More+ or Less-
pad to switch between LO and HI broil
° Broil times may be longer when the lower broiling
temperature is selected.
° Most foods should be turned halfway through broiling
time.
° For additional broiling tips and temperatures, refer to the
"Cooking Made Simple" booklet.
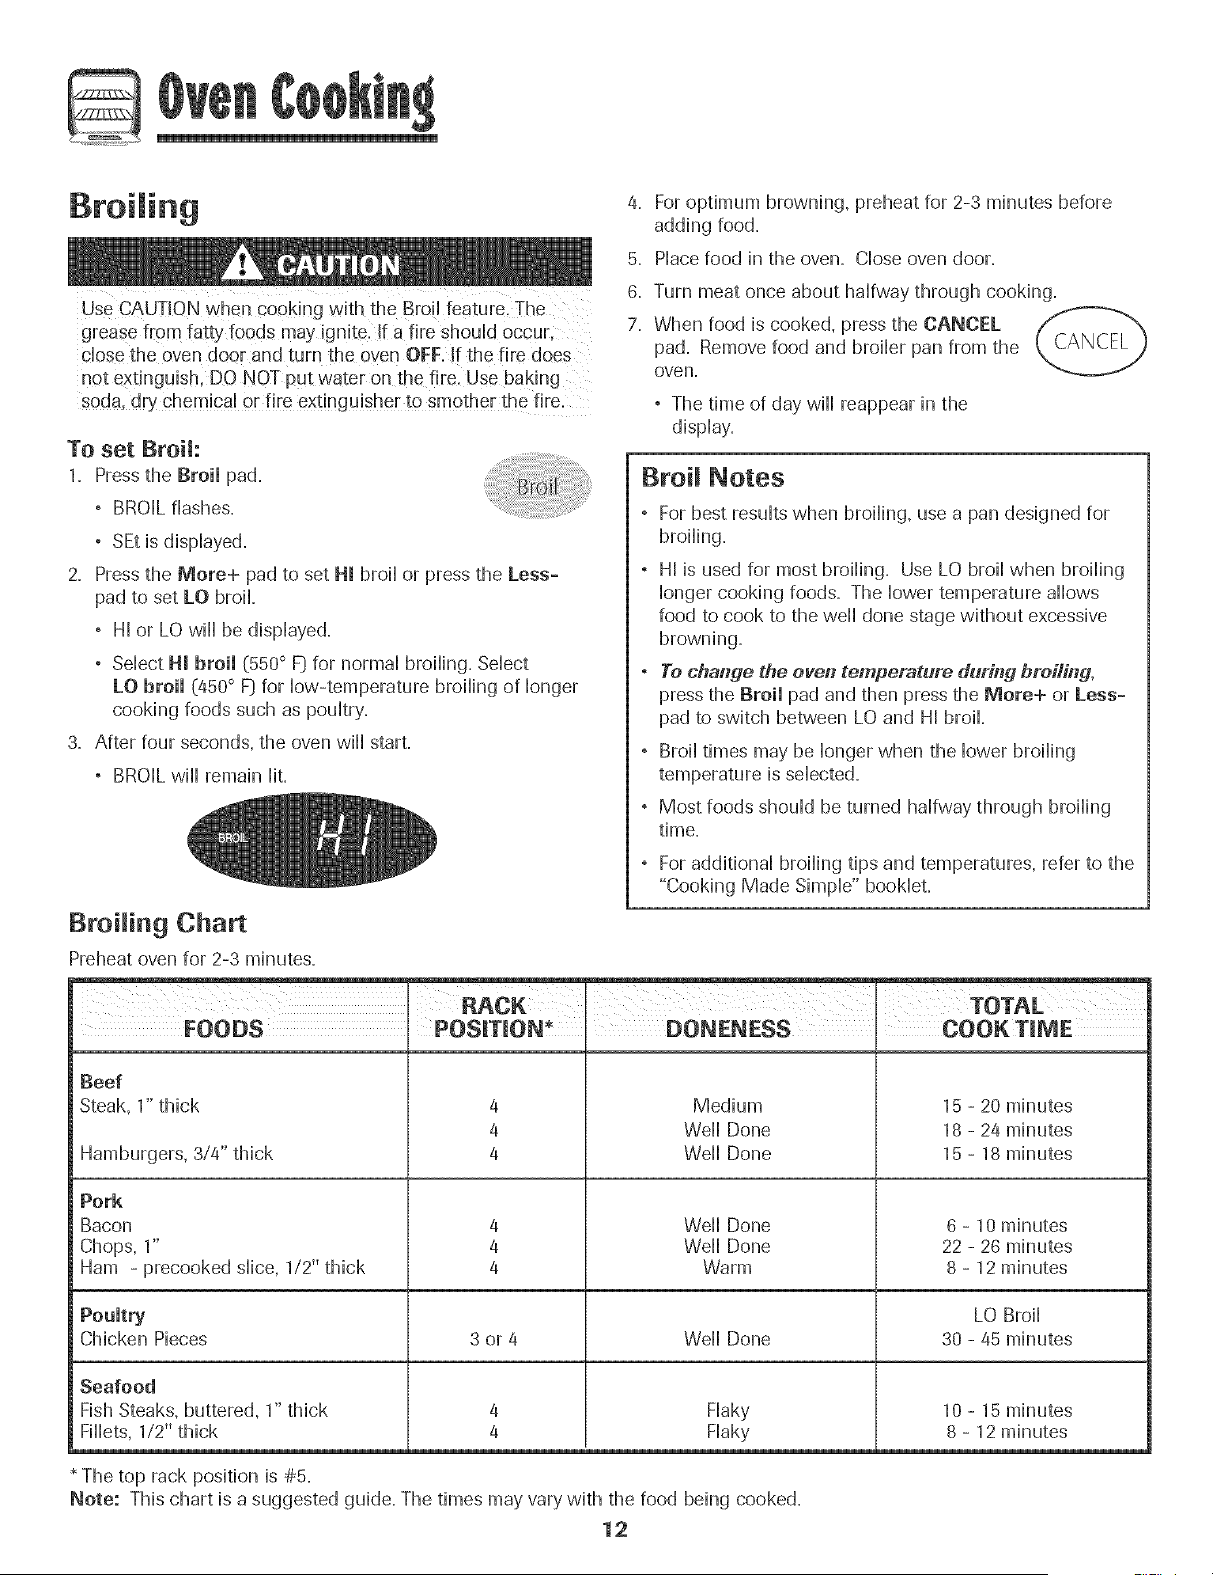
Broiling Chart
Preheat oven for 2-3 minutes.
FOODS POS_TmON DONENESS I
4
4
4
Beef
Steak, 1" thick
Hamburgers, 3/4" thick
Pork
Bacon
Chops, 1"
4
4
4
Medium
Weii Done
Weii Done
Weii Done
Weii Done
Warm
15 - 20 minutes
18 - 24 minutes
15 - 18 minutes
6 - 10 minutes
22 - 26 minutes
8 - 12 minutes
Ham - precooked slice, 1/2" thick
Poultry LO Broil
Chicken Pieces 3 or a Well Done 30 - a5 minutes
Flaky
Flaky
Seafood
Fish Steaks, buttered, 1" thick
Fillets, 1/2" thick
* The top rack position is #5.
Note: This chart is a suggested guide. The times may vary with the food being cooked.
12
10 - 15 minutes
8 - 12 minutes

Automatic Shut-Off/
Sabbath Mode
The oven will automatically turn off after 12 hours if you
accidentally Heaveit on. This safety feature can be turned off.
TO cancel the 12-hour shut-off and run the
oven continuously for 72 hours:
1. Set the oven to bake (see page 9[).
2. Press and hoHdthe Clock pad for five seconds.
, SAb will be dispHayedand flash for five seconds.
, SAb will then be displayed continuously until turned
off or until the 72-hour time limit is reached.
, BAKEwill also be displayed if a bake cycle is in use
while the oven is in Sabbath Mode.
, BAKEis the only funcdon that operates during the
Sabbath Mode. All other functions (TimersKeep Warm,
Ciean,etc.] are/ocked out during the Sabbat,HMode.
To cancel Bake when in Sabbath Mode:
Press CANCEL,
, BAKEwill turn off in the display.
, No beeps will sound.
To cancel the Sabbath Mode:
1, Press the Clock pad for five seconds,
OR
2, After 72 hours, the Sabbath Mode will end,
, SAb will flash for five seconds,
, The time of day will return to the display,
Adjusting the Oven Temperature
Oven temperatures are carefully tested for accuracy at the
factory, It is normal to notice some baking or browning
differences between a new oven and an old one. As ranges
get older, the oven temperature can shift.
You may adjust the oven temperature if you think the oven is
not baking or browning correctly. To decide how much to
change the temperature, set the temperature 25 degrees
higher or lower than your recipe recommends, then bake.
The results of the "test" should give you an idea of how much
To adjust the oven temperature:
1. Press Bake.
2. Enter 550° by pressing the More+ pad.
3. Pressand hold the Bake pad for several
seconds or until 0° appears in the display.
If the oven temperature was previously adjusted, the
change will be displayed. For example, if the oven
temperature was reduced by 15 degrees the display will
show -15°.
4. Pressthe More+ or Less- pad to adjust the temperature.
Each time a pad is pressed, the temperature changes by 5
degrees. The oven temperature can be increased or
decreased by 5 to 35 degrees.
5. The time of day will automatically reappear in the display.
You do not need to readjust the oven temperature if there is
a power failure or interruption. Broiling and cleaning
temperatures cannot be adjusted.
Sabbath Mode Notes
, Sabbath Mode can be turned on at any time with or
without the oven on.
, Sabbath Mode cannot be turned on if the touchpads are
locked out or when the door is locked.
, If the oven is baking when Sabbath Mode is set, BAKE
will go out at the end of the baking cycle. There will be
no audible beeps.
, If the oven light is desired while in Sabbath Mode, it
must be turned on before the Sabbath Mode is started.
When the Sabbath Mode is started, no preheat beep will
sound.
All prompts, messages and beeps are deactivated when
Sabbath Mode is active.
The automatic door lock does not operate during the
Sabbath Mode.
, Pressing CANCEL will cancel a Bake cycle, however the
control will stay in the Sabbath Mode.
, If power fails, the oven will power up in Sabbath Mode with
72 hours remaining and no cycle active.
13
@
Pilotless ignition
Your range is equipped with piHotHessignition. With this type of
ignition system, the gas automatically shuts off and the evetl
will not operate during a power faihtreo
A lighted match will not light the oven burner. No attempt
should be made to operate the oven daring a power
failure.
Cooling Fan
A cooHingfan will automatically turn on during all broiling and
some baking operations. It is used to keep internal parts on
the control panel cool. The fan will automatically turn off
when parts have cooled. The fan may continue to operate
after the oven has been turned off=This is normal.
Oven Vent
When the oven is in use the area near the vent may become
hot enough to cause burns. Never block the vent opening.
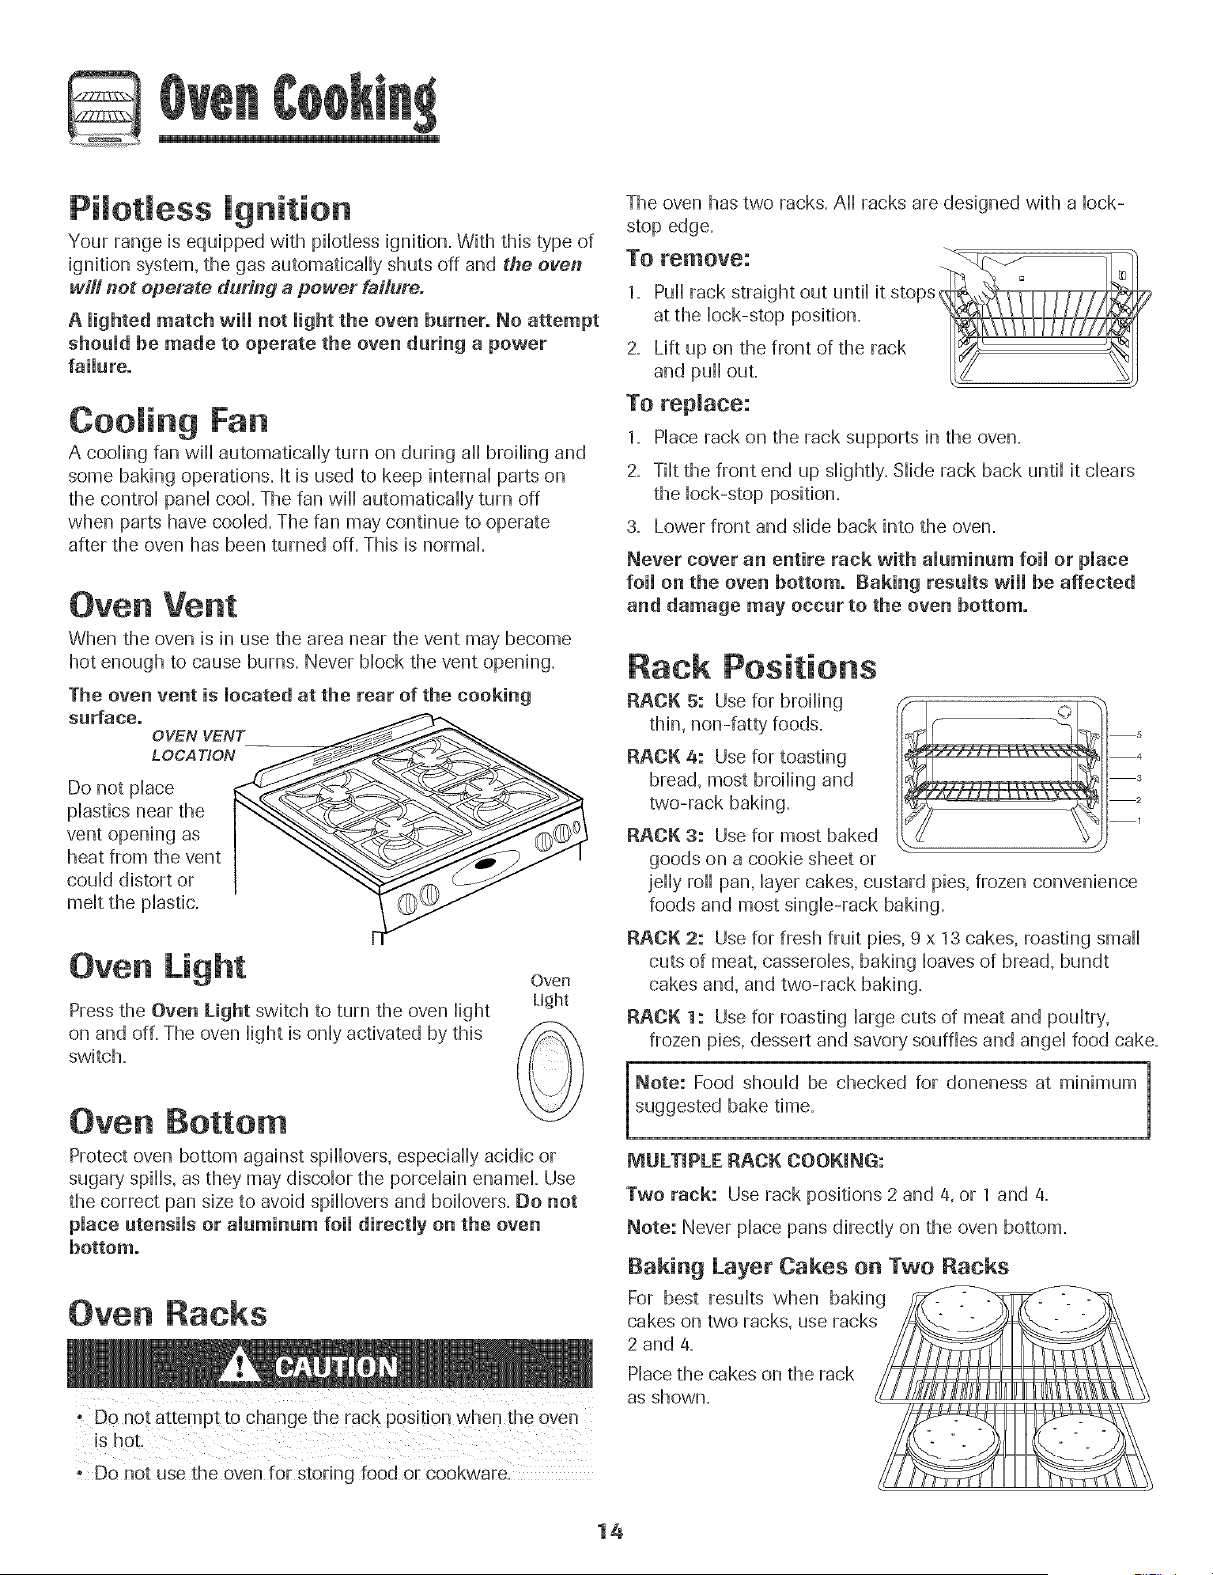
The oven vent is located at the rear of the cooking
sarface.
OVEN VENT_
L OCA TION __
Do not place
plastics near the _"__
vent opening as
heat from the vent
could distort or
Oven Light
Pressthe Oven Light switch to turn the oven light
on and off=The oven light is only activated by this
switch.
Oven
Light
Oven Bottom
Protect oven bottom against spillovers, especially acidic or
sugaR,,spills, as they may discolor the porcelain enamel. Use
the correct pan size to avoid spillovers and boilovers= Do not
place utensils or amaminam foil directly on the oven
bottom.
Oven Racks
The oven has two racks. All racks are designed with a lock-
stop edge.
and puJ[out.
To replace:
1= Place rack on the rack supports in the oven.
2= Tilt the front end up slightly. Slide rack back until it clears
the lock-stop position.
3= Lower front and slide back into the oven.
Never cover an entire rack with alaminum foil or place
foil on the oven bottom. Raking resalts wiii be affected
and damage may occar to the oven bottom.
Rack Positions
RACK 5: Use for broiling
thin, non-fatty foods.
RACK 4: Use for toasting
bread, most broiling and
two-rack baking.
RACK 3: Use for most baked
goods on a cookie sheet or
5
4
3
2
--1
jelly roll pan, layer cakes, custard pies, frozen convenience
foods and most single-rack baking.
RACK 2: Use for fresh fruit pies, 9 x 13 cakes, roasting small
cuts of meat, casseroles, baking loaves of bread, bundt
cakes and, and two-rack baking.
RACK 1: Use for roasting large cuts of meat and poultry,
frozen pies, dessert and savory souffles and angel food cake=
Note: Food sho,dd be checked for aloneness at minimum 1
suggested bake time.
]
MULTIPLE RACK COOKING:
Two rack: Use rack positions 2 and 4, or 1 and 4.
Note: Never place pans directly on the oven bottom.
Baking Layer Cakes on Two Racks
For best results when baking
cakes on two racks, use racks
2 and 4.
Place the cakes on the rack
as shown.
, Do not use the oven for storing food or cookwam.
14
Seff-C ean Oven
• it is normal for parts of the range to become hot during a
• To prevent damage to oven door. do not attempt to open
the door when LOCK is displayed,
, Avoid touching cooktop, door. window or oven vent area
during a clean cycle.
° Do not use commercial oveuucleaners on the oven finish
or around any part of the oven. The}, will damage the
finish o_ parts.
The self-clean cycle uses above-normal cooking temperatures
to automatically clean the oven interior.
It is normal for flare-ups, smoking, or flaming to occur during
cleaning if the oven is heavily soiled. It is better to clean the
oven regularly rather than to wait until there is a heavy build-
up of soil in the oven.
During the cleaning process, the kitchen should be well
ventilated to get rid of normal odors associated with cleaning.
Before Self-C eaning
1. Turn off the oven light before cleaning. The light may burn
out during the clean cycle.
2. Remove all pans and oven racks from the oven. The oven
racks will discolor and may not slide easily after a self-
clean cycle if they are not removed.
3. Clean oven frame, door frame, area outside of gasket, and
around the opening in the door gasket with a nonabrasive
cleaner such as Bon Ami * or detergent and water. The
self-cleaning process does not clean these areas. They
should be cleaned to prevent soil from baking on during
the clean cycle. (The gasket is the
seal around the oven door and
window.}
4. To prevent damage, do not clean or
rub the gasket around the oven
door. The gasket is designed to
seal in heat during the clean cycle.
5. Wipe up excess grease or spillovers from the oven bottom.
This prevents excessive smoking, flare-ups or flaming
during the clean cycle.
6. Wipe up sugary and acidic spillovers such as sweet
potatoes, tomato, or milk-based sauces. Porcelain enamel
is acid-resistant, not acid-proof. The porcelain finish may
discolor if acidic spills are not wiped up before a self-clean
cycle.
TO set Sorer-Clean:
Note: Oven temperature must be below 400° Fto programa clean cycle.
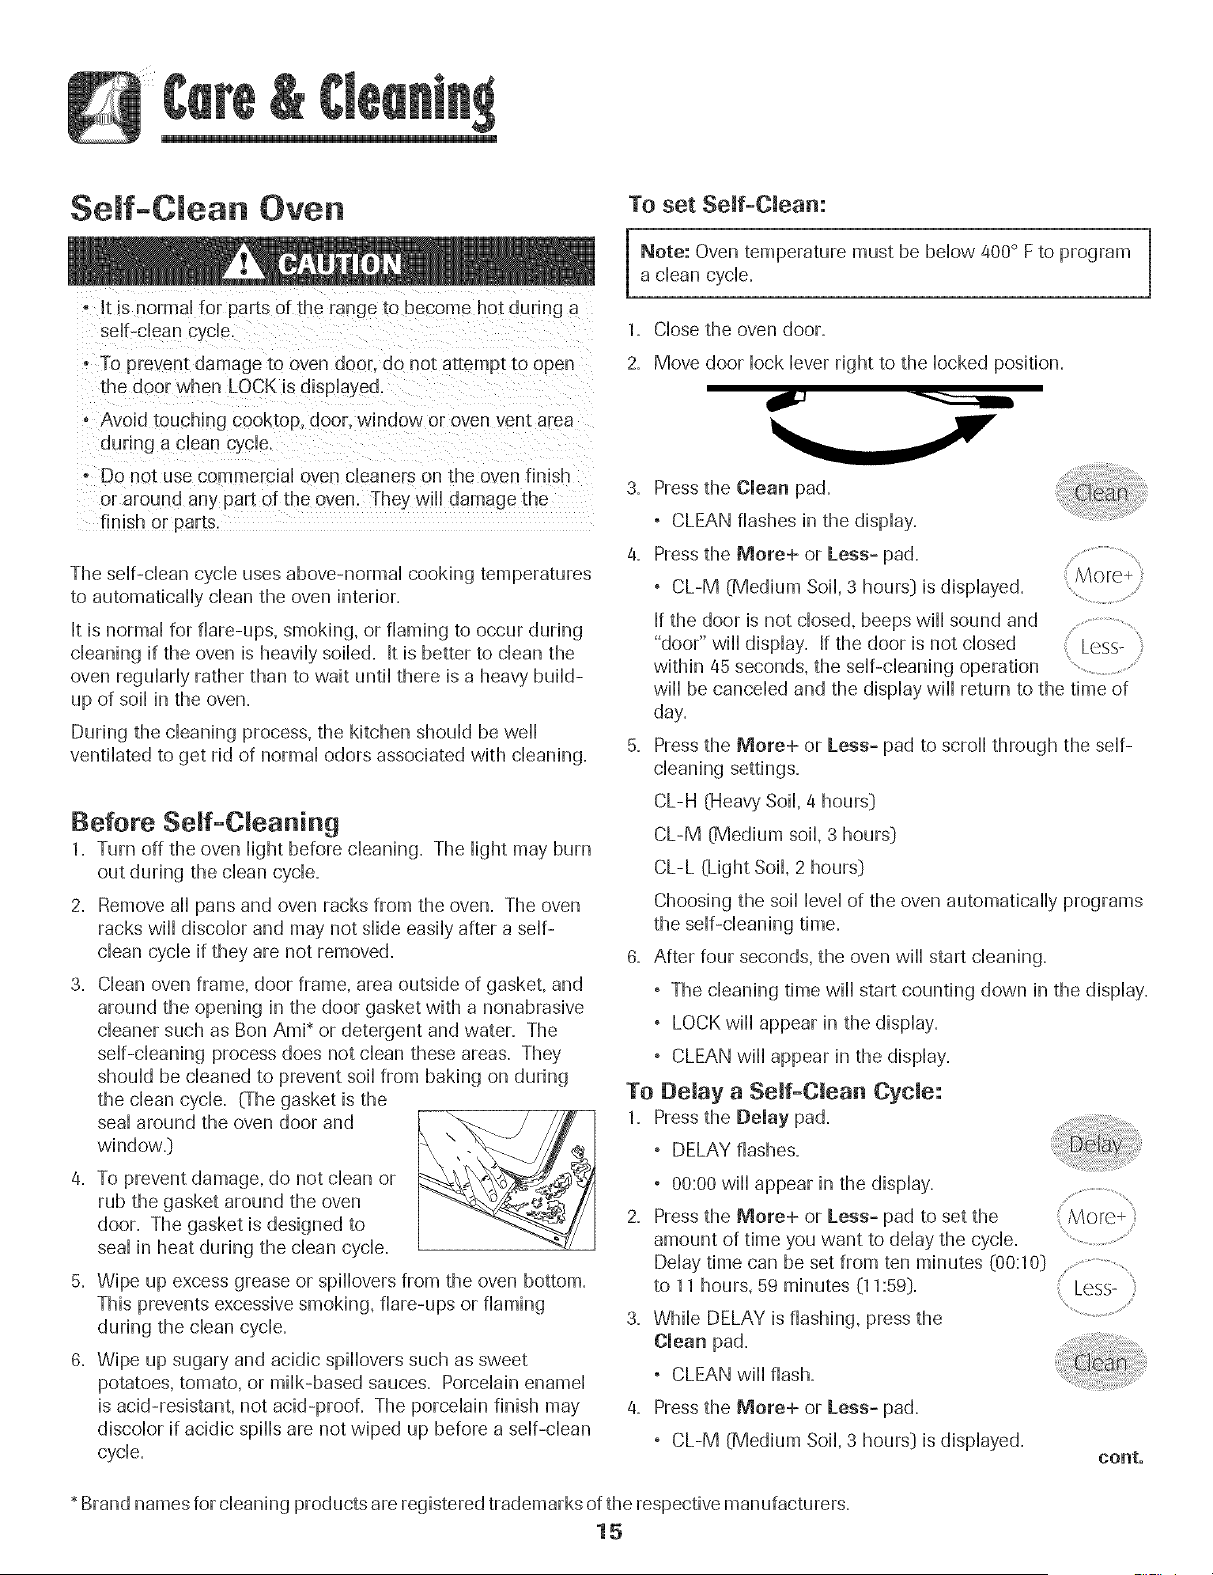
1. Close the oven door.
2. Move door lock lever right to the locked position.
3. Pressthe Clean pad.
, CLEAN flashes in the display.
4. Pressthe More+ or Less- pad.........................................
, CL-M (Medium Soil, 3 hours} is displayed ..........................................
[f the door is not closed, beeps wiil sound and
"door" wiii display. If the door is not closed Less-
...._
within 45 seconds, the self-cleaning operation .............................................
wiil be canceled and the display wiil return to the time of
day.
5. Pressthe More+ or Less- pad to scroll through the self-
cleaning settings.
CL-H (Heavy Soil, 4 hours}
CL-M (Medium soil, 3 hours}
CL-L (Light Soil, 2 hours}
Choosing the soil level of the oven automatically programs
the self-cleaning time.
6. After four seconds, the oven wiil start cleaning.
, The cleaning time wiil start counting down in the display.
, LOCK wiil appear in the display.
, CLEAN wiil appear in the display.
To Delay a Self-Oleaa Cycle:
1. Press the Delay pad.
° DELAY flashes.
° 00:00 will appear in the display.
2. Pressthe More+ or Less- pad to set the
amount of time you want to delay the cycle.
Delay time can be set from ten minutes (00:10} ......................................
to 11 hours, 59 minutes (11:59}. Less-
3. While DELAY is flashing, press the
Clean pad.
, CLEAN wiil flash.
4. Pressthe More+ or Less- pad.
° CL-M (Medium Soil, 3 hours} is displayed.
eonto
* Brand names for cleaning products are registered trademarks of the respective manufacturers.
15
5. Press the More+ or Less- pad to scroll through the serf-
charting settings.
CL-H (Heavy Soil, 4 hours}
CL-M (Medium soil, 3 hours}
CL-L (Light Soil, 2 hours}
Choosing the soil level of the oven automatically programs
the self-cleaning time.
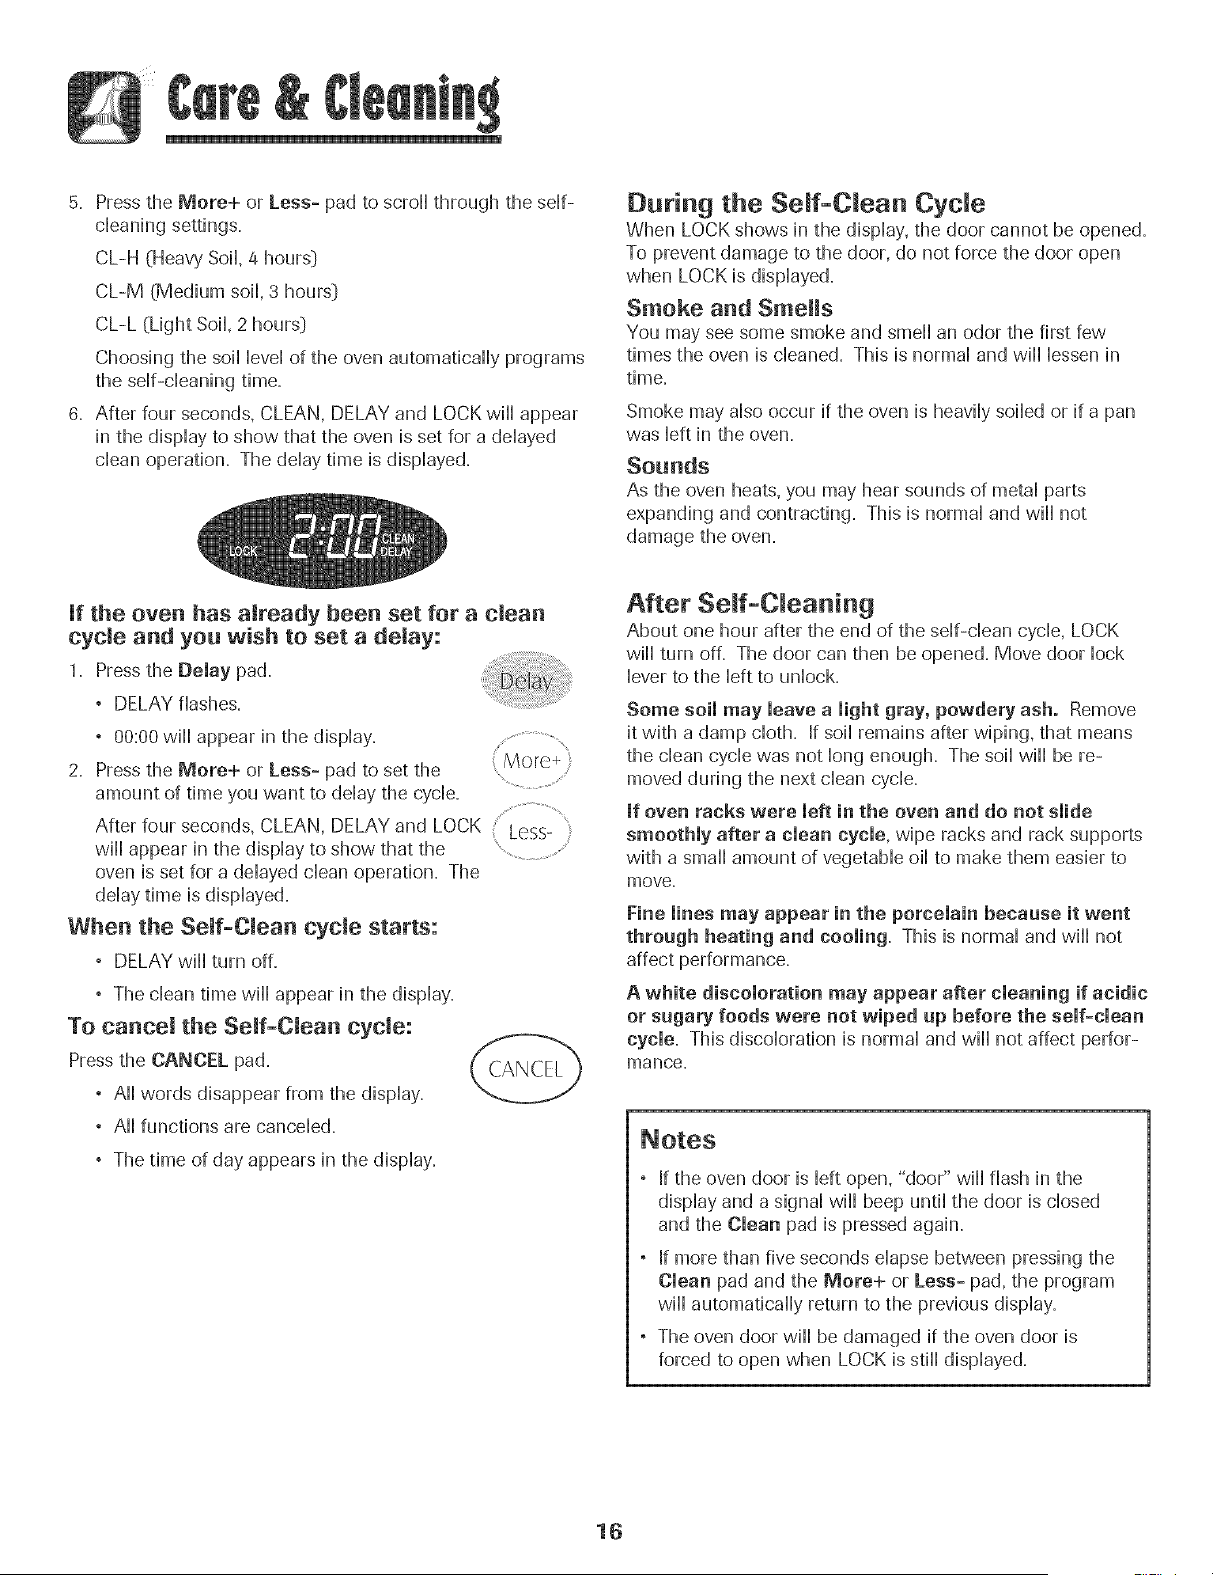
6. After four seconds, CLEAN, DELAY and LOCK will appear
in the display to show that the oven is set for a delayed
clean operation. The delay time is displayed.
During the Se[f-C_ean Cycle
When LOCK shows hi the dispiay, the door cannot be opened.
To prevent damage to the door, do not force the door open
when LOCK is dbpiayed.
Smoke an[[ Smells
You may see some smoke and smell an odor the first few
times the oven is cleaned. This is normal and will lessen in
time.
Smoke may abo occur if the oven is heaviiy soiied or if a pan
was Heftin the oven.
Sounds
As the oven heats, you may hear sounds of metal parts
expanding and contracting. This is normal and will not
damage the oven.
Jf the oven has already been set for a clean
cycle an[[ you wish to set a delay:
1. Press the Delay pad.
° DELAY flashes.
, 00:00 will appear in the display.
2. Press the More+ or Less- pad to set the ....More+
amount of time you want to delay the cycb.
Afterfourseconds,CLEAN,DELAYandLOOKL ss-
will appear in the display to show that the .....................................
oven is set for a delayed clean operation. The
delay time is displayed.
When the Self-Clean cycle starts:
, DELAY will turn off.
° The clean time will appear in the display.
To cancel the Self-Clean cycle:
Press the CANCEL pad.
° All words disappear from the display.
° All functions are canceled.
° The time of day appears in the display.
After Serf-Cleaning
About one hour after the end of the self-dean cycle, LOCK
will turn off. The door can then be opened. Move door lock
lever to the left to unlock.
Same sail may leave a light gray, powdery ash. Remove
it with a damp cloth. If soil remains after wiping, that means
the clean cycle was not long enough. The soil will be re-
moved during the next clean cycb.
if oven racks were left in the oven and do not slide
smoothly after a clean cycle, wipe racks and rack supports
with a small amount of vegetable oil to make them easier to
move.
Fine lines may appear in the porcelain because it went
through heating and cooling. This is normal and wiii not
affect performance.
A white discoloration may appear after cleaning if acidic
or sugary foods were net wiped up before the self-clean
cycle. This discoloration is normal and will not affect perfor-
mance.
If the oven door is left open, "door" wiii flash in the
display and a signal wiil beep until the door is closed
and the Clean pad is pressed again.
If more than five seconds elapse between pressing the
Clean pad and the More+ or Less- pad, the program
wiil automatically return to the previous display.
The oven door wiil be damaged if the oven door is
forced to open when LOCK is still displayed.
16
Cleaning Procedures
or cleaning. This is te avoid damage and possib!e burn s, _ Brand names are registered trademarks of the
, To Prevent staining or discobrati0n, clean appliance after each use, respective manufacturers=
!! a part iS removed, be sure !t is correct!y replaced. _*To order call 1-877-232-8771 USA or
1-800-688-8408 Canada=
PROCEDURE
Burner Grates -
Porcelain on
Cast iron
Clock and
Control Pad
Area
Control Knobs
Ceoktop and
Control Panel -
Porcelain Enamel
Storage Drawer
and Door
Handles -
Painted Enamel
Removable Burner Caps
° Allow burner to cool. Remove burner cap and wash in soapy water with a plastic scouring pad. For
stubborn soils, clean with a soap-filbd, nonabrasive pad or Cooktop Cleaning Creme*
(Part #20000001} _* and a sponge.
° Do not clean in the dishwasher or sdf-cbaning oven.
Sealed Gas Rumors
° Clean frequently= Allow burner to cool= Clean with soap and plastic scouring pad. For stubborn soils,
clean with a soap-filbd, nonabrasive pad. Do not enlarge or distort holes.
° Be careful not to get water into burner ports.
° Use care when cleaning the ignitor= If the ignitor is wet or damaged the surface burner will not light=
, Wash with warm, soapy water and a nonabrasive, plastic, scrubbing pad. For stubborn soils,
clean with a soap-tiffed, nonabrasive, plastic pad or Cooktop Cleaning Creme* (Part #20000001)**
and a sponge, if soil remains, reapply Cooktop Cleaning Creme*, cover with a damp paper towel
and soak for 30 minutes. Scrub again, rinse and dry'.
° Do not clean in the dishwasher or self-cbaning oven.
, To activate control lock for cleaning, see "Locking the Controls" page 8.
, Wipe with a damp cloth and dry. Do not use abrasive cleaning agents as they may scratch the finish.
, Glass cleaners may be used if sprayed on a cloth first. DO NOTspray direcdy on controlpad and
display area.
° Remove knobs in the OFF position by pulling forward.
° Wash, rinse and dry'. Do not use abrasive cleaning agents as they may scratch the finish.
° Turn on each burner to be sure the knobs have been correctly replaced.
Porcelain enamel is glass fused on metal and may crack or chip with misuse, kis acid resistant, not acid proof.
All spillovers, especially acidic or sugary' spillovers, should be wiped up immediately with a dry cloth.
° When cool, wash with soapy water, rinse and dry.
, Never wipe off a warm or hot surface with a damp cloth. This may cause cracking or chipping.
, Never use oven cleaners, abrasive or caustic cleaning agents on exterior finish of range.
° When cool, wash with warm soapy water, rinse and dry. Never wipe a warm or hot surface with a damp
cloth as this may damage the surface and may cause a steam burn.
° Forstubborn soil, use mildly abrasive cleaning agents such as baking soda paste or Ben Ami*. Do not use
abrasive cleaners such as steel wool pads or oven cleaners. These products will scratch or permanently
damage the surface.
Note: Use a dt_j towel or cloth to wipe up spills, especially acidic or sucjary spills. SuFface may
discolor or dull if soil is t_otimmediately removed. This is especially important for white su_aces.
17

i
Oven Window
and Door - Glass
, Avoid using excessive amounts of water which may seep under or behind gHasscausing staining.
, Wash with soap and water. Rinsewith dear water and dry. GHasscHeanercan be used if sprayed on a cHoth
first.
, DO NOT use abrasive materiaHssuch as scouring pads, steeHwooHor powdered cHeanersas they wiHH
scratch gHass.
Oven mnterior , FoHHowinstructions on pages 15-18 to set a seHf-cHeancycHe.
Oven Racks
Stainmess Steel
(seHect modems:)
CHeanwith soapy water.
Remove stubborn soiHwith cHeansingpowder or soap-fiHHedscouring pad. Rinse and dry.
Racks wiHHpermanentHydiscoHorand may not sHideout smoothHyif Heftin the oven during a seHf-cHean
operation. If this occurs, wipe the rack and embossed rack supports with a smaHHamount of vegetabHeoiH
to restore ease of movement, then wipe off excess oil
° DO NOT USE ANY CLEANING PRODUCT CONTAINiNO CHLORINE BLEACH.
° DO NOT USEABRAStVE OR ORANGE CLEANERS.
° ALWAYS WiPE WiTH THE GRAIN WHEN CLEANING.
, Daily Cleaning/Light Soil -- Wipe with one of the foHHowing- soapywater, white vinegariwater soHution,
FormuHa409 GHassand Surface CHeaner*or a simiHargHasscHeaner- using a sponge or soft cHoth.
Rinse and dry. To poHishand heHpprevent fingerprints, foHHowwith StainHessSteeHMagic Spray*
(Part No=20000008:)**=
° Moderate/Heavy Soil -- Wipe with one of the foHHowing- Ben Ami*, Smart CHeanser*,or Soft Scrub* -
using a damp sponge or soft cHoth.Rinse and dry. Stubborn soiHsmay be removed with a damp muHti-
purpose Scotch-Brite * pad; rub evenHywith the grain. Rinse and dry.To restore Husterand remove streaks,
foHHowwith StainHessSteeHMagic Spray*.
, Discoloration -- Using a damp sponge or soft cHoth,wipe with Cameo StainHessSteeHCHeaner*.Rinse
immediateHyand dry. To remove streaks and restore Huster,foHHowwith StainHessSteeHMagic Spray*.
* Brand names for cHeaning products are registered trademarks of the respective manufacturers.
_ To order direct, caHH1-877-232-8771 USA or 1-800-888-8408 Canada.
18
Oven Door
Leve ing Legs
° Do not place excessive weight on or stand on an open
even door. This could cause the range to tip over. break
the door, or njure the user.
• Do not attempt to open or close door or operate oven until
door is properly replaced.
- Never place fingers between hinge and front oven frame
Hinge arms are spring mounted. If accidental y hit. the
hinge will slam shut against oven frame and could injure
your fingers.
To remove:
1. When cool, open the oven door to
the first stop position (opened
about four inches_}.
2. Grasp door at each side. Do not
use the door handle to lift door.
3. Lift up evenly until door clears
leye!ing legs to the fiOoE,This bracket prevents the range
from accidentally tipping.
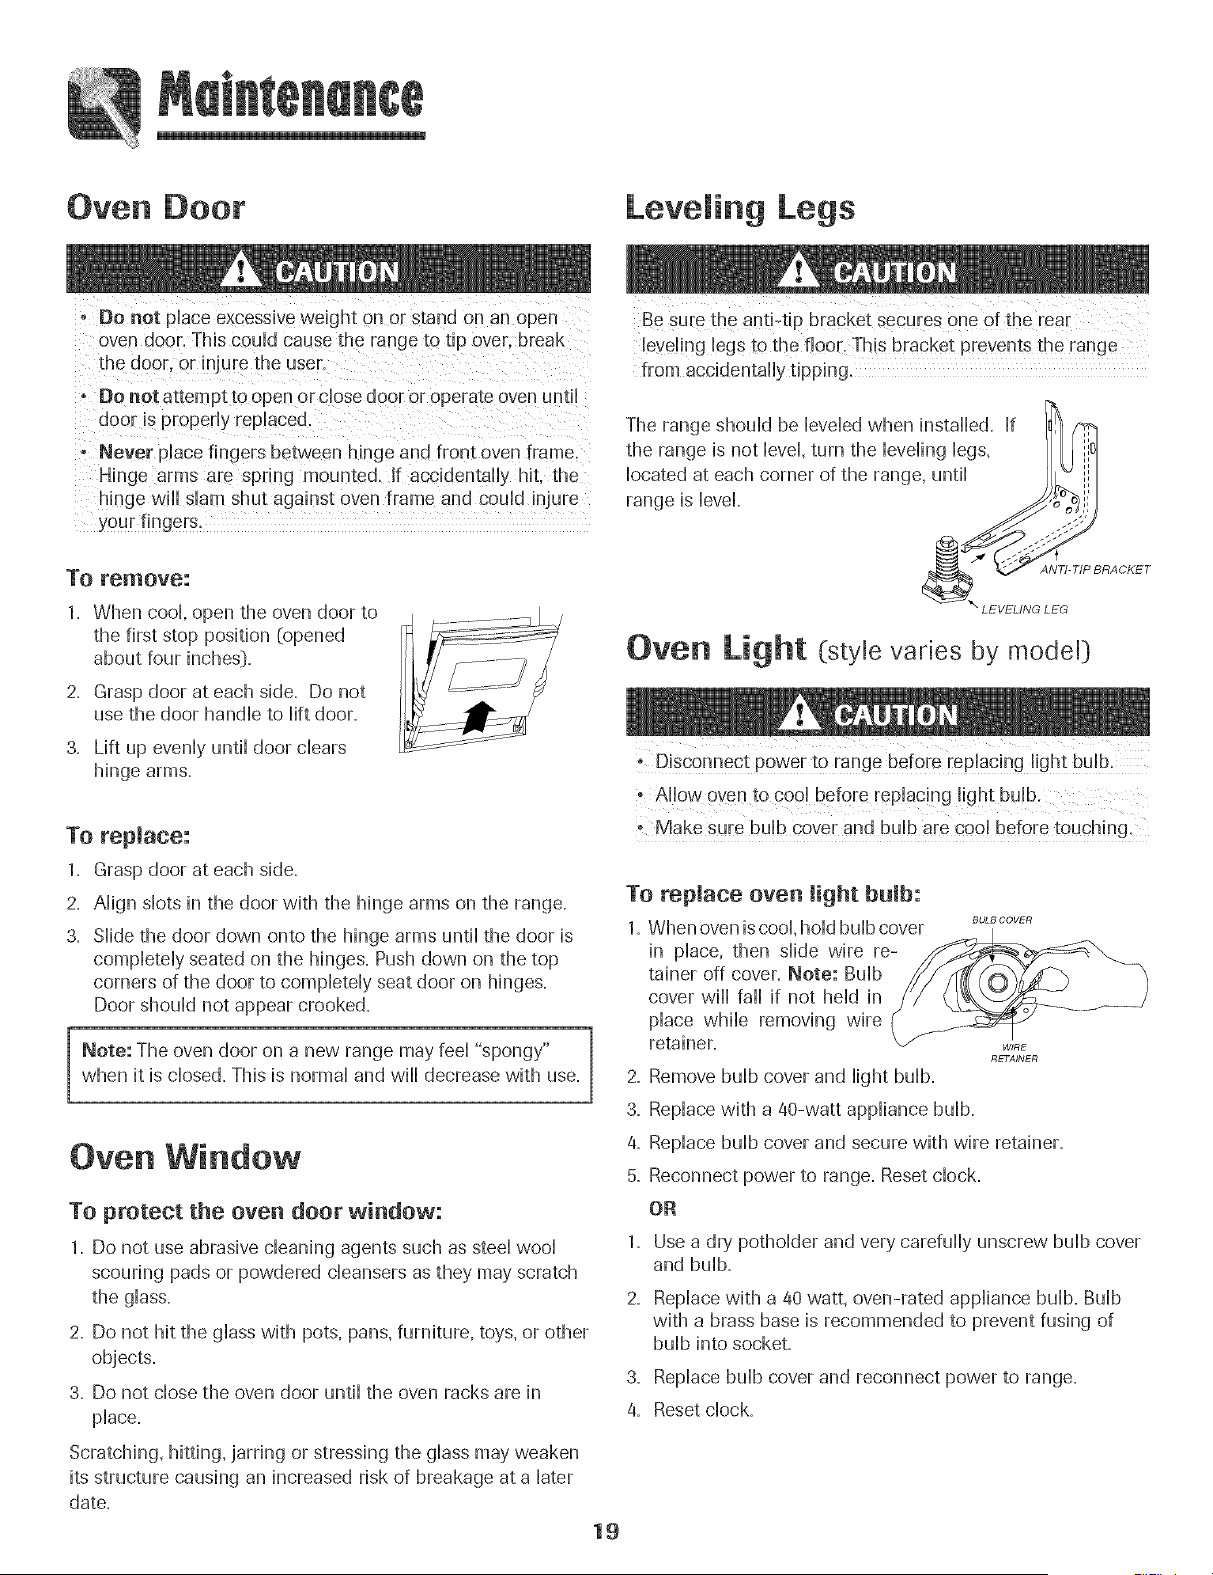
The range should be leveled when installed. If
the range is not level, turn the leveling legs,
located at each corner of the range, until
range is level
Oven
ANTI-TIP BRACKET
LEVELING LEG
Light (style varies by model)
To replace:
-Make sure bu!b cover and bulb are coo! before touching.
1. Grasp door at each side.
2. Align slots in the door with the hinge arms on the range.
3. Slide the door down onto the hinge arms until the door is
completely seated on the hinges. Push down on the top
corners of the door to completely seat door on hinges.
Door should not appear crooked.
Note: The oven door on a new range may feel "spongy"
when it is closed. This is normal and will decrease with use.
To replace oven light bulb:
1, When oven is cool, hold bulb cover BoL_covER
in place, the[) slide wire re-
tainer off cover, Note: Bulb
cover will fall if not held in
place while removing wire
retainer.
RETAINER
2. Remove bulb cover and light bulb.
3. Replace with a 40-watt appliance bulb.
Oven Window
4. Replace bulb cover and secure with wire retainer.
5. Reconnect power to range. Reset clock.
To protect the oven door window:
1. Do not use abrasive cleaning agents such as steel wool 1.
scouring pads or powdered cleansers as they may scratch
the glass. 2.
2. Do not hit the glass with pots, pans, furniture, toys, or other
objects.
3.
3. Do not close the oven door until the oven racks are in
place. 4.
OR
Use a dry potholder and very carefully unscrew bulb cover
and bulb.
Replace with a 40 watt, oven-rated appliance bulb. Bulb
with a brass base is recommended to prevent fusing of
bulb into socket.
Replace bulb cover and reconnect power to range.
Reset clock.
Scratching, hitting, jarring or stressing the glass may weaken
its structure causing an increased risk of breakage at a later
date.
19
Remova of Gas Appliance
Gas appHiance connectors used to connect this appHianceto
the gas suppHyare not designed for continuous movement.
Once instaHHed,DO NOT repeatedHymove this gas appHiance
for cHeaningor to reHocate.If this appHiancehas to be moved
and/or removed for servicing, foHHowthe procedure described
in the instaHHationinstructions. For information, contact
Maytag Customer Assistance at 1-800-888-9900 USA or
1-800-688-2002 Canada.
To prevent range from accidentally tipping, range must be
secured to the floor by sliding rear leveling leg into the anti-
tip bracket.
Storage Drawer
Do not store pHastic,paper products, food or flammable
for these items when the oven is in use.
The storage drawer can be removed to allow you to clean
under the range.
To remove:
1. Empty'drawer and puHHout to the first stop position.
2. Lift up the front of the drawer.
3. Puil out to the second stop position.
4. Grasp sides and lift drawer up and out.
To replace:
1. Fit the ends of the drawer glides into the rails in the range.
2. Lift up the front of the drawer and gently push in to the
first stop position.
3. Lift drawer up again and push until drawer is closed.
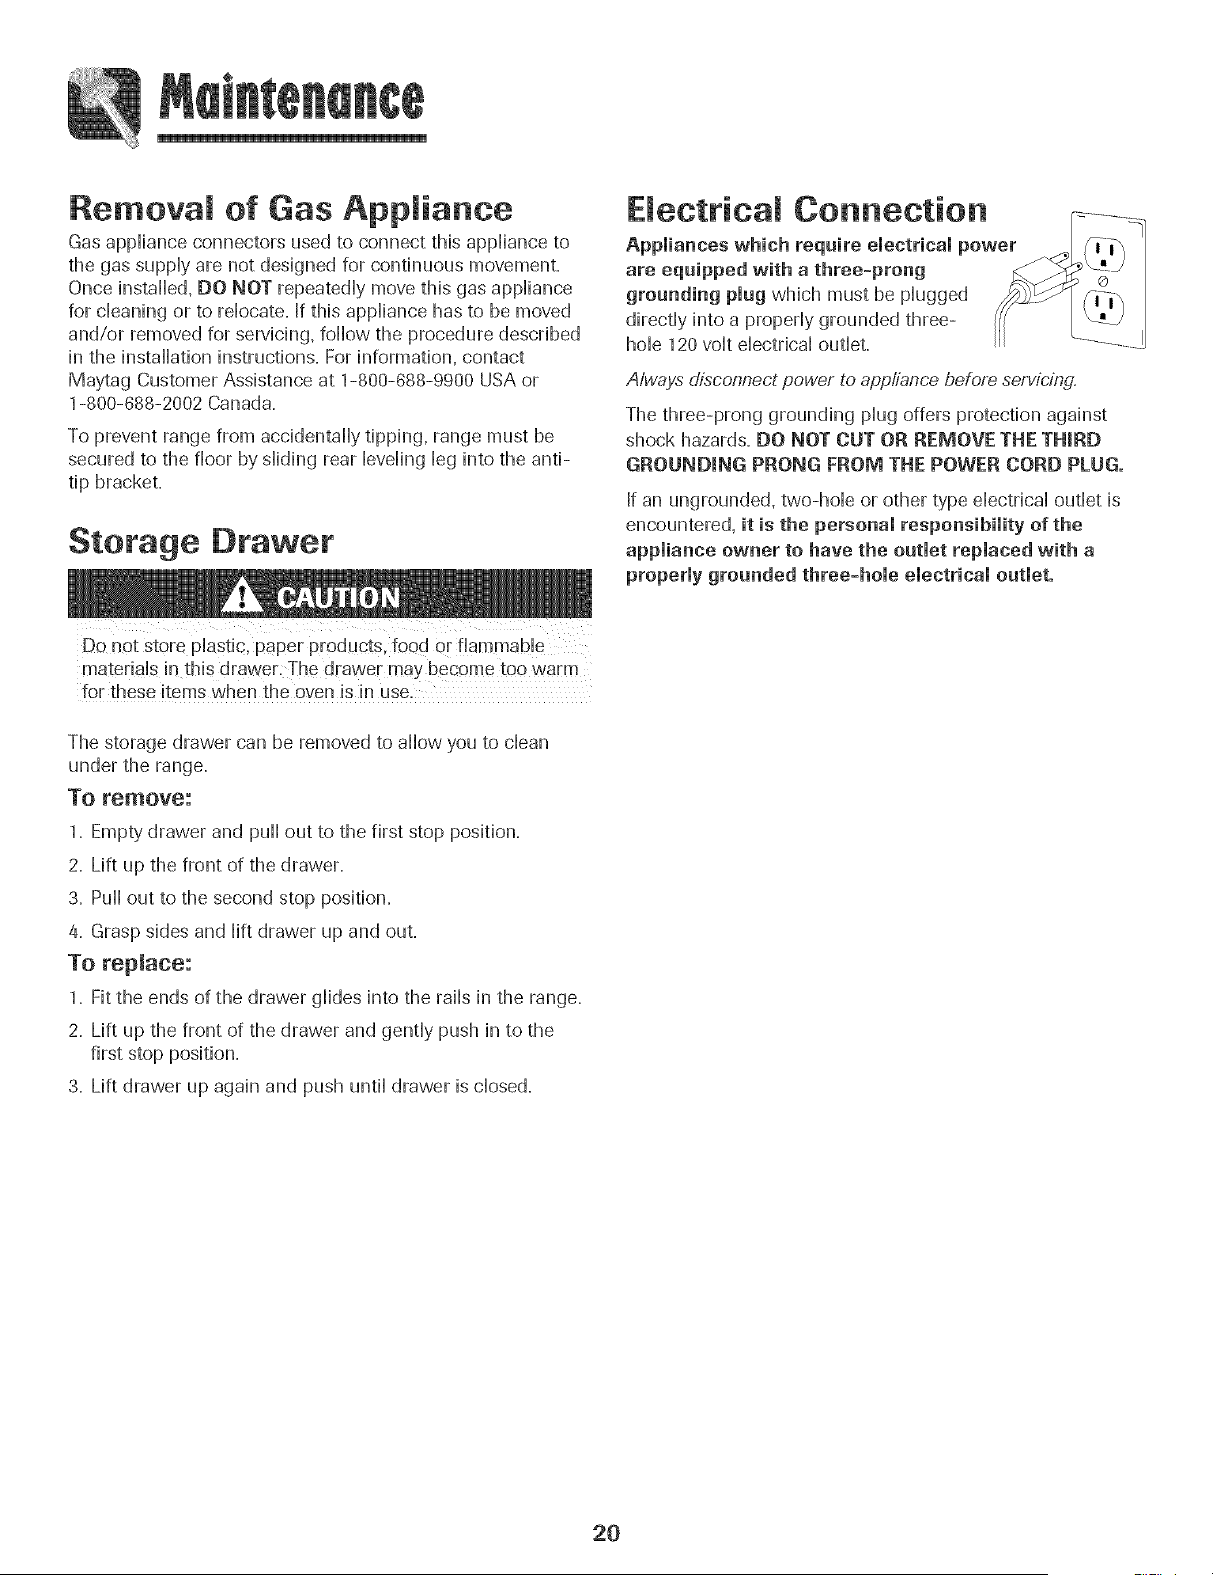
Electrical Connection
Appliances which reqaire electrical power
are eqaipped with a three-prong
grounding plug which must be pHugged
directHyinto a propedy grounded three-
home120 voHteHectricaHoutHet.
A/ways disconnect power to appiiance before servicing.
The three-prong grounding pHugoffers protection against
shock hazards. DO NOT CUT OR REMOVE THE THIRD
GROUNDmNG PRONG FROM THE POWER CORD PLUG.
If an ungrounded, two-hollo or other type eHectricaHoutHetis
encountered, it is the personal responsibility of the
appliance owner to have the outlet replaced with a
properly grounded three-hole electrical outlet.
2O

PROBLEM SOLUTION
For most concerns, try these first. ° Check if oven controHshave been propedy set.
° Check to be sure pHugis secumHyinserted into receptacle.
° Check or re-set circuit breaker. Check or repHacefuse.
° Check power suppHy.
Surface burner fails to light. , Check to be sure unit is propedy connected to power suppHy.
° Check for a Mown circuit fuse or a tripped main circuit breaker.
° Check to be sure ignitor is dry and cHicHng.Burner will not Hightif ignitor is damaged.
soiHedor wet. If ignitor doesn't chick,turn controHknob to OFF.
The flame is uneven. ° Burner ports may be clogged.
Sarface burner flame lifts ° Check to be sure a pan is sitting on the grate above.
off ports.
Baking results are not as , Check the oven temperature selected. Make sure oven is preheated when recipe
expected or differ from or directions recommend preheat.
previous oven. , Make sure the oven vent has not been blocked. See page 14 for location.
, Check to make sure range is level.
, Temperatures often vary between a new oven and an old one. As ovens age, the oven
temperature often "drifts" and may become hotter or cooler. See page 13 for
instructions on adjusting the oven temperature. Note: It is not recommended to
adjust the temperature if only one or two recipes are in question.
, Use correct pan. Dark pans produce dark browning. Shiny pans produce light
browning. See "Cooking Made Simple" booklet for more information on bakeware.
, Check rack positions and pan placement. Stagger pans when using two racks. Allow
1-2 inches between pans and oven wall.
, Check the use of foil in the oven. Never use foil to cover an entire oven rack. Place
a small piece of foil on the rack below the pan to catch spillovers.
Food is not broiling properly or , Check oven rack positions. Food may be too close to flame.
smokes excessively. , Aluminum foil was incorrectly used. Never line the broiler insert with foil.
, Trim excess fat from meat before broiling.
, A soiled broiler pan was used.
, Preheat oven for 2-3 minutes before placing food in the oven.
, Broil with the oven door closed.
Oven will not self-clean. , Check to make sure the cycle is not set for a delayed start. See pages 15-16.
° Check if door is closed.
° Check if control is in Sabbath Mode. See page 13.
° Oven may be over 400° F.Oven temperature must be below 400° F to program a
clean cycle.
21
PROBLEM SOLUTION
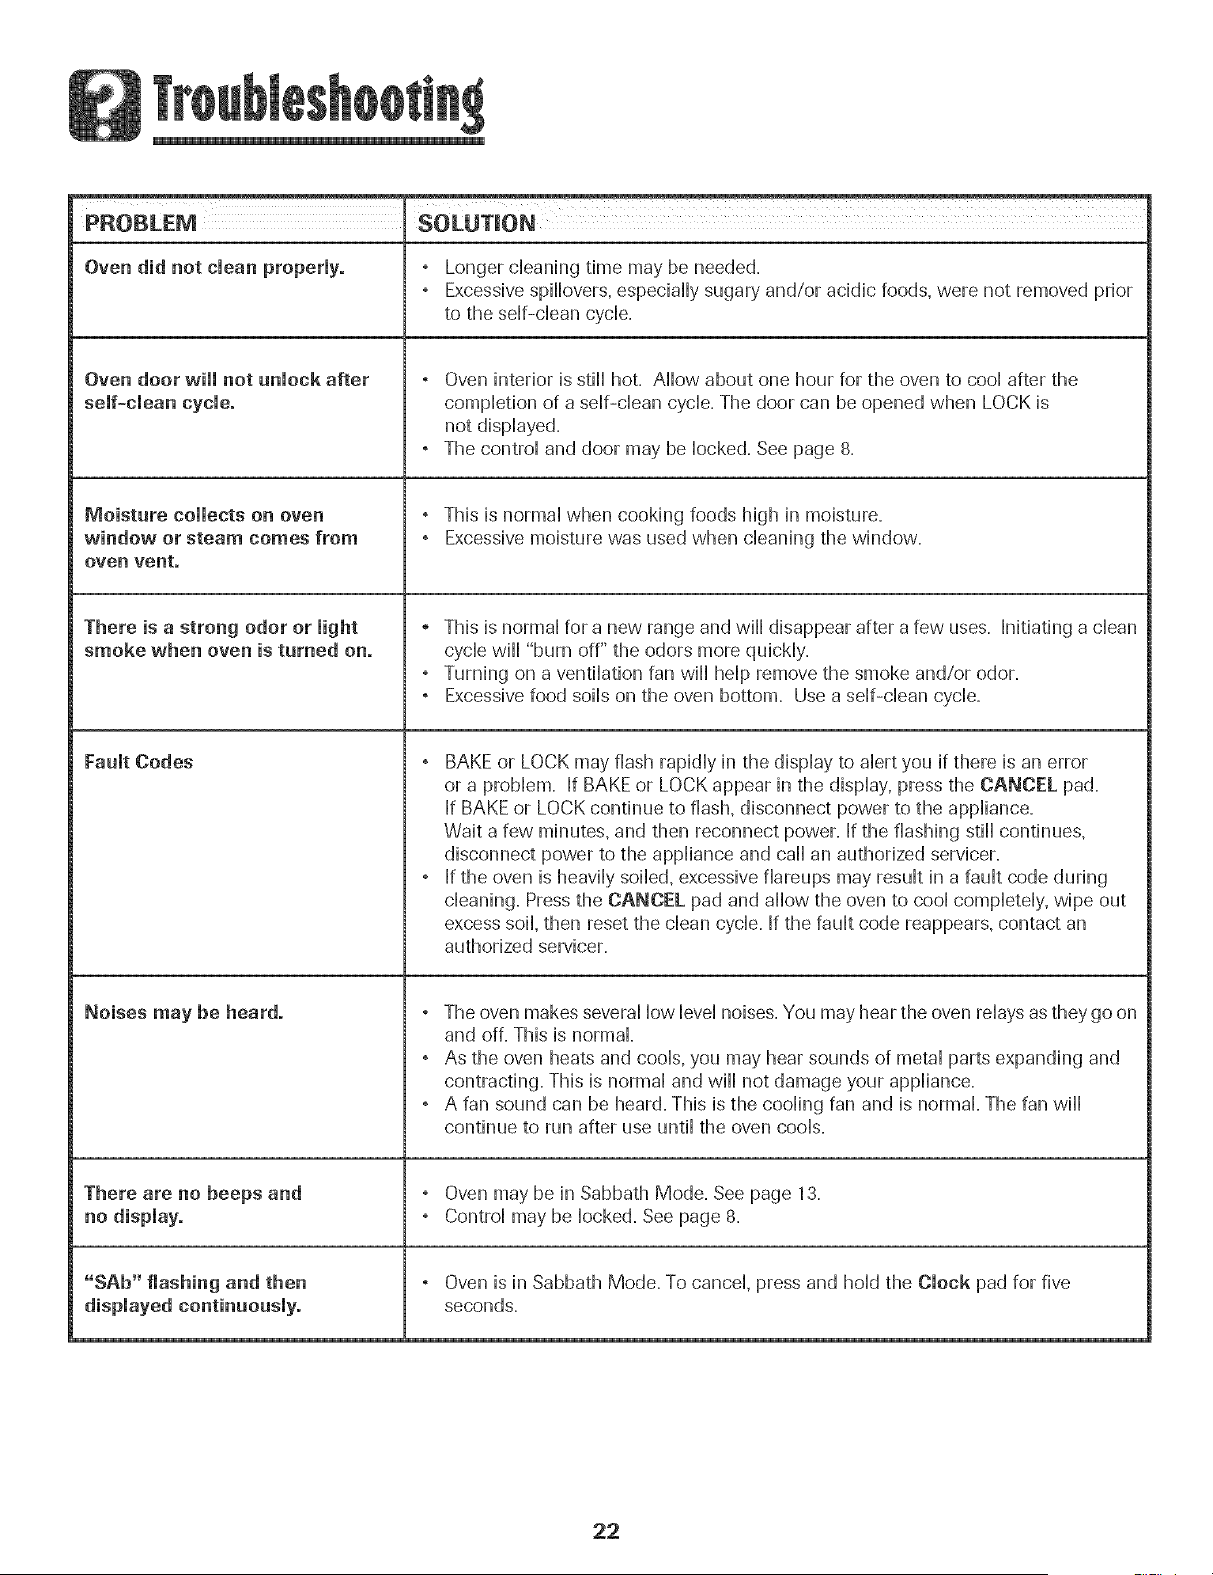
Oven did not clean properly. ° Longer cleanhg time may be needed_
, Excessive spillovers, especially sugary andlor acidic foods, were not removed prior
to the self-clean cycle.
Oven door will not unlock after
self-clean cycle.
Moisture collects on oven
window or steam comes from
oven vent.
There is a strong odor or might
smoke when oven is turned on.
Fault Codes
Noises may be heard.
There are no beeps and
"SAb" flashing and then
Oven interior is still hot. Allow about one hour for the oven to cool after the
completion of a self-clean cycle. The door can be opened when LOCK is
not displayed.
The control and door may be locked. See page 8.
, This is normal when cooking foods high in moisture.
, Excessive moisture was used when cleaning the window.
, This is normal for a new range and wi[[ disappear after a few uses. Initiating a dean
cycle will "burn off" the odors more quickly.
° Turning on a ventilation fan will help remove the smoke and/or odor.
° Excessive food soils on the oven bottom. Use a self-clean cycle.
, BAKE or LOCK may flash rapidly in the display to alert you if there is an error
or a problem. If BAKE or LOCK appear in the display, press the CANCFL pad.
If BAKE or LOCK continue to flash, disconnect power to the appliance.
Wait a few minutes, and then reconnect power. If the flashing still continues,
disconnect power to the appliance and call an authorized servicer.
° If the oven is heavily soiled, excessive flareups may result in a fault code during
cleaning. Press the CANCEL pad and allow the oven to cool completely, wipe out
excess soil, then reset the clean cycle. If the fault code reappears, contact an
authorized servicer.
, The oven makes several low level noises. You may hear the oven relays as they go on
and off. This is normal.
° As the oven heats and cools, you may hear sounds of metal parts expanding and
contracting. This is normal and will not damage your appliance.
° A fan sound can be heard. This is the cooling fan and is normal. The fan will
continue to run after use until the oven cools.
° Oven may be in Sabbath Mode. See page 13.
, Control may be locked. See page 8.
° Oven is in Sabbath Mode. To cancel, press and hold the Clock pad for five
seconds.
22
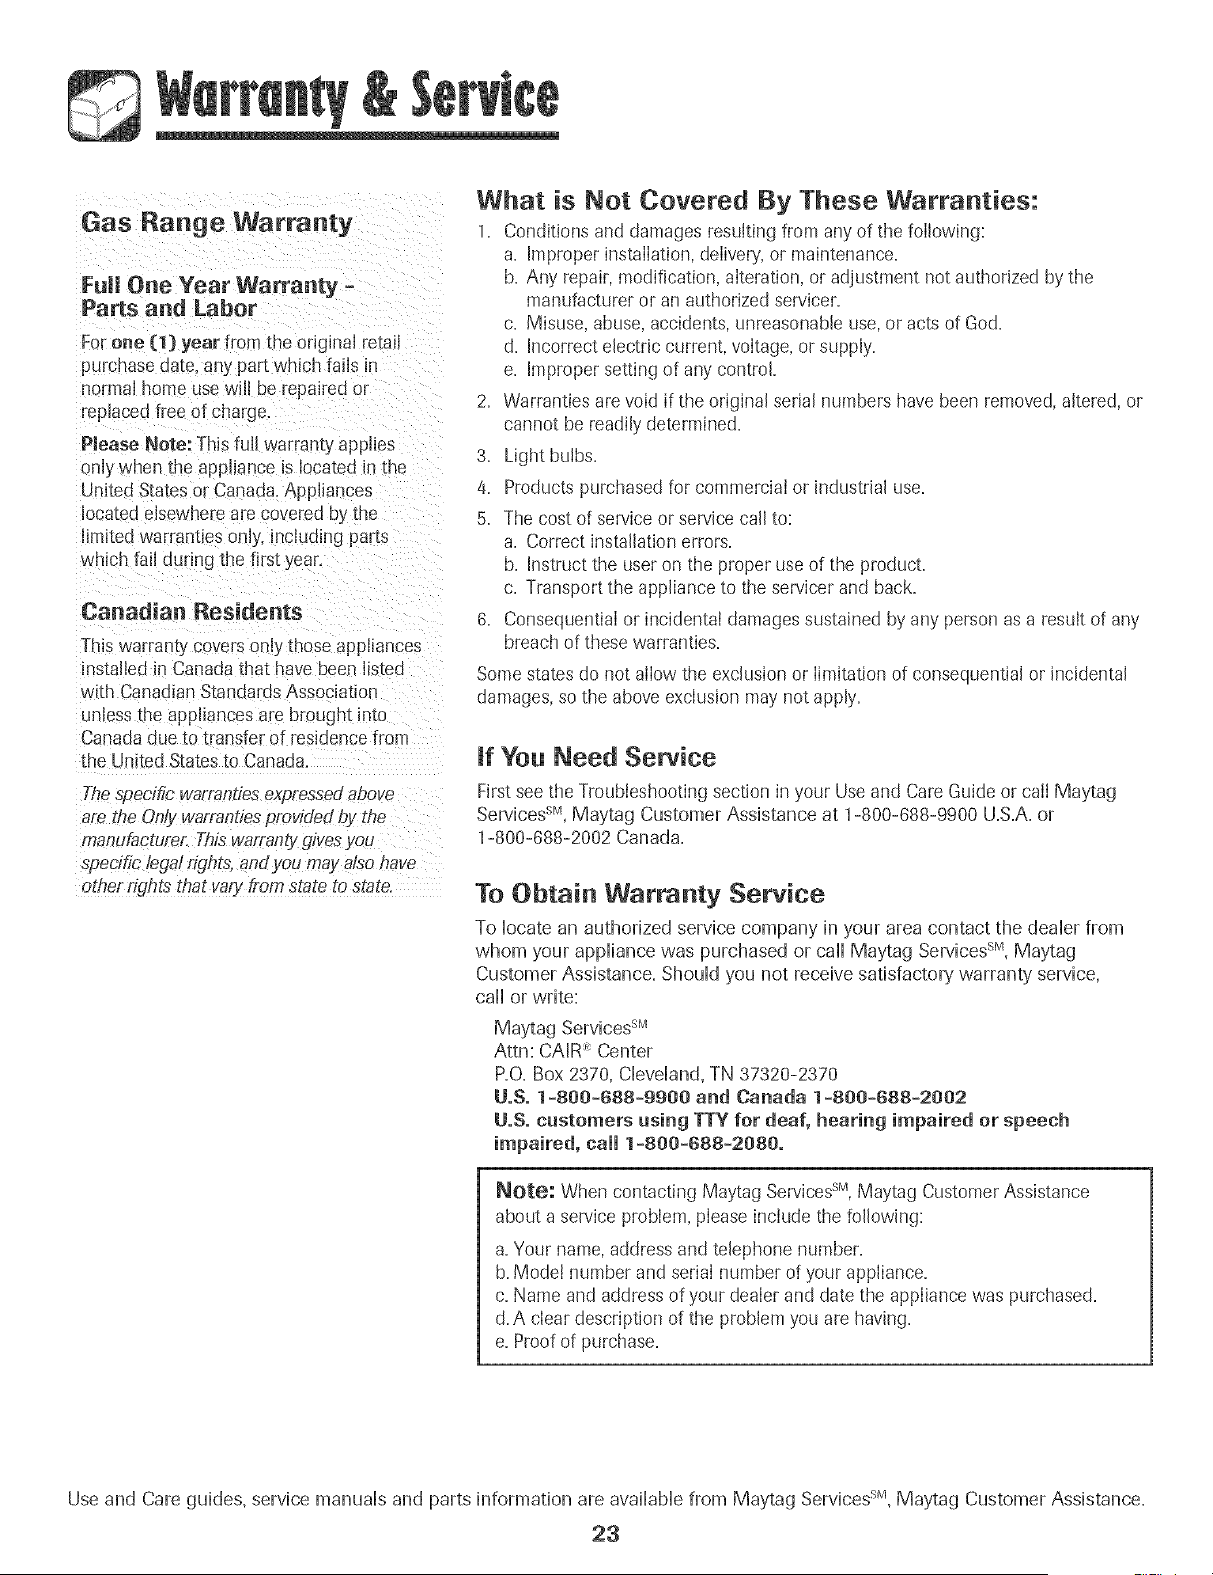
Gas Range Warranty
Full One Year Warranty
Parts and Labor
Forerie [1} year from the odginal retail
purchase date.any part which fails in
normal hom_ use will be repaired or
replaced free of charge.
Please Note: Thisfurl warramy applies
onlywhen the appliance is located in [he
United States or Canada.Appliances
located elsewhere are covered by the
limited warranties only, including paris
which fail during the first year.
Canadian Residents
This warramy covers orHythose appliances
installed in Canada that have been listed
with CanadianStandards Association
unless the appliancesare brought into
Canada due to transfer ot residence from
the United States to Canada.
What is Not Covered By These Warranties:
1= Conditions and damages resulting from any of the foIlowing:
a= Improper instaIIation,deIivery,or maintenance.
b. Any repair, modification, aIteration, or adjustment not authorized by the
manufacturer or an authorized servicer.
c= Misuse, abuse, accidents, unreasonable use, or acts of God=
d. Incorrect electric current, voItage, or supply=
e= Improper setting of any control=
2= Warranties are void if the original serial numbers have been removed,altered, or
cannot be readily determined.
3= Light bulbs.
4= Products purchased for commercial or industrial use=
5= The cost of service or service call to:
a= Correct installation errors.
b=Instruct the user on the proper use of the product.
c= Transport the appliance to the servicer and back.
6= Consequential or incidental damages sustained by any person as a result of any
breach of these warranties.
Some states do not allow the exclusion or limitation of consequential or incidental
damages, so the above exclusion may not apply.
if You Need Service
Thespecific warrantiesexpressedabove First see the Troubleshooting section in your Use and Care Guide or call Maytag
are the On_/warrantiesorovided by the ServicessM,Maytag Customer Assistance at 1-800-688-9900 U=S=A=or
manufacture_ Th[swarrantygivesyou 1-800-688-2002 Canada.
speeific legal rights, and you mayalso have
other rights that vary from state to state. TO Obtain Warranty Service
To locate an authorized service company in your area contact the dealer from
whom your appliance was purchased or call Maytag ServicessM,Maytag
Customer Assistance. Should you not receive satisfactory warranty service,
call or write:
Maytag ServicessM
Attn: CAIR _Center
P.O.Box 2370, Cleveland, TN 37320-2370
UoS.1-800-688-9900 and Canada 1-800=688=2002
UoSocustomers using TTY for deaf, hearing impaired or speech
impaired, call 1-800-688-2080o
Note: When contacting Maytag ServicessM,Maytag CustomerAssistance
about a service problem, pIeaseinciude the following:
a=Your name,address and telephone number.
b=Model number and seriaI number of your appliance.
c=Name and address of your deaIer and date the appIiance was purchased.
d=A clear description of the problem you are having.
e=Proof of purchase=
SM
Use and Care guides, service manuals and parts information are available from Maytag Services* , Maytag Customer Assistance=
23
®
Cuisini_re encastrabme _ gaz
touches de pr6cision 500
m m m "1_
//|S|//|e
Table d_
instructions de securit_
importantes ................................ 25-29
Cuisson sur masurface ............. 30-31
Commandes de la surtace de cuisson
BrOleurs sceN6s
Cuisson darts le four ................ 32-41
Cuisson courante
Cuisson et maintien
Cuisson et maintien diff6r6e
Maintien au chaud
Cuisson au gril
Grilles du four
Nettoyage ................................... 42°45
M6thodes de nettoyage
Entretien ......................................46-47
Hublot et lain pe du four
D6placement d'un appareil a gaz
Recherche des pannes ............. 4t1=49
Garantieet serviceapr_s=vente .... 51
Gufa de Use y Cuidado ....................52

lnstaUatear : Laissezce guide avecI'appareil.
Consommateur: VeuHbzIire le guideet le conselvetpaul
consur[ationuiterbure. Conservezlafacture d'achat ou ie cheque
encalssecomme preuvede I'achat.
Numerode mod_Je
Numerode serie
Dated'achat
Sivousavezdes questions,veuifleznousappeier :
Servicea laclientelede May[ag
1-800-688-9900 E.-U.
1-800-688-2002 Canada
(lundiau vendredi,8 h _ 20 h, heure de rest}
Internet:http:iiwwvv.maytag.com
Dartsle cadrede nos pratiquesd'ameliorationconstantede la
qualit6 et de la pedormancede nos produitsde cuisson.(ms
modificationsde ['appareilqui ne sont pasmentionndesdans ce
guide pourront 6tre introduites.
Repertez=veus _ la page 51 pour plus d'iiffermatiens
cencemant le se_lviceapHts-vellteo
Los instructions de securite importantes et bs paragraphes
avertissement., de ce guide ne sont pas destines a couvrir
toutes bs conditions et situations qui pourraient se presenter.
IIfaut faire preuve de bon sons. de prudence et de soin Iors de
rinstallation de Fentretien ou du fonctionnement de Fappareil
Toujours prendre contact avec b fabricant dans b cas de
problemes ou de conditions qui ne seraent pas comprises.
Reconna_tre les 6tiquettes, paragraphes et
symboUes sur la s6curite
Life toutes los instructions avant d'utiliser cot appareii;
observer toutes bs instructions pour eliminer bs risques
d'incendie, choc ebctrique, dommages materiels et corporeb
que pourrait susciter une utflisation incorrecte de rapparefl.
Utfliser rapparefl uniquement pour bs fonctions prevues,
decrites darts ce guide.
Pour ane atilisation adequate et en securit_ : fl faut que
rapparefl soit convenabbment instdld par un technicien
qudifie, et relic 8 la terre. Ne pas regbr, r@arer ni remplacer
un composant, a moins que ceB ne soit sp@ifiquement
recommande darts ce guide. Toute autre reparation doit 6tre
effectuee par un technicien qualifie. Demander a rinstallateur
de montrer o8 se trouve b robinet d'arret de gazet comment
b former en cas d'urgence.
Toujours debrancher rapparefl avant d'y faire de rentretien.
sent pas respectdes _ la iettre, il y a risque d'!ncendie
blessures et mSme mamort.
-Ne pas ranger ni utiliser d'essence eu autre vapeur
eu liquide inflammable _ pre×imit_ de cot appareil
e_ de teat a_tre appareiL
Z QUE FAIRE SI L'ON SENT UNE ODEUR DE GAZ :
, N'uti!iser a_cun telephone de I'imme_bleo
o Se te_dre ehez _ veisin et t_l_phe_er
i_ra_diatement _ _a cempag_ie de gaz, S_ivre los
direetives de_es par le pr_pes_ de la
ee_pag_ie de gaz.
, S'il est impossible de jeindre la eompag_ie de
gaz, t_lephe_e_ a_ service des i_ce_dies.
cen{i_es _ _n i_stallate_r competent, _ u_e
entreprise de service eu _ la ce_pag_ie de gaz,
AVERTISSE_ENT _ Dangers ou pratiques dangereuses qui
POURRAIENT rdsu!ter en de graves blessures ou memo !a
mo_t.
Une fuite de gaz pouN'ait Surven!r dans le Systeme et
POURRAIENTresulter en des blessures mineures,
conformement aux instructions du fabricant,
25
,u
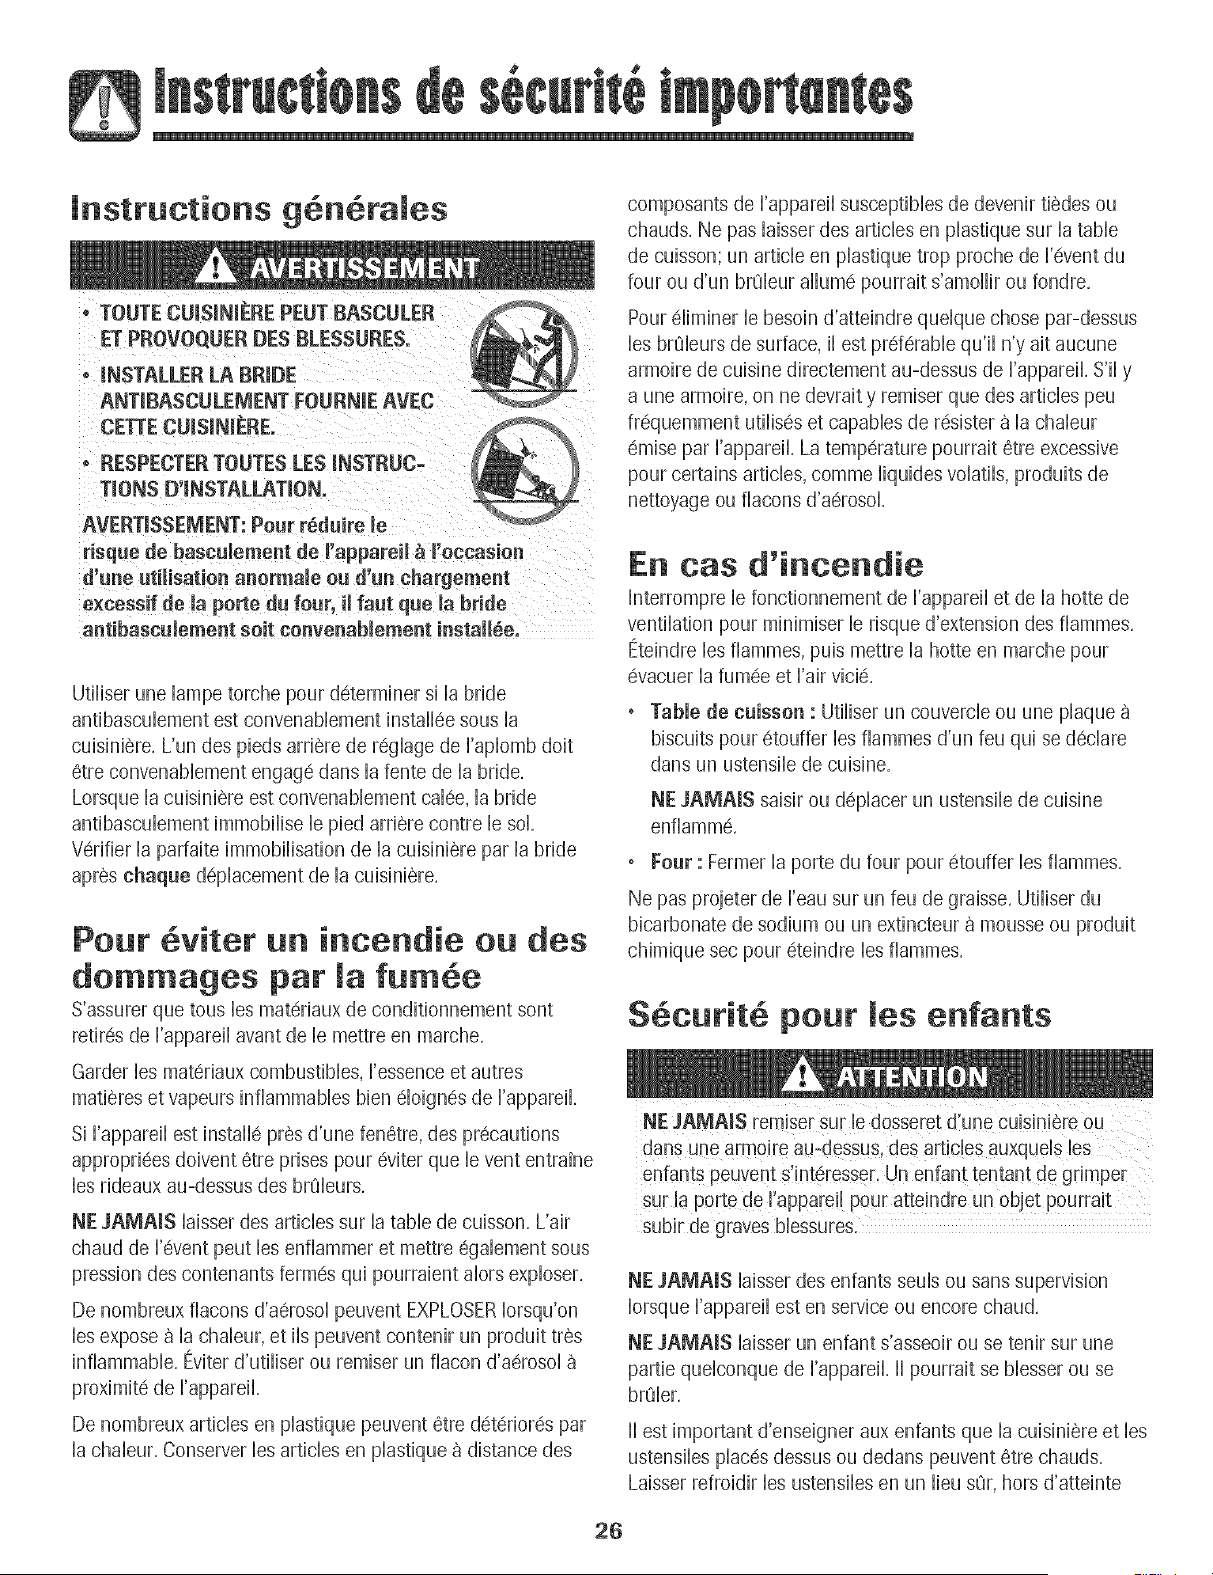
instructions g neraJes
o TOUTE CUm$1NIEREPEUT BASCULER
ET PROVOQUER DES BLESSURES°
,, mNSTALLERLA BRIDE
ANTIBASCULEMENT FOURNIE AVEC
CETTE CUISINIERE.
o RESPECTERTOUTES LES iNSTRUC-
TiONS [}'iNSTALLATiON.
AVERTJSSEMENT: Peur r_duire Je
risque de basculement de I'appareil _ m'eccasien
d'une utiHsatien anermaie eu d'un chargement
e×cessif de Ja porte du feur, il faut que JabrMe
antibascuiement seit cenvenabiement instaii_e,
Utiliser une Bmpe torche pour determiner si la bride
antibascubment est convenabbment instaflee sous la
cuisiniere, L'un des pie@ arriere de reghge de Faplomb doit
etre convenabbment engage darts la fente de la bride,
Lorsque la cuisiniere est convenabbment calee, la bride
antibascubment immoNise b pied arriere contre b sol,
Verifier la parfaite immobflisation de la cuisiniere par la bride
apres chaqae @placement de la cuisiniere,
Pour viter tin incendie ou des
dommages par la fumee
S'assurer que tous bs materiaux de conditionnement sont
retires de Fappareil avant de b mettre en marche,
Garder bs materiaux combustibles, [essence et autres
matieres et vapeurs inflammables bien 61oignesde Fappare&
Si Fappareil est instafle pres d'une fenetre, des precautions
appropriees doivent 6tre prises pour @iter que b vent entrdne
bs rideaux au-dessus des brQburs,
NE JAMAIS hisser des articles sur la table de cuisson, L'air
chaud de F@ent peut bs enfiammer et mettre egabment sous
pression des contenants fermes qui pourraient alors exploser,
De nombreux flacons d'aerosol peuvent EXPLOSERIorsqu'on
bs expose a la chabur, et ib peuvent contenir un produit tres
inflammable, Eviter d'utifiser ou remiser un flacon d'aerosol
proximite de [@pare&
De nombreux articles en plastique peuvent etre deteriores par
la chabur, Conserver bs articles en pBstique a distance des
composants de ['apparei[ susceptibies de devenir tiedes ou
chauds, Ne pas laisser des articles en plastique sur la table
de cuisson; un article en plastique trop proche de I'event du
four ou d'un bn:deur allume pourrait s'amollir ou fondre,
Pour eliminer le besoin d'atteindre quelque chose par-dessus
les brQburs de surface, il est preferable qu'il n'y ait aucune
armoire de cuisine directement au-dessus de I'appareil, S'il y
a une armoire, on ne devrait y remiser que des articles peu
frequemment utilises et capables de resister a la chaleur
emise par I'appareil, La temperature pourrait etre excessive
pour certains articles, comme liquides volatils, produits de
nettoyage ou flacons d'aerosol,
En cas d'incendie
[nterrompre [e fonctionnement de ['apparei[ et de [a hotte de
ventilation pour minimiser le risque d'extension des fiammes,
Eteindre les fiammes, pub mettre la hotte en marche pour
evacuer la fumee et Fair vicie,
, Table de caisson : Utfliser un couverde ou une plaque
biscuits pour etouffer bs fiammes d'un feu qui se declare
darts un ustensib de cuisine,
NE JAMAmS saisir ou d@Bcer un ustensib de cuisine
enfiamm&
, Fear : Fermer la porte du four pour etouffer bs fiammes,
Ne pas projeter de [eau sur un feu de graisse, Utiliser du
bicarbonate de sodium ou un extincteur a mousse ou produit
chimique sec pour eteindre bs fiammes,
S curit6 pour enfants
enfantS Peuvent s!nt_resser, Un enfant tentant de grimper
subiEde graves bbssures.
NE JAMAIS iaisser des enfants seuis ou sans supervision
Iorsque I'appareil est en service ou encore chaud,
NF JAMAIS laisser un enfant s'asseoir ou se tenir sur une
partie quelconque de I'appareil, II pourrait se blesser ou se
brQler,
II est important d'enseigner aux enfants que la cuisiniere et les
ustensiles places dessus ou dedans peuvent etre chauds,
Laisser refroidir les ustensiles en un lieu sQr, hors d'atteinte
26
des enfants. II est important d'enseigner aux enfants qu'un
appareiI mdnager n'est pas un jouet, et qulb ne doivent
toucher aucune commande ou autre composant de I'appareiI.
FamiJiarisation avee J'appareiJ
NE JAMAIS utHiser la porte de four comme tabouret/siege!
escabeau: ced pourrait faire basculer I'appareil et entrainer
dommages corporals serieux.
NE JAIVlAIS utHber la cubJniere comme source de chal euH
pour le chauffage de Japiece. Sinon. un empoisonnement au
monoxyde de carbone pourrait s'ensuivre ainsi qu'une
surchauffe du four.
NE JAMAIS recouwer les fentes, ouvertures ou passages
de la sob de four ni la grille toute entiere avec un materiau
comme du papuerd'aluminium. Sinon, la circulation de I'ar
dans le fouu sera entravee et donc entrainer un
empousonnement au monoxyde de carbone. Le papier
d'alummium peut aussi empnsonner de la chaleur et
entrdner un risque d'incendie.
NE JAMAIS obstruer la circulation de I'air de combustion et
de ventilation au niveau de r@ent de four ou des entrees
d'air. Sinon. I'air ne parvient pas correctement aux brOburs
et donc cda peut poser un risque d'empoisonnement au
monoxyde de carbone.
L'event de four est situe a I'arriere de la surface de cuisson.
Evitez de toucher b voisinage de I'event de four Iorsque b four
est utilise et pendant plusieurs minutes apres I'arret du four.
Certains composants de I'event et la zone voisine peuvent
devenir suffisamment chauds pour provoquer des bn31ures.
Apres I'arret du four, ne touchez pas I'event de four ou la zone
voisine avant que ces composants aient pu se refroidir
suffisamment.
Autres surfaces potentielbment chaudes : table de cuisson,
zones faisant face a la table de cuisson, event de four, zone
voisine de I'event, porte de four et zone voisine de porte et de
hublot.
Ne touchez pas I'ampoule chaude du four avec un linge
humide; le choc thermique pourrait la briser, Si tel est le cas,
d@ranchez I'appareil avant de retirer I'ampoule pour eviter
une decharge electrique,
Ne remisez pas des aliments ou ustensiles de cuisine sur la
table de cuisson ou dans les fours,
Cuisson et s eurit6
Placer toujours un ustensib sur un br0bur de surface avant de
I'dlumer. Veilbr a bien connatre la correspondance entre bs
boutons de commande et bs brQburs. Veilbr a allumer b
br0bur correct et verifier que b bn_bur s'dlume
effectivement. A la fin de la periode de cuisson, eteindre b
brQbur avant de retirer rustensib, pour eviter une exposition
aux fiammes du brQbur.
Veiller a toujours ajuster correctement la taille des flammes
pour qu'elles ne depassent pas sur la peripherie de I'ustensile,
Des flammes de trop grande taille sur un brSleur sont
dangereuses, elles entrainent un gaspillage d'energie et elles
peuvent faire subir des dommages a rustensile, a I'appareil ou
I'armoire situee au-dessus,
NE JAMAiS iaisser un brQieur de surface aiiume sans
surveillance, particulierement avec une puissance de
chauffage elevee ou Iors d'une operation de friture, Un
d@ordement pourrait provoquer la formation de fumee et des
produits gras pourraient s'enflammer, Eiiminer des que
possible les produits gras renverses, Ne pas utiliser une
puissance de chauffage elevee pendant une periode
proiongee,
NF JAMAiS faire chauffer un recipient non ouvert dans ie
four ou sur un brOleur de surface; I'accumulation de pression
dans le recipient pourrait provoquer son eclatement et de
graves dommages materiels ou corporels,
Utiliser des maniques robustes et seches, Des maniques
humides peuvent provoquer la formation de vapeur brQlante,
Ne jamais utiliser un torchon a vaisselle ou autre article textile
la place de maniques; un tel article pourrait trainer sur un
brQleur et s'enflammer, ou accrocher un ustensile ou un
composant de I'appareil,
Laisser toujours refroidir un recipient d'huile de friture chaude
avant de tenter de le deplacer et le manipuler,
Ne pas laisser la graisse de cuisson ou autre materiau inflam-
mable s'accumuler dans ou pres de I'appareil, de la hotte ou
du ventilateur de I'event, Nettoyer frequemment la hotte pour
empecher route accumulation sur la hotte elle-meme ou sur le
filtre, Lots du flambage d'aliments sous la hotte, mettre le
ventilateur en marche,
NE JAMAJS porter, Iors de I'utilisation de I'appareil, des
vetements fairs d'un materiau inflammable, ou amples, ou
Iongues manches, De tels vetements peuvent s'enflammer ou
accrocher la poignee d'un ustensile,
27
Placertoujours[esgrillesa[apositionapproprieedans[efour
[orsque[efourestfroid.Fairecouiisser[agrillevers['exterieur
avantd'ajouterouenbverunplat;utiiiserpourceiaune
maniquerobusteetseche.Eviterd'introduire[amaindarts[e
fourpouryplacerouretirerunplat.S'i[estn@essairede
d@iacerunegrille[orsqu'eiieestchaude,utiiiserunemanique
seche.Veiiieratoujoursarreter[efoura [afin d'uneperiode
decuisson.
Ouvrirtoujours[aportedufourtresprudemment.Laisser[air
chaudoulavapeurs'@happeravantderetirer/introduireun
plat.
AVERTmSSEMENT: Metspr@ares: Respecterlesinstruc-
tionsdufabricant.Silecontenantoulecouverdeenplastique
d'unmetssurgeleseddormeouestendommagedurantla
cuisson,jeterimmediatementlerecipientetsoncontenu.Les
alimentspourraientetrecontamines.
NEJAMNSgarnirlasoleouunegrilledufouravecdela
feuilled'aluminium.Cecipourraitsusciterunrisquedechoc
electriqueoud'incendie,ouuneautredeteriorationde
I'appareil.Utiliserdelafeuilled'aluminiumuniquementselon
lesinstructionsdeceguide.
Ustensimes et s6cutit6
Utiliser des ustensibs a fond plat comportant une poignee
qu'on peut facilement saisir et qui reste froide. Eviter d'utiliser
un ustensile instable ou ddorme, qui pourrait facilement
basculer, ou dont la poignee est mal fixee. Eviter egalement
d'utiliser des ustensiles de petite taille comportant une
poignee Iourde; ces ustensibs sont generalement instabbs et
peuvent facibment basculer. Un ustensile Iourd Iorsqu'il est
rempli peut egalement 6tre dangereux Iors des manipulations.
Veiller a utiliser un ustensile de taille suffisante pour que le
contenu ne risque pas de deborder. Ceci est particulierement
important pour un ustensile rempli d'huile de friture. Verifier
que la taille de I'ustensib est suffisante pour qu'il puisse
recevoir les produits alimentaires a cuire, et absorber
I'augmentation de volume suscitee par I'ebullition de la
graisse.
Pour minimiser les risques de br01ure,d'infiammation de
matieres et de renversement par contact non intentionnel avec
un ustensile, ne pas orienter la poignee d'un ustensile vers un
br01euradjacent; orienter toujours la poignee d'un ustensile
vers le cOte ou I'arriere de I'appareil; ne pas laisser non plus la
poignee d'un ustensile deborder a I'avant de I'appareil, o0 un
jeune enfant pourrait facilement la saisir.
Veiller a ne jamais laisser le contenu liquide d'un ustensile
s'evaporer completement; I'ustensile et I'appareil pourraient
subir des dommages.
Appliquer les instructions du fabricant Iors de I'emploi d'un
sachet pour cuisson au four.
Seuls certains materiaux en verre, vitroceramique, ceramique,
ou certains ustensiles vitrifies/emailles peuvent etre utilises sur
la table de cuisson ou darts le four sans risque de bris sous
I'effet du choc thermique. Observer les instructions du
fabricant Iors de I'utilisation d'un ustensile en verre.
La s@urite de fonctionnement de cet apparei[ a ere testee
I'aide d'ustensibs de cuisine conventionnels. Ne pas utiliser un
ustensib ou accessoire qui n'est pas sp@ifiquement
recommande darts ce guide. Ne pas utiliser de couvre-brQbur,
gril place sur la table de cuisson ou systeme de convection
additionnel. L'utilisation d'un dispositif ou accessoire qui n'est
pas expressement recommande dans ce guide peut degrader
la securite de I'appareil ou sa performance, ou reduire la
Iongevite des composants.
Nettoyage et s curit
Arreter toutes les commandes et attendre le refroidissement
de tousles composants avant de les toucher ou d'entre-
prendre le nettoyage. Ne pas toucher la grille d'un brQleur ou
la zone voisine avant que ces composants aient pu suffisam-
merit refroidir.
Exercer une grande prudence Iors du nettoyage de I'appareil.
Travailler prudemment pour eviter des brQlures par la vapeur
en cas d'utilisation d'un chiffon ou d'une @onge humide Iors
de I'elimination d'un produit renverse sur une surface chaude.
Certains produits de nettoyage peuvent generer des vapeurs
nocives Iorsqu'on les applique sur une surface chaude.
Four autor|ettoyar|t
Ne laisser aucune nourriture ni ustensile de cuisine, etc,
dams le fo0r !ors d 0he operat!on d autonettoyage,
Nettoyer uniquement les pieces mentionnees dans ce guide,
Ne pas nettoyer le joint de porte; le joint joue un rob essentiel
quanta I'etancheite, Ne pas frotter, endommager ou deplacer
le joint, Ne pas utiliser de produit de nettoyage du four dans
le four autonettoyant ou sur les zones voisines,
Avant d'ex@uter une operation d'autonettoyage, retirer la
lechefrite, les grilles du four et les autres ustensiles, et eliminer
par essuyage tout exces de residus renverses pour @iter la
formation de fumee ou I'inflammation de ces residus,
28

II est normal que la surface de cubson devienne chaude
durant une operation d'autonettoyage; par consequent, dviter
de toucher la surface de cubson durant Fautonettoyage,
Avertissement et avis
important pour la s6curit6
La ioi caiifornienne <_Safe Drinking Water and Toxic Enforce-
ment Act >>de 1986 {proposition 65} stipule la publication par
le gouverneur de la Californie d'une liste de substances que
I'etat de Californie considere comme cancerigenes ou
dangereuses pour le systeme reproducteur, et impose aux
entreprises commerciales I'obligation de signaler a burs
clients les risques d'exposition a de telles substances,
Les utilisateurs de cet appareil peuvent etre exposes a une
faible concentration de certaines substances figurant dans la
liste mentionnee ci-dessus, dont benzene, formaldehyde et
suie, du fait de la combustion incomplete du gaz naturel ou du
gaz de petrole liquefie, Pour minimiser la combustion
incomplete, veiller ace que les brQleurs soient parfaitement
regles, Pour minimiser I'exposition aces substances, veiller
bien evacuer les gaz de combustion a I'exterieur,
Nous informons les utilisateurs de cet appareil que Iors d'une
operation d'autonettoyage, iis peuvent etre exposes a une
faible concentration de certaines substances figurant dans la
liste mentionnee ci-dessus, dont le monoxyde de carbone,
Pour minimiser [exposition, veiller b ce que la piece 08 se
trouve le four soit convenablement aeree durant une operation
d'autonettoyage par I'ouverture d'une fenetre ou d'une porte,
AViS iMPORTANT - OISEAU× FAMIMERS : Les oiseaux ont
un systeme respiratoire tres sensible, Ne pas garder un oiseau
famiiier dans ia cuisine ou dans une piece o8 ii pourrait etre
expose aux fumees, Les fumees emises durant une operation
d'autonettoyage peuvent etre dangereuses ou morteiies pour
un oiseau, de meme que ies fumees emises iors du chauffage
excessif de graisse, huile, margarine, et du chauffage excessif
dans un ustensile a revetement antiadhesif,
Conserver ces instructions pout consultation ult tieute
29
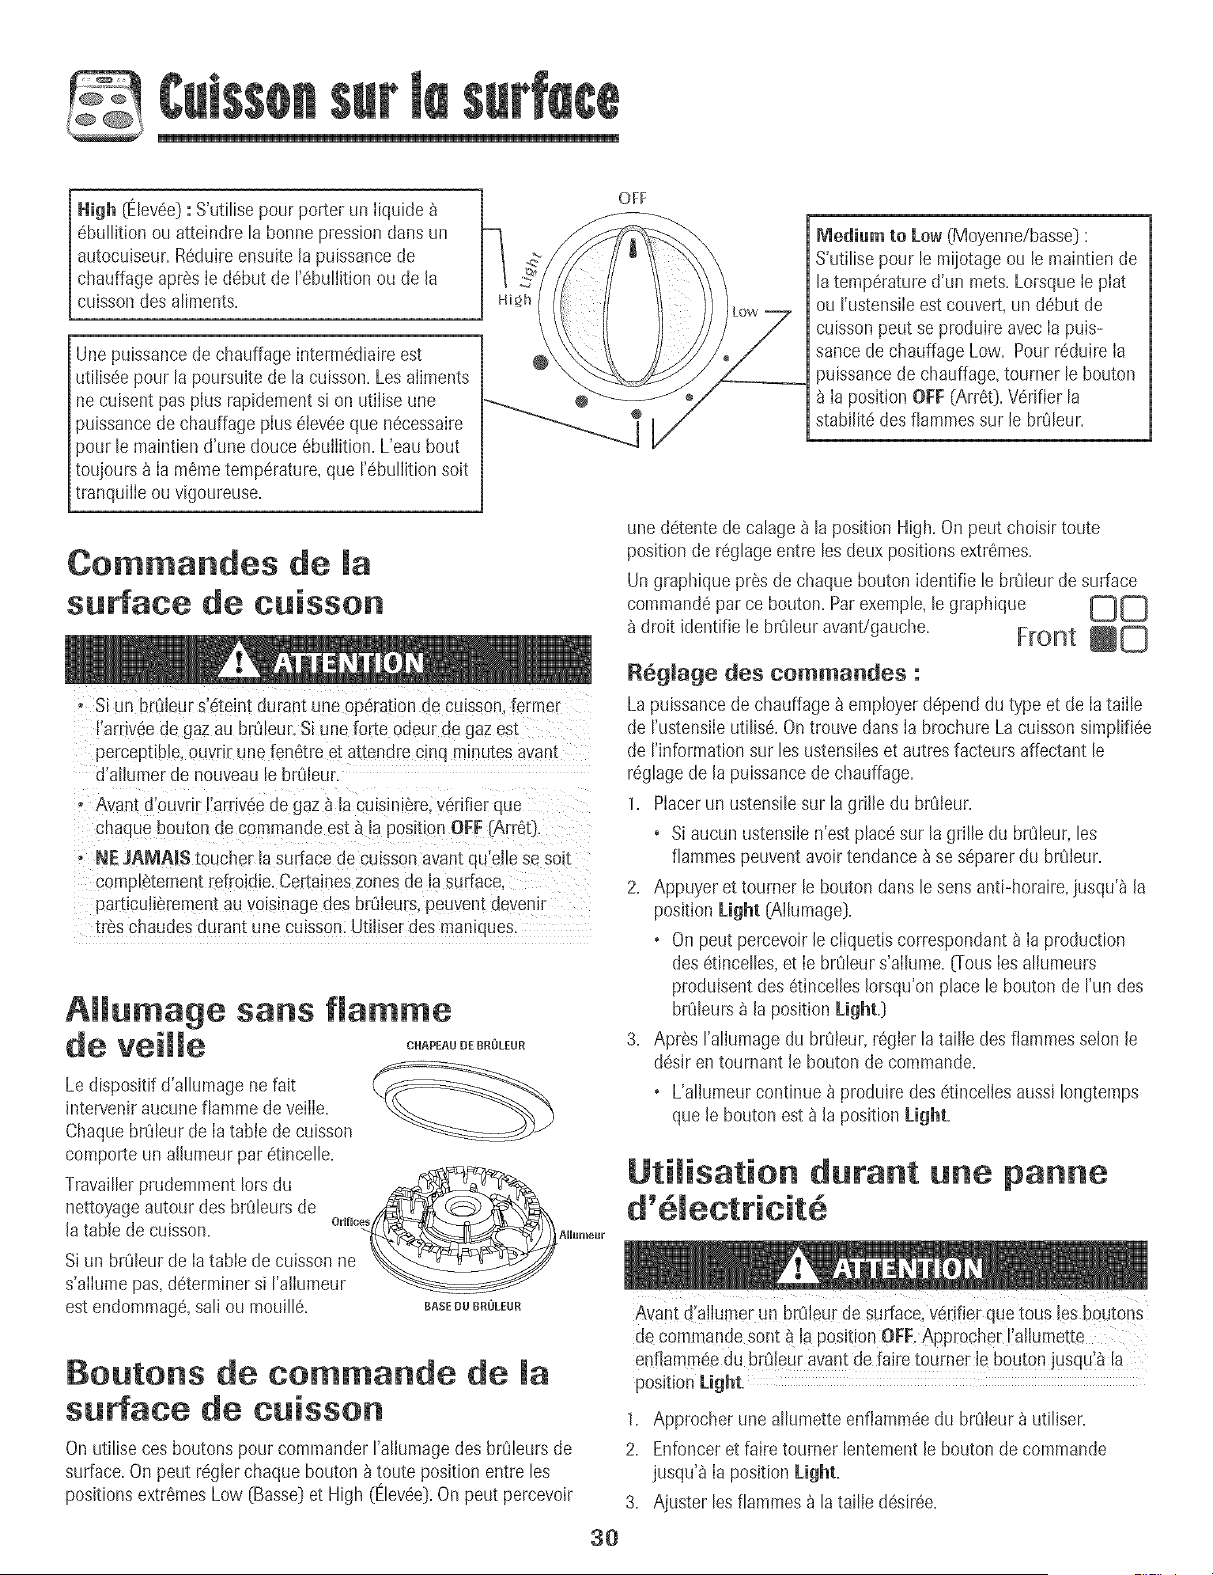
High (Elev6e): S'utilisepour porter un Iiquide
6bulNtionou atteindrela bonne pressiondans un
autocu+seur.R6duireensuite[a puissancede
chauffage aprSsle d6but de r6buliition ou de [a
cuissondes aliments.
Unepuissancedechauffage interm6diaireest
utiliseepour [a poursuitede [acuisson.Lesaliments
necuisent pas plus rapidementsi on utiiiseune
_uissancede chauffageplus eJeveeque necessaire
_ourle maintiend'une douce 6buiiition.L'eau bout
:oujours_ [a memetemperature,que rebuIiitionsoit
tranquiJieou vigoureuse.
OFF
Paediumto Low (Moyenne/basse]:
S'uti[isepour [e mijotageou [e maintiende
latemp6ratured'un mets.Lorsque[e plat
ou I'ustensiieest couvert,un debut de
cuissonpeut se produireavec[a puis-
sancede chauffageLow. Pourreduire[a
puissancede chauffage,toumer le bouton
la positionOFF(Arr60.Verifier [a
stabi[ltedes fiapamessur [e bffJleur.
Commandes de [a
surface de cuissor|
- Si un brCdeurs'eteintdurant uneop6rationde cu ;son.fermer
I'arriveedegaz au braleur.Si une forte odeur de gaz es_
perceptible+ouvrir une fenetre et attendrecmq minutesavam
d'atlumerae nouveaule brOieur.
- Avant d'ouvrir ['arriv6ede gaz _ [a cuisini_re,verifierque
chaquebouton ue commandeest _ [a posit+onOFF[Arr_tj
+ NEJANIA[$ toucher la surfacede cuissonavantqu'eile se so+t
comDe[emen_re_roidie,Cer[aineszonesae ]asurface
part+culi_rementauvolsmagec_esbrt3ieurs,peuventdeveni+
treschaudesdurant unecuisson.Ut+liserdes maniqdes,
AHumage sans f[amme
de veiJJe +++°+o°+o
Ledispositifd'allumagene fait
interveniraucune fiammede veille.
ChaquebrCJIeurde Iatable de cuisson
comporte un alhmeur par etinceIIe.
Travai[[erprudemrnent[orsdu
nettoyageautour des bffJ[eursde ,_ (-_ _@_X_
[atable decuisson. °'m__.m+
Si un brOleurde latable de cuisson ne _..__
s'ailume pas,determinersi ['a[lumeur
est endommage,sail ou mouille. BASEU°BROLEUR
Boutor|s de commande de [a
surface de cuissor|
OnutiIise ces boutons pour commanderI'aIiumagedes brOIeursde
surface.On peut regIerchaquebouton b toute positionentre les
positionsextrSmesLow (Basse)et High (Elevee).On peut percevoir
une detentedecalage _ [a positionHigh. On peut choisir toute
positionde regIageentre [es deux positionsextr6mes.
Un graphique pres de chaquebouton identifie [e brOleurde surface
commandepar ce bouton.Parexemple,le graphique _
droit identifie[e bffJ[euravant/gauche. Front mD
R6g[age des commandes :
La puissancede chauffage_ employerdependdu type et de [ataii[e
de rustens+ieutiIise+On trouve dans[a brochureLa cuisson simpIifiee
de rinformation sur [esustensi[eset autresfacteurs affectant [e
regIagede [a puissancede chauffage+
1+ Piacerun ustensiIesur [agrille du brOieur+
• Si aucun ustensiJen'est placesur [a grille du brOIeur,[es
fiammespeuventavoir tendance _ se separerdu brOleur+
2+ Appuyer et toumer [e boutonclans[e sensanti-horaire,jusqu'_ [a
positionLight (Ailumage].
. Onpeut percevoir [e ciiquetiscorrespondant_ [a production
desetinceIIes,et [e brOIeurs'aiIume+O-ous[esaIlumeurs
produisentdes 6tincel[es[orsqu'onplace [e bouton de run des
br_ileurs_ la positionLight.[}
3+ Apr6s raIiumagedu brOleur,rSgler[a taiIie des flapapaesselon [e
desJren toumant le bouton de commande+
. L'aIJumeurcontinue _ produire des etincellesaussJ[ongtemps
que[e boutonest 8 [a positionLight+
Uti[isation durar|t ur|e parme
Avant dlaJiumcrun brOleurdesurface,v6dfier quetous Jesboutons
de commandesont _ la POsitionOFF,Approch#_Iialiumette
enfiammeedu br_Jleuravant de faire toutnet !e bouton jusqui_ [a
pos+tionLight.
1. Approcher uneallumette enflammeedu brOleur_ utiliser.
2. Enfonceret faire toumer [entementle bouton de commande
jusqu'a [a positionLight.
3. Ajuster [esfiammes_ [atailie desiree.
30
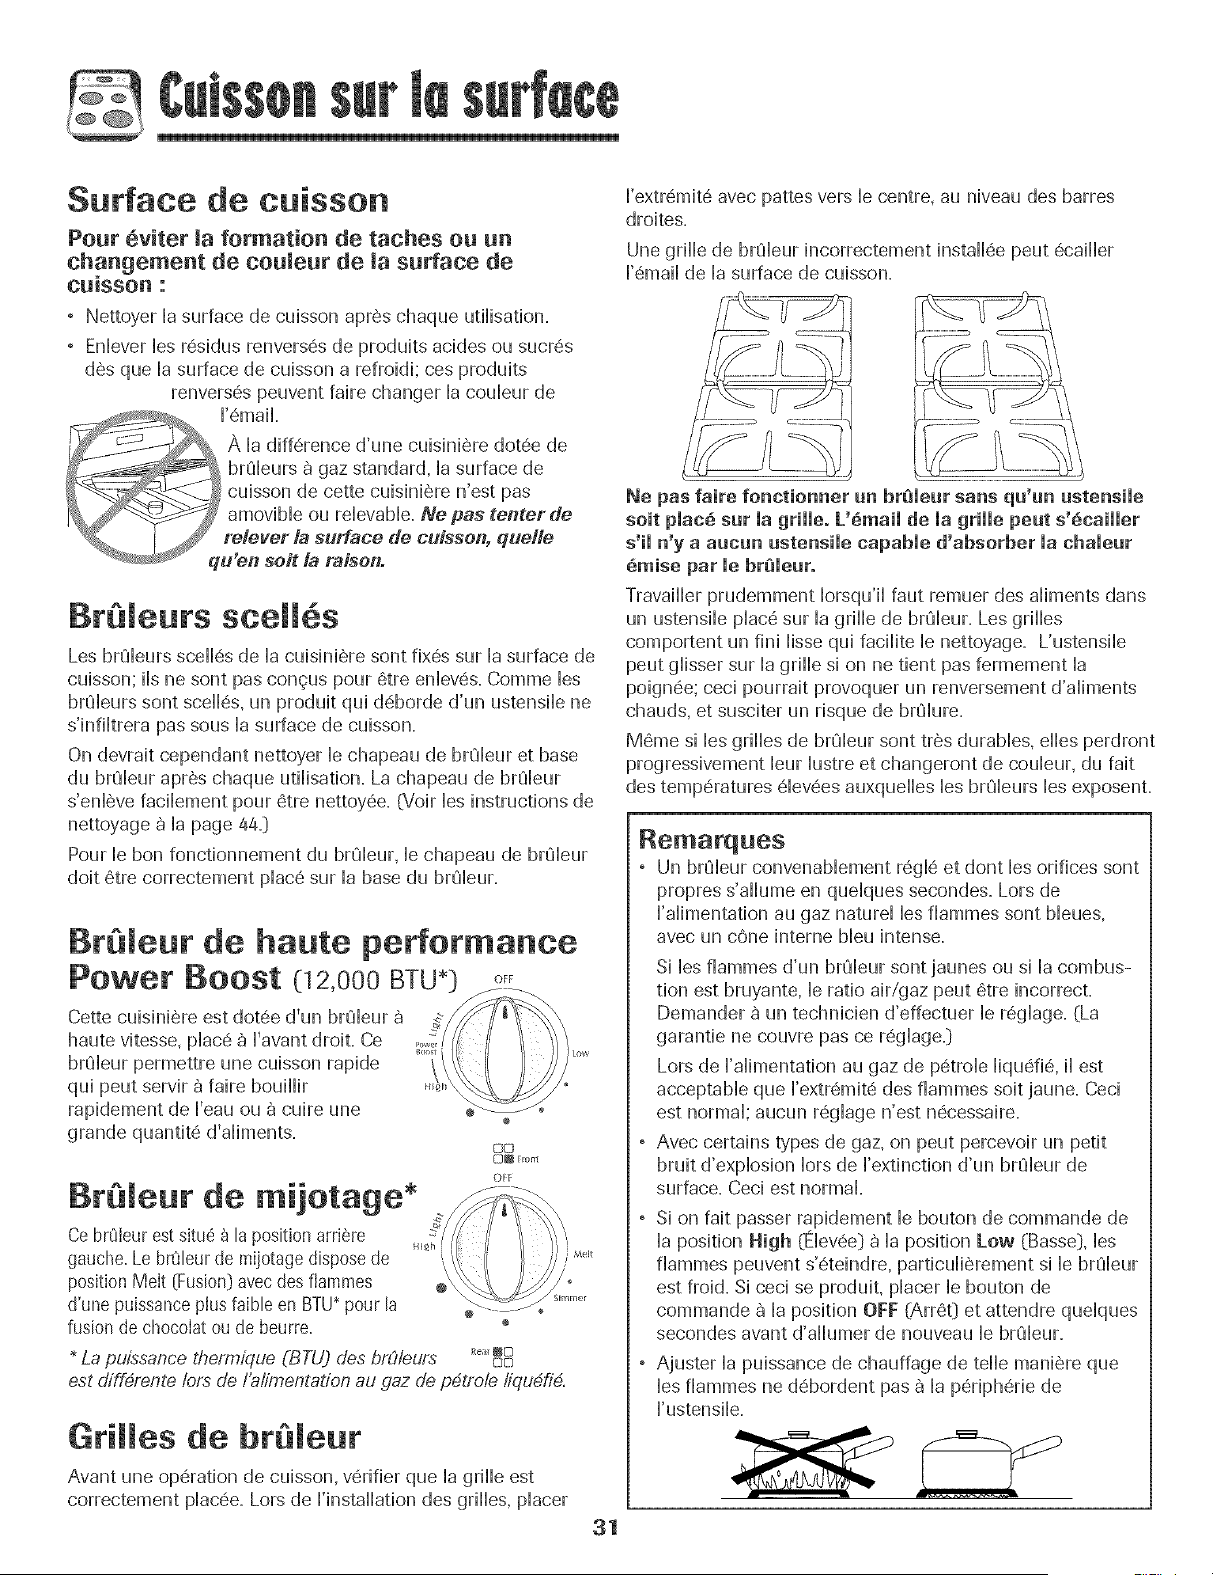
@
Surface de cuisson
Pour 6viter ia formation de taches ou un
changement de couleur de la surface de
cuisson :
° Nettoyer ia surface de cuisson apr6s chaque utiiisation•
° Enlever les r6sidus renvers6s de produits acides ou sucr6s
d6s que la surface de cuisson a refroidi; ces produits
renvers6s peuvent faire changer la couleur de
i'6mail.
qu'en seit /a raison.
Br leurs scell6s
Les brqleurs scell6s de la cuisini6re sont fix6s sur la surface de
cuisson; ils ne sont pas congus pour 6tre enlev6s• Comme les
brqleurs sont scell6s, un produit qui d6borde d'un ustensile ne
s'infiltrera pas sous la surface de cuisson.
On devrait cependant nettoyer le chapeau de brSleur et base
du brqleur apr6s chaque utilisation. La chapeau de brqleur
s'enl6ve facilement pour 6tre nettoy6e• {Voir ies instructions de
nettoyage _ la page a4.}
Pour le bon fonctionnement du brqleur, Uechapeau de brqleur
dolt 6tre correctement plac6 sur la base du brqleur.
Bt eur de halite performance
Power Boost (12,000 BTU*)
Cette cuisini6re est dot6e d'un br¢Jleur
haute vitesse, plac6 _ I'avant droll Ce
brSleur permettre une cuisson rapide
qui peut servir 8 faire bouillir
rapidement de I'eau ou 8 cuire une
OD
OFF
Br leur de mijotage *
Cebr0bur estsitu_ _ la positionarri6re
gauche.Le brCJleurde mijotagedisposede
positionMelt (Fusion)avecdes flammes
d'une puissanceplus faible en BTU_pour la e
fusion de chocoIatou de beurre.
La p_;ssance thermique (BTU) des brC//eu'rs _so
est differente /ors de I'alimentadon au gaz de p#troie /iqu#fi#.
Grilles de br@leur
Avant une op6ration de cuisson, v6rifier que ia grille est
correctement plac6e. Lots de I'installation des grilles, placer
31
I'extr6mit6 avec pattes vers le centre, au niveau des barres
droites.
Une grille de br6Jleurincorrectement install6e peut 6cailler
1'6mailde la surface de cuisson.
Ne pas faire fonctionner un breleur sans qu'un ustensiie
soit plac_ sur la grille. L'_mail de la grille peut s'_cailler
s'ii n'y a aucun ustensiie capable d'absorber ia chaie_r
_,_ise par le br_le_r.
Travailler prudemment Iorsqu'il faut remuer des aliments dab
un ustensile plac6 sur la grille de br¢aleur•Les grilles
comportent un fini lisse qui facilite le nettoyage• L'ustensile
peut glisser sur la grille si on ne tient pas fermement la
poign6e; ceci pourrait provoquer un renversement d'aliments
chauds, et susciter un risque de br¢Jlure•
M6me si les grilles de br_leur sont tr6s durables, dies perdront
progressivement bur lustre et changeront de couleur, du fait
des temp6ratures 6levees auxquelles les br¢aleursles exposenL
Remarques
, Un br8leur convenablement r6gl6 et dont les orifices sont
propres s'allume en quelques secondes. Lots de
I'alimentation au gaz naturel les flammes sont bleues,
avec un cone interne bleu intense•
Si les fiammes d'un breleur sont jaunes ou si la combus-
tion est bruyante, le ratio airigaz peut 6tre incorrect•
Demander a un technicien d'effectuer le r6glage. (La
garantie ne couvre pas ce r6glage.}
Lots de I'alimentation au gaz de petrole liqudi6, il est
acceptable que I'extr6mit6 des fiammes soit jaune. Ceci
est normal; aucun r6glage n'est n6cessaire.
, Avec certains types de gaz, on peut percevoir un petit
bruit d'explosion Iors de I'extinction d'un br6aleurde
surface• Ceci est normal
, Si on fait passer rapidement le bouton de commande de
la position High (Elev6e} _ la position Low (Bass@, les
flammes peuvent s'6teindre, particuli6rement si le brSleur
est froid. Si ceci se produit, placer le bouton de
commande _ la position OFF (Art60 et attendre quelques
secondes avant d'allumer de nouveau le brSleur.
, Ajuster la puissance de chauffage de telle mani6re que
les flammes ne d6bordent pas 8 la p6riph6rie de
I'ustensile.
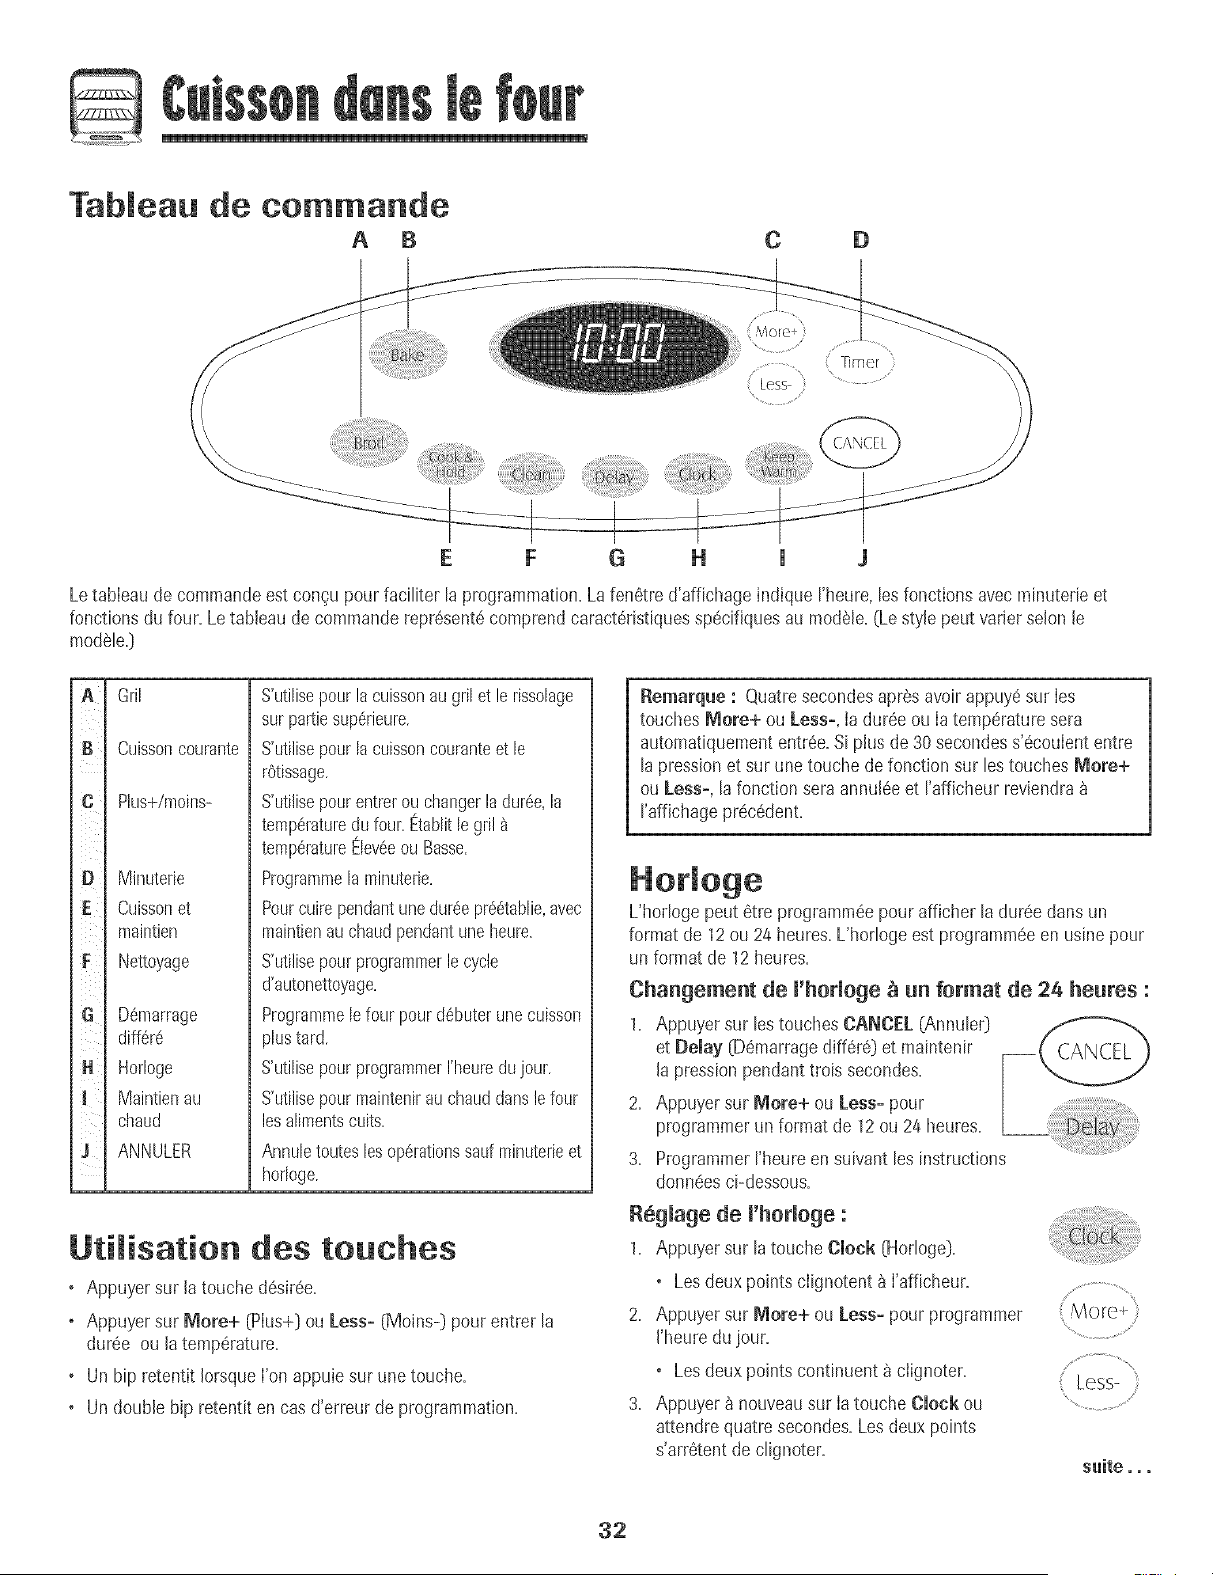
Tableau de eemmande
A B C D
......... Timer
Less : ..............
H l J
Letableaude commandeestcongu pour faciliter la programmation.Lafen6tre d'affichageindique I'heure,lesfonctions avecminuterie et
fonctions du four. Le tableau de commanderepr6sent6comprendcaract@istiquessp6cifiquesau modSle.(LestyJepeut varJerscion Je
mo@le.)
A
B ¸
D
E
iiii_
G
H ¸
J
qrJl
Cuissoncourante
Plus+/moins-
Minutefie
CuJssonet
maJntien
Nettoyage
D6marrage
diff6r6
Horloge
Maintienau
chaud
ANNULER
S'utilisepourla cuissonau grilet lerissolage
surpattiesup@ieure.
S'utilisepourla cuissoncouranteet le
rOtissage.
S'utilisepourentrerouchangerladur@,la
temp@aturedu four. Etablitle gril
temperatureElev6eou Basse.
Programraela minuterie.
Pourcuirependantunedur6epr6_tablie,avec
maintienauchaudpendantuneheure.
S'utilisepout programmerlecycle
d'autonettoyage.
Programmele four pourd_buterunecuisson
plustard.
S'utilisepourprogramraerI'heuredujour.
S'utilisepourmaintenirau chauddansle four
lesalimentscuits.
Annuletouteslesop6rationssaufminuterieet
horloge.
Utilisation des touches
o Appuyersur latouche d6sir6e.
o Appuyersur More+ (Plus+)ou Less- (Moins-) pour entrer la
dur6e ou la temp6rature.
o Un hip retentit IorsqueI'on appuiesur une touche.
o Un double hip retentit en casd'erreur de programmation.
Remarqae : Quatresecondesapr6s avoirappuy6sur Ies
touches More+ ou Less-, ia dur@ ou la temperaturesera
automatiquemententr6e.Si plus de 30secondess'6coulententre
la pressionet sur unetouche defonction sur les touches More+
ou Less-, la fonction seraannul6eet I'afficheur reviendra
I'affichagepr6c6dent.
L'hodoge peut 6tre programm6epour afficher [a dur6edans un
format de 12ou 24 heures.Uhorlogeest programm6een usinepour
un format de 12heures.
Changement de J'horJoge _ un format de 24 heures :
1. Appuyersur les touchesCANCEL (Annule0
et Delay (DSmarragecliff@8)et maintenir
la pressionpendanttrois secondes.
2. Appuyersur More+ ou Less- pour .......................
programmerunformotde++ou +heures.
3. ProgrammerI'heureen suivantles instructions
donn_esci-dessous.
Reglage de l'horloge :
1. Appuyersur la touche Clock (Horloge).
o Lesdeux points clignotent b I'afficheur. .................................
2. Appuyersur IVlore+ ou Less- pour programmer
J'heuredujour. ".........................
o Lesdeux points cont[nuent _ ciignoter.
Less-
3. Appuyer_ nouveausur latouche CJockou ...........................
attendrequatresecondes.Lesdeux points
s'arrStentdeclignoter.
s,ite,,,
32
LorsqueIe courant #lectrique arriveou apr_s une interruption de
courant,ta derniSreheure avant rintermption de courant va
clignoter.
Pourrappelerrheure dujour torsqu'uneautre fonction de durCe
s'affiche,appuyersur la touche Clock (Hortoge].
L'heure de I'hortogenepout 6tre chancre Iorsquete four a 6t6
programm6pour une cuissonou un nettoyagediffCr6ou pour la
fonction de cuissonet maintien.
Annumation de m'affichage de m'heure :
Si I'onne d@sirepasI'affichagede [heure du jour :
Appuyersur Iestouches CANCEL (Annuler}st
Clock et les maintenirainsi pendanttrois
secondes+L'heure dujour disparaitde
I'afficheur+
Lorsque['affichagede ['heureest annul&
appuyersur [a toucheClock pour afficher
briSvementrheure du jour.
R_affichage de l'heure :
Appuyersur Iestouches CANCELet Clock et les maintenirainsi
pendanttrois secondes+L'heuredu jour rCapparatt_ I'afficheur+
La minuterie peut @treprogrammCe de une minute (0:01] jusqu'_
99 heures et 59 minutes (99:59}+
La minuterie peut 6tre utilis_e independamment de toute autre
activit6 du four, Elle pout 6tre aussi programmee alors qu'une autre
fonction du four est en cours d'utilisation+
La minuterienecommandopas le four.Ellenesort qu'_ #mettre
des hips+
Pregrammatien de la minuterie :
1, Appuyer sur la toucheTimer [Minuterie]. TimCF t
• 0:00s'alhme _ I'afficheur. ........................................
+ Lesdeux pohltsclignotent.
2. Appuyer sur la touche_]ore+ (Plus+}ou less+
(Moins-] jusqu'_ ce que I'heurejuste paraisse
I'afficheur.
•Les deux pohltscontinuent _ clignoter.
3. Appuyer _ nouveausur latouche Timer ou attendre quatre
secondes.
Less-
•Les deux pohltscontinuent _ clignoteret le dCcomptede la
durCecommence.
• La derni_re minute du dCcompte sera affich#e sous forme de
secondes+
4+ A la fin de la durCeprogrammCe,un bip long retentit+
Annulation de la minuterie :
1+ Appuyer sur la toucheTimer et la mahltenirainsi pendanttrois
secondes+
OU
2. Appuyer sur la toucheTimer et reglerI'heure_ 0:00.
Ven'ouillage des commandos
Lestouches peuvent#tre verrouiII_espour des raisonsde s_curit&
nettoyageou pourempSchertoute utilisation non souhait#e+Ellesne
pourront 8tre utiIis#essi elles sontverrouillSes+
Sile four esten cours d'utilisation,les commandesne peuvent 8tre
verrouill_es.
L'heure actuetIedujour restera_ I'afficheur
IorsquelescommandesserontverrouillSes+
Appuyerstir lestouches CANCE[ et Cook &
Hold [Cuissonet maintien] et Ies maintenir
ainsi pendanttrois secondes.[Appuyer
d'abord sur latouche C_NCEL)
D_verrouillage :
Appuyersur lostouches CANCELst Cook & Hold et Ies maintenir
ainsi pendanttrois secondes.(Appuyerd'abord sur latouche
Codes d'a omalie
Les roots BAKE(Cuissoncourante] ou LOCK(Verrouillage)peuvent
cIignoter rapidementb I'afficheurpour pr_veniren casd'erreur ou de
probl8me+Si te! est lecas,appuyersur iatouche CANCEL+Si los
rootsBAKEou LOCKcontinuent b c%noter, d_brancherI'apparei[
Attendrequelquesminutes, puis rebrancherrappareiLSi fun des
rootscontinueb clignoter,d_brancherI'appareilet prendrecontact
avecun r#parateurautoris#+
33
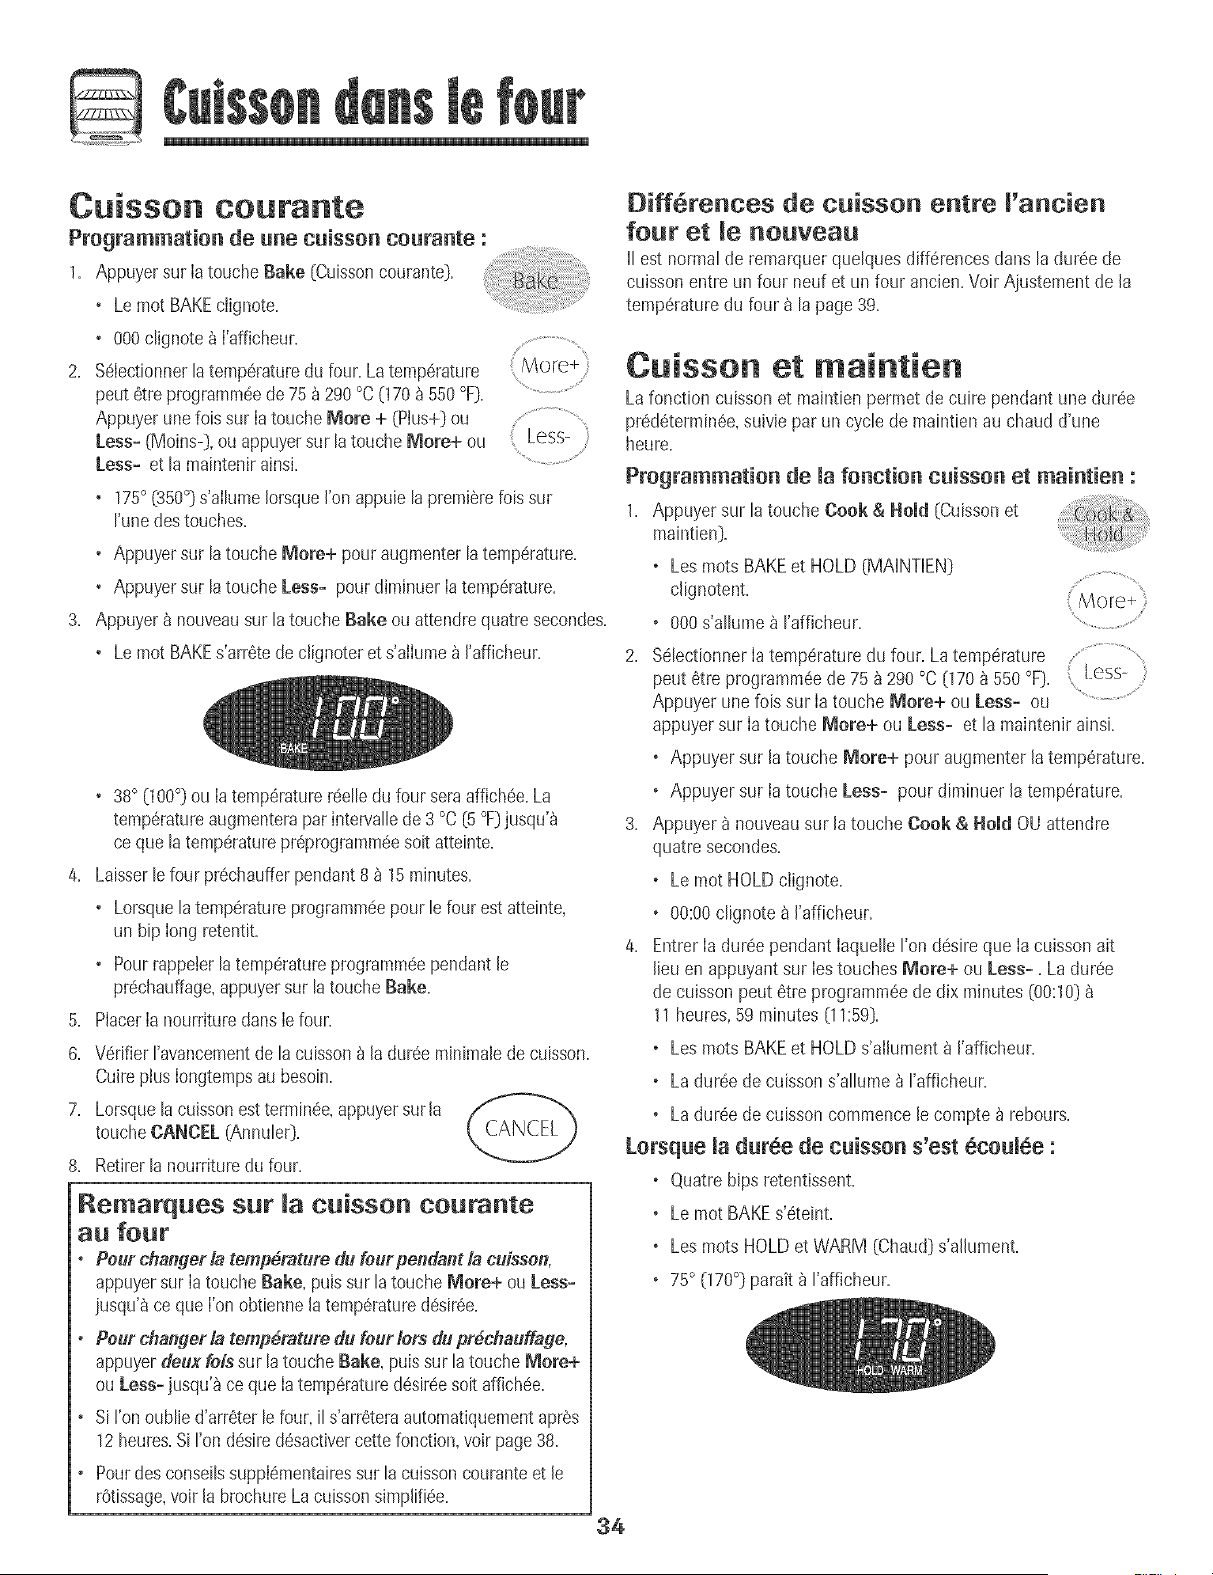
Cuisson courante
Programmatio_ de u_e cuisso_ coura_te :
1. Appuyersur IatoucheBake (Cuissoncourante}.
• Le mot BAKEciignote.
° 000dignote _ I'afficheur.
2. %bctionner B temperaturedu four. La temperature
peut6tre programm@de75_ 290 °C(170_ 550°F}. .................................
Appuyerunefob sur Iatouche More + (Plus+}ou
Less- (Moins-},ouappuyersur la touche More÷ ou Less=
Less- et la maintenirainsL ..............................
• 175° (350°} s'allumeIorsqueI'onappub la premierefob sur
I'unedes touches=
° Appuyersur latouche More+ pouraugmenterlatemperature=
° Appuyersur latouche Less- pourdiminuerIatemperature=
3. Appuyer_ nouveausur latoucheBake ou attendrequatresecondes.
° Lemot BAKEs'arretede clignoteret s'alIume_ I'afficheur.
• 38° (100°} ou Iatemperaturereelle du four seraaffich@.La
temperatureaugmenterapar intervalb de 3 °C {5°F}jusqu'_
ceque latemperaturepreprogrammeesoit atteinte.
4. Laisserlefour pr@haufferpendant8_ 15minutes.
• Lorsquelatemp@atureprogramm@pourle four est atteinte,
un biplong retentit.
• PourrappeJerlatemperatureprogramm@pendantJe
pr@hauffage,appuyersur latoucheBake.
5. PlacerIa nourrituredans Iefour.
6. VerifierFavancementde lacuisson_ ladur@ minimab de cuisson.
Cuireptus Iongtempsau besoin.
7. Lorsquela cuissonest terrain@,appuyersurla
toucheCANCEL(AnnuleO.
8. Retirerlanourrituredu four.
Remarques sot la cuisson courante
all four
• Pourchanger & temperature du four pendant la cuisson,
appuyersur IatoucheBake, puis sur la touche More+ ou Less-
iusqu'_ce que I'onobtbnne latemperature@siree.
• Pourchanger & temperature du four Iofs du pt'_chauffage,
appuyerdeox lois sur la touche Bake, puissur la touche More+
ouLess- jusqu'_ ce queIatemperaturedesir@soit affich@.
• Si !'onoublied'arreterlefour,il s'arreteraautomatiquementapres
12heures.Siron desiredesactivercettefonction,voir page 38.
• Pourdesconseilssupplementairessur la cuissoncouranteet le
rOtissage,voir la brochureLacuissonsimplifi@.
Differences de cuisson entre 'ancien
four et nouveau
II est normalde remarquerquelques differencesclansladur@ de
cuissonentre un four neuf et un four ancien.VoirAiustement de la
temperaturedu four a lapage 39.
Cuisson et maintien
Lafonction cuissonet maintbn permet de cuire pendant unedur@
predeterminee,suivb par un cycle de maintbn au chaud d'une
heure.
Programmation de mafonction cuisso_ et _ai_tie_ :
1. Appuyersur la touche Cook & Hold (Cuissonet
maintien}.
o Les roots BAKEet HOLD (MAINTIEN}
clig notent. £ ore+,
o 000s'a[[ume_ ['afficheur. ..............................................
2. Selectionnerla temperaturedu four. Latemperature ......... ,
pout etre programmeede 75 b 290 °C (170_ 550°F}. tess-
Appuyerune fob sur ia touche More+ ou Less- ou
appuyersur ia touche More+ ou Less- et la maintenirainsL
o Appuyersur latouche More+ pour augmenterlatemperature=
o Appuyer sur ia touche Less- pour diminuer la temperature=
3. Appuyer_ nouveausur la toucheCook & Hold OU attendre
quatre secondes.
o Le mot HOLDciignote.
o 00:00clignote b I'afficheur.
4. Entreria dur@ pendant iaquelle I'ondesire que iacuisson ait
lieu en appuyantsur iestouches More+ ou Less-. La dur@
de cuissonpeut etre programmeede dix minutes (00:10)
11heures,59 minutes (11:59}.
o Les roots BAKEet HOLDs'aihment _ I'afficheur.
o La dur@ de cuissons'allume b I'afficheur.
o La dur@ de cuissoncommencele compte b rebours.
Lorsq_e la d_ree de c_isso_ s'est 8co_lee :
o Quatrebips retentissent.
o Le mot BAKEs'eteint.
o Les roots HOLDet WARM (Chaud}s'alhment.
o 75° 070°} paratt_ I'afficheur.
34
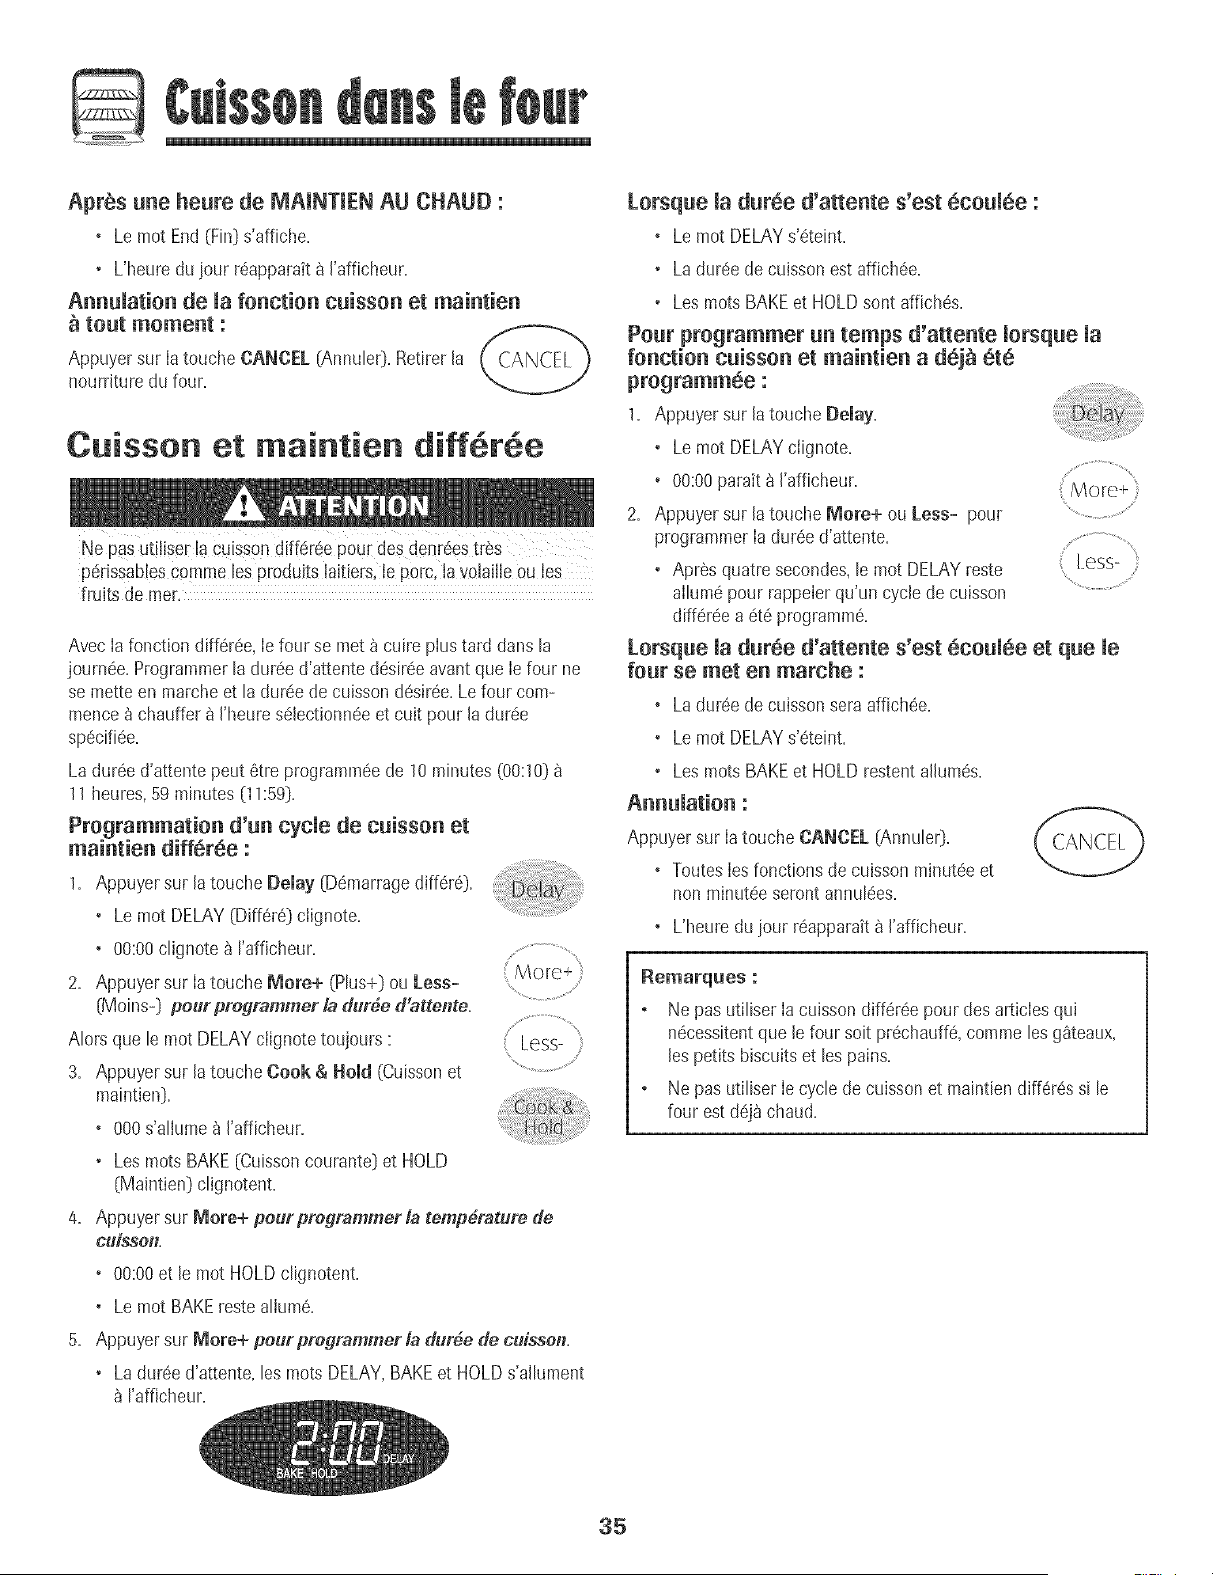
Apr@s une heure de MAJNTIEN AU CHAUD :
• Le mot End(Fin]s'affiche,
• L'heuredu iour r6apparaitb ['afficheur.
Annuiation de [a fonction caisson et maintien
Appuyersur [atouche CANCEl [Annulet]. Ret[rer[a ('_ANCH_
nourriture du four.
Caisson et maintien diff6r6e
Ne pasut!Hser[a caissondiffdr_epour des denr6estrSs
p_rissablescomme bs produits laitiers,!e porc,[avo[ai[[eou [es
fruits de mer.
AvecIa fonctJondiff6ree,Ie four se met _ cuire plustard dans la
journ6e. Programmer[a dur6ed'attentedesir6eavantque [e four ne
se mette en marcheet [a dur6ede cuissond6sir6e.Lefour com-
mence_ chauffera ['heures61ectionneeet cuit pour [a dur6e
sp6cifiee.
La dur6ed'attentepeut 6tre programm6ede 10minutes(00:10}
11heures,59 minutes [11:59].
Programmation d'Un cycJe de cuisson et
maintien differee :
1, AppuyersurlatoucheDelay(D6marragediff6r6),
• Le mot DELAY(Diff6r6)clignote.
• 00:00cJignote_ rafficheur.
2. Appuyer sur [a toucheMore+ (Plus+]ou less- More+
[Moins-] pour programmer la dur6e d'attente.
AJorsque [e mot DELAYoJJgnotetoujours " Less- ,
3. Appuyer sur [a toucheCook & Hold (Cuissonet ...........................................
maintJen}.
• 000s'aJJume_ ['afficheur.
• Lesroots BAKE(Cuissoncourante}et HOLD
(Maintien}cJignotent.
4. Appuyer sur More+ pour profframmeHa temp4rature de
C_[$$On,
• 00:00et le mot HOLDclignotent.
• Le mot BAKErestealIum&
5. Appuyer sur _ore+ pour programmer la dur_e de cuisson.
• La dur_e d'attente, les rootsDELAY,BAKEet HOLDs'alIument
rafficheur.
Lorsq_e la d_ree d'attente s'est 8co,lee :
• Le mot DELAYs'_teint.
Ladur_e decuisson estaffich_e.
• Los rootsBAKEet HOLDsont affich@s.
Po_r programmer _ temps d'attente [orsq_e [a
fo_ctio_ c_isson et mai_tie_ a d_j_ _t_
programmee :
1. Appuyersur [atouche Demay.
• Le mot DELAYciignote.
• 00:00parait _ ['afficheur.
More+
2. Appuyersur [atouche _ore+ ou less- pour
programmer[a durde d'attente.
Apresquatre secondes,[e mot DELAYreste { less-
al[um_pour rappelerqu'un cyclede cuisson ................................
differeea 6t6 programm&
Lorsq_e [a d_r_e d'atteate s'est _con[ee et q_e [e
fo_r se met en marche :
Laduree decuisson seraaffichee.
• Le mot DELAYs'_teint.
• Los rootsBAKEet HOLDrestent alhm@s.
A_nu[atio_ :
Appuyer sur la touche CANCEL (Annulet},
• Toutes [es fonct[ons de cuisson minutee et
non minutee seront annuI_es.
L'heure du]our r_apparak_ ['afficheur.
_e_arques :
Ne pas utiIiserIa cuissondiff6r_e pour des articlesqui
n_cessitentque le four soit pr_chauff& commeles g_teaux,
les petits biscuitset les pains.
Ne pas utiliserIe cycle decuissonet maintiendiffSrSssi le
four estd_j_ chaud.
35
Maintien au chaud
Pourmaintenirau chaud dans le four des alimentscuits et chauds
ou pour r6chaufferpainset assiettes.
Programmation du maintien au chaud :
1. Appuyersur Iatouche Keep Warm
[Maintien au chaud).
• Le motWARM [Chaud)c@note.
• 000 parait _ Fafficheur.
2. %Iectionner IatempSraturede maintien au chaud.
Celle-cipeut 6tre r_gl6ede 63 _90 °C [145
190°F).Appuyer Linefois sur la touche More+
[Plus+Dou Less- (Moins-_)ou appuyersur la
touche Mere+ ou Less_et la maintenir ainsi. ...........................
• 75° (WO°) s'a[lume[orsqueI'onappuie [a premJSrefois sur
['une destouches.
• Appuyersur la touche More+ pouraugmenter la temperature.
• Appuyersur la touche Less- pourdiminuer la temp6rature.
Le motWARMet la temp6ratureserontaffich#s pendantque la
fonction maintienau chaudest active.
Annumation du maintien an chand :
1. Appuyersur la touche CANCEL (AnnulerD.
2. Retirerla nourriture du four.
Remarques sur fonction maintien
au chaud
o Pourobtenir des quaIit_salimentaireset nutdtivesoptimaIes,
lesalimentscuits au four nedoivent pas6tre gardesau chaud
plus de 1 _ 2 heures.
o Pouremp6cherles alimentsde dess6cher,les recouvrirde
papieraiuminium,sansserrer,ou d'un couvercle.
o Pour r_chaufJer des petits pains :
- recouvdrles petits pains depapier aluminiumsans serrer et
les placer aufour.
- appuyersur lestouchesKeep Warm et More+ pour
programmer75 °C[170 °F].
- r6chaufferpendant 12_ 15 minutes.
o Pour r_chaiifJer des assiettes :
- placer deuxpiles de quatre assiettesmaximumdans le four.
- appuyersur lestouchesKeep Warm et More+ pour
programmer75 °C[170 °F).
- r6chaufferpendant 5 minutes,arr6ter Iefour et laisserles
assiettesau four pendantencore 15 minutes.
- n'utiJiserque des assiettespouvant aller au four, _ v6rifier
avecle fabricant.
- ne pas poserdes assiettesti@dessur une surfacefroide,Jes
changementsrapidesdetemp6raturepouvant casser
I'assietteou la fendilJer.
36
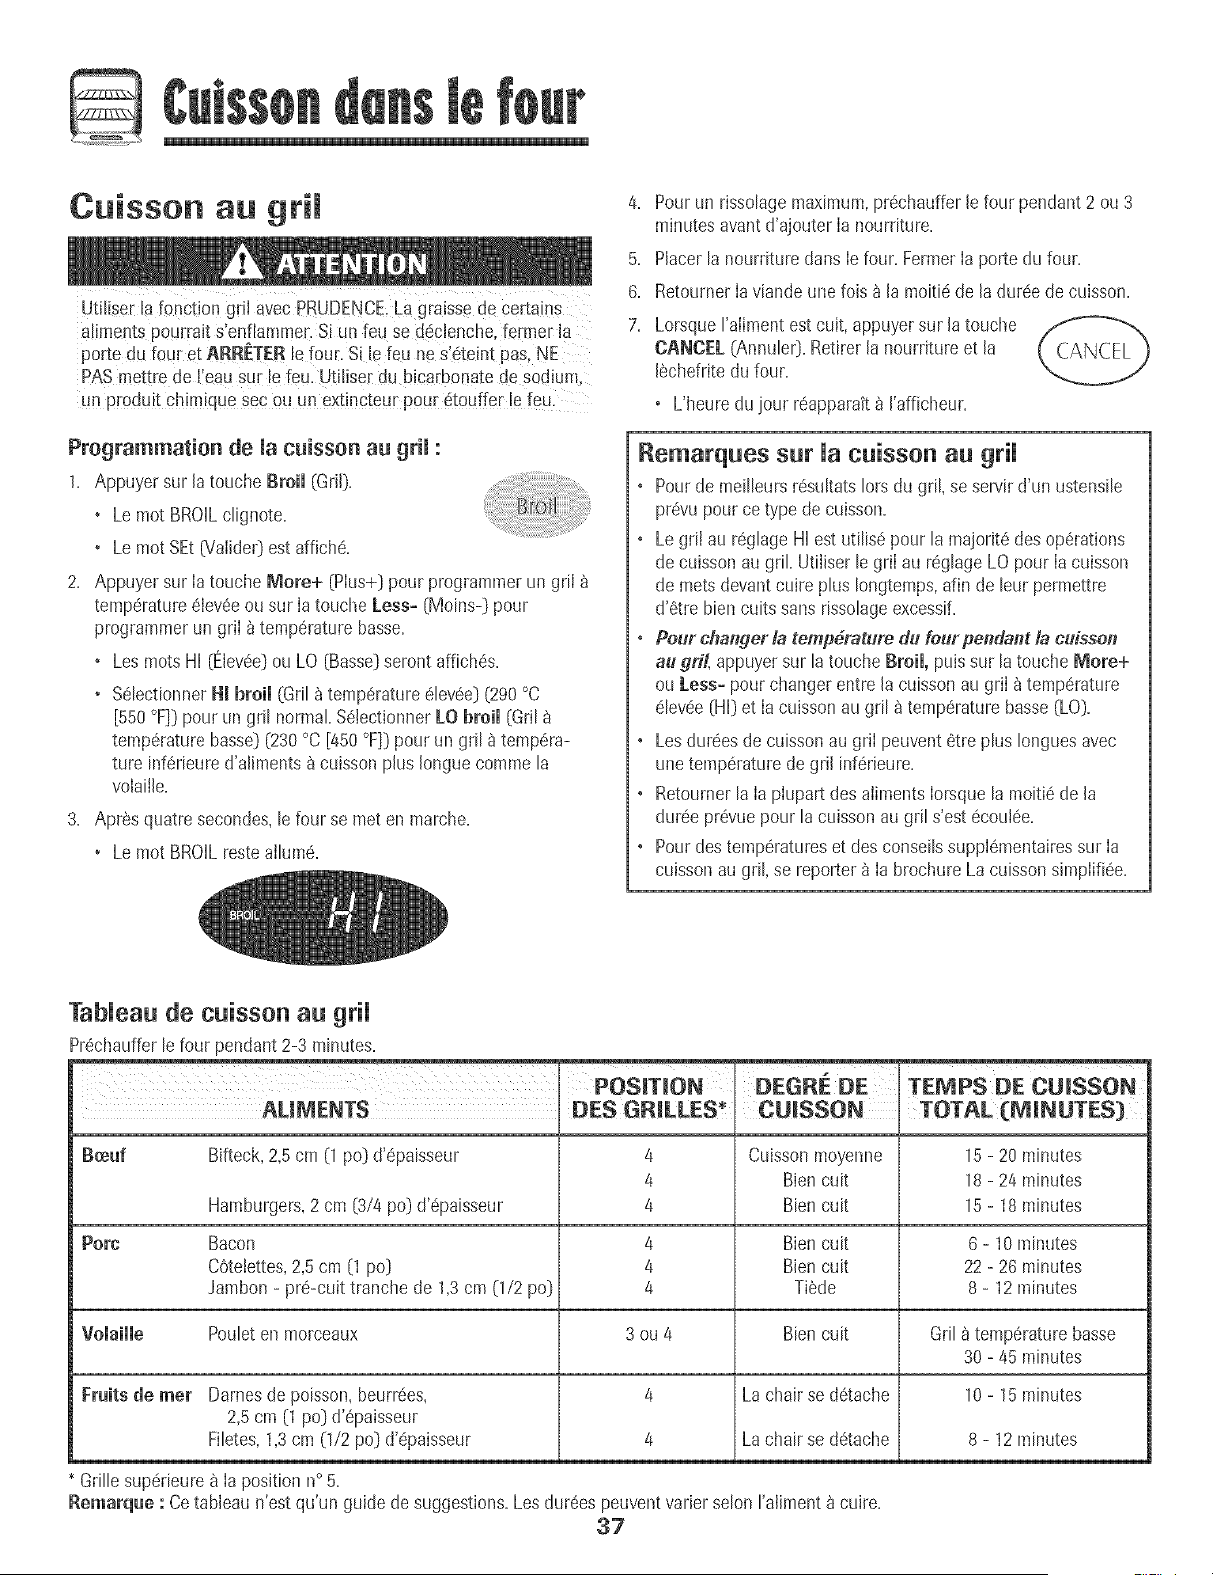
Cuisson au gril
Utfliser [a fonction gril avecPRUDENCELa graissede certains
aliments pourrait s'enfiammer.Si un feu se d4clenche,former [a
porte du four et ARRETERle four. Si iefeu ne s!@teintpas,NE
PAS mettre de %au sw!e feu. Utiliser du bicarbonatede sodium,
un produit chimique sec ou un extincteur pour etouffer [e feu,
Programmation de [a cuisson au gri[ :
1. Appuyersur la touche Broil (Grfl}.
• Le mot BROILdignote.
• Le motSEt 0?aiide0est affichd.
2. Appuyerstir [atouche More+ [Plus+} pour programmerun griI
temperatureeleveeou sur [a touche Less- (Moins-} pour
programmerun gri[ _temperature basso.
•Les rootsHi [Elevee}ou LO (Basso}seront affiches.
• %lectionner HI broil (Gril_temperatureeIevee}[290 °C
[550°F]} pour un gril normal %[ectionner LObroil (Gril
temperaturebasse}(230°C [450°F]} pour un gril _ tempera-
ture inferieured'alimentsa cuissonplus Ionguecomme la
volaiile.
3= Apr6s quatresecondes,[efour se meten marche.
• Le mot BROILreste a%me.
5.
6.
7.
Pourun rissolagemaximum,prechauffer[e four pendant2 ou3
minutes avantd'ajouter [a nourriture.
Placerla nourriture dans [efour=Former[a pore du four.
Retourner[a viandeune fois _ la moitiede la duree de cuisson=
Lorsque['ailmentest cult, appuyersur [a touche
CANCEL (Annuler}=Retirer [a nourritureet la
[echefritedu four.
CANCEL
o L'heure du jour reapparait_ ['afficheur.
Remarques sur [a euissen au gri[
° Pourde moll[oursresu[tats[ors du gdLse serv[rd'un ustens[[e
prevupour ce typede cuisson.
° Legrii au regiageHI estutilise pour [a majorite desoperations
de cuissonau griL Utiiiser[e gri[ au regiageLO pour [acuisson
de mets devantcuire plus [ongtemps,afin de [our permettre
d'etre bien cuits sansrissolageexcessif.
° Pourcflangerlatemp6raturedufourpendantlacuisson
augri!, appuyersur [a touche Broil, puissur [a toucheMore+
ou Less_ pour changer entre [a cuissonau gri[ _ temperature
elevee(HI}et [a cuissonau gri[ _ temperaturebasso(LO}.
° Losdureesde cuissonau gri[ peuvent6tre plus [onguesavec
unetemperaturede gri[ inferieure.
• Retourner[a[a plupart desailments [orsque[a moitie de [a
duree prevuepour [acuisson augri[ s'estecouiee.
• Pourdes temperatureset des conseiissuppiementairessur [a
cuissonau gri[,se reporter_ [a brochure La cuissonsimplifiee.
Tableau de cuisson au gri[
Prechauffer[efour pendant 2-3 minutes=
DES GP,_LLES* CUmSSON
Bceuf Bifteck,2,5cm (1 po} d'epaisseur 4 Cuissonmoyenne 15- 20 minutes
4 Biencuit 18- 24 minutes
Hamburgers,2 cm [3/4 po} d'epaisseur 4 Biencuit 15- 18 minutes
Pore Bacon 4 Biencuit 6 - 10minutes
Cetelettes,2,5cm (1 po} 4 Biencuit 22- 26 minutes
Jambon- prO-culttranche de 1,3cm (1/2 po} 4 Tilde 8 - 12minutes
Volaille Pouleten morceaux 3 ou 4 Biencuit Gri[_ temperaturebasso
30 - 45 minutes
Fruits de mer 10- 15minutes
Dames de poisson, beurrees,
2,5 cm (1 po} d'epaisseur
Filetes, 1,3 cm (1/2 po} d'epaisseur
4
4
DEGR DEiTEMPSDECUmSSON
Lachair se detache
Lachair se detache 8 - 12 minutes
Grillesuperieure_ la position n° 5.
Bemarq_e : Ce tableaun'est qu'un guide de suggestions=Les dureespeuventvarier solon I'aliment8 cuire=
32
Arr t automatique/
Mode sabbat
Lefour s'arr6teautomatiquementapr_s12 heuress'il a 6t6
accidentellementlaiss6en marche.CettecaractdrJstiquede s6curitd
pout 6tre arr6t6e.
Pour annuler l'arr_t 12 heures et faire fonctionner le
four en continu pendant 72 heures :
1. Programmerlefour pour une cuissoncourante{voir page 34}.
2. Appuyer sur la toucheClock (Horloge}et la
maintenirainsipendant cinq secondes.
• SAbsera affich6 et clignoterapendant
5secondes.
• SAbsera ensuiteaffich6 en continujusqu'b ce qu'on
rarr6te ou jusqu'b ce que la dur6e limitede 72 heuressoit
atteinte.
• Le mot BAKE(Cuissoncourante) seraaussi affich6 si un
cyciede cuissoncouranteesten cours alors que Jefour est en
modesabbat.
• La CU/SSONAU FOURestla seulefonetionqui est
op4ratior,,ne/leen mode sabbat.Toutes,,'esautresfonctions
(M/nutede,Mabtien auchaud,etc,) sont verrou_/14es
pendantfe modesabbat.
AnnuJation de Jacuisson courante aJors que Jefour
est en mode sabbat :
Appuyersur CANCEL (Annule0.
• Le mot BAKEs'6teintb I'afficheur.
• Aucun hip sonorene retentit.
Annulation du mode sabbat :
1. Appuyer sur Jatouche Clock pendantcinq secondes.
OU
2. Apres 72 heures,le modesabbat setermine.
• SAbclignote pendantcinq secondes.
• L'heuredu iour revient_ I'afficheur.
Rematques sut Je mode sabbat
• Le modesabbatpeut 6tre mis en marche_ tout moment,que
le four soit en marche ou non.
• Le modesabbatne pout pas 6tre misen marche siles
commandossontverrouilI6esou Japorte verrouill_e.
• Si Ie four esten mode cuissonIorsquele modesabbat est
programm6,le mot BAKEs'6teint _ Ia fin du cycJede cuisson.II
n'y aura aucun signal sonoreaudible.
• Si I'6clairagedu four estsouhait6pendant le modesabbat,la
lampedevra 6treallum@eavant que Ie mode sabbat ne d6bute.
• Lorsquele modesabbata d@paarr6,aucun bJpde pr6chauffage
ne retentit.
• Tous los messageset les hips sont d6sactiv6sJorsquele mode
sabbatest actJf.
• Le verrouillageautomatiquede la porte nefonctionne pas
pendant le modesabbat.
• Si I'on appuiesur latouche CANCEL,un cycle de cuisson
couranteau four seraannul6. Cependant,le programmateur
resteraen modesabbat.
• Apr6s unepannede courant,le four revienten modesabbat
avec72 heuresrestanteset aucuncycle actiE
38
Ajustement de la temp6rature
du four
La precisiondes temperaturesdu four a 6t6 soigneusementverifi_e
rusine.II est normalde remarquerqueJquesdifferencesdans Ia
cuissonentre un four neuf et un four ancien. Au fur et _ mesureque
lescuisinieressont moinsneuves,la temperaturedu four peut vader.
II estposs+bted'ajusterla temperaturedu four si I'on penseque Ie
four necuit pasou ne rissolepas correctement.Pourdeciderde
I'ajustementb apporter, regler Iefour _ une temperaturede 15 °C
(25 °FDplus 6ieveeou plus basseque Ia temperatureind+queedans
la recette, puisfaire cuire Ia preparation.Les resultatsdu ++test >7de
cu+ssondoiventdonnerune idee du hombrede degresduquel la
temperaturedolt 6tre ajustee.
Ajustement de la temperature du feur :
1. Appuyer sur Ia toucheBake (Cu+ssoncourante).
2. Entrer285°C(550 °F)en appuyantsur la touche
More+ (Plus+).
3. Appuyer sur Ia touche Bake et la maintenirainsi
pendantphsieurs secondesou jusqu'b ce que 0°
paraisse_ rafficheur.
Si Iatemperaturedu four a 8te prScedemmentajustee,Ie
changementseraaffich& Parexemple,si la temperaturedu four
a 6te reduitede 8 °C 05 °F},I'afficheurindiquera-8 (-15}.
4. Appuyer sur Ia touche More+ ou Less+(Moins-} pour ajuster la
temperature.
A chaquefois que I'on appu+esur unetouche, latemperature
changede 3 °C(5 °F}.Latemperaturedu four peut 6tre
augmenteeou diminueede 3 _ 20 °C(5 _ 35 °F}.
5. L'heuredu jour reapparakautomatiquement_ rafficheur.
II n'est pas necessairede reajuster la temperaturedu four en casde
panneou d'interruption de courant. Lestemperaturesde cuissonau
gril et de nettoyagene peuvent 6tre ajustees.
Changement de la
temperature °F/°C
1. Le r_glagepar ddaut de I'usinepour la temperatureesten
Fahrenheit.
2. Pour modifier ce regiage,appuyersur Iestouches CANCEL
(Annulet)et Bake simultanementet maintenerqesenfoncees
pendant trois secondes.
3. Un hip retentit et le reghge courant (°Fou °CDparatt _ I'afficheur.
(Sivous nefaites pasde changement,la cuisiniere retourneau
reglageexistantapres30 secondesY
4. Pour modifier le reglage,appuyersur Ia touch6 More+ ou Less+.
Appuyer_ nouveausur Iatouche pour retournerau reglage
existant.Attender cinq secondeset le regIagesera_ffectu&
39
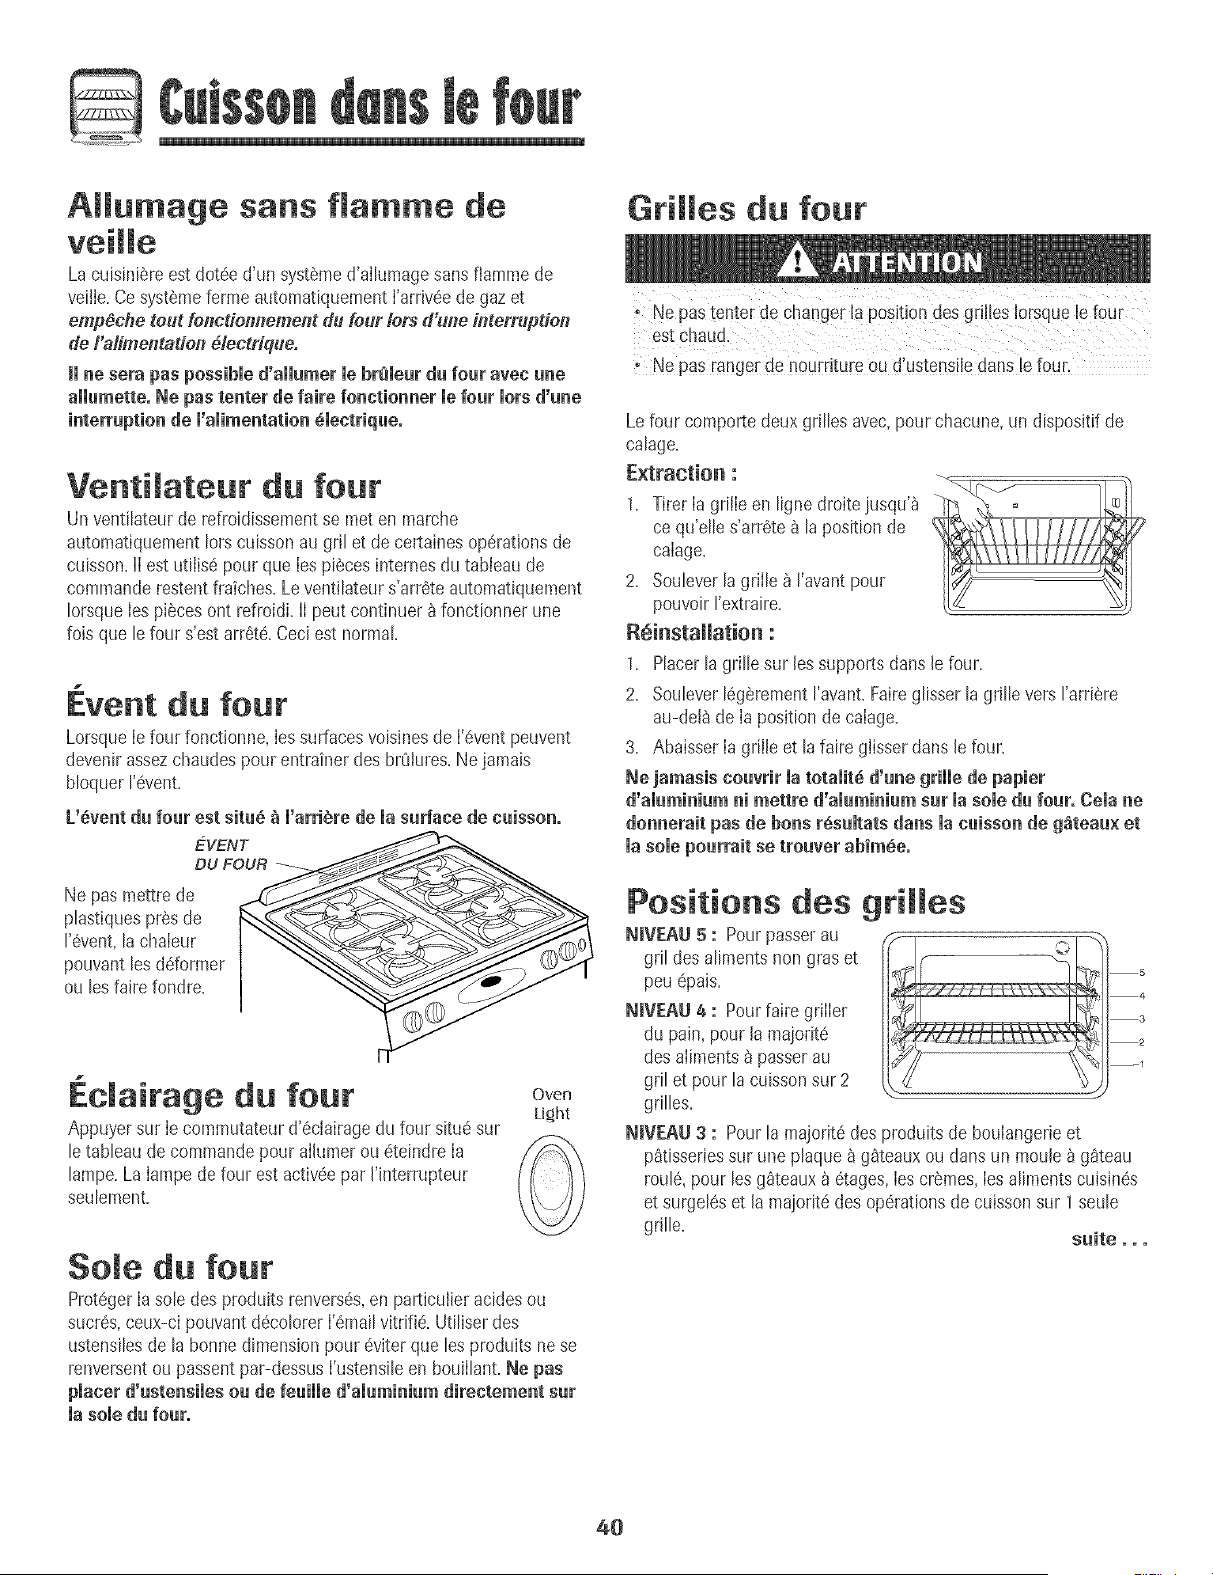
G
A mumage sans flamme de
Griffes du four
La cuisiniem est dot@ d'un systole d'aIlumage sans flamme de
veiJIe.Ce systole ferme automatiquement I'arriv@ de gaz et
emp#che tout fonctiom_ement du four tots d'une _l_terrupdo#
de Falimentado# 61ectrique.
_mae sera pus possibme d'ammumermebreleur du four avec uae
ammumette.Ne pus tearer de fake foactioaaer mefour morsd'une
interruption de m'amimentationemeetrique.
VentiJateur du four
Un ventilateurde refroidissementse met en marche
automatiquementlots cuissonau gril et de ce_ainesoperationsde
cuisson,lI estutili@ pour que Iespiecesinternesdu tabieaude
commanderestentfraiches.Le ventilateurs'arreteautomatiquement
IorsqueIes piecesont refroidLlI peut continuer&fonctionner une
fois que le four s'est arret6.Ceciest normal
1
Event du four
Lorsqueiefour fonctionne,bs surfacesvoisinesde I'eventpeuvent
devenirassezchaudespour entrainerdes brOIures.Nejamais
bloquerr@ent.
L'6ventdu four est situ6 _ J'arri_rede Jasadaee de caisson.
EVENT
Du FOUR__
Ne pas mettre de __
plastiquesprosde _.._/_
I'@ent,la chaIeur _
pouvantbsddormer "_
OU _es Talre Torture.
EcJairage du four
Appuyer sur Ie commutateurd'eciairagedu four situe sur
letableau de commandopour aIlumerou _teindreIa
lampe.La Iampede four est activ@ par I'interrupteur
seulement.
Oven
Light
Somedu four
Prot6gerIa sob des produitsrenvers@,en particulbr acidesou
sucres,ceux-ci pouvantd@olorer I'emailvitrifi6. Utiliserdes
ustensilesde la bonnedimension pour alter que los pro@its ne se
renversentou passentpar-dessusI'ustensileen bouillant.Ne pus
placer d'ustensiles ou de feuille d'aluminium directement sur
la sole du four.
Ne pastenter de change[ la positio[ des gri!les Jorsque!e four
estchaud.
, Ne Pasranger@ nourdture ou d'ustens!!edab le four,
Lefour comportedeux grilles avec,pour chacune,un dispositif de
calage.
1. Tirer Ia grille en ligne droite jusqu'_ ?r-_ k_. o _.il
ce qu'elb s'arrete _ la positionde
calage.
2. Souleverla grille _ I'avantpour
pouvoir rextraire.
R6instammation :
1. Placerla grillesur les supportsdarts le four.
2. Soubver legerementI'avant.Fakeglisserla grille vers rarriere
au-del8de Ia positionde calage.
3. AbaisserIa grille et lafaire glisserduns le four.
Ne jamasis eouvrk matotamit6d'une grille de papier
d'alaminium ni mettre d'aluminium sur masole du four. Comane
donnerait pus de boris r6sumtatsduns macuisson de g_teau× et
masomepourrait se trouver abim6e.
Positions des gri es
NIVEAU 5 : Pourpasselau
gril des alimentsnon graset
peu@ais.
NIVEAU 4 : Pourfake grilIer
du pain, pour la maiorite
des aliments_ passerau
gril et pour lacuissonsur 2
grilles.
5
4
3
2
--1
NIVEAU3 : Pourla majorite desproduits de boulangerieet
p_tisseriessur une plaque_ gateauxou dab un moule a g_teau
foul& pour les gateauxa etages,Ies cremes,Ies alimentscuisin@s
et surgel@et la ma}oritedes operationsde cuissonsur 1 seule
gdlle, suite...
4O

@
NIVEAU2 : PourIe r6tissagede petits morceauxde viande,Ies
platsmijot6s,Iepain, les savarins,lestartes auxfruits fraiset
g_teauxde 9 x 13poet Ia cuissonsur deux griIIes.
NIVEAU 1 : Pour Ie r6tissagede gros morceauxde viande,la
volaiIIeet lessoufflesou g_teauxdes anges.
CUISSON SURPLUSIEURSGRILLES:
Deuxgrilles : Utilisezles positions2 et 4.
_@maEqu@$ :
• V6rgiezla cuissonaprSsla dur6e minimaie suggeree=
• Nejamais pJacerles ustensilesdirectementsur lasole du four=
Cuisson de g_teau× h 6rages sur deu× grilles
Pourde meilleursr6sultatspour la cuisson deg_teauxsur deux
grilles,utiJiserlespositions2 et 4.
PlacerlesgQteauxsur la grille, commeiI estindiqu6.
41
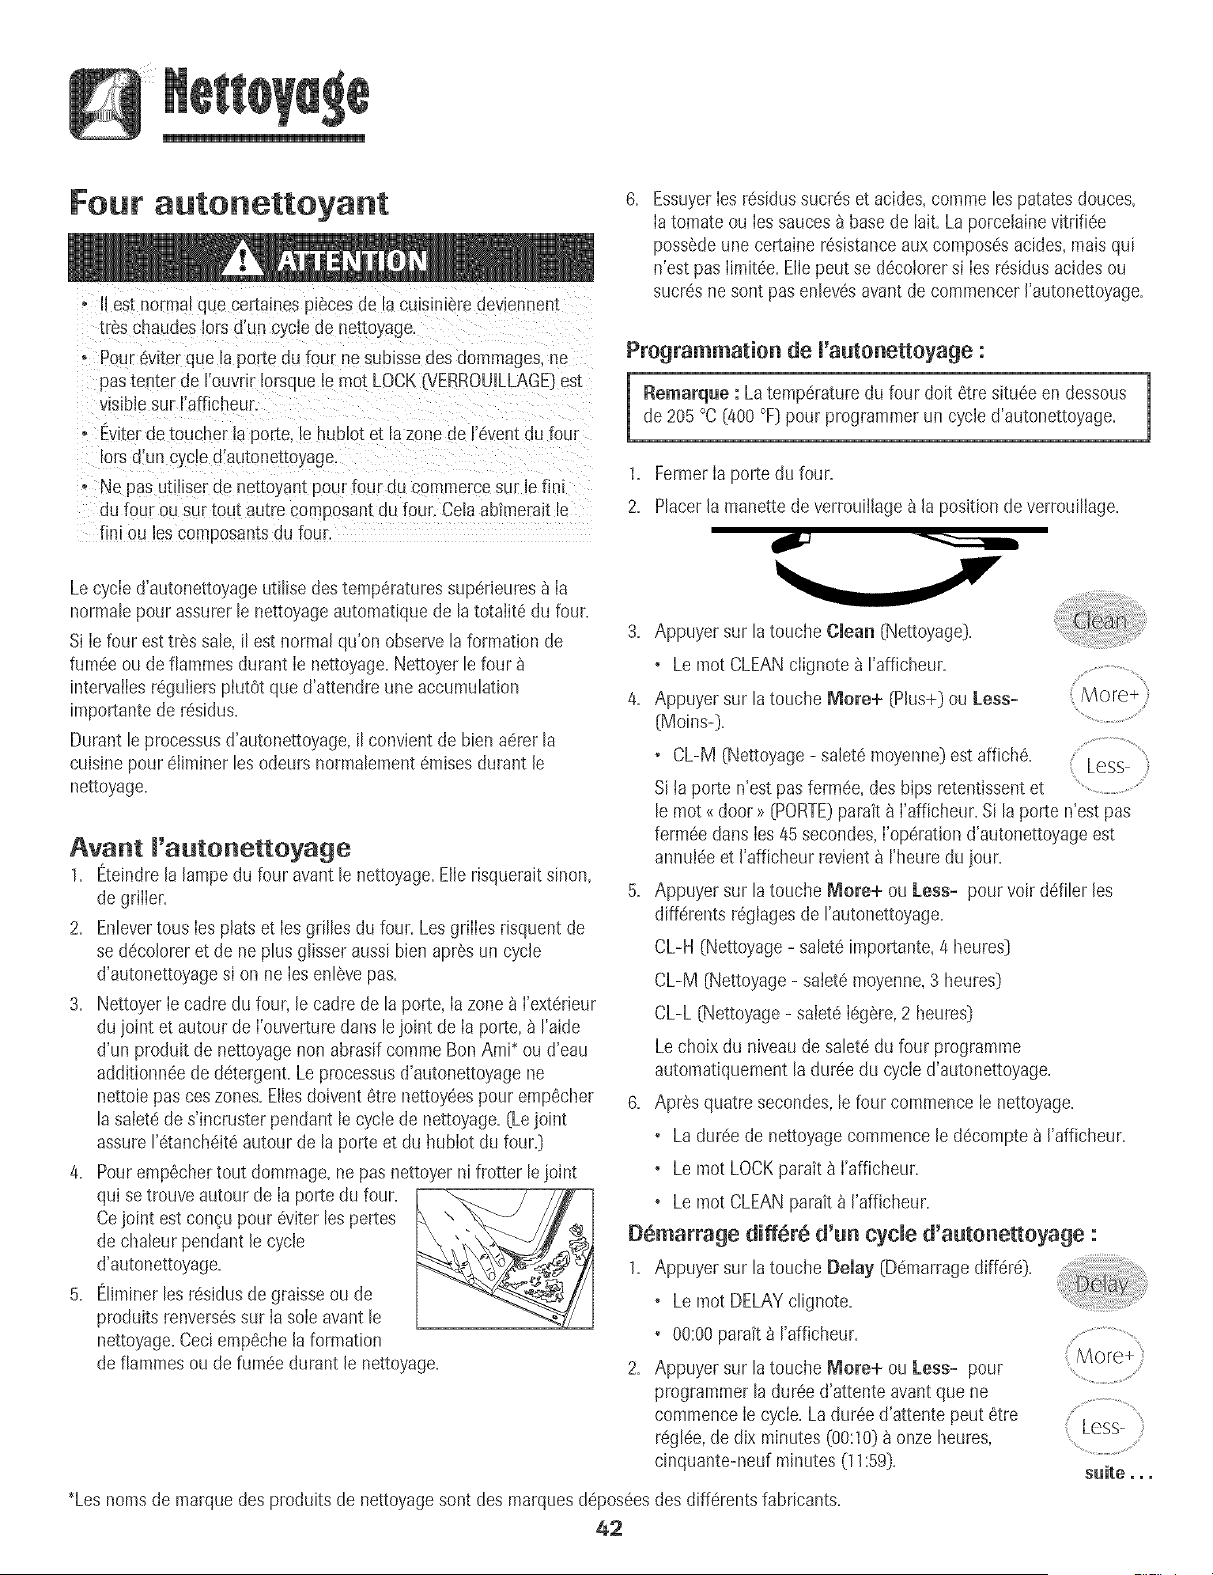
Four autonettoyant
o IJest normal quecertanes pieces de lacubiniOredeviennent
tres cnaudeslotsd'un cycle de nettoyage.
o PourevLterque laporte du four ne sub[sseees dommages,ne
pastenter de rouvrir Iorsqueb mot LOCK(VERROUULLAGE}est
visiblesur I'a[ficheur.
o @iter de toucher ia por[e.[e hubiot et la zonede F@entdu fou_
lots d'un cycle d'autone_toyage.
o Ne pas utiiiserde ne[[oyan[ pour four du commemesur le fin[
dufour ou sur tout autre composantdu four.Cela abimerait le
fin[ ou loscomposantsdufour.
6. EssuyerIesresidussucr@et acides,corrlmelespatatesdouces,
Ia tomate ou Ies saucesa basede Bit. La porcelainevitrifi@
posse@une certaine r@istanceaux compos@acides,mais qui
n'est paslimit@. Elb peut se d@otorersi Iesr@idus acidesou
sucresne sont pasenlev@avantde commencerI'autonettoyage.
Programmation de J'autonettoyage :
Remarque : Latemp@aturedu four doit 6tre situOeen dessous 1
de 205°C (400°F}pour programmerun cycled'autonettoyage.
l
1. FermerIa porte du four.
2. Placerla manettedeverrouiJlagea la positionde verrouillage.
Lecycle d'autonettoyageutilisedes temperaturessuperJeures_ la
normab pour assurerle nettoyageautomatiquede la totaiit6 du four.
Si Ie four esttres sale, il est normal qu'on observela formatiml de
fum@ ou deflammesdurant Ie nettoyage.Nettoyerle four
intewaIIesrOguliersphtOt que d'attendre une accumulation
importantede r@idus.
Durantle processusd'autonettoyage,il cmwient de bien aOrerla
cuisinepoureliminer les odeurs normalement6raisesdurant le
nettoyage.
Avant J'autonettoyage
1. Eteindrela lampedu four avantle nettoyage.EilerJsqueraitsinon,
de griIIer.
2. Enlevertous Iesptatset Iesgrilles du four.Los griIIesrisquentde
se d@oloreret de ne plus glisseraussibien apresun cycle
d'autonettoyagesi on ne Iesenl@epas.
3. NettoyerIe cadredu four, le cadre de la porte,Iazone _ I'exterieur
du joint et autour de I'ouvertureclanslejoint de Ia porte,_ I'aide
d'un produit de nettoyagenon abrasifcommeBonAmi_ ou d'eau
additionn@ de detergent.Leprocessusd'autonettoyagene
nettoiepas ceszones.Eilesdoiventetre nettoy@spour emp@her
la saiet_des'incruster pendant le cycle de nettoyage.(Lejoint
assure1'OtanchOit6autour de la porte et du hubIotdu four.)
4. Pour empOchertout dommage,nepas nettoyerni frotter le joint
qui se trouveautour de Ia porte du four.
Cejoint est congupour @iter lespertes
de chabur pendantle cycle
d'autonettoyage.
5. Eliminerles rOsidusde graisse ou de
produits renversOssur Iasole avantb
nettoyage.Ceciemp@he laformation
de flammesou de rum@ durant le nettoyage.
3. Appuyersur latouche Clean (Nettoyage}.
• Le mot CLEANciignote _ I'affbheur. ..............................
4. Appuyersur latouche Mere+ {Plus+} ou [ess_
(Moins-}. ...............................
• CL-M (Nettoyage- salete moyenne}est affich&
\ Less
Sita porte n'est pasform@, des bips retentissentet
le mot _ door >>{PORTE)parait_ I'afficheur.Si laporte n'est pas
ferm@ dartsIes 45 secondes,I'operationd'autonettoyageest
annul@ et I'afficheur revient_ I'heuredu jour.
5. Appuyersur latouche More+ ou Less- pour voir defiler los
diff@entsrOgIagesde I'autonettoyage.
CL-H (Nettoyage- saleteimportante,4 heures)
CL-M (Nettoyage- salet6moyenne,3 heures)
CL-L (Nettoyage- salet6Iegere,2 heures)
Lechoix du niveaude salet6du four programme
automatiquementla dur@ du cycie d'autonettoyage.
6. Apresquatre secondes,le four commencele nettoyage.
• La durOede nettoyagecommencele d@omptea I'afficheur.
• Le mot LOCKparait _ I'afficheur.
o Le mot CLEANparait _ I'afficheur.
DOmarrage diff@_ d'un cycle d'autonettoyage :
1. Appuyersur [atouche Delay {DOmarragediffer@.
• Le mot DELAYclignote.
• 00:00parak _ I'afficheur.
2. Appuyersur latouche More+ ou Less_ pour
programmerla dur@ d'attente avantque ne
commenceIe cycie. La Our@d'attente peut etre
reglOe,de dix minutes (00:10)_ onzeheures,
cinquante-neuf minutes(11:59}.
*Lesnomsde marquedes produitsde nettoyagesont des marquesd@os@s
42
des differents fabricants.
' Less- ;
saite,,,
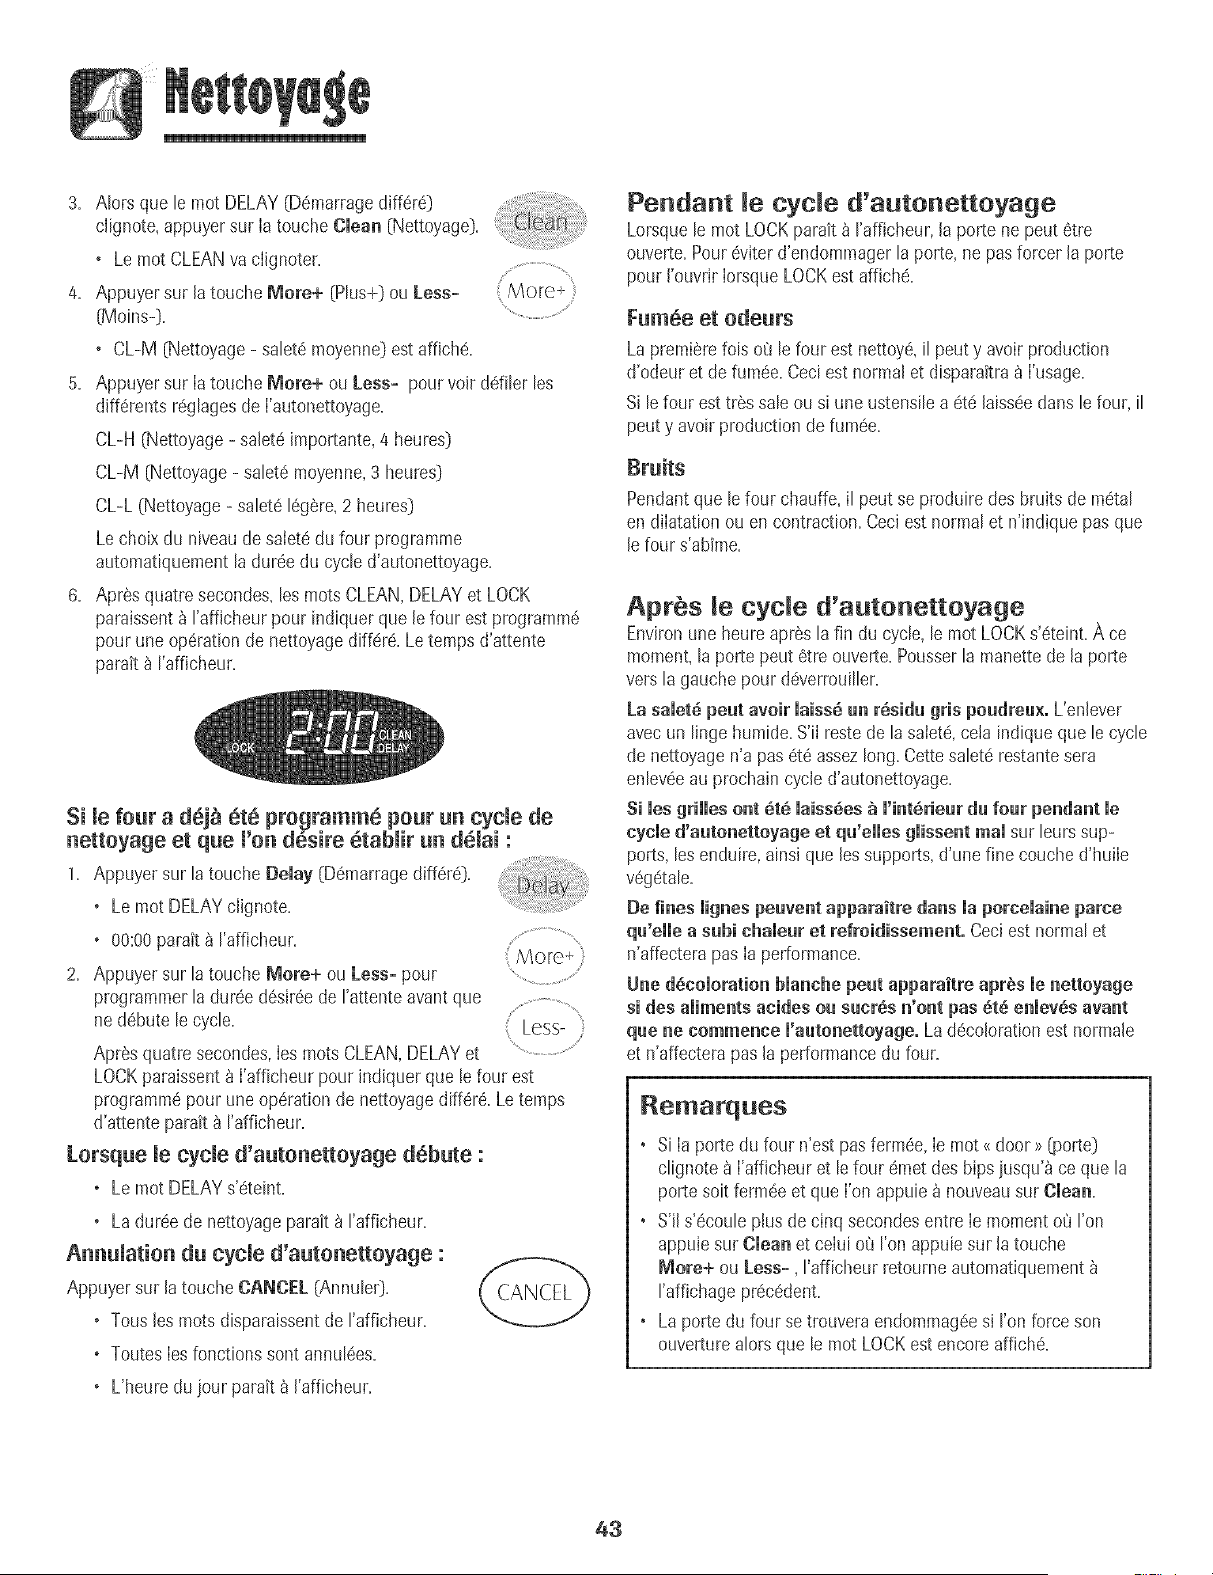
3. AlorsquelemotDELAY(D@Tlarragediff6r6}
c[[gnote,appuyersur[atouche(}lean(Nettoyage}.
+ LemotCLEANvaciignoter.
4. Appuyersur[atoucheMore+(PBs+}ou[ess-
[IV!oins-},
+ CL-M(Nettoyage- sabt6moyenne}estaffich_.
[ ,More+
5. Appuyersur[atoucheMere+ouLess+pourvoirddilerles
diff6rentsr6glagesde['autonettoyage.
CL-H[Nettoyage- sa[et6importante,4heures}
CL-M(Nettoyage- salet6moyenne,3heures}
CL-L(Nettoyage-saIet616gere+2heures}
Lechoixduniveaudesaietedufourprogramme
automatiquementladur@ducycbd'autonettoyage.
6. Apr6squatresecondes+leslOtSCLEAN,DELAYetLOCK
paraissent_rafficheurpourindiquerque[efourestprogramm6
pouruneop6rationdenettoyagediff6r6.Letempsd'attente
parak_I'afficheur.
Si le four a d6]_ 6t6 programm6 pour un cycle de
nettoyage et que l'on dSsire etablir un dSlai :
1. Appuyer sur [a touche Delay (D6marragediff6r@.
o Lemot DELAYclignote.
o 00:00parait _ I'afficheur.
More+
2. Appuyer sur [a touche More+ ou less- pour ......................................
programmer[a dur@ d6sJr6ede rattente avantque
nedebute le cycle. Less-
Apr6s quatre secondes,[eslOtS CLEAN,DELAYet
LOCKparaissenta ['afficheur pour [ndiquerque [e four est
programm6pour uneopSrationde nettoyagediff6re. Le temps
d'attente parait _ I'afficheur.
Lorsque [e cycle d'autonettoyage debute :
o Lemot DELAYs'6teint+
o Ladur@ de nettoyageparait _ ['afficheur.
Annu[ation du cycle d'autonetteyage :
Appuyersur latouche (},_,N(}E[(Annule0+
o Tousles lOtS disparaissentde rafficheur+
o ToutesIesfonctionssent annul@s+
o L'heuredu jour parait_ ['afficheur.
Pendant le cycle d'autonettoyage
Lorsquele mot LOCKpara_t_ I'afficheur,la porte ne peut 6tre
ouverte+Pour@iter d'endommagerla porte,ne pasforcer la porte
pour I'ouvrir IorsqueLOCKest affich_+
Fum6e et odeurs
La premierefois 08 [efour est nettoy6,i[ peut y avoir production
d'odeur et de fum@+Ceci est normal et disparaitra_ ['usage.
Si lefour esttr6s saleou si une ustensilea 6t6 [aiss@clansle four, il
peut y avoir production de rum@+
Bruits
Pendantque [efour chauffe,i[ peut se produiredes bruits de m6ta[
en dilatationou en contraction+Cec[estnormal et n'ind+quepasque
[e four s'abime+
Aprbs [e cycle d'autonettoyage
Environuneheure apr@ la fin du cycle, le mot LOCKs'6teint+A ce
moment,laporte peut 6tre ouverte.Pousserla manettede la porte
versla gauchepour d@errouiller+
La sametepeut aveir maiss__ r6sid_ gris po_dre_×, L'enbver
avecun linge humide.S'i[ restede la saiet_+ceta indique que le cycle
de nettoyagen'a pas 6te assezlong. CettesaIet6restantesera
enlev@au prochain cycled'autonettoyage.
Si mesgrilles ont _t_ mabs_es_ m'imeHeurd_ fo_r pendant me
cycmed'aute_etteyage et qa'emmesgmisse_troamsur burs sup-
ports, lesenduire,ainsJque lessupports,d'une fine couched'huib
v6g_taIe+
De fi_es iig_es pervert apparaitre da_s ia porceiai_e parce
q_'eHe a sabi chale_r et refroidissement, Ceciest normal et
n'affecterapas Ia performance.
Une d_coloration blanche peat apparaitre apr_s menetteyage
si des aliments at[des o_ s_crSs _'o_t pas _t_ e_mev_savast
q_e _e cemme_ce m'a_te_ettoyage.La d@oloration est normale
et n'affecterapas la performancedu four+
Remarq es
+ Si Ia porte du four n'est pas ferm@, Ie mot<(door >>[porte}
clignote8 I'affbheur et le four @_etdes hips jusqu'_ ce que la
porte soit ferm@ et que I'on @pub _ nouveausur (}lea_.
+ S'il s'@oub plus de cinq secondesentre Ie momentoQI'on
@pub sur (}lea_ et ceIui oQ I'onappuiesur la touche
Mere+ ou less+, I'afficheur retourneautomatiquement
raffichage pr@edent.
+ Laporte du four se trouveraendommag@s+Fenforceson
ouverturealors que le mot LOCKestencore affbh6.
43
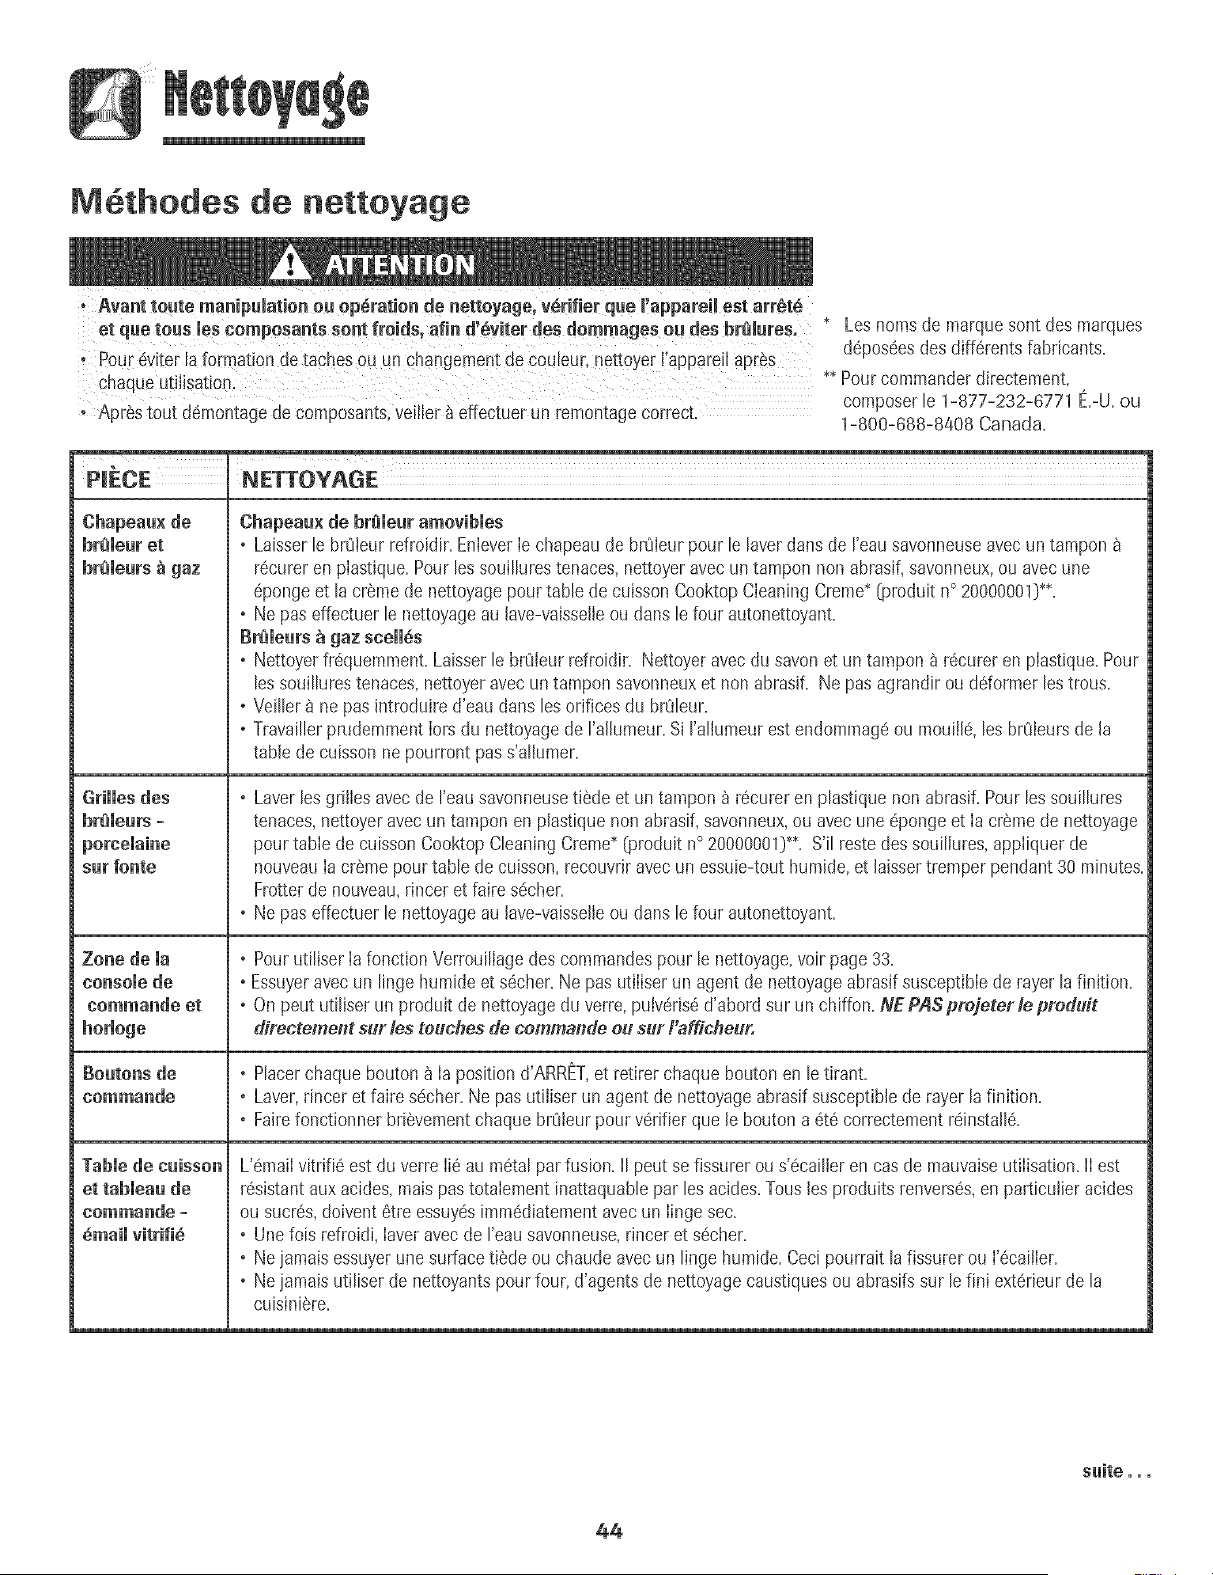
M6thodes de nettoyage
, Avant route manipulatien ea op6ration de nettoyage, v_rifier qae I'appareil est arr_t_
et qae teas les cempesants sent freids, afin d,_viter des demmages eu des br_lures. " Les nomsde marquesent des marques
' Pour6viter la formationde tachesou un chart ement de Couleur,netto er I a are[Ia r_s ddpos6esdes diff6rents fabricants.
g Y PP P
chaqueutiJisation. _ Pourcommanderdirectement,
composerle 1-877-232-0771 E.-U.oa
o Apr@stout d6montagede composants,veiller _ effectuerun remontagecorrect. 1-800-088-8408 Canada.
N ETTOYAG E
Chapeaa× de
br_meur et
br_meura_ gaz
sur fonte
Zone de ia
console de
eommandeet
TaMe de caisson
et tabmeaude
commande -
_maii vitrifi_
Chapeau× de breieur amovibles
o Laisserle brQleurrefroidir. EnleverIe chapeaude brOleurpour le laverdartsde reau savonneuseavecun tampon
r6cureren plastique.Pourlessouillurestenaces,nettoyeravecun tampon nonabrasif,savonneux,ou avecune
6pongeet la cremede nettoyagepour table de cuissonCooktopCleaningCreme_ (produit n° 20000001)_.
o Ne pas effectuer le nettoyageau lave-vaisselleou clansle four autonettoyant.
Br_ieurs _ gaz sceii6s
o Nettoyer%quemment. Laisserle brOleurrefroidir. Nettoyeravecdu savonet un tampon & r6curer en plastique.Pour
lessouillurestenaces,nettoyeravecun tamponsavonneuxet non abrasif. Ne pas agrandirou ddormer lestmus.
oVeiller_ nepas introduired'eau dartslesorifices du brOleur.
oTravaillerprudemmentIotadu nettoyagede I'alhmeur. Si rallumeurest endommageou mouille,lesbrOleursde la
table decuisson nepourront pas s'aliumer.
o Laver[esgrillesavecde ['eausavonneuseti8de et un tampon_ r6curer enp[astique non abrasif.Pour [es souillures
tenaces,nettoyeravecun tamponen piastique non abrasif,savonneux,ou avec une 6pongeet [a crSmede nettoyage
pourtable de cuissonCooktop CleaningCreme*(produit n° 20000001)**.S'il reste dessouiliures,appIiquerde
nouveauIa crSmepourtable de cuisson,recouvriravecun essuie-tout humide, et laissertremper pendant30 minutes.
Frotterde nouveau,rincer et faire s_cher.
o Ne pas effectuer le nettoyageau [ave-vaisselleou clansle four autonettoyant.
o Pourutiliser [a fonction Verrouiliagedes commandespour le nettoyage,voir page33.
oEssuyeravec un linge humide et s6cher.Ne pas utiliser un agent de nettoyageabrasifsusceptiblede rayerla finition.
o Onpeut utiliser un produit de nettoyagedu verre,puiv6risdd'abord sur un chiffon.NEPASprejeterlepreduit
directement sur les touches de cemmar_deeu sur Fafffcfleur.
o Placerchaque bouton_ Ia positiond'ARRET,et retirerchaque bouton en le tirant.
o Laver,rinceret faire s6cher.Ne pas utiliserun agent de nettoyageabrasifsusceptiblede rayerla finition.
o Fairefonctionner briTvementchaque brOieurpour v6rifierque le bouton a 6t6 correctementr6install6.
L'6maiIvitrifi6 est du verre Ii6au metalparfusion. II peut se fissurerou s'6cailleren casde mauvaiseutilisation.IIest
r6sistantaux acides,mais pastotaiement inattaquablepar les acides.Tousles produitsrenvers6s,en particuiier acides
ou sucr6s,doivent6tre essuyesimmddiatementavecun Iingesec.
o Unefois refroidi, Iaveravec de reau savonneuse,rinceret s_cher.
o Neiamaisessuyerunesurfacetiede ou chaude avec un linge humide.Ceci pourrait la fissurerou I'ScailIer.
o Neiamais utiliser de nettoyantspour four, d'agentsde nettoyagecaustiquesouabrasifssur le fini exterieurde la
cuisiniSre.
suite° oo
44
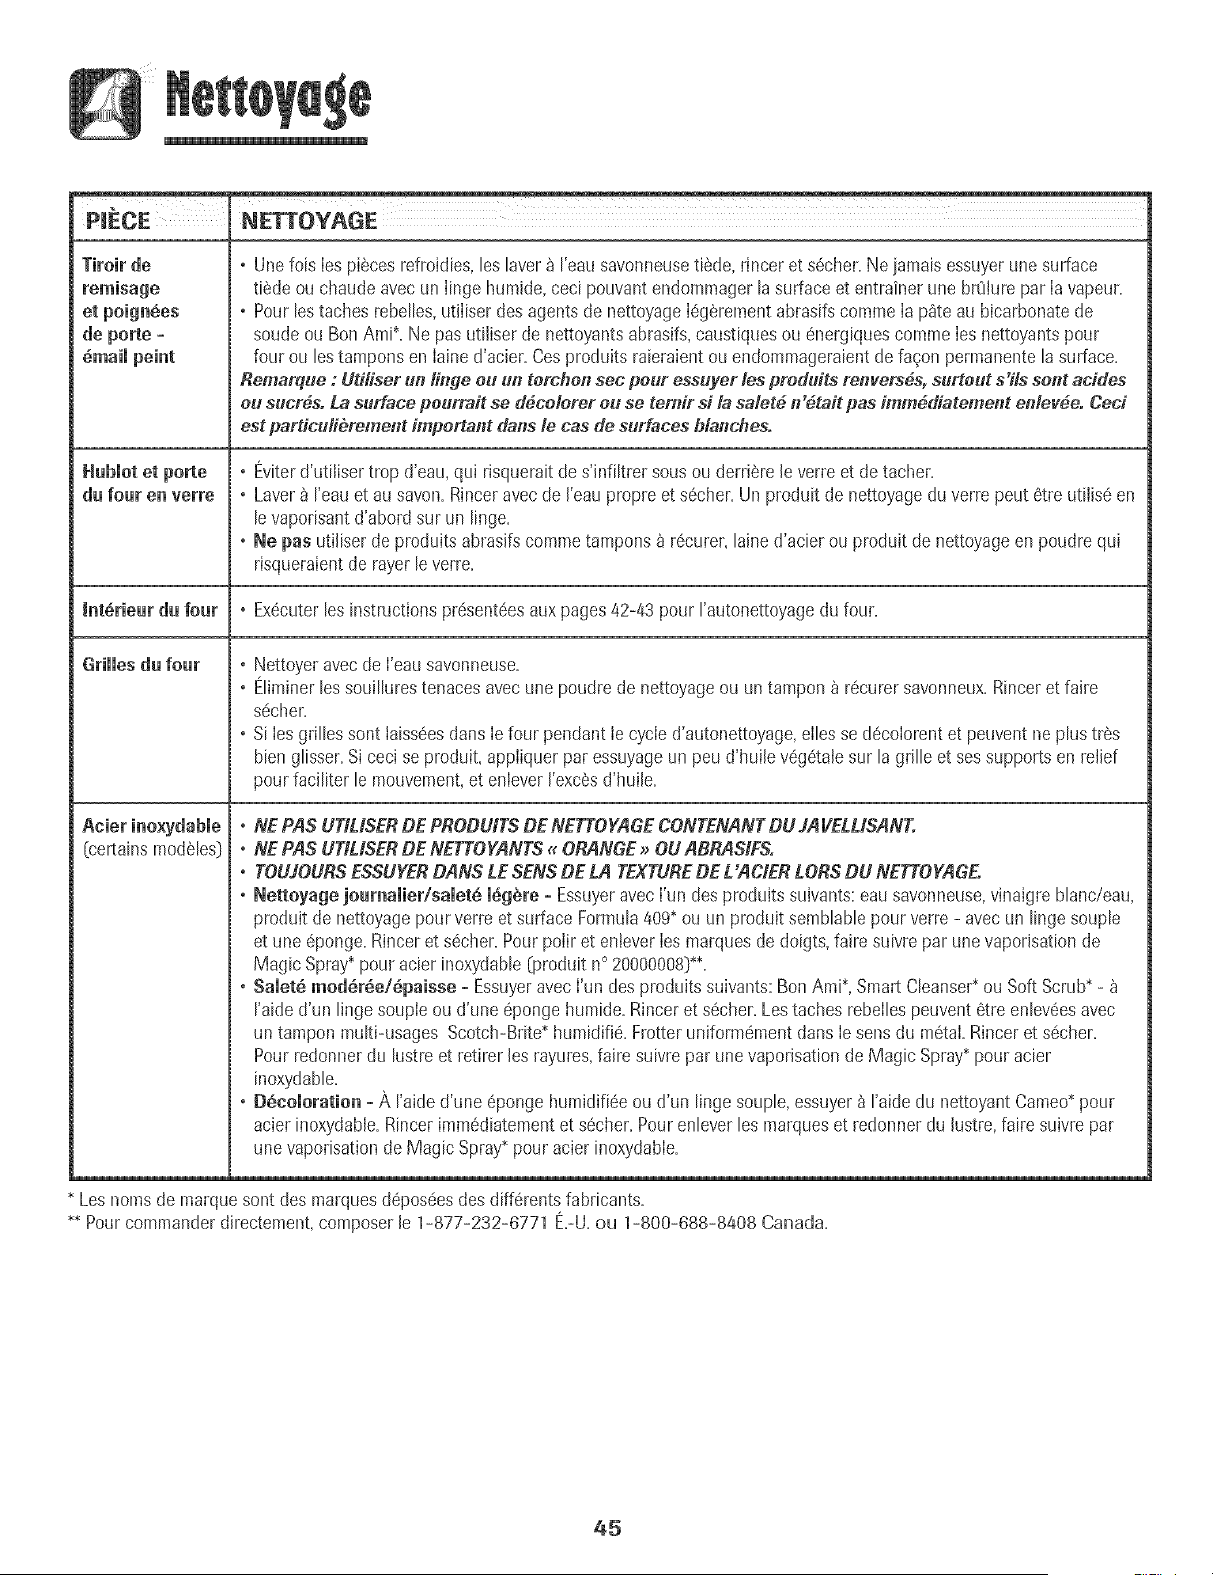
NE_OYAGE
Tiroirde
et poign_es
de porte +
_maimpeint
Hubmotet pa_e
du four en verre
* Unefois Iespiecesrefroidies,les laver _ I'eausavonneusetiSde,rincer et s6cher.Ne jamais essuyerunesurface
tilde ou chaude avecun Iinge hurnide,ceci pouvant endommagertasurfaceet entrainerune brOiurepar Iavapeur.
, Pour testaches rebettes,utiIiser des agentsde nettoyageI6g_rementabrasifscomme Ia p_te au bicarbonatede
soude ou BonAmi+.Ne pas utiliser de nettoyantsabrasifs,caustiquesou energiquescommeIesnettoyantspour
four ou les tamponsen Iained'acier. Cesproduits raieraientou endommageraientdefa_on permanentela surface.
Remarque : Ud/iser un /iage eu un tercherlsec pour essuyer ]es preduits reayers6s, surtout sTls sent acides
eu sucr_so Lasurface peur_it se d6ce]erer eu se ternir si ]a sa/etd n'6taitpas imm6diatemerlt en]ey6e. Ceei
est pardcu]i_rement important dartsle cas de surfaces b/artches.
* Eviterd'utiliser trop d'eau,qui risquerait de s'infikrer sousou derrierele verre et de tacher.
, Laver_ I'eauet au savon.Rinceravecde I'eaupropre et s6cher.Un produit de nettoyagedu verre peut 6tre utilise en
levapodsantd'abord sur un linge.
, Ne pas utiliser de produitsabrasifscommetampons _ r6curer,lained'acier ou produit de nettoyageen poudrequi
risqueraientde rayerleverre.
Int_rieur du four • Ex6cuterles instructionspr6sent6esaux pages42-43pour rautonettoyagedu four.
GHIIesdu four
[certainsmodSles]
* Nettoyeravec de I'eausavonneuse.
* Eliminerlessouillurestenacesavec une poudrede nettoyageou untampon h r6curersavonneux.Rinceret faire
s6cher.
* Si Iesgrillessont iaiss6esdartsIe four pendant ie cycle d'autonettoyage,eIlesse decoIorentet peuventne plus tr_s
bienglisser.Siceci se produit,appiiquer par essuyageun peud'huile v6g6talesur la grille et sessupports en relief
pourfaciliter le mouvement,et enleverI'exc6sd'huile.
* NEPAS UT/L/SERDE PRODU/TSDE NETTOYAGECONTENANTDU JAVELL/SANT.
* NEPAS UT]L]SERDE NETTOYANTS. ORANGE_ OUABRASIFSo
* TOUJOURSESSUYE_DANS LESENSDE LA TEXTUREDE L'AC]E_ LO_S DU NETTOYAGE,
" Nettoyage jo_malier/salet_ l_gSre +EssuyeravecI'un des produitssuivants:eau savonneuse,vinaigrebianc/eau,
produit de nettoyagepour verre et surface Formula409*otJ un produit semblabiepour verre- avecun linge souple
et une 6ponge.Rinceret s6cher.Pour polir et enteverIesmarquesde doigts, faire suivrepar unevaporisationde
MagicSpray+pour acier inoxydabie(produit n° 20000008)**.
, Salet_ modSr_e/Spaisse + Essuyeravec I'un desproduits suivants:BonAmi+,Smart Cleanse€ou SoftScrub* -
I'aided'un lingesouple ou d'une _pongehumide. Rinceret s6cher.Lestaches rebeliespeuvent 6tre eniev6esavec
untampon multi-usages Scotch-Brite+humidi% Frotteruniform6mentdartsIesens du m6taLRinceret s6cher.
Pourredonnerdu lustreet retirer lesrayures,faire suivre par une vaporisationde Magic Spray+pour acier
inoxydabie.
, DSeoloratio_ +A raide d'une _pongehumidi%e ou d'un linge soupie,essuyer_ I'aidedu nettoyantCameo+pour
acier inoxydable.Rincerimmediatementet sScher.Pourenieverles marqueset redonner du lustre,faire suivrepar
unevaporisationde Magic Spray+pour acier inoxydable.
Lesnomsde marquesontdes marquesd_pos6esdes diff6rentsfabticants.
** Pourcommanderdirectement,composerle 1-877-232-6771 E+-U+ou 1-800-688-8408 Canada.
45
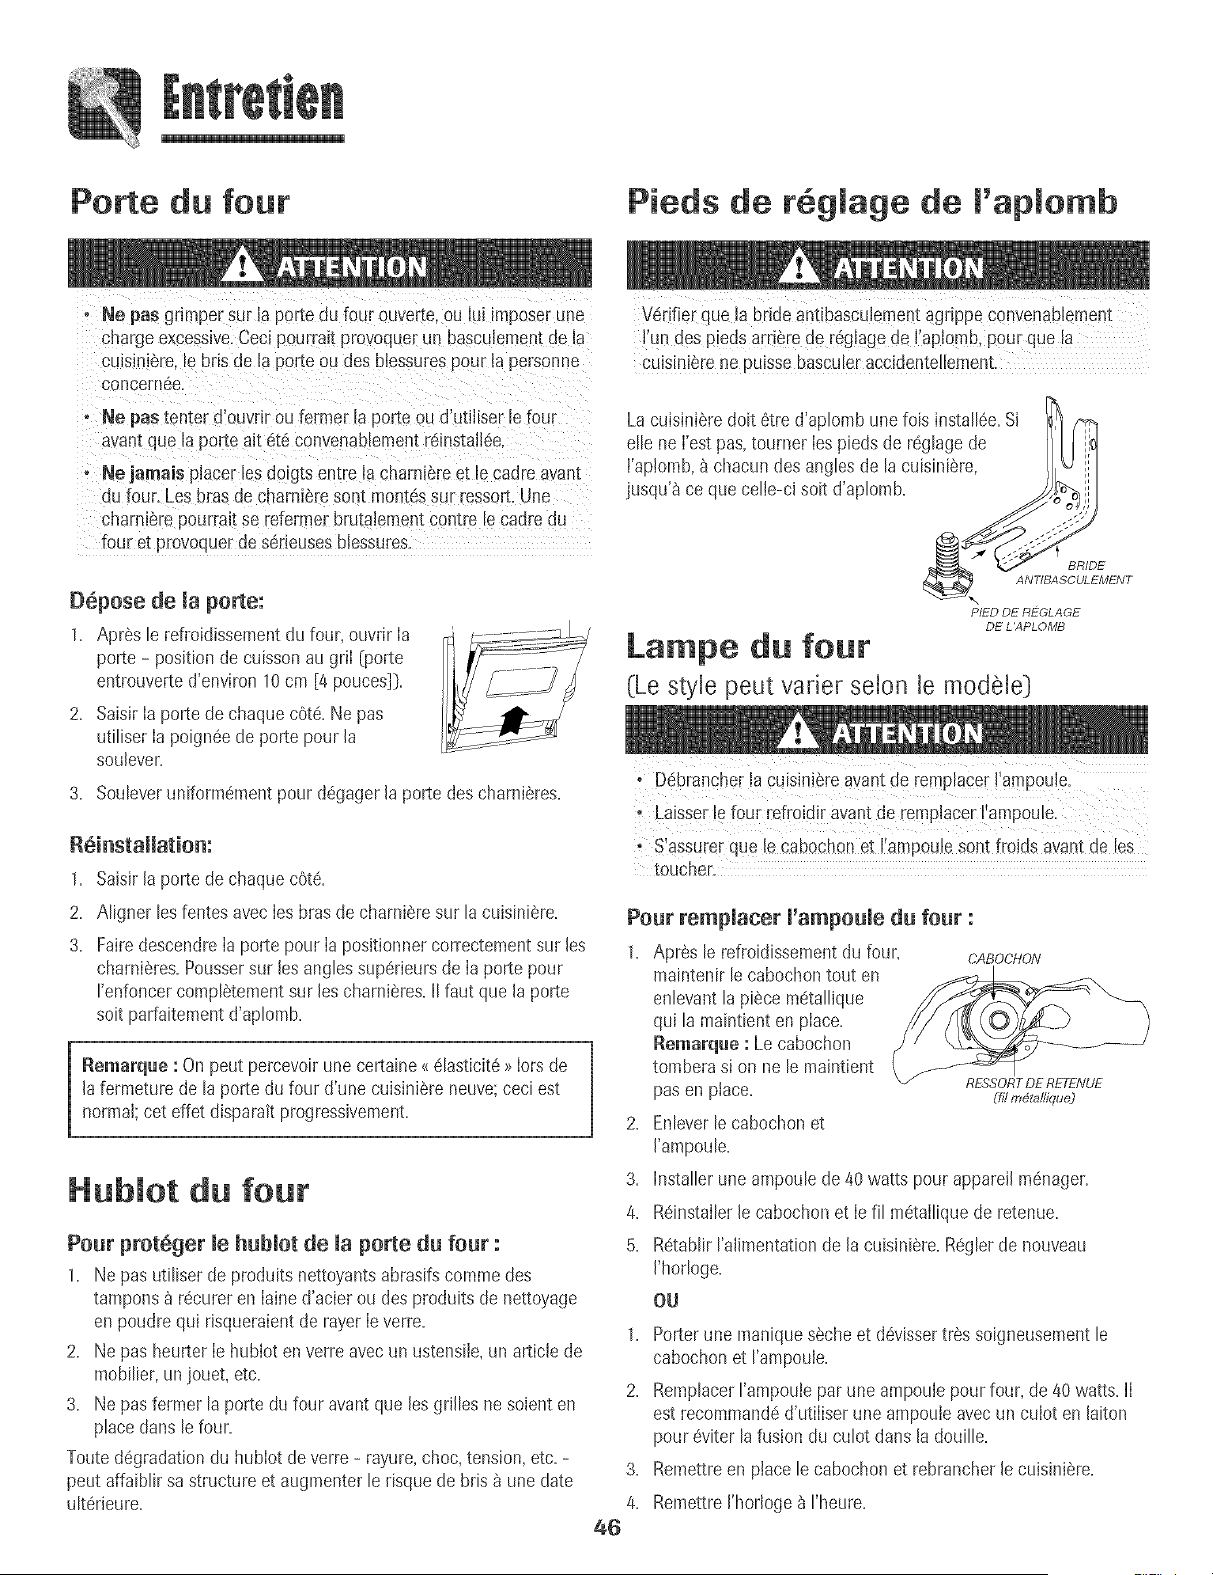
Porte du four
Pieds de r g age de 'ap omb
o Ne pas grlmper sur la porte du four ouverte,ou Bi imposer une
charge excessive.Ceci pourrat provoquerun basculementde la
culsiniere !ebns de la pore ou des blessurespour la personne
concernee.
o Ne pas tenter d'ouvrir ou fermer la pore ou d'utiliser le four
avant que la porte ait 6t6 convenabbment r6install@
o Ne jamais placerbs doig[sentre ia charniSreet le cadre a_ant
du four.Les bras de charni_resore mont6ssur ressort.Une
charni@epourrailse rete[mer brutalementcontre le cadredu
four et provoquerdes6rieusesNessures.
D6pose de la porte:
1. Apr_s b refroidissementdu four, ouvrir Ia
porte - position decuissonau griI [porte
entrouverted'environ10cm [4 pouces]}.
2. SaisirIa porte de chaquecote. Ne pas
utiliser Ia poign6ede porte pourla
soulever.
3. Soubver uniform@_entpour d69agerla porte des charnieres.
1, Saisirla porte de chaquec6t&
2, Aligner les fentesavecIesbrasde charnieresur la cuisiniere.
3. FairedescendreIa porte pour Ia positionnercorrectementsur les
charniSres.Poussersur lesangbs sup6rieursde Ia porte pour
I'enfoncercomplStementsur les charnieres.II faut que la porte
soit parfaitementd'aplomb.
Remarque : On peut pelcevoirune certaine_61asticit6_>Iorsde
la fermeturede la porte du four d'une cuisini6reneuve;ceci est
normal;ceteffet disparaitprogressivement.
Hub ot du four
Pour prot6ger mehubmotde maporte du four :
1. Ne pas utiliser de produits nettoyantsabrasifscommedes
tampons _ r@ureren Iained'acier ou des produitsde nettoyage
en poudrequi rbqueraient de rayer Ieverre.
2. Ne pas heurter Ie hublot enverre avecun ustensiie,un articb de
mobilier,unjouet, etc.
3. Ne pas fermerla porte du four avantque lesgrilbs ne soient en
placeclansle four.
Touted6gradationdu hublot de verre - rayure,choc,tension,etc. -
peut affaiblir sa structure et augmenter le risque de bris _ une date
ulterieure.
V6df!eE que la bride antibasculementagrippecQnvenabbment
fUn des pie@at@re de r_glagede I'aplo!-nb,p0ur que la
cuisiniere ne puissebascubr accidentelbment.
r%
La cuisini_redoit 6tre d'aplombune fois install@.Si ]_1
elle netest pas,tourner bs pieds de r6gBge de IIII r_
i'ap!omb,_}_chacun des anglesde lacuisini_re, } w
_\ ANTIBASCULEMENT
PIED DE REGLAGE
DE L 'APLOMB
Lampe du four
(Le style peut vaner selon le modete}
Ddbrancherla cubini6re avantde remplacerI'am oule
.
° Labser le four Fefroidiravant de rempiacer%mpoule.
S'assurerque le Cabochonet I'ampoulesont froids avantde les
toucher:
Pour rempmacerl'ampouie du four :
1. Apr_s le refroidissementdu four, CASOCHON
maintenir b cabochontout en
enlevantla piScemetallique
qui la maintienten place.
Remarque : Lecabochon
tomberasi on ne le maintient
pas en place.
2. Enbver le cabochon et
I'aPapoub.
3. Installer uneampoulede 40watts pour appareilm6nager.
4. Reinstallerle cabochonet Iefil m_talliquede retenue.
5. R6tablir I'alimentationde lacuisini6re.Reglerde nouveau
I'horloge.
OU
2.
3,
4,
46
Porterune maniques6cheet d@issertr_s soigneusementle
cabochonet I'ampouie.
RemplacerI'ampoulepar une ampoulepour four, de 40watts, lI
est recommand6d'utiIiserune ampouieavecun cuIot en laiton
pour @iter lafusion du culot darts la douille.
Remettreen place lecabochon et rebrancherle cuisiniere.
RemettreI'horloge_ I'heure.
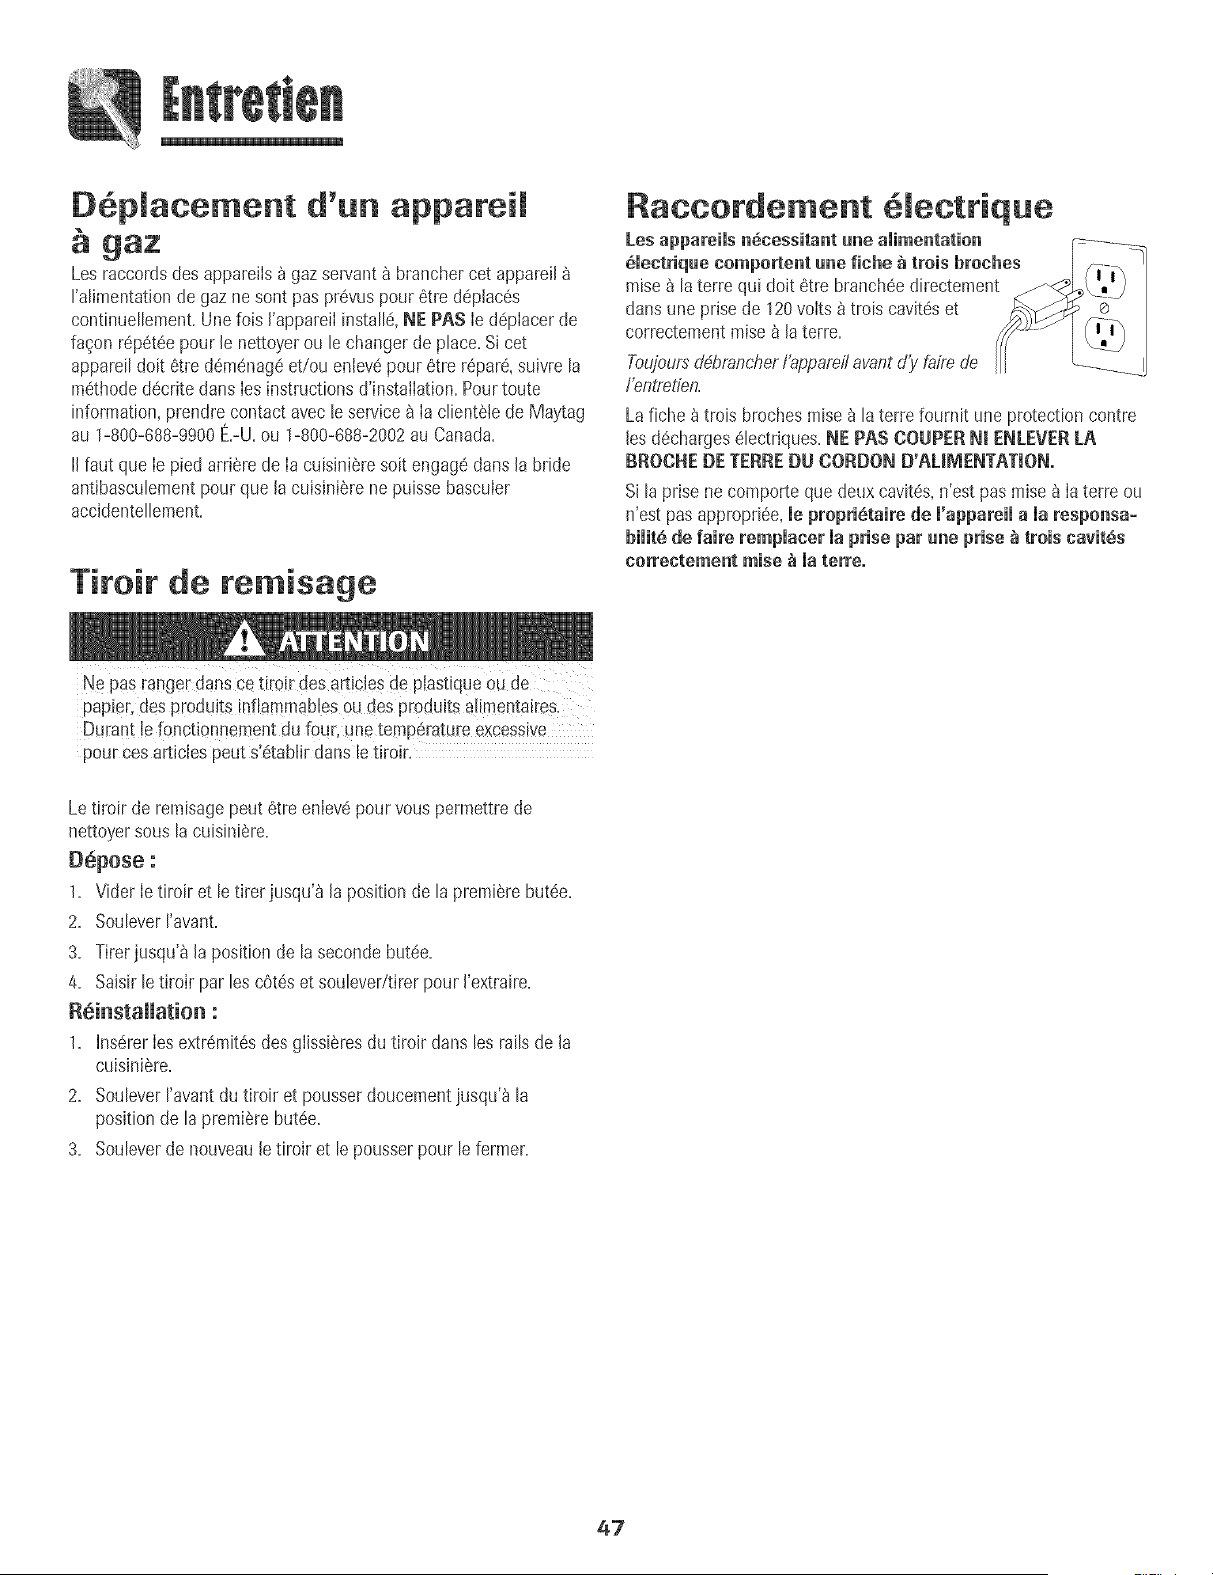
06placement d'un appareil
gaz
Lesraccordsdesappareils_ gazservant_ branchercet appareJ[
I'alimentationde gaz ne sont pas pr@uspour 6tre d@lac6s
continuellement.Une fois I'appareiIinstall6,NE PAS Ie d@Iacerde
fa£on r@6t6e pour le nettoyerou le changerde place.Si cet
appareildoit 6tre d6menag6et!ou eniev6pour 6tre r@ar6,suivre la
methoded6critedarts Ies instructionsd'instailation.Pourtoute
information,prendrecontact avec le service& Ia clientelede Maytag
au 1-800-688-9900E.-U.ou 1-800-688-2002au Canada.
IIfaut que Ie piedarri_rede Ia cuisiniSresoitengagedartsla bride
antibasculementpour que lacuisinierene puisse bascuier
accidentellement.
Tiroir de remisage
Raccordement 61ectrique
Les appareils n6cessitant une alimentation
_lectrique compor{ent une fiche _ trois broehes
raise_ la terre qui dolt 6tre branch6edirectement
dans une prisede 120volts _ trois cavReset
correctementmise_ Jaterre.
Toujuursd4braneherf'appareitavantd'y fairede
l'entretien.
Lafiche _trois brochesmise_ la terre foumit uneprotection contre
lesd6charges61ectriques.NE PASCOUPERNI ENLEVERLP,
RROCHE DE TERRE DU CORDON D'ALIIVmENTATION.
Si la prise necomporte que deux cavit6s,n'est pas +elsea la terre ou
n'est pasappropri6e,mepropri_taire de l'appareil a la responsa+
bimit_de faire rempmaeermaprise par role prise _ trois cavitSs
correctement raise _ materreo
papier,des produits it!flammables0u des produitsa!irnentaires.
Durant lefonctionneme_tdu four, uneternp@atureexcessive
pour cesarticles peut s'6tablJrdans letiroJr.
Letiroir de remisagepeut 6tre enlev6pour vouspermettrede
nettoyersousla cuisiniSre+
D6pose :
1+ Vider le tiroir et le tirer jusqu'_ la position de la premierebut6e+
2+ SouleverI'avant+
3+ Tirerjusqu'_ la position de la secondebut6e+
4+ Saisir le tiroir par les cOt6set soulever/tirerpour I'extraire+
R_installation :
1+ InsUrerIesextr@ait6sdes glissiSresdu tiroir dans les rails de la
cuisJni_re.
2+ SouleverI'avantdu tiroir et pousserdoucementjusqu'_ la
positionde la premierebut6e.
3+ Souleverde nouveauJetiroir et lepousser pour le fermer+
47
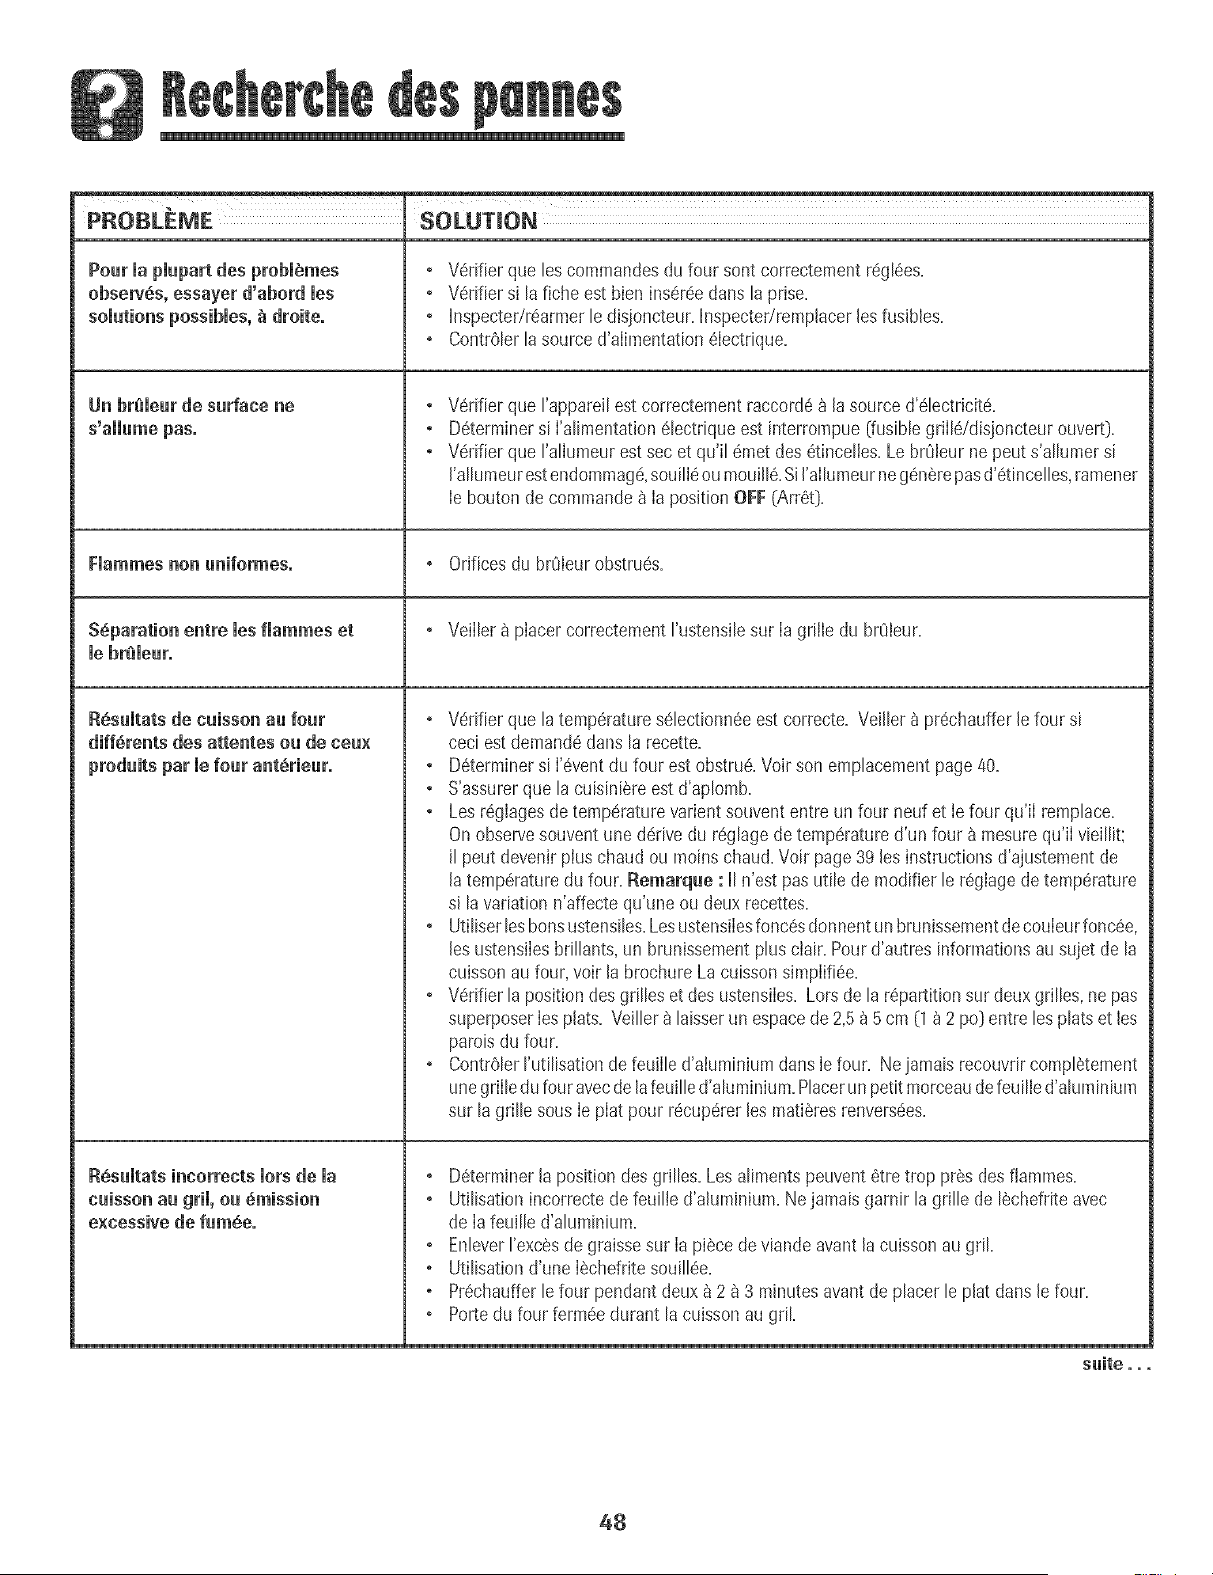
PROBLEME SOLUTION
Pourmapmupartdesprobm_mes
obse_6s, essayer d'abord rues
somutionspossibmes,_ droite.
Un br_meurde surface ne
° V6rifier que lescommandesdufour sont correctementr6gl6es.
° V6rifiersi la fiche estbien ins6r6edartslaprise.
° Inspectedr6armerle disioncteur.Inspecter/repaplacerlesfusibles.
° ContrOlerlasourced'alimentationelectrique.
Verifier que rappareilestcorrectementraccorde_ lasourced'electricit&
Determinersi I'alimentationelectriqueest interrompue(fusiblegrilIddisjoncteur ouvert).
Verifier que rallumeurest sec et qu'il emetdes etincelles.Le br0Ieurne peut s'alkmlersi
I'allumeurestendommag&souilleou mouill&SiI'allumeurnegenerepasd'etincelles,ramener
Ie bouton de commande8 IapositionOFF (Arre0.
Flammes non uniformes. ° Orificesdu br0Ieurobstrues.
S_paration entre les flammes et , Veiller _ placer correctementI'ustensilesur Ia grille du brOleur.
le breleur.
Resuitats de cuisson uu four
diff6rents des attentes ou de eeu×
produits parmefour unterieur,
Resultats ineorrects morsde ma
euisson au grim,ou _mission
excessive de fumee.
Verifier que latemperatureselectionneeest correcte. Veiller _ prechaufferle four si
ceci estdemandedans la recette.
° Determinersi I'eventdu four estobstru& Voir son emplacementpage 40.
° S'assurerque la cuisiniereest d'aplomb.
° Les reglagesde temperaturevarientsouvententre un four neuf et Ie four qu'iI remplace.
Onobservesouventune derivedu reglagede temperatured'un four _ mesurequ'iI vieillit:
il pent devenirplus chaud ou moinschaud.Voir page39 les instructionsd'ajustementde
la temperaturedu four.Remarque : II n'est pasutile de modifierle reglage detemperature
si lavariationn'affecte qu'une ou deux recettes.
° Utiliserlesbonsustensiles.Lesustensilesfoncesdonnentunbrunissementdecouleurfoncee,
les ustensilesbrillants,un brunissementplus clair.Pourd'autres inforpaationsau sujet de la
cuissonau four,voir la brochureLa cuissonsimplifiee.
° Verifier la positiondesgrilles et des ustensiles. Lotsde la repartitionsur deux grilles, ne pas
superposerIesplats. Veiller _ hisser un espacede 2,5_ 5 cm (1 _ 2 po] entre lesplats et les
paroisdu four.
, ContrOlerrutilisation defeuille d'atuminiumdansle four. Nejamaisrecouvdrcompletement
unegrille dufour avecdelafeuilled'aluminium.Placerun petitmorceaudefeuilled'aluminium
sur lagrille sousIe plat pour recupererles matieresrenversees.
, Determinerla positiondes grilles.Lesalimentspeuventetre trop pres desflammes.
, Utilisation incorrectede feuilIe d'aluminium.Nejamais garnir la grille de lechefriteavec
de Ia feuille d'aluminium.
, EnleverI'excesde graissesur Ia piecede viande avant la cuissonau gril.
• Utilisation d'une Iechefritesouillee.
o Prechaufferlefour pendantdeux _ 2 _ 3 minutesavant de placer le plat dartsle four.
• Portedu four fermeedurant la cuissonau griL
suite° o.
48
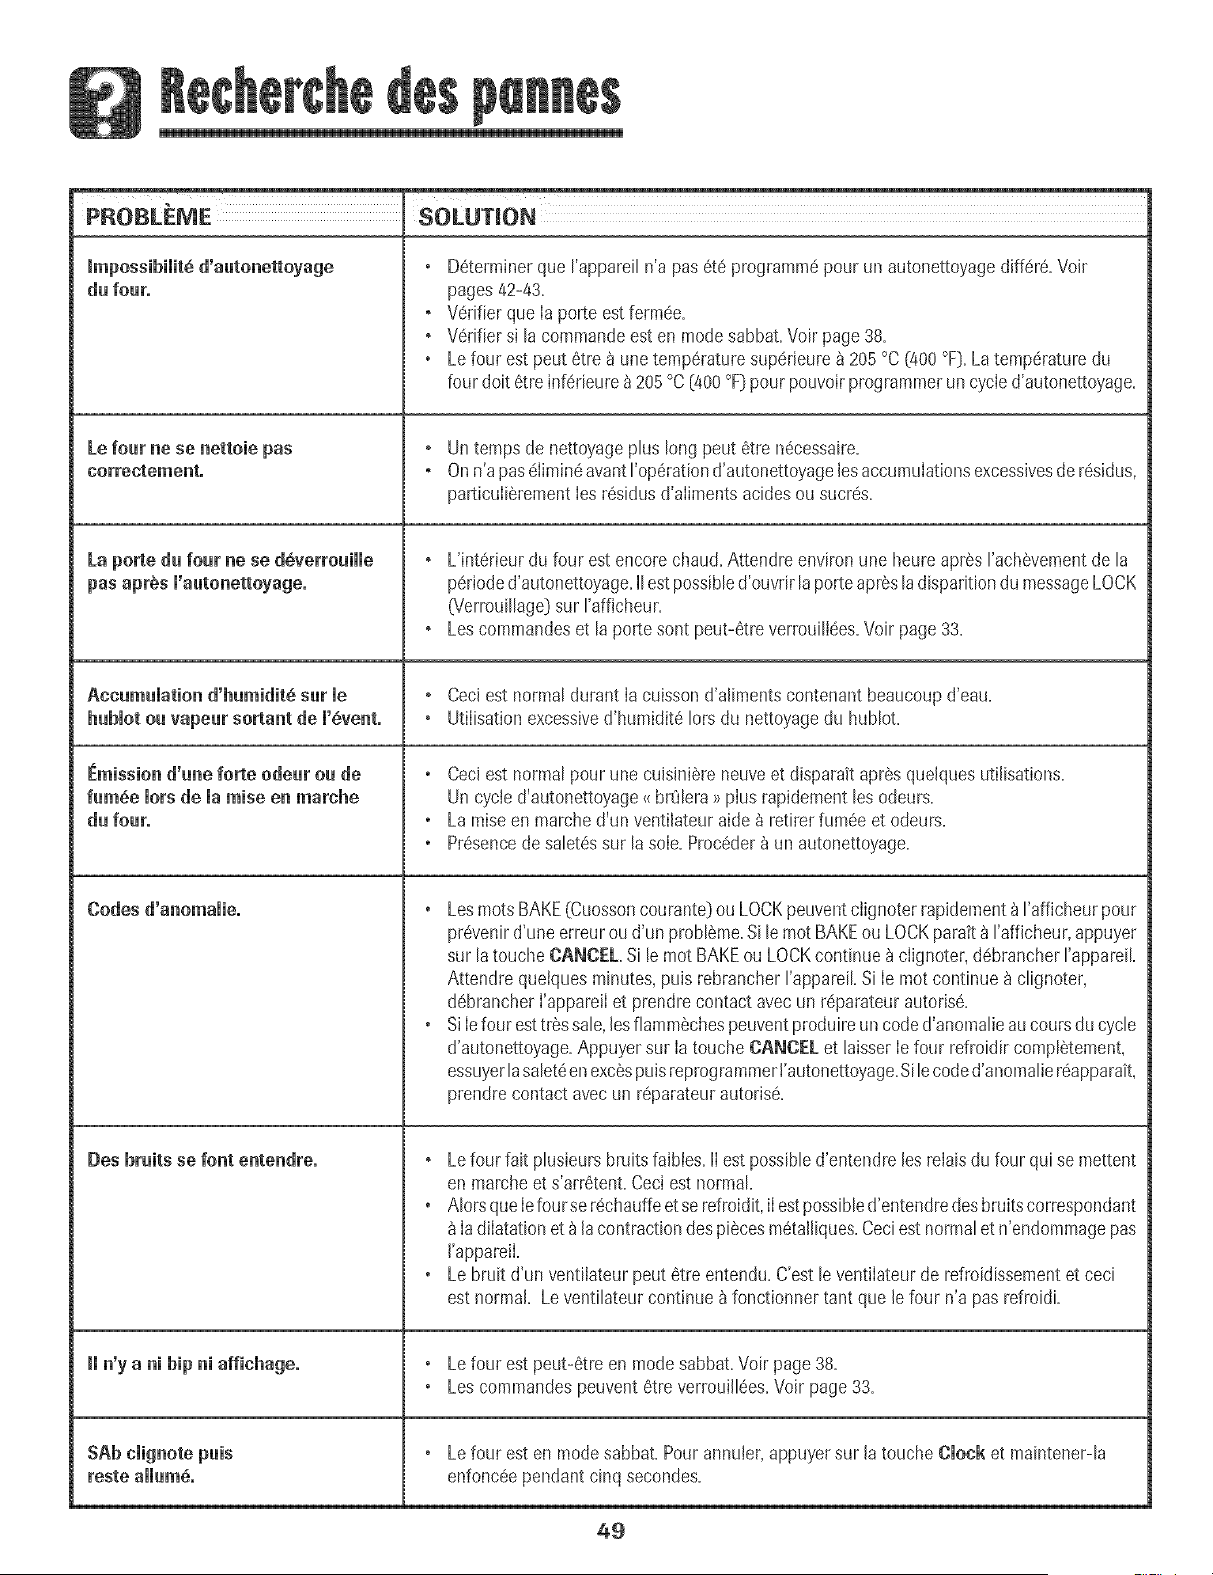
B
PP,OBLEME SOLUTION
mpossibimit6d autonettoyage
du four.
Lefour ne se nettoie pus
corr@ctem@nto
La porte du four ne se d_verrouimme
Accumumationd'humidit_ sat me
humorou vapearsortant de m'6vent.
Emission d'une forte odear ou de
fum6emorsdemaraiseenmarche
du four.
codesd'anomamie.
Des bruits se font entendreo
n'yanihipni affichage.
SAb cmignotepais
reste ammum_.
o Determinerque Fappareiln'a pusete programmepour un autonettoyagediffere.Voir
pages82-43.
, Verifier que Ia porte est fermee.
, Verifier si lacammandeesten mode sabbat.Vair page 38.
o Le four est peut etre 8 une temperaturesuperieure_ 205°C [400°F].La temperaturedu
four doit etreinferieure_ 205 °C(400°F[pour pauvoirprogrammeruncycled'autonettoyage.
, Un tempsde nettayageplus long peut etre necessaire.
, Onn'a puselimineavantI'aperationd'autanettoyagelesaccumulatiansexcessivesderesidus,
particulierementIesresidusd'alimentsacidesau sucres.
, L'interieurdu four estencore chaud.Attendre environ une heure apresI'achevementde la
periaded'autonettoyage.IIestpassibled'ouvrir la porteapresladisparitiondu messageLOCK
(Verrouillage)sur I'afficheur.
, Lescommandeset la porte sont peut-6treverrouilI6es.Voir page33.
, Ceciest normal durant Ia cuissond'alimentscontenantbeaucaupd'eau.
• Utilisatianexcessived'humidite lots du nettoyagedu hublot.
o Ceciest normal pourune cuisiniere neuveet disparaitapres quelquesutilisatians.
Un cycled'autonettoyage_<brCJlera>>plus rapidementles odeurs.
o La raiseen marche d'un ventilateur aide_ retirer fumeeet odeurs.
o Presencede saletessur la sole. Praceder_ un autonettoyage.
o LesmatsBAKE[Cuassoncourante)au LOCKpeuventclignoterrapidement_Fafficheurpour
prevenird'une erreur ou d'un prableme.Si lematBAKEau LOCKparatt8 I'afficheur,appuyer
sur latoucheCANCEL.Si lemot BAKEou LOCKcontinue _ clignoter,debrancherI'appareiL
Attendre queiquesminutes,puis rebrancherI'appareiLSi Ie mot continue_ clignater,
d6brancherI'appareiIet prendrecontact avec un reparateurautarise.
o SiIefour esttr_ssale,lesfiammechespeuventproduireun coded'anomalieaucaursducycle
d'autonettoyage.Appuyersur Ia touche CANCELet hisser Iefour refroidir completement,
essuyerlasaleteen exc_spuisreprograminer!'autanettayage.Silecoded'anamalier6apparait,
prendrecontact avec un r6parateurautorise.
, Le four fait plusieurs bruits faibles.II est possibled'entendreles relaisdu four qui se mettent
en marcheet s'arretent.Ceci est normal.
o AlorsqueIefourse rechauffeetse refroidit,iI estpossibled'entendredesbruitscarrespondant
ladilatationet _la cantractiondespi_cesmetalliques.Ceciestnormalet n'endammagepus
['appareiL
o Le bruit d'un ventilateurpeut 6tre entendu. C'estle ventilateur de refroidissementet ceci
est normal Leventilateur continue_ fonctionnertant que [e faur n'a pasrefroidL
o Le four est peut-etre en modesabbat.Vair page38.
o Lescommandespeuventetre verrouillees.Voir page33.
• Le four est en madesabbat. Pourannuler,appuyersur Jatouche cmonket maintener-la
enfanc6ependantcinq secondes.
49

50
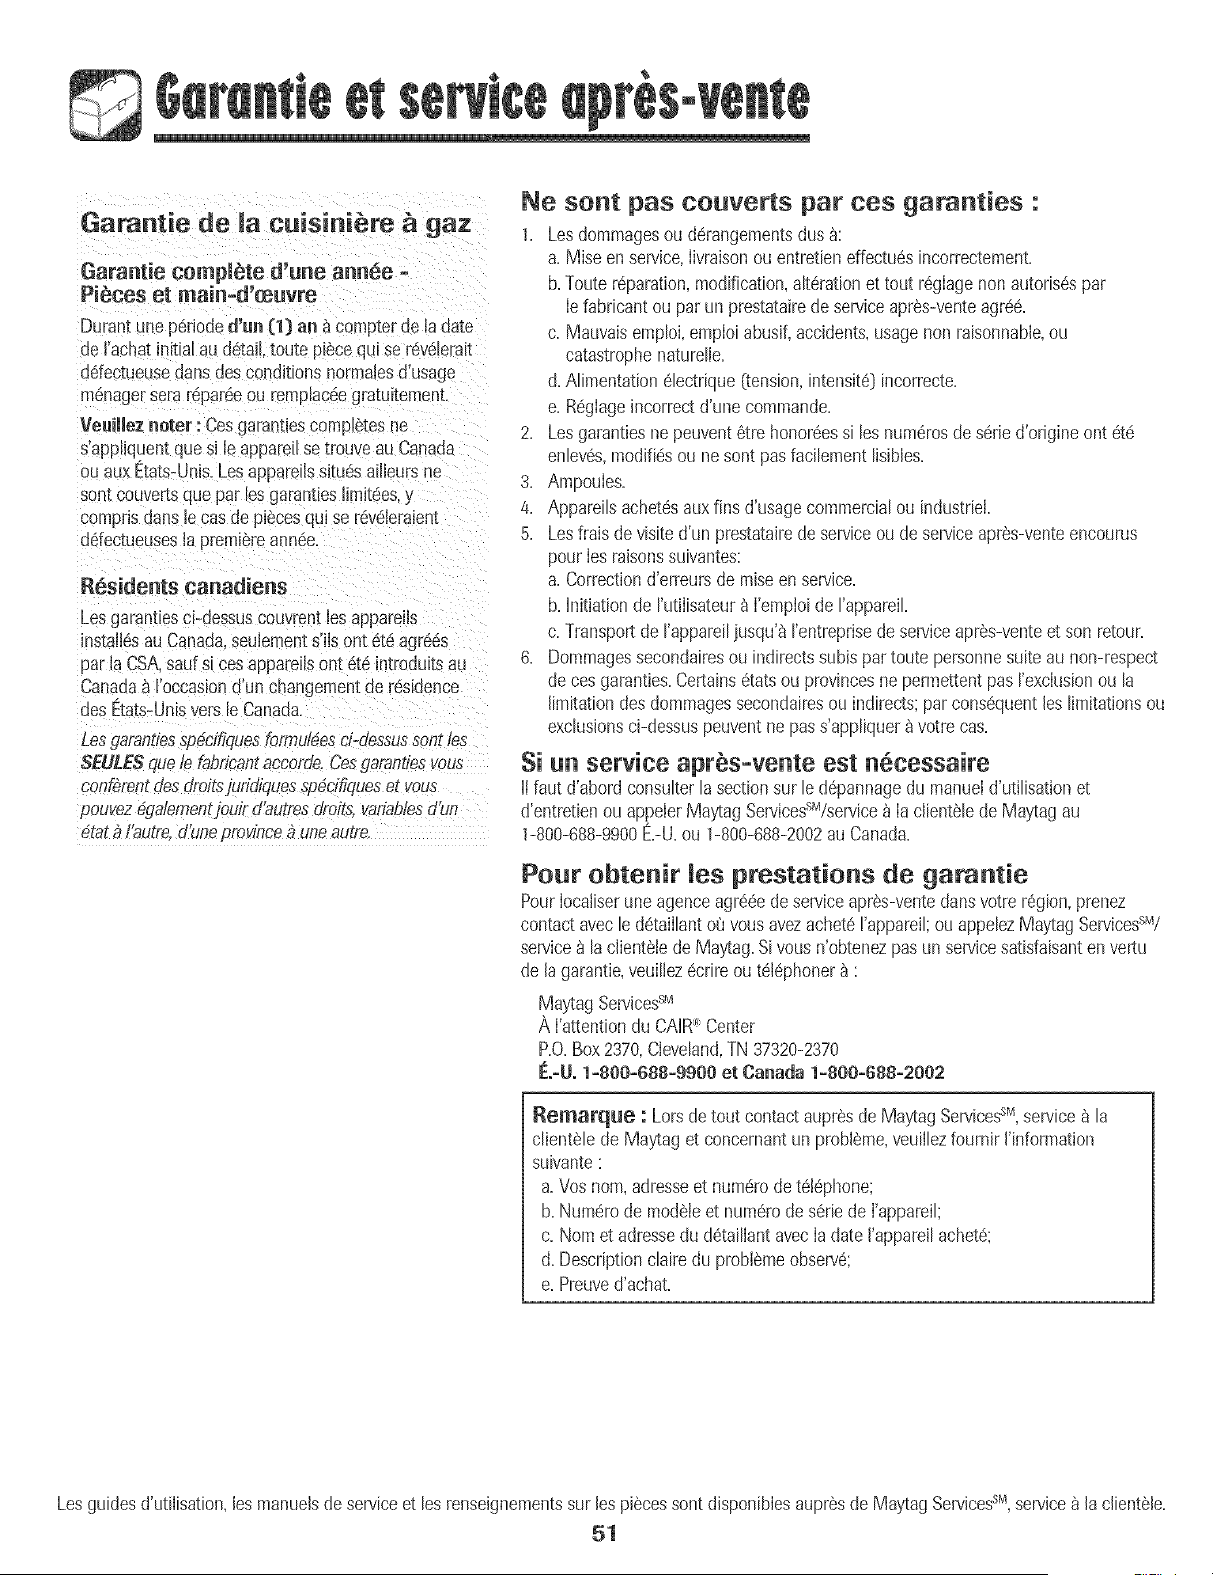
Garantie de ia cuisini_te _ gaz
Garantie complbte d'une annee =
Pibces et main-d'oeuvre
Duran_une perJoded'un (1} an _ comp-[eroe Jadate
de I'achatinitiaEau detail toutepiecequ_se r@ebrat
ddectueusedans desconditionsnormalesd'usage
menagersera repase ou rempla@egratuitemen_.
Veuillezrioter : Cesgarantlescompletesne
s'apphquemquesi le apparellsetrouveau Canada
ou auxEtats-Unb.Lesappareilssitu@ailleursne
son[couver[squepar bs garantieslimit@s,y
comprisdartsb casde piecesqul se revebraient
ddectueusesla p[smiereannee.
Residents canadiens
Lesgarantiesci-dessuscouvrentiesappareils
installesau Canada.seulementslls ont ete agrees
par laCSA.sad si cesap_areilsont et_s.introduitsau
Can@a_ I'occasiond'un changementde residence
6es Etats-Unisversb Canada.
Lesgarantiesspeeffiquesformutdesci-dessussonrIns
SEULESqu'e/e fabricantaccorde.Cesgarantiesvous
conf_rentdesdroitsjur,_qquesspec,,tiqueser vous
pouvez_galemenzjouird'autresdrolts,variablesd'un
_tatb/'autre,d'uneprovincefi uneautre
Ne sent pas couverts par ces garanties :
1. Lesdommagesouderangementsdus _}_:
a=Miseenservice,Iivraisonou entretieneffectuesincorrectement=
b=Touter@aration,modification,alterationet tout regIagenonautoris@par
Iefabncantou parun prestatairedeserviceapr_s-venteagree=
c. Mauvaisemploi,emploiabusif,accidents,usagenon raisonnabb,ou
catastrophenaturelb.
d. Alimentationelectrique(tension,intensitd)incorrecte.
e. RegIageincorrectd'une commande.
2. Lesgarantiesnepeuvent6tre honor@ssi les numerosde seried'origineont ete
enbv@,modifi@ou nesont pasfacibment lisibles.
3. Ampoules.
4. Appareilsachetesauxfins d'usagecommercialou industriel.
5. Lesfrais devisited'un prestatairede serviceoude serviceapres-venteencourus
pourIesraisonssuivantes:
a. Correctiond'erreursde paiseen service.
b. initiationde I'utilisateur_I'empioide rappareiL
c. Transportde I'appareiliusqu'8I'entreprisede serviceapr@-venteet son retour.
6. Dommagessecondairesou indirectssubispar toute personnesuiteau non-respect
de cesgaranties.Certainsetatsou provincesne permettentpas I'exclusionou la
limitationdes dommagessecondairesou indirects;parconsequentleslimitationsou
exclusionsci-dessuspeuventnepass'appliquer_votre cas.
Si un sewice apr_s_vente est n6cessaire
Itfaut d'abordconsulterla sectionsur le d@annagedu manueld'utilisationet
d'entretbn ou appelerMay'tagServicesSM/service_ IaclientSbde Maytagau
1-800-688-9900E=-U=ou 1-800-688-2002au Canada.
Pour obtenir _es prestations de garantie
PourIocatiserune agenceagre@deserviceapres-ventedansvotreregion,prenez
contactavecle detaiIlanto_vousavezachete!'appareil;ouappelezMaytagServicesSM/
service_ laclient_b deMaytag.Sivousn'obtenezpas un servicesatisfaisantenvertu
de lagarantie,veuillezecrireou tel@honer_ :
MaytagServicessM
A I'attentiondu CAIR_ Center
P.O.Box2370,Cleveland,TN 37320-2370
F:o-Uo1-800-688-9900 et Canada 1-800-688-2002
Remarque : Lorsde tout contactaupr6sdeMaytagServices%servicea la
clienteb de MayCaget concernantun probleme,veuilbzfournir I'information
suivante:
a. Vosnora,adresseet numerode tel@hone;
b.Num_rode mo@leet numerode seriede I'appareil;
c. Noraet adressedu @taillantavecIa date I'appareilachete:
d. Descriptionclairedu problemeobserve:
e. Preuved'achat.
Lesguidesd'utiJisation,bs manuebde serviceet les renseJgnementssur Jespiecessontdisponibbsaupresde MaytagServbessr_,service_ Jaclienteb.
51
MAY]PAG
®
Estufa a Gas Desmizante con Controm a
Precisi6n Sensibme amTacto 500
//
Tabma de Matetias
Instrucciones Importantes
sobre Seguridad ........................ 53-57
Cocinando en la Estufa ............ 58-59
ControHes
Quemadores de Gas Sellados
Cocinando en el Homo ............ 60=69
Horneado
'Cook & HoW
'Cook & HoW Diferido
Mantener Caliente
Asar a la Parrilla
Parrillas del Homo
Cuidado y Limpieza .................. 70-73
Proced mientos de Limpieza
Mantenimiento .......................... 74-75
Ventana y Luz del Homo
Retiro de la Estufa a Gas
Localizaci6n y Soluci6n
de Aver_as ................................... 76=77
Garantia y Servicio .......................... 79
[nstalador: Potfavor dejeesta gu[ajunto COne[
Censumidor: Potfavor leay COnServeesta guia para rderencia
NOmerode Modelo
N_merodeSerie
Fecha de Cornpra
(Lunesa Viernes,8100a.m.a 8;00p.m. Horade[ Este)
Ennuestrocontinuo af_n de mejorar !aCa!idady [endimiento de
nuestroselec_rodorn6sticos,puede que sea necesariomodificar
Para i#fermacifi# seflre servicie, ver pbg#la 79.
Lea y siga todas las instrucciones antes de usar este
eiectrodom_stico para evitar el fiesgo potential de incendio=
choque el6ctfico= lesion personal o daSo al electrodom6stico
como resultado de su uso inapropiado. Utilice este
electrodomestico sohmente para el propOsito que ha sido
destinado segQn se describe en esta guia.
Para asegarar funcionamiento correcto y seguro: El
electrodom6stico debe sell instalado debidamente y puesto a
tierra poll un tecnico calificado. No intente ajustar, reparaH
prestal servicio o reemplazar nnguna pieza de este electro-
dom6stico a menos que sea especdicamente recomendado en
esta guia. Todas las reparaciones deben ser realizadas por un
tecnico cafificado. Pida al instahdor que le indique la
ubicaciOn de la v_ilvula de cierre del gas y como cerrafla en
caso de una emergencia.
Siempre desenchufe el electrodom6stico antes de efectuan
alguna reparaciOn.
Las advertencias e instrucciones importantes sobre seguridad
que aparecen en esta guia no est_in destinadas a cubrir todas
las posiNes circunstancias y situaciones que puedan ocurrir.
Se debe ejercer sentido comLin, precauciOn y cuidado cuando
instale, realice mantenimiento o haga funcionar el artefacto.
Siempre pOngase en contacto con el fabricante si surgen
proNemas o situaciones que usted no comprenda.
Reconozca los simbolos, advertencias,
etiquetas de seguridad
Si no se sigue estrictamente la infermaci6n
prepercienada en esta gala, se puede preducir Ltn
incendie e una e×plesi6n, causande da_os materiaies,
lesienes persenaies e mertales.
No almacene ni ase gaselina ni etres vaperes y
liquides inflamables en la vecindad de este
electrodom_stico o de cualquier otroo
QUE HACER SI PERCIBE OLOR A GAS:
o Ne trate de encender ning_n artefact&
. No toque ning_n interrupter el6ctriceo
. No use ningen tel6feno en su edificie,
• Llame inmediatamente a su preveeder de gas
_esde el tel_fene ee a a vecine. Siga las
instracciones prepereiena_as per el prevee_e[
_e gas.
o Si no pae_e lecalizar a su prevee_or _e gas,
_lame al cuerpe _e beraberes°
- La instalaci_n y reparacienes _eben set efectua_as
per _n t_cnice ealifica_e, una agencia _e
reparacienes e el prevee_er _e gas.
PODRIAN causar lesion personal grave o mortal.
una situaciOn pdigrosa. Los escapes de gas no pueden ser
PODRIAN Causar lesion personal menos grave.
acuerdo con bs inst[ucciones del [abdcante.
53

lnstruccienes Generates
o TODAS LAS ESTUFAS SE PUEDEN
VOLCAR Y CAUSAR LESJONES
PERSONALES
° mNSTALEEL DmSPOSffW(}
ANTiVUELCO INCLUIDO CON LA
ESTUFA
o SIGA TODAS LAS mNSTRUCCiONES
DE mNSTALACmON
ADVERTENCIA: Para redueir el desgo de vuelco deU
ebctrodom6stico a eausa de use anormal o debido a
peso e×eesivo en Japuerta deJ homo, es neoesario
asegurarJo mediante un dispositivo antivueleo
debidamente instalado=
Paraverificar si eI disposidvo est,1debidamente instaBdo, mire
debajo de la estufa con una linterna para asegurarse de que
uno de los tornillos niveladores traseros estd debidamente
enganchado en la ranura del soporte, Eldispositivo antivuebo
asegura el tornillo niveBdor trasero al piso cuando estd
debidamente enganchado, Estodebe verificarse carla vez
que la estufa sea movida,
Pata Evitar un it|cot|die e
Da e Causado pet eJ Hume
Asegurese de que se hayan retirado redes los materiabs de
empaque del ebctrodomdstico antes de su use,
Mantenga el drea alrededor del ebctrodomdstico libre y
exenta de materiabs combustibles, gasolina u otros vapores y
materiabs infiamabbs,
Si el ebctrodomestico es instalado cerca de una ventana, se
debe tener cuidado para evitar que Bs cortinas pasen sobre
los quemadores,
NUNCA deje articulos sobre la cubierta de la estufa, Elaire
caliente del respiradero puede encender los articulos
infiamabbs y aumentar la presi6n en los envases cerrados
hasta hacerlos reventar,
Muchos envases de tipo aerosol son EXPLOSIVOScuando son
expuestos al crier y pueden ser altamente infiamabbs, Evite
su use o su almacenamiento cerca del ebctrodom6stico,
Muchos pl_sticos son vulnerables al calor, Mantenga los
pl_sticos alejados de las piezas de la estufa que puedan estar
tibias o calientes, No deje art{culos de pl_stico sobre la
cubierta de la estufa pues se pueden derretir o ablandar si
est_indemasiado cerca del respiradero o de un quemador
superior encendido,
Paraeiiminar ei riesgo de pasar sobre los quemadores
superiores calientes, no se deben guardar art{culos en los
armarios que estSn directamente sobre la estufa, Si tabs
armarios son usados para almacenamiento, debe limitarse a
colocar articulos de use poco frecuente y que pueden
guardarse en forma segura en una _rea que est_ sujeta ai
calor proveniente de la estufa, Las temperaturas pueden no
set apropiadas para algunos articulos, tal come liquidos
vol_itiles,limpiadores o sprays en aerosol,
En Case de lncendie
Apague ei eiectrodomestico y ia campana de ventiiaci6n para
evitar que las llamas se dispersen, Extinga las llamas luego
encienda ia campana para expuisar ei humo y ei oior,
• En la eubierta: Apague ei fuego o ia llama en una sart_n
con una tapa o una bandeja de hornear,
NUNCA levante o mueva una sartdn en llamas,
• En el homo: Apague el fuego o la llama cerrando la puerta
dei homo,
No use agua en los incendios de grasa, Use bicarbonate, un
producto quimico seco o un extinguidor dei tipo con espuma
para apagar un incendio o la llama,
Seguridad para Jes Ni es
NUNCA almacene art[cuios de inter6s para !os nih0S en !0S
armar!os que est_n sobre la estufa o en el protecto[ t[asero
de la estufa, LOSn!SoSque se trepan en la puerta de la
sedamente,
NUNCA deje a los niSos solos o sin supervisi6n cuando el
electrodomestico est6 en use o este caliente,
NUNCA permita que los niSos se sienten o se paren en
ninguna parte del electrodom6stico pues se pueden lesionar o
quemar,
54
Sebsdebeensdiaralosni_iosqueeIebctrodom6stboy
losutensiiiosqueestanen_Io sobre61puedenestar
cdientes,Dejeenfnarlosutensiiioscaiientesenunlugar
seguro,fueradeIabancedelosni_iospequdios,Sebs
debeensdiaralosni_iosqueunebctrodom6stbonoesun
juguete,Nosedebepermitirquelosni_iosjueguenconlos
controbsu otraspbzasdelaestufa,
NUNCA use la puerta de este elec_rodom6sticocomo pelda_o
o asiento ya que el ebcUodom6stico se puede volcar, y causar
lesiones graves,
NUNCA use este electrodom6stico como caiefactor de area
o para elevar la temperatura de la habitaciOn, Esto puede
causar envenenamiento pot monOxido de carbono y el
sobr_caientamiento del homo
NUNCA cubra ninguna rendija, agujero o canal en la parte
inferior dei homo o cubra la rejilia compbta con materiabs
tales como el papei de aluminio, Esto evita que ei aire fiuya
a trav6s del norno y puede causar envenenamiento por
mon6xido de carbono, El papel de aiuminio tambi6n puede
contener el calor y producir un riesgo de incendio,
NUNCA obstruya el fiujo dei aire de combusti6n y de
ventilaciOncubriendo las entradas o salidas de aire del homo,
Esto puede restringir ei acceso del aire a los quemadores
causar envenenamiento pot monOxidode carbono,
El respiradero del homo se encuentra en la parte trasera de la
superficie de cocci6n,
Evite tocar el area del respiradero mientras el homo est6
encendido y durante varios minutos despues de haberlo
apagado, Aigunas partes dei respiradero y dei area que io
rodea se calientan Io suficiente como para causar
quemaduras, Despuds de apagar ei homo, no toque ei
respiradero o el area que Io rodea hasta que haya tenido
suficiente tiempo para enfriarse,
Qtras superficies que pueden estar calientes incluyen la
cubierta, las superficies que estan dirigidas hacia la cubierta,
el respiradero del homo, la superficie cercana a la abertura del
respiradero, ia puerta dei homo y ia area que ia rodea, y ia
ventanilla del homo,
No toque un foco de homo caliente con un patio hOmedo ya
que se puede romper, Si ei foco se rompe, desconecte ei
suministro eldctrico al electrodomdstico antes de retirar el foco
para evitar un choque el6ctrico,
No utilice la cubierta o los hornos como areas de
almacenamiento para alimentos o utensilios de cocina,
Seguridad Para Coeinar
Siempre coioque un utensiiio en un quemador superior antes
de encenderio, Asegurese de usar ia periiia correcta que
controia cada quemador superior, AsegSrese de encender ei
quemador correcto y comprobar de queen efecto ei
quemador haya sido encendido, Cuando haya terminado de
cocinar, apague ei quemador antes de retirar ei utensiiio para
evitar exposici6n a la llama del quemador,
Siempre ajuste ia llama dei quemador superior de modo que
no se extienda mas alia del borde inferior del utensilio, Una
llama excesiva es peiigrosa, desperdicia energia y puede
da_iar la estufa, el utensilio o los armarios que estan sobre la
estufa,
NUNCA deje sin supervisi6n ia cubierta de ia estufa cuando
este cocinando, especialmente cuando usa un ajuste de calor
alto o cuando est6 usando una freidora, Los reboses pueden
producir humo y los derrames de grasa pueden infiamarse,
Limpie los derrames grasosos tan pronto como sea posible,
No use calor alto durante periodos de cocci6n prolongados,
NUNCA caiiente un envase cerrado en ei quemador superior
o en ei homo, La acumuiaci6n de presi6n puede hacer
explotar el envase causando una lesi6n personal grave o ddio
a la estufa,
Use tomaollas secos y gruesos, Los tomaollas hOmedos
pueden causar quemaduras a causa dei vapor, Las toaiias u
otros sustitutos no deben ser usados como tomaollas porque
eiios pueden quedar coigando a trav6s de los quemadores
superiores y encenderse o enredarse en ias piezas de ia
estufa,
Siempre deje enfriar la grasa caliente que se ha usado en la
freidora antes de intentar mover o manipularla,
No permita que se acumule grasa u otros materiales
inflamables en la estufa o cerca de ella, en la campana o en el
ventilador aspirador, Limpie la campana extractora con
frecuencia para evitar que la grasa u otros materiales
inflamables se acumulen en la campana o en el filtro,
Encienda el ventilador cuando cocine alimentos flameados
debajo ia campana,
NUNCA use vestimentas de materiales inflamables, ropa
suelta o de mangas largas cuando est6 cocinando, La
vestimenta se puede encender o enganchar en los mangos de
los utensilios,
55
SbmprecoIoquelasparriihsdeIhomoenlaposbi6ndeseada
cuandoeIhomoest6frio, DesibelaparriihdeIhomohacia
afueraparaagregaroretiraraiimento,usandotomaoiiassecos
yresbtentes,SiempreeviteabanzardentrodeIhomopara
agregaroretiraraiimentos,Siunaparriiiadebesersacada
cuandoest,1todaviacaiiente,useuntomaoiiasseco,Siempre
@agueeIhomo@spudsdehaberterminadodecocinar,
Tengacuidadocuandoabralapuertadeihomo,Dejeque
escapeeIaireoeIvaporcaibnteantesdesacarovoiver
coIocareIaiimento,
ADVERTENCIASOBRE LOS ALIMENTOS PREPARADOS:
Siga Bs instrucciones del fabricante de los aBnentos, Si un
envase de pldstico de alimento congeBdo y/o su tapa se
deforma, se comba o se da_ia de alguna otra manera durante
la cocci6n, descarte inmediatamente el alimento y su envase,
Elalimento puede estar contaminado,
NUNCA use papel de duminio para cubrir una parrilh del
homo o la parte inferior del homo, El uso incorrecto puede
resultar en un riesgo de choque el6ctrico, incendio o daho al
ebctrodomestico, Use papel de duminio soBmente como se
indica en esta guia,
Utensilios Apropiados
Use sartenes con fondos pBnos y mangos que sean f_cibs de
tomar y que permanezcan frios, Evite usar sartenes u ollas
inestabbs, combadas que se pueden vobar fdcilmente u olhs
cuyos mangos est6n sueltos, Ademds evite usar utensilios
especidmente peque_ios o sartenes con mangos pesados
pues ellos pueden ser inestabbs y vobarse fdcilmente, Los
utensilios que son pesados de mover cuando est_in Ibnos con
alimento pueden tambi_n ser un peligro,
Asegurese de que el utensilio sea Io suficientemente grande
como para contener en forma debida los alimentos y evitar
derrames, El tama_ioes particularmente importante cuando
se utilizan freidoras, Asegu3resede que el utensilio tiene
capacidad para el volumen de dimentos que se va a agregar
al iguai que para la formaci6n de burbujas de la grasa,
Para reducir a un minimo Bs quemaduras y que los materiabs
infiamabbs y los derrames se enciendan debidos a contacto
no intencional con el utensilio, los mangos no deben
extenderse sobre el quemador superior adyacente, Siempre
gire los mangos de los utensilios hacia el lado o hacia la parte
trasera de la estufa, no hacia la habitaci6n donde puede ser
facilmente golpeados o dcanzados por los ni_ios pequehos,
Nunca deje que un utensilio hierva hasta quedar seco pues
esto puede da_iar el utensilio y la estufa,
Siga las instrucciones del fabricante cuando use bolsas para
cocinar en el homo,
Solamente ciertos tipos de utensilios de vidrio cer_imico, de
ceramica o glaseados son convenientes para uso en la
cubierta de la estufa o en el homo sin quebrarse debido al
cambio repentino de temperatura, Siga las instrucciones del
fabricante cuando use utensilios de vidrio,
Esteelectrodomestico ha sido probado respecto a su
rendimiento seguro usando utensilios de cocina
convencionales, No use ningun dispositivo o accesorio que no
haya sido espedficamente recomendado en esta guia, No use
tapas para cubrir los quemadores superiores, rejiiias para ia
cubierta de la estufa ni agregue sistemas de convecci6n para
hornos, El uso de dispositivos o accesorios que no son
expresamente recomendados en esta guia, puede crear serios
peligros de seguridad, resultar en problemas de rendimiento y
reducir la vida utii de los componentes de la estufa,
Seguridad de la Limpieza
Apague todos los controies y espere que se enfrien ias piezas
de la estufa antes de tocarlas o limpiarlas, No toque las
rejiiias de los quemadores o ias _reas circundantes hasta que
elias no hayan tenido tiempo suficiente de enfriarse,
Limpie la estufa con cuidado, Tenga cuidado para evitar
quemaduras de vapor si se usa una esponja o un paho mojado
para iimpiar los derrames en una superficie caiiente, Aigunos
iimpiadores pueden producir vapores nocivos cuando se
aplican a una superficie caliente,
Homo Auto impiante
No deje a!imento ni utensilios de cocina, etc, en e! homo
durante el cicio de autolimpieza_
Limpie solamente las piezas que se indican en esta guia, No
iimpie ia junta de ia puerta, La junta es esenciai para un
sellado herm6tico, No restriegue, ddie, ni mueva la junta de
la puerta, No use limpiadores de homo de ninguna clase en el
homo ni alrededor de cualquier parte del homo autolimpiante,
56
Antes de la autolimpieza del homo, saque la asadera, las
parrillas dd homo y otros utensilios y limpie los derrames
excesivos para evitar que se produzca demasiado humo,
Ilamaradas o llamas.
Es normal que la cubierta de la estufa se cdiente durante el
ciclo de autolimpieza. Pot Io tanto, se debe evitar tocar la
cubierta durante un ciclo de autolimpieza.
Aviso y Advertencia
lmportante Sobre Seguridad
La Propuesta 65 de la Ley de 1986 del Estado de California
Sobre Seguridad y Contaminad6n del Agua Potable (California
Safe Drinking Water and Toxic Enforcement Act of 1986_}exige
que el Gobemador de California publique una lista de las
sustancias que segun el estado de California causan c_incer o
da_io al sistema reproductivo y exige que hs empresas
adviertan a sus dientes sobre la exposici6n potencid a tales
sustancias.
Se advierte a los usuarios de esta estufa que la combusti6n
del gas puede resultar en exposici6n de bajo nivel a dgunas
de las sustancias publicadas en la lista, induyendo benceno,
formddeh{do y hollin, debido principalmente a la combusti6n
incompleta del gas natural o de los combustibles de petr61eo
licuado. Los quemadores ajustados en forma debida
reducirdn la combusti6n incompleta. La exposici6n a estas
sustancias puede tambi6n set reducida a un minimo
ventilando los quemadores al exterior en forma adecuada.
Se advierte a los usuarios de este electrodomdstico que
cuando el homo est,1funcionando en el cido de autolimpieza,
puede haber exposici6n de bajo nivel a dgunas de las
sustancias indicadas en la lista, induyendo mon6xido de
carbono. La exposici6n a estas sustancias puede set reducida
a un minimo ventilando el homo al exterior en forma
adecuada, abriendo las ventanas y/o la puerta en la habitaci6n
en donde est,1ubicado el electrodomdstico durante el cido de
AVISO mMPORTANTE RESPECTO A LOS PAJAROS
DOMESTmCOS:
Nunca mantenga los pdjaros en la cocina o en las
habitaciones donde puedan Ilegar los humos de la cocina. Los
pdjaros tienen un sistema respiratorio muy sensitivo. Los
humos producidos durante el cido de autolimpieza dd homo
pueden set perjudiciales o mortales para los p_ijaros. Los
humos que despide el aceite de cocina recalentado, la grasa,
margarina y los utensilios antiadherentes recalentados pueden
tambi6n set perjudiciales.
Conserve estas lnstrucciones para Referencia Futura
57
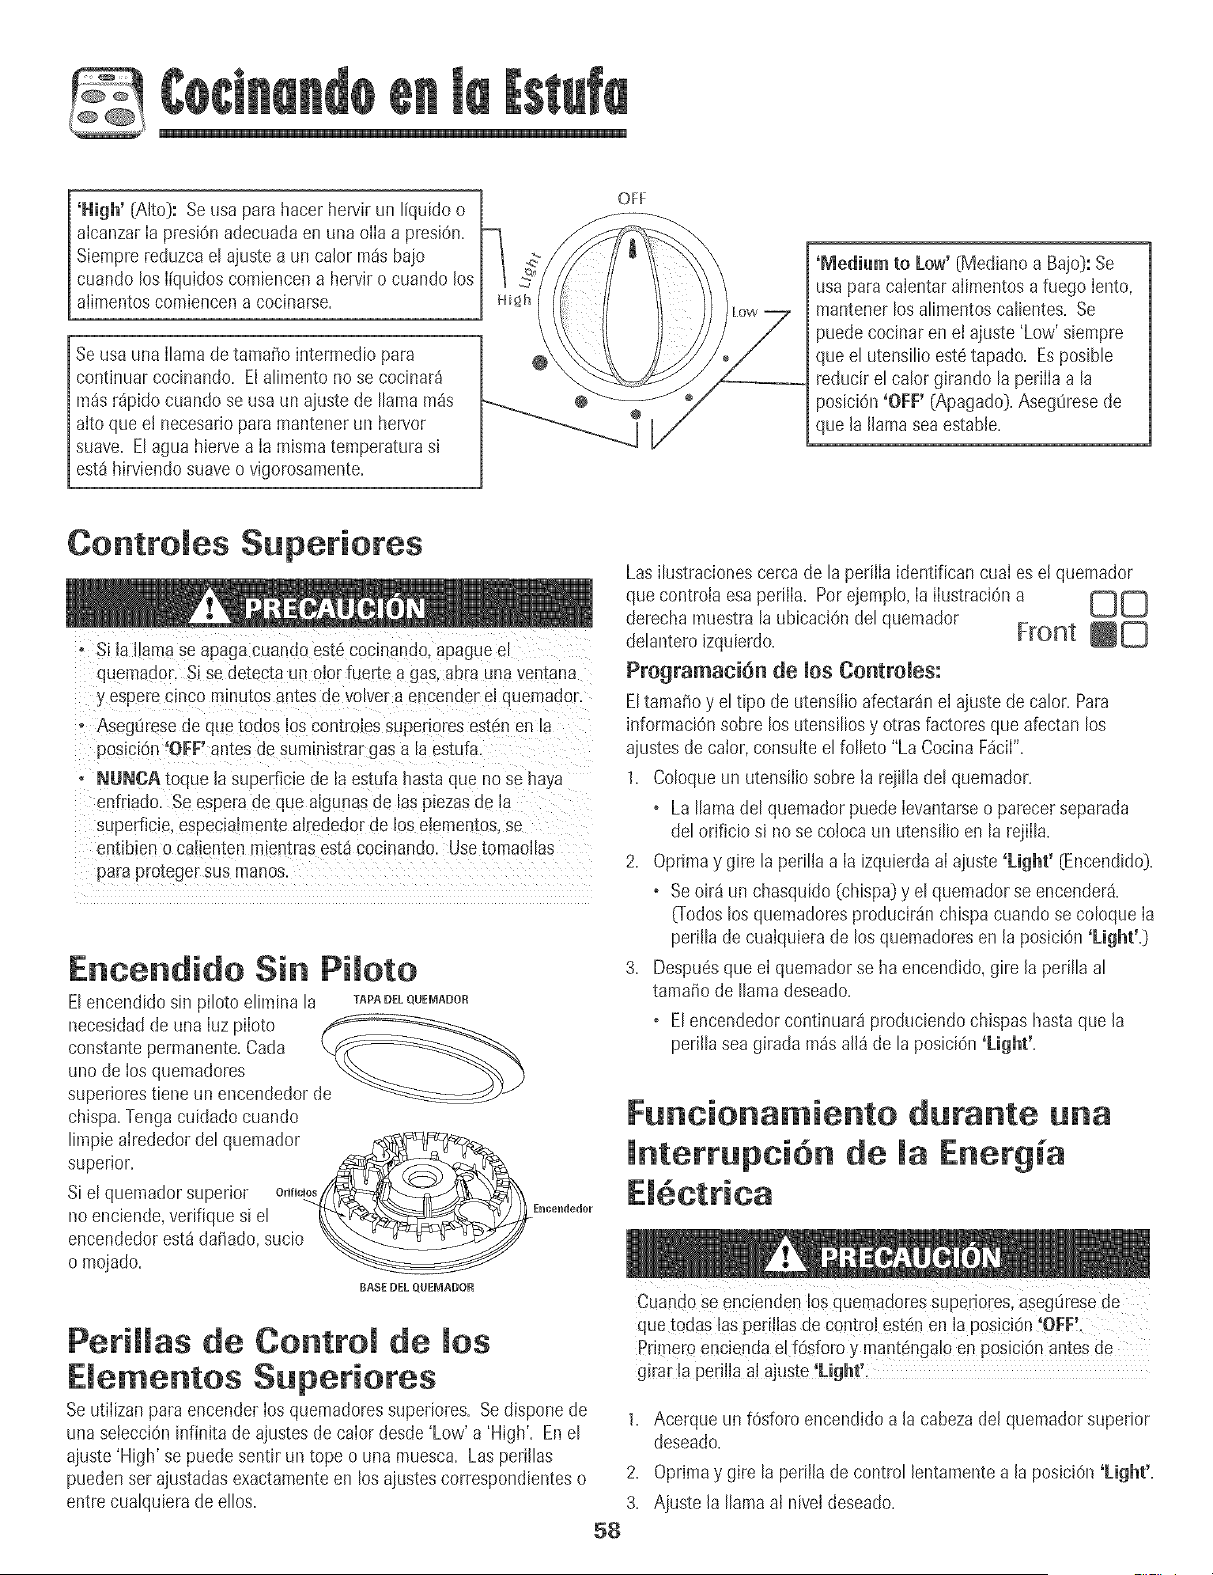
'High' [Alto): Seusa para hacer hervir un [iquido o
aicanzarIa presi6n adecuadaen una oiia a presi6n+
Siemprereduzcael ajustea un calor m_s bajo
[ cuando tos I[quidoscomiencena herviro cuando los
aiimentoscomiencena cocinarse+
Seusauna Itamadetamafio intermediopara
continuarcocinando+Ela[imentono se cocinar_
m_sr_pidocuando se usaun ajustede llamam_s
alto que e[ necesariopara mantenerun hervor
suave. Elagua hiervea Ia mismatemperaturasi
est_hirviendosuaveo vigomsamente+
OFF
'Medium to Low'[Medianoa Bajo):Se
usaparacalentaralimentosa fuego lento,
mantenerlos a[imentosca[ientes+Se
puedecocinaren el ajuste 'Low'siempre
que el utensi[[oest6 tapado+Esposib[e
reduc[rel calor girando [a periiia a [a
posici6n'OFP (Apagado).Aseg0resede
que [a llama seaestab[e.
ControJes Superiores
* Si ia llama _e apaga cuando est6 cocinando, apague el
quemador. Si se detecta un olor fuer[e a gas, aDra una ventana
y espere clnco mmutos antes de volver a en tender el quemador.
o AsegOrese de que [oaos los controies super+ores est6n en ta
pos+ci6n +OFF'antes de summ+strar gas a la estufa.
o NUNCA toque la superfieie de la estufa hasta que no se haya
enfriado. Se espera de que aJgunas de las piezas de Ja
superfic+e, especlamente alrededor de los eiementos, se
ent+bien o cahenten mlentras esta cocmando. Use tomaoJlas
para proteger sus manos.
Encendido Sin Piloto
Elencendidosin piloto elimina la TAPADELQUEB_]ADOff
necesidaddeuna Iuzpiloto
constantepermanente+Cada (
unode Ios quemadores
superiorestiene un encendedorde
chispa Tengacuidado cuando
limpie alrededordel quemador
superior,
Si el quernadorsuperior O"B_n_.tt.!'#__._/_" _
no enciende,vedfiquesi el _L._ E"_'l_"_'
encendedorestd dafiado, sucio ___
o mojado,
BASE DEL QUEMADOR
PeriHas de Control de los
EJementos Superiotes
Seutilizanpara encenderIos quemadoressuperiores. Sedispone de
una selecciOninfinita deajustesde calor desde'Low' a 'High'. En el
ajuste'High' se puedesentir un tope o una muesca Lasperillas
puedenset ajustadasexactamenteen losajustescorrespondienteso
entre cualquierade ellos.
58
Lasilustracionescercade la periila identificancuaI ese! quemador
quecontroia esaperiila. Porejemplo,Ia ilustraci0na
derechamuestrala ubicaciOndelquemador
Front
delanteroizquierdo. _U
Programaci6n de los Controies:
Eltamafio y el tipo de utensilioafectarainel ajustede calor.Para
informaciOnsobre los utensiliosy otrasfactoresqueafectan los
ajustesdecaior,consulteel folleto "La CocinaF_ciI".
1. Coloqueun utensiiiosobre la rejilia del quemador.
• La Ihma del quemadorpuede Ievantarseo parecerseparada
del orificio si no se coiocaun utensilioen la rejilla.
2. Oprimay gire la periliaa Ia izquierdaaI ajuste'[Light' [Encendido).
+ Seoira un chasquido(chispa)y elquemadorse encender&
ffodos losquemadoresproducir_nchispa cuando secoloque Ia
perilla decualquiera de losquemadoresen la posiciOn'[Light'.)
3. Despu6sque el quemadorse ha encendido,gire la perilla al
tamafio de llamadeseado.
o Elencendedorcontinuar_produciendochispas hastaque la
periilasea girada m_s ail_ de la posiciOn'[Light'.
Funcionamiento durante una
lnterrupci6n de la Energia
quetodas las peri!+asde contr0! est6nen la posiciOn'OFF!+
Prime_oenc+endael fOsforoy mant_nga!oen posici_nantesde
girar la perilia al ajuste Light i
1. Acerque un f6sforo encendidoa la cabezadeJquemadorsuperior
deseado+
2. Oprimay gire la periiJadecontrol lentamentea Japosici6n'[Light'.
3. Ajuste la llamaal niveldeseado.
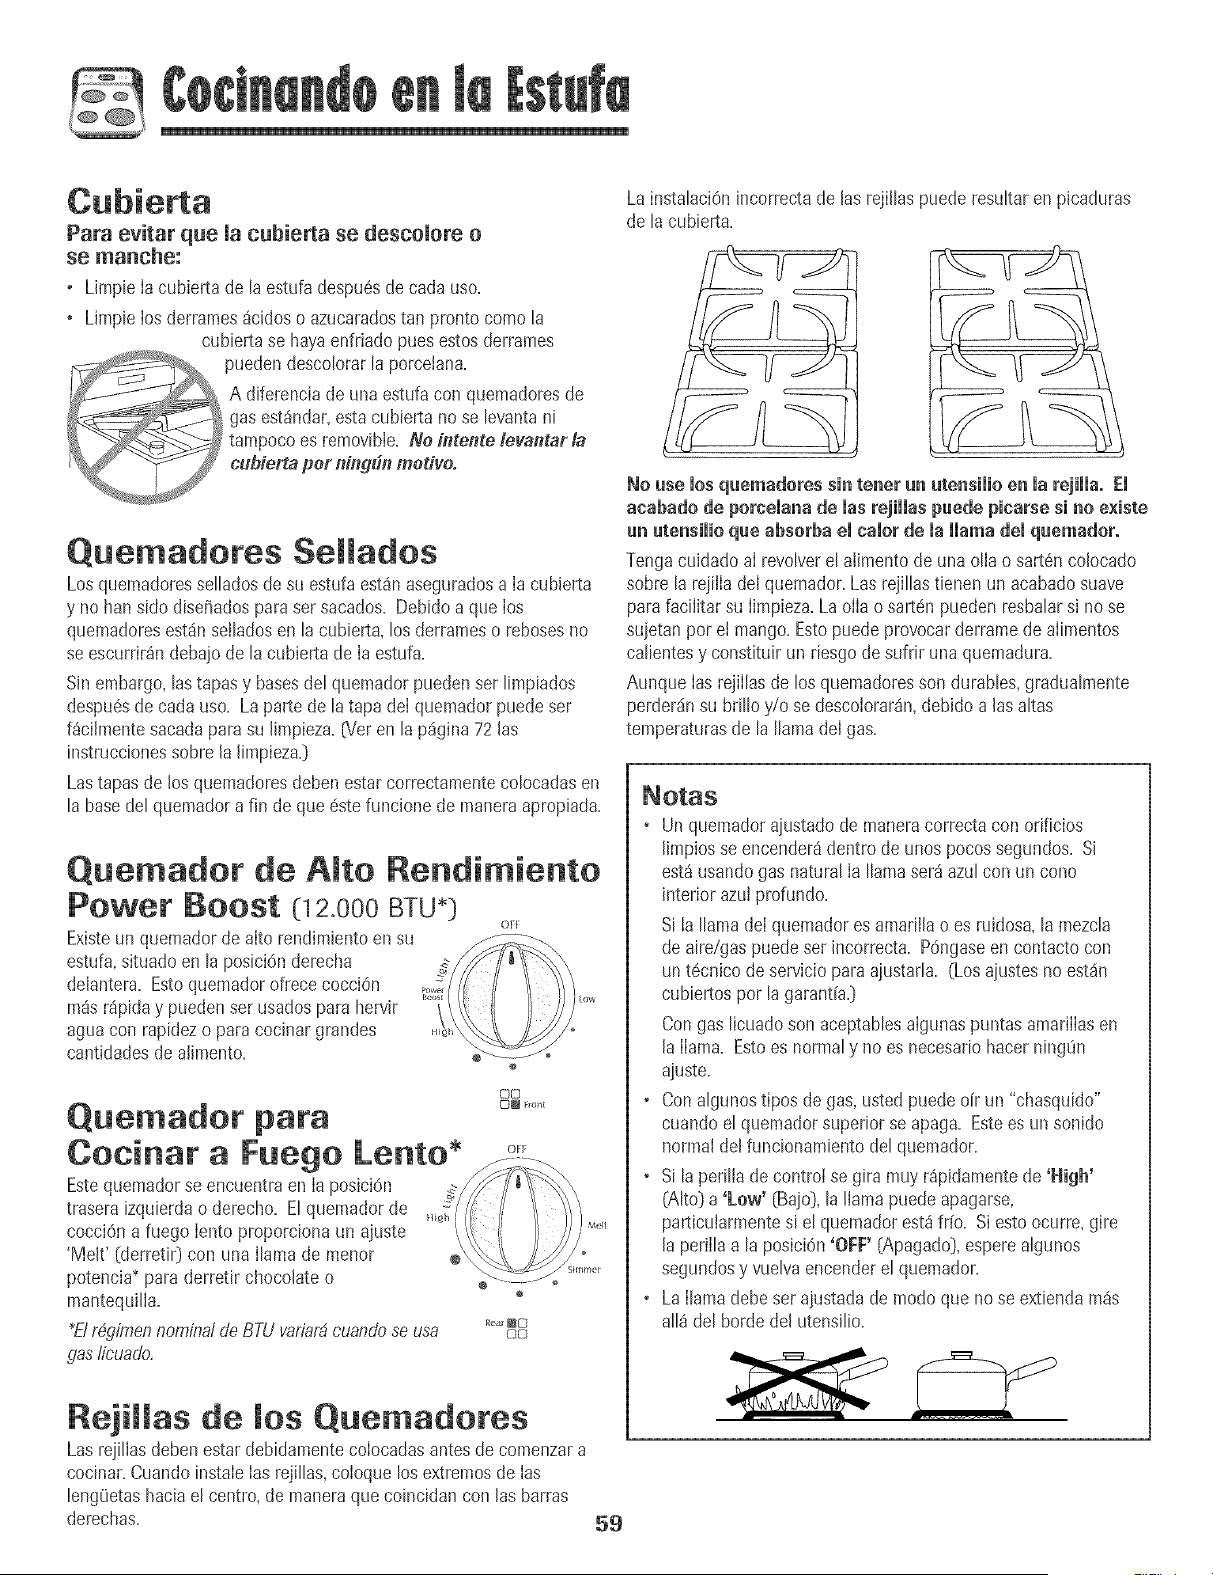
Para evitar que macubierta se descomore o
• Limpie [a cubiertade [a estufadespu6sde cada uso+
+ Limpie Iosderramesacidos o azucaradostan pronto comoh
cubiertase hayaenfriado puesestosderrames
__ uedendescolorarla porcelana+
A diferenciade una estufacon quemadoresde
gas est_ndar,estacubierta nose levantani
tampoco es removibIe+No il_tente/evantar/a
cuflietta per ning_n medve.
Quemadores SeJJados
Los quemadoresselladosde su estufa est_naseguradosa Ia cubierta
y no bansido disei_adospara ser sacados+Debidoa que Ios
quemadoresest_nseIladosen la cubierta,los derrameso rebosesno
se escurrir_ndebajo de la cubiertade Ia estufa+
Sinembargo,lastapasy basesdel quemador puedenset limpiados
despu6sde cadauso+ Laparte de la tapa deI quernadorpuedeset
f_cilmentesacadapara su limpieza+_/er en la p_gina72las
instruccionessobre la limpiezay
Lastapas de los quemadoresdebenestarcorrectamentecolocadasen
la basedel quemadora fin de que 6stefuncione de maneraapropiada+
Quemador de AJto Rendimiento
Power Boost (12.000 BTU+:)
OFF
Existeun quemadorde aIto rend+mientoen su
estufa,situado en la posici6nderecha
delantera. EstoquemadorofrececocciOn
mis r_ipiday puedenset usadosparahervir
aguacon rapidezo paracocinargrandes
cantidadesdealimento.
Quemador para
Cocinar a Fuego Lento + o+
Estequemadorse encuentra en Ia posici6n
traseraizquierdao derecho+Elquemadorde
cocciOna fuego Iento proporcionaun ajuste
'Melt' [derreti0 con una Ilamade menor
potencia+para derretir chocolate o ÷
mantequilIa+ °
+Elr_qimennominalde BTUva,_iardcuandose usa ::_o
gas,#buado,
00
C:}E rent
RejiJJas de Jos Quemadores
Las rejillasdeben estar debidamentecoIocadasantesde cornenzara
cocinar.CuandoinstaIeIasrejillas,coIoquelos extremosde Ias
leng0etashaciael centro,de maneraque coincidancon las barras
derechas+
59
La instalaci6nJncorrectade Jasrejillaspuede resultar en picaduras
de la cubierta+
No me mosquemadores sin tenet un utensimioen mamjimma.Em
acabado de porceJanade JasrejiJJaspuede picarse si no e×iste
un utensiiio que absorba emcareerde mammamademquemador°
Tengacu+dadoaI revolverel alimento de una olIao sart6ncolocado
sobre la rejilIadel quemador+Lasrejilhs tienen un acabadosuave
parafaciiitar su Iimpieza+La oIIao sart6n puedenresbalars+nose
sujetanpor et mango.Estopuede provocarderramede aIimentos
calientesy constituir un riesgode sufrir una quemadura+
AunqueIas rejiIlas de los quemadoresson durables,gradualmente
perder_nsu brillo y/o se descoIorar_n,debido alas altas
temperaturasde la llamadel gas+
* Un quemadorajustadode maneracorrectacon orificios
limpiosseencender8dentro de unos pocossegundos. Si
est_ usandogas naturalIa llamaser_azul con un cono
interior azulprofundo.
Si la llama deIquemadores amarillao es ruidosa,la mezcla
de aire/gaspuedeset incorrecta. P6ngaseencontacto con
unt_cnico de servicioparaajustarla. (Losajustesno est_n
cubiertos por la garant[ay
Congas licuadoson aceptablesalgunaspuntasamarilIasen
la llama. Estoes normaly no es necesariohacerning0n
ajuste.
, Conalgunostipos de gas,ustedpuedeoir un "chasquido"
cuando el quemadorsuperiorse apaga. Estees un sonido
normaldel funcionamientodel quemador.
, Si la perilla de control se gira muy r_pidamentede 'High'
(AIto_a 'Low' (Bajo],la llama puede apagarse,
particularmentesi el quemadorest_fr[o. Siestoocurre+gire
la perillaa la posiciOn'OFF' [Apagado],esperealgunos
segundosy vuelvaencenderel quemador.
, La llama debeset ajustadade modo que no se extiendam_s
all_ del borde del utensilio.
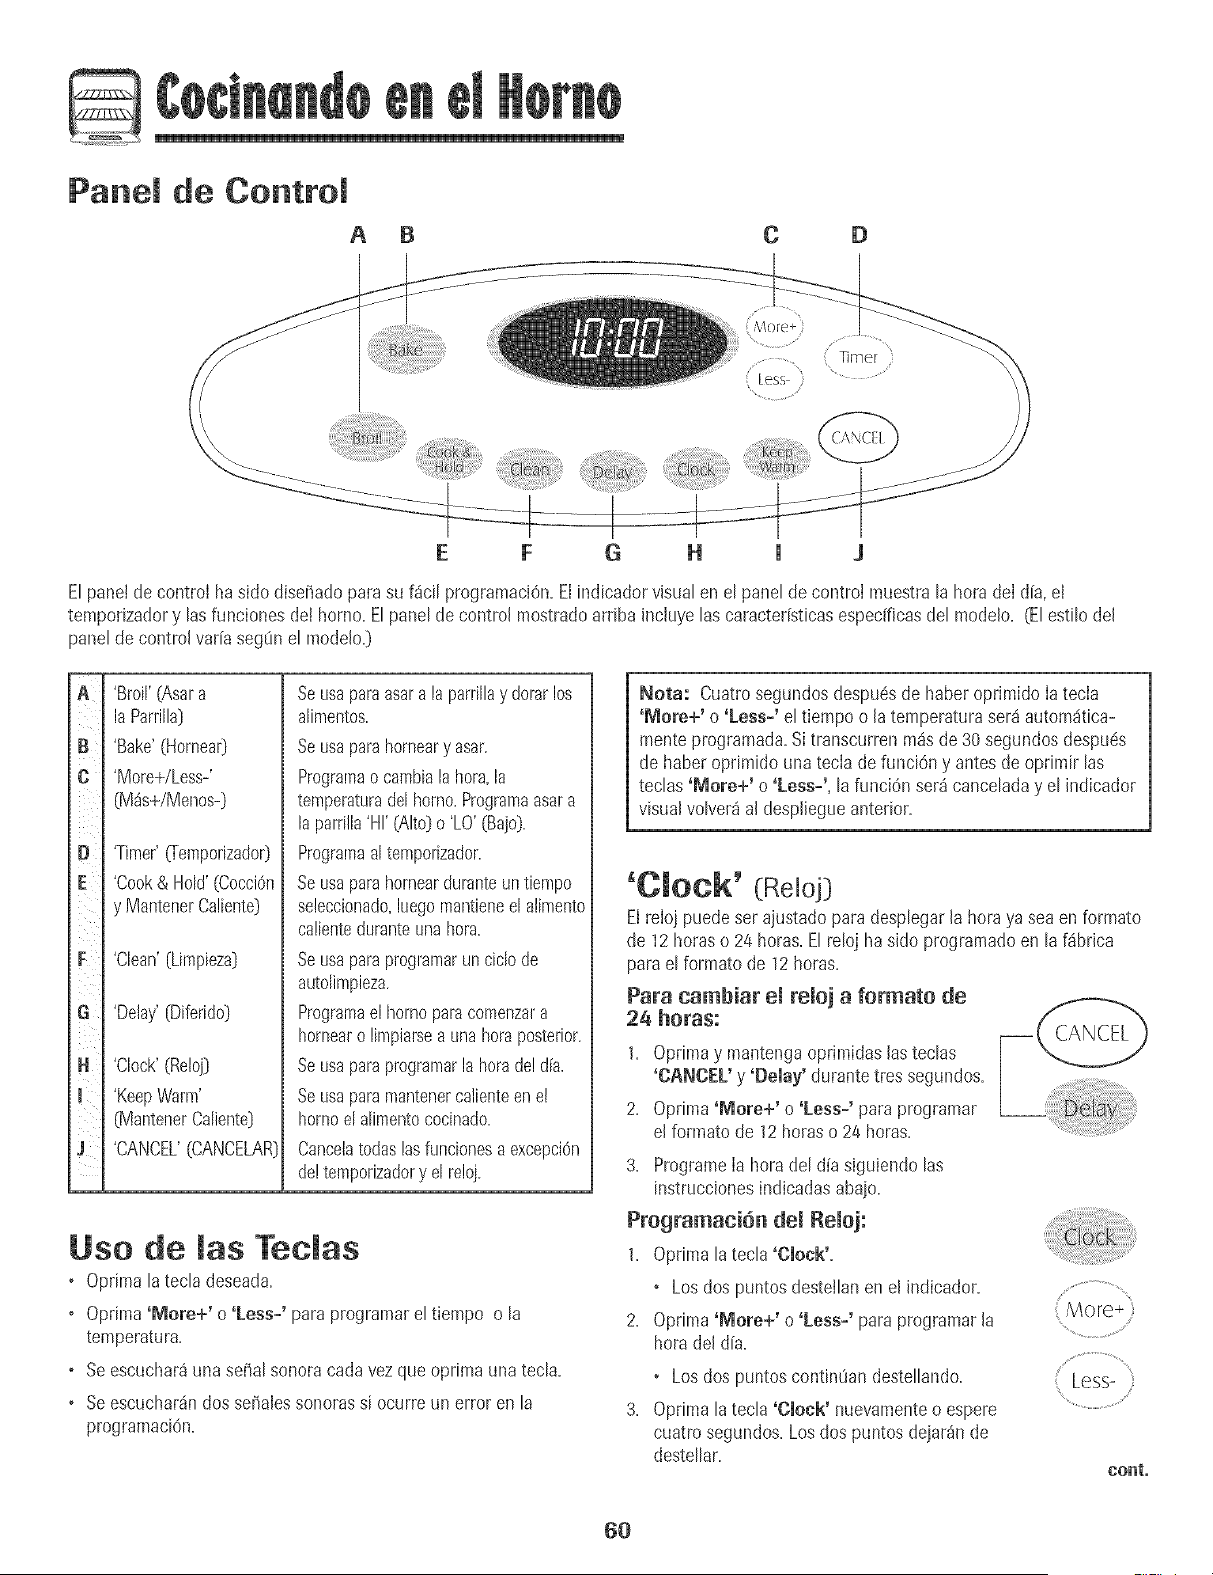
Panel de Control
A B C D
E
/
(More +
ELpanelde control ha side disefiadopars su f_ci[ programaci@.Elindicador visualen eLpanelde controi muestra[a hera de[ d[a,el
temponzadory lasfunciones de[ borne.Elpanelde control mostradoarriba inc[uyelas caracter[sticasespedficasdel modelo. (Elestilo del
panelde controlvar[asegOnel mode[o.}
B
C
E
H
m
illi
'Broil'(Asara
IsParrilla}
'Bake'(HomeaO
'More+/Less-'
(M_s+/Menos-}
'Tirner'_empofizsdor}
'Cook& Hold'(Cocci@
y MantenerCaliet_te}
'Clean' [Limpbza}
'Delay'(Diferido}
'Clock'(Reloj}
'KeepWarm'
(MantenerCaliente}
'CANCEL'(CANCELAR}
Seusaparsasarala parfillay dorarlos
alimentos.
Seusaparshomeary asar.
Programso cambiala hera,Is
temperatursdel homo.Programsasara
IspaNills'HI'(Alto}o 'LO'(Bajo).
Programsal temporizador.
Seusaparshornearduranteuntiempo
seleccionado,luegomantieneel atimento
calbnteduranteuna hera.
Seusaparsprogramarunciclode
autolimpieza.
Programael homoparscomenzara
hornearo limpiarsea unaheraposterior.
Seusaparsprogramarlaherade!dia.
Seusaparsmantenercalienteenet
homoel alimentococinado.
Cancelstodaslasfuncionesa excepci6n
de!temporizadory el reloj.
Use de las Tedas
o Oprima la tecla deseada.
o Oprima'More+' o 'Less-' para programarel tiempo o la
temperatura.
o Seescuchar_unaseSalsonoracada vezque oprima una tecla.
o Seescuchar_ndos serialessonoras si ocurre un error en la
programaciOn.
Nota: Cuatrosegundosdespuesde haber oprimido Ia tecla
'More+' o 'Less=' el tiempo o la temperaturaser_ autom_tica-
menteprogramada.Si transcurrenm_sde30 segundosdespu@
de haberoprimido una teciade funciOny antes de oprimir las
teclas 'More+' o 'Less=', la funci6nser_ canceladay el indicador
visualvolver_al despliegueanterior.
'Clock' (Reloj}
Elreioi puedeser ajustadopara desplegarla heraya sea en formate
de 12horas o 24 horas.Elreloj ha side programatic en la f_brica
parael formate de 12horas.
Para cambiar emremej a formate de
24 horas:
1. Optima y mantengaoprimidas lasteclas
'CANCEL' y 'Belay' durantetres segundos.
2. Oprima '_lore+' o 'Less=' paraprogramar
el formate de 12betas o 24 horas.
3. Programe[a herade[ d[asiguiendo [as
instruccionesindicadasabaio.
Pregramaci6n demRemej:
1. 0prima latecla 'Clock',
• Losdos puntos desteilan en el ff_dicador.
2. Oprima 'Mere+' o 'Less-' paraprogramarla
heradel d[a.
° Losdos puntoscontinOandestellando.
3. Optima latecla 'Clock' nuevamenteo espere
cuatro segundos.Losdos puntos deiar_nde
destellar.
Less-
cent°
6O

G
Cuandose conectaenerg[ae!6ctricaa[ hornoo despudsdeuna
interrupci6nde ta energfaei6ctrica,Ia Littimahoradel retoj previaa
la interrupcidndestetlar8en ei indicador.
Paradesptegarta hora deI dia cuando ei indicadorest6 mostrando
otra funcidn detiempo, oprima tatecta 'Clock'.
La horadei reloj no puede ser cambiadacuandoei hornoha sido
programatic para 'DelayCookor Clean' [Horneadoo Limpieza
DiferidoDo 'Cook& HoW [CocciOny MantenerCalienteD.
Para cancelar el despliegue del reloj:
Si nodeseaque eI indicadorvisualmuestre la hora del alia:
Oprimay mantengaoprimida Iasteclas
'CANCEL' [Cancela0y 'Clock' durantetres --
segundos.La horadel d[a desaparecer8del
hldicador.
Cuandose cancelael desplieguede! reloj,
oprima Iatecla 'Clock' paradesplegar
brevementela horadel dia.
Para restaurar emdespmiegue demremoj:
Oprimay mantengaoprimida Iasteclas 'CANCEL'y 'Clock' durante
tres segundos.Lahoradel d[a reaparecer8en el indicador.
'Timer' (Temporizador}
Eltemporizadorpuede set programatic de un minuto {0:01}hasta99
horasy 59 minutos{99:59}.
Eltemporizadorpuede set usado independientementedecualquier
otra actividaddel homo.Adem_spuedeser programadocuando otra
funciOndel homo est6en funcionamiento.
Eltemporizadorno controlael horno.Solamentecontrolauna seSal
SOFiors.
Para programar el temporizador:
1. OprimaIatecla 'Timer',
• '0:00'se iIuminaen el indicadorvisual. .........................
• Losdos puntosdesteilar_n.
2. OprimaIatecla 'More+' [M_s[}o 'Less-' [Menos)
hastaque el tiempo correcto aparezcaen el
indicadorvisual. : Less-
...............................
_ Losdos puntos contimian destellando.
3. Oprimanuevamentela tecla 'Timer' o esperecuatrosegundos.
• Losdos puntoscontinOandestellandoy comienzala cuenta
regresivadel tiempo.
• EI_ltimo minutode Ia cuentaregresivadel temporizadorse
desplegar_en segundos.
4. AI final del tiempo programatic,se escuchar8una serialsonora
larga.
Timer
Para canceiar el temporizador:
1. Optima y mantengaoprimida la tecla 'Timer' durantetres
segundos.
U
2. Optima latecla 'Timer' y coloque la horaa 0:00.
Bloqueo de ruesConttomes
EItecladodel horno puedenser bloqueadosparaseguridad,limpieza
o evitarel uso no autorizado.No funcionar_n cuando est6n
bloqueados.
Siel homo estd en uso,los controlesni puedenbloquearse.
La horaactualdel d[a permanecer_en el indicador cuando los
controlesest6nbloqueados.
Para bloquear:
Oprimay mantengaoprimidaslastecias
'CANCEL' y 'Cook & Hold' durante tres
segundos.(Oprimaprimero latecla
Para desbioquear:
Oprimay mantengaopdmidaslastecIas 'CANCEL' y 'Cook & Hold'
durantetres segundos.(Optimaprimero la tech 'CANCE[').
C6digos de Errores
'BAKE'[HorneaOo 'LOCK'[BtoqueaOpuedendestelIarr_pidamente
paraadvertirieque hayun error o un problema.Si 'BAKE'o 'LOCK'
destetlanen e! indicador visual,opnmaIe tecla 'CANCEL'. Si 'BAKE'
o 'LOCK'continSandesteliando,desconecteIa cordenteel6ctrica
hacia el artefacto.Espereunos pocosminutosy vuelvaa conectar la
corrienteel6ctrica.Si las pahbras a0n contin0an desteilando,
desconectela corrienteel6ctdcahacia el artefactoy Ilamea un
t6cnico de servicioautorizado.
61
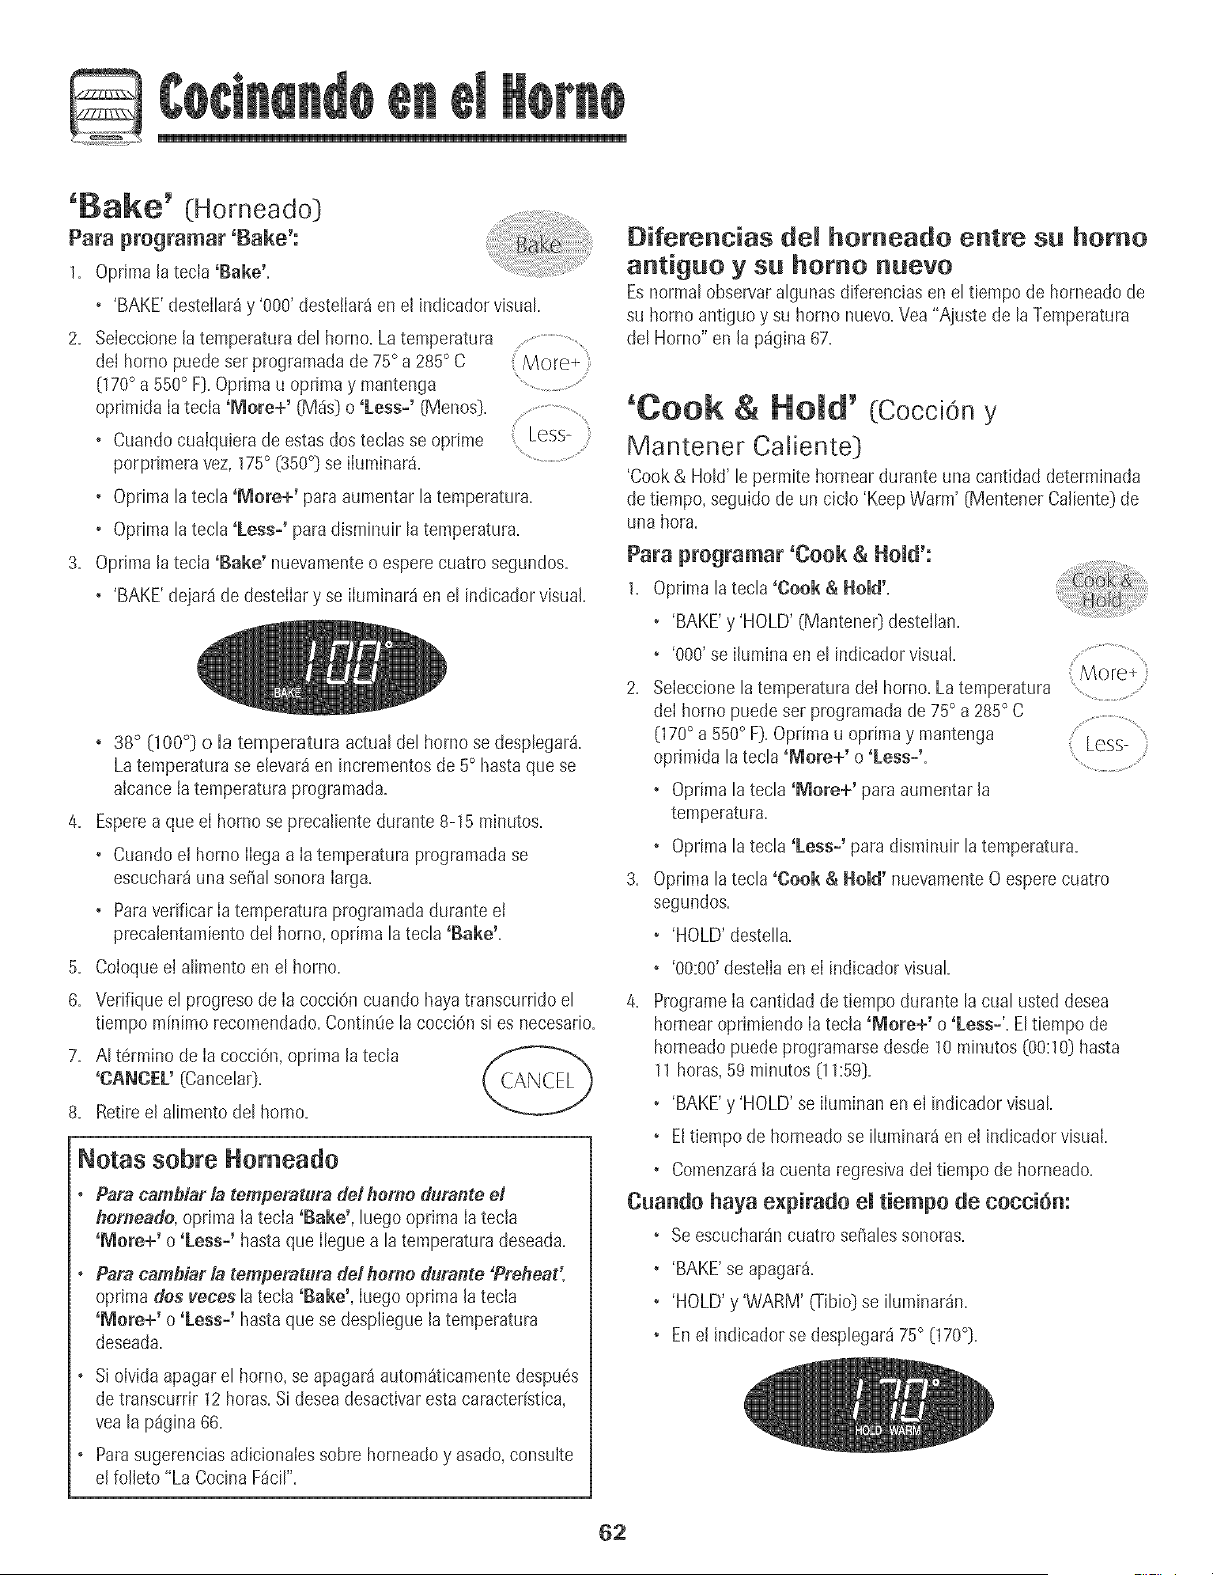
G
'Bake' (Horneado)
Para programar 'Bake':
1, Oprima[atecia 'Bake'.
+ 'BAKE'destelhr_ y '000' deste!lar_en el indicadorvisuat.
2. Seleccionela temperaturadet homo. Latemperatura ................................
det horno puede ser programadade 75° a285° C
070° a 550° F].Oprimau oprimay mantenga .............................
oprimidaIa tecIa 'More+' (M_is)o 'Less-' [Menos]. ...................................
+ Cuandocualquierade estasdos tecBs se oprime Less- }
porprimeravez, 175° (350°} se iluminar& "..................................
+ Optimatatecta 'More+' para aumentarta temperatura.
• Optima tatecta 'Less-' paradisminuir tatemperatura.
3. Oprh_aalatec+a'Bake' nuevamenteo esperecuatm segundos.
+ 'BAKE'dejar_de @stellary se ilumlnar_en el indicadorvisual.
, 38° (100°} o la temperatura actual del horno se desplegar&
Latemperaturase elevar_en incrementosde 5° hastaque se
alcanceta temperaturaprogramada.
4. Esperea que el homo se precalbnte durante 8-15 minutos.
• Cuandoel hornoIlegaa IatemperaturaprograPaadase
escuchar_una serial sonoraIarga.
+ ParavedficarIa temperaturaprogramadadurante el
precalentaPabntodel horno,optima la tecla 'Bake'.
5. Coloquee! alimentoen el homo.
6. Venfique el progresode Ia cocci@ cuando hayatranscurridoel
tiempo minimorecomendado.Contin_iela cocci@ si es necesado.
7. AI t@Tlinode Ia cocci@, optimala tecla
'CANCEL' (Cancelar).
8, Retireel alimentodel homo+
Notas sobre Horneado
+ Para cambiar/a temperatura del hor#u duraate el
hemeade, oprima la tecla 'Bake', luego oprima Ia tecla
'More+' o 'Less-' hasta que Ilegue a la temperatura deseada.
+ Para camMar/a temperatura del homo durante 'Preheat',
oprima des veces la tecla 'Bake', Iuego oprima la tecla
'More+' o 'Less-' hasta que se despliegue la temperatura
deseada.
o Si olvida apagar el horno, se apagara autom_ticamente despuCs
de transcurrir 12 horas. Si desea desactivar esta caracter[stica,
vea la p%ina 66.
+ Para sugerencias adbionaies sobre homeado y asado, consulte
el folleto "La Cocina F_cil".
Diferencias del homeado entre su homo
antiguo y su homo nuevo
Esnormal observaralgunas diferenciasen el tiempo de horneadode
su horno antiguoy su homo nuevo.Vea "Ajustede la Temperatura
del Horno" en la p%ina 67.
'Cook & Hold' (Coccion y
Mantener Caliente}
'Cook& HoW le permitehorneardurante una cant/dad determinada
detiempo, seguidode un ciclo 'KeepWarm' (MentenerCaliente}de
una hora.
Para programar 'Cook & Hold':
1. Optima latecla 'Cook & Nomd'.
• 'BAKE'y 'HOLD' (Mantene0 desteIlan.
+ '000'se ihmina en el indicadorvisual.
2.
Seleccimselatemperaturadet homo. La temperatura
deI homo puede ser programadade 75° a 285° C
070° a 550° F}.Oprima u oprimay mantenga
oprimida la tecla'P_ore+' o '[Less-'.
+ Optima la tecla 'More+' para aumentarla
temperatura.
+ Oprimala tecla 'Less-' paradisminuir la temperatura.
3. Optima latecla 'Cook & Hold' nuevamenteO esperecuatro
segundos.
• 'HOLD'destella.
+ '00:00'desteiIaen eI indicadorvisual
4. ProgrameIacantidad de tiempo durante lacual usted desea
hornearoprimbndo Iatec+a'More+' o 'Less-'. Eltbmpo de
homeadopuedeprogramarsedesde 10minutos (00:10}hasta
11horas,59 minutos {11:59}.
• 'BAKE'y 'HOLD'se iIuminanen el indicador visual
+ EltiePapode horneadose iluminar_ en el indicadorvisual.
+ Comenzar_lacuenta regresivadeI tiePapode homeado.
Cuando haya expirado el tiempo de cocciCm
+ Seescuchar_ncuatro sefialessonora&
+ 'BAKE'se apagar&
• 'HOLD'y 'WARM' (Tibio}se iluPainar_n.
• Enel indicadorse despbgar_ 75° 070°}+
..........................................,/
Less- }
62
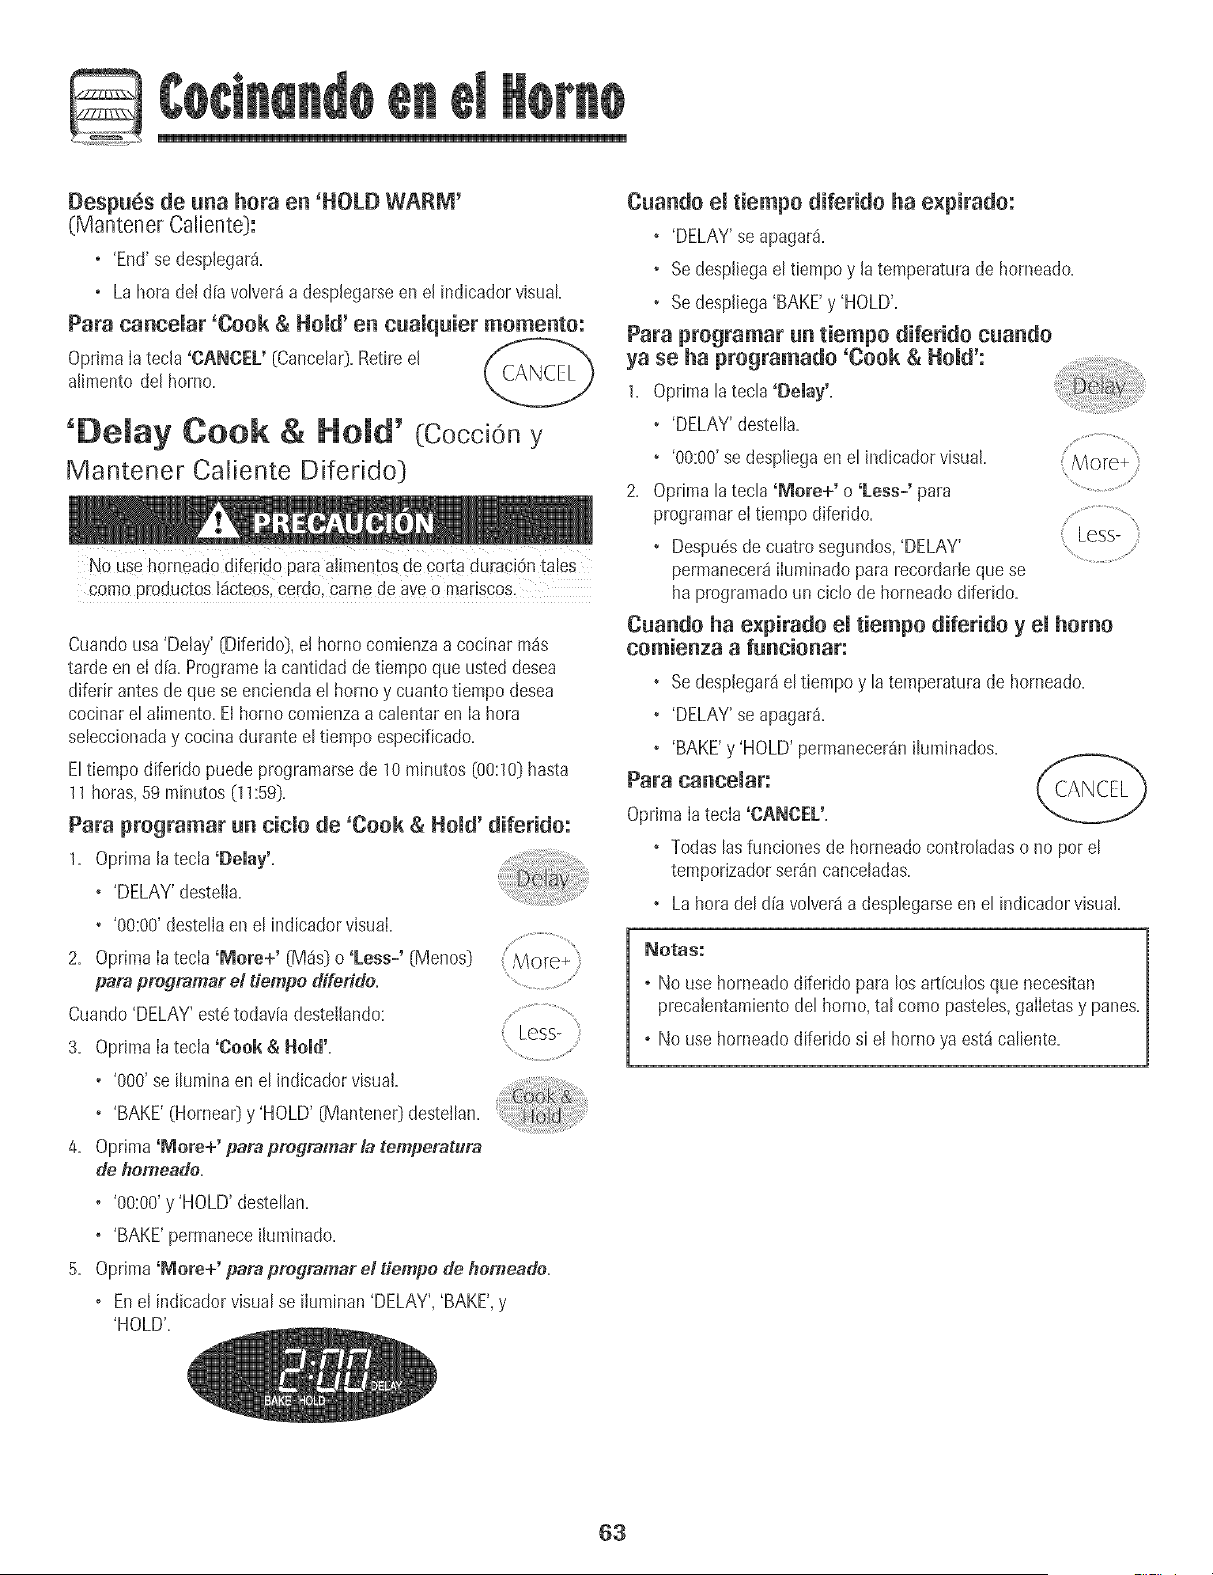
G
Despu_s de ena hora en 'HOLD WARM'
(Mantener Caliente):
o 'End' se desplegar&
o Lahorade[ d[a vo[ver_a despIegarseen e[ indicadorvisual
Para cancemar 'Cook & Hold' en cuaiquier momento:
Opnmaia tecia'CANCEL' (Cancehr).Retireel //_ A_,,-,,,_
aIimento de[ homo.
'Delay Cook & Hold' (Coco+ony
Mantener Caliente Difeddo)
No use homeadodiferido paraalimentosde corta duraci6ntabs
como productos!_icteos,cerdo Camede aveo manscos.
Cuandousa 'Delay' [Diferido),e! homo comienzaa cocinar m_s
tarde en eI d[a.ProgrameIscantidadde tiempo que usted desea
difedr antesde que se enciendaet homo y cuantotiempodoses
cocinarel aiimento.EIhomo comienzaa calentaren Is hora
seleccionaday cocina durante eltiempo especificado.
Eltiempo diferido puedeprogramarsede 10 minutos (00:10)hasta
11horas,59minutos (11:59).
Para programar ua cicio de 'Cook & Hold' diferido:
1. Oprimala tecia 'Delay',
+ 'DELAY'destetla.
• '00:00'desteliaen el indicadorvisual.
2, Oprima Ia tecla 'lViore+' {M4s} o 'Less-' {Menos)
para prog_mar el dempe dffedde. ....................................
Cuando 'DELAY' est_ todavia destelJando:
3. OprimaIatecia 'Cook & NON'.
• '000'se ene++n ++osdo yes.a+.
+ 'BAKE'(Hornear)y 'HOLD' [Mantene0 destellan.
4. Oprima'More+' para programar la temperatura
de hemeado.
o '00:00'y'HOLD' destellan.
o 'BAKE'permaneceihminado.
5. Oprima'More+' para preg_mar el dempe de flemeade.
o Enel indicadorvisualse iIuminan'DELAY','BAKE',y
'HOLD'.
Cuando ei tiempo diferido ha e×pirado:
+ 'DELAY'se apagar4.
• Se desplJegael tiempoy Istemperaturade horneado.
• Se despJJega'BAKE'y 'HOLD'.
Para programar un tiempo diferido cuando
ya se ha programatic 'Cook & Hold':
1. Optima latecla 'Delay',
• 'DELAY'destella.
+ '00:00'sedespliegaen el indicadorvisual. ,More+
2. Optima latecla 'lViore+' o 'Less-' para
pragramareI tiempo difeddo.
, Despu6sde ouatrosegundos,'DELAY' Less-
..............................
permanecer_iluminadopara recordarieque se
haprogramatic un cic[o de horneadodiferido.
Caando ha expirado el tiempo diferido y el homo
comienza a funcionar:
+ Sedesplegar_el tiempoy la temperaturade horneado.
• 'DELAY'se apagar&
• 'BAKE'y 'HOLD' permanecer_niluminados.
Para canceiar:
OprimaIa tecla 'CANCEL',
+ Todaslasfuncionesde horneadocontroladaso no parel
temporizadorser_n canceladas.
+ La hora del aliavolver_a desplegarseen el indicadorvisual+
Notas."
o No use horneadodiferido para los art[culosque necesitan
precalentamientodel horno,tal coma pasteles,gaiietasy panes+
o No use horneadodiferido si el hornoya estdcaliente.
63
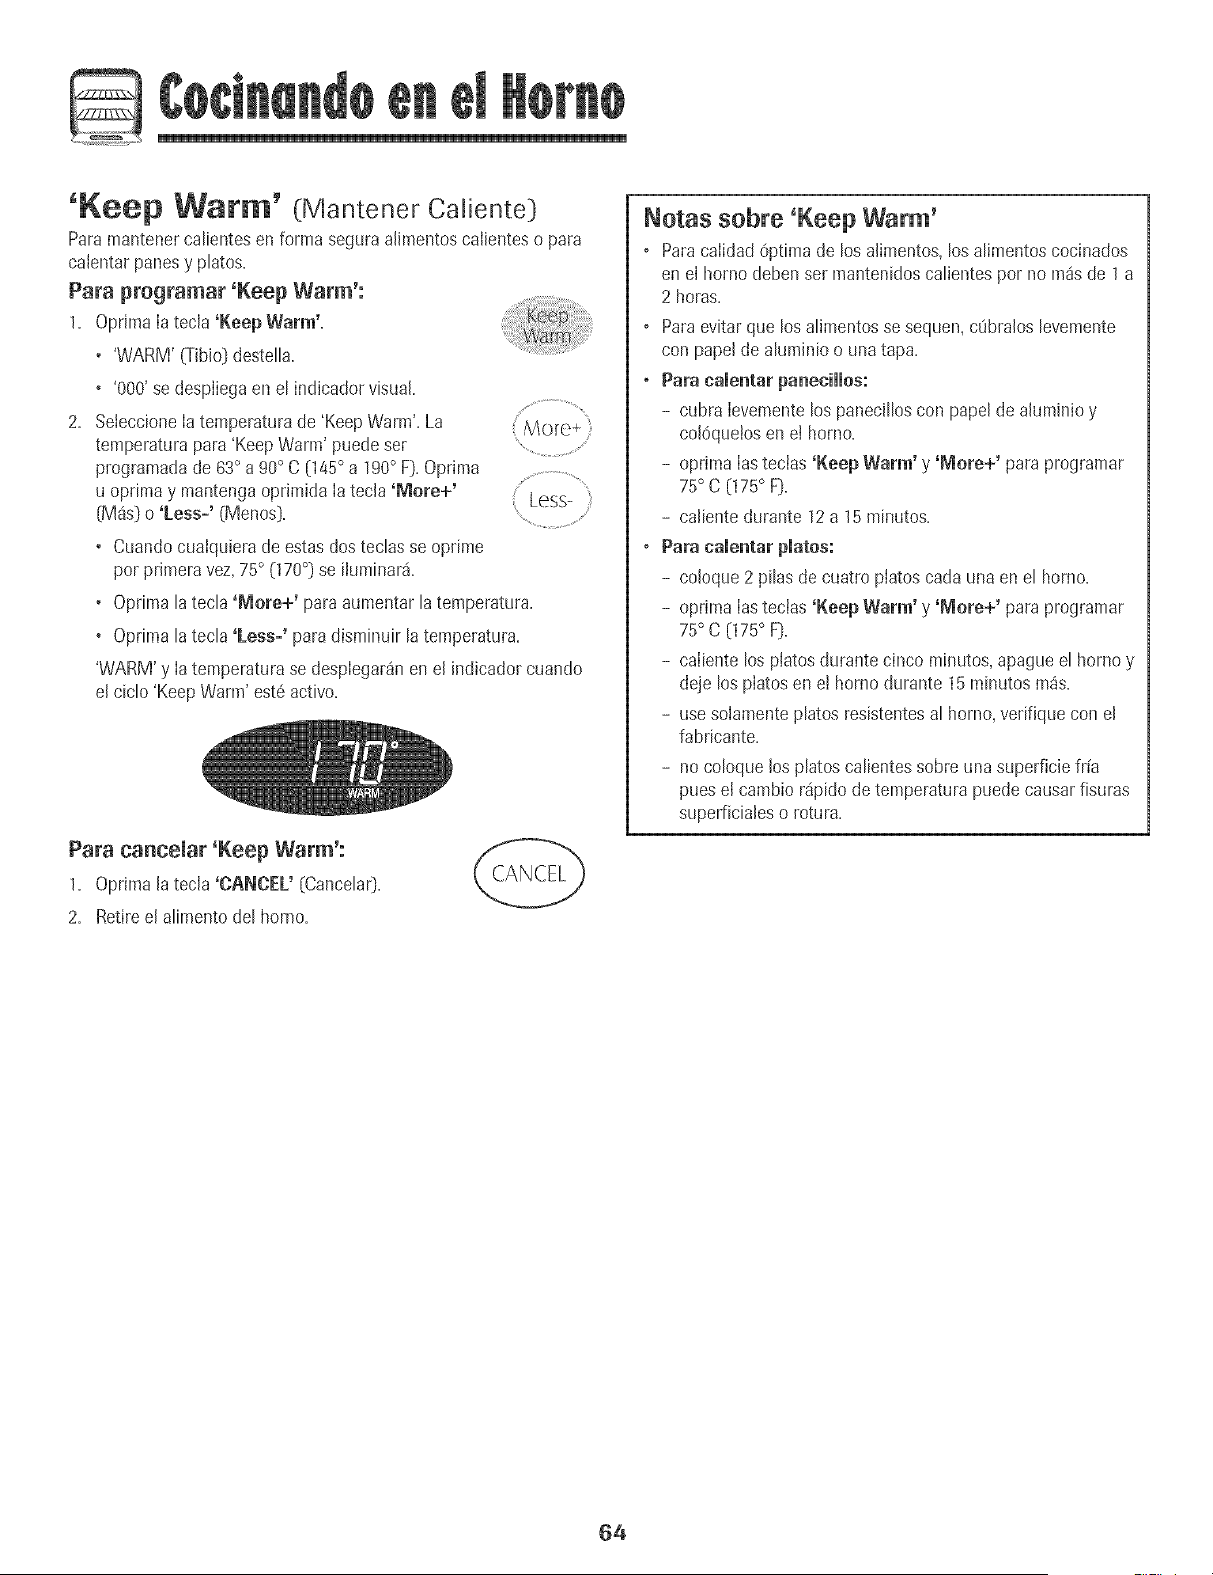
G
'Keep Warm' (Mantener Caliente)
Paramantenercatientesen forma seguraalimentoscalienteso para
calentarpanesy ptatos.
Para programar +Keep Warm':
1. Oprima[atecla 'Keep Warm'.
+ 'WARM' _Tibio])desteHa.
+ '000'se despiiegaenet indicadorvisual
2. SeleccioneIatemperaturade 'KeepWarm'+La
temperaturapara 'KeepWarm' puede ser
programadade 63° a 90° C [145° a 190° F).Optima
u optimay mantengaoprimida Ia tecla'More+' '+ Less-
[Mas} o 'Less+' [Menos).
+ Cuandocuaiquierade estasdos teclasse oprime
por primeravez,75° (170°} se iiuminar&
+ Optimalatecla 'More+' paraaumentarla temperatura.
+ Oprimalatecla 'Less+' paradisminuir latemperatura.
'WARM'y Iatemperaturase desplegar_nen el indicador cuando
el ciclo'Keep Warm' est6activo.
Para cancelar 'Keep Warm':
1. Oprimalatecla 'CANCEL' [CancelarD.
2. Retireel alimentodel horno.
Notas sebre +Keep Warm'
o ParacaIidadOptimade los alimentos,losalimentoscocinados
en el homo deben ser mantenidoscalientespor no ross de 1 a
2 horas.
o Paraevitarque losalimentosse sequen,cObraloslevemente
con papelde aluminioouna tapa.
+ Para eamentarpanecimmos:
- cubra Ievementelos panecilloscon papel de aluminio y
coldquelosen ei homo+
- oprima Iastecias 'Keep Warm' y 'More+' para programar
75° C [175° F].
- calientedurante 12a 15minutos.
o Para camemarplato+:
- coloque 2 pilas decuatro piatos carla unaen el homo+
- oprima Iastecias 'Keep Warm' y 'More+' para programar
75° C [175° F].
- caIiente los piatosdurante cinco minutos,apague el homo y
deje los piatosen e! homo durante 15minutosm_s.
- use solamenteplatos resistentesal homo,verifique con el
fabricante.
- no coloque losplatoscalientessobreuna superficiefr[a
pues et cambiordpidode temperaturapuedecausarfisuras
superficialeso rotura.
64
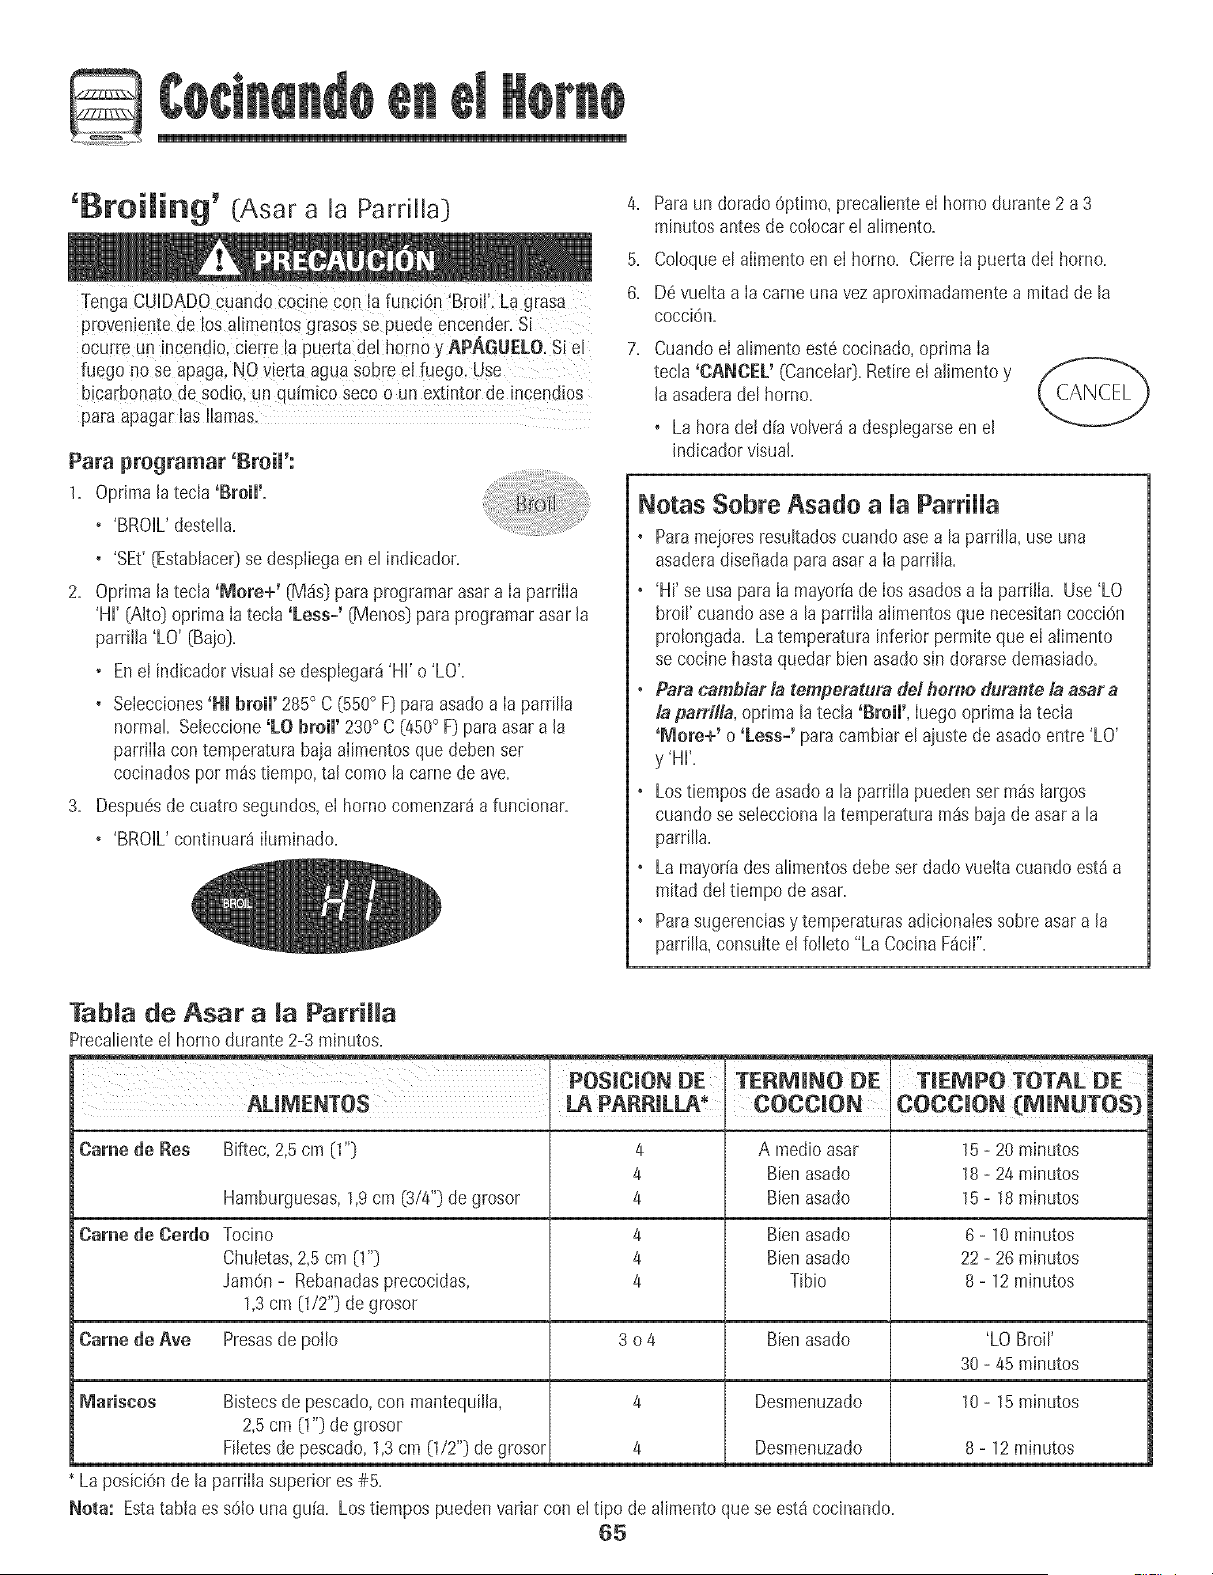
G
'Broiling' (Asar a ]a Pardlb}
proveniente de los alimentosgrasos se puede encender.Si
ocurre unincendio, Cierre[a puerta de[ homo y APAGBELO.Si el
fuego no se apaga,NO v!erta aguasobre el [uego, Use
bicarbonato de sodb, un qufm!c0 seco 0 Un ext!nt°r de !ncendi0s
para apagarlas llamas.
Para pregramar 'Broi[':
1. Oprimala tecia 'Broil'.
• 'BROIL'desteiB.
• 'SEt' (EstabBce0se despliegaen e[ indbador.
2. Oprimalatecla 'More+' (M_s}paraprogramarasar a [a parriiia
'Hi' (Alto} oprima[a tecla 'Less_' {Menos}paraprogramarasar la
parrilla'LO' (Bajo}.
• Enel indicadorvbual se despbgar_ 'Hi' o 'LO'.
• Selecciones'HI broil' 285° C (550° F) paraasadoa Ia parrilla
normal Seleccione&O broil' 230° C (450° F}para asar a [a
parrillacon temperaturabaja alimentosque debenser
cocinadospot m_s tbmpo, ta[ como lacame de ave.
3. Despu@de cuatm segundos,el hornocomenzar_a funcionar.
• 'BROIL'continuar_iluminado.
4.
5.
6.
7.
Paraun dorado6ptimo, preca[bnte el homo durante 2 a 3
minutosantesde colocarel aIimento.
Coloqueel aiimentoen el horno. Cbrre [a puerta de[ homo.
D6 vueita a [a carneuna vezaproximadamentea mitad de la
cocci@.
Cuandoe[ aIimentoest6 cocinado,optima [a
tecIa 'CANCEL' (CanceIa0.Retiree[ alimento y
la asaderadel homo.
CANCEL
La horade] d[avoIver_a despIegarseen el
indbador visual
Notas Sebre Asade a [a ParriHa
• ParamejoresresuItadoscuando asea la parrilIa, use una
asaderadisefiadaparaasar a [a pardIla.
• 'Hi'se usapara la mayoffade los asadosa [a parrilia. Use'LO
broil' cuando asea la parriiIa aiimentosque necesJtancocci@
proIongada.La ternperatura inferior permiteque el alimento
se cocine hastaquedar bienasadosin dorarsedemasiado.
• Para cambiar la temperatura de! home durante la asar a
la parrifla, opnma latecIa 'Broil', [uegooprima [a tecla
'More+' o 'Less-' paracambiarel ajuste de asado entre'LO'
y 'Hi'.
• Lostiemposde asadoa la parrilIa puedenser mas largos
cuando se sebcciona la temperaturam_sbajade asara la
parri[[a.
• Lamayoriades a[imentosdebeser dadovue[taeuando est_ a
mitadde[tbmpo de asar.
• Parasugerenciasy temperaturasadicionaiessobre asara la
parriIIa,consulteel foiIeto "La CocinaFacii".
Tab[a de Asar a [a ParrH[a
PrecaHentee[ homo durante 2-3 minutos.
POS[CiON DE TERP_[NO DE
ALIMENTOS , LAPARR[LU_* , COCC[ON
T[EMPO TOTAL DE
COCCI[ON (M[NUTOS)
Came de Bes Biftec,2,5cm (1"} 4 A medio asar 15- 20 minutos
4 Bienasado 18- 24 minutos
Hamburguesas,1,9cm (3/4"} degrosor 4 Bienasado 15- 18 minutos
Came tie Cerdo Tocino 4 Bienasado 6 - 10 minutos
Chubtas,2,5 cm (!"} 4 Bienasado 22- 26 minutos
Jam@ - Rebanadasprecocidas, 4 Tibio 8 - 12minutos
1,3cm (1/2"} de grosor
Came de Ave Presasde polio 3 o 4 Bienasado 'LO Broil'
30- 45 minutos
Mariseos 10- 15minutos
4
4
Desmenuzado
Desmenuzado
Bistecsde pescado,con mantequil[a,
2,5cm (1"} de grosor
FiIetesde pescado,1,3cm 0/2"} degrosor
LaposiciOnde la parriiIasuperior es#5.
Nora: Estatabla ess61ouna gu[a. LostiePapospuedenvariarcon el tipo de alimento que se est_ cocinando.
65
8 - 12 minutos
G
Cietre Auto tico/
Modo Sab tico
Elhornose apagar_autom_ticamentedespu_sde 12 horassi usted
Iodejaaccidentahnenteencendido=Estacaracter[sticade seguridad
puedeset desactivada=
Para cancemar emcierre autom_tico de 12 horas y
dejar que el homo funcione continuamente durante
72 horas:
1= Programeel homo para hornear (ver p_gina62_]=
2= Optimay mantengaoprimidaIa tecla 'cmock'
[Reloj_durante cinco segundos=
• 'SAb'se despIegar_y destellar_durante cincosegundos=
• 'SAb'se desptegar_continuamente hastaque se desactiveo
hastaque transcurrael I[mitede 72 horas=
• 'BAKE'(Hornea0tambi6nse desplegar4si seest4 usandoun
ciclo de horneadocuando eJhomo est4en Modo Sab4tico.
La fund6,_'BAKE'es /a 4nicaquesepuedeudizar con e/modo
sab4tieo.Lasdem4sfunciones(temporizador,mantener
ca_;Jente,etc.) se bbquearfinduranteel modosab_fico.
Para cancemar 'Bake' cuando emMode
Sab_tico est_ active:
Optima'CANCEL' (Cancela0=
• 'BAKE'se apagar4en eJindicadorvisual,
o No se oir4 nhlguna serialsonora,
Para canceJar eJ Mode Sab_tico:
1,
Optimala tecla'Clock' durante cincosegundos=
O
Despu6sde 72 horas,el modosab_iticoterminate=
• 'SAb' destellar_durantecinco segundos=
• La horadel dia reaparecer_en el indicadorvisual
Notas Sobre eUMode Sab tico
o ElMode Sab_ticopuede set activadoen cuaiquier momento,
est6o no ei homo encendido=
o ElModo Sabaiticono se puede activarsi Iasteclas est_n
bloqueadaso cuando lapuerta est_ bioqueada=
o Si el homo est_horneandocuandoeI Modo Sab_ticoes
programatic,'BAKE'se apagar8cuando se canceleel
horneado=No se emitir_nserialessonoras=
o Si se deseala Iuzdei homo duranteel Modo Sab_tico,6sta
debeset encendidaantesde que comienceel Modo Sab_tico=
o Cuandocomienzael modosab_tico,no se emitir_ la serial
sonorade precalentamiento=
o Lamayor[ade las advertenciasy rnensajesy todas lasseriaIes
sonorasestandesactivadascuando el Modo Sab_ticoestd
activo=
o Elciclo de autoiimpiezay bloqueoautom_ticode la puerta no
funcionar_durante el Modo Sab_tico=
o Si oprime latecla 'CANCEL' se canceiar_un ciclo 'Bake',sin
embargoe! control permaneceraien Modo Sab_tico=
o Si falla Ia corriente eIectrica,cuandovuelvaIa energ[ae! homo
se activaraen Modo Sab_ticocon 72 horas restantesy ning_n
ciclo activo=
66
Ajuste de temperatura
deJ homo
La exactitudde Ias temperaturasdeI homo es cuidadosamente
probadaen Jaf4brica. Es normalnotar alguna diferencia entre ia
temperaturade horneado, entre un homo nuevoy un homo antiguo.
Con e! cotter del tiempo, la temperaturadel homo puedecambiar.
Usted puedeajustar latemperaturadet homo,si consideraquesu
homo noest4 horneandoo dorando en forma correcta. Paradecidir
cuantodebe cambiar ia temperatura,prog+ameiatemperaturadel
homo a 15° C (25° F[ m4salta o m4sbajaque iatemperatura
indicadaen sus recetas,luego homee. Los resultadosde ia
"prueba" puedendade una ideade cuantoajustar la temperatura.
Ajuste de matemperatura dem homo:
1. Optima Iatecla 'Bake' [Hornear).
2. Programe280° (550°[oprimiendola tecla
'More+' (M_s].
3, Oprimay mantengaoprimida Ia tecla 'Bake' ( More+ }
durantevariossegundoso hastaque0° aparezca ........................................
enel indicadorvisual
Si Jatemperaturadel homo ha sido previamenteajustada,el
cambioaparecer4en el indicadorvisual. PotejempIo,si la
temperaturadel hornofue reducidaen 8° C 05 ° F) el indicador
mostrar4'- 80,('-15°'[.
4. OprimaIatecla 'More+' o 'Less+' (Menos)para ajustar Ja
temperatura.
Cadavez que se oprimeuna tecla, Jatemperaturacambiaen
3° C [5° F[. LatemperaturadeI homo puedeser aumentadao
disminuidaen 3° a 20° C (5° a 35° F).
5. Lahora del d[a reaparecer4autom4ticamenteen el indicador
visual
No necesitareajustar la temperaturadel homo si hayuna falla o
interrupci6nde energ[aeJ6ctrica.Lastemperaturasde asara Ja
parriJJay limpiezano puedenset ajustadas.
Cambio de Ja temperatura
de °F/°C
1. El ajustede f4brJcade la medidadetemperaturaes Fahrenheit=
2. ParacanqbJareIajuste,oprima y mantengaoprimidasIasteclas
'CANCEL' (CanceJa0y 'Bake' al mJsmotiempo durante tres
segundos.
3. Escuchar4una seBalsonoray el ajuste actual [°F o °C] se
despJegar4en la pantalla. (Si no se realizaning@lcambio, la
estufa regresar4al ajusteactuaJdespu@sde 30segundos].
4. Paracambiarel ajuste,oprima la tecla 'Mere+' o 'Less+'=
Oprimalanuevamentepara regresaral ajusteanterior=Espere
cinco segundosy el ajustese guardar4.
67
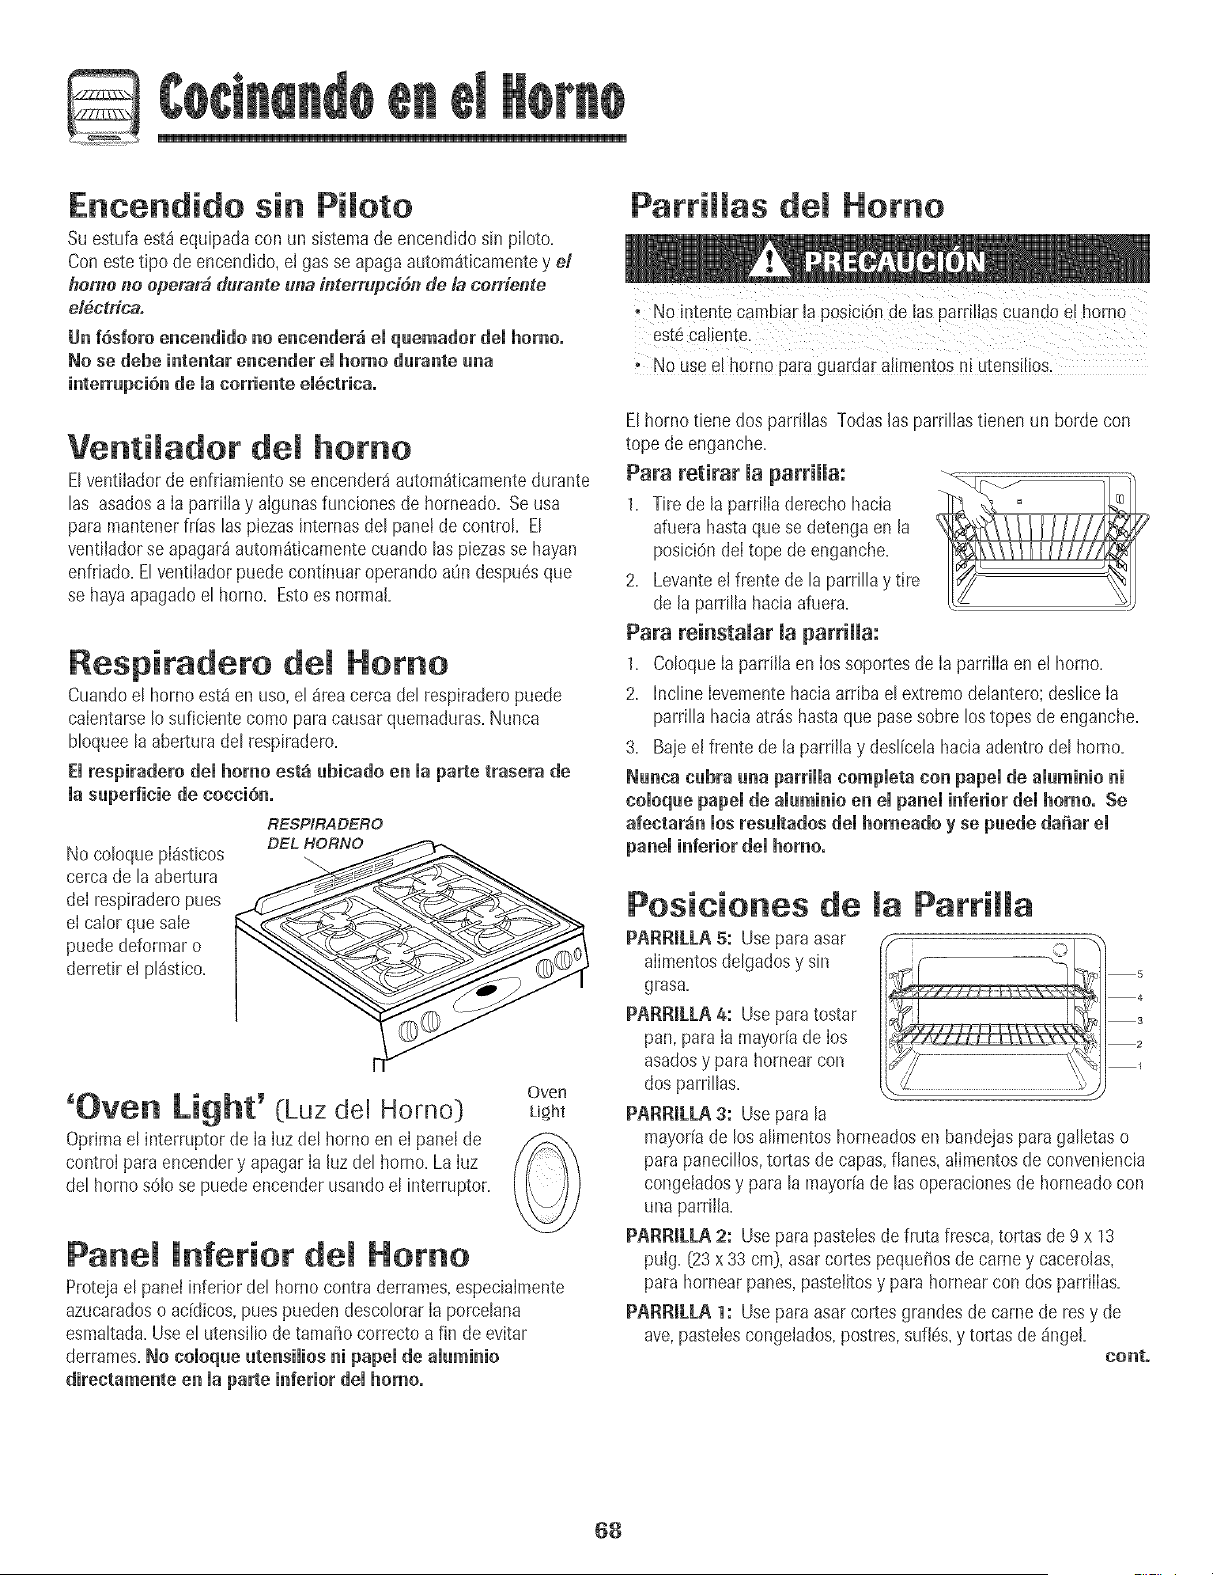
O
Encendido sin Pimoto
Su estufa est_equipadacon un sistemade encendidosin piloto.
Conestetipo de encendido,el gasse apagaautomSticamentey el
home l_e epemrb durante u1_a&terrupci6n de & cerriente
el#ctricao
Un f6sforo eaceadido no eacender_ el qaemador del homo°
No se debe intentar encender el homo durante una
interrupei6nde ia eorriente ei6etrieao
Ventimador dem homo
B ventfladorde enfriamientose encender_autom_ticamentedurante
las asadosa Ia parrfllay aIgunasfunciones de horneado=Se usa
paramantenerif[as las piezasintemas del panelde control El
ventiladorse apagar_autom_ticamentecuando [as piezasse hayan
enfdado=Elventiiadorpuedecontinuaroperandoa0ndespu6sque
se hayaapagadoel homo= Estoes normal=
Respitadeto dem Homo
Cuandoel homo est_en uso, el _rea cerca del respiraderopuede
caIentarseIo suficiente como para causar quemaduras=Nunca
bloqueela aberturadel respiradero=
El respiradero dei homo est_ ubieado en la parte trasera de
la supedieie de eoeci6n.
No coloque pI_sticos
cercade la abertura
deI respiraderopues
eI calor quesale
puededeformar o
derretir el pl_stico.
RESPIRADERO
DEL HORNO
'Oven Light' (Luz de[ Homo}
Oprimael interruptorde [a[uzdel homo en e[ panel de
contro[para encendery apagar[a [uzdel homo=La [uz
del homo s61ose puedeencenderusandoel interruptor=
Oven
Light
Panem inferior Homo
Proteiael panel inferior del homo contra derrames,especialmente
azucaradoso addicos, pues puedendescolorarIa porcelana
esmaltada=Useel utensilio de tama5o correcto a fin de evitar
derrames.No coioque utensilios ni papei de aluminio
direetamente en la parte inferior dei homo,
Parrimmas Homo
NOintenteCambiarla posiciSnde las parrillascuand0el homo
est6caliente.
; N0use e! horn0 paraguardaraliment0sni utens!li0Sl
E[homo tiene dos parrfl[as Todas[as parri[iastienen un bordecon
tope de enganche=
Para retirar la parriiia:
1= Ti_ede la parrilIaderechohacia
afuera hastaque se detengaen la
posicidndeI tope de enganche=
2= Levanteel frente de la parrillay tire
de la parrilla haciaafuera=
Para reinstaiar la parriiia:
1= ColoqueIa parrfllaen Ios soportesde Ia parriIIaen el homo=
2= h]cline Ievementehaciaarriba el extremodelantero; desliceIa
parrilla haciaatr_s hastaque pasesobre lostopes deenganche=
3= Baie el frente de la parrfllay deslicelahaciaadentro del homo=
Nunea eubra una parrillaeompleta con papel de aluminio ni
eomoquepapemde aluminio en el paneminferiordemhomo° Se
afectar_in mosresumtadosdemhomeado y se puede da_ar em
paneminferiordei homo°
Posiciones de la Parrimma
PARRILLA5: Use para asar _.,
alimentosdelgadosy sin
s
grasa= ' 4
PARR_tLi.A4: Usepara tostar 3
pan,para Ia mayoriade Ios _ 2
asadosy parahornear con _
dos parrillas= '/ '
PARRIL[A3: Usepara la
mayoriade los alimentoshorneadosen bandejaspara galletaso
parapanecilios,tortas de capas,fianes,aIimentosde conveniencia
congeladosy parala mayoriade las operacionesde homeadocon
unaparrii[a=
PARR_LLA2: Use para pastelesde fruta fresca,tortas de9 x 13
pulg=(23x 33 cm), asarcortes pequefiosde came y cacerolas,
parahomear panes,pasteiitosy para hornearcon dos parriiias=
PARR_LLA1: Use para asar cortesgrandesde came de resy de
ave,pastelescongelados,postres,suf[6s,y tortas de dngeL
conto
68
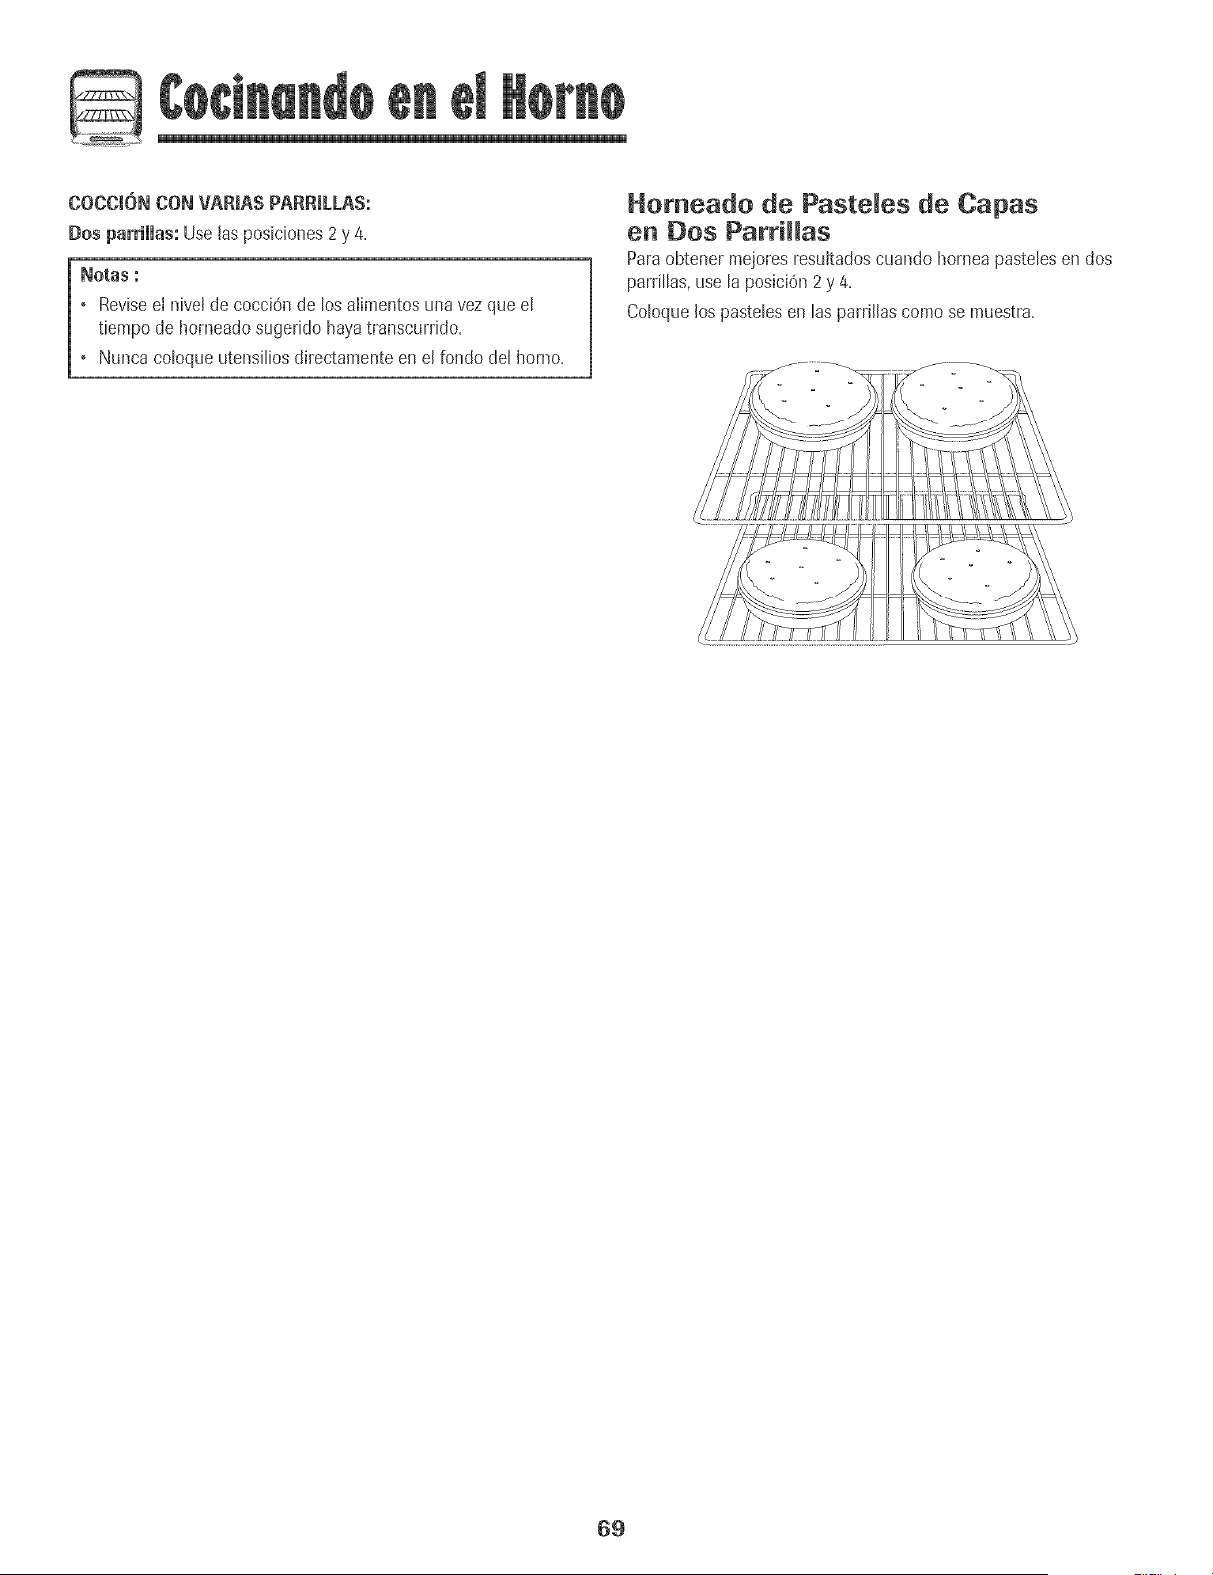
©
COCCt6N CON VARJASPARRmLLAS:
Dos parriJJas:Uselasposiciones2 y 4.
Notas :
, Reviseei nivel de cocci6n de tos aIimentosuna vez queet
tiempode horneadosugerido hayatranscurrido.
, Nuncacotoqueutensitiosdirectamenteen el rondo det homo.
Homeado de Pasteles de Capas
en Dos Pattillas
Paraobtener mejoresresukadoscuando homea pastelesen dos
parrillas,use la posiciOn2y 4.
Coloquelos pastelesen las parrillascomo se muestra.
69
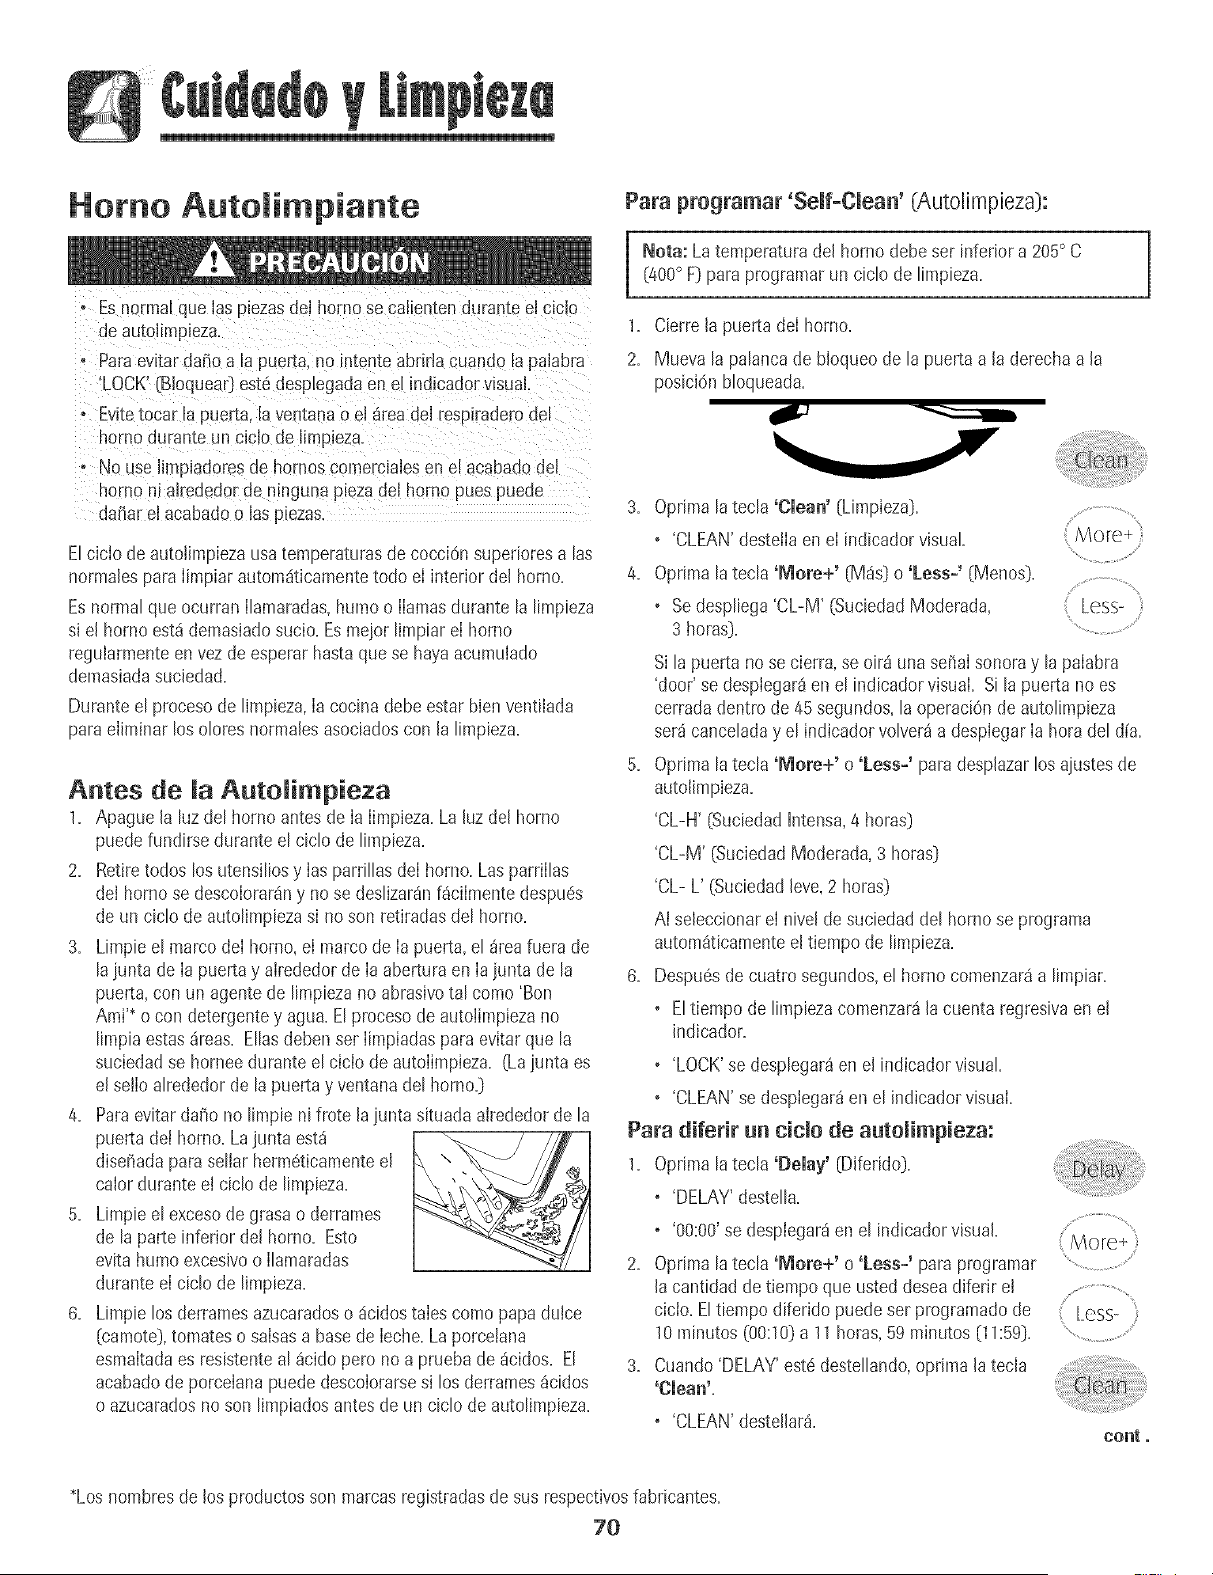
Homo Autolimpiante
° Es norma! que Jaspiezas del homo se calienten durame el ciclo
de autoJimpieza,
, Para evitar da_io a la puerta, no mtente abrJrla euando la paiabra
LOCK' [Bioquear_ est6 despLegada en el +ndicador visual,
° Evite toear la puerta, la ventana o el 4rea del respiradero de!
homo durante un ciclo de limp+eza.
° No use limpJadores de hornos comere+aJesen el aeabado del
homo nialrededorde mnguna pmza deJhomo pues pueae
da_ar el acabado o las prezas
Elcicio de autolimpiezausatemperaturesde cocci6n supedoresa las
normalespara Iimpiarautom4ticamentetodo eI interior del homo+
Esnormal que ocurran Ilamaradas,humoo IIamasdurante la limpieza
si el horno estd demasiadosucio. Esmejor limpiar eI horno
reguiarmenteenvez de esperarhastaquese hayaacumuiado
demasiadasuciedad.
Duranteel procesode limpieza,Ia cocinadebeestarbienventilada
paraeliminar los oloresnormalesasociadoscon la limpieza.
Antes de ia Autoiimpieza
1. Apague la luzdel horno antes de ia iimpieza.La hz deJhomo
puedefundirse duranteel ciclo de limpieza.
2. Retiretodos los utensiliosy ias parrillasdei homo+Lasparriilas
dei homo se descoiorar4ny no se deslizarainfSciimentedespu6s
deun ciclode autolimpiezasi noson retiradasdel homo+
3. Limpieel marcodei homo, el marco de ia puerta,el 4tea fuera de
lajunta de la puertay airededorde la aberturaen la junta de la
puerta,con un agentede limpiezano abrasivotal como'Bon
Ami'+o con detergentey agua. Elproceso de autoiimpiezano
limpia estas_reas. Eliasdeben set iimpiadaspara evitar que la
suciedadse homee duranteel cicio de autoiimpieza. (Lajunta es
eJseiio alrededorde la puerta y ventana del homo+)
4. ParaevitardaSo no limpie ni frote la junta situada alrededorde la
puertadet homo. Lajunta est4 _ _
disefiadaparasellar herm6ticamenteel \ "
calordurante ei ciclo de limpieza.
5. Limpieel excesode grasa o derrames
de laparte inferior deJhomo+ Esto
evitahumo excesivoo Ilamaradas
duranteel ciclo de limpieza.
6. Limpie losderramesazucaradoso 4cidostales comopapaduice
[camote],tomateso salsasa basede Ieehe.La porcelana
esmaltadaes resistenteal _cidopero no a prueba de 4cidos. EJ
acabadode porcelanapuededescolorarsesi los derrames_cidos
o azucaradosno son limpiados antesde un ciclo de autolimpieza.
Para programar 'SeJf-CJean' (Autolimpieza):
Nora: Latemperaturadel hornodebeset inferiora 205° C[400° F] para programarun ciclo de limpieza.
1. Cierrela puerta deI homo+
2. Muevala palancade bloqueo de la puertaa Jaderechaa Ja
posicidnbloqueada.
Optimala tecla 'Clean' [Limpieza].
o 'CLEAN'desteila en el indicadorvisual More+
Optimala tecla 'lViore+' [Mas) o 'Less+' [Menos).
o SedespJiega'CL-M' (SuciedadModerada, Less-
3 horas).
Sila puerta no se cierra,se oir4 una se_aIsonoray la palabra
'door' se despiegar4en el indicadorvisual. Sila puerta no es
cerradadentro de 45segundos,la operaciOnde autolimpieza
set4canceladay el indicadorvolver_a despiegarIa hora del d[a.
Optimala tecla 'lViore+' o 'Less+' paradespJazarlosajustesde
autolimpieza.
'CL-H' [SuciedadIntensa,4 horas)
'CL-M' (SuciedadModerada,3 horas]
'CL- L' (Suciedadleve,2 horas)
AI seleccionarei niveJde suciedaddel homose programa
autom4ticamenteeltiempo de limpieza.
Despu6sde cuatrosegundos,el homo comenzar4a limpiar.
o Eltiempode limpiezacomenzar4Jacuentaregresivaen eJ
indicador.
o 'LOCK'se desplegar4en el indicadorvisual
o 'CLEAN'se despiegarden el indicadorvisual+
Para diferir un cicJo de autoiimpieza:
1. Optima la tecla 'Delay' [Diferido).
o 'DELAY'destella.
o '00:00'se desplegar4en el indicadorvisual
2. Optimala tecJa'More+' o 'Less+' paraprogramar
Jacantidad de tiempo que usteddeseadiferir el
cicio. EJtiempo diferido puede set programadode
10minutos (00:10)a 11horas,59 minutos [11:59)+
3. Cuando'DELAY'est6 destellando,optima JatecJa
'Clean'=
o 'CLEAN'desteJlar_=
More_
+:iless- i
eonto
*Losnombresde los productosson marcasregistradasde sus respectivosfabticantes.
70

4. Oprimala tecta 'More+' (M_s} o 'Less+' (Menos}.
o 'CL-M' (SuciedadModerada,3 horas} se
desptiegaenel indicador.
5. OprimaIatecia 'More+' o 'Less+' paradesplazartos ajustesde
autolimpieza.
'CL-H' (SuciedadIntensa,4 horas}
'CL-M' {SuciedadModerada,3 horas}
'CL-L' (SuciedadIeve,2 horas}
At seteccionaret nivet de suciedadde! homo se programa
autom_ticamenteet tiempo de timpieza.
6. Despuesde cuatrosegundos,'CLEAN'(Limpieza},'DELAY'
(Diferido}y 'LOCK'(Btoquea0se desptegar_nen el indicador
visual paraindicar queel homo est_programadoparaun ciclo
de limpiezadiferido.Eltiempodifendo tambi6n se despliegaen
el indicadorvisual
Si el home ya ha side programatic para un tide de
limpieza y usted desea programar un tiempo
1. Optima la tecla 'Delay+.
+ 'DELAY'destella.
+ '00:00'se desplegar_en el indicadorvisual .....................................
2. Oprimalatecla 'More+' o 'Less+' paraprogramar[a .................................
cantidadde tiempo que usted desead+ferirel ciclo. ..........................
Despuesde cuatrosegundos,'CLEAN','DELAY'y Less-
'LOCK'sedespiegar_nen el indicador visualpara .........................................
indicar que e[ homo est4programadopara unacic[o de [impieza
diferido.Eltiempo diferido tambi@nse despJiegaen el [ndicador
visual
Cuando comienza emcido de automimpieza:
+ 'DELAY'se apagar&
+ Eltiempo de Iimpiezase desplegar_en et indicadorvisual
Para cancemar emcido de automimpieza:
Oprimala tecla 'CANCEL'{Cancela0.
+ Elindicadorvisualquedaen blanco.
+ Todas lasfuncionesson canceladas.
• La hera deldia se despliegaen el indicadorvisual
Durante e_ cido de autolimpieza
Cuandoaparece'LOCK'eneI ind+cador,Ia puerta no se puedeabrir.
Paraevitardario a la puerta,nofuerce la puertapara abrirtacuando
la palabra'LOCK'est_ desplegadaen el ind+cadorvisual+
Humo y Omores
Ustedpuedever humoy sentir olor Iasprimerasvecesque el homo
es limpiado. Estoes normal y disminuir_con el tiempo.
Tamb+enpuedeocurrir humosi ei borneest_ demasiadosucio o si
se ha dejadoun utensilioen el homo.
Sonidos
A medidaque el borne se calienta,usted puedeoir sonidos de
piezasmet_licasquese expandeny contraen. Estoes normaly no
dariar_el homo.
[:}espu s cic o de
automimpieza
Aproximadamenteunahera despuesdeIfin deI ciclo de limpieza,
'LOCK'desaparecer& La puerta ahorapuede set abierta.MuevaIa
palancade bloqueode la puerta a la izquierdapara desbloquearla.
Alguna sueiedad puede quedar come una leve ceniza gris ripe
pelvo° Ret[relacon un pa_o hOmedo.Si la suciedadpermanece
despu6sde iimp+ar+a,significa que el ciclo de limpiezano rueio
suficientementeiargo. La suciedadser8eiiminada duranteel
proximociclo de limpieza.
Si masparriHasdemhomo fueron dejadas en el homo y no se
deslizan suavemente despu_s de un title de limpieza, Iimpie
las parrillasy los soportesde lasparrilIas con una pequefiacantidad
de aceitevegetalpara hacerlasdeslizarcon m_sfacilidad.
Pueden aparecer l_neasdelgadas en la percelanaal pasar per
cities de calentamie_te y e_friamie_te. Estoes normaly no
afectar_e! rendimiento.
U_a desceloraciS_ bla_ca p_ede apareeer despots del ciclo
de mimpiezasi mosamime_tos_cidos e azucarades_e fuere_
limpiados a_tes dem_i_mode a_tomimpieza. EstadescoloraciOnes
normaly no afectar8el rend+miento.
+ Si se dejaabierta [a puertade[ homo, [a palabra'door' (puerta}
destellar8enel indicadorvisual y se escuchar_una se_al
sonora hasta que [a puertasea cerraday la tecla'Clea_' sea
oprimidanuevamente.
• Si transcurrenm_s de cincosegundosdespu6sde oprimir [a
tecla 'Clea_' y antesde oprimir [asteclas 'Mere+' o 'Less+',
e[ prograpaavolver_autom_ticamentealdespiiegueprevio.
• La puerta del homo se da_ar_ si se fuerzapara abr+rlacuando
la palabra'LOCK' continOadesp[egadaen e[ indicador.
71
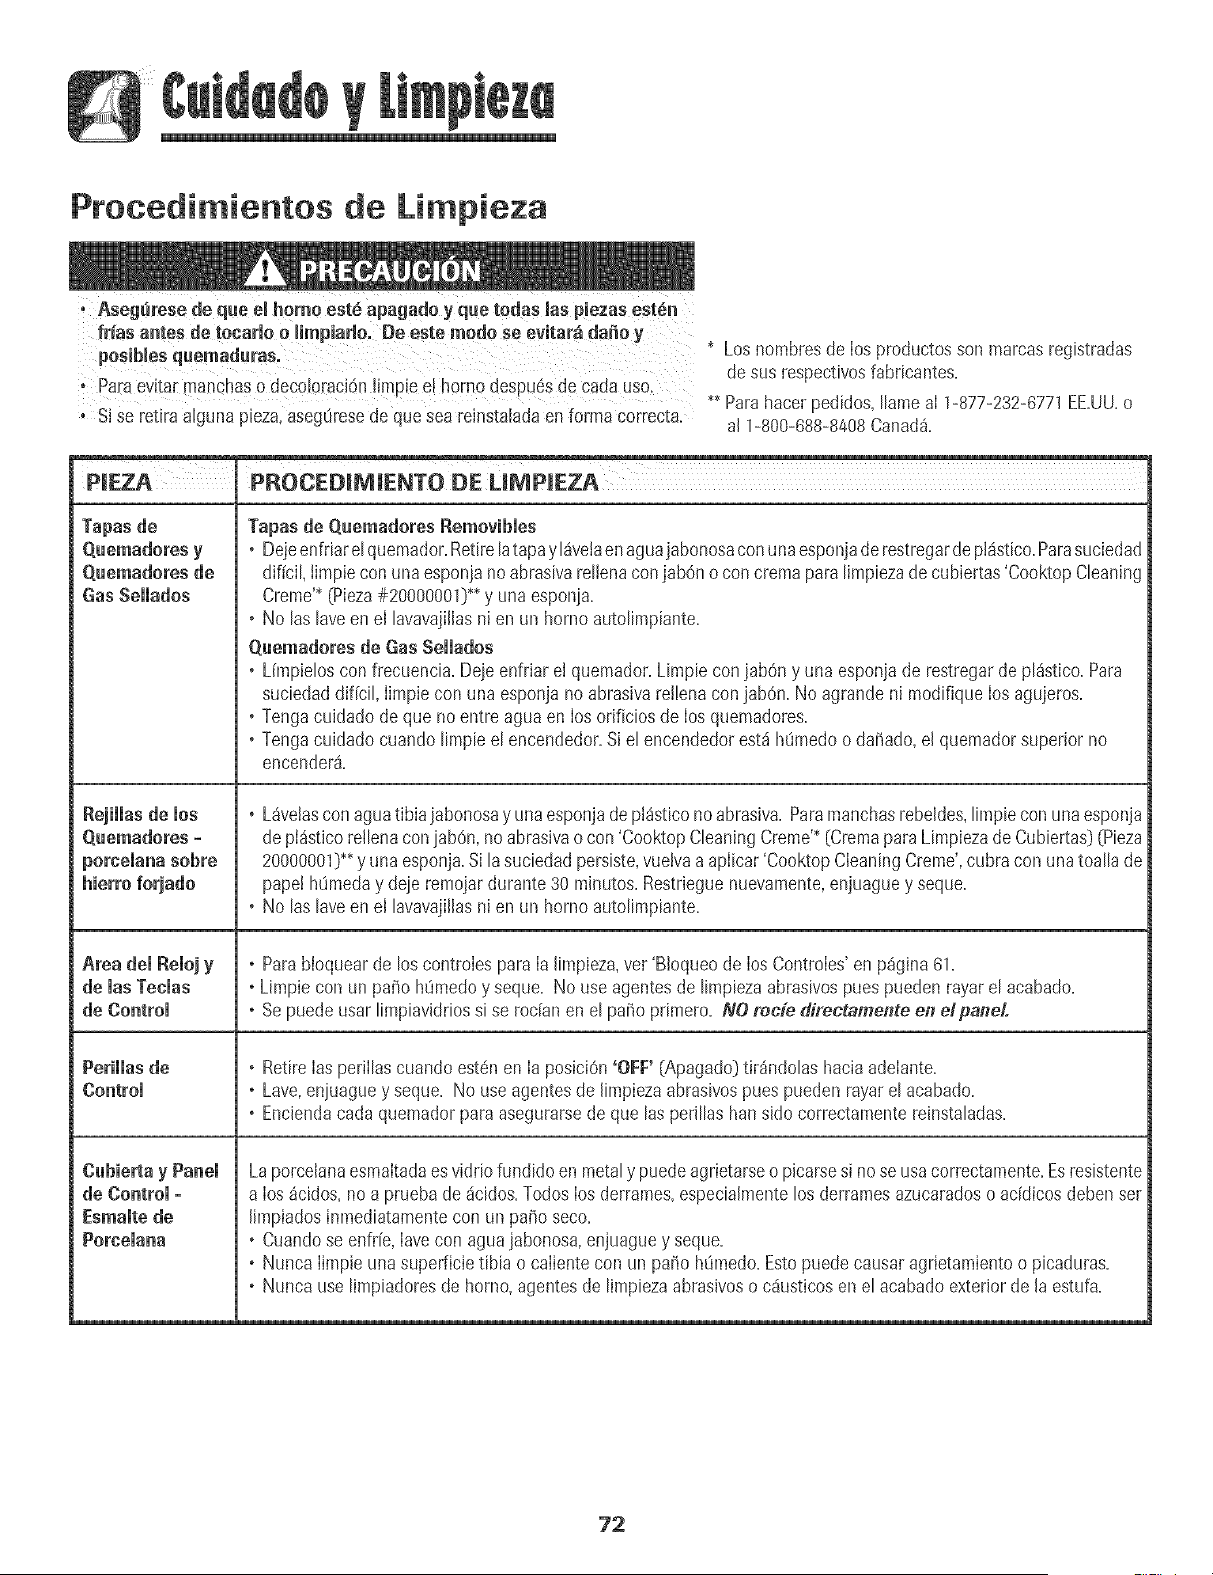
Procedi ientos de Limpieza
fr[as antes de tecarJo e mimpiarmo.De este mode se evitar_ dn_o y
posibiesqaemadaras. * Loshombresde Ios productosson marcasregistradas
Paraevita[ rnanchaso dec0!oraciSnIimpiee! homo desPU6Sdecada use. de susrespectivosfabricantes.
•_Parahacerpedidos,llamaaI 1-877-232-6771EE.UU.o
, Sise retira algunapieza,aseg_resede qua seareinsta[adaenforma correcta, al 1-800-688-8408Canada.
m
PROCED_MIENTO DE LmMPmEZA
Tapasde Tapasde Qnnmadores Removibles
Qunmadores y , Dejeenfdarelquemador=RetirelatapayI_ve]aenaguajabonosaconunaesponjade restregarde pl_stico=Parasuciedad
Quemadores de dificil, timpie conuna esponjano abrasivarellenaconjabOno concrema para limpiezade cubiertas'CooktopCleaning
Gas Snllados Creme'*(Plaza#2OOOOOOl)*_y unaesponia=
, No Ins laveen el lavavajillasni en un homo autolimpiante=
O.uemadorns de Gas Ballades
, L[mpielsscon frecuencia=Deieenfriar e] quemador=Limpie conjabOny una esponjade restregarde pl_stico=Para
suciedaddificil, limpie con una esponjano abrasivare!lenacon jabOn=No agrandeni modifique los agujeros=
, Tengacuidado de qua no entreagua en ios orificios de ios q_Jemadores=
, Tengacuidado cuando limpie el encendedor=Si elencendedorest_hOmedooda5ado,el quemadorsuperior no
encender&
Rejiiias de los , L_velascon aguatibiajabonosay unaesponjadepl_stico noabrasiva=ParamanchasrebeHes,limpie conunaesponja
Quemadores - depI_stJcorellenaconiabOn,noabrasivao con 'CooktopCleaningCreme'_[CremaparaLimpiezadeCubiertas_(Pieza
percelana sobre 2OOOOOOl)*_y una esponja.Silasuciedadpersiste,vueivaa aplicar'CooktopCleaningCreme',cubracon unatoalla de
papalhOmeday deieremojardurante 30 minutes.Restrieguenuevamente,enjuaguey seque.
, No Ins laveen el lavavajillasni en un borne autolimpiante.
Area del Reloj y , Parabloquear de los controlespara Ia limpieza,ver 'B!oqueode IosControles'en pdgina 61.
dn las Tecias , Limpiecon un pai_oh_medoy seque. No use agentesde [impiezaabrasivespues puedenrayare[ acabado.
dn Control , Se puede usar limpiaviddossi se roc[anen el pa_o primate=NO recie directamenteell elpanet°
Periiias dn , Retire[asperiilascuandoest_nen [a posiciOn'OFF' {Apagado}tir_ndolas hacia adeiante=
Control , Lave,enj_mguey seque. No useagentes de [impiezaabrasivespunspueden rayarel acabado.
, Enciendacada quemadorpara asegurarsede que Insperillas banside correctamentereinstaladas.
Cubierta y Panel Laporcelanaesmaitadaesviddo fundido en metaly puede agrietarseo picarsesi no se usacorrectamente.Esresistente
tin Control - a Ios _cidos,no a prueba de 4cities. Todos Ios derrames,especiaJmentelos derramesazucaradosoacidicos deben set
Esmaitn de [impiadosinmediatamentecon un pai_oseco.
Poreeiana , Cuandose enfr[e,Iavecon agua jabonosa,enjuaguey seque=
, Nunca [impie unasuperficietibia o caiiente con un pa_ohOmedo=Estopuedecausar agrietamientoo picaduras=
, Nunca use limpiadoresde borne,agentes de limpiezaabrasiveso cdusticosen el acabadoexteriorde [a estufa=
72
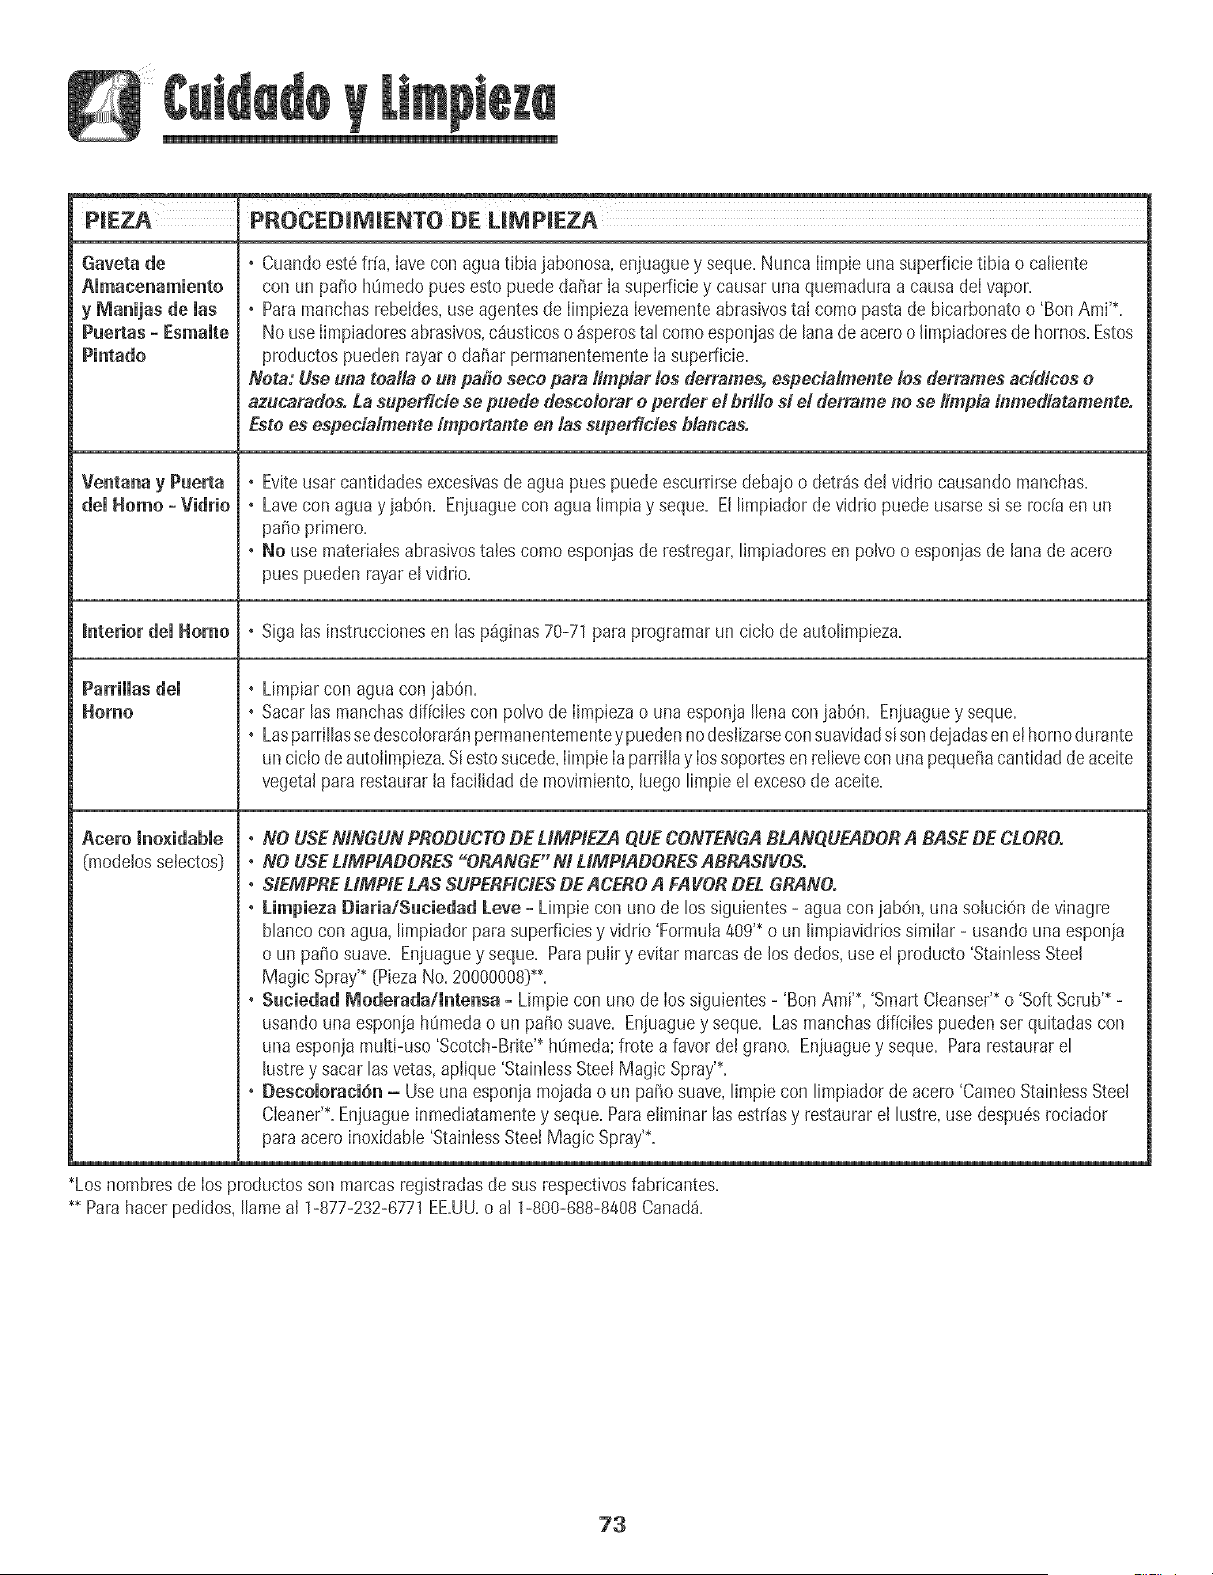
PmEZA PROCEDIM_ENTO DE LIMPIEZA
Gaveta de
AJmacenamiento
y Manijas de las
Puertas - EsmaJte
Pintado
Ventana y Puerta
demHomo - Vidrio
• Cuandoest6fr[a, Iavecon agua tibia jabonosa,enjuaguey seque.Nunca Iimpieunasuperficietibia o cafiente
con un pai_oh0medopues esto puede da_ar Ia superficiey causaruna quemaduraa causadeI vapor.
• Paramanchasrebeldes,use agentesde IimpiezaIevementeabrasivestat comepastade bicarbonateo 'BenAmi'*.
No useIimpiadoresabrasives,c_usticoso _sperostal comeesponiasde lanadeacero o limpiadoresde berries.Estos
productospuedenrayaro da_ar permanentementeIa superficie.
Nora: Use uIla tealla e un parle sece para fimpiar los derrames, especialmente los derrames addices e
azucaradesoLa superfide se puede descelerar e perder e! bri#e si el dert_me 1pcse #mpia inmediatamettte.
Este es espedah_ente impertante en tas superficies b/ancas.
• Eviteusar cantidadesexcesivasde agua pues puedeescurrirsedebajoo detrSsdel vidrio causandomanchas.
• Lavecon aguayiab6n. Enjuaguecon agua limpiay seque. El limpiador deviddo puede usarsesi se roda en un
pa_oprimero.
• No use materialesabrasivestales come esponjasde restregar,Iimpiadoresen polvo o esponjasde lana de acero
pues pueden rayarel vidrio.
Interior del Homo • Siga las instrucciones en las p_ginas 70-71 para programar un ciclo de autolimpieza.
Acero Ine×idabJe
(modelosselectos)
• Limpiarcon agua con jab6n.
• Sacarlas manchasdificiles con polvo de Iimpiezao una esponjaIlenacon jab6n. Enjuaguey seque.
• Lasparrillassedescolorar4npermanentementey puedennodeslizarseconsuavidadsisondejadasen el bornedurante
unciclo deautolimpieza.Siestosucede,IimpieIaparrilJay Iossoportesen relievecon una pequeBacantidaddeaceite
vegetaJpara restaurarJafaciJJdadde movimiento,Juegolimpie el excesode aceite.
• NO USEMNGUN PBODUCTODE LIMPIEZA QUECONTENGABLANQUEADOBA BASEDE CLOBO.
• NO USELIMPIADOBES "ORANGE" M LIMPtADOBES ABBASIVOS.
• SIEMPBELIMPIE LAS SUPEBFICtESDE ACEBOA FAVORDEL GBANOo
• Umpieza Diaria/Suciedad Leve - Limpie con uno de los sig_ientes- aguaconjabOn,una soluciOnde vinagre
blancocon agua,limpiador para superficiesy viddo 'Formula409'*o un limpiaviddossimilar - _Jsandouna esponia
o un paso suave. Enjuaguey seque. Parapuiir y evitar marcasde los dedos,use el producto 'StainlessSteel
Magic Spray'*[PiezaNo.20000008]_.
• Suciedad Moderada/Jntensa - Limpiecon uno de Iossiguientes- 'Ben Ami'_,'SmartCleanser'*o 'Soft Scrub'_ -
usandounaespon]a h0medao un paBosuave. En]uaguey seque. Lasmanchasdificiles puedenset quitadas con
una esponjamulti-use 'Scotch-Bdte'_ h0meda:frote a favor deJgrano. Enjuaguey seque. Pararestaurarel
lustrey sacar lasvetas,aplique'StainlessSteelMagic Spray'_.
• DesceloraciSn - Useuna esponjamojadao un paBosuave,limpie con limpiador de acero'CameoStainlessSteel
Cleaner'*.Enjuagueinmediatamentey seque. ParaeJiminarlasestriasy restaurarel lustre,use despu6srociador
paraacero inoxidable'StainlessSteelMagic Spray'*.
*Loshombresde Iosproductosson marcasregistradasde sus respectivosfabricantes.
** Parahacer pedidos,Ilameal 1-877-232-6771EE.UU.o al 1-800-688-8408Canada.
73
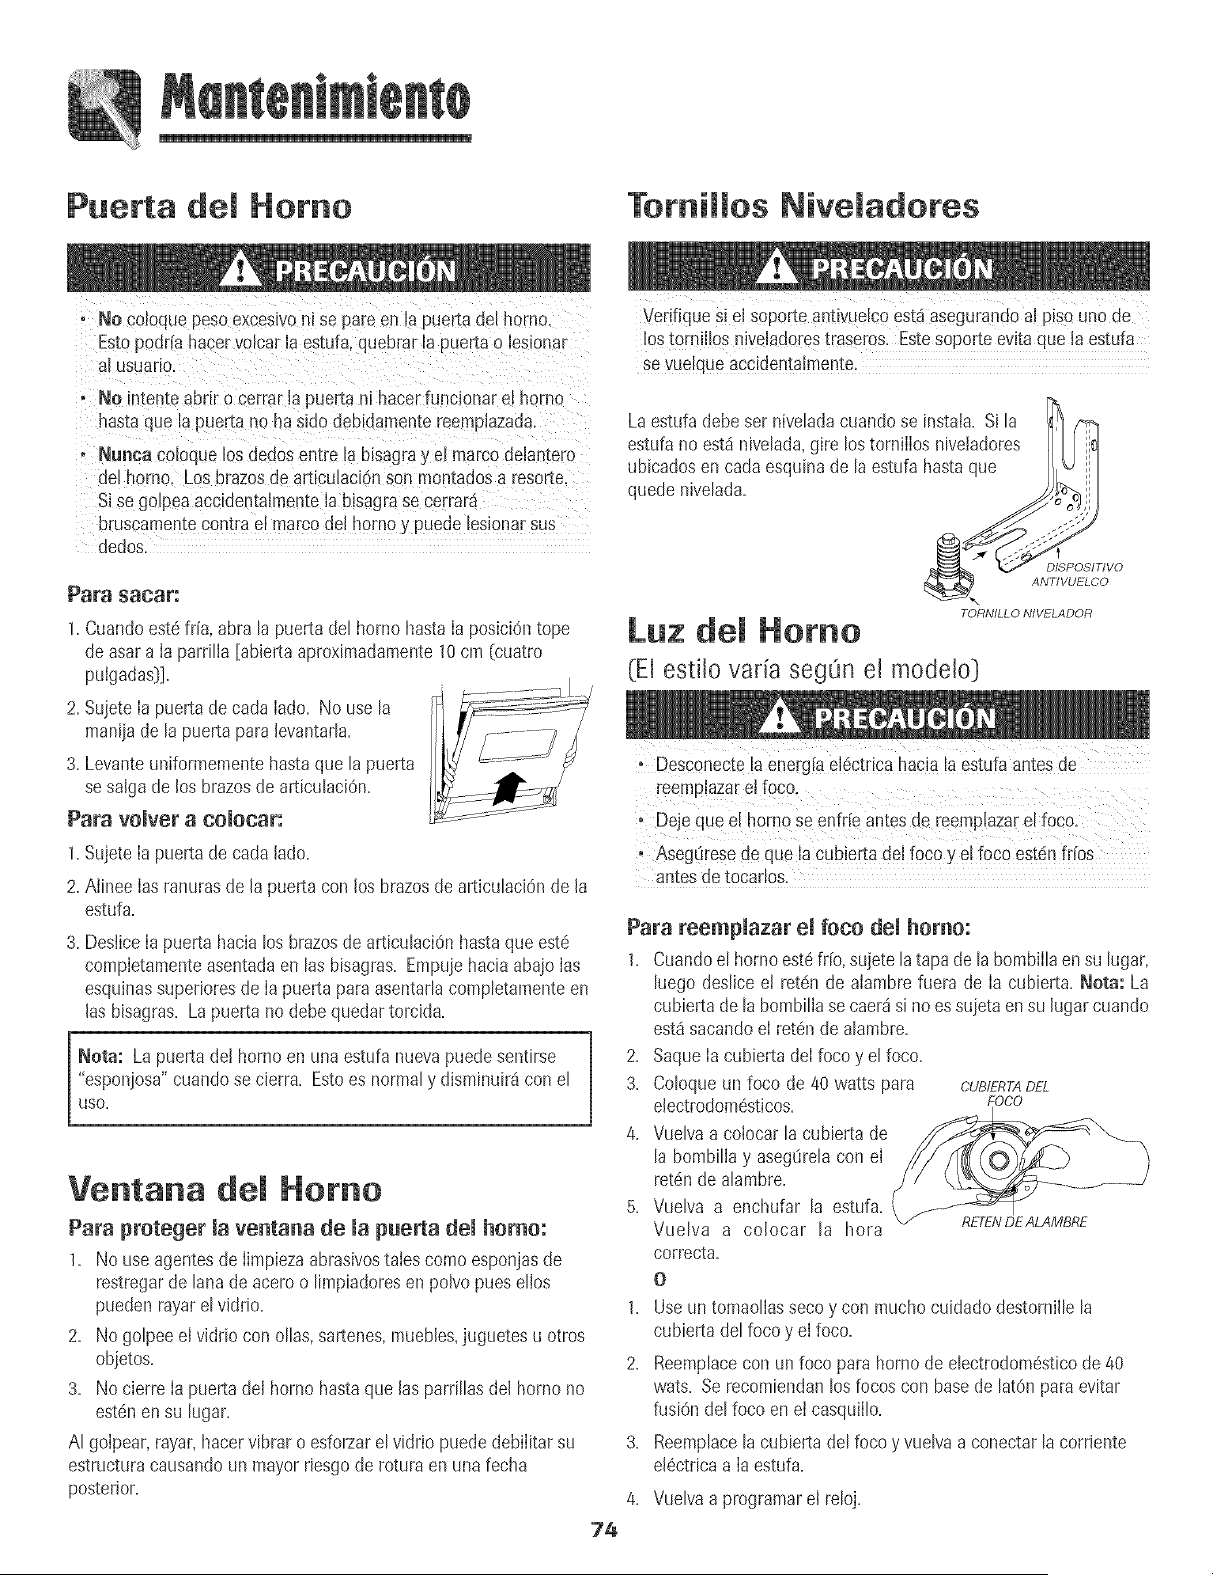
Puerta Homo Tornillos Niveladores
• No coioque peso exces_vonl se pare en [a puerta de[ homo.
Esto podria hacer vo_car Jaestufs quebrar la puerta o Jesionar
aJusuario.
° No intente abrir 3 cerrar Japuer[a ni hacerfunclonarel homo
hasts que Eapuer[a no hasido debidamentereempJazada,
- Nunea coJoquelos dedosentre la bisagray el marco dela/[ero
gel homo. LosbrazosdearticulacJ6nson rnon[adosa resorte.
SJse golpeaaccidentaJmenteJablsagrase cerrara
bruscamen[econtra el marco del homo y puede lesionarsus
dedos.
1,Cuandoest6frFa,abra la puerta del homo hastala posici6ntope
de asara [aparr[Ha[abiertaaprox[madamente10 cm (cuatro
pulgadas)].
2. Sujete[a puerta de cada [ado. No use la
manija de la puerta para[evantarla.
3. Levanteuniformementehasta que la puerta
se saigade los brazosde art[cuJaci6n.
Para voiver a coiocar:
1,SujeteIa puerta de carla lado.
2. Aiinee [asranurasde [a puerta con [osbrazosdearticulaci6n de [a
estufa.
3, Desiice[a puerta hacia [os brazosde articu[aciOnhastaque est6
completamenteasentadaen las bisagras. Empujehaciaabajo[as
esquinassuperioresde [a puerta paraasentarlacompletamenteen
[asbJsagras.Lapuerta no debe quedar torcida.
Nota: La puerta de! hornoen unaestufa nuevapuedesentirse
"esponjosa"cuandose cierra. Estoes normaly disminuir4con el
USO,
Ventana del Homo
Para proteger Javentana de Ja puerta deJ homo:
1. No use agentesde [impiezaabrasivostaiescomoesponjasde
restregarde lanade aceroo limpiadoresen polvo pues enos
puedenrayarel viddo.
2. No golpee e[ vidrio con ollas,sartenes,muebles,juguetes u otros
obietos.
3. No cierre [a puertade[ horno hasta que [asparrillasdel homo no
est6nen su lugar.
AI golpear,rayar, hacervibrar o esforzarel vidrio puededebilitar su
estructuracausandoun mayorrJesgode rotura en una fecha
posterior.
74
Verifique S[e[ s0porteantivueJc0est_gasegurandoa[ piso unode
10StorniiJ0SniveladorestEaseros.Este soporte evita que [a estufa
se vueiqueaccidentaknente,
Laestufa debe ser niveladacuando se instaia. SJla /_
estufa no est_nivelada,gire lostorniiios niveladores
ubicadosen cadaesquina de laestufa hasta que
quede nivelada. _,,J
TORNILLO NIVELADOR
Luz Horno
(El esti[o var[a segOn e[ mode[o]
° Desconecte!aene[g[a e!6ctr!cahacia [aestufa antesde
reemplaza_el foco.
aeje que e[h0rno Seenfr[eantesde reemp[azare[ f0CO.
. Aseg_resede que Jacubierta de[f0c0 y e[f0c0 esten fr[0s
antesde tocar[os.
Para reempJazar eJ foco deJ homo:
1. Cuandoe[ homo est6frio, sujete [atapa de [abombii[aen su [ugar,
luego deslicee[ ret6n de aiambrefuera de [a cubierta. Nota: La
cubiertade la bombillasecaer4si no essujeta en su hgar cuando
est4sacandoe[ ret6nde alambre.
2. Saque [a cubiertade[foco y elfoco.
3. Coloque un foco de 40 watts para CUBIERTADEL
eJectrodom6sticos, foco
4. Vuelvaa co[ocar la cubiertade
la bombilia y aseg8relacon e[
ret6nde alambre.
5. Vuelva a enchufar la estufa.
VueIva a oolooar la hoFa RE'/ENDEALAMBRE
correcta.
O
1. Useun tomaoliassecoy con muchocuidadodestornille la
cubierta delfoco y eI foco.
2. Reemplacecon un foco para homo de electrodomesticode 40
wats. Se recomiendanlosfocos con basede latOnpara evitar
fusion del foco enei casquiilo.
3. Reemplacela cubiertadel focoy vuelvaa conectarla corrJente
eJ6ctdcaa [aestufa.
4. Vuelvaa programare[ reloj.
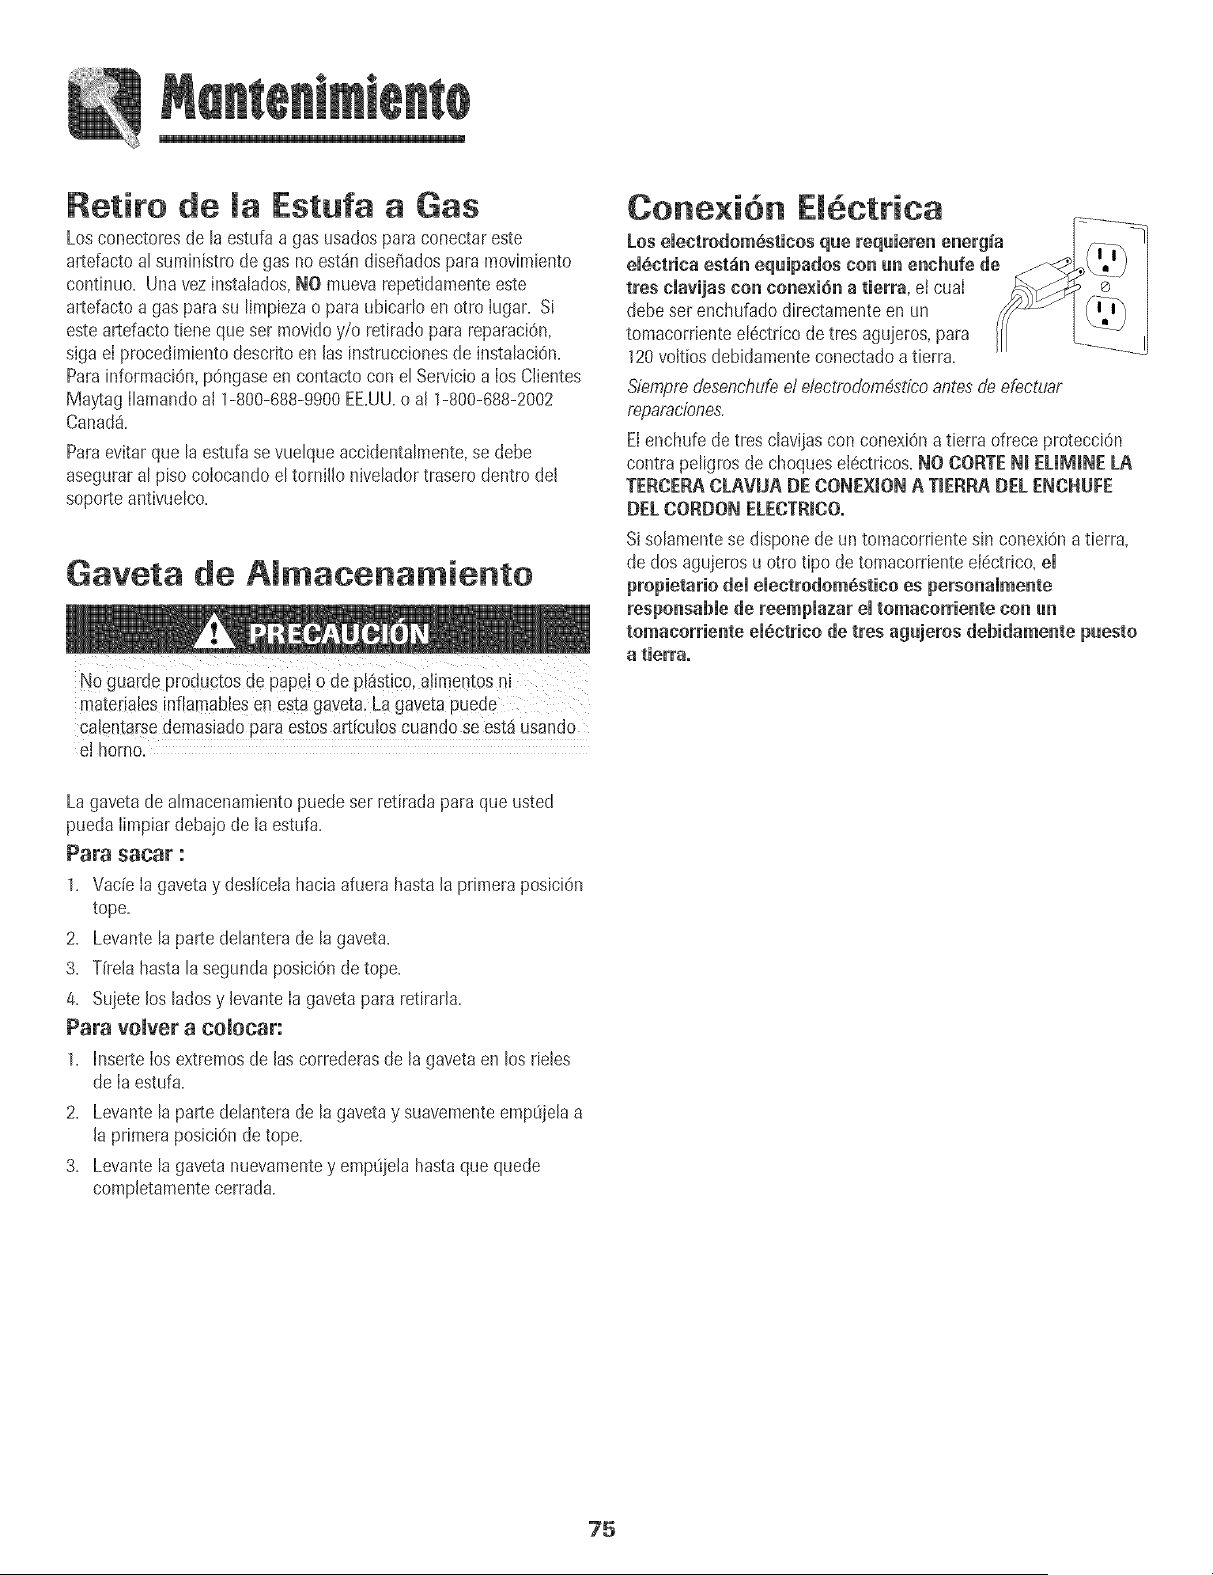
Retito de maEstufa a Gas
Losconectoresde [aestufa a gas usadospara conectareste
artefactoat suministrode gas no estdn dise_adospara movimiento
continuo. Unavez instatados,NO mueva repetidamenteeste
artefactoa gasparasu Nmpiezao para ubicado enotro Iugar. Si
esteartefactotiene que ser movidoy/o retiradopara reparaciOn+
siga el procedimientodescrito en las instruccionesde instahciOn.
ParainformaciOn,pdngaseen contactocon el Servicioa los Ciientes
Maytag Ilamandoal 1-800-688-9900EE.UU.o al 1-800-688-2002
Canad&
Paraevitarque la estufase vuelqueaccidentalmente,se debe
aseguraral pisocolocando el tornillo niveladortrasero dentro del
soporteantivuelco.
Gaveta de Almacenamiento
No guarde productosde PaPe+o de p!_StiCo,a!imentosni
materiatesinfiarnablesen esta gaveta,La gaveta PUede
calenta[se demasiadopara estosart[culoscuando se estdusando
el homo.
Conexi6n Em6cttica
LoseJectrodom6sticos que requieren energia
elSctrica est_in equipados con un enchufe de
ires clavijas con cone×iSn a tierra, el cuaI
debeset enchufadodirectamenteen un
tomacorrienteel6ctricode tres agujeros,para
120voltiosdebidamenteconectadoatierra.
Siempredesenchufeel e,,'eetrodom6stieoantesde efectuar
reparaciones,
Elenchufede tresclavijascon conexiOnatierra ofrece protecckSn
contrapeligros de choqueselectricos.NO CORTEN+_:_LIM_NELA
TERCERACLAVUA DE CONE×IONA T+ERP_,DEL ENCNUFE
DEECORDONELECTR_CO.
S+solamentese dispone de untomacorrientesin conexi6na tierra,
de dos agujerosu otro %o de tomacorrienteeI6ctrico+el
propietario dememectrodom6stico es personammente
responsable de reempmazarel tomacorriente con un
tomacorriente elSctrico de tres agujeros debidamente puesto
a tierra°
Lagavetade almacenamientopuedeser retirada paraque usted
puedaIimpiar debajo de la estufa+
Para sacar :
1+ Vade Ia gavetay deslicela haciaafuera hastaJaprimera posici6n
tope.
2+ Levante la parte delanterade la gaveta+
3+ Tirelahasta lasegundaposicidnde tope.
4+ SujeteJosladosy JevanteIa gavetapara retirarla+
Para vomvera comocar:
1. Inserte los extremesde las correderasde la gavetaen los rieles
de Ia estufa.
2. Levante la parte delanterade la gavetay suavementeempOjelaa
la primera posici6nde tope.
3. Levante la gaveta nuevamentey emp8jelahastaque quede
completamentecerrada.
75

PROBLEMA
Para mamayor_ade mosprobmemas, Revisesi Ioscontrolesde! horno est_ndebidamenteajustados+
verifique primero mosigaiente, + Verifique si el enchufeest4firmementeinse_adoen el tomacorriente+
+ Verifique o vuetvaa reponerel disyuntor. VerJfiqueo reemphce el fusible.
+ Verifique el suministrode energ[ael6ctrica.
Emquemador superior no se + VerJfiquesi la estufa est_debidamenteconectadaa la fuente dealimentaciOn.
enciende. , Verifique si est4 fundido un fusibledel circuito o sl se dispar6el disyuntor principal.
• Verifique paraasegurarsede que e! encendedorest6 seco y que ernitachasquidos. El
quemadornoseencender_s{ elencendedorest4 da_ado,sucioo mojado. Si el encendedor
no produceun chasquido,gire la perilla de control a la posJci6n'OFF'.
Eallama es dispareja. Los orJficiosdel quemadorpuedenestarobstruidos.
La llama del quemador superior se + Verifique para asegurarsede queel utensilioestdasentadoen la parrillasobreel quemador.
levunta del oHfieio.
[os resultados del homeado no son + Verifique Ia temperaturadel horno seleccionada.Aseg(Jresede quee! hornoest6
come se esperuban o son precalentadocuandola recetao instruccionesrecomiendanprecalentamientodel horno.
diferentes amosdel homo anterior° + Aseg0resede queel respiraderodelhomo noest8bloqueado.Vetp4gina68parala ubicaciOn.
+ Verifique paraasegurarsede que la estufaest4 niveJada.
Lastemperaturasa menudovar[anentreun hornonuevoy uno antiguo. A medidaquepasa
eJtiempo, la temperaturadeJhomo cambiay puede hacersem4scalJenteo m4sfr[a. Ver
p4g.67 paraIasinstruccionescomo ajustarlatemperaturadei homo. Nora: No se
recomiendaajustarla ternperaturasi ha tenido problemascon solo unao dos recetas.
UseeJutensiJiocorrecto.Los utensiliososcurosproducendoradooscuro.Los utensilios
brilIantesproducendoradoclaro.ConsulteelfoJleto"LaCocinaF4ciJ"paramayorinformaci6n
sobre los utensiliosde hornear.
+ Verifique lasposicionesde Ias parrilIasy Iacolocaci6nde los utensilios.AIternelosutensilios
cuandouse dos parrJllas.Deje2,5-5 cm (1-2pulgadas]entre Josutensiliosy las paredesdel
homo.
+ Verifique el uso de papelde aluminioen el homo. Nunca use papeJde aluminio para cubrJr
unaparriJlacompletadel horno.Coloqueun pedazopequeBodepapeldealuminioenlaparriJJa
queest4 debajo del utensilio para recibJrJosderrames.
Los alimentos no se asan a la + VerJfique[as posJcionesde [asparriJJasde[ horno. El a[imentopuede estar muy cerca de
purrillaen forma debida o sale la llama.
demasiado humoo ElpapeIdealumJniose us0demaneraincorrecta.Nuncaforre elinsertodelasadorconpapel
de aluminio.
Recorteel excesodegrasade lacame antesde ponerla a asara la parrJlla.
, Se us6 unaasaderasucia.
Precalienteel hornodurante 2 a 3 minutos antesde colocarel alJmentoen el homo.
+ Ase a la parrillacon la puerta del hornocerrada.
76
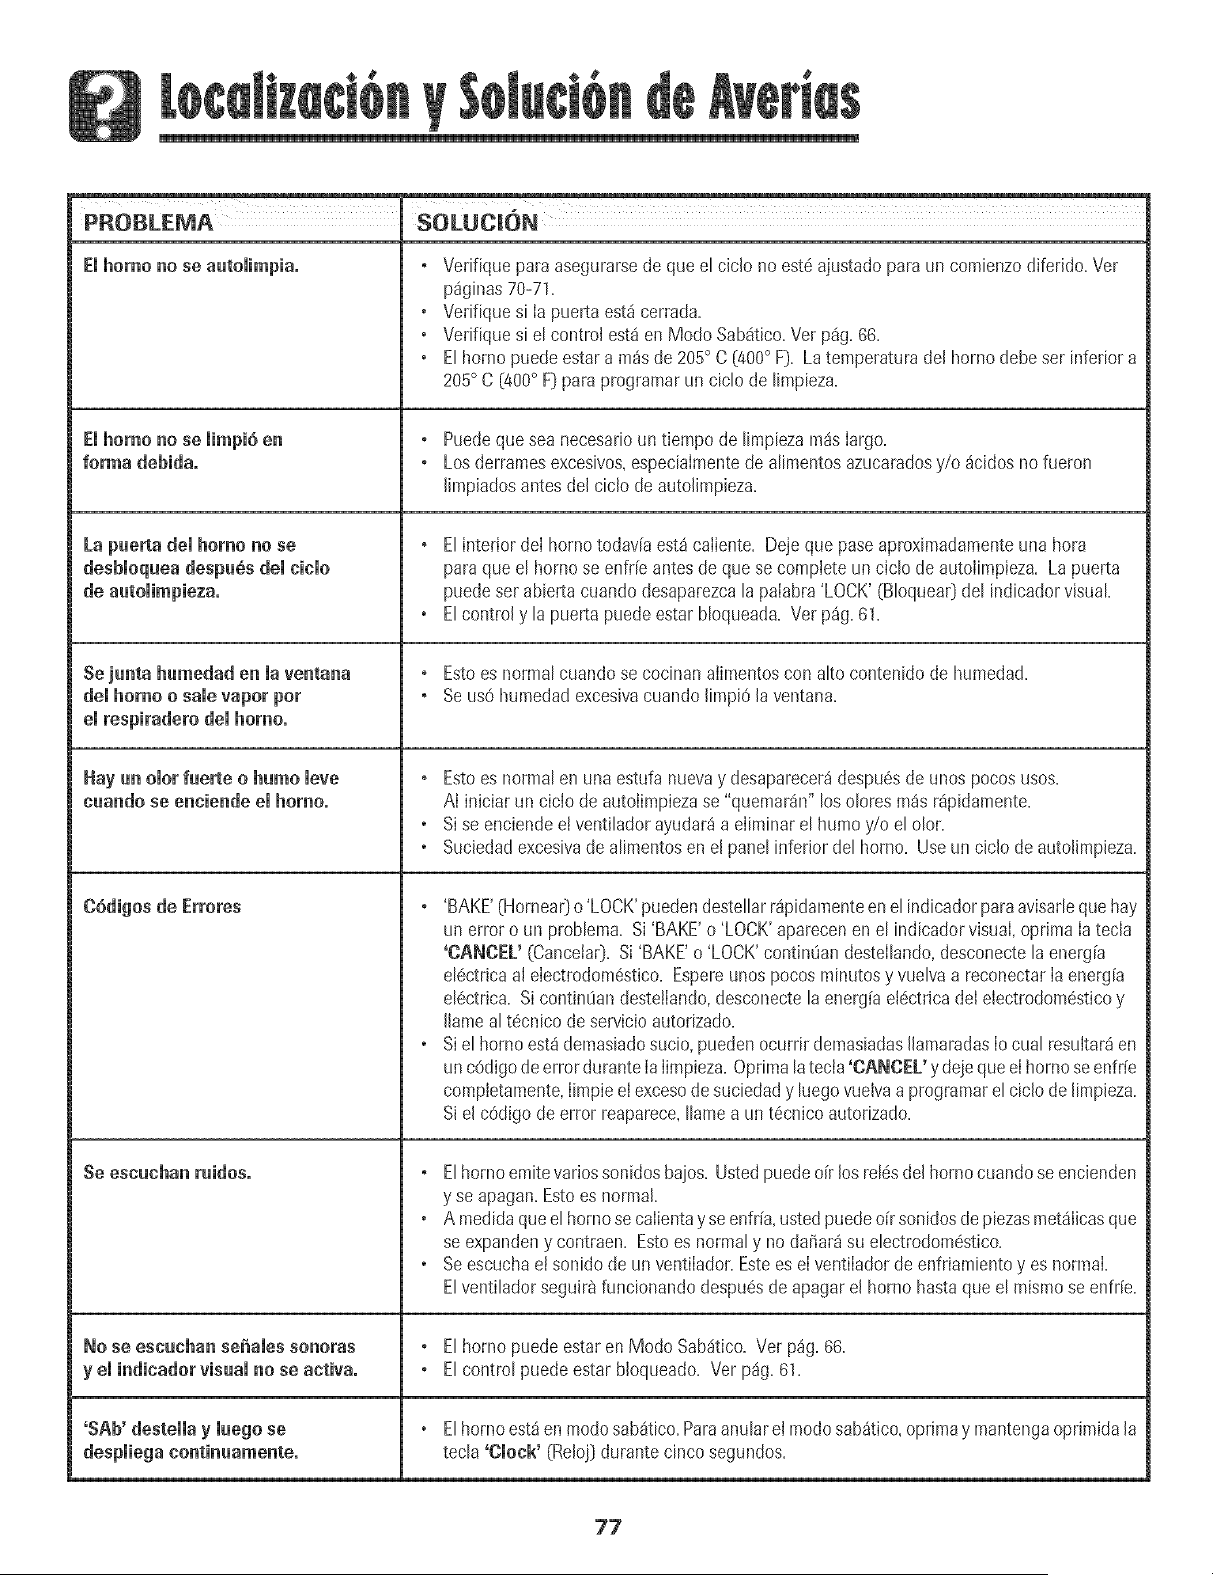
PROBLEMA SOLUCION
Emhomonoseautomimpia°
Emhomo no se mimpi6÷n
forma debida.
La puerta demhomo no se
desbmoqueadespu_s demeiemo
Sejuntahumedadenmaventana
demhomoo samevaporpot
emrespiraderodemhomo°
Hay un omorfuerte o humo mere
euando se enniende emhomo°
G6digos de Errores
Se esnuehan ruidos.
®
®
®
Vedfique para asegurarsede que el ciclo noest_ajustadoparaun comienzodiferido=Ver
p%inas 70-71=
Vedfiquesi ia puerta est_cerrada=
Verifiquesi e[ control est_en Modo Sab_tico=Vet p%=66=
E[homo puede estar a m_sde 205° C [400° F)=Latemperaturadel horno debe ser inferiora
205° C [400° F[}para programarun cic[o de [impieza=
° Puedeque sea necesar[oun tiempo de limpiezaross Iargo=
° Losderramesexcesivos,especiaImentede aIimentosazucaradosy/o _cidosno fueron
limpiadosantes del ciclo de autolimpieza=
° Elinterior deI homo todav[aest_caiiente. Deje que paseaproximadamenteuna hora
paraquee[ horno se enfr[eantesdeque se completeun cic[o de autoiimpieza. La puerta
puedeser abierta cuandodesaparezca[a palabra'LOCK'(BIoquea0de[ indicadorvisual
, E[control y [a puerta puede estar bIoqueada.Verp%. 61.
° Estoes normalcuando se cocinanaiimentoscon alto contenido de humedad.
° Seus0 humedadexcesivacuando limpi6la ventana.
° Estoes normalen una estufa nuevay desaparecer_despu6sde unos pocosusos.
AI iniciar un ciclo de autolimpiezase "quemaran" losolores m_s r_pidamente.
, Si se enciendee!ventihdor ayudar_a eliminare[ humo y/o e[ o[or.
, Suciedadexcesivade aIimentosen el pane[inferior de[ homo. Useun ciclo de autolimpieza.
° 'BAKE'{HorneaOo 'LOCK'pueden desteIIarrSpidamenteene[ indicadorparaavisarIeque hay
un erroro un probIema. Si'BAKE'o 'LOCK'aparecenen e[ indicadorvisual,optima Iatecla
'CANCEL' (Canceta0. Si 'BAKE'o 'LOCK'contimian destelIando,desconecte[a energ[a
eI6ctricaal electrodom6stico.Espereunos pocosminutosy vueIvaa reconectarIaenerg[a
eI6ctrica. SicontinOandeste!lando,desconecte[a energ[ael6ctricadeI electrodomesticoy
llamea[ t6cnico deservicio autorizado.
, Si e[ horno est_demasiadosucio, puedenocurrir demasiadasllamaradasIocua[ resultar_en
uncOdigode error duranteIaIimpieza.Oprima[atecia 'CANCEL' ydeie que eIhomo seenfr[e
completamente,IimpieeI excesodesuciedady [uegovuelvaa programare[ ciclo de limpieza.
Si el cOdigodeerror reaparece,[lamea un t6cnico autorizado.
° E[homo emitevariossonidosbaios.Ustedpuedeoir losre[6sdel horno cuandose encienden
y se apagan.Estoesnormal
, A medidaquee[homo secalientay seenfr[a,usted puededr sonidosdepiezasmetSlicasque
se expandeny contraen. Estoes normaly nodariar_ su electrodom6stico.
, Se escuchael sonidode un ventilador.Estees eI ventiladorde enfriamientoyes normal
E[ventiIadorseguirbfuncionando despu6sde apagarel hornohastaque e[ mismose enfr[e.
No se escunhan seiiales sonoras ° E[homo puedeestar en Modo Sab_tico. Ver p%. 66.
y el indinadorvisual no se antiva. ° E[control puedeestar bloqueado. Verp%. 61.
'SAb' destemmay muegose , E[horno est_en modosab_tico.Paraanu[arei modosab_tico,optimay mantengaoprimida[a
tecIa 'Clock' (Re[o}}durante cincosegundos.
77

78
Garantia de la Estu[a a Gas
Garant[a Completa de Un A_o = Piezas
y Mane de Obra
Duran[eun (1) a_o desde la fecha original (_e
compraa[ pot menor, se repararao reemplazara
gratu_tamentecualqu_erplezaquefalle durante
uso normalen el hogar
Note mesiguiente:Estasgaranuascomple[asse
aplican Onicamentecuandoel e[ectrodomesticose
encuentraen los EstauosUnidoso Canadi Los
ebctmdom@ticos que seencuen_renen otros
pa[sesestar_n cubiertos 3n_camentepot [as
garant[aslimitadas,incluyendola garant[aI[mltaea
para [asplezasque fallen durante el pr met aJ'lo,
Residentes Canadienses
Estas_arantias c_brensolamenteaque!los
ebc[rodom6sticosins[aladosen Canad_que hayan
sldo certificauospor la AsociaciOnde Normas
Canadienses(CSAO,a menosque hayansido
[raidosa Canad_des@ EstadosUnidosdebiao a
un cambiode residencia.
LosdamnS;ase@edfieasexpresadasanteriormen_e
sonlos _nicasgarantfasotorgadaspor d fabflcante.
Estasgarantiasle otolganderechoslegales
e_pecfficos.Ustedpuedetenet otrosderechosque
vaffande un estadoa otto.
Lo que No Cubren Estas Garant[as:
1. Situacionesy dariosresultantesde cualquierade lassigubnteseventualidades:
a. hlstahciOn,entregao mantenimientoinapropiados.
b. CualquierreparaciOn,modificaci6n,aIteraciOno ajusteno autorizadopot el
fabricanteo pot uncentre de servbio autorizado.
c. Mai uso, abuse,accidentes,uso irrazonabbo hechosfetuitos.
d. Corrienteel6c.trica,voltajeo suministroincorre('.to=
e. ProgramaciOnincorrectade cualqubrade los controIes.
2. Lasgarant[asquedannuIassi losnOmemsdeserieoriginabs banside retirados,
alteradoso noson f@ilmentelegibles.
3. Focos.
4. ProductoscompradosparausocomerciaIo industrial.
5. Elcostodelservicioo Ilamadadeserviciopara:
a. Corregirerroresde instalaci6n.
b. hlstruJral usuariosobreel usocorrectodel artefacto.
c. TransportedeIartefactoal estabbcimientodeservicioy el retomoal cliente.
6. LosdaBosconsecuenteso incidentabssufridospot cualquierpersonacomo
resultadode cualquierincumplimientode estasgarant[as.Enalgunosestadosno se
permiteIa exclusi6no limitaciOndelos da_osconsecuenteso incidentabs,por Jo
tantola exclusi6nanteriorpuedequeno se apliqueensu caso.
Si Necesita Sewicio
Veaprimero la secci6nde Iocalizaci6ny soluci6nde aver[asenla guia de uso y
cuidadoo Jlamea Maytag Services sM,Servicioa los ClientesMaytag Ilamandoal
1-800-688-9900EE.UU.o aI 1-800-688-2002Canad&
Para Obterler Sewicio Bajo Garantia
Paraubicarunacompat_[adeservicioautorizadoensu Iocalidad,p6ngaseencontacto
con el distdbuidordondeadquiriOsu ebctrodom@ticoo IIamea MaytagSewice_*M,
Servicioa IosCibntesMaytag.Si no recibesewiciosatisfactoriobaio la garant[a,por
favorIlameo escribaa:
M@_ag ServicessM
Attn: CAIR:_Center
RO. Box 2370, CbveIand, TN 37320-2370
EE.UU. 1_80e_688_99ee y Canad_ 1_80e_688_2002
NOra: Cuandose pongaencontactocon MaytagServices sM,Servicioa los
Clbntes Maytagacercade un probiema,por favor incluyala siguienteinformaciOn:
a. Su nombre,direcci6ny nOmerode teldono.
b. Losntimerosde modeloy deserb desu ebctrodom@tico:
c. Nombrey direcciOndel distribuidory Iafechadecompra.
d. Unadescripci6nclaradelprobbma que est_experimentando.
e. Pruebade compra.
Losguiasdel usuarJo,manuabsde servicioe JnformaciOnsobreJaspiezaspuedensolicitarseaMaytagSewiceesM,Servicioa losClientes.
Form No A/04/05 Part No. 8113P499-60 @2005 Maytag Appliances Sales Co Litho U.S.A.