Gas glide-In Range - Easy Touch Controm 700
Form No. A/04/05 Part No. 8113P498 60
Care & Cleaning ............................................ 15-18
SeHf-CHeanOven
CHeaningProcedures
Maintenance .................................................. 19-20
Oven Window & Light
RemovaHof Gas AppHiance
Troubleshooting ............................................ 21-22
Warranty & Service .............................................. 23
Guide d'utilisation et d'entretien ...................... 24
Gu_a de Use y Cuidado ....................................... 52
@2005 Maytag Appliances Sales Co. Litho U.S.A.
Model Number
Serial Number
replace any part of your appliance unless it is specifically
recommended in this guide. AU other servicing should be
referred to a qualified servicer. Have the installer show
you the location of the gas shut off valve and how to
shut it off in an emergency.
Always disconnect power to appliance before servicing.
tn our continu#]g effort to improve the quaUtyand performance
of our cooking PrOducts,it may be necessary to make changes
to the appliance w!th0ut revising this guide.
Forsetvice info_atiott, seepage23,
Warning and Important Safety Instructions appearing in
this guide are not meant to cover all possible conditions
and situations that may occur. Common sense, caution,
and care must be exercised when installing, maintaining,
or operating the appliance.
Always contact the manufacturer about problems or
conditions you do not understand.
Recognize Safety Symbems, Words, Labels
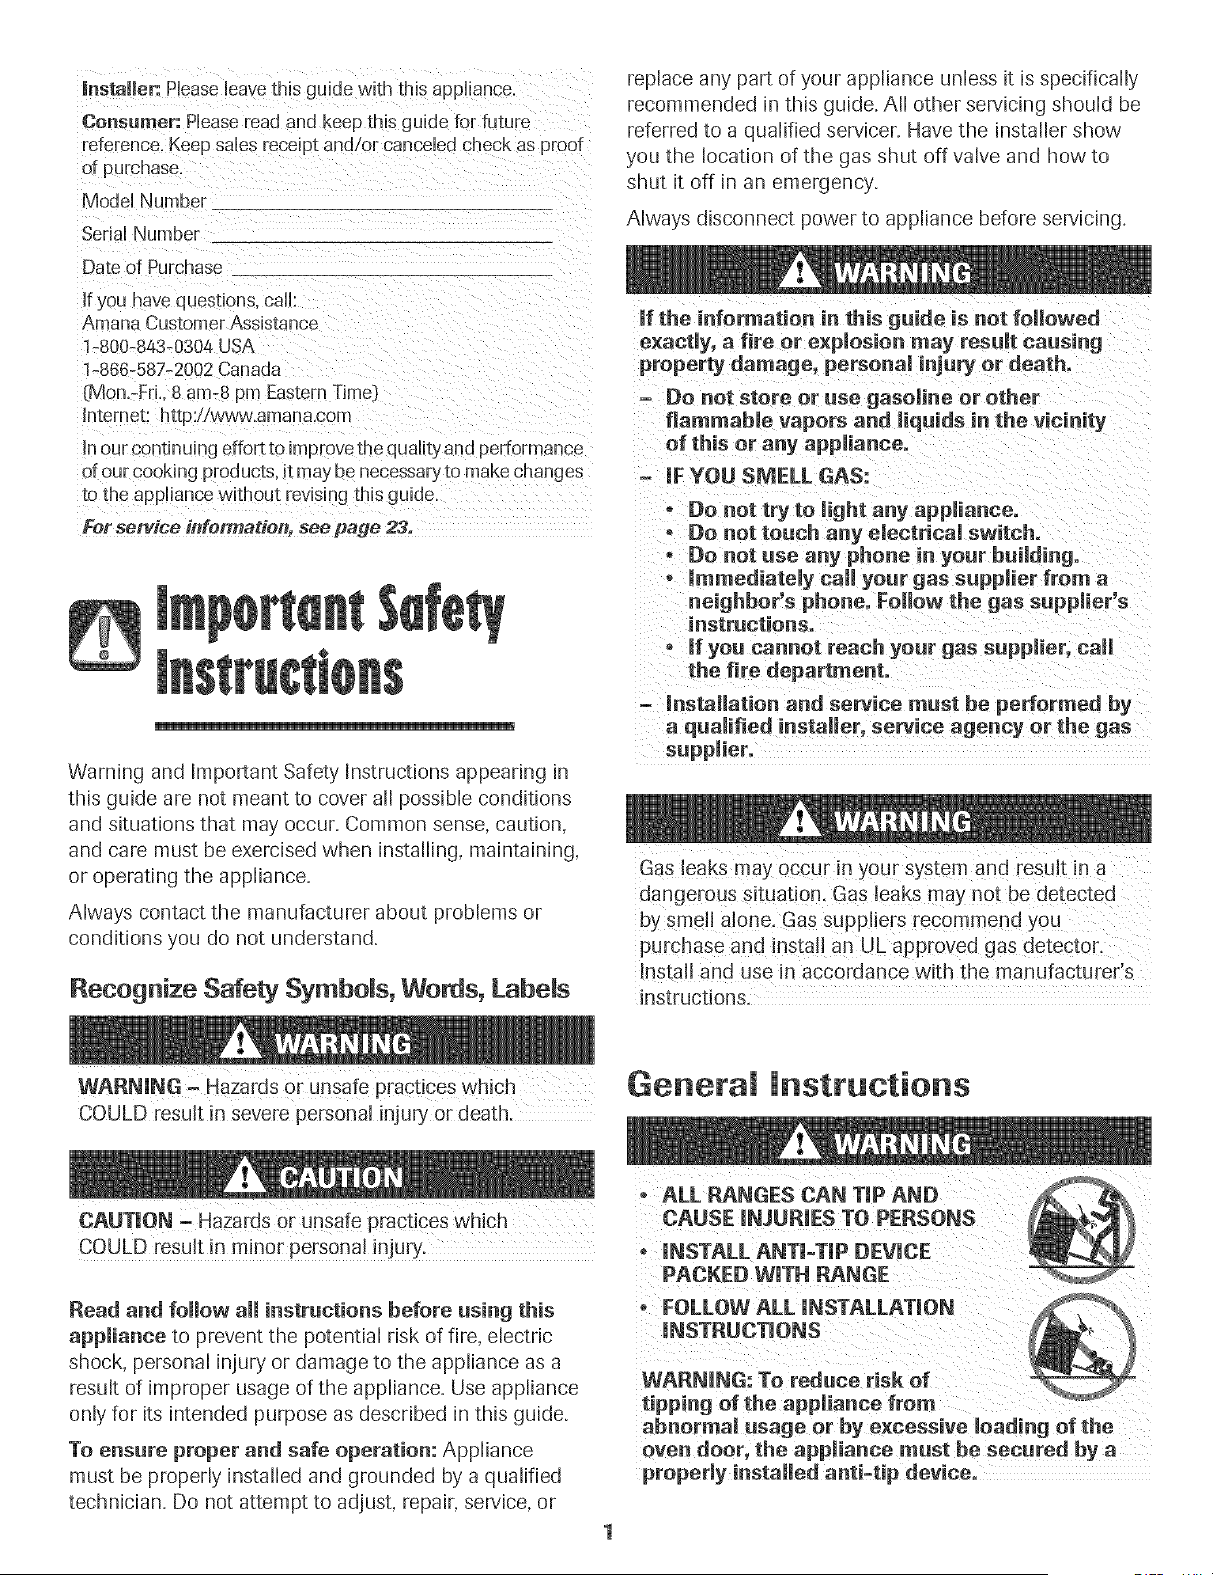
if the information in this guide is not followed
exactly, a (ire or explosion may result causing
property damage, persona_ injury or death.
Do not store or use gaso|ine or other
flammable vapors and liqnids in the vicinity
of this or any app|iance.
IF YOU SMELL GAS:
- Do not try to light any appliance.
o Do not touch any electrical switch.
• Do not use any phone in yonr building.
- (mmediately can your gas supplier from a
neighbor's phone. Follow the gas supplier's
instructions,
- If you cannot reach you(" gas supplier, can
the fire department°
- instaUation and service must be performed by
a quahfied installer, service agency or the gas
su pplier.
Gas !oaks may occur !n your system and result in a
!nstaU and use in accordance with the manufacturer's
instructions,
Genera instructions
COULD result in severe personal injury or death.
CAUTMON - Hazards or unsafe practices which
COULD result in minor personal injury.
Read and follow a(iinstrnctions before rising this
appmiance to prevent the potential risk of fire, electric
shock, personal injury or damage to the appliance as a
result of improper usage of the appliance. Use appliance
only for its intended purpose as described in this guide.
To ensure proper and safe operation: Appliance
must be propedy installed and grounded by a qualified
technician. Do not attempt to adjust, repair, service, or
Tocheckif deviceis properlyinstalled,lookunderneath
rangewith a flashlightto makesureoneofthe rear
levelinglegsisproperlyengagedinthe bracketslot.The
antPtipdevicesecurestherearlevelinglegto thefloor
whenproperlyengaged.Youshouldcheckthis anytime
the rangehasbeenmoved.
Donot usewateron greasefires.Usebakingsoda,a
drychemicalorfoam-typeextinguisherto smotherfire
or flame.
Child Safety
To Prevent Fire or
Smoke Damage
Be sure all packing materials are removed from the
appliance before operating it.
Keep area around appliance clear and free from
combustible materials, gasoline, and other flammable
vapors and materials.
If appliance is installed near a window, proper
precautions should be taken to prevent curtains from
blowing over burners.
NEVER leave any items on the cooktop. The hot air from
the vent may ignite flammabb items and may increase
pressure in dosed containers which may cause them to
burst.
Many aerosol-type spray cans are EXPLOSIVE when
exposed to heat and may be highly fiammabb. Avoid
their use or storage near an appliance.
Many plastics are vulnerabb to heat. Keep plastics away
from parts of the appliance that may become warm or
hot. Do not leave plastic items on the cooktop as they
may melt or soften if left too close to the vent or a
lighted surface burner.
To eliminate the hazard of reaching over hot surface
burners, cabinet storage should not be provided directly
above a unit. If storage is provided, it should be limited
to items which are used infrequently and which are
safely stored in an area subjected to heat from an
appliance. Temperatures may be unsafe for some items,
such as volatile liquids, cleaners or aerosol sprays.
In Case of Fire
Turn off appliance and ventilating hood to avoid
spreading the flame. Extinguish flame then turn on hood
to remove smoke and odor.
Cooktop: Smother fire or flame in a pan with a lid or
cookie sheet.
NEVER pick up or move a flaming pan.
Oven: Smother fire or flame by closing the oven door.
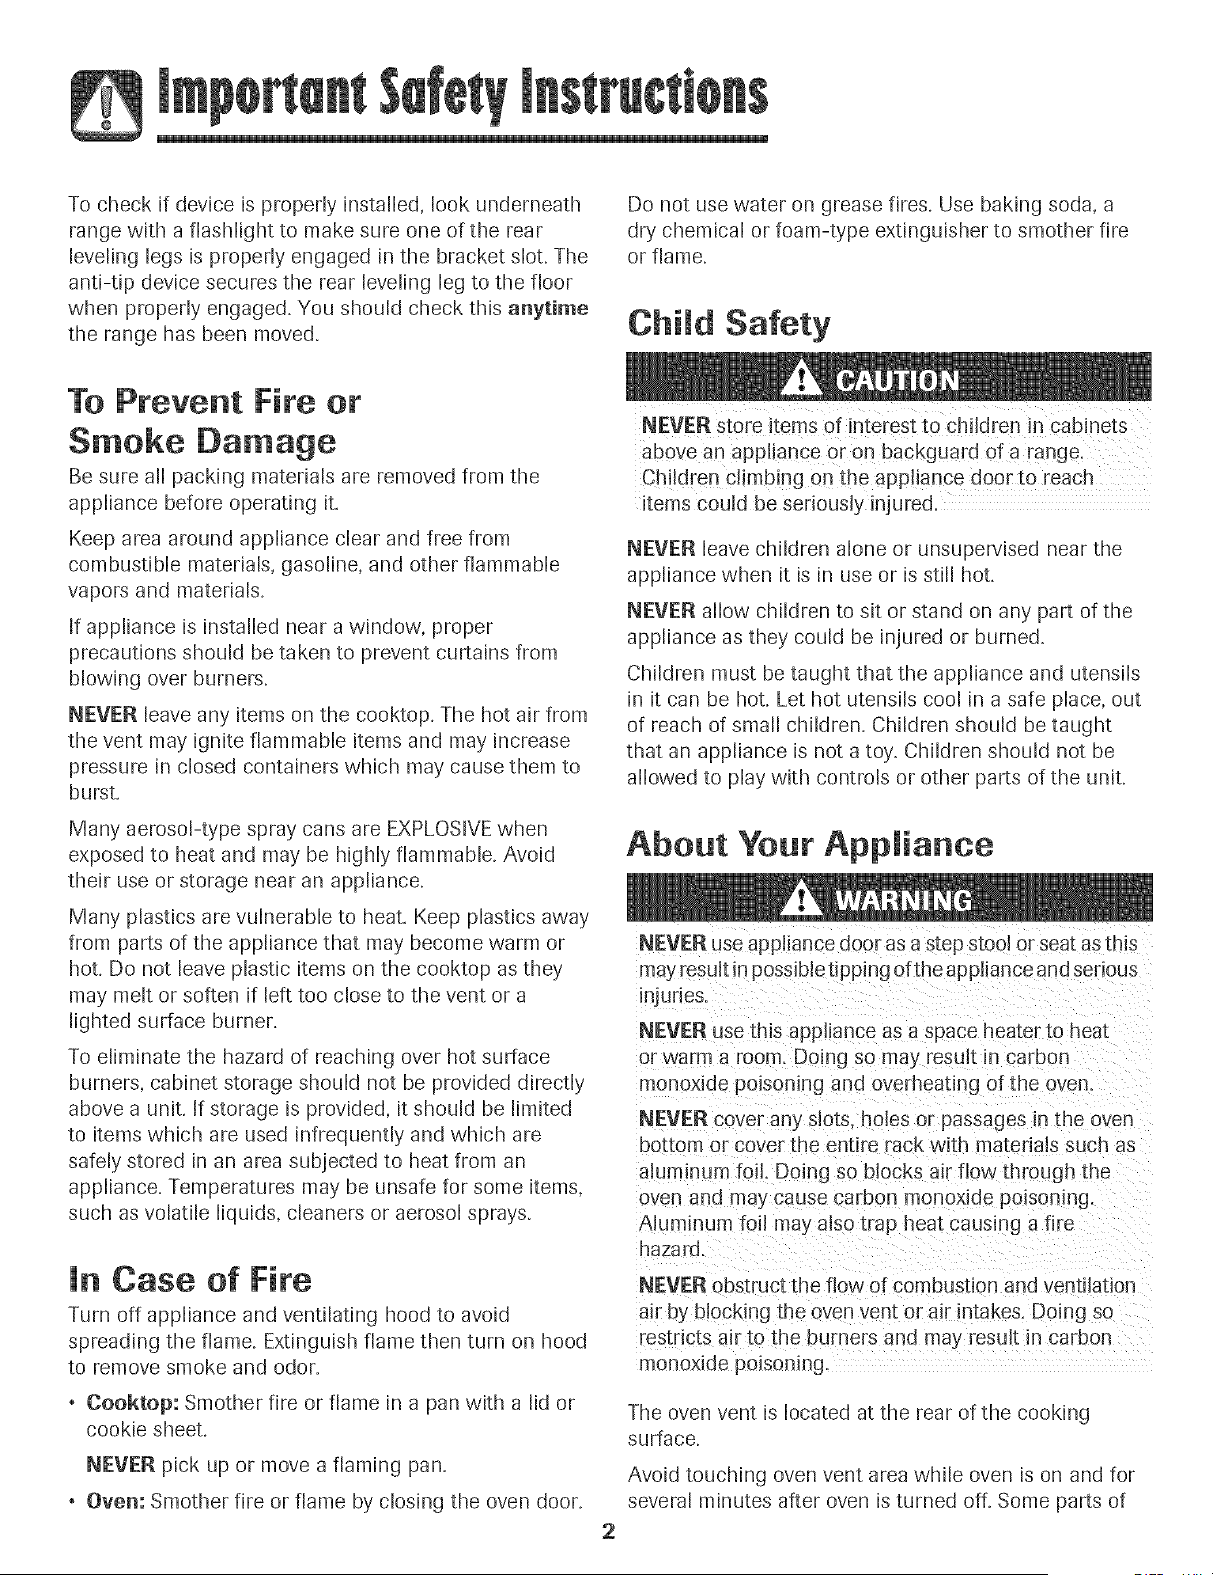
NEVER store items of interest to children in cabinets
above an appliance Or`on backguard 0f a range.
items could be seriously injured.
NEVER leave children alone or unsupervised near the
appliance when it is in use or is still hot.
NEVER allow children to sit or stand on any part of the
appliance as they could be injured or burned.
Children must be taught that the appliance and utensils
in it can be hot. Let hot utensils cool in a safe place, out
of reach of small children. Children should be taught
that an appliance is not a toy. Children should not be
allowed to play with controls or other parts of the unit.
About Your Appliance
2
NEVER use appliance door as a step stool or seat as this
may result in possibletipping of the appliance and serious
njuries.
NEVER use this appliance as a space heater to heat
or warm a room. Doing so may result in carbon
monoxide poisoning and overheating of the oven.
NEVER cover any slots, holes o[ passages in the oven
bottom or cover the entire rack with materials such as
aluminum foil. Doing so blocks air flow through the
oven and may cause carbon monoxide poisoning.
Aluminum foil may atso trap heat causing a fire
hazard.
NEVER obstruct the flow of combustion and ventilation
ai[ by btocking the oven vent or air intakes. Doing so
restricts air to the burners and may result in carbon
monoxide poisoning.
The oven vent is located at the rear of the cooking
surface.
Avoid touching oven vent area while oven is on and for
several minutes after oven is turned off. Some parts of
theventandsurroundingareabecomehotenoughto
causeburns.Afterovenisturnedoff,do nottouchthe
ovenventor surroundingareasuntiltheyhavehad
sufficienttimeto cool
Otherpotentiallyhotsurfacesincludecooktop,areas
facingthecooktop,ovenvent,surfacesnearthevent
opening,ovendoor,areasaroundthe ovendoorand
ovenwindow.
Do not touch a hot oven light bulb with a damp cloth as
the bulb could break Should the bulb break, disconnect
power to the appliance before removing bulb to avoid
electrical shock
Do not use the cooktop or oven as a storage area for food
or cooking utensil&
Cooking Safety
Always place a pan on a surface burner before turning it
on. Be sure you know which knob controls which
surface burner. Make sure the correct burner is turned
on and that the burner has ignited. When cooking is
completed, turn burner off before removing pan to
prevent exposure to burner flame.
Always adjust surface burner flame so that it does
not extend beyond the bottom edge of the pan. An
excessive flame is hazardous, wastes energy and may
damage the appliance, pan or cabinets above the
appliance.
NEVER leave a surface cooking operation unattended
especially when using a high heat setting or when deep
fat frying. Boilovers cause smoking and greasy spillovers
may ignite. Clean up greasy spills as soon as possible.
Do not use high heat for extended cooking operations.
NEVER heat an unopened container on the surface
burner or in the oven. Pressure build-up may cause
container to burst resulting in serious personal injury or
damage to the appliance.
Use dry, sturdy potholders. Damp potholders may cause
burns from steam. Dish towels or other substitutes
should never be used as potholders because they can
trail across hot surface burners and ignite or get caught
on appliance parts.
Always let quantities of hot fat used for deep fat frying
cool before attempting to move or handle.
Do not let cooking grease or other flammable materials
accumulate in or near the appliance, hood or vent fan.
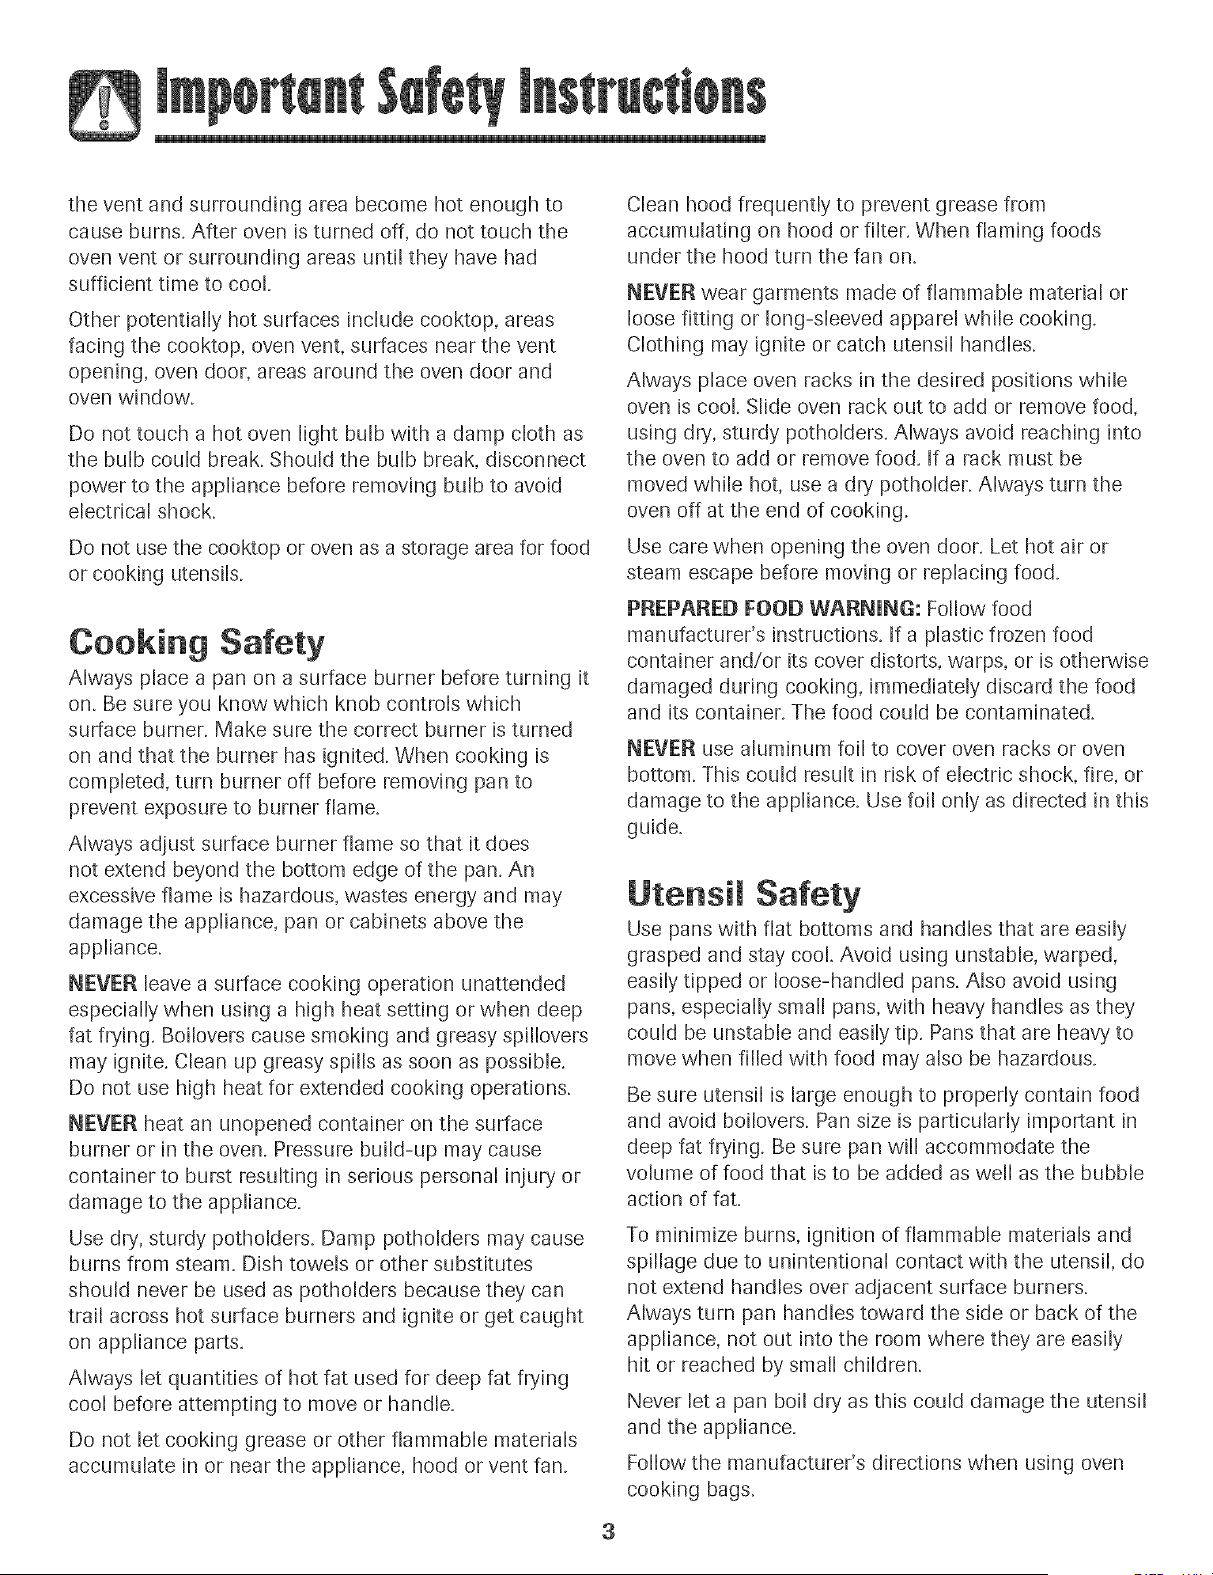
Clean hood frequently to prevent grease from
accumulating on hood or filter. When flaming foods
under the hood turn the fan on.
NEVER wear garments made of flammable material or
loose fitting or long-sleeved apparel while cooking.
Clothing may ignite or catch utensil handle&
Always place oven racks in the desired positions while
oven is cool Slide oven rack out to add or remove food,
using dry, sturdy potholders. Always avoid reaching into
the oven to add or remove food. If a rack must be
moved while hot, use a dry potholder. Always turn the
oven off at the end of cooking.
Use care when opening the oven door. Let hot air or
steam escape before moving or replacing food.
PREPARED FOOD WARNUNG: Follow food
manufacturer's instructions. If a plastic frozen food
container and!or its cover distorts, warps, or is otherwise
damaged during cooking, immediately discard the food
and its container. The food could be contaminated.
NEVER use aluminum foil to cover oven racks or oven
bottom. This could result in risk of electric shock, fire, or
damage to the appliance. Use foil only as directed in this
guide.
3
Utensim Safety
Use pans with flat bottoms and handles that are easily
grasped and stay cool. Avoid using unstable, warped,
easily tipped or loose-handled pans. Also avoid using
pans, especially small pans, with heavy handles as they
could be unstable and easily tip. Pans that are heavy to
move when filled with food may also be hazardous.
Be sure utensil is large enough to properly contain food
and avoid boilovers. Pan size is particularly important in
deep fat frying. Be sure pan will accommodate the
volume of food that is to be added as well as the bubble
action of fat.
To minimize burns, ignition of flammable materials and
spillage due to unintentional contact with the utensil, do
not extend handles over adjacent surface burners.
Always turn pan handles toward the side or back of the
appliance, not out into the room where they are easily
hit or reached by small children.
Never let a pan boil dry as this could damage the utensil
and the appliance.
Follow the manufacturer's directions when using oven
cooking bags.
Onlycertaintypesof glass,glass/ceramic,ceramic
or glazedutensilsaresuitablefor cooktopor oven
usagewithoutbreakingdueto thesuddenchangein
temperature.Followmanufacturer'sinstructionswhen
usingglass.
Thisappliancehasbeentestedforsafeperformance
usingconventionalcookware.Donot useanydevices
oraccessoriesthat arenotspecificallyrecommended
in this guide.Donot useeyelidcoversforthesurface
units,stovetopgrills,or add-onovenconvection
systems.Theuseof devicesoraccessoriesthatarenot
expresslyrecommendedinthismanualcancreate
serioussafetyhazards,resultin performanceproblems,
andreducethelife ofthecomponentsofthe appliance.
Cmeaning Safety
Turn off all controls and wait for appliance parts to cool
before touching or cleaning them. Do not touch the
burner grates or surrounding areas until they have had
sufficient time to cool.
Clean appliance with caution. Use care to avoid steam
burns if a wet sponge or cloth is used to wipe spills on a
hot surface. Some cleaners can produce noxious fumes
if applied to a hot surface.
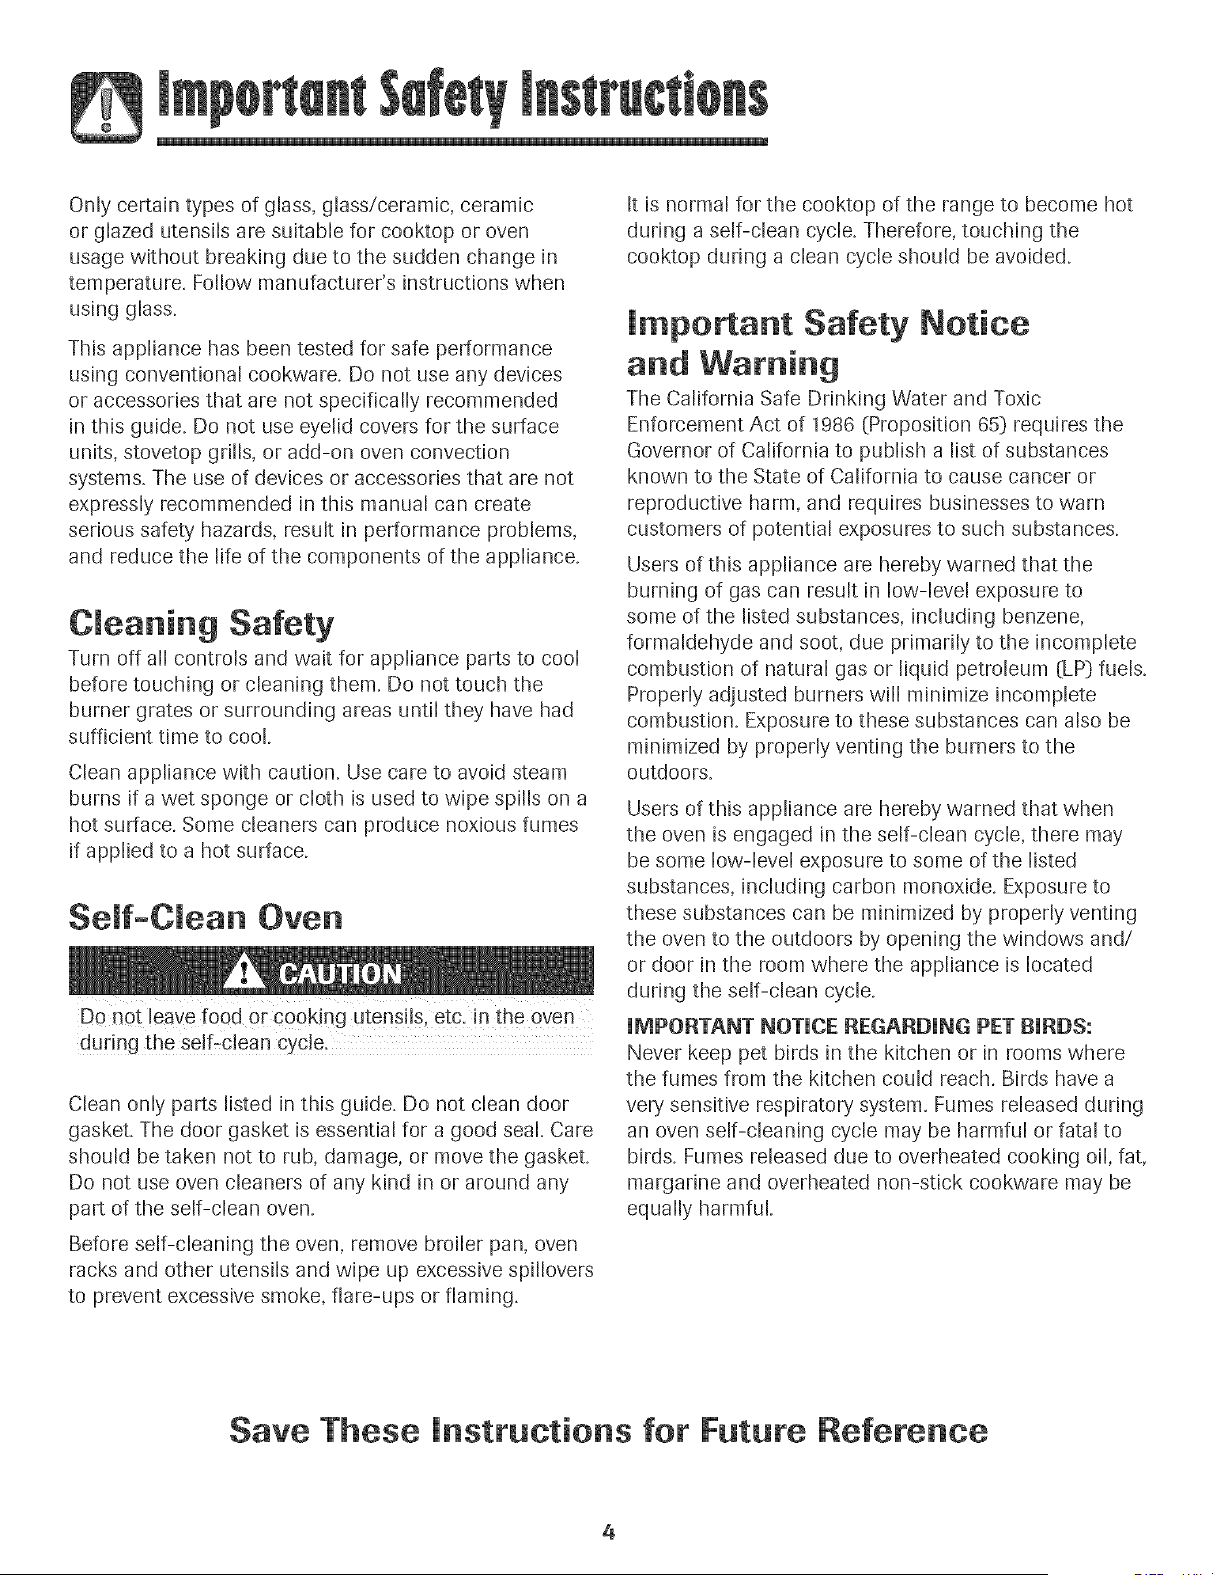
Self-Cmean Oven
DO not Ieave food 0r c0oking utensils, etc. in the oven
during the self.clean cycle.
Clean only parts listed in this guide. Do not clean door
gaskeL The door gasket is essential for a good seal Care
should be taken not to rub, damage, or move the gaskeL
Do not use oven cleaners of any kind in or around any
part of the self-clean oven.
Before self-cleaning the oven, remove broiler pan, oven
racks and other utensils and wipe up excessive spillovers
to prevent excessive smoke, flare-ups or flaming.
It is normal for the cooktop of the range to become hot
during a self-clean cycle. Therefore, touching the
cooktop during a clean cycle should be avoided.
important Safety Notice
and Warning
The California Safe Drinking Water and Toxic
Enforcement Act of 1986 (Proposition 65) requires the
Governor of California to publish a list of substances
known to the State of California to cause cancer or
reproductive harm, and requires businesses to warn
customers of potential exposures to such substances.
Users of this appliance are hereby warned that the
burning of gas can result in Iow-bvel exposure to
some of the listed substances, including benzene,
formaldehyde and soot, due primarily to the incomplete
combustion of natural gas or liquid petroleum (LP} fuels.
Properly adjusted burners will minimize incomplete
combustion. Exposure to these substances can also be
minimized by properly venting the burners to the
outdoors.
Users of this appliance are hereby warned that when
the oven is engaged in the self-dean cycle, there may
be some Iow-bvel exposure to some of the listed
substances, inchding carbon monoxide. Exposure to
these substances can be minimized by properly venting
the oven to the outdoors by opening the windows and/
or door in the room where the appliance is located
during the self-dean cycle.
IMPORTANT NOTICE REGARDIN[_ PET BIRDS:
Never keep pet birds in the kitchen or in rooms where
the fumes from the kitchen could reach. Birds have a
very sensitive respiratory system. Fumes released during
an oven self-cbaning cycle may be harmful or fatal to
birds. Fumes released due to overheated cooking oil, fat,
margarine and overheated non-stick cookware may be
equally harmful.
Save These instructions for Future Reference
4
@
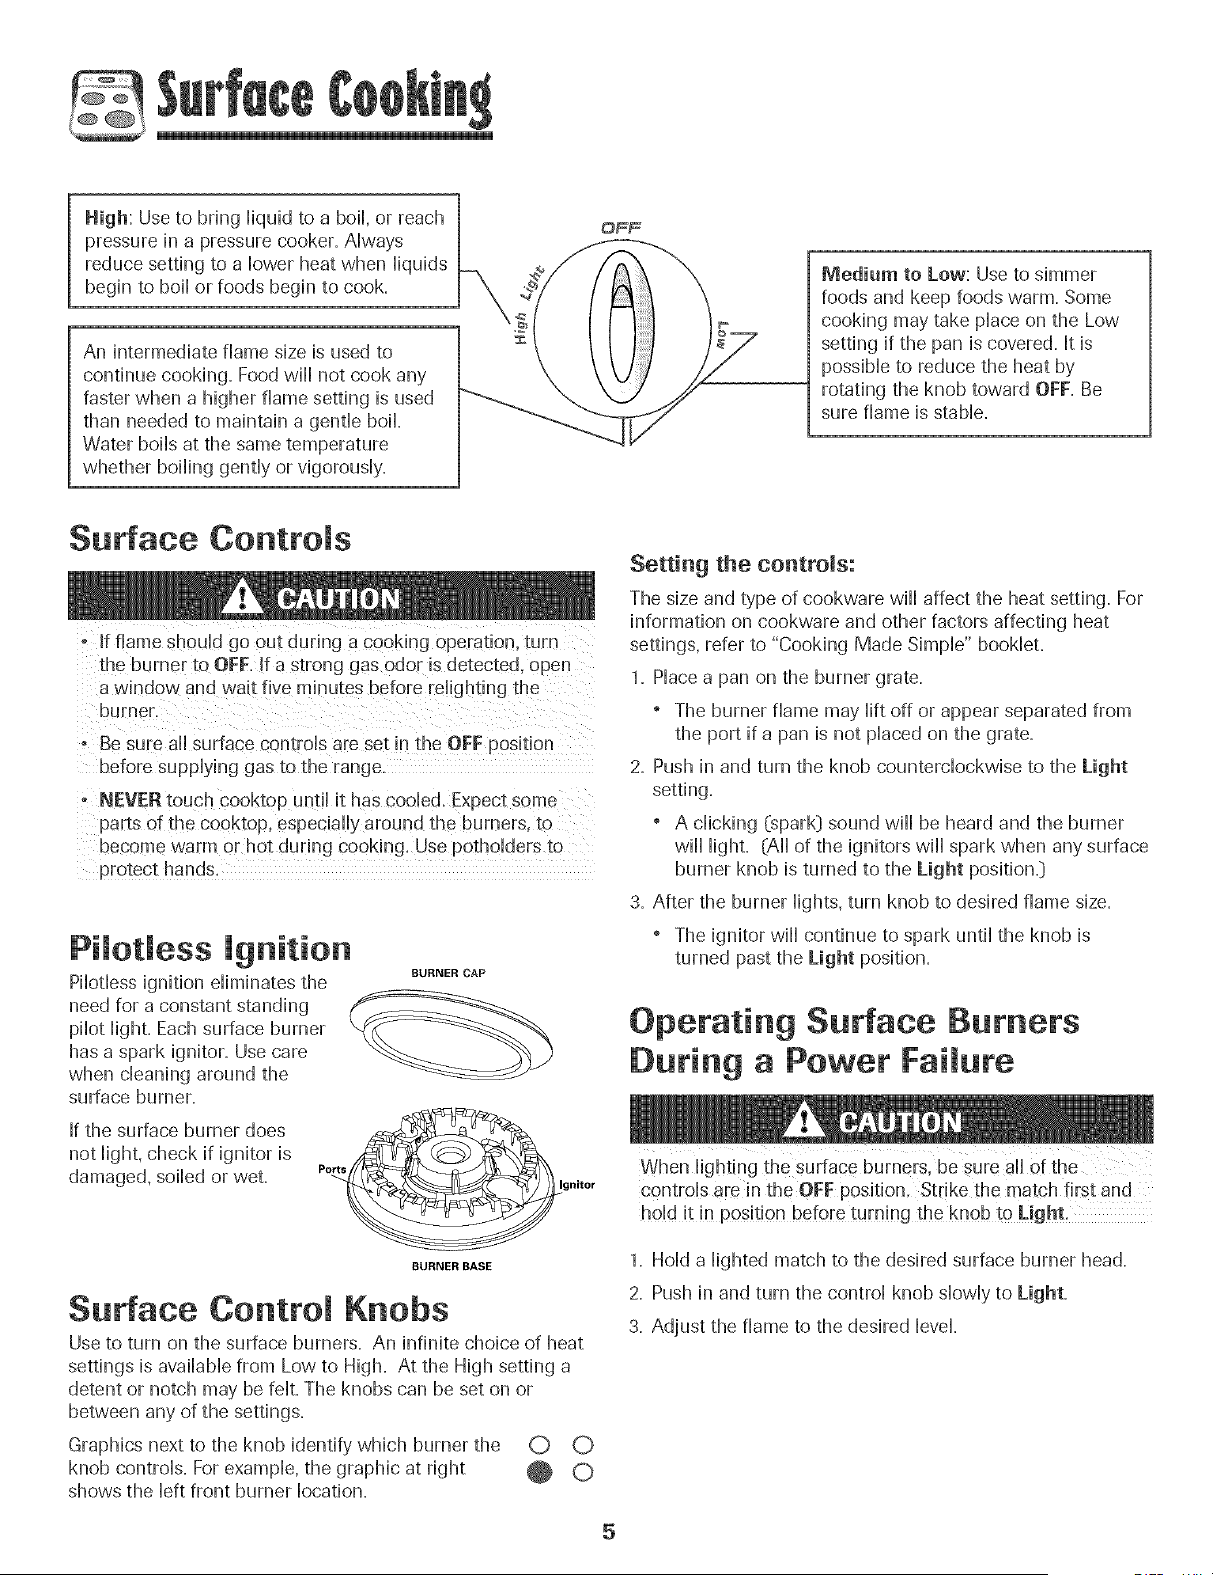
High: Use to bring iiquid to a boil or reach
pressure in a pressure cooker. Nways
reduce setting to a bwer heat when iiquids
begin to boii or foods begin to cook.
An intermedbte flame size is used to
continue cooking. Food will not cook any
faster when a higher flame setting is used
than needed to maintain a gentb boE
Water boiis at the same temperature
whether boiiing gently or vigorousiy.
Medium to Low: Use to simmer
foods and keep foods warm. Some
cooking may take piace on the Low
setting if the pan is covered. It is
possiMe to reduce the heat by
rotating the knob toward OFF. Be
sure flame is staMe.
Surface Controls
If flame should go out during a cooking operation, turn
the burnel to OFF, if a strong gas odor is detected, open
a window and wait five minutes before relighting the
burnel
o Be sure all surface controb are set in the OFF position
before supplying gas to the range.
- NEVERtouch cooktop until it has cooled. Expect some
parts of the cooktop, especiaii} around the burners, to
become warm or hot during cooking. Use potholders to
PiLotLess ignition
Pilotless ignition eliminates the
need for a constant standing
pilot light. Each surface burner
has a spark ignitor. Use care
when cleaning around the
surface burner.
If the surface burner does
not light, check if ignitor is
damaged, soiled or wet.
BURNER CAP
Ports
gnitor
BURNER BASE
Surface Control Knobs
Use to turn on the surface burners. An infinite choice of heat
settings is available from Low to High. At the High setting a
detent or notch may be fee The knobs can be set on or
between any of the settings.
Graphics next to the knob identify which burner the
knob controls. For example, the graphic at right
shows the left front burner location.
Setting the controms:
The size and type of cookware will affect the heat setting. For
information on cookware and other factors affecting heat
settings, refer to "Cooking Made Simple" booklet.
1. Place a pan on the burner grate.
" The burner flame may lift off or appear separated from
the port if a pan is not placed on the grate.
2. Push in and turn the knob counterclockwise to the Light
setting.
" A clicking (spark} sound will be heard and the burner
will light. (All of the ignitors will spark when any surface
burner knob is turned to the Light position.}
3. After the burner lights, turn knob to desired flame size.
" The ignitor will continue to spark until the knob is
turned past the Light position.
Operating Surface Burners
During a Power FaiLure
When lighting the surface burners, be Sure all o1:the
Controls are in the OFF position, Strike the match first and
hold it in posit!on before turning the knob to Light_
1. Hold a lighted match to the desired surface burner head.
2. Push in and turn the control knob slowly to Light.
3. Adjust the flame to the desired level.
5

@
Cooktop
To prevent the cooktop from discoloring
or staiaiag:
CHeancooktop after each use.
Wipe acidic or sugary spills as soon as the cooktop has
cooHedas these spills may discoHorthe
-_:_ _ UnHikea range with standard gas burners,
_ this cooktop does not Hilt-up nor is it
removaMe. Do not attempt to lift the
coo&top for arty reason°
Sea ed Gas Burners
The sealed burners of your range are secured to the cooktop
and are not designed to be removed. Since the burners are
sealed into the cooktop, boi]overs or spills will not seep
underneath the cooktop.
However, the burner cap and base should be cleaned after
each use. The cap portion of the burner is easily removed for
cleaning. (See page 17 for cleaning directions.:)
The burner caps must be correctly placed on the burner base
for proper operation of the burner.
High Performance Burner
(12,000 BTU*)
There is one high speed burner located in the right front position
on your range. This burner offers higher speed cooking that can
be used to quickly bring water to a boil and for large-quantity
cooking.
Simmer Burner
This burner is located in the left rear
position. The simmer burner offers an
Extra Low setting with a lower BTU*
flame for melting chocolate or butter.
* BTU ratings will vary when using LP gas,
OFF =
@ o
o o
Burner Grates
The grates must be properly positioned before cooking,
When installing the grates, place the tab ends toward the
center, matching the straight bars,
hlproper installation of the grates may result in chipping of
the cooktop=
Do not operate the barners withoat a pan on the grate.
The grate's porcelain finish may chip withoat a pan to
absorb the heat from the burner flame.
Use care when stirring food in a pot/pan sitting on the burner
grate. The grates have a smooth finish for ease of cleaning.
The pot/pan will slide if the handle is not held. This may result
in spilling of hot food items and may be a burn hazard.
Although the burner grates are durable, they will gradually
lose their shine and/or discolor, due to the high temperatures
of the gas flame.
A properly adjusted burner with clean ports will light
within a few seconds. If using natural gas, the flame
will be blue with a deeper blue inner cone.
If the burner flame is yellow or is noisy, the air/gas
mixture may be incorrect. Contact a service
technician to adjust. (Adjustments are not covered
by the warranty'.)
With LPgas, slight yellow tips on the flames are
acceptable. This is normal and adjustment is not
necessary.
" With some types of gas, you may hear a "popping"
sound when the surface burner is turned off. This is a
normal operating sound of the burner.
" If the control knob is turned very' quickly from High to
Low, the flame may go out, particularly if the burner is
cold. If this occurs, turn the knob to the OFF position,
wait several seconds and rdight the burner.
" The flame should be adjusted so it does not extend
beyond the edge of the pan.
6
Control Panel
\
\
\
\
\
A B
Bake
\
BroiH
\\\ Cook&
\\ HoHd CHaan Favorite CUock
\
E F G H
Keep
Warm
t
1 J
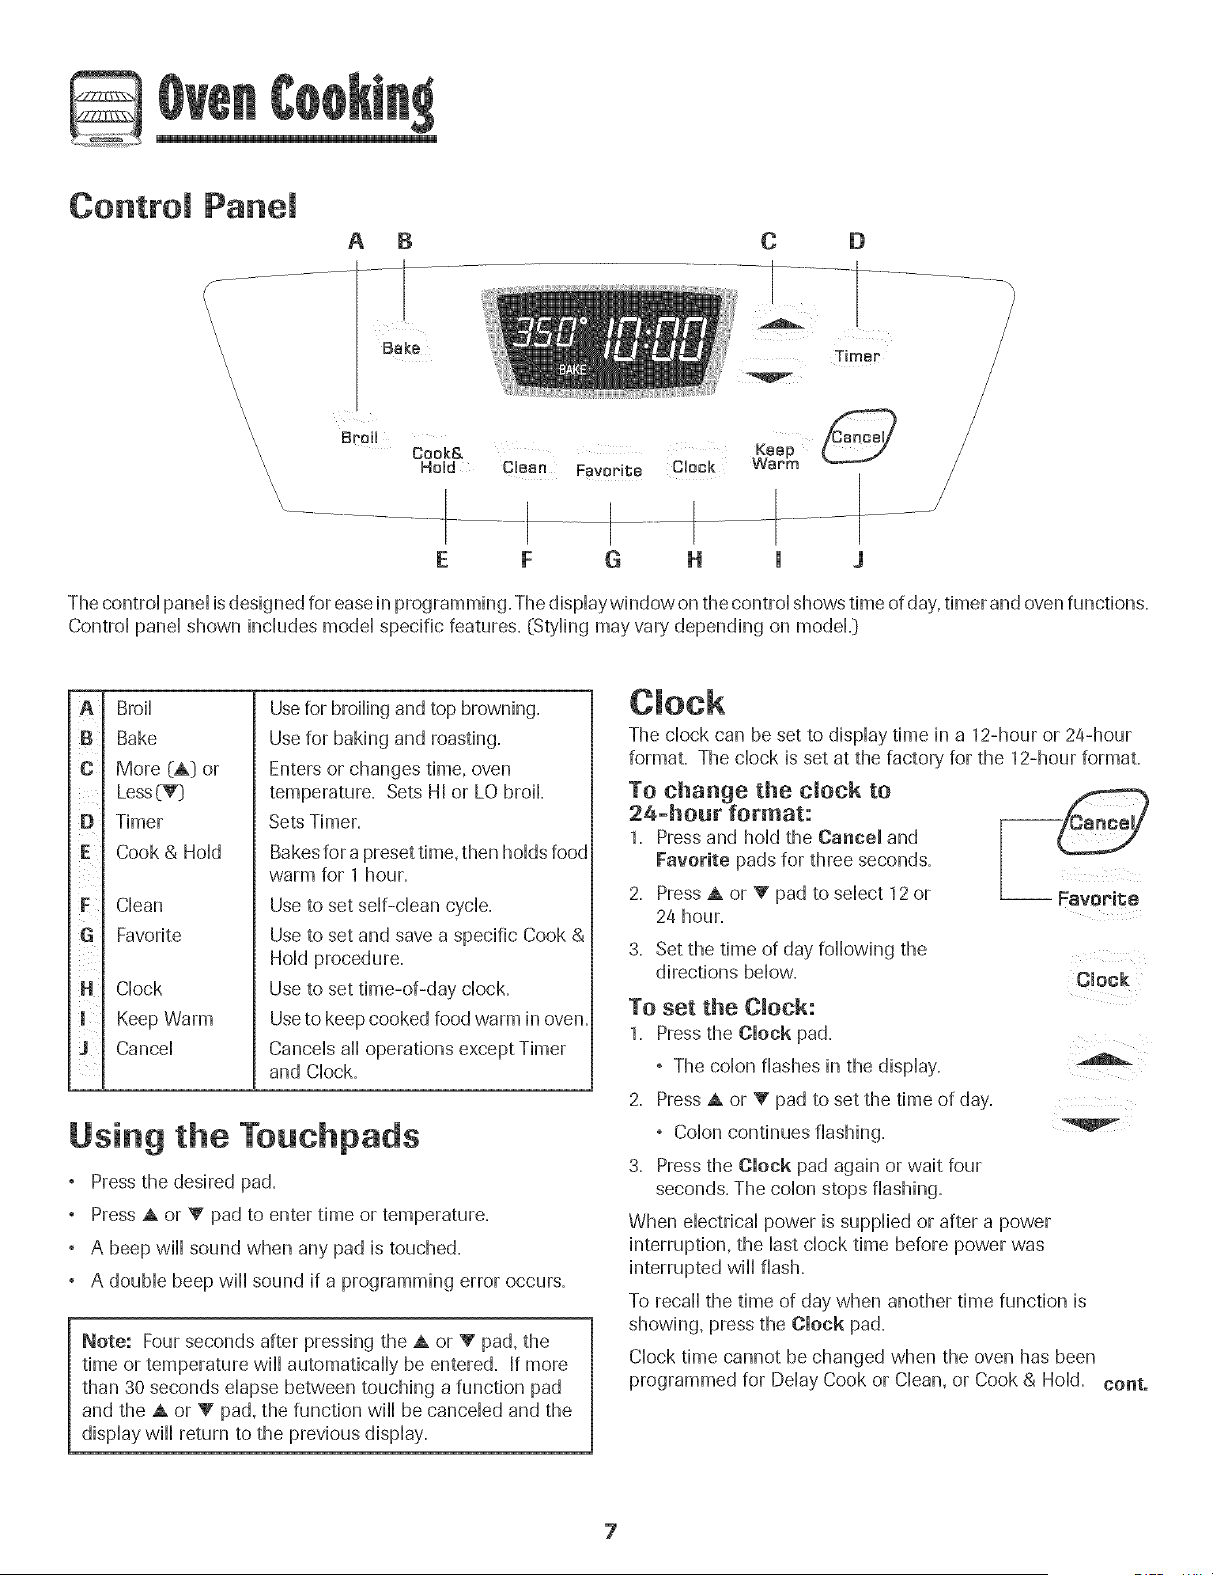
The controHpaneHis designed for ease in programming. The dispHaywindow on the controHshows time of day, timer and oven functions.
ControHpaneHshown incHudesmodeHspecific features. (StyHingmay vary depending on modeL_)
A
C
D
F
H
J
BmiH
Bake
More (A) or
Less(V_)
Timer
Cook & Hold
Clean
Favorite
CHock
Keep Warm
CanceH
Usefor broiHingand top browning.
Usefor baking and roasting.
Enters or changes time, oven
temperature. Sets HI or LO broil
Sets Timer.
Bakesfor a preset time, then hoHdsfood
warm for 1 hour.
Use to set seHf-cHeancyclic.
Use to set and save a specific Cook &
HoHdprocedure.
Use to set time-of-day chock.
Useto keep cooked food warm in oven.
CanceHsaHHoperations except Timer
and CHock.
Using the Teuchpads
Pressthe desired pad.
Press A or V pad to enter time or temperature.
° A beep wiHHsound when any pad is touched.
° A doubHebeep wiHHsound if a programming error occurs.
Note: Four seconds after pressing the A or V pad, the
time or temperature wiHHautomaticaHHybe entered. If more
than 30 seconds eHapsebetween touching a function pad
and the A or V pad, the function wiHHbe cancelled and the
dispHaywiHHreturn to the previous dispHay.
The clock can be set to display time in a 12-hour or 24-hour
format. The chock is set at the factory for the 12-hour format.
To change the clock to
24-hour format:
1. Press and hoHdthe Cancel and
Favorite pads for three seconds.
2. Press A or V pad to seHect12 or
24 hour.
3. Set the time of day foHHowingthe
directions bellow. Clock
To set the Clock:
1. Press the Clock pad.
, The colon flashes in the display.
2. Press A or V pad to set the time of day.
, Colon continues flashing.
3. Press the Clock pad again or wait four
seconds. The colon stops flashing.
When electrical power is supplied or after a power
interruption, the last clock time before power was
interrupted wiHHflash.
To recaHHthe time of day when another time function is
showing, press the Clock pad.
CHocktime cannot be changed when the oven has been
programmed for DeHayCook or CHean,or Cook & HoHd. conto
G
To cance! the Clock dispmay:
If you do not want the thlle of day to dispHay:
Press and hoHdthe Cancel and Clock pads for three
seconds. The time of day will disappear from the dispHay.
When the chock dispHayis cancded, press the Clock pad to
briefly dispHaythe time of day.
To restore the Clock display:
Press and hoH the Cancel and Clock
pads for three seconds. The time of day
will reappear in the dispHay.
__ Clock
The timer can be set from one minute (0:01) up to 99 hours
and 59 minutes (99:59).
The timer can be used independently of any other oven
activity. It can also be set while another oven function is
operating.
The timer does not control the oven. It only controls a beeper.
TO set the Timer:
1. Press the Timer pad.
Timer
° 0:00 lights in the display.
° The colon will flash.
2. Press the A or V pad until the
correct time appears in the display.
° The colon will continue to flash.
3. PressTimer pad again or wait four seconds.
° The colon continues flashing and the time begins
counting down.
° The last minute of the timer countdown will be displayed
as seconds.
4. At the end of the set time, one long beep will sound.
To cancem the Timer:
1. Press and hold the Timer pad for three seconds.
OR
2. Press the Timer pad and set the time to 0:00.
Locking the Contro
The touchpad controls carl be locked for safety, cleaning, or
to prevent unwanted use. They will not function when locked.
If the oven is currently in use, the controls cannot be locked.
The current time of day will remain in the display when the
controls are locked.
To lock:
Press and hold the Cancel and Cook &
Hold pads for three seconds. (Press
Cancel pad first,)
To unlock:
Cook&
-- Hold
Press and hold the Cancel and Cook & Hold pads for three
seconds. (Press Cancel pad first.)
Faumt Codes
BAKE or LOCK may flash rapidly in the display to alert you if
there is an error or a problem. If BAKE or LOCK flash in the
display, press Cancel pad. If BAKE or LOCK continue to
flash, disconnect power to the appliance. Wait a few minutes,
and then reconnect power. If the flashing still continues,
disconnect power to the appliance and call an authorized
servicer,
8
5
To set Bake:
1, Press the Bake pa&
Bake
° BAKEwill flash.
° 000 wifl Hightin the dispHay.
2. SeHectthe oven temperature. The oven
temperature can be set from 170° to 550°.
Press or press and hoHdthe A or V pad.
v
° 350° will Hightwhen either pad is first pressed.
, Press the A pad to increase the temperature.
, Press the V pad to decrease the temperature.
3. Press Bake pad again or wait four seconds.
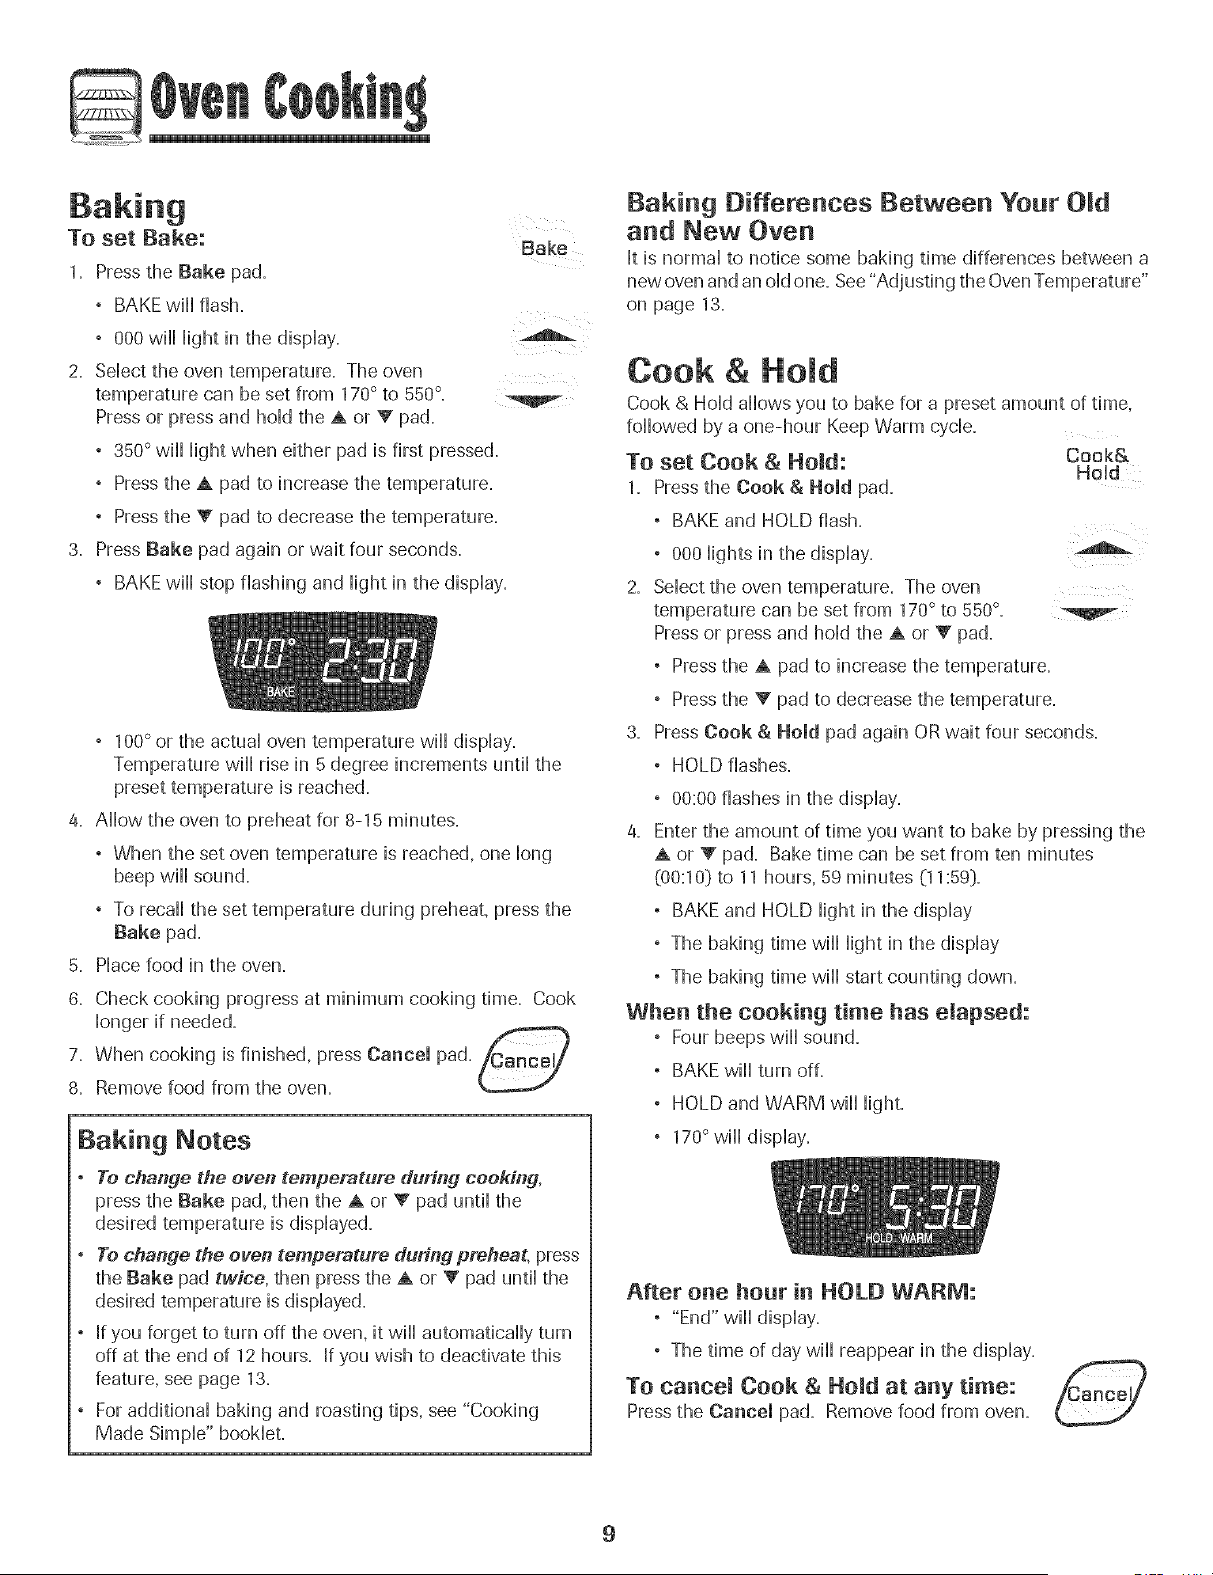
, BAKEwifl stop flashing and Hightin the dispHay.
, 100° or the actuaHoven temperature will dispHay.
Temperature will rise in 5 degree increments untiHthe
preset temperature is reached.
4. AHow the oven to preheat for 8-15 minutes.
, When the set oven temperature is reached, one long
beep will sound.
, To recall the set temperature during preheat, press the
Bake pad.
5. Place food in the oven.
6. Check cooking progress at minimum cooking time. Cook
longer if needed.
7. When cooking is finished, press Cancel pad. iCance 7
L_-.Y
8. Remove food from the oven.
Baking Notes
, To change the oven temperature during cooking,
press the Bake pad, then the A or V pad until the
desired temperature is displayed.
, To ehan_je the oven temperature during preheat, press
the Bake pad twice, then press the A or V pad unti[ the
desired temperature is displayed.
, [f you forget to turn off the oven, it will automatically turn
off at the end of 12 hours. [f you wish to deactivate this
feature, see page 13.
, For additional baking and roasting tips, see "Cooking
Made Simple" booklet.
Baking Differences Between Your Old
and New Oven
It is normal to notice some baking time differences between a
new oven and an old one. See "Adjusting the OvenTemperature"
on page 13.
Cook & Ho d
Cook & Hold allows you to bake for a preset amount of time,
followed by a one-hour Keep Warm cycle.
To set Cook & Homd: Cook&
Hold
1. Pressthe Cook & Hold pad.
° BAKE and HOLD flash.
° 000 lights in the display.
2. Select tile oven temperature. Tile oven
temperature can be set from 170° to 550°.
Pressor press and hold the A or V pad.
° Pressthe A pad to increase the temperature.
° Pressthe V pad to decrease the temperature.
3. Press Cook & Hold pad again OR wait four seconds.
° HOLD flashes.
° 00:00 flashes in the display.
4. Enter the amount of time you want to bake by pressing the
A or V pad. Bake time can be set from ten minutes
(OO:lODto 11 hours, 59 minutes (11:59:).
° BAKE and HOLD light in the display
° The baking time will light in the display
° The baking time will start counting down.
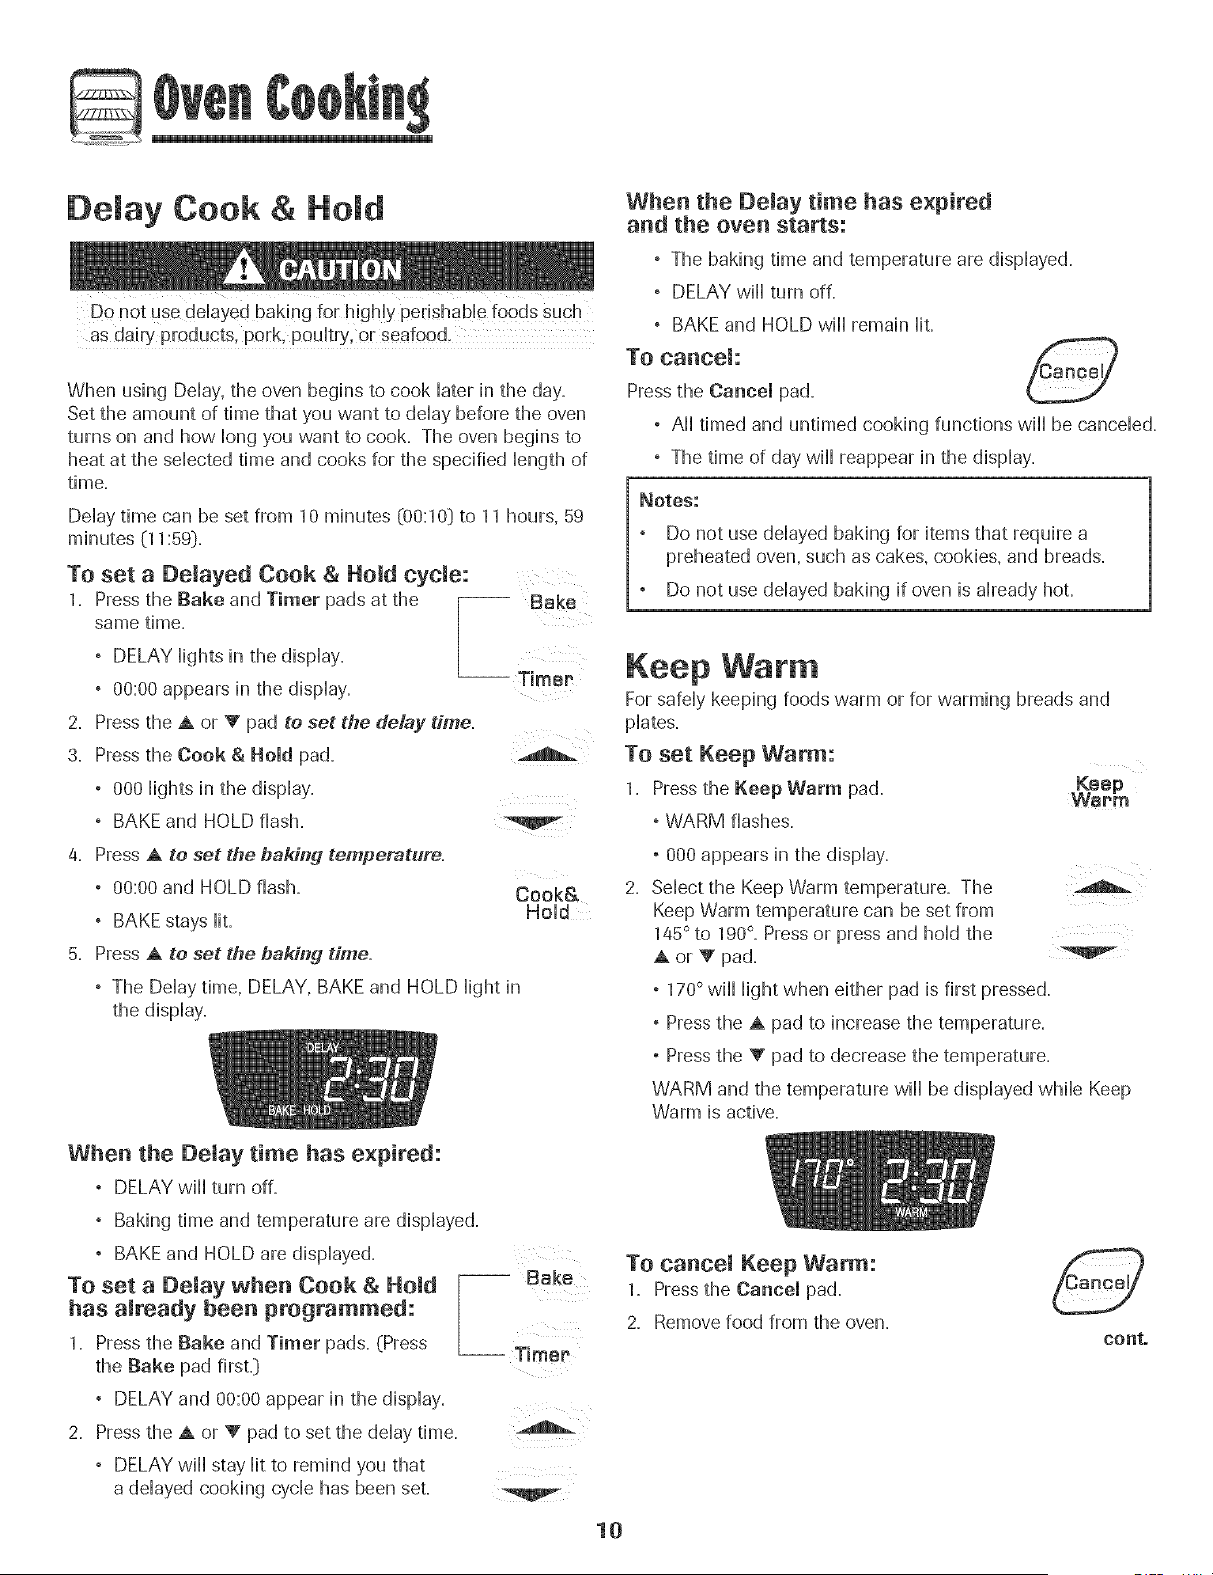
When the cooking time has elapsed:
° Four beeps will sound.
° BAKE will turn off.
° HOLD and WARM will light.
° 170°will display.
After one hour in HOLD WARM:
° "End" will display=
° The time of day will reappear in the display.
To cancel Cook & Hold at any time:
Press the Cancel pad. Remove food from oven.
9
5
Delay Cook & Hold
Do not use ddayed baking for higMy perishaMe foods Such
as dairy products, polk, poultry, or seafood,
When using Dday, the oven begins to cook Haterin the day.
Set the amount of time that you want to dday before the oven
turns on and how Hongyou want to cook. The oven begins to
heat at the sdected time and cooks for the specified Hengthof
time.
DeHay time can be set from 10 minutes (00:10) to 11 hours, 59
minutes (11:59).
To set a Demayed Cook & Hold cycle:
1. Pressthe Bake and Timer pads at the -- Bake
same time.
° DELAY @hts in the dispHay.
° 00:00 appears in the dispHay. -- TimeP
2. Pressthe A or V pad to set the delay time.
3. Pressthe Cook & Hold pad.
, 000 @hts in the dispHay.
, BAKEand HOLD flash.
4. Press A to set the baking temperature,
° 00:00 and HOLD flash.
° BAKE stays lit.
Cook&
Hold
5. Press A to set the baking time.
, The Delay time, DELAY, BAKE and HOLD light in
the display.
When the Delay time has expired:
° DELAY will turn off.
, BAKE and HOLD are displayed.
To set a Delay when Cook & Hold
has already been programmed:
1. Press the Bake and Timer pads. (Press
the Bake pad first.)
Baking time and temperature are displayed.
L Bake
TimeP
, DELAY and 00:00 appear in the display.
Press the A or V pad to set the delay time.
, DELAY will stay lit to remind you that
a delayed cooking cycle has been set.
10
When the Delay time has expired
and the oven starts:
° The baking time and temperature are displayed.
° DELAY will turn off.
° BAKE and HOLD will remain lit.
To cancel:
Press the Cancel pad.
, All timed and untimed cooking functions will be canceled.
, The time of day will reappear in the display.
Notes:
Do not use delayed baking for items that require a
preheated oven, such as cakes, cookies, and breads.
Do not use delayed baking if oven is already hot.
Keep War
For safely keeping foods warm or for warming breads and
plates.
To set Keep Warm:
1 Press the Keep Warm pad. Keep
" Worm
° WARM flashes.
2=
° 000 appears in the display.
Select the Keep Warm temperature. The
Keep Warm temperature can be set from
145° to 190°. Press or press and hold the
A or V pad.
° 170° will light when either pad is first pressed.
, PresstheApad to increase the temperature.
° Pressthe V pad to decrease the temperature.
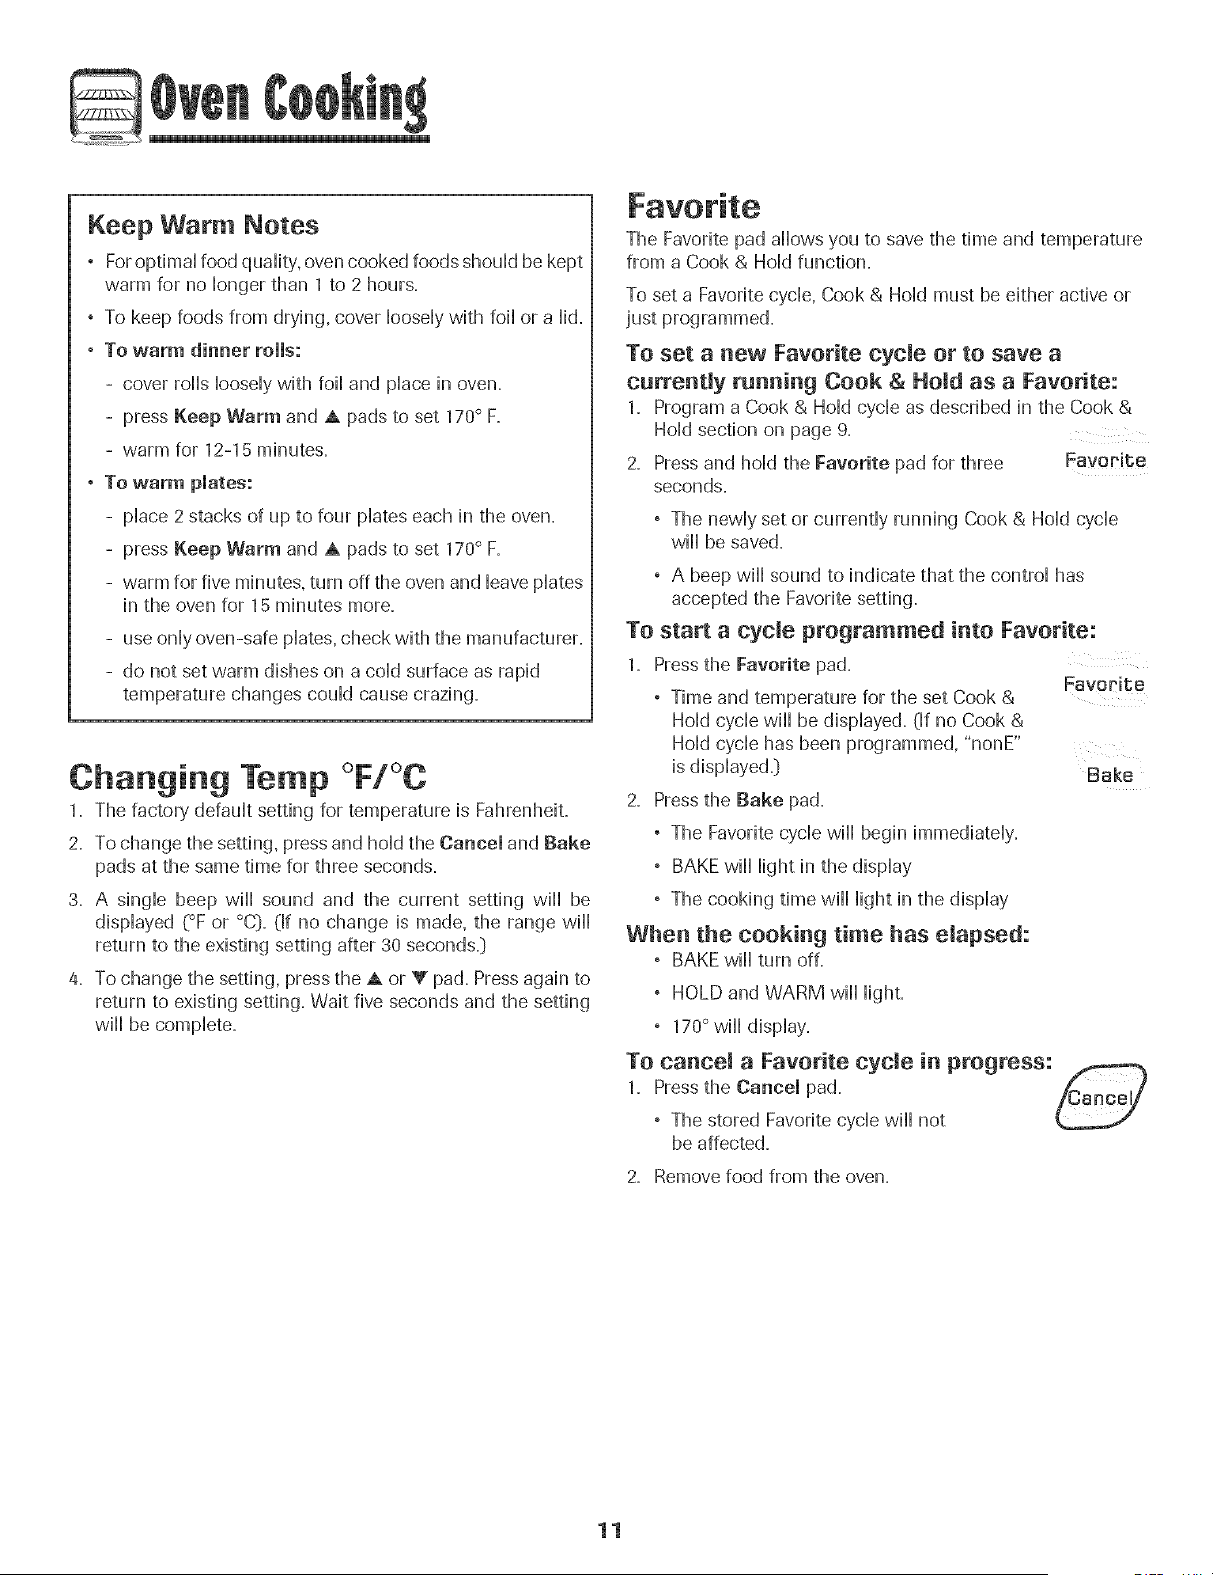
WARM and the temperature will be displayed while Keep
Warm is active.
To cancel Keep Warm:
1. Pressthe Cancel pad.
2. Remove food from the oven.
conto
5
Keep Warm Notes
, Foropdmal food quaiity, oven cooked foods shouid be kept
warm for no bnger than 1 to 2 hours.
° To keep foods from drying, cover bosdy with foii or a Hid.
° To warm dinner rolls:
- cover rolls bosdy with foii and piace in oven.
- press Keep Warm and A pads to set 170° F.
- warm for 12-15 minutes.
° To warm pmates:
-piace 2 stacks of up to four piates each in the oven.
- press Keep Warm and A pads to set 170° F.
- warm for five minutes, turn off the oven and Heavepiates
in the oven for 15 minutes more.
- use oniy oven-safe piates, check with the manufacturer.
- do not set warm dishes on a coid surface as rapid
temperature changes couM cause crazing.
Changing Temp °F/°C
1. The factory defauit setting for temperature is Fahrenheit.
2. To change the setting, press and hold the Caeeel and Bake
pads at the same time for three seconds.
3. A single beep will sound and the current setting will be
displayed (°F or °C}. (If no change is made, the range will
return to the existing setting after 30 seconds.}
4. To change the setting, press the A or V pad. Press again to
return to existing setting. Wait five seconds and the setting
will be complete.
The Favorite pad allows you to save the time and temperature
from a Cook & Hold function.
To set a Favorite cycle, Cook & Hold must be either active or
just programmed.
To set a new Favorite cycle or to save a
cnrrentJy rnnning Cook & Hold as a Favorite:
1. Program a Cook & Hold cycle as described in the Cook &
Hold section on page 9.
2. Pressand hold the Favorite pad for three Favorite
seconds.
° The newly set or currently running Cook & Hold cycle
wiii be saved.
, A beep will sound to indicate that the control has
accepted the Favorite setting.
To start a cycle programmed into Favorite:
1. Pressthe Favorite pad.
Favorite
, Time and temperature for the set Cook &
Hold cycle wiii be displayed. {If no Cook &
Hold cycle has been programmed+ "nonE"
is displayed.} Bake
2. Pressthe Bake pad.
° The Favorite cycle will begin immediately.
° BAKE will light in the display
° The cooking time will light in the display
When the cooking time has elapsed:
° BAKE will turn off.
° HOLD and WARM wiii light.
° 170°will display.
To cance+ a Favorite cycJe in progress:_
1. Pressthe Caeeel pad.
Aoooo/
, The stored Favorite cycle wiii not
be affected+
2. Remove food from the oven.
11
G
Use CAUTION when cooking With the Broil feature: The
grease from fatty foods may ignite, if a fire should occur
Closethe oven door and turn the oven OFF:!f the fire does
not extinguish, DO NOT put water on the fire. Use baking
To set Broih
1. To begin, press the Broil pad.
, BROIL flashes
Broil
, SEt is displayed
Press the A pad to set Bmbroil or press the _' pad to set
LO broil
. HI or LO wiii be displayed.
, Select Hmbroil (550 ° F} for normal broiling. Select
LO broil (450 ° F} for low-temperature broiling of longer
cooking foods such as poultry.
After four seconds, the oven will start.
, BROIL wiii remain lit
4.
5.
6.
7.
For optimum browning, preheat for 2-3 minutes before
adding food.
Place food in the oven. Close the oven door.
Turn meat once about halfway through cooking.
When food is cooked, press the Cancel pad. /OanceU/
Remove food and broiler pan from the oven.
° The time of day wiil reappear in the display.
BroH Notes
For best results when broiling, use a pan designed for
broiling.
HI is used for most broiling. Use LO broil when broiling
longer cooking foods. The lower temperature allows
food to cook to the well done stage without excessive
browning.
To change the oven temperature dur#_g broiling,
press the Broil pad and then press the A or V pad to
switch between LO and HI broil
Broil times may be longer when the lower broiling
temperature is selected.
Most foods should be turned halfway through broiling
time.
For additional broiling tips and temperatures, refer to
the "Cooking Made Simple" bookleL
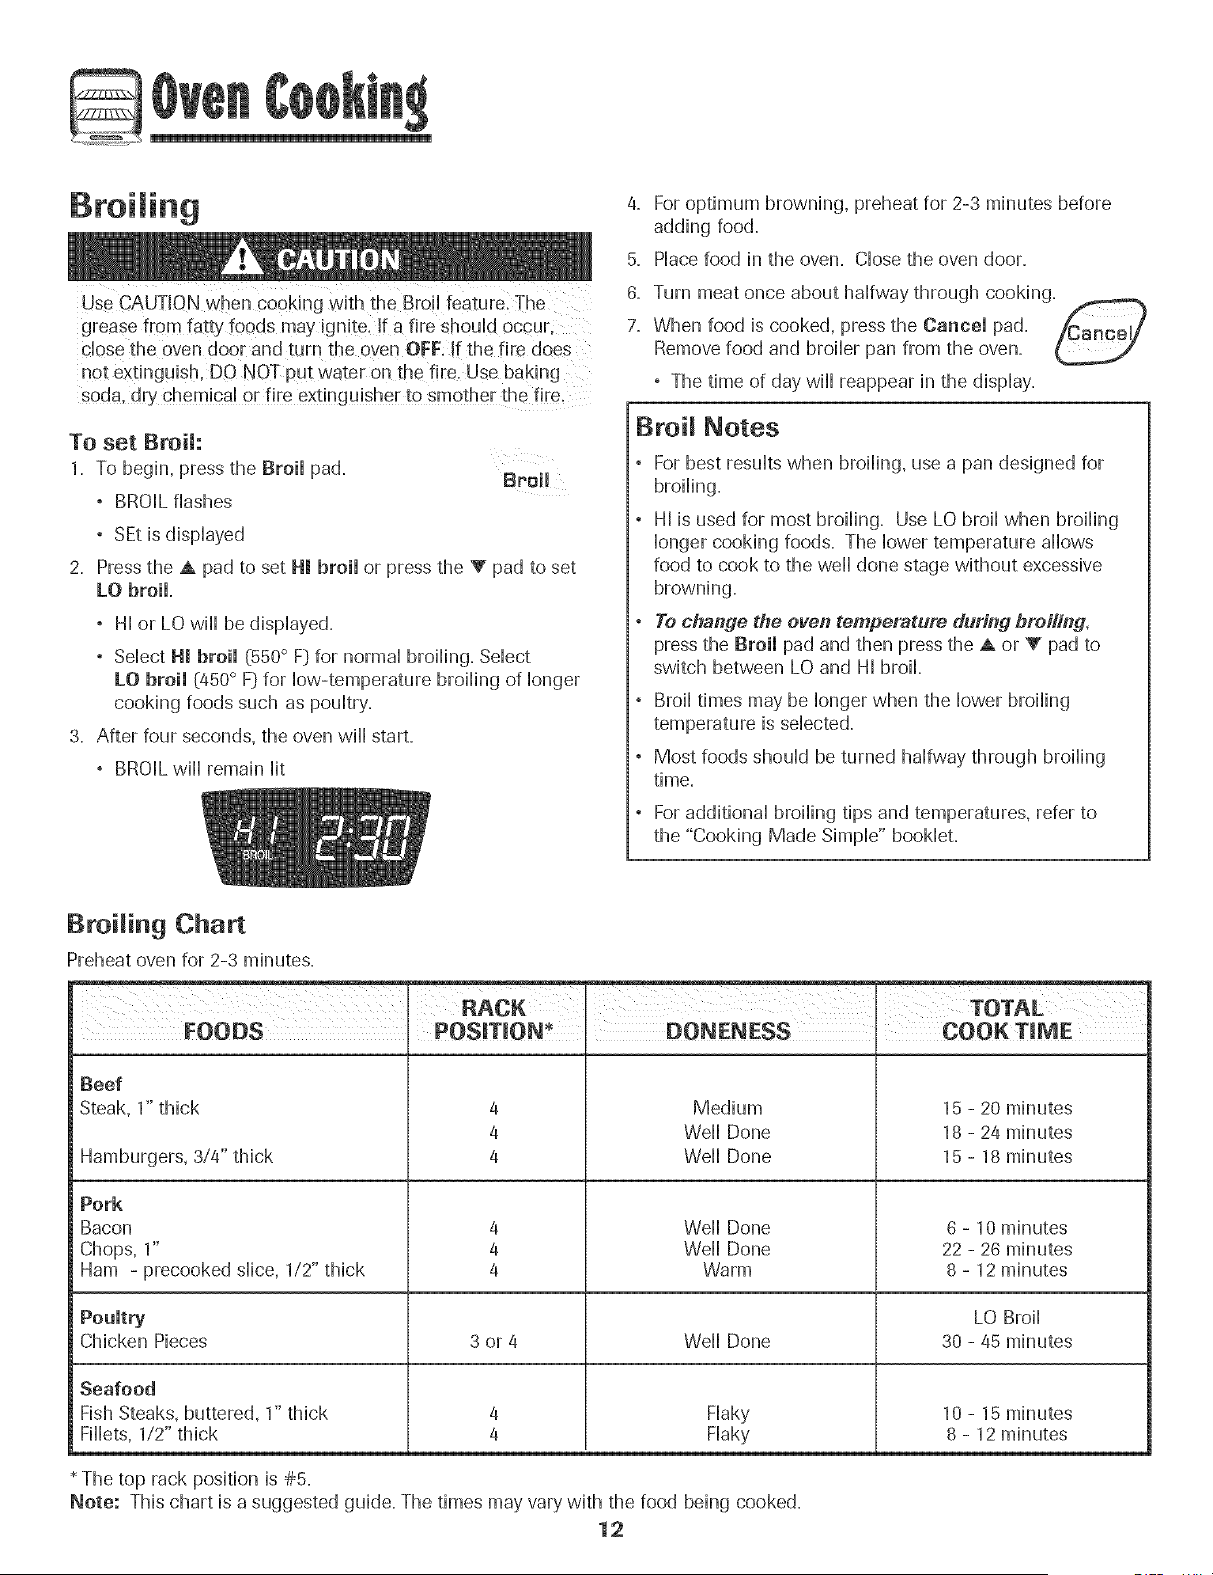
Broiling Chart
Preheat oven for 2-3 minutes.
Beef
Steak, 1" thick
Hamburgers, 3/4" thick
Pork
Bacon
Chops, 1"
4
4
4
' DONENESS
Medium
Weir Done
Weir Done
Weir Done
Weir Done
COOK TiME
15 - 20 minutes
18 - 24 minutes
15 - 18 minutes
6 - 10 minutes
22 - 26 minutes
Ham - precooked slice, 1/2" thick 4 Warm 8 - 12 minutes
LO Broil
3 or 4 Weir Done 30 - 45 minutesChicken Pieces
Seafood
Fish Steaks, buttered, 1" thick
Fillets, 1/2" thick
The top rack position is #5.
Flaky
Flaky
Note: This chart is a suggested guide. The times may vary with the food being cooked.
12
10 - 15 minutes
8 - 12 minutes
5
Adjusting the Oven Temperature
Oven temperatures are carefully tested for accuracy at the
factory. It is normal to notice some baking or browning
differences between a new oven and an oM one. As ranges
get oHder,the oven temperature can shift.
You may adjust the oven temperature if you think the oven is
not baking or browning correctHy. To decide how much to
change the temperature, set the temperature 25 degrees
higher or [ower than your recipe recommends, then bake.
The resuHtsof the "test" shouHdgive you an idea of how much
To adjust the oven temperature:
1. Press the Bake pad.
2. Enter 550° by pressing the A pad.
3. Press and hoHdthe Bake pad for severa[
seconds or unti[ "0°'' appears in the dispHay.
Bake
If the oven temperature was previously adjusted, the
change wiil be displayed= For example, if the oven
temperature was reduced by 15 degrees the display wiil
show "-15°"
4= Press the A or V pad to adjust the temperature.
Each time a pad is pressed, the temperature changes by 5
degrees. The oven temperature can be increased or
decreased by 5 to 35 degrees.
5. The time of day wiil automatically reappear in the display=
You do not need to readjust the oven temperature if there
is a power failure or interruption. Broiling and cleaning
temperatures cannot be adjusted.
Automatic Shut-Off/
Sabbath Mode
The oven wiil automatically turn off after 12 hours if you
accidentally leave it on. This safety feature can be turned off.
To cancel the 12-hour shut-off and run the
oven continuously for 72 hours:
1. Set the oven to bake [see page 9]= Clock
2= Press and hold the Clock pad for five seconds,
° "SAb" will be displayed and flash for five seconds.
, "SAb" wi[[ then be displayed continuously until turned
off or until the 72-hour time limit is reached.
, BAKEwi[[ a[so be disp[ayed if a bake cycle is in use
while the oven is in Sabbath Mode.
. BAKE is the only funcdon that operates during the
Sabbat,_ Mode. All other functions (Tither, Keep Warm,
Clean, etc.) are locked out during the Sabbath Mode.
To cancel Bake when in Sabbath Mode:
Press Cancel pad=
° BAKE wi[[ turn off in the disp[ay=
° No beeps will sound.
To cancel the Sabbath Mode:
1= Press the Clock pad for five seconds.
OR
2= After 72 hours, the Sabbath Mode will end=
° "SAb" will flash for five seconds.
° The time of day will return to the display.
Clock
Sabbath Mode Notes
° Sabbath Mode can be turned on at any time with or
without the oven on=
° Sabbath Mode cannot be turned on if the touchpads are
locked out or when the door is locked.
[f the oven is baking when Sabbath Mode is set, BAKE
will go out at the end of the baking cycle. There will be
no audible beeps.
[f the oven light is desired while in Sabbath Mode, it
must be turned on before the Sabbath Mode is started.
When the Sabbath Mode is started, no preheat beep wiii
sound.
Ail prompts, messages and beeps are deactivated when
Sabbath Mode is active.
The automatic door lock does not operate during the
Sabbath Mode.
Pressing Cancel pad will cancel a bake cycle, however
the control will stay in the Sabbath Mode.
[f power fails, the oven will power up in Sabbath Mode
with 72 hours remaining and no cycle active.
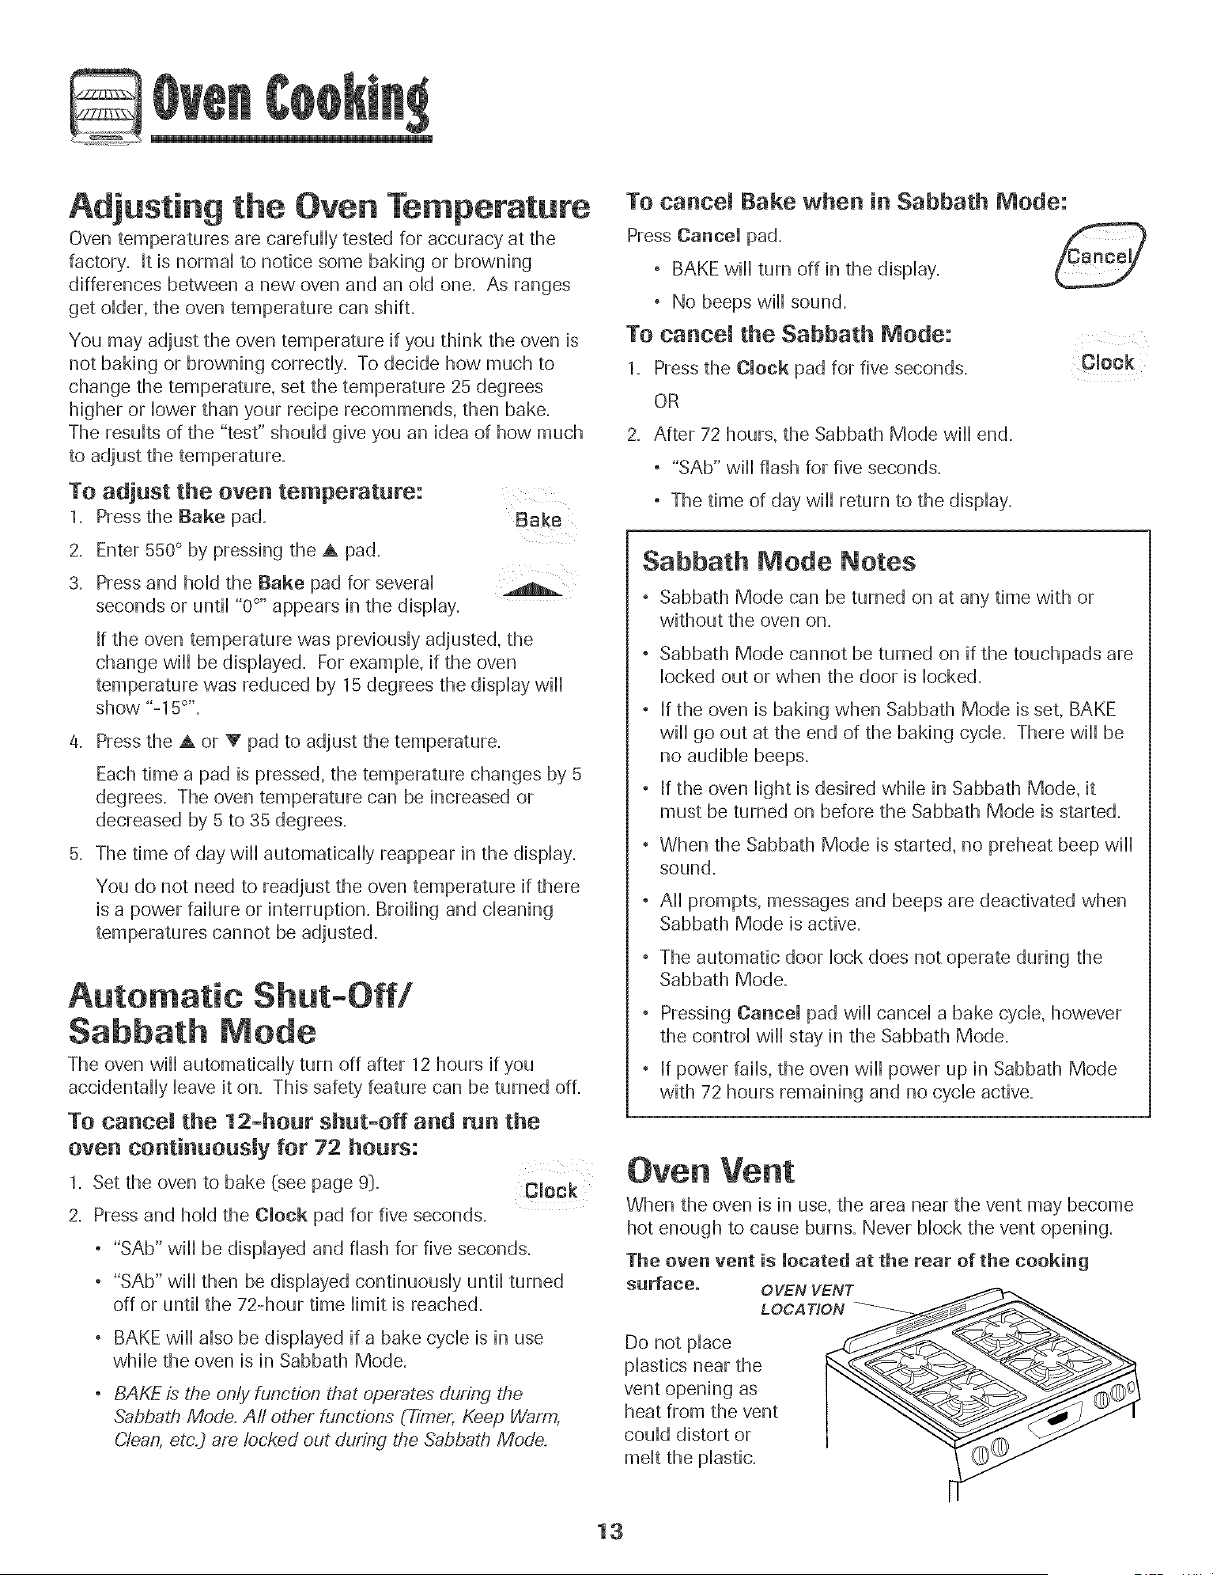
Oven Vent
When the oven is in use, the area near the vent may become
hot enough to cause burns. Never block the vent opening.
The oven vent is located at the rear of the cooking
surfaceo OVENVENT
LOCATION
Do not place
plastics near the
vent opening as
heat from the vent
could distort or
13
Pilotless ignition
Your range is equipped with piHotHessignition. With this type of
ignition system, the gas automatically shuts off and the oven
will not operate durii_g a power failureo
A lighted match will not mightthe oven burner. No attempt
should be made to operatethe oven daring a power failure.
Oven Light
Press the Oven Light switch on the control panel to
turn the oven light on and off=The oven light is only
activated by this switch.
Oven Bottom
Protect oven bottom against spillovers, especially acidic or
sugary spills, as they may discolor the porcelain enamel. Use
the correct pan size to avoid spillovers and boilovers. Do not
place atensils or alaminam foil directly on the oven
bottom.
Cooling Fan
A cooling fan will automatically turn on during all broiling and
some baking operations. It is used to keep internal parts on
the control panel cool. The fan will automatically turn off
when parts have cooled. The fan may continue to operate
after the oven has been turned off=This is normal.
2= Tilt the front end up slightly. Slide rack back until it clears
the lock-stop position.
3= Lower front and slide back into the oven.
Never cover an entire rack with alaminam foil or place
foil on the oven bottom. Raking resalts wiii be affected
and damage may occar to the oven bottom.
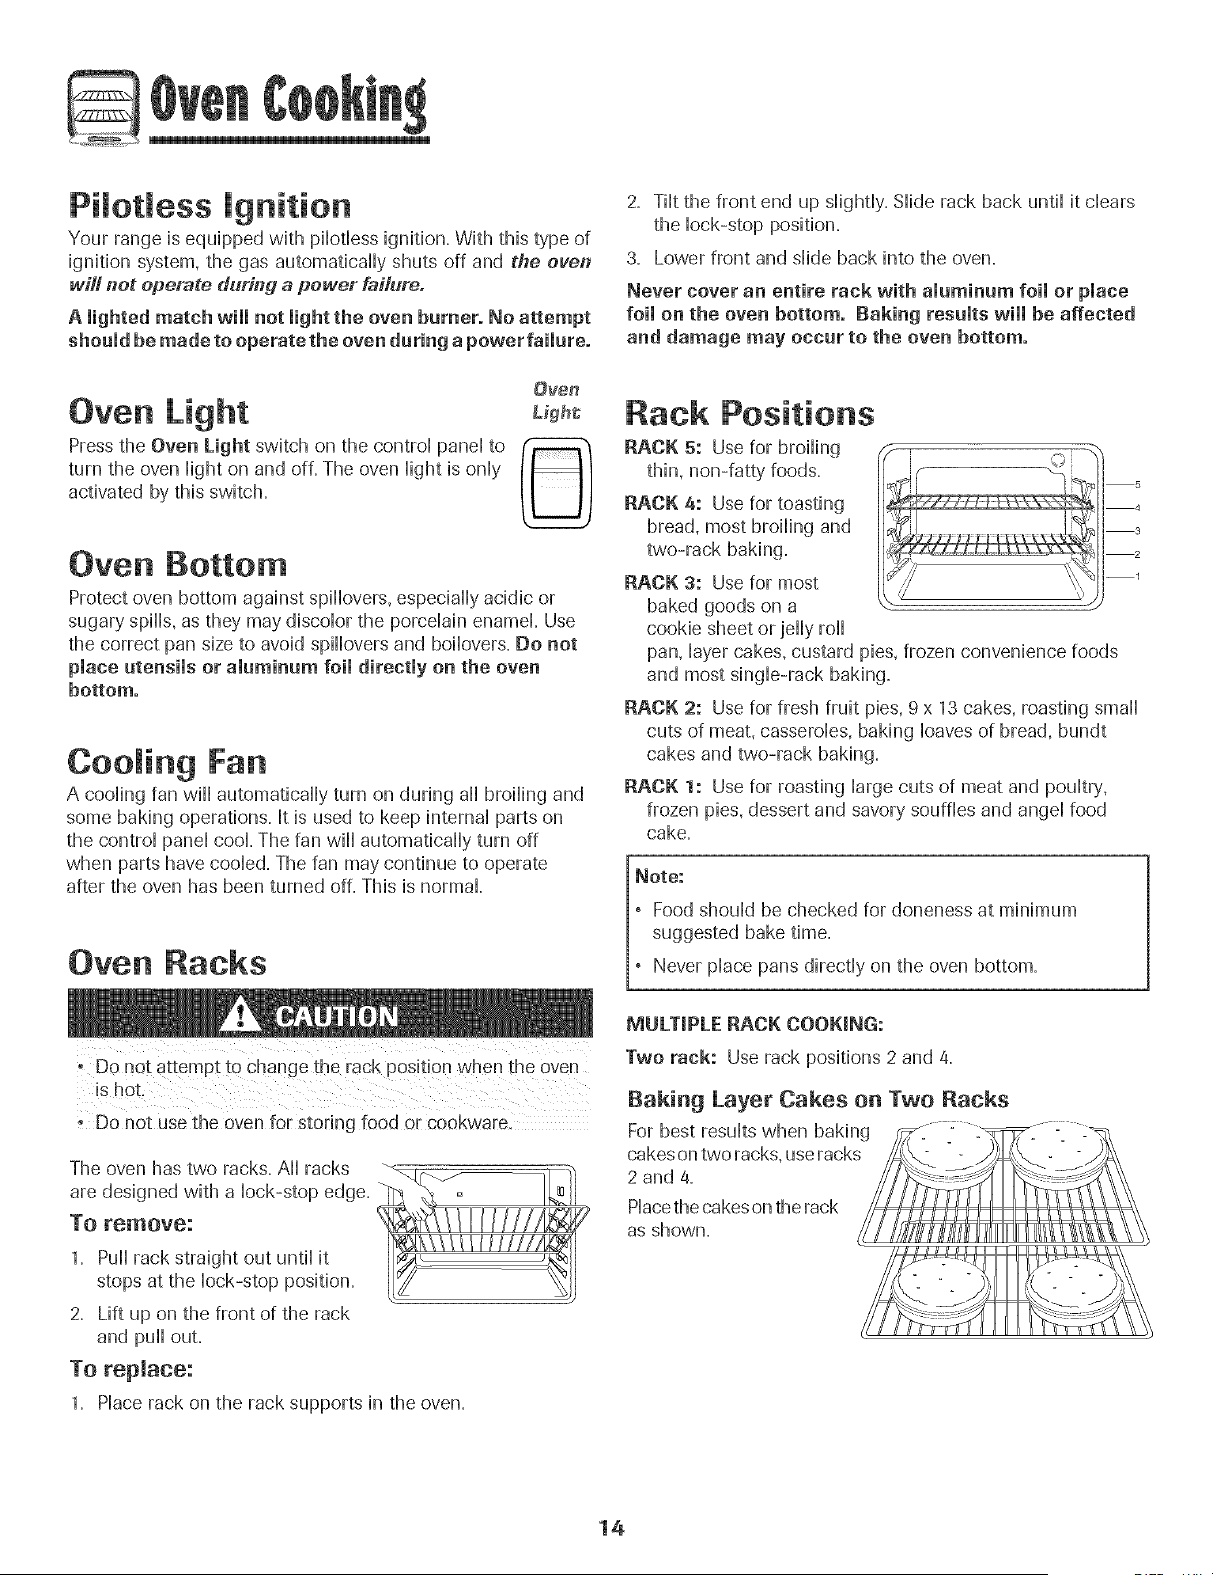
Rack Positions
RACK 5: Use for broiling
thin, non-fatty foods.
RACK 4: Use for toasting
bread, most broiling and
two-rack baking.
RACK 3: Use for most
baked goods on a
cookie sheet or jelly roll
pan, layer cakes, custard pies, frozen convenience foods
and most single-rack baking.
RACK 2: Use for fresh fruit pies, 9 x 13 cakes, roasting small
cuts of meat, casseroles, baking loaves of bread, bundt
cakes and two-rack baking.
RACK 1: Use for roasting large cuts of meat and poultry,
frozen pies, dessert and savory souffles and angel food
cake.
Oven Racks
is hot.
i i i i i _ _i i i _ i i
, Do not use the even for storing rood or cookware.
The oven has two racks. All racks _._ _-_
are designed with a lock-stop edge.
TO remove: _1 I/////_/
1. Purrrack straight out until it I_FFFFT_I
StOpSat tile lock-stop position. ,/_ _
2. Lift up on the front of the rack
and pull out.
To replace:
1. Place rack on the rack supports in the oven.
MULTIPLE RACK COOKING:
Two rack: Use rack positions 2 and 4.
Baking Layer Cakes on Two Racks
14
Seff-C ean Oven
o It is normal for parts of the range to become hot during a
- To prevent damage to oven door. do not attempt to open
the door when LOCK is dispUayed.
• Avoid touching cooktop, doo_ window or oven vent area
during a dean cycle,
, Do not use commercial oven cleaners on the oven finish
or around any part of the oven. They will damage the
finish o_ parts.
The self-clean cycle uses above-normal cooking temperatures
to automatically clean the oven interior.
It is normal for flare-ups, smoking, or flaming to occur during
cleaning if the oven is heavily soiled. It is better to clean the
oven regularly rather than to wait until there is a heavy
build-up of soil in the oven.
During the cleaning process, the kitchen should be well
ventilated to get rid of normal odors associated with cleaning.
Before Se f-Cmeaning
1. Turn off the oven light before cleaning. The light may burn
out during the clean cycle.
2. Remove all pans and oven racks from the oven. The oven
racks will discolor and may not slide easily after a self-
clean cycle if they are not removed.
3. Clean oven frame, door frame, area outside of gasket, and
around the opening in the door gasket with a nonabrasive
cleaner such as Bon Ami* or detergent and water. The
self-cleaning process does not clean these areas. They
should be cleaned to prevent soil from baking on during
the clean cycle. (The gasket is the
seal around the oven door and
window.}
4. To prevent damage, do not clean or
rub the gasket around the oven
door. The gasket is designed to
seal in heat during the clean cycle.
5. Wipe up excess grease or spillovers from the oven bottom.
This prevents excessive smoking, flare-ups or flaming
during the clean cycle.
6. Wipe up sugary and acidic spillovers such as sweet
potatoes, tomato, or milk-based sauces. Porcelain enamel
is acid-resistant, not acid-proof. The porcelain finish may
discolor if acidic spills are not wiped up before a self-clean
cycle.
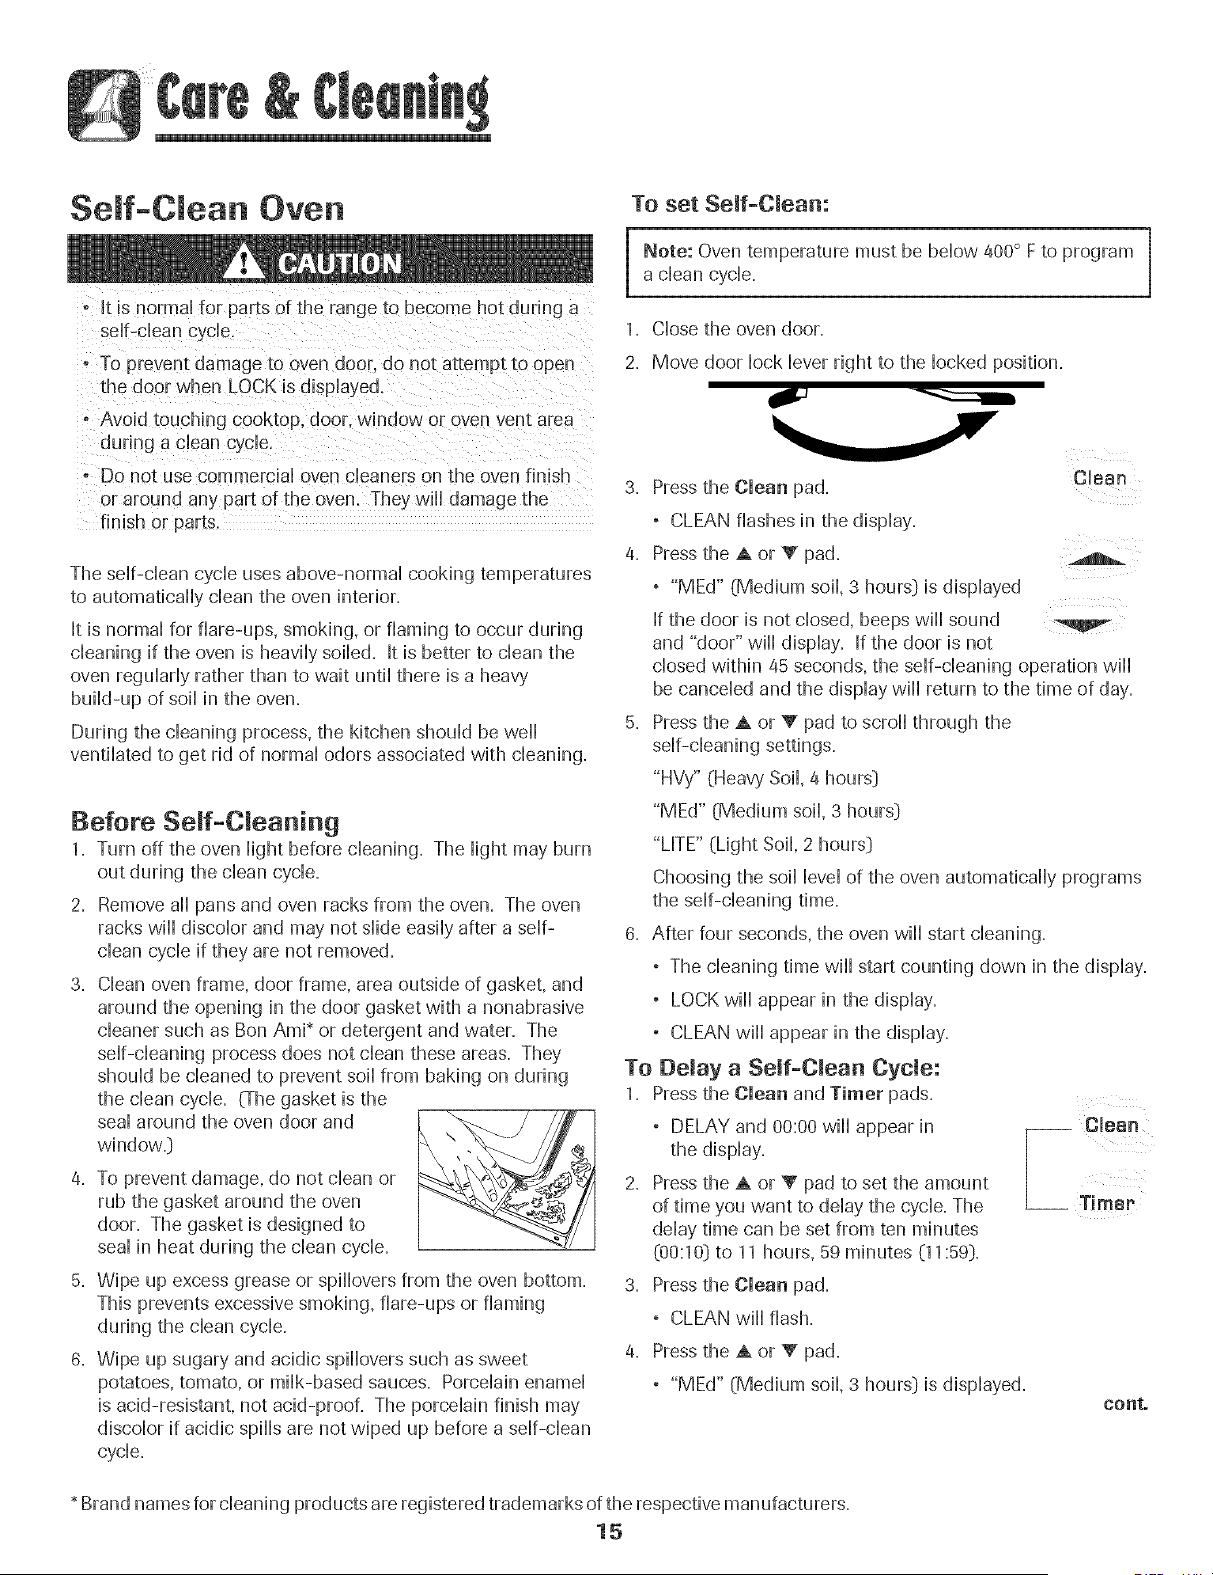
To set Self-Clean:
Note: Oven temperature must be below a00° F to programa clean cycle.
1. Close the oven door.
2. Move door lock lever right to the locked position.
3. Press the (}lean pad. Clean
, CLEAN flashes in the display.
4. Press the A or V pad.
° "MEd" {Medium soil, 3 hours} is displayed
If the door is not closed, beeps wiii sound
and "door" wiii display. If the door is not
closed within 45 seconds, the self-cleaning operation wiii
be canceled and the display wiii return to the time of day.
5. Press the A or V pad to scroll through the
self-cleaning settings.
"HVy" (Heavy Soil,/_ hours}
"MEd" (Medium soil, 3 hours}
"LITE" (Light Soil, 2 hours}
Choosing the soil level of the oven automatically programs
the self-cleaning time.
6. After four seconds, the oven wiii start cleaning.
° The cleaning time wiii start counting down in the display.
° LOCK wiii appear in the display.
° CLEAN wiii appear in the display.
To Demay a Seif-C_ean Cycle:
1. Press the Clean and Timer pads.
° DELAY and 00:00 will appear in
the display.
2. Press the A or V pad to set the amount
of time you want to delay the cycle. The
delay time can be set from ten minutes
[00:10} to 11 hours, 59 minutes (11:59}.
3. Press the Clean pad.
° CLEAN will flash.
a. Press the A or V pad.
° "MEd" (Medium soil, 3 hours} is displayed.
-- Clean
__ Timer
eonto
* Brand names for cleaning products are registered trademarks of the respective manufacturers.
15
5. Press the A or V pad to scroll through the stir-charting
settings+
"HVy" (Heavy Soil 4 hours3
"MEd" (Medium soil 3 hours3
"LITE" (Light Soil 2 hours:)
Choosing the soii bvei of the oven automatically programs
the sdf-cbaning time+
6. After four seconds, CLEAN, DELAY and LOCK will appear
in the dispiay to show that the oven is set for a ddayed
dean operation+ The deiay time is dispiayed.
During the Se_f-Clean Cycle
When LOCK shows hi the dispiay+the door cannot be opened+
To prevent damage to the door+do not force the door open
when LOCK is displayed+
Smoke and Smells
You may see some smoke and smell an odor the first few
times the oven is cleaned. This is normal and will lessen in
time.
Smoke may also occur if the oven is heavily soiled or if a pan
was left in the oven.
Sounds
As the oven heats, you may hear sounds of metal parts
expanding and contracting. This is normal and will not
damage the oven.
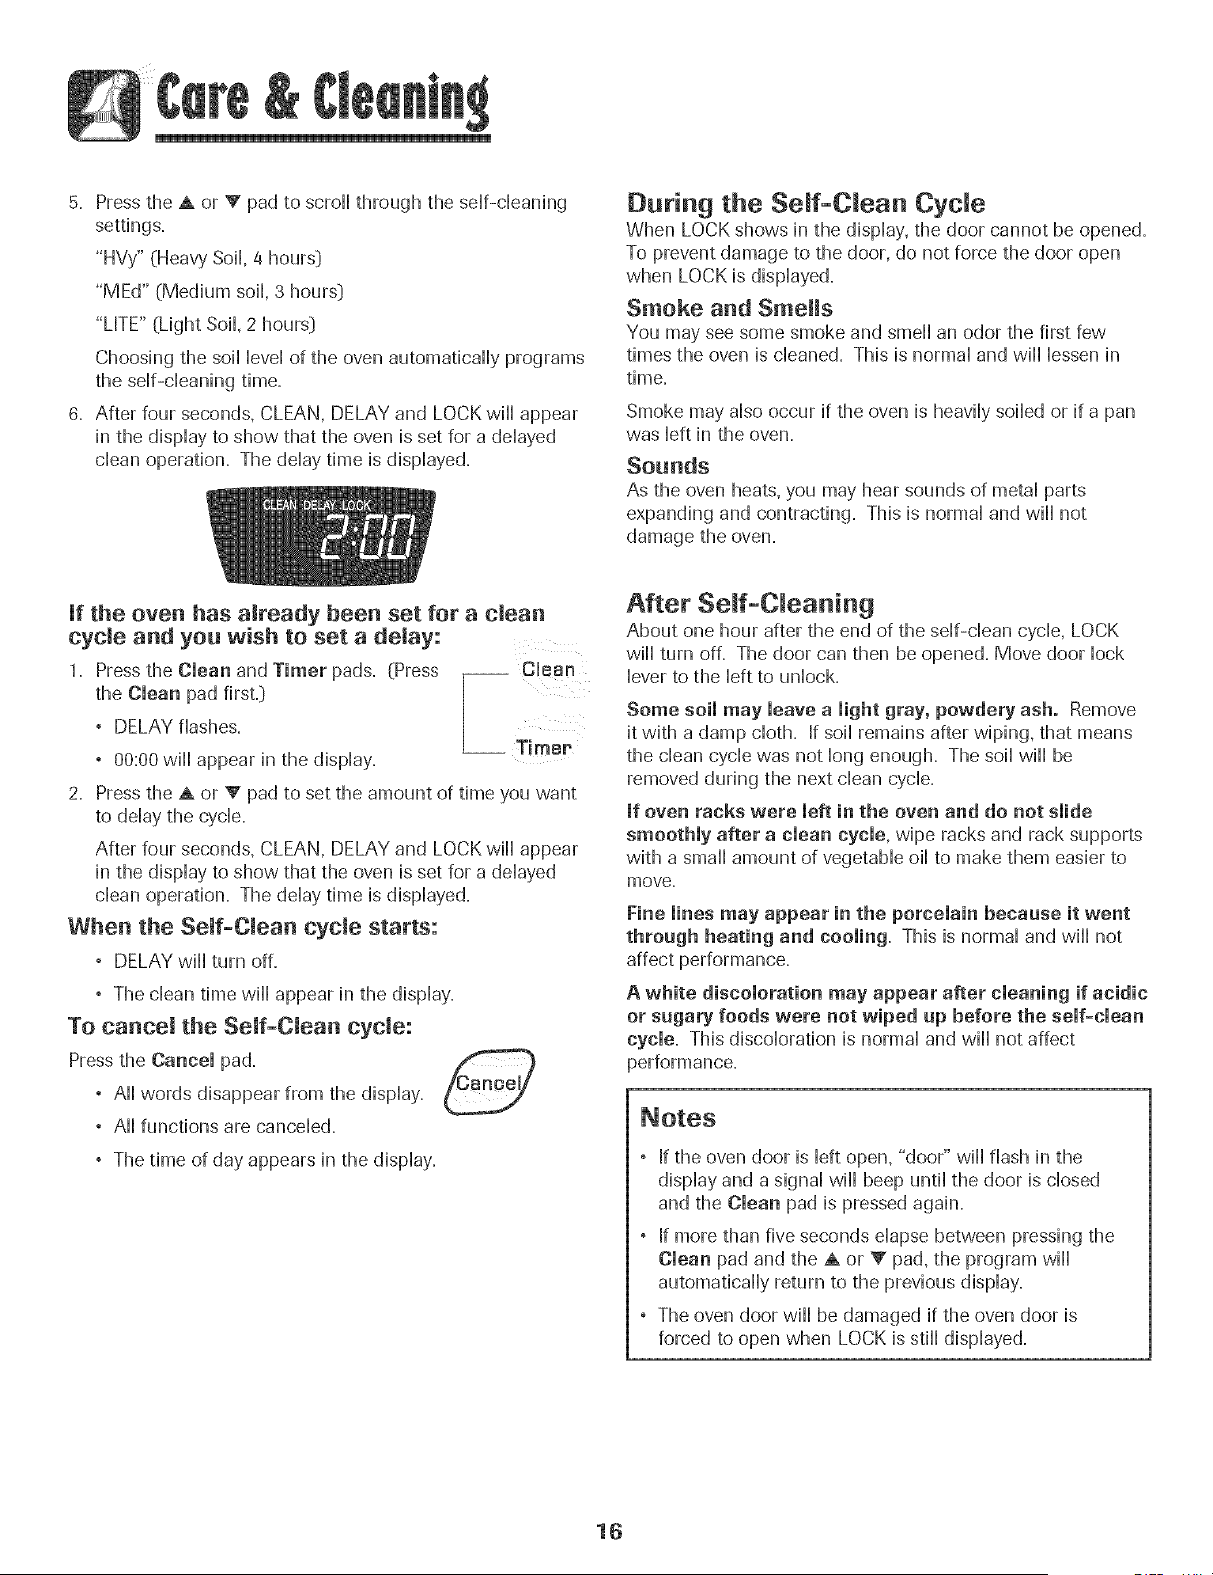
If the oven has already been set for a clean
cycle and you wish to set a delay:
1. Press the Clean and Timer pads, (Press
the Clean pad first+:)
° DELAY flashes+
° 00:00 will appear in the display.
2. Press the A or T pad to set the amount of time you want
to delay the cycle.
After four seconds, CLEAN, DELAY and LOCK will appear
in the display to show that the oven is set for a delayed
clean operation. The delay time is displayed.
When the Self-Clean cycle starts:
, DELAY will turn off.
° The clean time will appear in the display.
To cancel the Self-Clean cycle:
Press the Cancel pad.
, All words disappear from the display.
, All functions are canceled.
° The time of day appears in the display.
After Serf-Cleaning
About one hour after the end of the self-dean cycle, LOCK
will turn off. The door can then be opened. Move door lock
lever to the left to unlock.
Some soil may leave a light gray, powdery ash. Remove
it with a damp cloth. If soil remains after wiping, that means
the clean cycle was not long enough. The soil will be
removed during the next clean cycb.
If oven racks were left in the oven and do not slide
smoothly after a clean cycle, wipe racks and rack supports
with a small amount of vegetable oil to make them easier to
move.
Fine lines may appear in the porcelain because it went
through heating and cooling, This is normal and will not
affect performance.
A white discoloration may appear after cleaning if acidic
or sugary foods were net wiped up before the self=clean
cycle= This discoloration is normal and will not affect
performance+
If the oven door is left open, "door" wiii flash in the
display and a signal will beep until the door is closed
and the Clean pad is pressed again.
If more than five seconds elapse between pressing the
Clean pad and the A or V pad, the program will
automatically return to the previous display.
The oven door will be damaged if the oven door is
forced to open when LOCK is still displayed.
16
Cleaning Procedures
or cleaning. This is to avoid damage and possible burns.
, To Prevent staining or discoloration, clean appliance after each use.
• tf a Part is removed, be Sure it is C0rrect!Y repPaced,
* Brand names are registered trademarks of the
respective manufacturers.
_* To order call 1-877-232-6771 USA or
1-800-688-8408 Canada.
_|
PART PROCEDURE
Sealed Gas
Burners
Burner Grates -
Porcelain on
Cast iron
Clock and
Control Pad
Area
Control Knobs
Cooktop and
Control Panel =
Porcelain Enamel
Storage Drawer
and Door
Handles -
Painted Enamel
Removable Burner Caps
, Allow burner to cool Remove burner cap and wash in soapy water with a plastic scouring pad. For
stubborn soils, clean with a soap-filled, nonabrasive pad or Cooktop Cleaning Creme*
(Part #20000001} _* and a sponge.
, Do not clean in the dishwasher or self-cleaning oven.
Sealed Gas Burners
, Clean frequently. Allow burner to cool Clean with soap and plastic scouring pad. For stubborn soils,
clean with a soap-filled, nonabrasive pad. Do not enlarge or distort hobs.
, Be careful not to get water into burner ports.
, Use care when cleaning the ignitor. If the ignitor is wet or damaged the surface burner will not lighL
, Wash with warm, soapy water and a nonabrasive, plastic, scrubbing pad. For stubborn soils,
clean with a soap-filled, nonabrasive, plastic pad or Cooktop Cleaning Creme* (Part #20000001}**
and a sponge. If soil remains, reapply Cooktop Cleaning Creme*, cover with a damp paper towel and
soak for 30 minutes. Scrub again, rinse and dry.
° Do not clean in the dishwasher or self-cleaning oven.
, To activate control lock for cleaning, see "Locking the Controls" page 8.
, Wipe with a damp cloth and dry. Do not use abrasive cleaning agents as they may scratch the finish.
, Glass cleaners may be used if sprayed on a cloth first. DO NOTapray directly on eontrelpad and
display area.
, Remove knobs in the OFFposition by pulling forward.
, Wash, rinse and dr},. Do not use abrasive cleaning agents as they may scratch the finish.
, Turn on each burner to be sure the knobs have been correctly replaced.
Porcelain enamel isglass fused on metal and maycrack or chip with misuse. It is acid resistant, not acid proof.
All spillovers, especially acidic or sugary spillovers, should be wiped up immediately with a dry cloth.
° When cool, wash with soapy water, rinse and dry.
, Never wipe off a warm or hot surface with a damp cloth. This may cause cracking or chipping.
, Never use oven cleaners, abrasive or caustic cleaning agents on exterior finish of range.
, When cool, wash with warm soapy water, rinse and dry. Never wipe a warm or hot surface with a damp
cloth as this may damage the surface and may cause a steam burn.
° Forstubborn soil, use mildly abrasive cleaning agents such as baking soda paste or Bon Ami*. Do not use
abrasive cleaners such as steel wool pads or oven cleaners. These products will scratch or permanently
damage the surface.
Note; Use a dry towel or cloth to wipe up spills, especially acidic or sugary spills. Surface may
discolor or dull if soil is not immediately removed. This is especially important for white surfaces.
17
PART PROCEDURE
Oven Window
and Door - Glass
, Avoid using excessive amounts of water which may seep under or behind glass causing staining,
, Wash with soap and water, Rinsewith dear water and dry, GHasscleaner can be used if sprayed on a cloth
first,
, DO NOT use abrasive materiaHssuch as scouring pads, steal wooHor powdered cleaners as they will
scratch gHass,
Oven mnterior , Follow instructions on pages 15-18 to set a stir-dean cycle,
Oven Racks
Stainmess Steel
(sdect modds_)
, CHeanwith soapy water=
, Remove stubborn soiHwith cHeansingpowder or soap-filled scouring pad, Rinse and dry',
, Racks will permanently discolor and may not slide out smoothly if left in the oven during a self-clean
operation, If this occurs, wipe the rack and embossed rack supports with a small amount of vegetable oil
to restore ease of movement, then wipe off excess oil,
. DO NOT USE ANY CLEANING PRODUCT CONTAiNiNG CHLORINE BLEACH.
. DO NOT USEABRASIVE OR ORANGE CLEANERS.
. ALWAYS WiPE WiTH THE GRAIN WHEN CLEANING.
. DaimyCmeaning/Light soim-- Wipe with one of the following - soapywater, white vinegar/water sohJtion,
Formula 409 Glass and Surface Cleaner_or a similar glass cleaner - using a sponge or soft cloth,
Rinse and dry, To polish and help prevent fingerprints, follow with Stainless Steel Magic Spray_
(Part No=20000008]_=
, Moderate/Heavy Soil -- Wipe with one of the following -Bon Ami _,Smart Cleanser_,or Soft Scrub _ -
using a damp sponge or soft cloth, Rinse and dry, Stubborn soils may be removed with a damp multi-
purpose Scotch-Brite _pad; rub evenly with the grain, Rinseand dry, To restore luster and remove streaks,
follow with Stainless Steel Magic Spray_,
, Discoloration -- Using a damp sponge or soft cloth, wipe with Cameo Stainless Steel Cleaner_, Rinse
immediately and dry, To remove streaks and restore luster, follow with Stainless Steel Magic Spray_,
Brand names for cleaning products are registered trademarks of the respective manufacturers=
_ To order direct, call 1-877-232-8771 USA or 1-800-888-8408 Canada=
18
=
Oven Door
o Do not place excessive weught on or stand on an open
oven door. This could cause the range to tip over. break
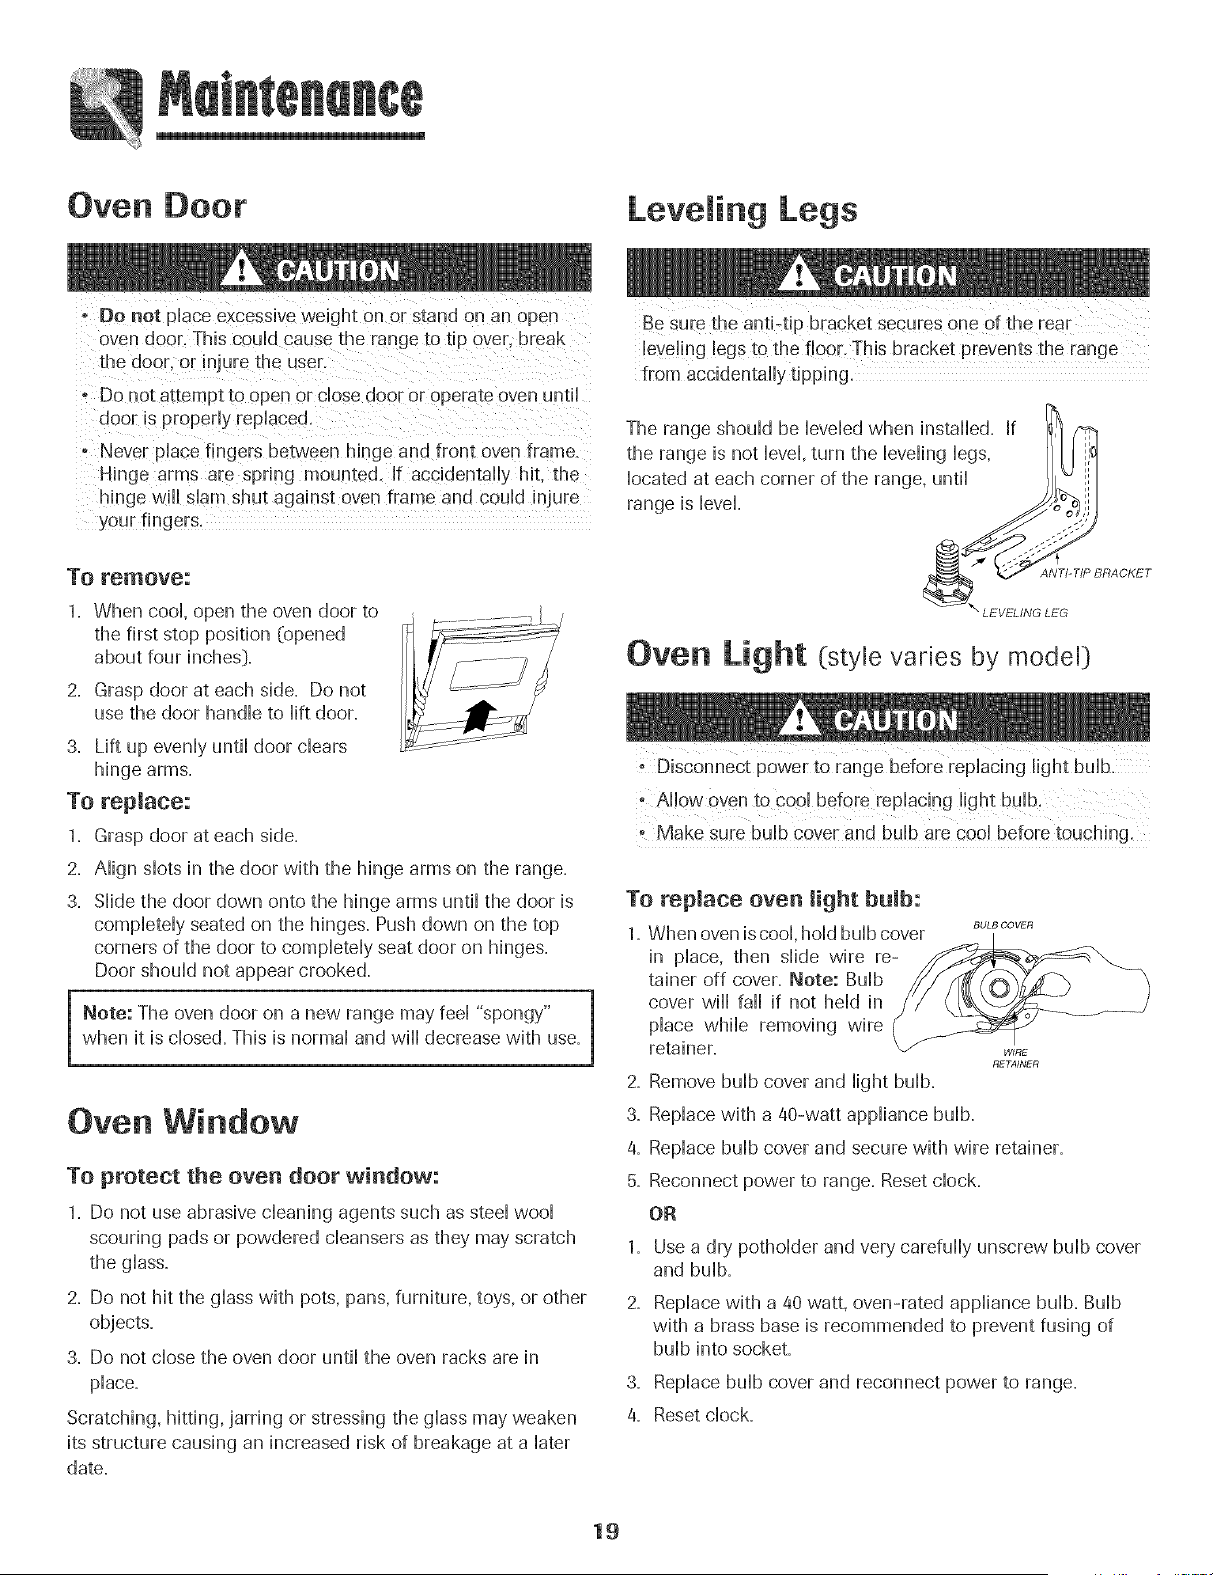
Leve ing Legs
Be SU[ethe antbtip bracket secures one Ofthe tear
leveling legs to the floor. This bracket prevents the range
o Do not attempt to open or close door or operate oven until
door is properly replaced.
o Never place fingers between hinge and front oven frame.
Hinge arms are spring mounted. If accidentally hit. the
hinge will siam shut against oven frame and could injure
your ring ors.
To remove:
1. When cool, open the oven door to
the first stop position (opened
about four inches}.
2. Grasp door at each side. Do not
use the door handle to lift door.
3. Lift up evenly until door clears
hinge arms.
To replace:
1. Grasp door at each side.
2. Align slots in the door with the hinge arms on the range.
3. Slide the door down onto the hinge arms until the door is
completely seated on the hinges. Push down on the top
corners of the door to completely seat door on hinges.
Door should not appear crooked.
Note: The oven door on a new range may feel "spongy"
when it is closed. This is normal and will decrease with use.
Oven Window
, Aflow Ovento Co01before replacing light bulb.
- Make sure bulb cover and bulb are cool before touching.
To replace oven light bulb:
1. When oven is cool, hold bulb cover
in place, then slide wire re-
tainer off cover. Note: Bulb
cover wiii fail if not held in
place while removing wire
retainer. -/
2. Remove bulb cover and light bulb.
3. Replace with a @-watt appliance bulb.
a.
To protect the oven door window: 5.
1. Do not use abrasive cleaning agents such as steel wool
scouring pads or powdered cleansers as they may scratch
the glass.
2. Do not hit the glass with pots, pans, furniture, toys, or other
objects.
3. Do not close the oven door until the oven racks are in
place.
Scratching, hitting, jarring or stressing the glass may weaken a. Reset clock.
its structure causing an increased risk of breakage at a later
date.
BULB COVER
WIRE
RETAINER
Replace bulb cover and secure with wire retainer.
Reconnect power to range. Reset clock.
OR
1. Use a dry potholder and very carefully unscrew bulb cover
and bulb.
2. Replace with a 40 watt, oven-rated appliance bulb. Bulb
with a brass base is recommended to prevent fusing of
bulb into socket.
3. Replace bulb cover and reconnect power to range.
19

Remova of Gas Appmiance
Gas appHianceconnectors used to connect this appHianceto
the gas suppHyare not designed for continuous movement.
Once instaHHed,DO NOT repeatedHymove this gas appHiance
for cHeaningor to reHocate.If this appHiancehas to be moved
and/or removed for servicing, foHHowthe procedure described
in the instaHHationinstructions. For information, contact
Amana Customer Assistance at 1-800-843-0304 USA or
1-886-587-2002 Canada.
To prevent range from accidentaHHytipping, range must be
secured to the floor by sHiding rear HeveHingHoginto the anti-
tip bracket.
Storage Drawer
E ectticam Connection
Appmiances which require emectrical power
are equipped with a three-prong
grounding plug which must be
pHuggeddirectHyinto a properHygrounded
three-hoMe120 voHteHectricaHoutHet.
Always disconnect power to app!;iancebefore servicing.
The three-prong grounding pHugoffers protection against
shock hazards=DO NOT CUT OR REMOVE THE THIRD
GROUNDING PRONG FROM THE POWER CORD PLUG.
If an ungrounded, two-hollo or other type eHectricaHoutHet is
encountered, it is the personal responsibility of the
appliance owner to have the outlet replaced with a
properly grounded three=hole electrical outlet.
Do not store pHastic,paper products, food or fiammabHe
materials in this drawer. The drawer may become too warm
for these items when the oven is in use.
The storage drawer can be removed to allow you to clean
under the range.
To remove:
1. Empty drawer and puHHout to the first stop position.
2. Lift up the front of the drawer.
3. Puil out to the second stop position.
4. Grasp sides and lift drawer up and out.
To replace:
1. Fit the ends of the drawer gHidesinto the raiHsin the range.
2. Lift up the front of the drawer and gentHypush in to the
first stop position.
3. Lift drawer up again and push untiHdrawer is dosed.
20
PROBLEM SOLUTION
For most concerns, try these first.
Surface burner faimsto light.
The flame is uneven.
Surface burner flame lifts
off ports.
gaking results are not as
expected or differ from
previous oven.
° Check if oven controHshave been propedy set,
° Check to be sure pHugis secureHyinserted into receptacle,
° Check or re-set circuit breaker, Check or repHacefuse,
° Check power suppHy,
, Check to be sure unit is properHyconnected to power suppHy,
, Check for a Mown circuit fuse or a tripped main circuit breaker,
, Check to be sure ignitor is dry'and cHicking,Burner will not Hightif ignitor is damaged,
soiled or wet, If ignitor doesn't click, turn control knob to OFF,
, Burner ports may be clogged,
, Check to be sure a pan is sitting on the grate above,
° Check the oven temperature selected, Make sure oven is preheated when recipe
or directions recommend preheat,
° Make sure the oven vent has not been blocked, See page 13 for location,
° Check to make sure range is level,
• Temperatures often vary between a new oven and an old one, As ovens age, the oven
temperature often "drifts" and may become hotter or cooler, See page 13 for
instructions on adjusting the oven temperature, Note: It is not recommended to
adjust the temperature if only one or two recipes are in question,
° Use correct pan, Dark pans produce dark browning, Shiny pans produce light
browning, See "Cooking Made Simple" booklet for morn information on bakewam,
° Check rack positions and pan placement, Stagger pans when using two racks, Allow
1-2 inches between pans and oven wall,
° Check the use of foil in the oven, Never use foil to cover an entire oven rack, Place
a small piece of foil on the rack below the pan to catch spillovers,
Check oven rack positions, Food may be too close to flame,
Aluminum foil was incorrectly used, Never line the broiler insert with foil,
Trim excess fat from meat before broiling,
A soiled broiler pan was used,
Preheat oven for 2-3 minutes before placing food in the oven,
Broil with the oven door closed,
Check to make sure the cycle is not set for a delayed start, See pages 15-16,
Check if door is closed,
Check if control is in Sabbath Mode, See page 13,
Oven may be over 400° R Oven temperature must be below 400° F to program a
clean cycle,
Food is not broiling properly or ,
smokes excessively. ,
Oven will not self-clean.
21
PROBLEM SOLUTION
Oven did not clean properly. , Longer deanhg thne may be needed=
, ExcessivespiHovers, especially sugary and/or acidic foods, were not removed prior
to the stir-dean cycle.
Oven door will not unlock after
self=clean cycle.
Moisture collects on oven
window or steam comes from
oven vent.
There is a strong odor or light
smoke when oven is turned on.
Fault Codes
Noises may be heard.
There are no beeps and
"SAb" flashing and then
Oven interior is still hot= Allow about one hour for the oven to cool after the
completion of a self-clean cycle. The door can be opened when the LOCK indicator
word is not displayed.
The control and door may be locked. See page 8.
, This is normal when cooking foods high in moisture.
, Excessive moisture was used when cleaning the window.
, This is normal for a new range and wi[[ disappear after a few uses. Initiating a dean
cycle will "burn off" the odors more quickly=
, Turning on a ventilation fan will help remove the smoke and/or odor.
, Excessivefood soils on the oven bottom. Use a self-clean cycle.
, BAKEor LOCK may flash rapidly in the display to alert you if there is an error
or a problem. If BAKE or LOCK appear in the display, press the Cancel pad.
If BAKE or LOCK continue to flash, disconnect power to the appliance.
Wait a few minutes, and then reconnect power. If the flashing still continues,
disconnect power to the appliance and call an authorized servicer.
, If the oven is heavily soiled, excessive fiareups may result in a fault code during
cleaning. Press the Cancel pad and allow the oven to cool completely, wipe out
excess soil, then reset the clean cycle. If the fault code reappears, contact an
authorized servicer.
, The oven makes several low level noises. You may hear the oven relays as they go on
and off. This is normal.
, As the oven heats and cools, you may hear sounds of metal parts expanding and
contracting. This is normal and will not damage your appliance.
, A fan sound can be heard. This is the cooling fan and is normal. The fan will
continue to run after use until the oven cools.
, Oven may be in Sabbath Mode. See page 13.
, Control may be locked. See page 8.
, Oven is in Sabbath Mode. To cancel, press and hold the Clock pad for five
seconds.
22
Gas Range Warranty
FumlOne Year Warranty =
Parts and Labor
For one ( I[} year from the original retail
purchase da[e, any part which fails in
normal home use will be repaired or
replaced free c [ charge.
Please Note: Fhis full warranty appiie_
only when the appliance is located in the
Unite_ States or Canada. Appliances
located eise_vhereare covered bythe
limited warranties only, including pars
which fail during the tirst year.
Canadian Residents
Thiswarran[y covers only those appliances
installed in Canada that have been listed
with Canadian Standsrds Association
unless[he appliances are brought into
Canada due to transfer of residence from
the United States to Canaoa.
The,specificwarrantiesexpressedabove
are the Only warrantiesprovided by the
manufacturer. TMswarTan_gl_esyou
,specific'legal rigbts, andyou may also have
otber rigbts that vary from state to state.
What is Not Covered By These Warranties:
1= Conditions and damages resuIting from any of the following:
a. Improper instaiIation, deIivel% or maintenance.
b=Any repair, modification, aIteration, or adjustment not authorized by the
manufacturer or an authorized servicer.
c= Misuse, abuse, accidents, unreasonabIeuse,or acts of God=
d= Incorrect electric current, voltage, or supply=
e= Improper setting of any control.
2. Warranties are void if the original serial numbers have been removed, altered, or
cannot be readily determined.
3= Light buibs=
4= Products purchased for commerciai or industrial use=
5. The cost of service or service call to:
a=Correct installation errors.
b= Instruct the user on the proper use of the product.
c= Transport the appliance to the servicer and back.
6= ConsequentiaI or incidentai damagessustained by any person as a resuit of any
breach of these warranties.
Some states do not aiIow the exclusion or Iimitation of consequential or incidental
damages, so the above exclusion may not apply=
if You Need service
First see the Troubleshooting section h_your Use and Care Guide or calI Maytag
ServicessM,Amana Customer Assistance at 1-800-843-0304 U=S=A=or
1-866-587-2002 Canada.
To Obtain Warranty Service
To locate an authorized service company in your area contact the dealer from
whom your appliance was purchased or call Maytag ServicessN,Amana
Customer Assistance= Should you not receive satisfactory warranty service,
call or write:
Maytag ServicessM
Attn: CAR Center
P=O=Box 2370, Cleveland, TN 37320-2370
NoSo1-800-843=0304 and Canada 1-866=587-2002
NoSocastomers asing TTY for deaf, hearing impaired or speech
impaired, call 1-800-688-2080o
Note: When contacting Maytag Services sM,Amana Customer Assistance
about a service probIem, pIeaseinciude the following:
a=Your name,address and teIephone number.
b=Model number and seriaI number of your appIiance=
c=Name and address of your deaIer and date appliance was purchased.
d. A cIear description of the problem you are having.
e=Proof of purchase.
Use and Care guides, service manuals and parts information are available from Maytag Servicess_J_,Amana Customer Assistance.
23
Cuisini_te h gaz encasttable h commandes Easy Touch 700
instructions de s6curit6
importantes ............................................................. 25-29
Cuisson sur masurface .......................................... 30o31
Commandes de Hasurface de cuisson
BrCJHeurssceH6s
Cuissen darts le four ............................................. 32-81
Cuisson courante
Cuisson et maintien
Cuisson et maintien diff6r6e
Maintien au chaud
Cuisson au gril
Favori
Grilles du four
Nettoyage ................................................................ 42-45
Four autonettoyant
M6thodes de nettoyage
Entretien ................................................................... 46-47
H_Jblotet lampe du four
D6placement d'un appareil 8 gaz
Recherche des pannes ..........................................48-49
Garantie et service aprSs-vente ................................51
Guia de Use y Cuidade ................................................52
consultation u!t6rieure,Consewezla facture d'achat ou !ech#que
encaiss8C0mrnepreuvede !'achat.
Nurn6rode modele
Nurnerode s6rie
Date d'achat
Si vousavezdesquestions,veui!!eznous appe!er:
Service _ la client_b de Amana :
]-800.843_0304USA
Dana le cadre de nospratiquesd'am61iorationconstante de [a
qualit6 et de la performancede nos produits de cuisson,des
modificati0[_sde I appareil qui ne sent Pasmentionn@sdansce
Repertez:vegs _ la page 51 pour plus d'#lformadol_S
Cencer#a#t b service apr#-s-ve#te.
Les instructions de s@urite importantes et bs paragraphes
<<avertissement >>de ce guide ne sent pas destines 8 couvrir
toutes bs conditions et situations qui pourraient se presenter.
II faut faire preuve de ben seas, de prudence et de soin Iors de
Finstdlation, de Fentretien ou du fonctionnement de Fappare&
Toujours prendre contact avec le fabricant darts b cas de
proN_mes ou de conditions qui ne seraient pas comprises.
Reconna tre Ues6tiquettes, paragraphes et
symboUes sur Uas6curit6
AVERTISSEMENT _ Dangers OUpratiques dangereuses qui
Life routes bs instructions avant d'utiliser cot appareii;
observer toutes bs instructions pour 61iminer bs risques
d'incendie, choc 6bctrique, dommages materiels et corporeb
que pourrait susciter une utilisation incorrecte de Fappare&
Utiiiser i'appareii uniquement pour ies fonctions pr@ues,
d6crites dans ce guide
Pour une utilisatien ad6quate et en s6curit6, ii faut que
Fappareil soit convenabbment install6 pa un technicien
qualifi& et reli6 8 la terre. Ne pas r6gbr, r@arer n remplacel
un composant, a morns que cela ne soit s p@ifiq Jement
recommand6 darts ce guide. Toute autre reparation doit 6tre
effectu6e pa un technicien qualifie Demander a Finstallateu
de montreu ouse trouve le robinet d'arr6t de gaz et comment
b former en cas d'urgence.
Toujours d6brancher I'appareil avant d'y faire de [entretien.
Si los directives denn6es darts le present game ne
sent pas respect6es a la Bettre, il y a risque d'incendie
eu d'e×plesien _euvant causer des dommages, des
hlessa reset m6me la raerL
- Ne pas ranger ni utiliser d'essence eu autre vapeur
eu liquide inflammable _ pre×imit6 de cot appareil
eu de teat autre appareiL
- QUE FAIRE SI L'ON SENT UNE ODE[JR DE GAZ :
° Ne mettre aucun appareil en marche.
, Ne pas toucher _ un interrupteur 61ectrique.
. N'utiliser aucun t616phene de I'immeuble.
- Se ren_re chez ua veisin et t61@hener
...................................... los
_ireetives _enn6es par le pr6pes_ ee la
cempagnie _e gaz.
- S'il est impossible _e jeindre la cempagnie _e
gaz, t_i6phener au service _es incen_ies.
- L'installatien et los reparations _eivent 6tre
cenfi6es _ un installateur cemp6tent, _ une
entreprise de service eu _ la cempagnie de gaz.
mort.
Une [uite de gaz pourrait survenir darts le syst6me et
suffire pour detecter une fuite de gaz, Les foumisseurs de
POURRAIENTr6sulter en des blessures mineures, conformdment aux instructions du fabdcant,
25
,u
instructions g neraJes
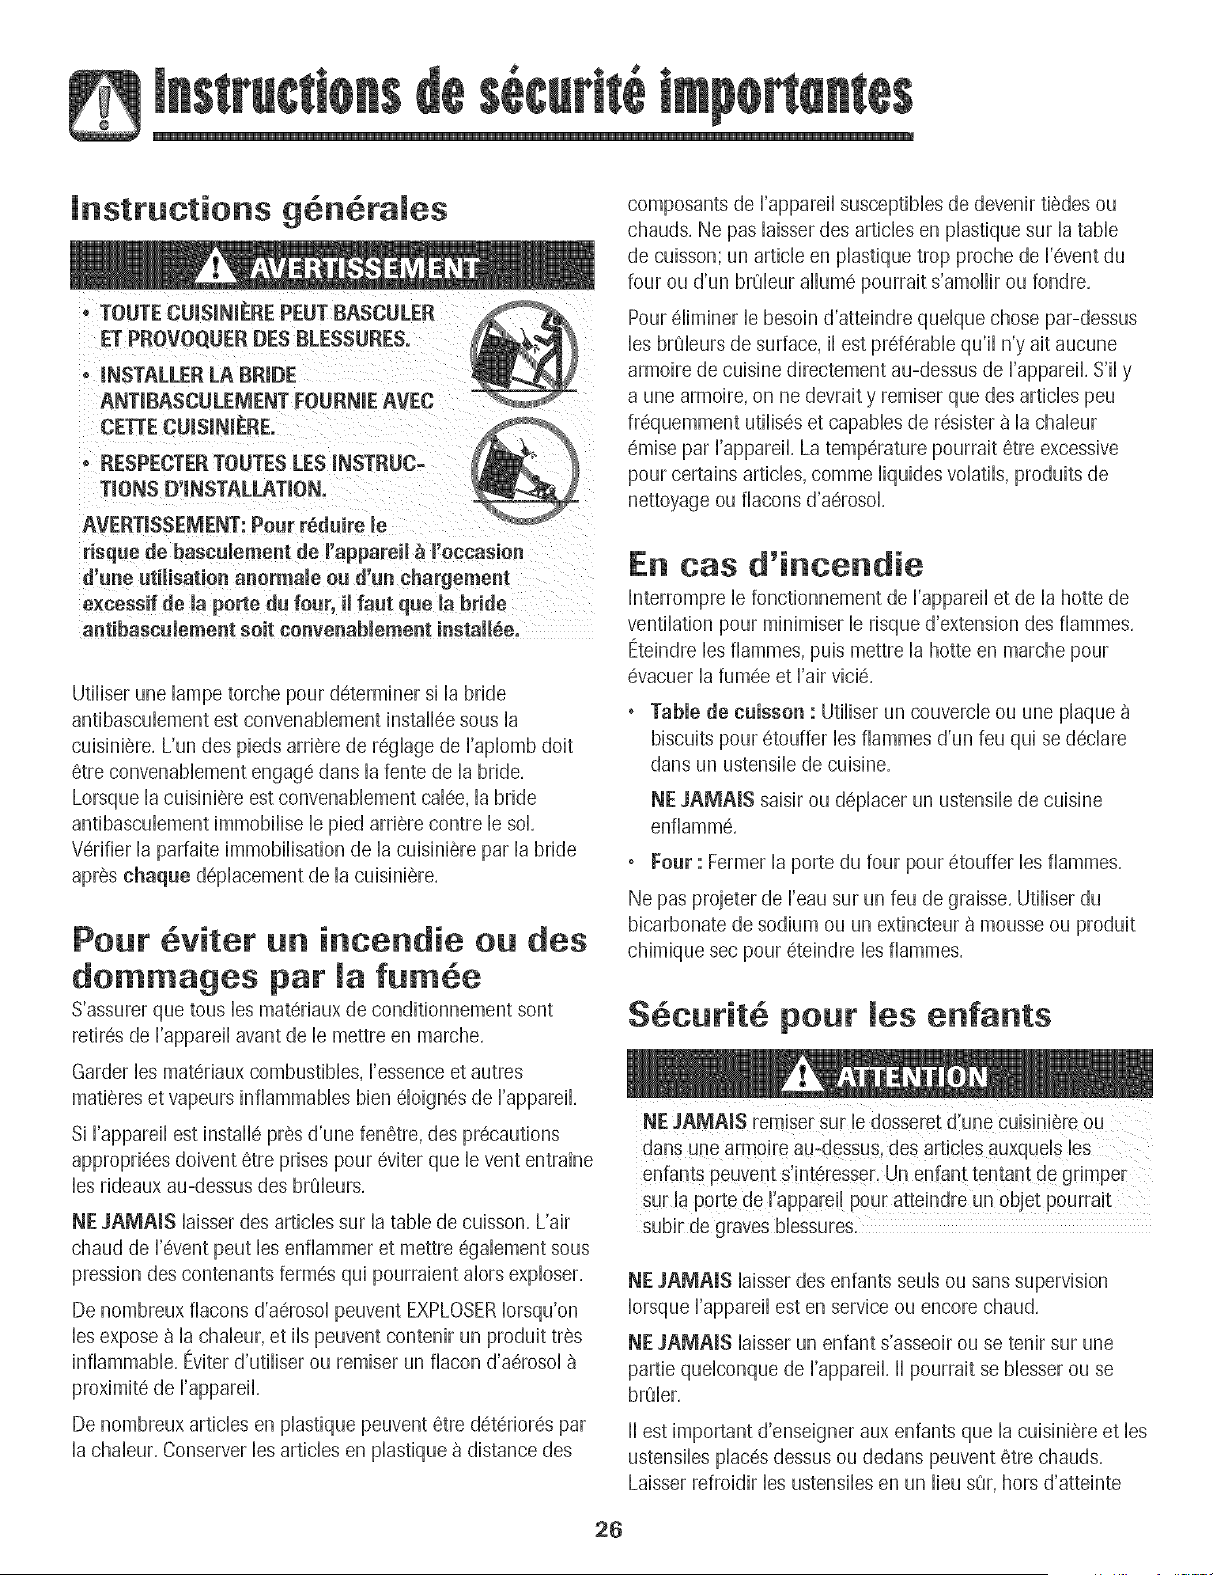
o TOUTE CUm$1NIEREPEUT BASCULER
ET PROVOQUER DES BLESSURESo
,, mNSTALLERLA BRIDE
ANTIBASCULEMENT FOURNIE AVEC
CETTE CUISINIERE.
o RESPECTER TOUTES LES JNSTRUC=
TIONS [}'iNSTALLATiON.
AVERTJSSEMENT: Peur r_duire le
risque de basculement de I'appareil _ m'eccasien
d'une utilisatien anermaie eu d'un chargement
e×cessif de Japorte du feur, il faut que JabrMe
antibascuiement seit cenvenabiement instaii_e,
Utiliser une Bmpe torche pour determiner si la bride
antibascubment est convenabbment instaflee sous la
cuisiniere, L'un des pie@ arriere de reghge de Faplomb doit
6tre convenabbment engage darts la fente de la bride,
Lorsque la cuisiniere est convenabbment calee, la bride
antibascubment immoNise b pied arriere contre b sol,
Verifier la parfaite immobflisation de la cuisiniere par la bride
apres chaqae @placement de la cuisiniere,
Pour viter tin incendie ou des
dommages par la fumee
S'assurer que tous bs materiaux de conditionnement sont
retires de Fappareil avant de b mettre en marche,
Garder bs materiaux combustibles, [essence et autres
matieres et vapeurs inflammables bien 61oignesde Fappare&
Si Fappareil est instafle pres d'une fenetre, des precautions
appropriees doivent 6tre prises pour @iter que b vent entraine
bs rideaux au-dessus des brQburs,
NE JAMAIS hisser des articles sur la table de cuisson, L'air
chaud de F@ent peut bs enfiammer et mettre egabment sous
pression des contenants fermes qui pourraient alors exploser,
De nombreux flacons d'aerosol peuvent EXPLOSERIorsqu'on
bs expose 8 la chabur, et ib peuvent contenir un produit tres
inflammable, Eviter d'utifiser ou remiser un flacon d'aerosol
proximite de [@pare&
De nombreux articles en plastique peuvent 6tre deteriores par
la chabur, Conserver bs articles en pBstique a distance des
composants de ['apparei[ susceptibies de devenir tiedes ou
chauds, Ne pas laisser des articles en plastique sur la table
de cuisson; un article en plastique trop proche de I'@ent du
four ou d'un brQbur allum6 pourrait s'amollir ou fondre,
Pour eliminer le besoin d'atteindre quelque chose par-dessus
les brQburs de surface, il est preferable qu'il n'y ait aucune
armoire de cuisine directement au-dessus de I'appareil, S'il y
a une armoire, on ne devrait y remiser que des articles peu
frequemment utilises et capables de resister a la chaleur
6mise par I'appareil, La temperature pourrait etre excessive
pour certains articles, comme liquides volatils, produits de
nettoyage ou flacons d'aerosol,
En cas d'incendie
[nterrompre [e fonctionnement de ['apparei[ et de [a hotte de
ventilation pour minimiser le risque d'extension des fiammes,
Eteindre les fiammes, pub mettre la hotte en marche pour
@acuer la fumee et Fair vicie,
, Table de caisson : Utfliser un couverde ou une plaque
biscuits pour etouffer bs fiammes d'un feu qui se declare
darts un ustensib de cuisine,
NE JAMAJS saisir ou d@Bcer un ustensib de cuisine
enfiamm&
, Fear : Fermer la porte du four pour 6touffer bs fiammes,
Ne pas projeter de [eau sur un feu de graisse, Utiliser du
bicarbonate de sodium ou un extincteur a mousse ou produit
chimique sec pour eteindre bs fiammes,
S curit6 pour enfants
enfantS Peuvent s!nteresser, Un enfant tentant de grimper
subiEde graves bbssures.
NE JAMAIS iaisser des enfants seuis ou sans supervision
Iorsque I'appareil est en service ou encore chaud,
NF JAMAIS laisser un enfant s'asseoir ou se tenir sur une
partie quelconque de I'appareil, II pourrait se blesser ou se
brQler,
II est important d'enseigner aux enfants que la cuisiniere et les
ustensiles places dessus ou dedans peuvent etre chauds,
Laisser refroidir les ustensiles en un lieu sQr,hors d'atteinte
26
des enfants, II est important d'enseigner aux enfants qu'un
apparefl menager n'est pas un jouet, et qulb ne doivent
toucher aucune commande ou autre composant de I'apparefl,
Familiarisation avee l'appareil
NE JAMAIS utflber la porte de four comme tabouret/siege/
escabeau: cecl pourrait faire bascubr I'appareil et entrdner
dommages corpor_b serieux,
NE JAMAIS udfiser la cubinbre comme source de chdeuf
pour b chauffage de la piece, Sinon. un empobonnement au
monoxyde de carbone pourrait s'ensu we ainsi qu'une
surchauffe du four,
NE JAMAIS recouvrer les fentes, ouvertures ou passages
de la sole de four ni la grille toute entiere avec un materiau
comme du papier d'aluminium. Sinon. la circulation de I'air
dans b four sera entravee et donc entra[ner un
empoisonnement au monoxyde de carbone, Le papie_
d'aiuminium peut aussi emprisonner de la chaleur et
entrdner un risque d'incendie,
NEJAMAIS obstruer la circulation de I'air de comDustion et
de ventilation au niveau de revert1de four ou des entrees
d'air. S non. I'air ne parvient pas correctement aux brQleurs
et donc cela peut poser un risque d'empolsonnement au
monoxyde de carbone,
L'event de four est situ6 _ I'arriere de la surface de cuisson,
Evitez de toucher b voisinage de I'event de four Iorsque b four
est utflise et pendant plusieurs minutes apres I'arret du four,
Certains composants de I'@ent et la zone voisine peuvent
devenir suffisamment chauds pour provoquer des brOlures,
Apres I'arret du four, ne touchez pas I'event de four ou la
zones voisines avant que ces composants aient pu se refroidir
suffisamment,
Autres surfaces potentielbment chaudes : table de cuisson,
zones faisant face a la table de cuisson, event de four, zones
voisines de I'event, porte de four et zone voisine de porte et de
hubiot,
Ne touchez pas I'ampoule chaude du four avec un linge
humide; le choc thermique pourrait la briser, Si tel est le cas,
debranchez I'appareil avant de retirer I'ampoule pour eviter
une decharge electrique,
Ne remisez pas des aliments ou ustensiles de cuisine sur la
table de cuisson ou dans le four,
Cuisson et s6cutit
Placer toujours un ustensile sur un brQleur de surface avant de
i'aiiumer, Veiiier a bien connaitre ia correspondance entre ies
boutons de commande et ies brOieurs,Veiiier a aiiumer ie
brOieur correct et verifier que ie brOieur s'aiiume
effectivement. A ia fin de ia periode de cuisson, eteindre ie
brOieur avant de retirer i'ustensiie, pour eviter une exposition
aux flammes du brOieur,
Veiller a toujours ajuster correctement la taille des flammes
pour qu'elles ne d@assent pas sur la peripherie de I'ustensile,
Des flammes de trop grande taille sur un brQleur sont
dangereuses, elles entrament un gaspillage d'energie et elles
peuvent faire subir des dommages _ I'ustensile, a I'appareil ou
I'armoire situee au-dessus,
NE JAMAIS iaisser un brOieur de surface aiiume sans
surveillance, particulierement avec une puissance de
chauffage elevee ou Iors d'une operation de friture, Un
debordement pourrait provoquer la formation de fumee et des
produits gras pourraient s'enflammer, Eiiminer des que
possible les produits gras renverses, Ne pas utiliser une
puissance de chauffage elevee pendant une periode
proiongee,
NF JAMAIS faire chauffer un recipient non ouvert dans le
four ou sur un brQleur de surface; I'accumulation de pression
dans le recipient pourrait provoquer son eclatement et de
graves dommages materiels ou corporels,
Utiliser des maniques robustes et s@hes, Des maniques
humides peuvent provoquer la formation de vapeur brQlante,
Ne jamais utiliser un torchon a vaisselle ou autre article textile
la place de maniques; un tel article pourrait trainer sur un
brQleur et s'enflammer, ou accrocher un ustensile ou un
composant de I'appareil,
Laisser toujours refroidir un recipient d'huile de friture chaude
avant de tenter de le deplacer et le manipuler,
Ne pas laisser la graisse de cuisson ou autre materiau inflam-
mable s'accumuler dans ou pres de I'appareil, de la hotte ou
du ventilateur de I'@ent, Nettoyer frequemment la hotte pour
empecher toute accumulation sur la hotte elle-meme ou sur le
filtre, Lors du flambage d'aliments sous la hotte, mettre le
ventilateur en marche,
NE JAMAIS porter, Iors de I'utilisation de I'appareil, des
vetements faits d'un materiau inflammable, ou amples, ou
Iongues manches, De tels vetements peuvent s'enflammer ou
accrocher la poignee d'un ustensile,
Placer toujours ies grilles a ia position appropriee dans ie four
Iorsque le four est froid, Faire coulisser la grille vers I'exterieur
avant d'ajouter ou enlever un plat; utiliser pour cela une
27
maniquerobusteetseche,Eviterd'introduirelamaindartsle
fourpouryplacerouretirerunplat,S'ilestnecessairede
dephcerunegrilleIorsqu'elleestchaude,utiliserunemanique
seche,Veilleratoujoursarreterlefouralafind'uneperiode
decuisson,
Ouvrirtoujourslaportedufourtresprudemment,LaisserI'air
chaudoulavapeurs'echapperavantderetirer/introduireun
plat,
AVFRTISSFMI:NT: Metsprepares: Respecterlesinstruc-
tionsdufabricant,Silecontenantoulecouverdeenplastique
d'unmetssurgeleseddormeouestendommagedurantla
cuisson,jeterimmediatementlerecipientetsoncontenu,Les
alimentspourraientetrecontamines,
NEJAMAISgarnirlasoleouunegrilledufouravecdela
feuilled'aluminium,Cecipourraitsusciterunrisquedechoc
electriqueoud'incendie,ouuneautredeteriorationde
I'appareil,Utiliserdelafeuilled'duminiumuniquementselon
lesinstructionsdeceguide,
Ustensimes et s6curit6
Utiliser des ustensiles a fond plat comportant une poignee
qu'on peut facilement saisir et qui reste froide, Eviter d'utiliser
un ustensile instable ou ddorme, qui pourrait facilement
basculer, ou dont la poignee est mal fixee, Eviter egdement
d'utiliser des ustensiles de petite taille comportant une
poignee Iourde; ces ustensiles sont generalement instables et
peuvent facilement basculer, Un ustensile Iourd Iorsqu'il est
rempli peut egalement etre dangereux lots des manipulations,
Veiller a utiliser un ustensile de taille suffisante pour que le
contenu ne risque pas de deborder, Ceci est particulierement
important pour un ustensile rempli d'huile de friture, Verifier
que la taille de I'ustensile est suffisante pour qu'il puisse
recevoir les produits dimentaires a cuire, et absorber
I'augmentation de volume suscitee par I'ebullition de la
graisse,
Pour minimiser les risques de brfllure, d'infiammation de
matieres et de renversement par contact non intentionnel avec
un ustensile, ne pas orienter la poignee d'un ustensile vers un
brOleur adjacent; orienter toujours la poignee d'un ustensile
vers le cote ou I'arriere de [appareil; ne pas laisser non plus la
poignee d'un ustensile deborder a [avant de I'appareil, ou] un
jeune enfant pourrait facilement la saisir,
Veiller a ne jamais laisser le contenu liquide d'un ustensile
s'evaporer completement; Fustensile et I'appareil pourraient
subir des dommages,
Appliquer les instructions du fabricant lots de Femploi d'un
sachet pour cuisson au four,
Seuls certains materiaux en verre, vitroceramique, ceramique,
ou certains ustensiles vitri%s/emailles peuvent etre utilises sur
la table de cuisson ou darts le four sans risque de bris sous
I'effet du choc thermique. Observer les instructions du
fabricant lots de Futilisation d'un ustensile en verre.
La secur[te de fonctionnement de cet apparel[ a ete testee
I'aide d'ustensiles de cuisine conventionnels. Ne pas utiliser un
ustensile ou accessoire qui n'est pas specifiquement
recommande darts ce guide. Ne pas utiliser de couvre-brQleur,
gril place sur la table de cuisson ou systeme de convection
additionnel. L'utilisation d'un dispositif ou accessoire qui n'est
pas expressement recommande darts ce guide peut degrader
la securite de I'appareil ou sa performance, ou reduire la
Iongevite des composants.
Nettoyage et s curit
Arreter routes les commandes et attendre le refroidissement
de tousles composants avant de les toucher ou d'entre-
prendre le nettoyage, Ne pas toucher la grille d'un brOleur ou
la zone voisine avant que ces composants aient pu suffisam-
merit refroidir,
Exercer une grande prudence [ors du nettoyage de ['apparefl,
Travailler prudemment pour eviter des brQlures par la vapeur
en cas d'utilisation d'un chiffon ou d'une eponge humide lots
de I'elimination d'un produit renverse sur une surface chaude,
Certains produits de nettoyage peuvent generer des vapeurs
nocives Iorsqu'on les applique sur une surface chaude,
Four autonettoyant
Ne laisser aucune nourriture ni ustensi!e de cuisinel etc,
dans le four lots d'une op_rat!on d'autonettoyage,
Nettoyer uniquement les pieces mentionnees dans ce guide.
Ne pas nettoyer le joint de porte; le joint joue un role essentiel
quant 8 [etancheite. Ne pas frotter, endommager ou deplacer
le joint. Ne pas utiliser de produit de nettoyage du four darts
le four autonettoyant ou sur les zones voisines.
Avant d'executer une operation d'autonettoyage, retirer la
lechefrite, les grilles du four et les autres ustensiles, et eliminer
par essuyage tout exces de residus renverses pour eviter la
formation de fumee ou I'infiammation de ces residus.
II est normal que la surface de cuisson devienne chaude
durant une operation d'autonettoyage; par consequent, eviter
de toucher la surface de cuisson durant I'autonettoyage,
28
Avertisse ent et avis
i portant pour la s curit
La Ioi californienne _Safe Drinking Water and Toxic Enforce-
ment Act >>de 1986 (proposition 65)stipule la puNication par
le gouvemeur de la Californie d'une liste de substances que
Fetat de Californie considere comme cancerigenes ou
dangereuses pour le systeme reproducteur, et impose aux
entreprises commerciales [obligation de signaler a leurs
clients les risques d'exposition a de telles substances,
Les utilisateurs de cet appareil peuvent etre exposes a une
faiNe concentration de certaines substances figurant darts la
liste mentionnee ci-dessus, dont benzene, formaldehyde et
suie, du fait de la combustion incomplete du gaz naturel ou du
gaz de petrole liquefie, Pour minimiser la combustion
incomplete, veiller ace que les brQleurs soient parfaitement
regles, Pour minimiser Fexposition a ces substances, veiller
bien evacuer les gaz de combustion a Fexterieur,
Nous informons [es uti[isateurs de cet apparei[ que [ors d'une
operation d'autonettoyage, ils peuvent etre exposes a une
faible concentration de certaines substances figurant darts la
liste mentionnee ci-dessus, dont le monoxyde de carbone,
Pour minimiser [exposition, veiller ace que la piece ouse
trouve le four soit convenablement aeree durant une operation
d'autonettoyage par I'ouverture d'une fenetre ou d'une porte,
AViS IMPORTANT - OISEAUX FAMILIERS : Les oiseaux ont
un systeme respiratoire tres sensible, Ne pas garder un oiseau
familier darts la cuisine ou darts une piece oeil pourrait etre
expose aux fumees, Les fumees emises durant une operation
d'autonettoyage peuvent etre dangereuses ou mortelles pour
un oiseau, de meme que les fumees emises Iors du chauffage
excessif de graisse, huile, margarine, et du chauffage excessif
darts un ustensile _ revetement antiadhesif,
Conserver ces instructions pour consultation ult rieure
29
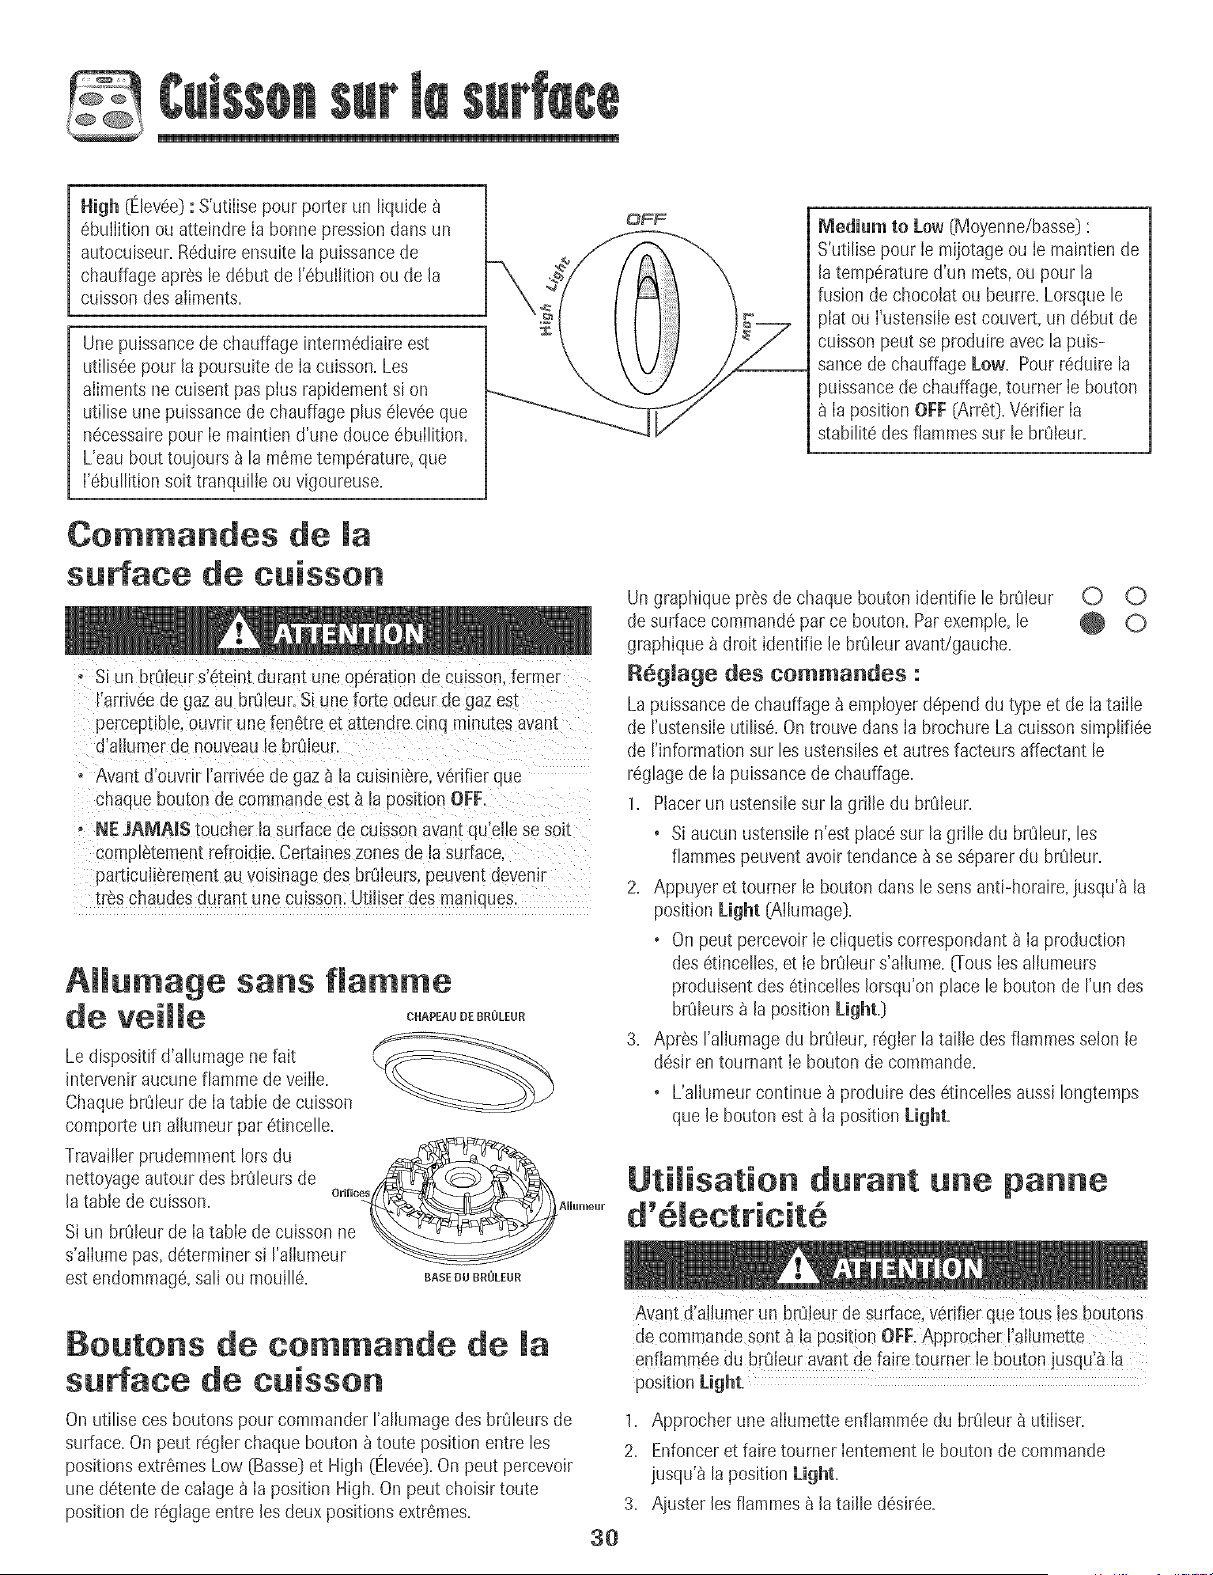
High (Elevee]:S'utilise pour porter un liquide
ebullition ou atteindre ia bonnepression dansun
autocuiseur+Reduireensuitela puissancede
chauffageapres ledebut de %builit[on ou de la
cuissondes ailments+
Une puissancede chauffage intermediaireest
utitiseepour [a poursuitede Ia cuisson+Les
aliments necuisent pas plus rapidementsi on
utilise unepuissancede chauffageplus 6leveeque
n6cessairepour Ie maintiend'une douce ebullitlon+
L'eau bout toujours _ la memetemperature,que
I'ebullition soit tranquille ou vigoureuse.
iViedium to Low(Moyenne/basse}:
S'ut[lisepour Ie mijotageou Ie maintien de
latemperatured'un mets,ou pour la
fusion de chocolatou beurre.Lorsquele
_iatou I'ustensfleestcouvert,un debut de
cuisson peut se produireavecla puis-
sancede chauffageLow. Pourreduire la
_uissancede chauffage,tourner Ie bouton
Ia positionOFF(Arret}.Verifier Ia
stabilite des flammessur le brOleur.
Commandes de la
surface de cuisson
• Si un brOleurs'eteintdurant uneoperationde cu+sson,ferme+
I'amveedegaz au brOIeur.Si u+_eforte odeur de gaz est
perceptibte,ouvrir une fenetre et attendre cinq minutesavan[
d'a[iumerde nouveau[e brOleur.
° Avantd'ouvdr ['arriveede gaz a [a cu[sin[ere,v6rifierRUe
cnaquebouton de commandeest a [a position OFF
+ NEJAiViA[Stoucher [asurface de cuLssonavantqu'elle se soit
completementref oldie.Certalneszones de +asur[ace
part+cuii_rementau voLsmagedes br_iieurs,peuventdevenh
treschaudesdurant unecuisson.Utfliser des maniqdes.
Allumage sans flamme
de veille +++o,o°0+o
Ledispositifd'a%mage ne fait
interveniraucune fiammede veille.
ChaquebrCJleurde Iatable de cuisson
comporte un alhmeur par 6tincelle.
Travai[[erprudemmentIorsdu
nettoyageautour des brCJ[eursde ,d_ (-_ :i_'x_
[atable decuisson. °'m__,m+
Si un brOleurde latable de cuisson ne _,,__
s'allume pas,determinersi I'a[lumeur
est endommage,saltou mouille. BASEU°BROLEUR
go°tons de eommande de la
surface de euisson
OnutiHsecesboutonspour commander['aliumagedes br8ieursde
surface.Onpeut reglerchaquebouton _ toute position entre les
positionsextremesLow [Basse}et High (Elevee}.On peut percevoir
unedetentede caiage_ [a position High.Onpeut choisirtoute
positionde regiageentre [es deux positionsextremes.
30
Un graphiquepres de chaquebouton identifie le brOleur
de surfacecommandeparce bouton.Parexemple,le
graphique_ droit identifie [e brOleuravant/gauche.
Regiage des commandes :
La puissancede chauffage_ employerdepend du type et de [ataii[e
de rustensiie uti[ise+Ontrouve dans[a brochureLa cuisson simpli%e
de rinformation sur [esustensi[eset autresfacteurs affectant [e
reglagede [a puissancede chauffage+
1+ Placerun ustensilesur [agrille du brOieur+
o Si aucun ustensiien'est placesur la grille du bffJleur,les
fiammespeuventavoir tendance_ se separerdu brOieur+
2+ Appuyer et toumer le boutondans le sensant[-horaire,jusqu'_ [a
positionLight (AIlumage}.
o On peut percevoir[e ciiquetiscorrespondant_ [a production
des6tincelles,et ie brOleurs'ailume+{Tous[es aliumeurs
produisentdes etincefles[orsqu'onplace le bouton de run des
brO[eurs_ [a positionLight.}
3. Apres rallumage du brOleur,reglerla ta[lledes flammesselon le
desJren tournant Ie bouton de commande.
o L'aliumeurcontinue _ produJredes etince%s aussiIongtemps
quele boutonest _ la positionlight+
Utilisation durant une panne
Avantd'aihmer Unbr8ieur de surface,verifier quetousies boutons
de commandeSont_ la positionOFF.App[ocheEI'allumette
en%mmee du brOJeuravantde faire tourner le b0uton JUSqU'_!a
positionLight.
1. Appmcher une ailumetteenfiammeedu br8leur a utiliser.
2. Enfonceret faire tourner Ientementle boutonde commande
jusqu'_ la positionLight,
3. Ajuster [esflammesa [ataJlledesiree.
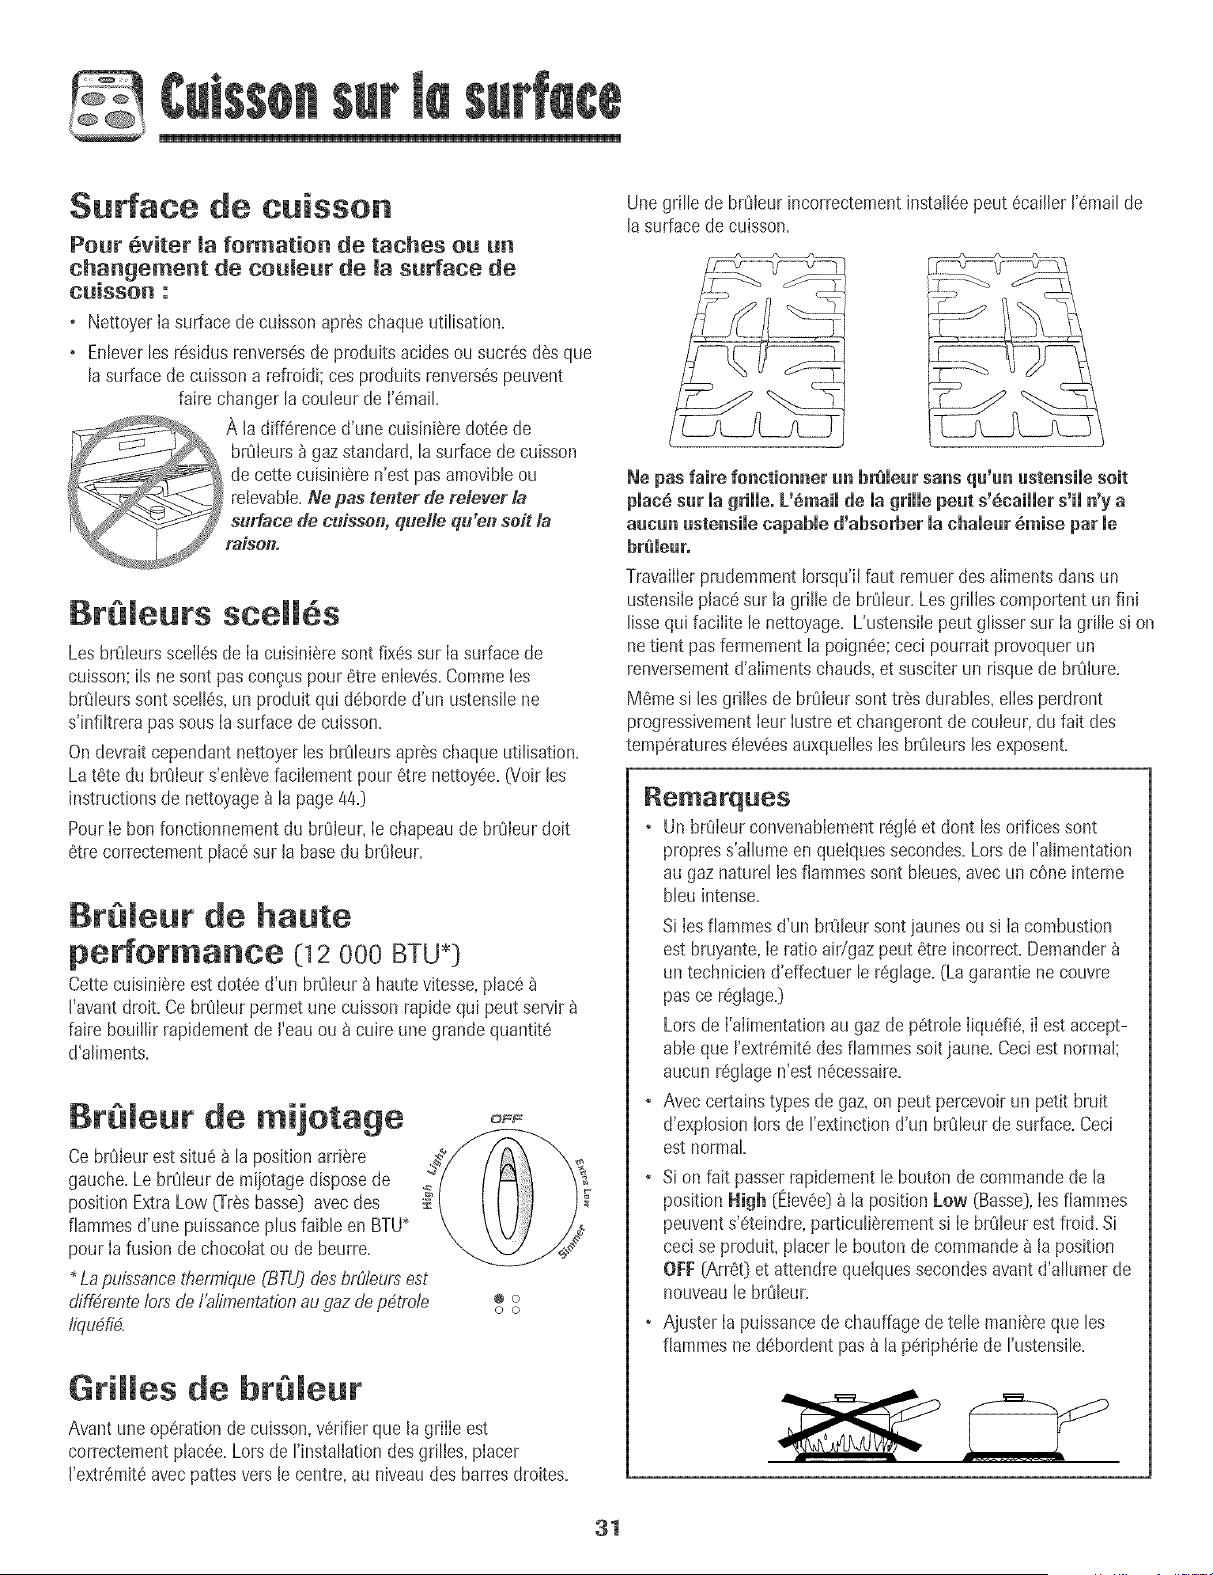
@
Surface de. cuisson
Pout 6vitet la formation de taches ou un
changement de couleur de la surface de
cu[sson :
• NettoyerIa surfacede cuissonapres chaqueutilisation.
• Enbver bs r6sidusrenvers6sde produitsacidesou sucr6s desque
lasurface de cuissona refroidi; ces produits renvers6speuvent
faire changer lacouleur de I'6maiL
__A la diff6renced'une cuisiniSredot6e de
= __ brOieurs_ gazstandard,la surfacede cuisson
• de cette cuisini_re n'est pasamovibleou
retevabie.Ne pas tenter de relever la
surface de cuissetl, quelle qu'en seit la
raison.
Br@leuts sceH s
Les brOleursscelI6.sde Ia cuisiniSresont fixessur Iasurface de
cuisson:ils nesent gas con_uspour 6tre enlev6s.Commeles
brOleurssont scell6s,un produit qui d6borded'un ustensJlene
s'infiltrera passousIa surfacede cuJsson.
Ondevraitcependantnettoyerles brOleursapres chaqueutilisation.
Lat6te du brOleurs'enlSvefaciiementpour 6tre nettoy6e.(Voir les
instructionsde nettoyage_ la page 440
PourIe bon fonctionnementdu brOieur,Ie chapeaude brOleurdoit
6tre correctementplac6sur la basedu brQleur.
Br@leur de haute
performance 0 2 000 BTU*])
CettecuisiniSreestdot6e d'un brOleur_ hautevitesse,plac6
J'avantdroll Ce brOieurpermet unecuisson rapidequi peut servir
faire bouiiJirrapidementde J'eauou _cuire unegrande quantit6
d'aliments.
Br@lew" de mijotage
Ce brOburestsitus _ la position arriSre
gauche=Le brOleurde mijotagedisposede
positionExtraLow (TrSsbasse[)avecdes
fiammesd'une puissanceplus faible en BTU"
pour Ia fusionde chocolat ou de beurre.
Lapuisaancetherm,igue(BTU)desbrCtteursest
diff4rentebrs de f'a_;Jmentationau daz de p4,trote
/kiudi4.
OFF
@ 0
0 0
Grilles de br@leur
Avantune op6rationde cuisson,v6rifier que la grille est
correctementplac6e.Lotsde I'installat[ondes grilles,placer
I'extr6mJt6avecpattesversle centre,au niveaudes barresdroites.
Une grille de brOleurincorrectementinstalleepeut 6caillerl'6mailde
la surfacede cuisson.
Ne pas faire follctiollner an brelear sans qu'_ ustensile soit
plac_ s_r la grille, L'_mail de la grille peat s'_cailler s'ii n'y a
aacan astensile capable d'abserber machaiear _mise par me
breme_r,
TravaiIIerprudemmentIorsqu'ilfaut remuerdesailments dansun
ustensiIeplacesur la grille de brOleur.LesgrilIescomportentun fini
IJssequi faciIite le nettoyage.L'ustensiIepeut glissersur Ia grilIe si on
netient pas refinementla poign_e;ceci pourrait provoquerun
renversementd'aiimentschauds,et susciterun risquede brOIure.
MSmesi bs grilles de brOIeursonttr_s durabIes,etIesperdront
progressivementbur Iustreet changerontde couIeur,du fait des
tempSratures_levSesauxquellesles brQleumles exposent.
Remarques
• Un brQIeurconvenabIementr_gl8 et dont lesorifices sont
propress'aIlumeen queIquessecondes.Lotsde ralimentation
au gaz naturel lesflammessont bleues,avec un cone interne
bleuintense.
Si Iesfiammesd'un brQbursent jaunesou si Ia combustion
est bruyante,Ieratio aidgaz peut Qtreincorrect.Demander
un technicien d'effectuer le rQglage.(Lagarantie ne couvre
pas ce r_glage0
Lotsde I'alimentationau gazde p8trole Iiqudi& iI est accept-
able que I'extrQmit6desfiammessoit jaune. Ceciest normal;
aucun r_glagen'est nScessaire.
• Aveccertainstypes de gaz,on peut percevoirun petit bruit
d'explosionIorsde rextinction d'un brQleurde surface.Ceci
est normal
• Sion fait passerrapidement le bouton de commandede la
position High (Elev_e}_ la position Low (Basse},Iesflammes
peuvents'@teindre,particuli@rementsi Ie brQleurestfroid. Si
ceci se produit placer le bouton de commandea Japosition
OFF(Arr6t} et attendrequeJquessecondesavantd'allumer de
nouveauJebrOleur.
• Ajuster Ia puissancede chauffagedetelle mani6reque les
fJampaesned_bordent pasb Jap@rJph@rJede rustensJle.
31
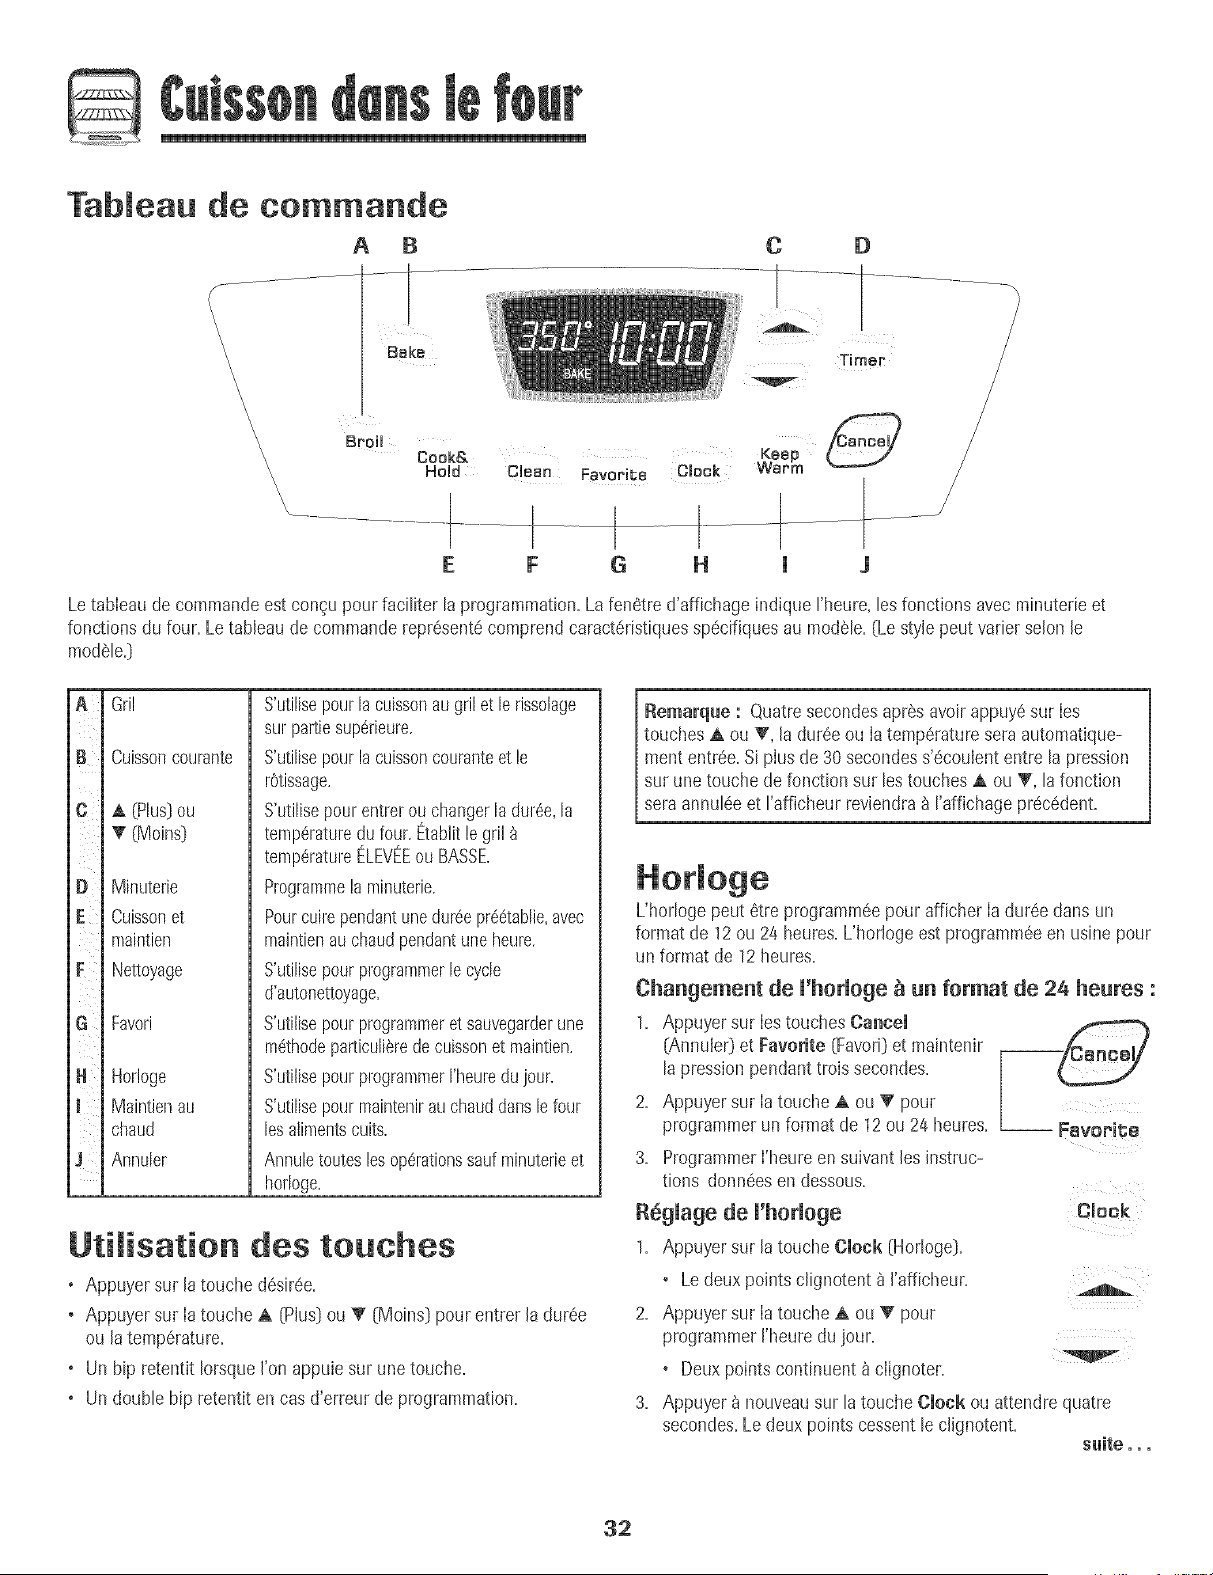
Tableau de commande
\
\
\
\
\
A B
Bake
C O
Timer
Broil Keep
\\\\\ War m
k
\
\
\_
Cook&
Hdd CUean Favorite Clock
E F G H l J
Letableau decommandeestcongu pourfaciliter h programmation.La fen6tre d'affichageindique rheure+lesfonctions avec minuterieet
fonctions du four. Letableaude commanderepr6sent6comprendcaract6ristiquessp6cifiquesau modSle.(Le stylepeut varier selon le
module.)
B
[}
G
H :
+
Gril
Cuissoncourante
_, (Plus)ou
T (Moins)
Minuterie
Cuissonet
maintien
Nettoyage
Favori
Horloge
Maintienau
chaud
Annuler
S'utilisepourlacuissonaugrilet lerissolage
sur pattiesup6rieure.
S'utilisepourlacuissoncouranteet le
r6tissage.
S'utilisepourentrerou changerladur6e,la
temp6raturedu four. Etablitle grilb
temp6ratureELEVEEou BASSE.
Programmelaminuterie.
Pourcuirependantunedur_epr6etablie,avec
maintienauchaudpendantune heure.
S'utilisepourprogrammerle cycle
d'autonettoyage.
S'utiiisepourprogrammeret sauvegarderune
mdthodeparticuli#.rede cuissonet maintien.
S'utilisepourprograramerI'heuredujour.
S'utilisepourmaintenirauchauddanalefour
losatiraentscults.
Annuletouteslesop6rationssad minutefieet
horloge.
Utilisation des touches
o Appuyer sur la touche d6sir6e,
, Appuyer sur Ia touche A (Plus)ou _' (Moins) pourentrer la dur6e
ou latemperature+
o Un bip retentit IorsqueI'on appuiesur une touche.
o Un double hip retentit encas d'erreur de programmation.
Remarque :Quatre secondesapresavoir appuy6sur Ies
touches A ou T, la dur6eou Ia temperatureseraautomatique-
mententree.Si plus de 30 secondess'6couIententre la pression
sur une touchede fonction sur lestouches A ou T, la fonction
[sera annu 6e et afficheur reviendrab affichagepr6c6dent.
L'horloge pout 6tre programm6e pour afficher Ia dur6e clans un
format de 12 ou 24 heures. L'horloge est programm6e en usine pour
un format de 12 heures.
Changement de l'horloge _ mi format de 24 heures :
1. Appuyersur Iestouches Cancel
(Annuie0et Favorite (Favori)et maintenir
la pressionpendant troissecondes.
2. Appuyersur Iatouche A ou _!' pour
programmerun format de 12ou 24 heures.
3. ProgrammerI'heureen suivantles instruc-
tions donn6esen dessous.
Regia9 e de l'horioge
1. Appuyersur latouche Clock (Horloge).
• Ledeux points clignotent 8 I'afficheur.
2. Appuyersur Iatouche A ou T pour
programmerI'heuredu jour.
• Deuxpointscontinuent _ ciignoter.
i iii_ i
-- Favorite
Clack
3. Appuyerb nouveausur la touche Clock ou attendrequatre
secondes.Le deuxpoints cessentle clignotent.
suite° o.
32
©
LorsqueIe courant61ectriquearriveou apr_s une interruption de
courant,ta demiSreheureavantrinterruption de courantva
clignoter.
Pourrappelerrheure du jour brsqu'une autre fonction de dur@
s'affbhe, appuyersur latouche Clock (Horbge}.
L'heure de I'horbge nepout 6tre chang@ Iorsquete four a 6t6
programm6pour une cuissonou un nettoyagediff6r6 ou pour la
fonction de cuissonet maintien.
Annumation de m'affichage de m'heure :
Si I'onne d@ire pasI'affichagede I'heuredu jour :
Appuyersur Iestouches Cancel {Annule0 et
Clock et les maintenirainsi pendanttrois
secondes.L'heure du jour disparaitde
I'afficheur.
LorsqueI'affichagede I'heureest annu+6,
appuyersur Ia toucheClock pour afficher
bri6vementrheuredu jour.
R6affichage de m'heure :
-- Clock
Appuyersur Iestouches Cancel et Clock et les maintenirainsi
pendanttrois secondes.L'heuredu jour r6apparait_ I'afficheur.
La minuterie peut 6tre programm@ de une minute (0:00 jusqu'_
99 heures et 59 minutes (99:59}.
La minuterie pout 6tre utilis@ ind@endamment de toute autre
activit6 du four. Elle peut 6tre aussi programm@ aJors qu'une autre
fonction du four est en cours d'utilisation.
La minuterb ne commandepas b four.Elienesert qu'a 6mettredes
bips.
Programmation de maminuterie : }
1. Appuyer sur la toucheTimer [Minuterie}. T!mer
+ 0:00clignote _ I'afficheur.
• Lesdeux pointsclignotent.
2. Appuyer sur latouche _kou T jusqu'a ce que
rheurejuste paraisse_ I'afficheur.
+ Losdeux pointscontinuent _ clignoter.
3. Appuyer _ nouveausur latouche Timer ou attendre quatre
secondes.
+ Lesdeux pointscontinuent _ clignoteret le d@omptede la
dur@ commence.
+ Laderni6re minutedu d@omptesera affich@ sousformede
secondes.
4. A la fin de ladur6e programm@,un hip long retentit.
Annumation de maminuterie :
1. Appuyer sur la toucheTimer et la maintenir ainsi pendanttrois
secondes.
OU
2. Appuyer sur la toucheTimer et r6glerI'heure_ 0:00.
Verrouimmage des commandos
Lostouches peuvent6tre verrouiII@spour des raisonsde s6cur+t6,
nettoyageou pouremp@hertoute utiIisationnon souhait@.Ellesne
pourront 6tre utiIis6essi olios sontverrouill6es.
Sile four esten cours d'utilisation,les commandesne peuvent6tre
verrouill6es.
L'heure actuelb dujour restera_ I'afficheur Iorsquelescommandos
serontverrouill@s.
Verrouillage :
Appuyersur lestouches Cancel et Cook &
Hold [Cuissonet maintien}et ies maintenir
ainsi pendanttrois secondes.[Appuyer
d'abord sur latoucheCancel.}
D6verrouimmage:
Cook&
-- Hold
Appuyersur Jestouches Cancel et Cook & Hold et tesmaintenir
ainsi pendanttrois secondes.(Appuyerd'abord sur la touche
Codes d'anomamie
Los rootsBAKE{Cu+ssoncourante}ou LOCK07errouillage}peuvent
ciignoter rapidement_ I'afficheurpour pr@eniren casd'erreur ou de
probl6me.Sitel est le cas,appuyersur iatouche Cancel+Si les roots
BAKEou LOCKcontinuent _ clignoter,d6brancheri'appare+i.
Attendrequelquesminutes,pub rebrancherI'appareii.Si i'un des
rootscontinueb clignoter,d6brancherI'appareilet prendrecontact
avecun r@arateur autoris6.
33
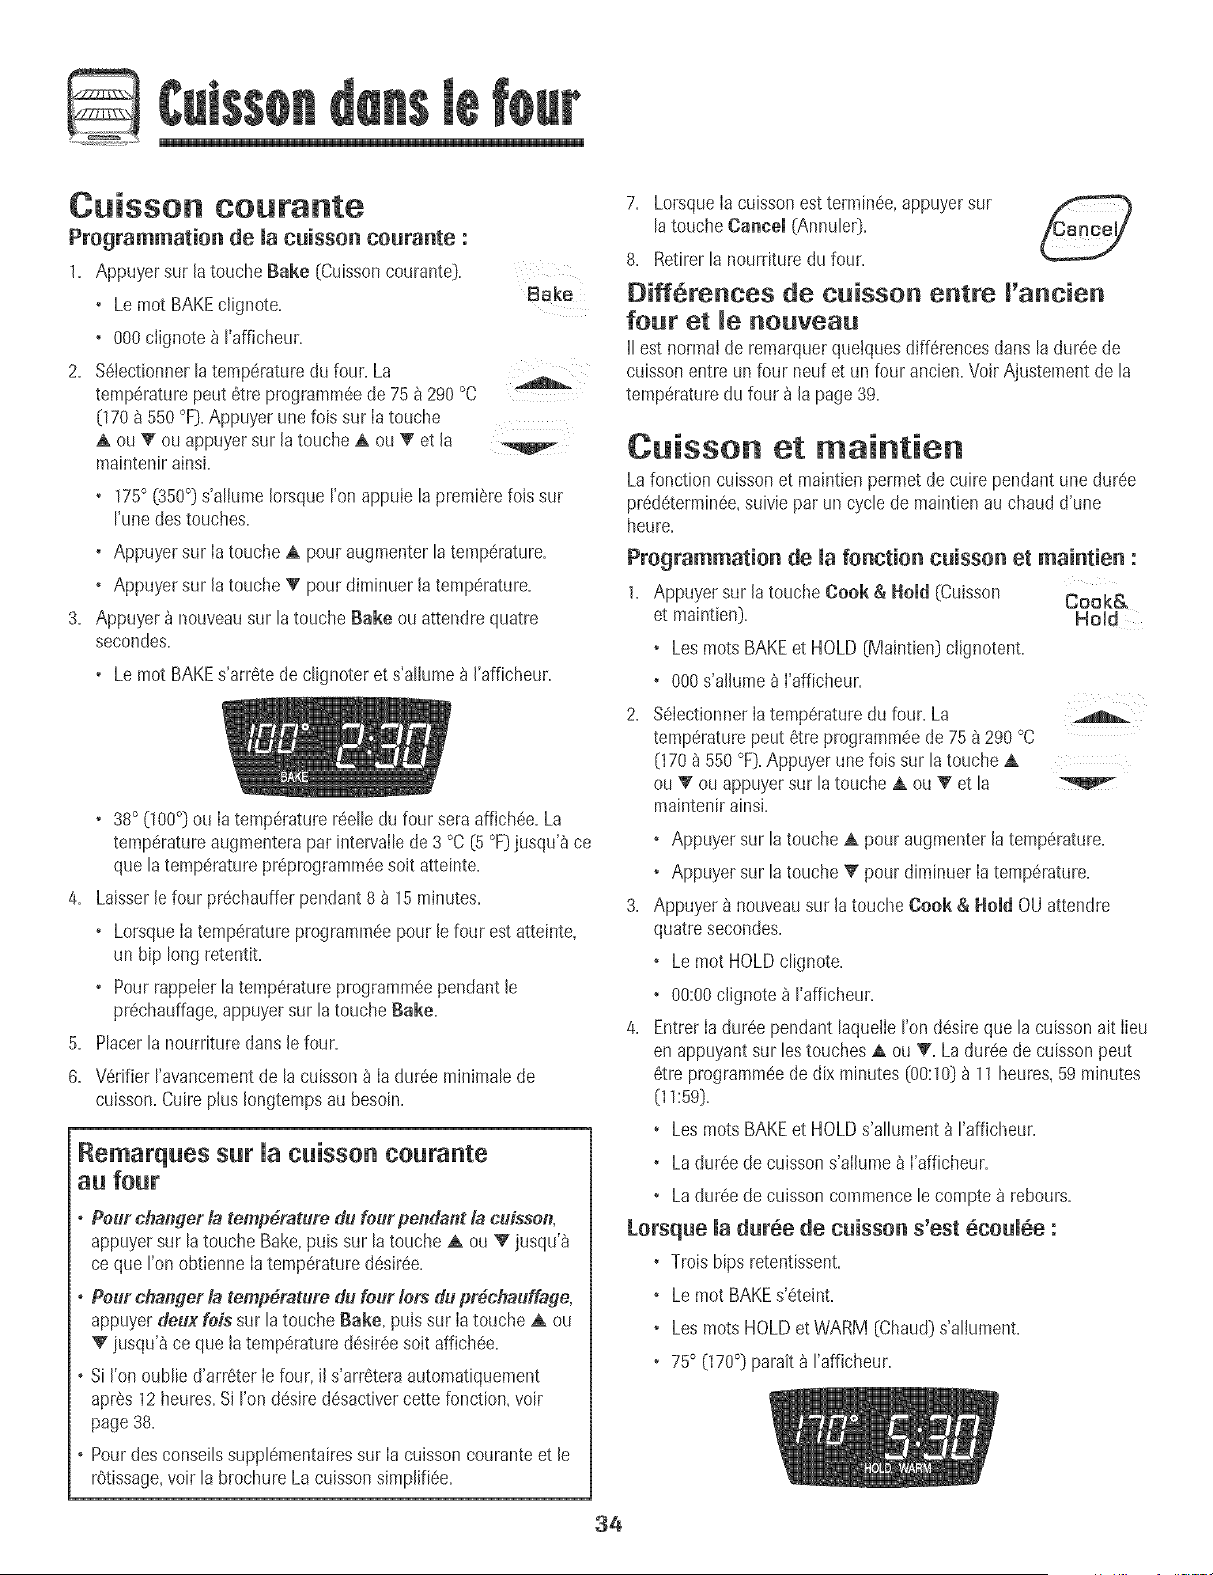
Cuisson courante
Programmation de la cuisson courante :
1. Appuyer sur la toucheBake (Cuissoncourante].
• Lemot BAKEc@note.
Bake
• 000clignote _ I'afficheur=
2= %tectionner la temp6raturedu four. La
temp6raturepout #tre programm6ede 75 _ 290°C
(170_ 550 OF].Appuyer unelois sur Ia touche
A ou You appuyersur latouche A ou Tet la
maintenirainsL
• 175° (350°] s'allumeIorsqueron appuie la premiSrefois sur
rune des touches.
• Appuyer sur Ia touche A pour augmenterla temp6rature.
• Appuyer sur la toucheT pour diminuer latemperature.
3. Appuyer _ nouveausur latouche Bake ouattendre quatre
secondes.
• Lemot BAKEs'arr6tede clignoter et s'allume_ I'afficheur=
• 38° 000°] ou Ia temp6raturer6elle du four sera affich6e.La
temp6ratureaugmenterapar intervallede 3 °C [5 °F]jusqu'_ ce
que la temperaturepr6programm6esoit atteinte.
4. Laisserlefour pr6chauffer pendant8 _ 15minutes. 3.
• LorsqueIatemperatureprogramm6epour le four est atteinte,
un bip long retentit.
• Pourrappelerla temp6ratureprogramm6ependant le
prechauffage,appuyersur la touche Bake.
4.
5. Placerlanourriture dans le four.
6. V6dfier ravancementde la cuisson_ Ia dur6e minimale de
cuisson.Cuireplus Iongtempsau besoin.
RemarqBes sw" Ua cuissoB COBtaBte
au (out
oPour chartger& temp6.raturedu four pendant la cufsson,
appuyersur latouche Bake,puis sur latouche ,A ou V jusqu'_
ce que I'onobtienne Iatemp6ratured6sir6e.
oPour changer& temp6rature du four lots du pr_chauffaffe,
appuyerdeux lois sur latoucheBake, puis sur Iatouche ,A ou
V jusqu'_ ceque latemp6.ratured6sir6.esoit affich6e.
oSi I'onoublie d'arrSterIefour, il s'arr6teraautomatiquement
aprSs12heures.Si I'ondesired6sactivercette fonction,voir
page38.
o Pourdes conseilssupplSmentairessur Ia cuissoncouranteet le
rOtissage,voir la brochure LacuissonsimpfifiSe.
7. LorsqueIacuisson estterm[n6e,appuyersur
latouche Cancel (Annule0.
8. Retirerla nourriture du four.
Oiff re ces de c isso entre I'a cien
fo r et le no vea
IIest normal de remarquerqueiquesdifferencesdartsladureede
cuissonentre un four neuf et un four ancien=Voir Ajustementde la
temperaturedu four _ la page 39=
C isso et maintien
Lafonction cuissonet mah_tienpermetdecuire pendantune duree
prSd_terminSe,suivie par un cyclede maintienau chaud d'une
heure,
Programmatio_ _e la fo_ctio_ c_isso_ et mai_tie_ :
1. Appuyer sur la toucheCook & Bold (Cuisson Cook&
et maintien]= Hold
• Losmots BAKEet HOLD (Maintien] c@notent=
• 000s'alhme _ I'afficheur=
2. S6IectionnerIatempSraturedu four. La
temperaturepout 8tre programmSede 75 _ 290 °C
(170_ 550 °F]. Appuyerune fois sur la touche a,
ou _ ou appuyersur la touche _ ou _' et la
maintenirainsi.
• Appuyer sur la touche ,_ pour augmenterla temp6rature.
• Appuyer sur la touche_ pour diminuer Iatemperature=
Appuyer _ nouveausur latouche Cook & Hold OUattendre
quatre secondes=
• Lemot HOLDclignote=
• 00:00clignote_ I'afficheur.
EntrerIadurSependant laquelleI'ond6sireque la cuissonait lieu
en appuyantsur lestouches _k ou 1F.La dureede cuissonpout
6tre programmeede dix minutes (00:10]_ 11heures,59minutes
0_:59],
•Les rootsBAKEet HOLDs'allument _ I'afficheur=
• LadurSede cuissons'alhme _ I'afficheur=
• LadurSede cuissoncompaencele compte_ rebours=
Lorsq_e la d_r_e de c_isso_ s'est _co_l_e :
• Troisbips retentissent=
• Lemot BAKEs'Steint=
• Losmots HOLDet WARM (Chaud]s'alIument.
• 75 ° (170°} paraK _ I'afficheur.
34
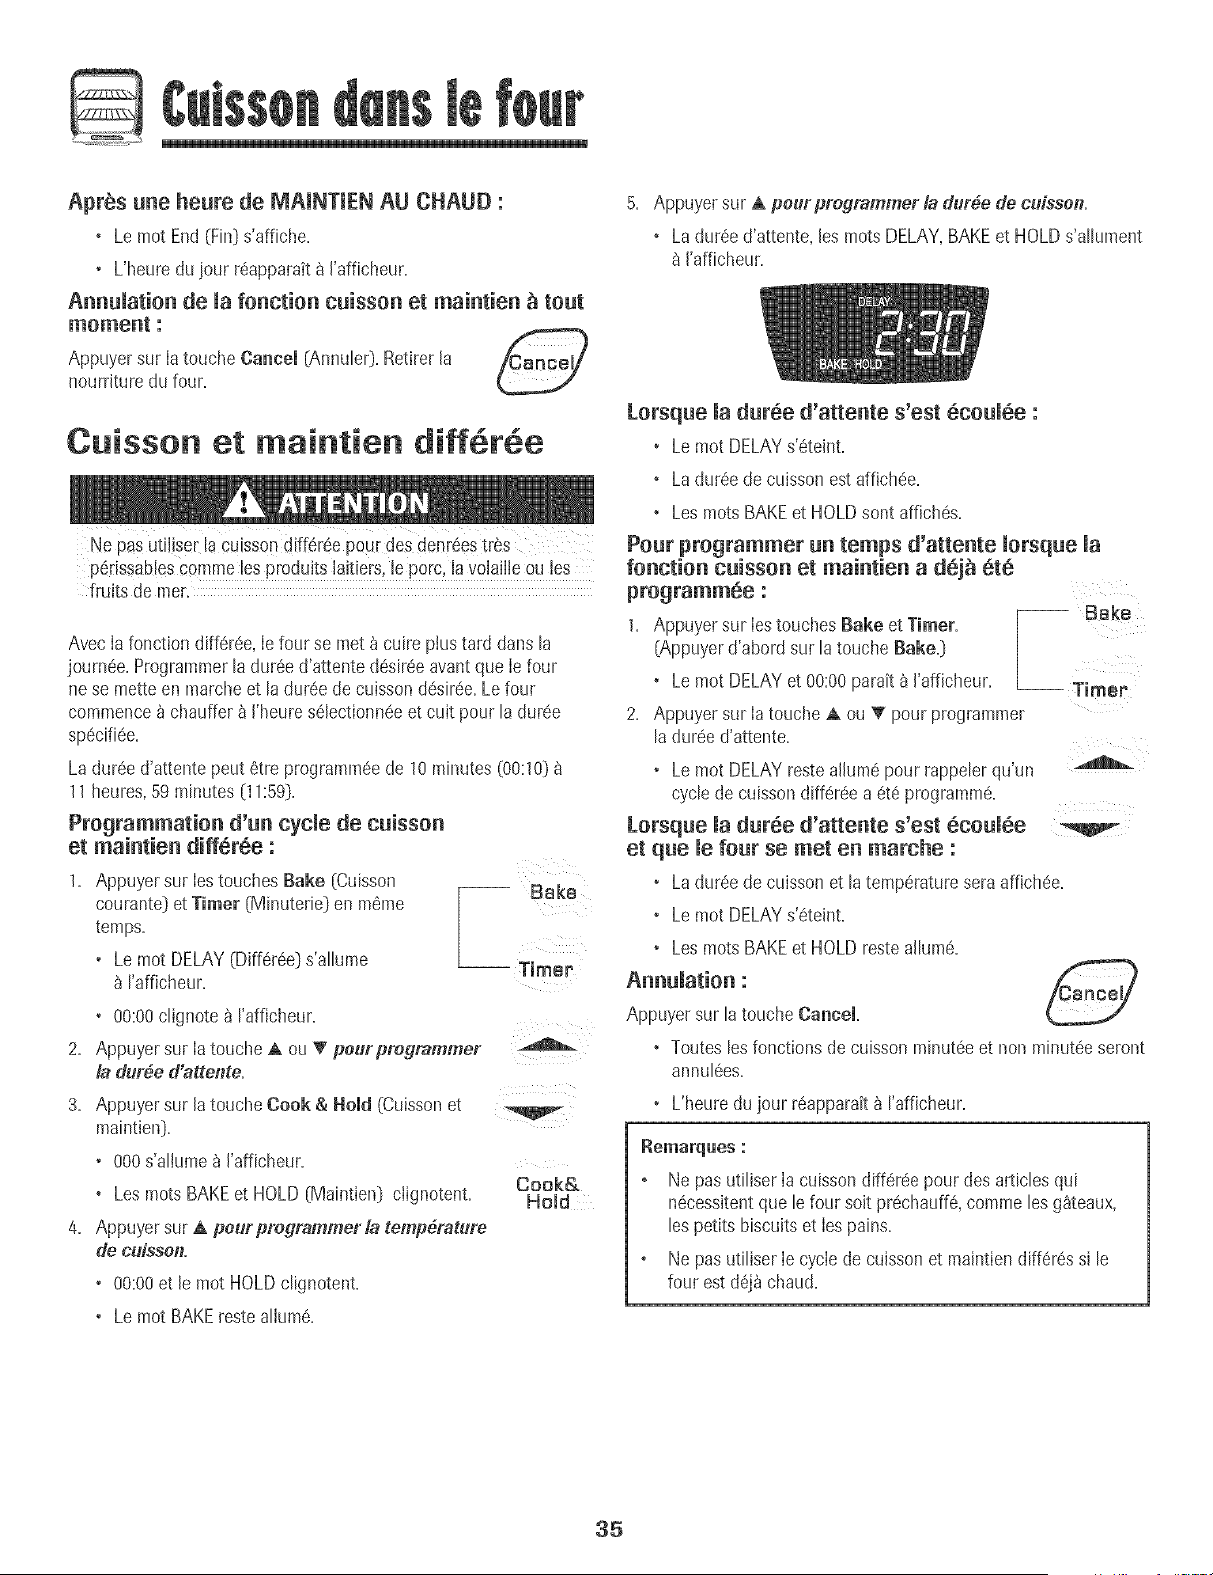
Apr_s une heure de _,_AINTIEN AU CHAUD :
• Lemot End(Fin)s'affiehe,
• L'heuredu iour r6appara_tb ['afficheur.
Annulatien de la fenction cuisson et maintien _ tout
moment :
Appuyersur [atouche Cancel [Annuler). Retirer[a Aenael/
nourrJturedu four.
Cuisson et maintien diff6r6e
pedssab[escomme los produits[aitiers,[e porc, [a vo[ai[leou ies
fruits de rner.
Avec[a fonction diff_r6e,[e four se met_ core plustard dens [a
journee. Programmer[a dur6ed'attented6sir6eavant que [e four
ne se metteen marcheet [adur6e de cuisson desir6e.Le four
commence_ chauffer& ['heures61ectionneeet cult pour [a dur6e
sp6cifi_e.
La dur6ed'attentepeut 6tre programm6ede 10minutes(00:10]
11heures,59 minutes [11:59].
Pregrammatien d'Un cycle de cuissen
et maintien diff@r6e :
1. Appuyer sur [estouchesBake [Cuisson
courante}et Timer (Minuterie} en m6me
temps.
• Lemot DELAY(Diff6r6e}s'aJJume
J'afficheur.
-- Bake
• 00:00c%note _ I'afficheur.
2. Appuyer sur [a toucheA ou _' peurpmfframmer
& dur4e d'atte#te,
Cook&
Hold
3. Appuyer sur [a toucheCook & Hold (Cuissonet
maintien}.
• 000s'aJlume_ ['afficheur.
•Les roots BAKEet HOLD{Maintien} ciignotent.
4. Appuyer sur A peur profframmer & temp#rature
de cuisse#.
• 00:00et le mot HOLDdignotent.
• Lemot BAKEresteallure&
5. Appuyersur A pour prog_mmer # dur#.ede cuisse#,
• Ladur6ed'attente, les motsDELAY,BAKEet HOLDs'aIIument
& I'afficheur.
Lersque la dur@e d'attente s'est @coul@e:
• Lemot DELAYs'6teint.
• Ladur6ede culssonestaffichee.
• LosrootsBAKEet HOLDsent affiches.
Pour programmer un temps d'attente [ersq_e la
fo_ctie_ c_isson et mai_tie_ a d@j_ @t@
pregramm@e :
1. AppuyersurlestouchesBakeetTimer. -- Bake
(Appuyerd'abord sur [a toucheBake.)
• Lemot DELAYet 00:00para_t_ ['afficheur. -- Timet
2. Appuyer sur [a toucheA ou T pour programmer
[adur@ed'attente.
• Lemot DELAYreste al[um_ pour rappeIerqu'un
cycle de cuissondiffer@ea et8 programm&
Lersque [a dur@e d'atteate s'est @coulee
et qae [e fear se met en marche :
• Ladur_ede cuissonet [atemperatureseraaffich_e.
• Lemot DELAYs'Steint.
•Les rootsBAKEet HOLDresteallure&
Appuyer sur la touche Cancel.
• Toutes les fonctions de cuisson minutSe et non minut_e seront
annuiSes.
• L'heuredu jour rSappara_t_ I'afficheur.
Ne pas utiliserla cuissondiffereepour des articles qui
n6cessitentque [efour soit pr6chauff& comme[esg_teaux,
[espetits biscuitset [espains.
Ne pas utiIiser[e cycle de cuissonet maintiendiffSrSss[ [e
four est dSj_chaud.
35
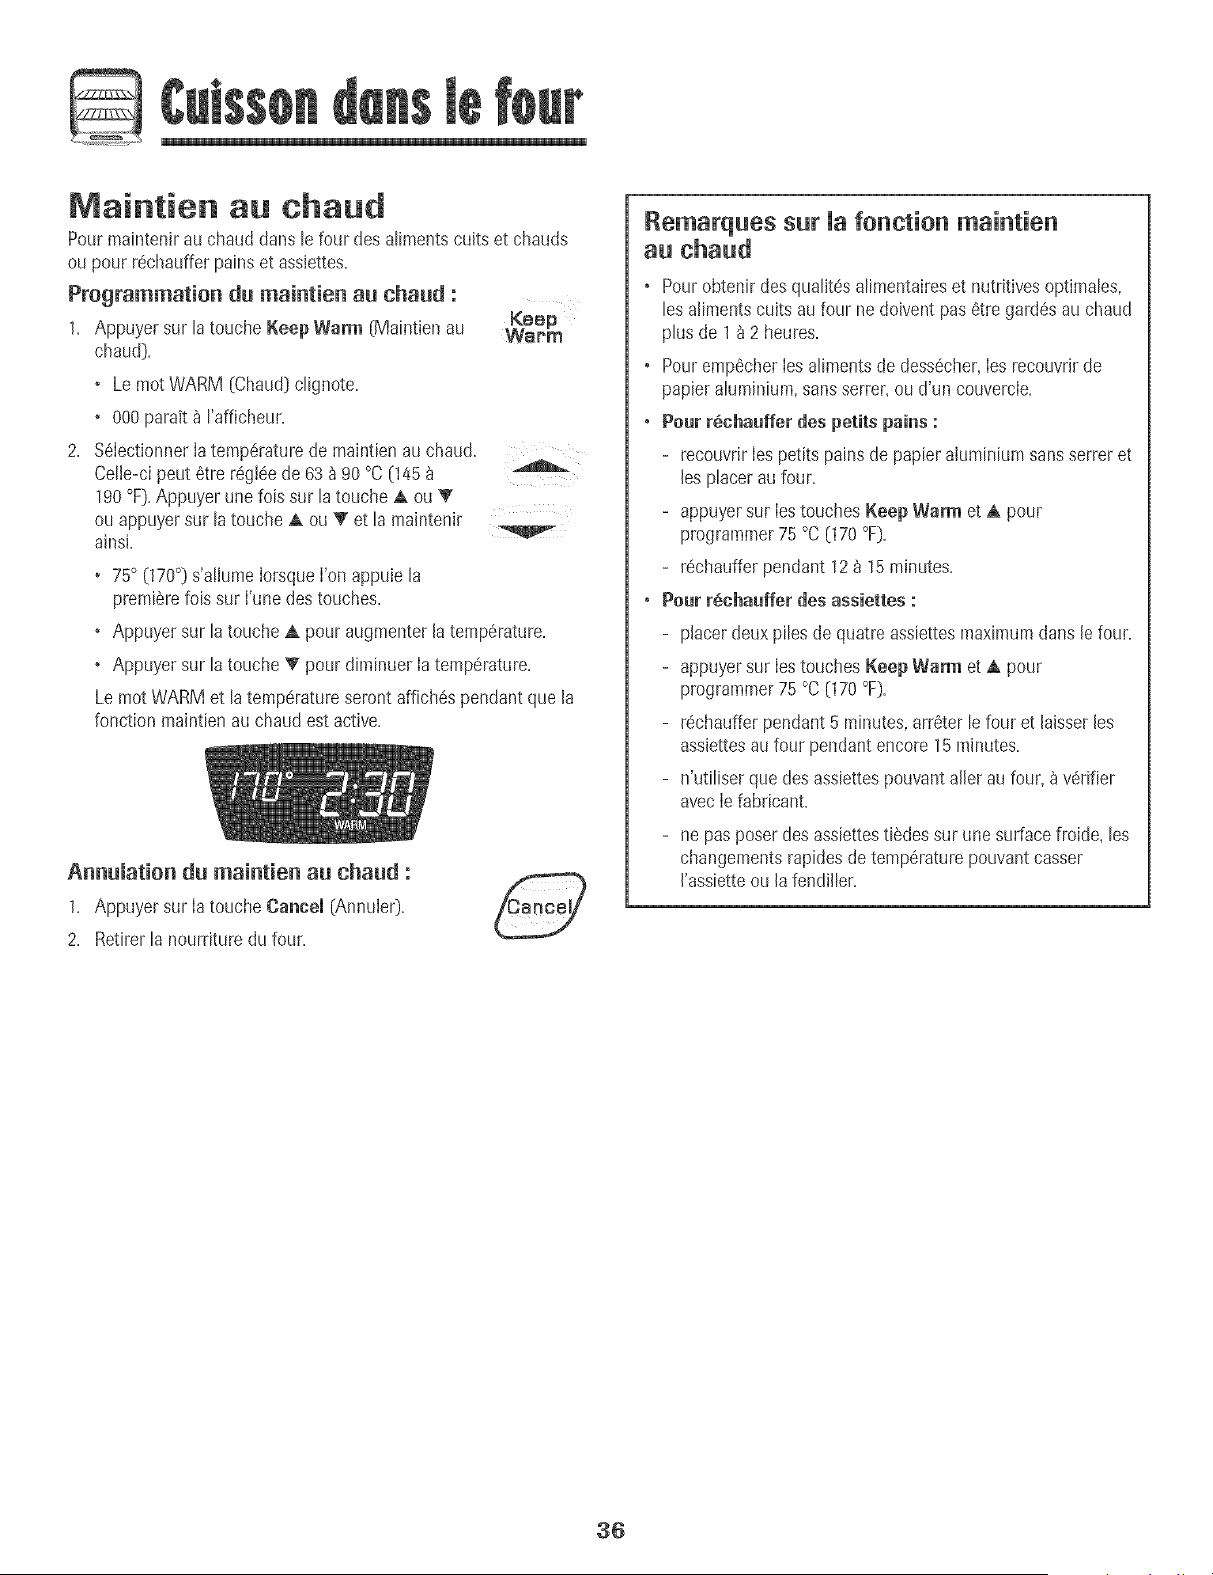
Maintien au chaud
Pourmaintenirau chaud dans [e four des alimentscuits et chauds
ou pour r6chaufferpainset assiettes.
Programmation du maintien au chaud :
1. Appuyersur latouche Keep Warm (Maintienau Keep
WaPm
chaud].
• Le motWARM [Chaud}clignote.
• 000para_t_ I'afficheur.
2. %lectionner la temp6rature de maintien au chaud.
Celle-ci peut 6tre r6gI6e de 63 _ 90 °C (145 _
190 °F}. Appuyer une fois sur la touche A ou _'
ou appuyer sur la touche ,L ou Vet la maintenir
ainsi.
, 75° 070°} s'allumeIorsqueI'onappuie la
premierefoissur I'une destouches.
• Appuyersur latouche A pour augmenterlatemp6rature.
• Appuyersur latouche _' pour diminuer Ia temp6rature.
Le motWARM et la temp6ratureseront affich6s pendantque la
fonction maintienau chaud est active.
Annumation du maintien au chaud :
1. Appuyersur Iatouche Cancel _Annuler).
2. Retirerla nourriture du four.
Remarques sur Uafonetien maintien
au ehaud
, Pourobtenir desqualit6salimentaireset nutritivesoptimales,
les alimentscuits au four nedoivent pas6tre gard6sau chaud
plus de 1a 2 heures.
• Pouremp6cherIesalimentsde dess6cher,Iesrecouvrirde
papieraluminium,sansserrer,ou d'un couvercle.
• Pour r_chauffer des petits pains :
- recouvrir Ies petits painsde papier aluminium sans serreret
les placerau four.
- appuyersur IestouchesKeep Warm et A pour
programmer75°C {170 °F}.
- r6chaufferpendant 12_ 15minutes.
• Pour r@chaufferdes assiettes :
- placerdeux piles de quatreassiettesmaximumdans le four.
- appuyersur IestouchesKeep Warm et A pour
programmer75 °C (170 °F).
- r6chaufferpendant 5 minutes,arrSterle four et laisserles
assiettesaufour pendant encore 15minutes.
- n'utiliser que desassiettespouvantaller au four, _ v6rifier
avecIefabricant.
- ne pasposer desassiettesti6dessur unesurfacefroide, les
changementsrapidesde temp6raturepouvantcasser
I'assietteou lafendiller.
36
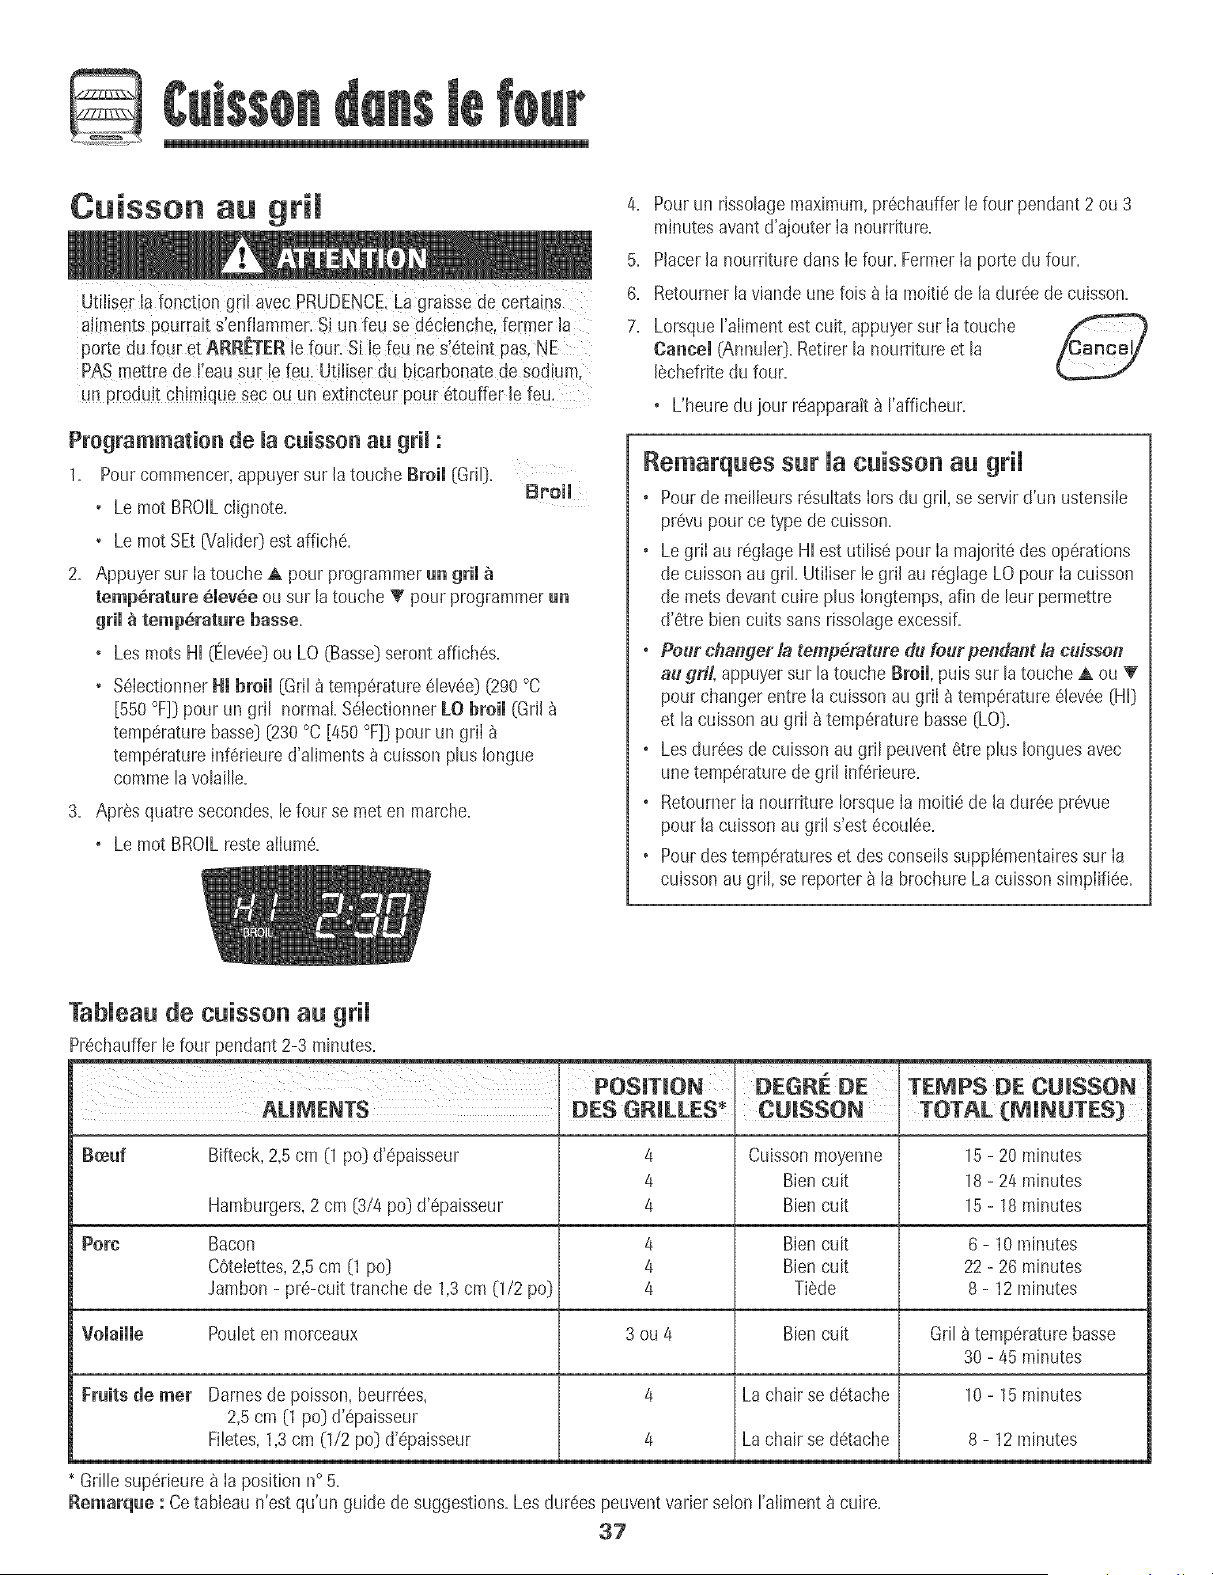
Cuisson au gril
Utiliserla fonction gril avec pRUDENCELagraissede certains
a!imentspourrai[ s'enfiammer.Si un feu se d6clenche,former la
porte du four et ARBE[ER le foul. Si lefeu nes_teint pas, NE
PAS mettre de [eau sur Ie fOu,UtJliserdu bica[bo[_atede sodium,
un produit chimiquesec ou un ext!ncteurpour 6touffer !e feu:
Programmation de la cuisson au gril :
1, Pourcommencer,appuyersur la touche Broil (Gd[},
Broil
• Lemot BROHLclignote.
• Lemot SEt(ValideOest affich6.
2. Appuyer sur Ia toucheA pour programmeran gril
temp_ratare _lev_e ou sur [a touche T pour programmeran
gri[ _ temperature basso.
•Les roots HI (EleveeDou LO (Basso)serontaffichSs.
• %Iectionner HI broil (Gril_ tempSrature81ev6e)(290°C
[550 °F])pour un gril normal %tectionner LO broil (Gril
temperaturebasse)[230°C [450 °F])pour un griI _
temperatureinf6rieure d'aliments_ cuisson plus Iongue
commelavolaille.
3. Apres quatre secondes,le four se met en marche.
o Le mot BROILresteaiIume.
4. Pourun rissolagemaximum,pr6chaufferle four pendant 2 ou 3
minutesavantd'ajouterIa nourriture.
5. Placerla nourrituredans Ie four. FormerIa porte du four.
6. Retournerlaviande une fois &Ia moit[6de ladur6ede cuisson.
7. LorsqueI'aIimentest cuit, appuyersur Iatouche
Cancel (AnnulerD.Retirer la nourriture et la
lechefritedu four.
o L'heuredu iour r6apparait_ I'afficheur.
Remarques sBr UaCBiSSOBaB grH
o Pour de meilleursr6sukatsIorsdu gril, se servird'un ustensile
pr6vu pource typede cuisson.
o Le griI au r6glageHI est utilis6 pour Ia majorit6des op6rations
de cuissonau gril. UtiIiser le gril au r6glageLOpour Ia cuisson
de metsdevantcuire plus Iongtemps,afin de leur permettre
d'6tre biencuits sansrissolageexcessif.
o Pourcbar_fferlatemp6t_turedufourpelldantfac#issott
augril, appuyersur latouche Broil puis sur la toucheA ou T
pour changerentre la cuissonau griI _ tempQrature81evSe(HD
et la cuissonaugriI _ tempSraturebasse(LO).
o LesdurSesde cuisson au gril peuvent Qtreplus Ionguesavec
unetempSraturede gril inf6rieure.
o RetournerIa nourriture IorsqueIa moit[_de ladurSeprSvue
pour la cuissonau gril s'est 8couIQe.
• PourdestempQratureset desconseilssuppl_mentairessur Ia
cuissonau gril, se reporter &la brochureLa cuissonsimpIifiQe.
Tab eaa de ceissoB aa grH
Prechaufferlefour pendant 2-3 minutes.
POSITION DEGRE OE TEMPS OE CU_SSON
_LI_ENTS DES G_LLES_ CUISSON
Bceuf Bifteck, 2,5 cm (1 po] d'_paisseur 4 Cuisson moyenne 15 - 20 minutes
4 Bien cuit 18 - 24 minutes
Hamburgers, 2 cm [3/4 po) d'_paisseur 4 Bien cuit 15 - 18 minutes
Porn Bacon 4 Bien cuit 6 - 10 minutes
COtetettes, 2,5 cm (1 pod 4 Bien cuit 22 - 26 minutes
Jambon - pr_-cuit tranche de 1,3 cm (1/2 pod 4 Tilde 8 - 12 minutes
Volaille Poulet en morceaux 3 ou 4 Bien cuit Gril _ temperature basse
30 - 45 minutes
Fraits de met 10 - 15 minutes
Dames de poisson, beurr6es,
2,5 cm (1 po] d'Spaisseur
Filetes, 1,3 cm (1/2 pod d'_paisseur
4
4
Lachair se d6tache
Lachair se dStache 8 - 12 minutes
Grillesup8rieure_ Iaposition n° 5.
Bemarqae : Ce tableaun'est qu'un guide de suggestions.Les durSespeuventvarJersolon I'aliment8 cuire.
37
Arr t auto atique/
Mode sabbat
Lefour s'arr6teautomatiquementapres12he,ires s'il a 6t6
accidentellementlaisseen marche.Cettecaract6rJstiquede s6curit6
peut 6tre arr6t6e.
Pour annulet l'arrSt 12 heures et faire fonctionner le
four en continu pendant 72 henres :
1. ProgrammerJefour pour une cuissoncourante [voir page34_.
2. Appuyer sur JatoucheClock [Horloge:)et la
maintenirainsJpendant cinq secondes. Clock
• SAb sera affiche et clignotera pendantcinq secondes.
• SAb sera ensuite affich6 en continujusqu'_ ce qu'on I'arr6te
oujusqu'_ ce que la dur6e limite de 72heuressoit atteinte.
• BAKE(Cuissoncoumnte)estia seufefonctionqd est
op4ratior,,ne/leenmode sabbat.Toutesfesautresfonetions
(Minuterie,Maindenau chaud,IVettoyageetc.) sont verrouiH4.es
pendantlemode sabbat.
Annniation de la cuisson conrante aiors qne le fonr
est en mode sabbat :
Appuyersur Jatouche Cancel (Annule0,
• Lemot BAKEs'6teint_ rafficheur,
• Aucun hip sonorene retentit,
Annniation du mode sabbat :
1. Appuyer sur JatoucheClock pendant
cinq secondes.
OU
2. Apres 72 heures,le modesabbat setermine.
• SAb cIignote pendantcinq secondes.
• L'heuredu jour revient_ I'afficheur.
Clock
Remarques sur Uemode sabbat
• Le modesabbatpeut 6tre mis en marche_ tout moment,que
le four soit en marcheou non,
• Le modesabbatne peut pas 6tre misen marche siles
commandessontverrouili6esou laporte verrouillee.
• SiIe four esten mode cuissonIorsquele modesabbat est
programm6,le mot BAKEs'6teint _ Ia fin du cycle de cuisson.II
n'y auraaucun signal sonoreaudible.
• Sii'6clairagedu four estsouhait6pendant le modesabbat,la
lampedevra 6treaiIumeeavantqueIe mode sabbatne d6bute.
• Lorsquele modesabbata d6marr6,aucun bJpde pr6chauffage
ne retentit.
• Tousles messageset les hips sontd6sactiv6sIorsquele mode
sabbatest actifi
• LeverrouiHageautomatiquede Japorte nefonctionne pas
pendant le modesabbat.
• SiI'on appuiesur latouche Cancel, un cycie de cuisson
couranteau four seraannul6. Cependant,le programmateur
resteraen modesabbat.
• Apr6s unepannede courant,le four revienten modesabbat
avec72 heuresrestanteset aucuncycle actiE
38
G
Ajuste ent de temperature
du four
La precisiondes temperaturesdu four a 6t6 soigneusementverifiee
Fusine.lI est normalde remarquerquetquesdifferencesdartsIa
cuissonentre un four neuf et un four ancien. Au fur et b mesureque
lescuisinieressont moinsneuves,Ia temperaturedu four pout varier.
II estpossibIed'aiusterla temperaturedu four si ton penseque Ie
four necuit pasou ne rissolepas correctement.Pourdeciderde
I'aiustementb apporter,regIer]efour _ une temperaturede 15°C
(25°F}plus eteveeou pius basseque Ia temperatureindiqueedans
la recette,puisfaire cuire Ia preparation.Les resuItatsdu _test >>de
cuissondoiventdonnerune ideedu hombrede degresduquel ia
temperaturedoit etre aiustee.
Ajustement de matemperature du four :
1. Appuyer sur Ia toucheBake (Cuissoncourante}. Bake
2. Entrer285°C (550 °F)en appuyantsur Ia toucheA.
3. Appuyer sur Ia toucheBake et la maintenirainsi
pendantphsieurs secondesouiusqu'b ceque 0°
paraisse_ rafficheur.
Si Iatemperaturedu four a eta precedemmentaiustee,Ie
changementseraaffich& Parexemple,si la temperaturedu four
a eta reduitede 8 °C 05 °F),I'afficheurindiquera -8° (-15°).
4. Appuyer sur Ia toucheA ou _' pour ajusterla tempelature.
A chaquefois que I'on appuie sur une touche, la temperature
changede 3 °C (5 °F}.Latemperatule du four peut etre
augmenteeou diminueede 3 h 20 °C (5 h 35°F).
5. L'heuredu iour reapparaftautomatiquement_ rafficheur.
II n'est pas necessairede reajusterla temperaturedu four en cas
depanneou d'interruption de courant.Lestemperaturesde
cuissonau gril et de nettoyagene peuventetre aiustees.
Change ent de ma
temperature °F/°C
1. Lereglagepar ddaut de I'usine pour latemperatureest en
Fahrenheit.
2. Pourmodifier ce reglage,appuyersur les touchesCancel
{Annule0 et Bake simuItanementet maintener-lesenfoncees
pendanttrois secondes.
3. Un hip retentit et Ie regiage courant {°Fou °C} parait b I'afficheur.
{Sivous ne faites pas de changement,la cuisiniereretoumeau
regIageexistantapres30 secondes.}
4. Pourmodifier le reglage,appuyersur latouche A ou _'.
Appuyer _ nouveausur latouche pour reto(Jrnerau reglage
existant.Attendercinq secondeset le reglageseraeffectu&
Latouche FavoriteCfavori}permetde sauvegarderla duree et la
temperatured'une fonction de cuissonet maintien.
Pourprogrammerun cycle Favori,unefonction de cuissonet
maintiendoit etre activeou tout juste programmee.
Programmation d'un nouveau cycme favori ou
sauvegarde d'un cycle en cours de cuisson et
maintien comme favori :
1, Programmerun cycIede cuissonet maintien commeil est decrit
lasection Cuissonet maintien_ la page34,
2. Appuyer sur la toucheFavorite et la maintenir Favorite
ainsi pendanttrois secondes.
• Lecyciecuisson et maintiennouvellementprogramme ou en
cours defonctionnementserasauvegarde.
, Un hip sonoreretentit pourindiquerque lescommandosont
accepte Ie reglagefavori.
Demarrage d'un cycle programme darts favori :
1. Appuyer sur la toucheFavorite.
• Ladureeet latemperaturedu cycleprogramme Favorite
de cuissonet maintienseront affichees (si aucun
cycle de cuissonet maintienn'a ate programm&
<_nonE>>sera affiche}.
2. Appuyer sur Ia toucheBake. Bake
• Lecyclefavori commenceimmediatement.
• Lemot BAKEs'allume _ I'afficheur.
• Ladureede cuissons'alhme b I'afficheur.
Lorsque maduroc de cuisson s'est ecoumee:
, Le mot BAKEs'eteint.
•Les rootsHOLD (Maintien} et WARM (Chaud}s'alhment.
o 75° 070°} parait 8 rafficheur.
Annulation d'un cycle favori en tours :
1. Appuyer sur Ia toucheCancel
• Lecyclefavon sauvegardenesera pas affect&
2. Retirerla nourriture du four.
39
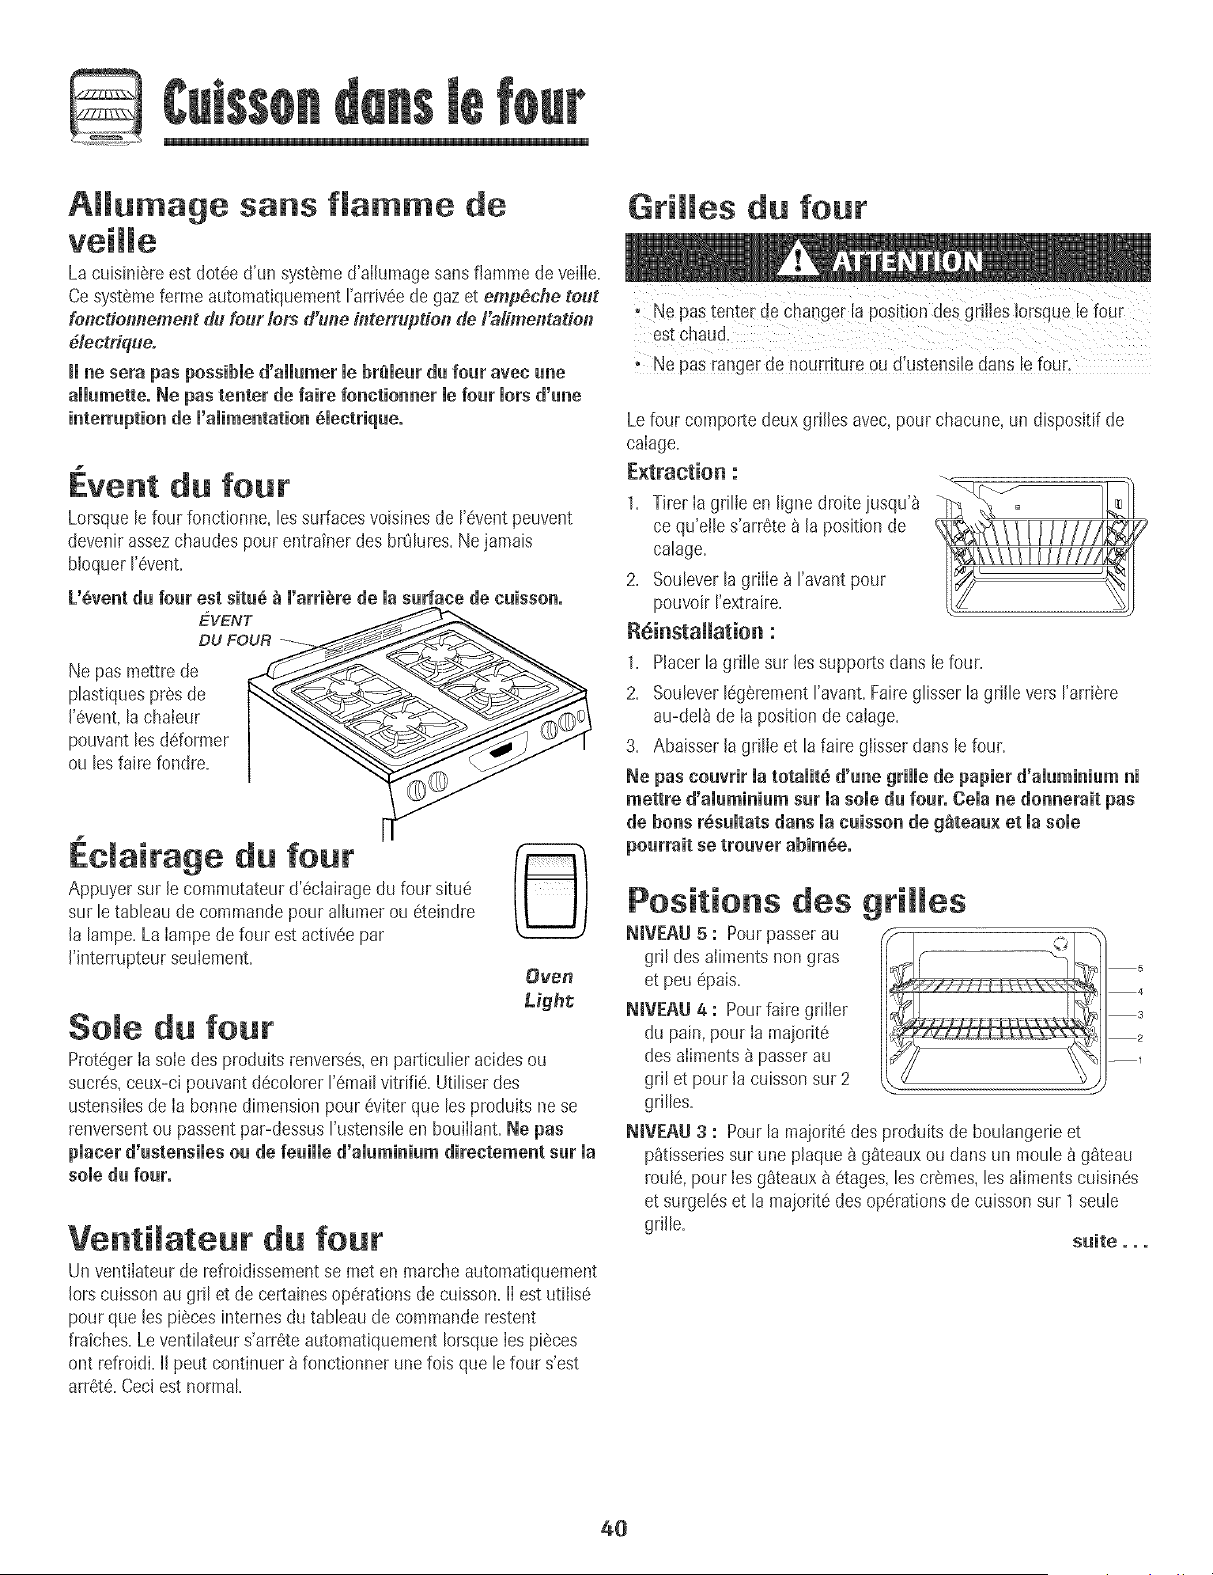
AHumage sans f[amme de
Griffes du four
La cuisiniere est dot6e d'un systeme d'alhmage sans fJamme de veilIe.
Ce systeme ferme automatiquement FarrJveede gaz et emp#che tout
foncdo##ement du four lets d'one interruption de I'alime#tatio#
#lectrique.
imae sera pus possibme d'aiiumer le br_leur du four ayec uae
ammumette.Ne pus tenter de faire foactioaaer mefour morsd'uae
iaterruptioa de m'amimeatatioa_meetrique.
1
Event du four
Lorsquele four fonetionne,lessurfacesvoisinesde I'6ventpeuvent
devenir assezchaudespour entrafl_erdes br_Iures.Nejamais
bloquerI'event.
L'Sveatdu four est situs _ m'arriSrede la sudaee de cuissoa.
EVENT
DU FO
Ne pas mettre de
pIastiquesprosde
['event,[a chaieur
pouvantles ddormer
ou [esfaire fondre.
m
Ec[amrage du four
Appuyersur [ecommutateurd'eciairagedu four situe
sur [e tableau decommandopour allumerou eteindre
[a [ampe.La[ampede four estactiv6e par
['interrupteurseuiement.
Oven
Mght
Sole du fear
Prot_ger[asoie des produitsrenverses,enparticu[ier acidesou
sucr6s,ceux-ci pouvantdecolorer['emai[vitrifi& Uti[iserdes
ustensilesde [a bonne dimensionpour eviter que [esproduitsnese
renversentou passentpar-dessus['ustensileen bouillant. Ne pus
pmacerd'usteasiies ou de feuiiie d'amumiaiumdirectemeat sur ma
somedu four,
VentiJateur du four
Un ventiIateurde refroidissementse meten mareheautomatiquement
[orseuissonau gril et de certainesoperations de cuisson,fl est utilis6
pour que les piecesinternes du tableaude commandorestent
fraiches,LeventiIateur s'arreteautoma%uementIorsqueIespieces
ont refroidLIIpeut continuer_ fonctionner unefois que lefour s'est
arret& Ceciest normal
, Ne pas tenter de changer la positiondes grilles !orsque[e four
estChaud.
Ne pas rangerde nourriture ou d'ustensileduns le four,
Lefour comportedeux grilles avec,pourchacune,un dispositifde
calage.
E×traction :
1. T,rerla gd,,een fignedroite,usqd_ __]_]
ce qu'elIes'arr6te &la positionde
outage, iN rrrrrrrc l
2. Sou[ever[agrille _ ['avantpour II_'_ r_J_l
pouvoir ['extraire.
R6instammation :
1. Placer[a grille sur [ussupportsdans [e four=
2. Soulever[egerement['avant.Fairegiisser[agrille vers ['arriere
au-de[_de la positionde caiage.
3. Abaisser[agrilie et [a faire glisserduns [efour=
Ne pus eouvrir ia totaiit_ d'uae grille de papier d'aiumiaium ai
mettre d'amumiaiumsur masomedu four. Comaae doaaerait pus
de boas r_sumtatsdaas macuissoa de g_teaux et masome
Positions des grilles
NiVEAU 5 : Pourpasserau
gril des alimentsnon gras
et peu@ais.
NiVEAU 4 : Pourfaire griiIer
du pain, pour Ia maiorite
des aliments8 passerau
gril et pour la cuissonsur 2
grilles.
NIVEAU 3 : Pour[a majorit6des produitsde bouiangerieet
p_tisseriessur unepiaque 8 g_teauxou duns un mouIe_ g_teau
rouIe,pour los g_teaux& etages,[escremes,[usalimentscuisines
et surge[Uset [a maioritedes operationsde cuissonsur 1 seuIe
grille.
suite...
40
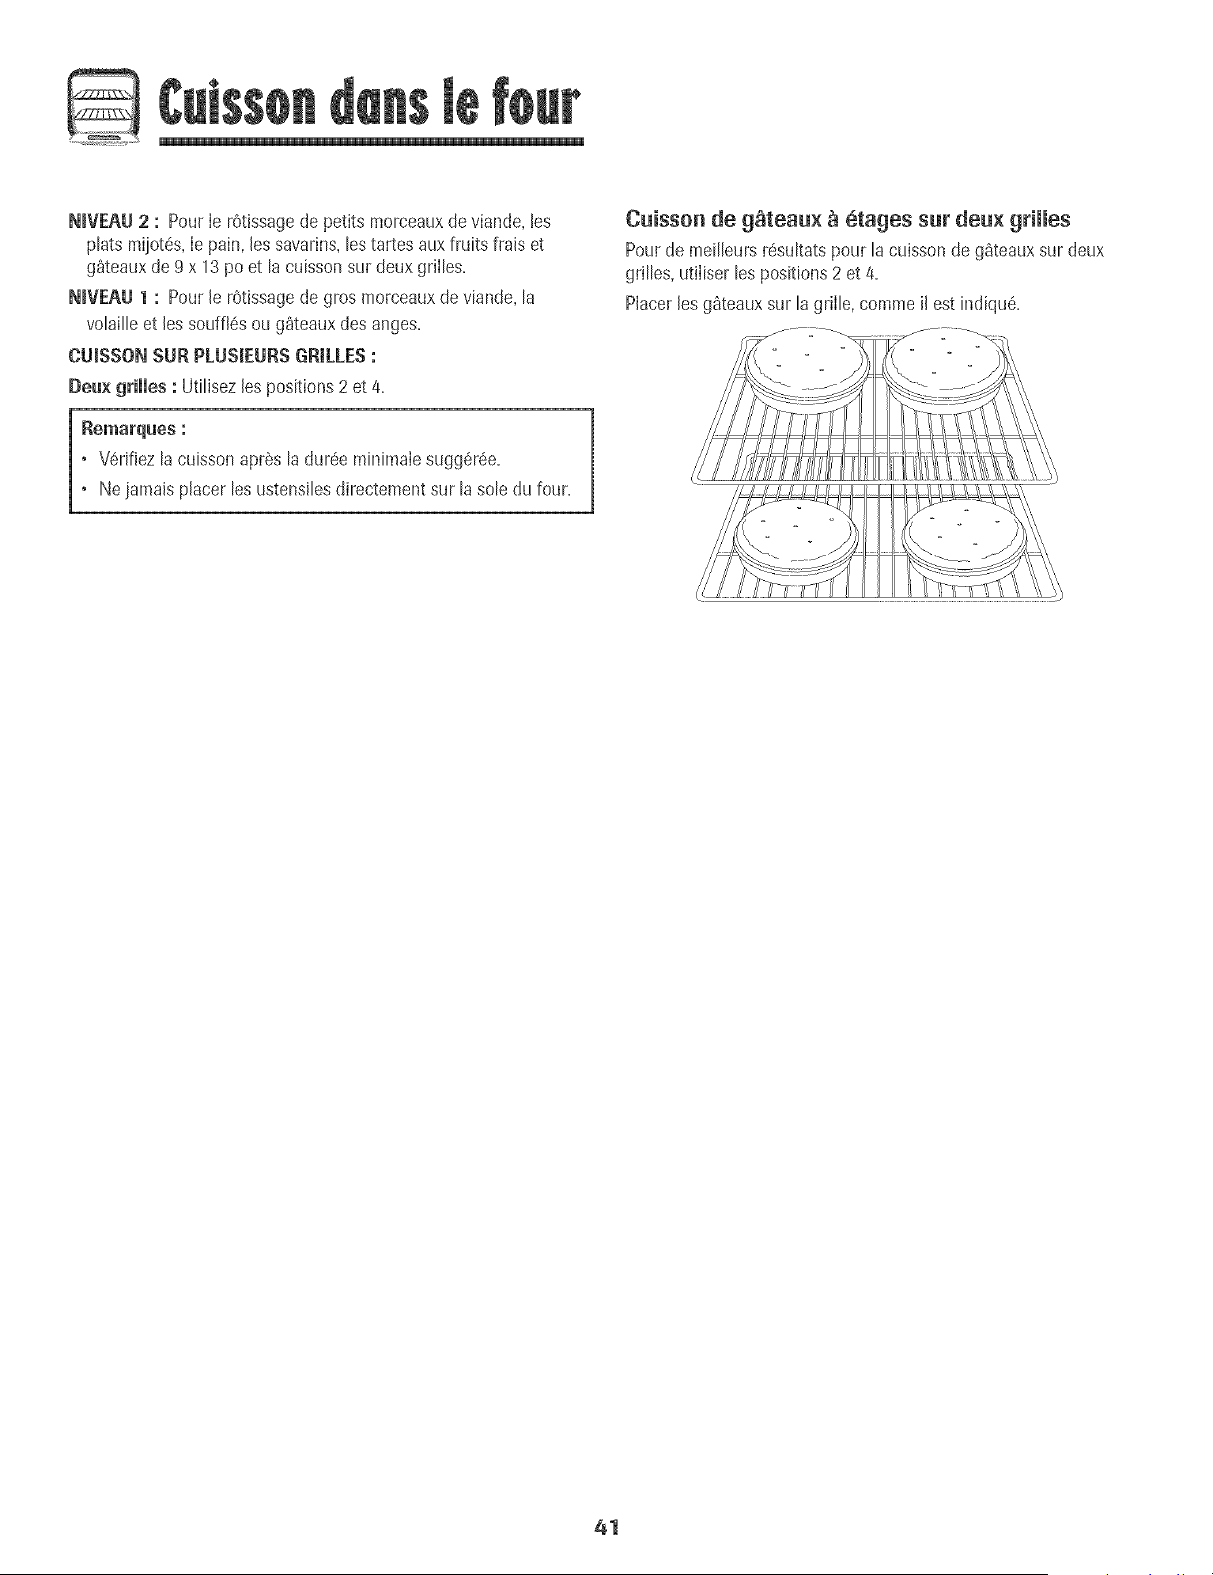
N[VEAU 2 : Pourle rOtissagedepetits morceauxde viande, [es
ptats miiot6s,[e pain,[essavarins,testartes auxfruits frais et
g_teauxde 9 x 13 poet tacuissonsur deuxgriites.
N[VEA[I I : Pour[e rOtissagede gros morceauxde viande, ta
votaitteet les souf%s ou g_teaux des anges.
CU_SSONSUR PLUSIEURSGRILLES:
Deu× grilles : Utilisez[espositions2 et 4.
_emarques :
• V6rifieztacuisson aprSsta dur6e minimaie sugger6e.
• Neiamaisplacer les ustensilesdirectementsur lasole du four.
Cuisson de g_teau× _ 6rages sur deu× grimmes
Pourde meilleursr6sultatspour la cuissonde g_teauxsur deux
grilles,utiIiser les positions2 et 4.
Placerles gQteauxsur lagriIle,comme il est indiqu6.
41
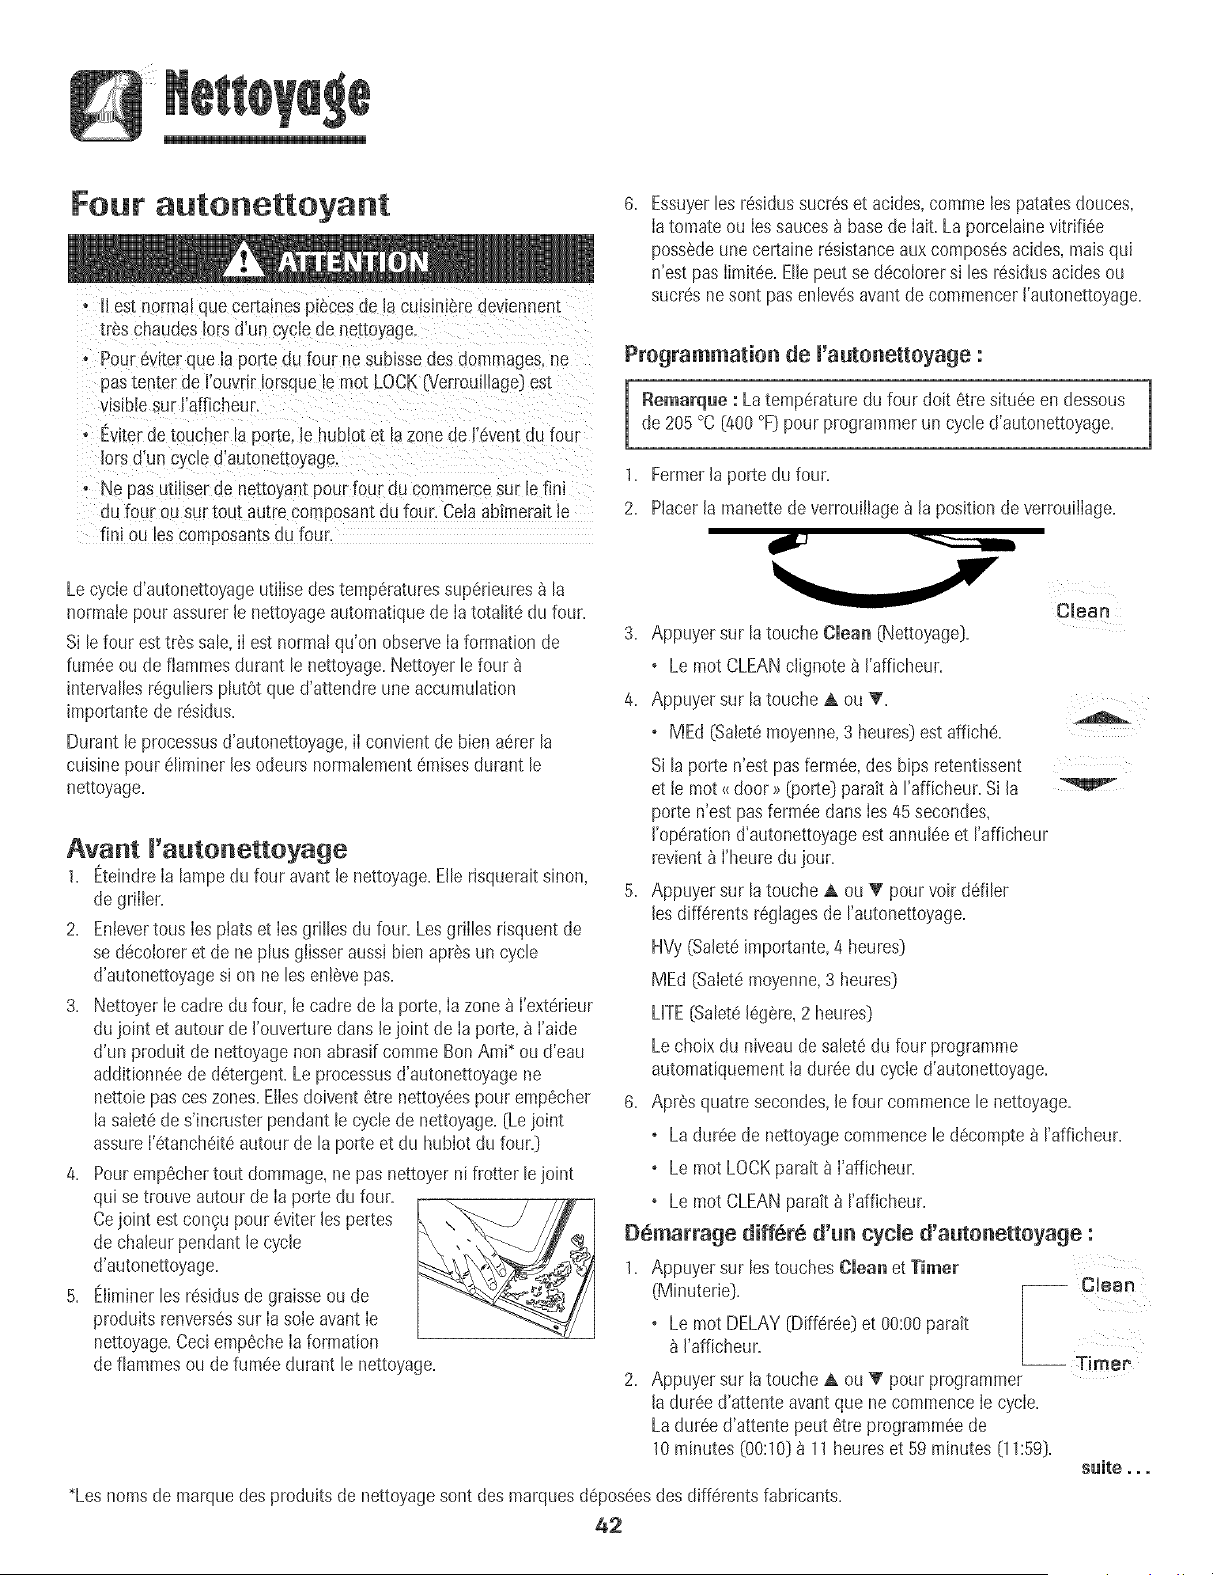
Four autonettoyant
®
+
tl es_normmque certamespisces de la cu+s+ni_redeviennent
Lrescl_audes[orsd'un cyclede nettoyage
Pour6viterque la porte du four nesubissedes dommages,ne
pas[enter de I'ouvrir IorsqueEemot LOCK{Verrou+ltage)es[
visiblesur I'afficheur.
Eviterde.toucher la porte,ie hublotet la zone de 1'6ventdu four
+orsd'un cycled'autonettoyage
Ne pas ut+liserde nettoyan[pour four du commercesur le fini
du four ou sur[ou[ au[re composantdu four. Celaabimeraitle
fin+ou les composantsdu four.
Lecycle d'autonettoyageutilise destemp6raturessup6rieures_ la
normalepour assurerle nettoyageautomatiquede Ia totalite du four.
Si lefour est trSs sale,iI est normalqu'on observeIaformation de
fum#.eou de flammesdurant le nettoyage.Nettoyer le four
intervallesreguliersplutOtque d'attendreune accumulation
importantede residus.
Durant le processusd'autonettoyage,iI convient de bienaerer la
cuisinepour 61iminerlesodeurs normalementCruisesdurant le
nettoyage+
Avant R'autonettoyage
1+ EteindreIa lampedu four avantle nettoyage+Ellerisqueraitsinon,
de griIler+
2+ Entevertous Ies plats et Ies grilles du four. LesgriIlesrisquentde
se decoloreret de ne plus glisseraussi bien aprSsun cycle
d'autonettoyagesi on ne les entevepas+
3+ NettoyerIe cadre du four, lecadre de la porte,Ia zone_ I'exterieur
du joint et autour de I'ouverturedans lejoint de Ia porte,8 I'aide
d'un produit de nettoyagenon abrasifcomme BenAm++ou d'eau
additionneede d6tergent+Le processusd'autonettoyagene
nettoiepas ceszones.EIIesdoivent 6tre nettoy6espour empecher
lasaietede s'incrusterpendant le cyclede nettoyage+[Le joint
assureI'6tancheit6autour de la porte et du hubIotdu four+)
4+ Pourempechertout dommage,ne pas nettoyerni frotter le joint
qui setrouve autourde Ia portedu four.
Cejoint estcon_u pour 6viterles pertes
de chaleur pendantle cycle
d'autonettoyage+
5+ Eiiminerles residusde graisseou de
produits renvers6ssur Iasoie avantIe
nettoyage+Ceci emp6cheIa formation
de flammesou defumeedurant le nettoyage+
Essuyerles residussucreset acides,comme les patatesdeuces,
Iatomate ou Iessauces_ basede Iait. Laporcelainevitrifi6e
poss6deune certaine r6sistanceaux compos6sacides,mais qui
n'est pas Iimitee.E!lepeut se decolorersi les r6sidusacidesou
sucres nesent pasenlevesavantde commencerI'autonettoyage.
Programmation de l'autonettoyage :
i Remarque : Latemp6raturedu four doit 6tresitu6e en dessous
de 205 °C(400°F)pour programmerun cycle d'autonettoyage.
!. Fermerla porte du four.
2. Placerla manettede verrouillage_ laposition de verrouiilage.
Clean
3. Appuyer sur la toucheClean (Nettoyage).
, Le mot CLEANclignote _ I'afficheur.
4. Appuyer sur la toucheA ou _'.
, MEd (Saletemoyenne,3 heures)est affiche.
Si la porte n'est pas ferm6e,des bips retentissent
et te mot<<door _>(porte)patait a I'afficheut. Sila
porte n'est pasfermSedartsIes45secondes+
I'opSrationd'autonettoyageest annulSeet rafficheur
revient_ I'heuredu jour.
5. Appuyer sur la toucheA ou _' pour voir ddiler
lesdifferentsrSglagesde rautonettoyage.
HVy(Saleteimportante,4 heures)
MEd (Salet6moyenne,3 heures)
LITE(Salete18gere,2 heures)
Lecho[xdu niveaudesalet8du four programme
automatiquementIa dur6edu cycled'autonettoya%
6+ AprSsquatresecondes,lefour commencele nettoyage+
, La dureede nettoyagecommence le dScompte_ I'afficheur+
, Le mot LOCKparait 8 I'afficheur+
+ Le mot CLEANparait _ rafficheur+
Ddmarrage differe d'aa cycle d'auteaetteyage :
1+ Appuyer sur les touchesClean et Timer
++++ L;+2:[
, Le mot DELAY(Differee)et 00:00parait
I'afficheur.
2. Appuyer sur la toucheA ou _' pour programmer
ladur6ed'attente avantque ne commenceIe cycIe.
Ladur6ed'attente peut 6tre programm6ede
10minutes (00:10)8 11heureset 59minutes (11:59).
s_ite oo.
+Lesnoms de marquedes produits de nettoyagesentdes marquesd6poseesdescliff,rentsfabricants.
42
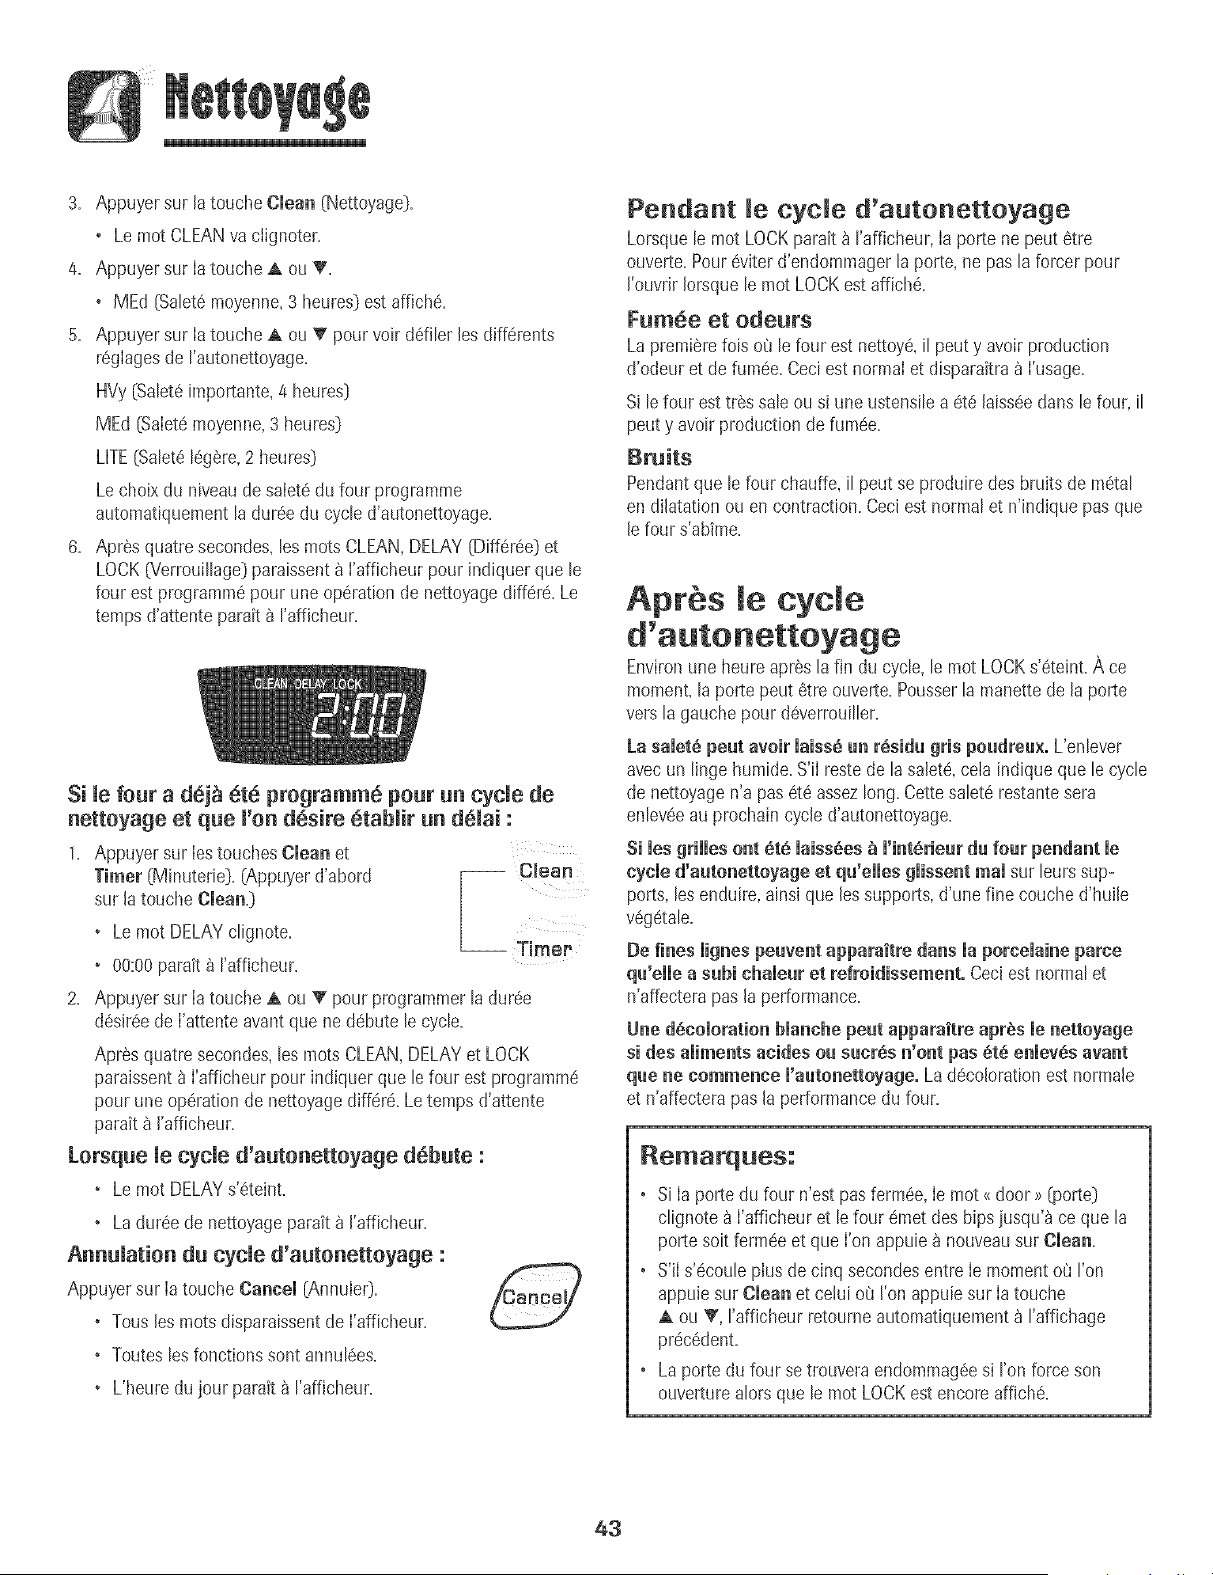
3. Appuyer sur la toucheClean (Nettoyage].
• Lemot CLEANva ciignoter.
4. Appuyer sur ia toucheA ou T.
• MEd [Salet8moyenne,3 heures]estaffich&
5. Appuyer sur ia toucheA ou T pour voir ddiler les diff6rents
r6giagesde I'autonettoyage.
HVy[Salet6importante,4 heures]
MEd [Saletemoyenne,3 heures]
UTE[Salet6I_g_re,2 heures]
Lechoixdu niveaude saiet6du four programme
automatiquementladurQedu cycled'autonettoyage.
6. Apres quatre secondes+les roots CLEAN,DELAY(Diff6r6e]et
LOCK(Verrouillage]paraissentb l'afficheur pour indiquer que le
four est programm6pour une op6ration de nettoyagediffer& Le
temps d'attente parait_ rafficheur.
Si le four a d6]_ et6 programm8 pour un cycle de
netteyage et que l'en dSsire 6tablir un dSlai :
1. Appuyersur iestouches Clean et
Timer [Minutede]. (Appuyerd'abord [ Clean
sur la touche Clean+]
[
• Le mot DELAYclignote.
--Timer
+ 00:00parait _ rafficheur.
2. Appuyersur Iatouche A ou _' pour programmerla dur6e
d6sir6ede I'attenteavant que ne d6bute lecycle.
Apr6s quatresecondes,les rootsCLEAN,DELAYet LOCK
paraissent_ I'afficheur pour indiquerque le four est programme
pour une op6rationde nettoyagediffer& Le temps d'attente
parait _ I'afficheur.
Lorsque le cycle d'autonettoyage d_bute :
• Le mot DELAYs'6teint.
• Ladur6e de nettoyageparait _ I'afficheur.
Annulation du cycle d'autonettoyage :
Appuyersur Ia toucheCancel [AnnuIe0.
• Tousles rootsdisparaissentde I'afficheur.
• Touteslesfonctions sent annul6es.
• L'heure dujour parait _ I'afficheur.
Pendant le cycle d'autonettoyage
Lorsquele mot LOCKparait _ rafficheur, Ia porte ne peut 6tre
ouverte.Pour6viterd'endommagerla porte,ne pasla forcer pour
I'ouvrir Iorsquele motLOCKest affich&
Fumee et odeurs
La premierefois o(Jlefour est nettoy& peut y avoir production
d'odeur et de fumee.Ceciest normaIet disparaitra_ I'usage.
Si lefour est trSs saleou si une ustensilea et6 laisseedans le four, il
peut y avoir productionde fum6e.
BruitS
Pendantque lefour chauffe, il peut se produire des bruits de instal
en dilatationou en contraction.Ceciestnormal et n'indique pasque
le four s'abime.
Aprb.s le cycle
Environuneheureapres la fin du cycle, le mot LOCKs'6teint. Ace
moment,laporte peut 6tre ouverte.Pousserla manettede la porte
versla gauchepour d6verrouiller.
La salet6 peut aveir laiss6 un r6sidu gris peudreux. L'enlever
avecun linge humide.S'il restede la saiet& cela indiqueque le cycle
de nettoyagen'a pas 8t6 assezlong. Cettesalet6 restantesera
enleveeau prochain cycled'autonettoyage.
Si les grilles ont _t_ maiss_es_ m'int_rie_rd_ fe_r pendant me
cycle d'a_tenettoyage et q_'elles glissent real sur leurs sup-
ports, lesenduire,ainsi que lessupports,d'une fine couched'huile
vSg_tale.
Be fines iignespe_ventappa_ait_e darts ia po_ceiainepa_ce
q_'elle a s_bi chale_r et refroidissement. Ceciest normal et
n'affecterapas la performance.
Une dscomoratienblanche pe_t apparaitre apr_s menetteyage
si des aliments acides e_ s_crSs n'ent pas 8t_ enlev_s avant
q_e ne commence l'a_tonettoyage° La d_coloration est normale
et n'affecterapas la performancedu four.
_emarql.les:
• si Ia porte du four n'est pas fermSe,Ie mot<door >>[porte]
clignote_ I'afficheur et lefour emetdes hips jusqu'_ ce que la
porte soitferrule et que I'on appuie_ nouveausur Clean.
• S'iI s'_couleplus de cinq secondesentre Ie momentoQI'on
appuiesur Clean et cetuio_ !'onappuiesur Iatouche
ou _', rafficheur retoume automatiquement_ raffichage
precedent.
• Laporte du four se trouveraendommag6esi I'on force son
ouverturealors que le mot LOCKest encore affich&
43
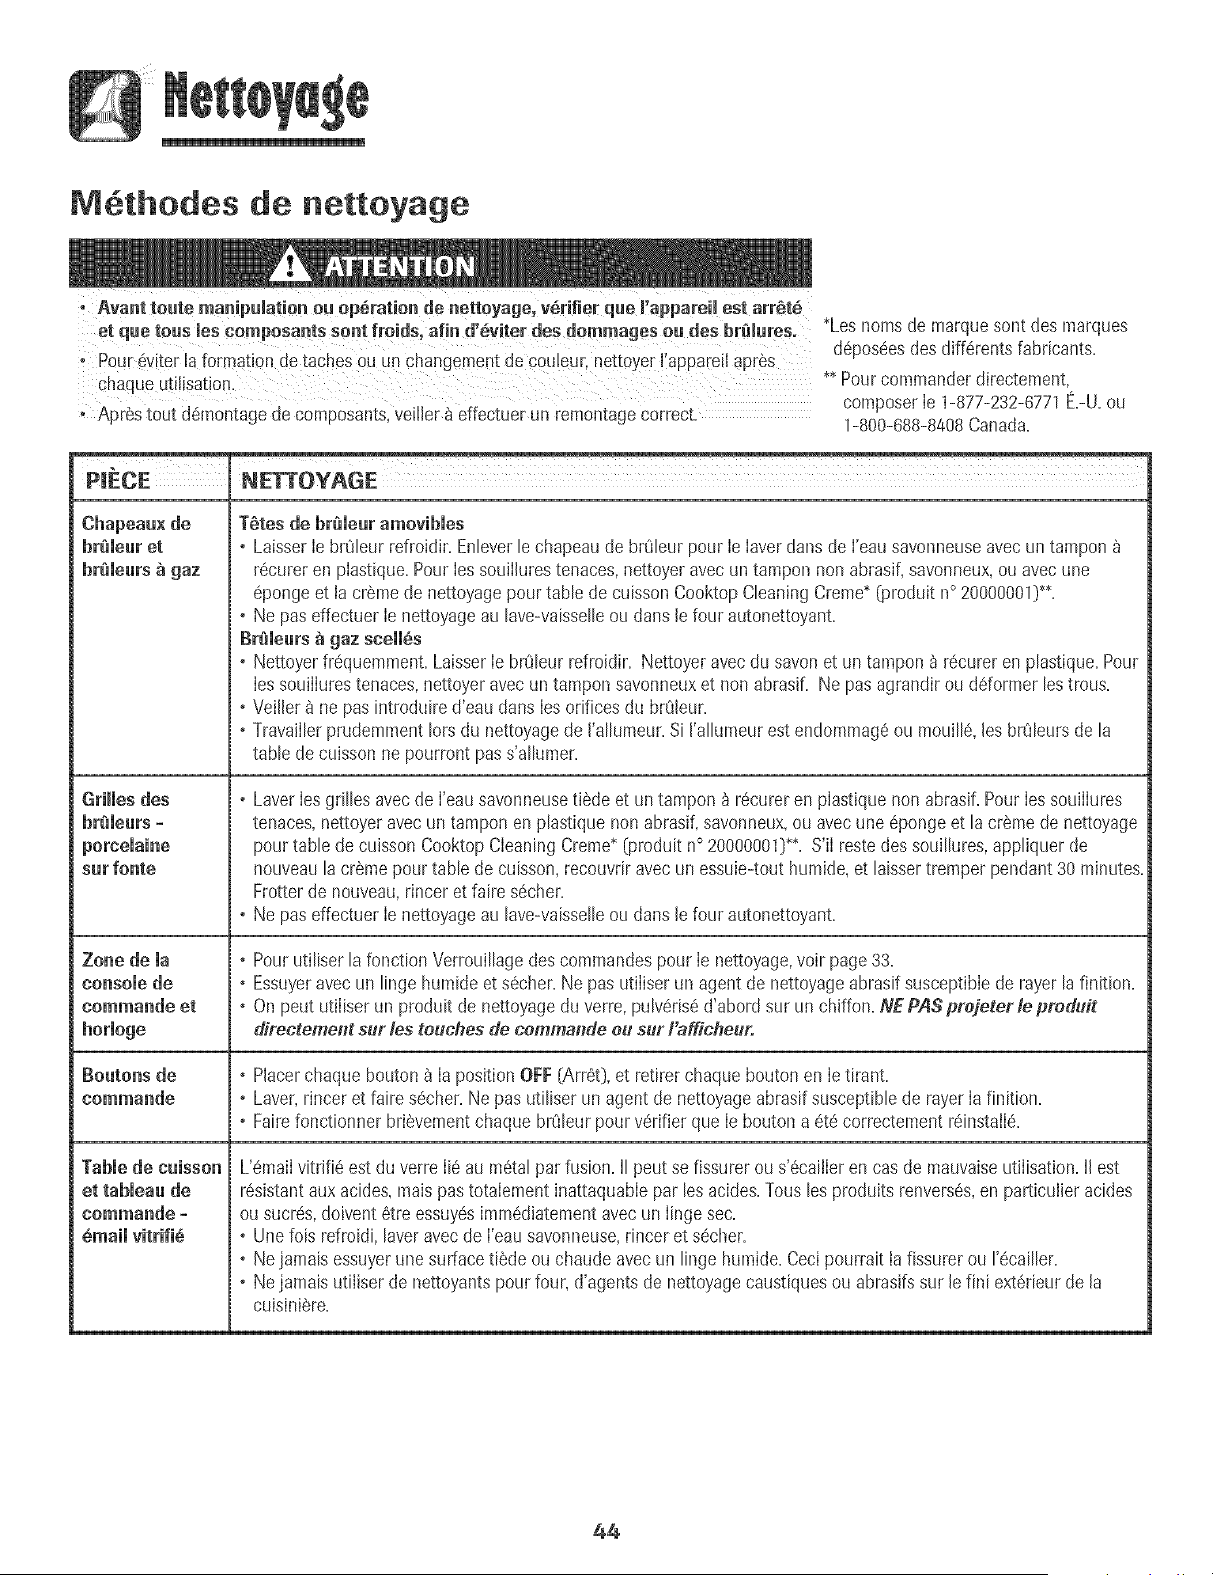
i
M thodes de nettoyage
et que teus les Cempesants sent fre ds, afin d'_viter des dommages eu des br_lures, %es nomsde marquesent des marques
d6poseesdesdifferentsfabricants=
+ Pour _viter la formation de taches0u un changementde C0U!eUr,nettoYe[!'appareil+plUs
ChaqueUti!isation. +"Pourcommanderdirectement,
composerIe 1-877-232-6771E=-U=ou
, AprSstout demontagede composants+veiller _ effectuerun remontagecorrect. 1-800-688-8408Canada.
NE_OYAGE
Chapeau×de
br_meuret
br_meurs_ gaz
sur fonte
Zone de la
console de
eommunde et
Tabmede euisson
et tabmeaude
eemmande =
_mail vitrifi_
T_tes de br_ieur amovibies
, Laisser[e breJ[eurrefroidir=En[ever[e chapeaude brQ[eurpour [elaver dansde ['eausavonneuseavecun tampon
recureren piastique=Pour[essouii[urestenaces,nettoyeravec un tampon nonabrasif,savonneux,ouavec une
epongeet Ia crSmede nettoyagepour table de cuissonCooktopCleaningCreme*[produit n° 20000001]**=
• Ne paseffectuer [e nettoyageau lave-vaisselleou darts [e four autonettoyant=
Br_ieurs _ gaz sceii6s
• Nettoyerfrequemment=Laisser[e br01eurrefroidir=Nettoyer avecdu savonet un tampon_ recurer enp[astique=Pour
[essouiiiurestenaces,nettoyeravecun tamponsavonneuxet nonabrasif=Ne pas agrandirou ddormer lestmus=
• Vei[ler_ ne pas introduire d'eau darts[esorifices du br01eur=
• Travaiilerprudemmentlots du nettoyagede ['allumeur=Si ['allumeurest endommageou mouille,[esbrOleursde la
table de cuissonne pourront pas s'allumer=
, LaverIesgrilles avec de I'eausavonneusetilde et untampon _ recureren plastique non abrasif.Pour Ies souilIures
tenaces,nettoyeravecun tamponen plastiquenonabrasif,savonneux,ou avecune eponge et la creme de nettoyage
pourtable de cuissonCooktopCleaningCreme_(produit n° 20000001D_. S'iI reste dessouillures,appliquerde
nouveaula cremepourtable de cuisson,recouvdravecun essuie-touthumide,et laissertremper pendant30 minutes.
Frotterde nouveau,rincer et faire secher.
• Ne paseffectuer Ie nettoyageau lave-vaisselleou darts le four autonettoyant.
• Pourutiliser la fonction Venouillage descommandespour Ie nettoyage,voir page33.
• Essuyeravecun linge humideet secher.Ne pasutiliser un agent de nettoyageabrasifsusceptiblede rayer lafinition.
• Onpeut utiliser un produit de nettoyagedu verre,pulverised'abord sur un chiffon.NEPASprejeterlepreduit
directement sur les touches de cemmande eu sur Fafficheur.
• Placerchaque bouton_ Ia positionOFF[Arr6t),et retirer chaquebouton en Ie tirant.
, Laver,rinceret faire s6cher.Ne pas utiliser un agent de nettoyageabrasifsusceptiblede rayerIa finition.
• Fairefonctionner brievementchaque br01eurpour verifierque Ie bouton a et6 correctementreinstaile.
L'emaiIvitrifie est duverre Iie au metalpar fusion. II peut se fissurer ou s'ecailleren cas de mauvaiseutilisation. II est
resistantaux acides,maispas totalementinattaquablepar les acides.Tousles produitsrenverses,en particulier acides
ousucres,doivent6tre essuy6simmediatementavecun Iinge sec.
• Unefois refroidi,laveravecde I'eausavonneuse,dncer et secher.
• Nejamaisessuyerune surfacetiSdeou chaude avecun linge humide.Cecipourrait la fissurerou recailler.
• Nejamaisutiliser de nettoyantspour four, d'agentsde nettoyagecaustiquesou abrasifssur lefini exterieurde la
cuisiniere.
44
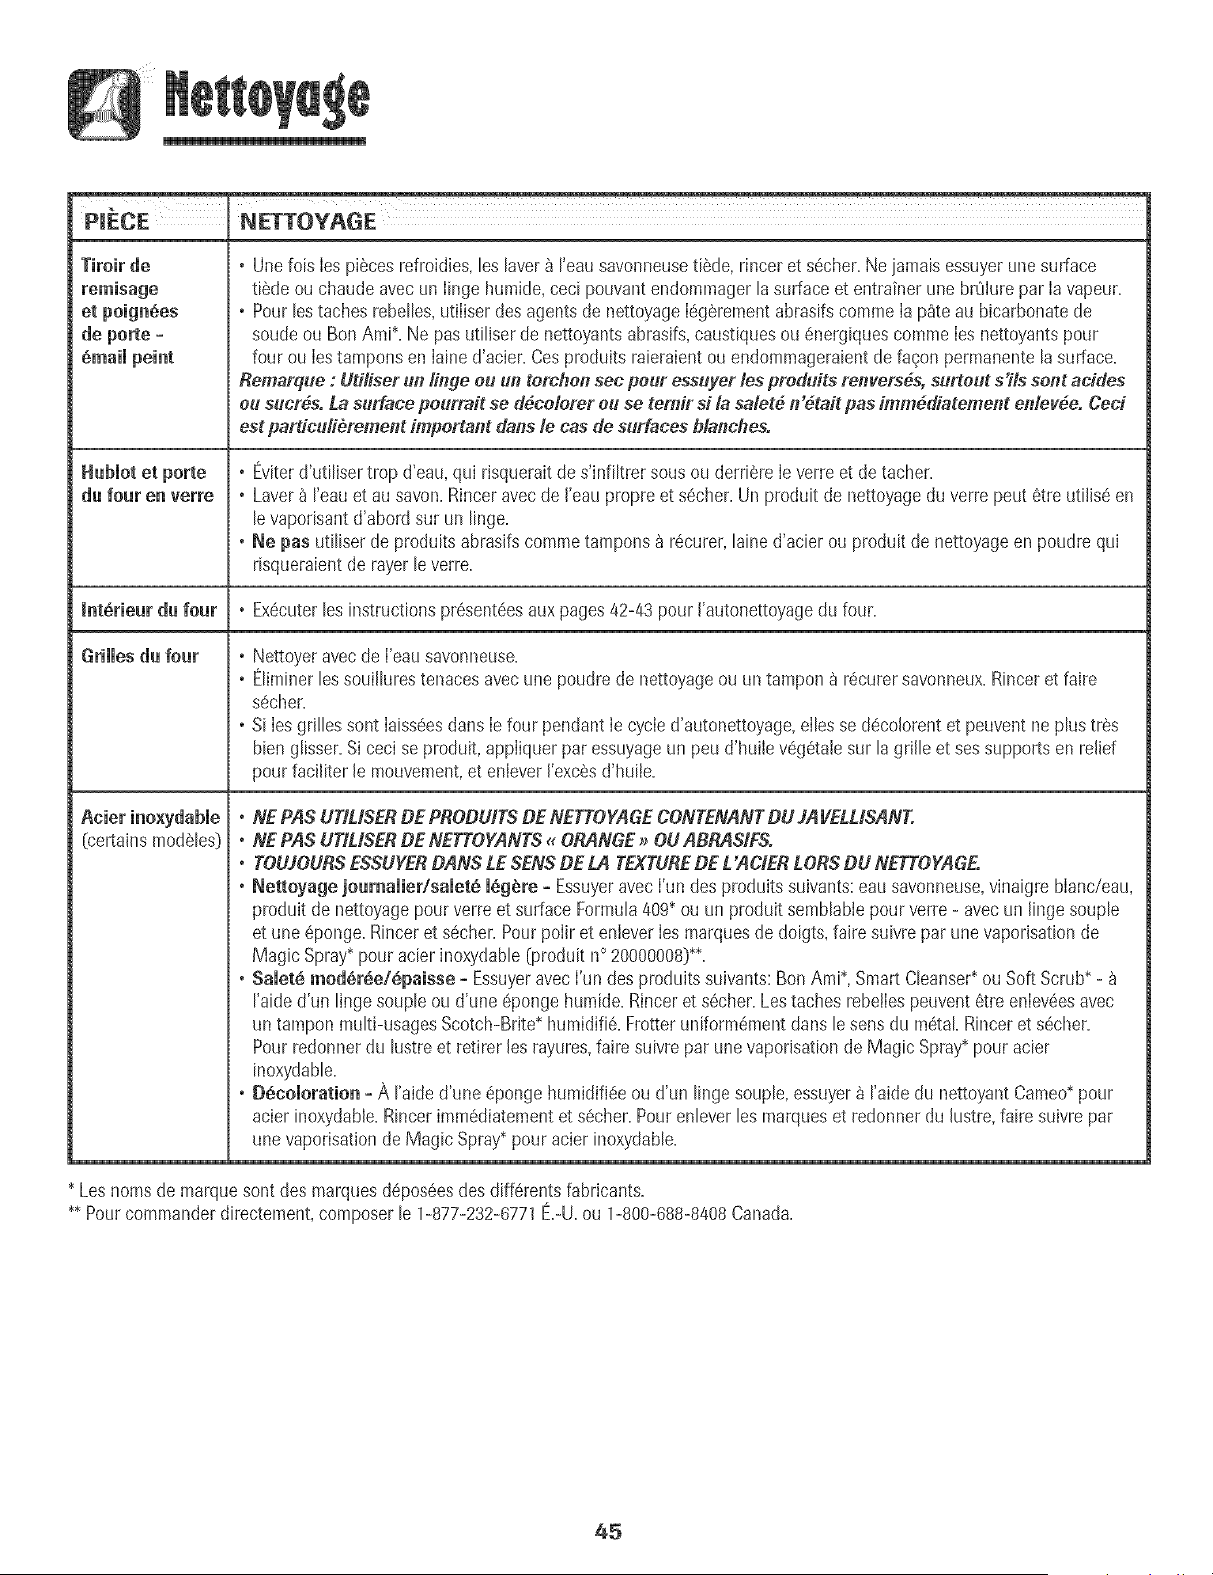
NETTOYAGE
Tiroir de
et poign_es
de po_e +
du four en verre
. Une lois Iespiecesrefroidies+les laver_ reau savonneusetiede, rincer et secher.Ne jamaisessuyerune surface
tiede ou chaudeavecun Iinge humide, ceci pouvant endommagerlasurface et entrainer une brOIurepar Ia vapeur+
. Pourlestaches rebelles,utiIiserdes agents de nettoyageI%erement abrasifscommeIa p_te au bicarbonatede
soudeou BenAmR Ne pasutiliser de nettoyantsabras+fs,caustiquesou 6nergiquescomme Iesnettoyantspour
four ou Iestamponsen Iaine d'acier+Cesproduitsraieraientou endommageraientde fagon perrnanentela surface+
Remarque : Udliser ua linge eu ul_terchen sec pour essuyer les preduits renverses, surtout s'ils sent addes
eu sucres, La surface peur_it se dece!erer eu se tern# si la saiet_ 1_'_taitpas immediatement enlevee. Ceci
est particuli_rement impertant darts le eas de surfaces blanches.
. Eviterd'utiliser trop d'eau,qui risqueraitde s'infiltrer sousou derriereIe verreet detacher+
. Laver_ reau et ausavon+Rinceravecde I'eaupropre et secher+Un produit de nettoyagedu verre peut etre utilis6 en
le vaporisantd'abord sur un linge+
. Ne pas utiliser de produits abrasifscommetampons_ recurer,lained'acier ou produit de nettoyageen poudre qu+
risqueraientde rayer le verre+
Interieur du four , Executer les instructions presentees aux pages 42-43 pour I'autonettoyage du four+
Grilles du four
[certainsmodeles}
. Nettoyeravecde I'eausavonneuse+
. Eliminerlessouillures tenacesavec une poudre de nettoyageou un tampon_ recurer savonneux+Rinceret faire
s_cher+
. SiIesgrilles sent Iaiss_esdartsIe four pendantIe cycle d'autonettoyage,ellesse decoJorentet peuvent ne plus tres
bien glisser+Si cecise produit, appliquerpar essuyageun peu d'huile vegetaJesur la grille et sessupportsen relief
pour facilKerJemouvement,et enleverJ'excesd'huHe+
, NE PAS UTILtSERDE PRODUffS DE NETTOYAGECONTENANTDU YAVELUSANT.
, NE PAS UTIUSERDE NETTOYANTS+_ORANGE_ OU ARRASIFS.
. TOUJOURSESSUYERDANS LESENSDE LA TEXTUREDE L'ACIERLORSDU NETTOYAGE.
. Nettoyage joumaJier/saJet_ m6gere- EssuyeravecI'un desproduitssuivants:eausavonneuse,vinaigre bIanc/eau,
produit de nettoyagepourverre et surface Formula409+ou un produit semblablepour verre - avecun lingesouple
et une eponge+Rinceret secher+PourpoIir et enleverIesmarquesde doigts,faire suivrepar unevaporisationde
Magic Spray*pour acier inoxydable[produit n° 20OOO008]**+
. Salet_ moder_e/epaisse +Essuyeravec I'un des produits suivants:Ben Arni*,Smart Cleanser*ouSoft Scrub*-
raide d'un linge soupleou d'une _pongehumide+Rinceret secher+Lestaches rebetIespeuventetre enIeveesavec
un tamponmulti-usagesScotch-Brite*humidi% Frotteruniformementdans lesens du metal Rinceret s_cher+
Pourredonnerdu lustreet retirer les rayures,faire suivrepar unevaporisationde Magic Spray*pour acier
inoxydable+
. D_coloratie_ - A I'aided'une epongehumidifiee ou d'un lingesouple,essuyer_ raide du nettoyantCameo*pour
acier inoxydable+Rincerimmediatementet secher+Pourenleverles marqueset redonnerdu hstre, faire suivre par
unevaporisationde MagicSpray* pour acier inoxydable+
* Lesnomsde marquesentdes marquesd#poseesdes differentsfabricants.
** Pourcommanderdirectement,composerle 1-877-232-6771E.-U.ou 1-800-688-8408Canada.
45
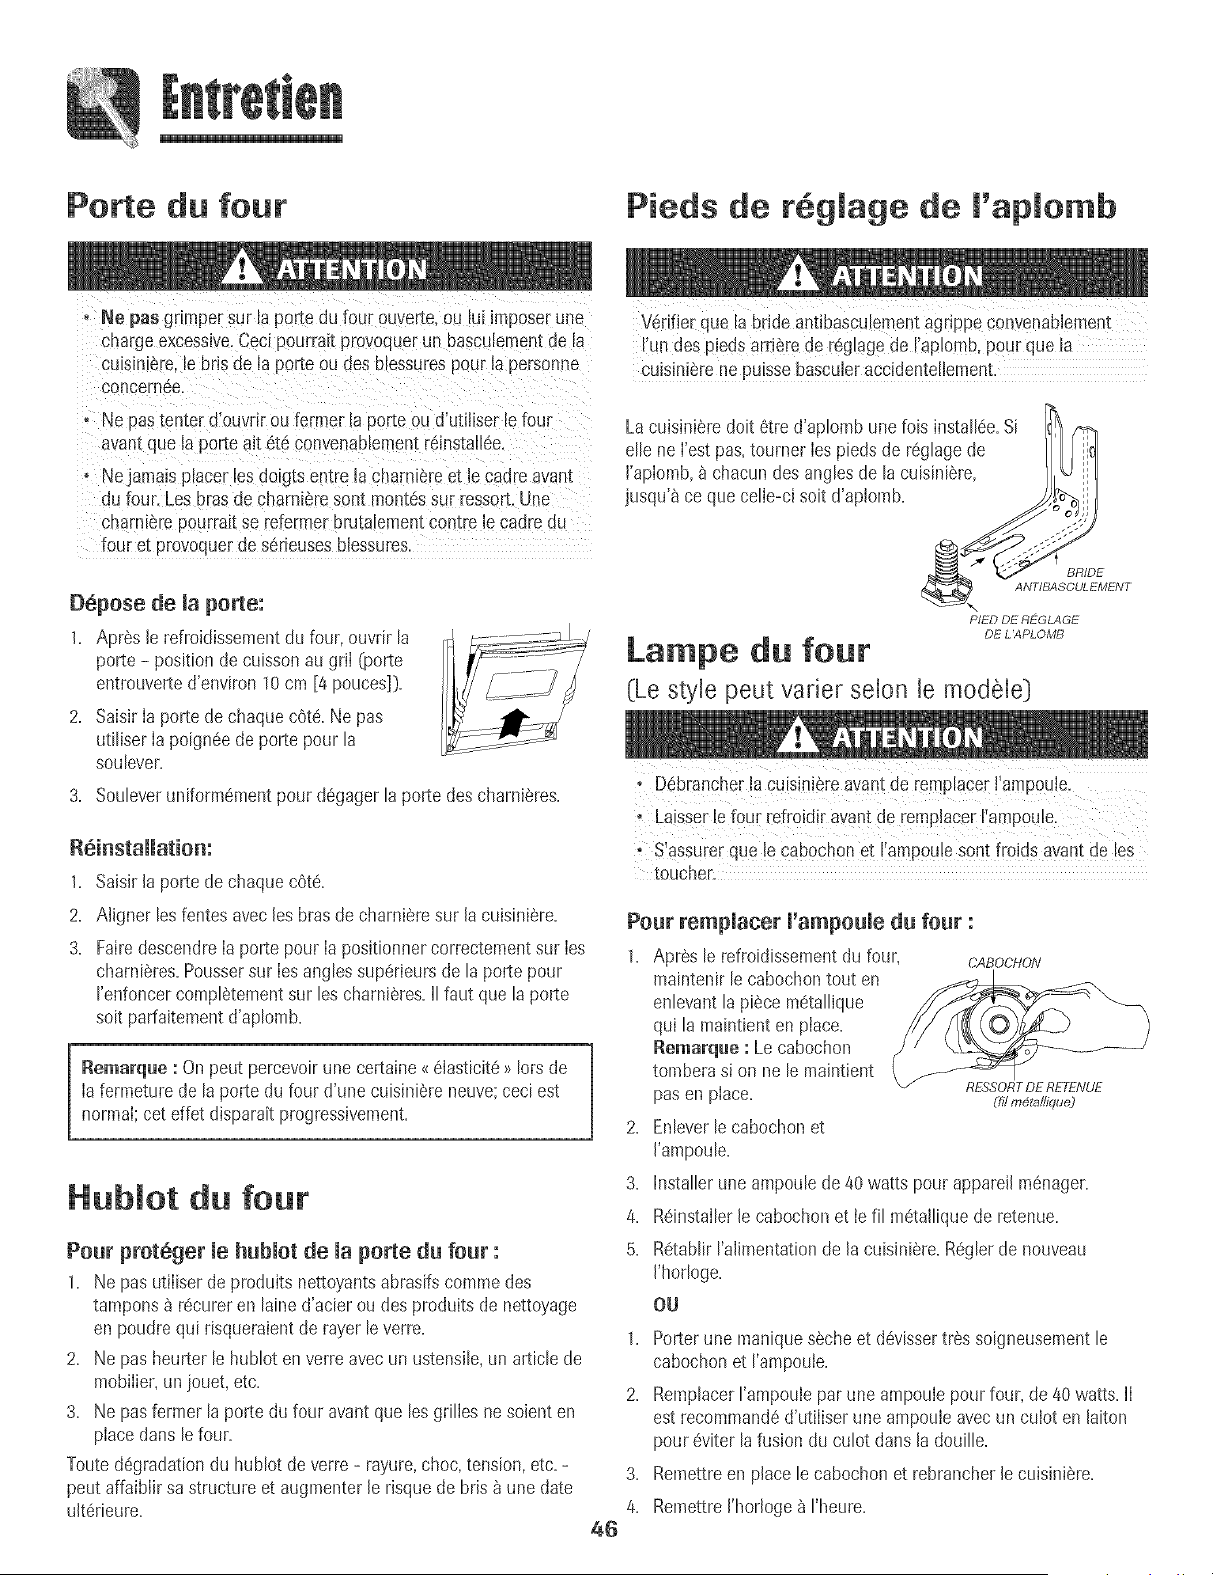
Porte du four
Pieds de r g[age de ['aplomb
, Ne pas grlmper sur Ia porte du four ouverte,ou [ui imposerune
cnarge excessive.Cec_pourra_tprovoquerun bascuiementde la
cuLs_n_ereiebds de la por[e ou c_esblessurespour ia personne
concern6e.
o Ne pasrenter d'ouvrir ou fermer la porte ou d'utiiiser lefour
avan[que [a porte ait et6 convenaNementr@install6e
- Nejamais placer[esdo_gtsentre ia charnLereet ie cadreavan[
du Tour.Les brasde charnieresont mont6ssur ressort,une
cnarmerepourraEtse refermer bmtaiementcontre lecadre du
four et provoquerde serieusesbiessures.
Depose de [a porte:
1. Apres [erefroidissementdu four, ouvrir la
porte - position de cuissonau gri[ (porte
entrouverted'environ 10cm [4 poucesD.
2. Saisir[a porte de chaquecote. Ne pas
utiliser [apoign6ede porte pour la
soulever.
3. SouJeveruniformementpour d6gagerJaporte descharnieres.
1. Saisir[aporte de chaquecote.
2. Aligner [esfentes avec [esbrasde charnieresur [acuisiniere.
3. Fairedescendre[a porte pour [a positionnercorrectementsur [es
charnieres.Poussersur [esanglessuperieursde la porte pour
renfoncer compietementsur les charnieres.II faut que laporte
soit parfaitementd'apiomb.
[ emarque : Onpeut percevoirune certaine<<6[asticite>>Iorsde
[afermeture de la porte du four d'une cuisiniereneuve;ceci est
normai;cet effet disparait progressivement.
Hub[or du four
Pour prot6ger mehubmotde [a porte du four :
1. Ne pas utiiiserde produits nettoyantsabrasifscommedes
tampons _ recureren laine d'acier ou des produits de nettoyage
en poudrequi risqueraientde rayer leverre.
2. Ne pas heurter le hubiot en verre avec un ustensile,un articlede
mobiiier,un jouet,etc.
3. Ne pas fermerla porte du four avantque lesgrilles ne soienten
placedartsle four.
Touted6gradationdu hubiot de verre - rayure,choc. tension,etc. -
peut affaibiir sa structureet augmenterle risque de bris _ une date
uit6rieure.
V6ri%r que [a brideantibasculementagrippeConvenabiement
I'undes piedsarriere de regiagede %piomb, pour que [a
cuisinierene puisse bascuieraccidenteilement.
Lacuisinieredoit etre d'apiomb unefois instalide.Si
eIIene l'est pas.tourner les piedsde reglagede I _
l'aplomb,_ chacundes anglesde la cuisiniere, J I
jusqu'_ ce que celie-cisoit d'aplomb. " _.,//
g_RAS_EMENT
PIED DE REGLAGE
DE L'APLOMB
La pe du four
(Le style peut vader selon [e module)
46
, S'assurerque [e Cabochonet ['ampouleSontfroids avantde les
toucher:
Pour remp[acer ['ampoule du four :
1. Apres [e refroidissementdu four, CAP,OCHON
maintenir [ecabochontout en
enievant[a piece metallique
qui [a maintienten piace.
Remarque : Lecabochon
tomberasi on ne le maintient
pas en place.
2. Enieverlecabochonet
['ampoule.
3. Installer uneampoulede 40watts pour appareilm6nager.
4. Reinstailerle cabochonet iefil metailiquede retenue.
5. RetabiirI'aiimentationde lacuisiniere.Regierde nouveau
I'horioge.
OU
RESSORT DE RET£NUE
(ill m_taHique)
1. Porterune maniquesecheet d6vissertres soigneusement[e
cabochonet I'ampouie.
2. RempiacerI'ampouiepar une ampoulepour four, de 40watts. I1
est recommand6d'utiiiser une ampouieavecun cuiot en ]aiton
pour eviter la fusion du culot dartsla douille.
3. Remettreen place le cabochon et rebrancherlecuisiniere.
4. Remettre['hodoge_ %eure.
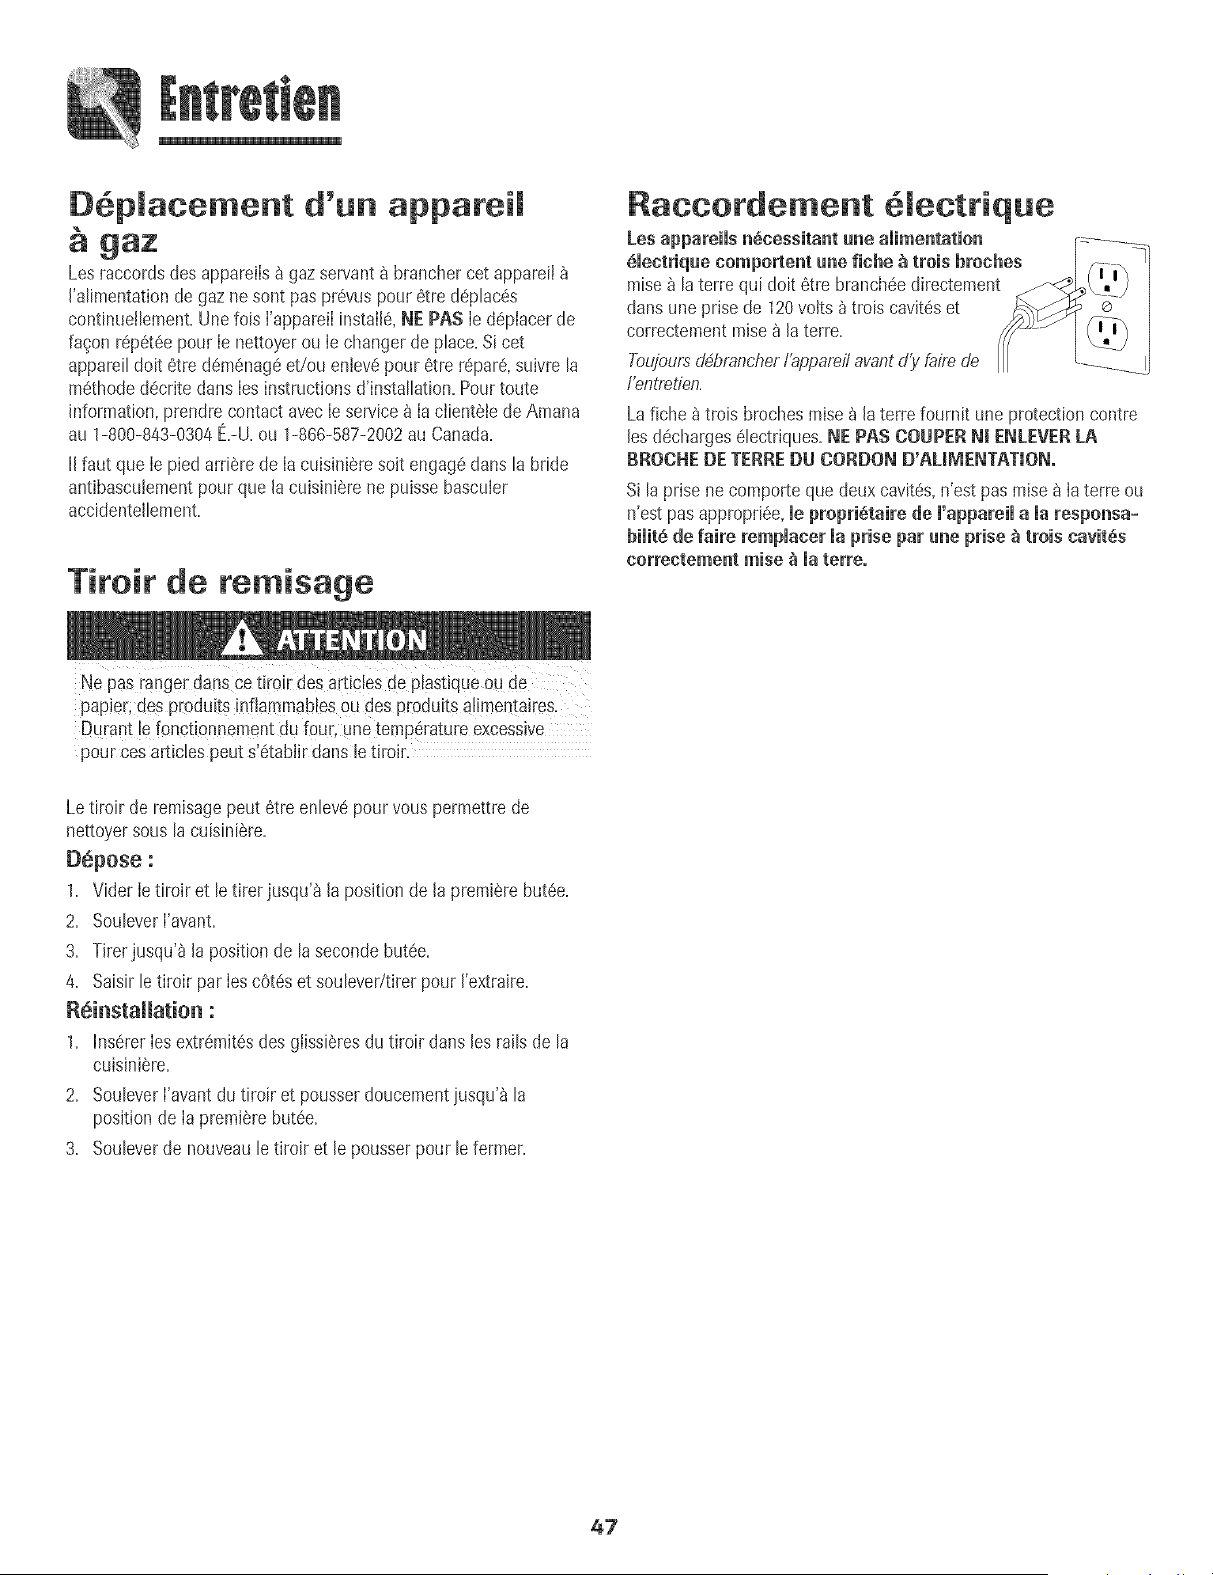
D6placement d'un appareil
gaz
Los raccordsdes appareils_ gazservant_ brancher cet appareil
['atimentationde gazne sont paspr@us pour 6tre d@ta@s
continueibment. Unefob ['apparei[instai[6,NE PAS [e d@iacer de
fa_on r@6t@ pour [e nettoyerou [echanger de ptace.Sicet
appareitdoit 6tre d6m@ag6et/ou enlev6pour 6tre r@ar6,suivre la
m6thode@crite dans [es instructionsd'installation.Pourtoute
information,prendrecontact avec [eservice_ [a ciienteb deAmana
au 1-800-843-0304E.-U.ou 1-866-587-2002au Canada.
I1faut que [e piedarri6rede [a cuisinieresoit engag6 dans la bride
antibascuiementpourque [a cuisinierene puisse bascubr
accidentellement.
Tiroir de remisage
Raccordement 6[ectrique
Les appareiis n6cessitant une aiimentation
6mectriquecompertent une fiche _ trois broches
raise_ la terre qu[ doit 6tre branch@ directement
dans uneprise de 120volts _ trois cavit@et
correctementrobe_ laterre.
Toujoursd@rancher/'appareilavantd'y faire de
i'entretien.
Lafiche _ trois brochesraise_ [aterre fournit une protectioncontre
[esd@harges61ectriques.NF PAS COUPERNI ENLEVERLA
RROCHE DE TERRE DU CORDON D'ALiMENTATION.
Si laprise ne comporteque deux cavit@,n'est pas raise_ iaterre ou
n'est pas appropri6e,mepropri6taire tie m'appareima maresponsa+
bimit6de faire rempmacermaprise par une prise _ trois cavit6s
correctement raise _ materreo
Ne pas rangerdans ce tiroir des art!des de p!astiqueou de
papier,des produitsinflarnmabtes0u des produitsa!imentairesr
{Durant !efonctionnementdu four, une temp6ratureexcess!re
pour cosarticles peut s!6tablirclans+etiroir.
Letiroir de remisagepeut 6tre enlev6pour vous permettrede
nettoyersousla cuisini6re.
D6pose :
1. Vider Ietiroir et le tirer jusqu'_ la positionde la premierebut@.
2. Soubver ['avant.
3. Tirerjusqu'a [a positionde laseconde but@.
4. Saisirle tiroir par [escOt6set soubver/tirer pour ['extraire.
R6instaHation :
1. Ins6rerIesextr@ak6sdes gibsi6res du tiroir dans les rails de la
cuisini_re.
2. Soubver I'avantdu tiroir et pousserdoueementjusqu'_ la
positionde Iapremi6re but6e.
S. Souleverde nouveaule tiroir et le pousserpour leformer.
47
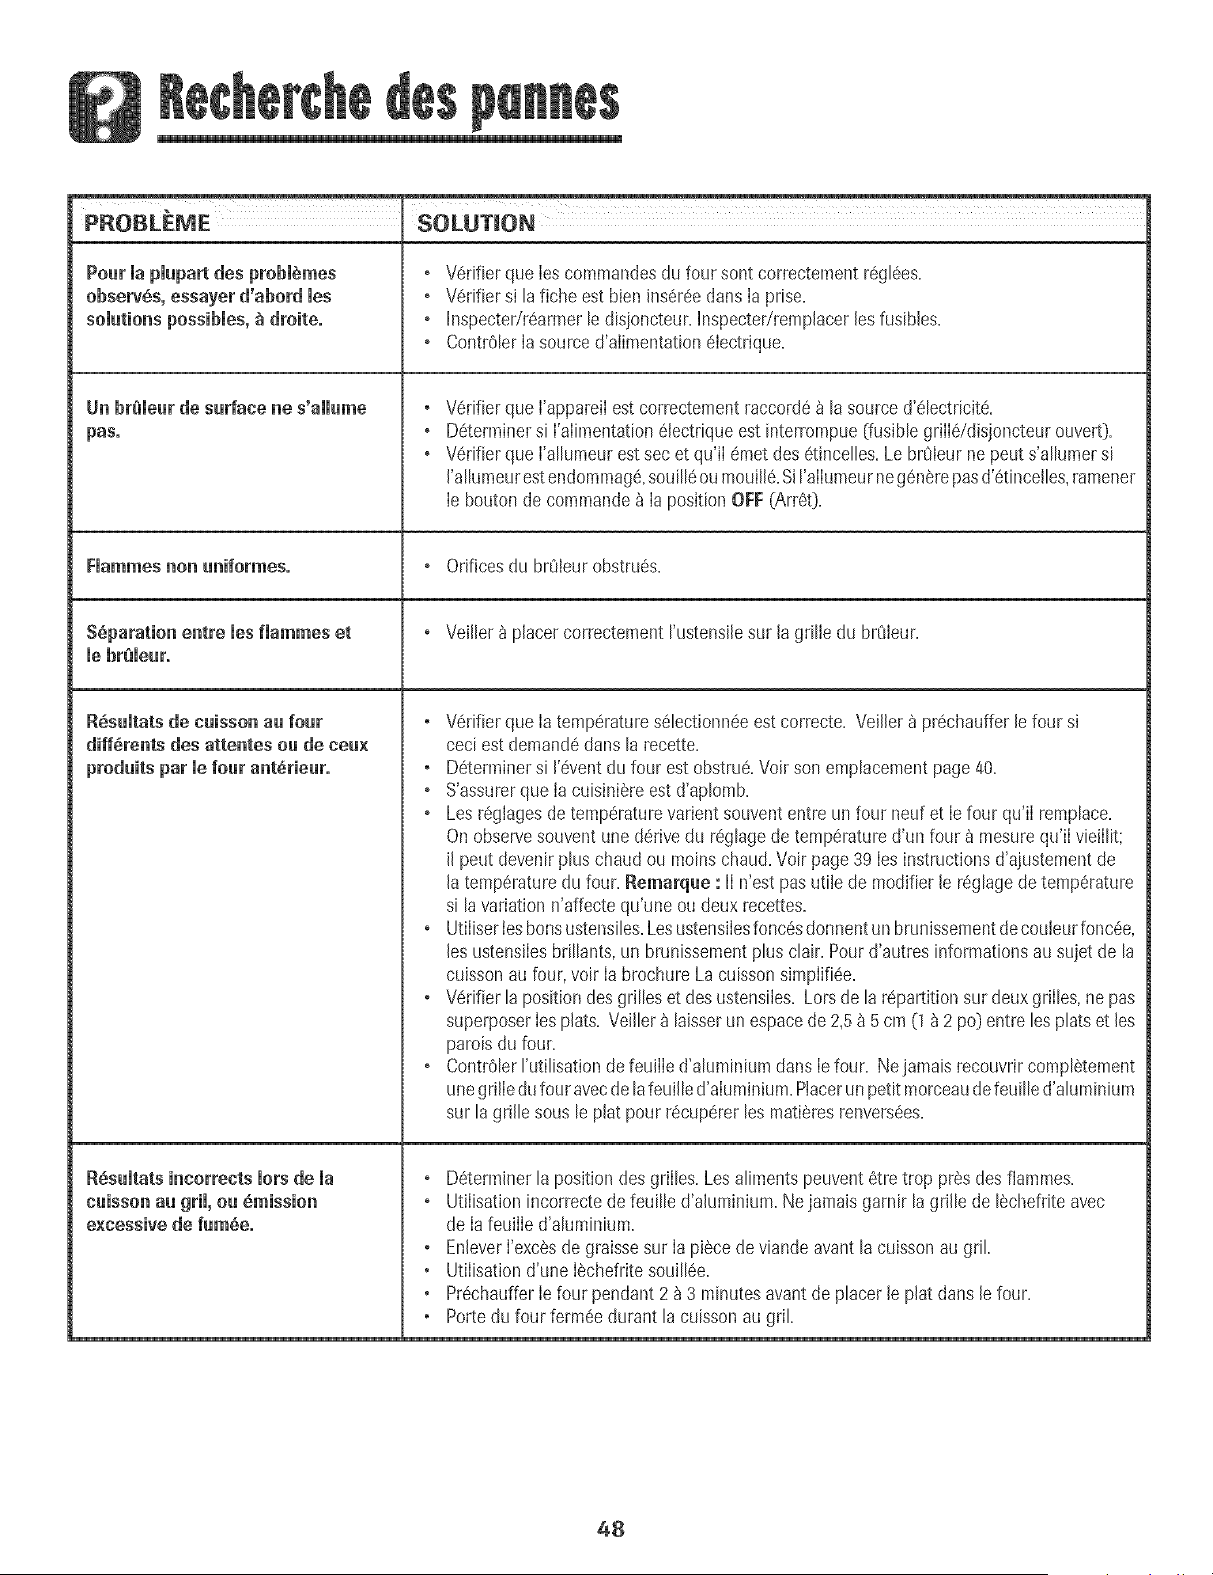
PROBLEME SOLUTION
Pourmapmupa desprobl mes
observes, essayer d'abord rues
somut_onspossibmes,_ droite.
(Inbr_leur de surface ne s'aiiume
pus.
, V6dfier que les corrlmandesdu four sont correctementr6gl6es.
, V6rifier si tafiche est bien ins6reedarts[a prise.
, Inspecter/r6armerle disjoncteur.Inspectedremp[acer[esfusib[es.
, ContrOler[a source d'aiimentationelectrique.
Verifier qua ['apparel[est correctementraccord6_ la source d'electricite.
D6terminersi ['alimentation6[ectriqueest interrompue(fusible grillddisjoncteur ouvert).
Verifier que ['allumeurest sac et qu'i[ emet des etincel[es.Le brOleurne peut s'al[umersi
['allumeurestendommag6,souilieoumouiH6.SiI'aiiumeurneg6nerepasd'6tincelles,ramener
[e bouton de commande_ [a positionOFF(Arr60.
Fiammes non aniformeso , Orificesdu brOleurobstru6s.
S_paration entre les fiammes et , Vei[ler _ placercorrectementI'ustensi[esur [a grille du brOleur.
mebremearo
RSsamtatsde caisson aa four
diffSrents des attentes oa de ceu×
produitsparlefour ant_riearo
R_sumtatsincorrects morsdema
caisson au grim,ou _mission
excessive de fumSeo
Verifier que Ia temperatures61ectionn6eest correcte. Veiller_ prechaufferlefour si
ceciest demandedans larecette.
° D6terminersi 1'6ventdu four estobstrue.Voirson emplacementpage 40.
° S'assurerqua tacuisini6re est d'aplomb.
° Les r6.gJagesde temp6raturevariant souvententre un four neuf et Ie four qu'iI remplace.
Onobservesouventune derivedu reglagede temp6ratured'un four _ mesurequ'iI vieillit;
il peut devenirplus chaud ou moins chaud.Voir page 39 Iesinstructionsd'aiustementde
Jatemp6raturedu four. Flemarque : II n'est pas utile de modifierJer6glagede temp6rature
si lavariationn'affecte qu'uneou deux recettes.
° UtiliserIesbonsustensiles.Lesustensilesfonc6sdonnentun brunissementdecouJeurfonc6e,
Jesustensilesbrillants,un brunissementplus clair. Pour d'autres informationsau sujet de la
cuissonau four,voir Ia brochureLa cuissonsimplifi6e.
° Verifier la position desgrilles et des ustensiles. Lorsde la repartition sur deux grilles,ne pas
superposerIesplats. Veiller _ hisser unespacede 2,5_ 5cm (1 _2 po) entre lesplatset Jes
paroisdu four.
° Contr61erI'utilisationde feuilIe d'aluminiumdans Ie four. Nejamais recouvrircomplatement
unegrilledufour avecdela feuilled'aluminium.Placerun petit morceaudefeuille d'aluminium
sur la grille sous le plat pourr6cuperer les matieresrenvers6es.
D6terminerla positiondes grilles. Lesalimentspeuvent6tre trop prSsdes flammes.
Utilisationincorrectede feuille d'ahminium. Nejamais garnir la grille de ISchefriteavec
de IafeuilIe d'aluminium.
EnleverI'excesde graissesur Ia piecede viandeavantla cuissonau griL
Utilisationd'une Iechefritesouill6e.
Pr6chaufferIe four pendant2 _ 3 minutesavantde placer Jeplat dans Jefour.
Portedu four ferm6.edurant la cuissonau griL
48
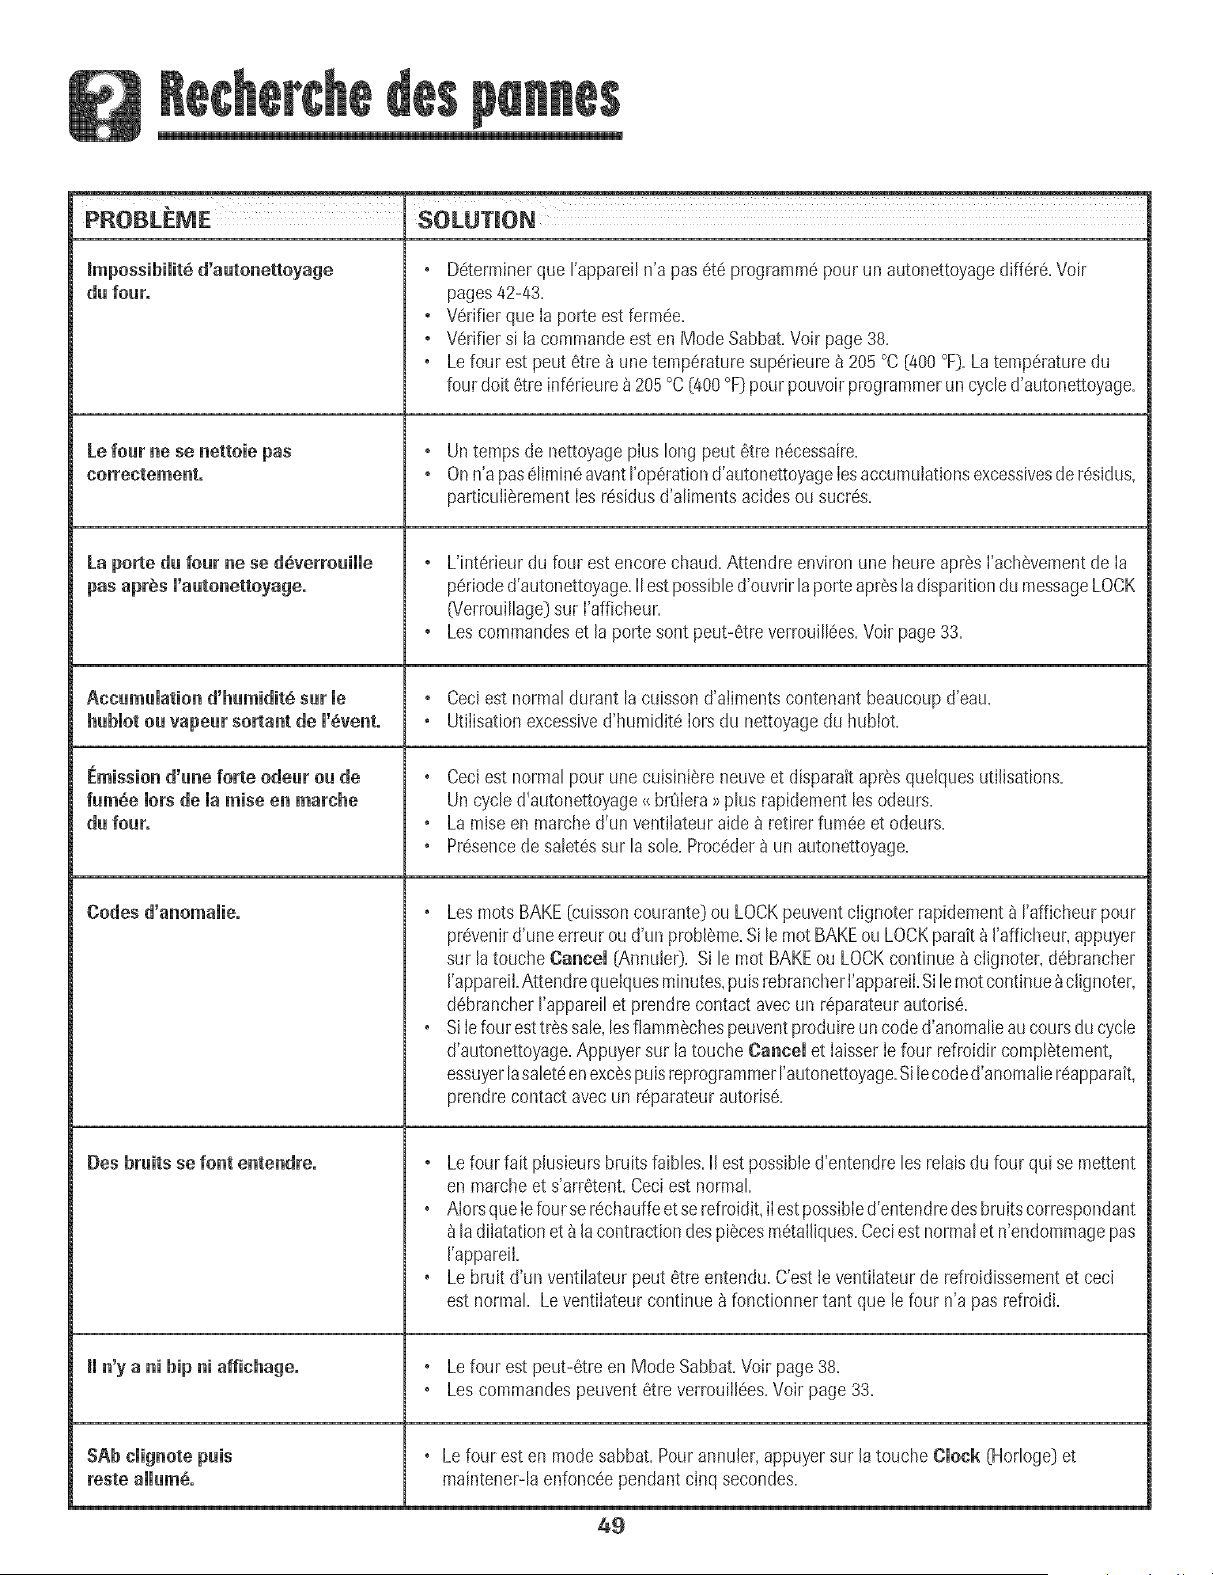
J
PROBLEME SOLUTION
mpessibimit d'autonettoyage
du four.
Le four ne se nettoie pas
correctement°
La porte du four ne se d_verrouiHe
pas apr_s m'autonettoyage°
D6terminerque Fappareiln'a pas 6te programmepour un autonettoyagediff6r6.Voir
pages42-43.
Verifierque Ia porte est ferm@.
Verifiersi la commandeest en Mode Sabbat.Voir page 38.
Le four est peut 6tre _ une temperaturesuperieureb 205°C {400°F}.Latemp6raturedu
four doit 6tre inferieure_205°C(400°F[)pourpouvoir programmerun cycled'autonettoyage.
, Un temps de nettoyageplus long peut 6tre n@essaire.
, On n'a paselimineavant I'op6rationd'autonettoyageIesaccumulationsexcessivesde r@Jdus.
particuliSrementIesresidus d'alimentsacidesou suet@.
Accamalation d'hamidit_ sat me , Ceciest normaldurant la cuissond'alimentscontenant beaucoupd'eau.
habmotoa vapear sortant de m'6vent, Utilisation excessived'humidite Iorsdu nettoyagedu hublot.
F:mission d'ane forte odear oa de
famSe brs de maraise en marnhe
da roar.
Codes d'anomalie.
Des braits se font entendre°
n'yanihipni affichage.
SAb cmignotepals
reste ammam_.
L'interieur du four est encorechaud.Attendre environ une heureaprSsI'achSvementde Ia
perioded'autonettoyage.IIestpossibled'ouvrirlaporteaprSsla disparJtiondu messageLOCK
(Verrouillage)sur I'afficheur.
Les commandeset la porte sont peut-6tre verrouill@s.VoJrpage 33.
Ceciest normalpour une cuisJniereneuveet disparaitaprSsqueJquesutiJJsations.
Un cycle d'autonettoyage_ brSIera>>plus rapidement lesodeurs.
La raiseen marched'un vendlateuraideb retirerrum@ et odeurs.
Presencede salet6ssur lasob. Proceder_ un autonettoyage.
Les rootsBAKE(cuissoncourante)ou LOCKpeuventcIignoter rapidement_ rafficheur pour
prevenird'une erreuroud'un probleme.Si le motBAKEou LOCKparak_ J'afficheur,appuyer
sur latouche Cancel [AnnuJe0. Sile mot BAKEou LOCKcontinue_ clignoter, d@rancher
J'appareiLAttendrequelquesminutes,puisrebrancherI'appareiI.Silemotcontinue_clignoter.
debrancherI'appareilet prendrecontact avecun r@arateurautoris6.
SiIefour esttr@ sale,lesflamm6chespeuventproduireun coded'anomalieaucoursducycle
d'autonettoyage.Appuyersur latouche Cancel et IaisserIe four refroidir comp!6tement,
essuyerlasaleteenex@spuisreprogrammerI'autonettoyage.Silecoded'anomalier@pparait,
prendrecontactavec un r6.parateurautoris6..
Le four fait phsieurs bruits faibles, IJest possible d'entendre les relais du four qui se mettent
en marche et s'arr6tent, Ceci est normal
Alors que Ie four se rechauffe et se refroidit, iI est possible d'entend re des bruits correspondant
la dilatation et _ Jacontraction des pi@es pa6tallJques,Ceci est normal et n'endommage pas
['appareiL
Le bruit d'un ventilateur peut 6tre entendu. C'est Jeventilateur de refroJdissement et ceci
est normal Le ventilateur continue _ fonctionner tant que le four n'a pas refroJdL
o Le four est peut-6tre en Mode SabbaLVoir page38.
Les commandespeuvent6tre verrouiJJ6es.Voir page33.
Lefour est en modesabbat.Pourannuler,appuyersur latouche Cbck [Horloge] et
maintener-laenfonc6ependantcinq secondes.
49

50
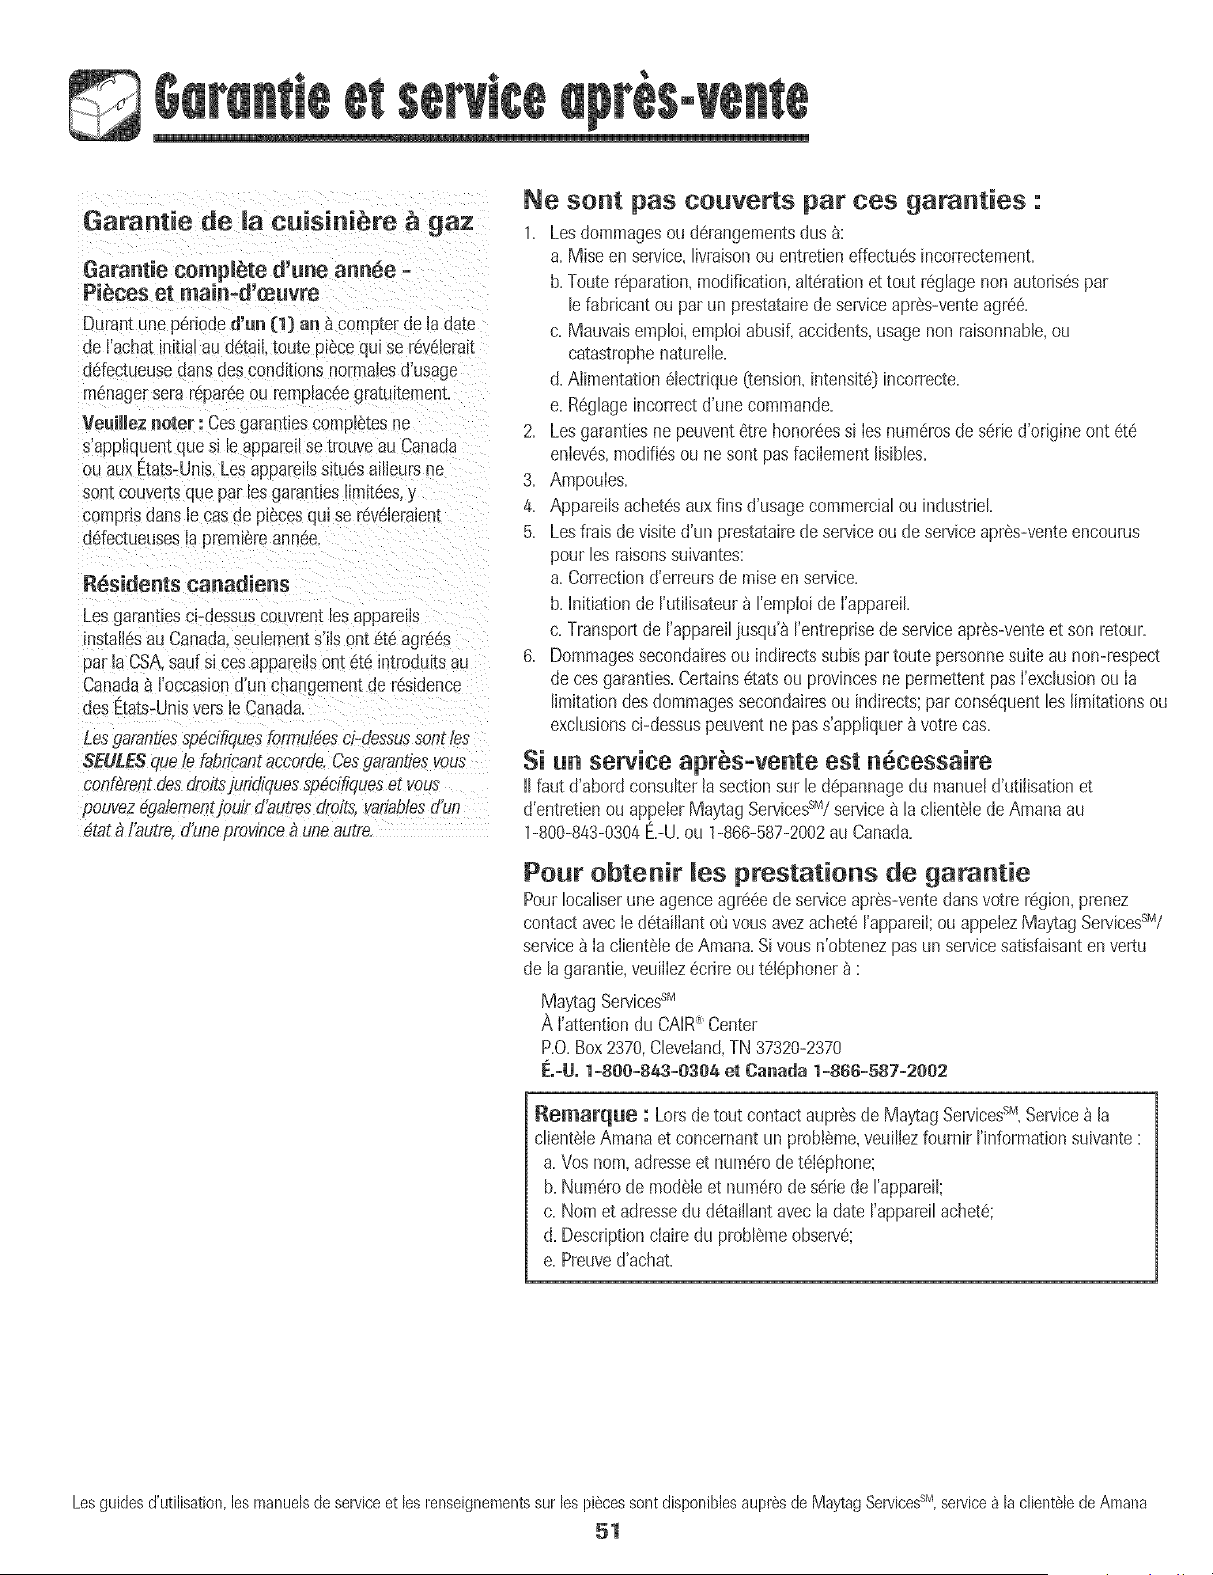
Garant[e de ia cuisini_re _ gaz
Garantie complete d'une annee -
Pieces et main-d'_uvre
Durantunep6noded'un (1) an a comp[erde ladate
de I'achat_nitialau d6taJLtoutep_ecequi se r6v6Jerait
d6fec[ueusedansdes conditionsnormalesd'usage
managerserar6par_eou remp_aceegratutement.
Veuillezrioter: Cesgarantiescomp_e_esne
s'appliq[Jentquesi le appareilse trouveau Canada
ou aux Etats-Unis.Lesapoarellssltuesaflleursne
son[couver[sque par lesgarantieslimJt6esy
comprisdartslecasde piecesqui se r6v61eraJem
ddectueusesla prerrfi_reann6e.
Residents canadiens
Lesgarantiesci-dessuscouvrentlesappare_ls
install6sauCanada.sedements'ils ont6t6 agr66s
par laCSA.sad si cesappareilsont 6t6introduitsau
Canada_ I'occasiond'un cnangemen[der6sidence
des Etats-Unisvers le Canada.
Lesgarantiessp6cifiquestormu/4esci-dessussonrles
$EU££S queb fabricantaceorde.Cesgarantiesvous
conf&_entdesdroitsyridiques sp4cifiqueser w,us
pouvezdga/ementjoulrd'autresdroits,variablesd'un
4tatb/_lutre,dbnepmwnce9 uneautre.
Ne sent pas couverts par ces garanties :
1= Les dommages ou d6rangements dus _:
a=Miseenservice,livraisonou entretieneffectu6sincorrectement=
b=Touter6paration,modification,alt6rationet tout r6glagenonautoris6spar
lefabricantou parun prestatairedeserviceaprSs-venteagr66=
c=Mauvaisemploi,emploiabusiflaccidents,usagenonraisonnable,ou
catastrophenaturelle=
d=Alimentation61ectrique(tension,intensitd)incowecte=
e=R6glageincorrectd'unecommande=
2= Lesgarantiesne peuvent6tre honor6essi Ies num6rosde s6ried'o%ine ont 6t6
enlev6s,modifi6soune sontpasfacilementIJsibles=
3= Ampoules=
4= Appareilsachet6sauxfins d'usagecommercialou industr[eL
5= Lesfraisdevisited'un prestatairede serviceoude serviceapr_s-venteencourus
pourles raisonssuivantes:
a=Correctiond'erreursde raiseenservice.
b=hlit[ationde I'ut[Iisateur_ I'emploide I'appareiL
c=Transportde rappareiliusqu'_ rentreprisede serviceapres-venteet son retour=
6= Dommagessecondairesou indirectssubispartoutepersonnesuite au non-respect
decesgaranties=Certains6tatsou provincesnepermettentpasI'excJusionou Ia
limitationdesdommagessecondairesou indirects;par cons6quentles limitationsou
exclusionsci-dessuspeuventnepas s'appliquer8 votrecas=
Si u_ sewice apr_s-ve_te est _cessaire
IIfautd'abordconsulteriasectionsur le d_pannagedu manueld'utiiisationet
d'entretienou appelerMaytagServicesSM/service_ la client_Jede Amanaau
1-800-843-0304E=-U=ou 1-866-587-2002au Canada=
Pour obte_ir les prestatio_s de gara_tie
PourIocaliserune agenceagre6ede serviceapr_s-ventedartsvotre r_gion,prenez
contactavecIed_taillanto_'_vousavezachet8I'appareii;ou appeIezMaytagServicesSM/
service_ IacIient61edeAmana=Si vous n'obtenezpas un servicesatisfaisantenveitu
de lagarantie,veuilIez8crireout618phoner_ :
MaytagServices"SM
A I'attentJondu CAIR Center
P.O=Box2370,Cleveland,TN37320-2370
E.-U. 1-80e-8_3-o3e_ et Canada 1-866-587-2002
_emarque : Lotsdetout contactaupr_sde MaytagServicess_,Service_ la
clienteleAmanaet concernantun prob!6me,veuillezfoumir I'JnformationsuJvante:
a=Vosnora,adresseet num_rodet_lSphone;
b. Num6rode moduleet num_rode s_riede['appareil;
c. Noraet adressedu d6taillantavecla date rappareilachet6;
d. Descriptionciaire du probl6meobserv6;
e. Preuved'achat.
Les guides d'utilisation, les manuels de service et les renseignen°lents sur les pi_ces sont disponibles aupres de Maytag ServicesSM,service a la clientele de AmalBa
51
Estufa a Gas Desiizante con Control 'Easy Touch' 700
Cocinando en [a Estufa ......................................... 58-59
ControHesSuperiores
Quemadores SeHados
Cocinando en e[ Homo .........................................60-69
Homeado
'Cook & HoHd'
'Cook & HoHd'Diferido
Mantener Cdiente
Asar a HaParriHa
'Favorite'
ParriHasde.,[Homo
Cuidado y Limpieza ............................................... 70-73
Horno Auto[impiante
Procedhllientos de Limpieza
Mantenimiento ....................................................... 74-75
Ventana y Luz dd Homo
Retiro de [a Estufa a Gas
Locaiizaci6n y Soluci6n
de Avefias ................................................................76-77
Garantia y Servicio .......................................................79

mnstalader: Porfavor deje esta gu[ajunto con el
CensumideR Potfavor leay conserveesta guia para referencia
futura, Conserveel recibode compray/o e! cheque canceBdo
NOmerode Modelo
NOmerodeSerie
(Lunes a V[emes,8:00 a,m,a 8:00p,m,
Er!nuestrocontinuoaf_inde mejorar Jacalidad y rendimientode
nuesttose[ectrQdem@ticos,puede que sea necesariomodif[cat
Para J#fermacJ## sebre servicie, ver pbg#la 19.
Lea y siga todas las instrucciones antes de usar este
eiectrodom_stico para evitar eI rbsgo potential de incendio.
choque ei@tfico, bsiOn personal o daSe al ebctrodom6stico
como resultado de su uso inapropiado, Utflice este
ebctrodomestico sohmente para el prop6sito que ha sido
destinado segQn se describe en esta guia,
Para asegurar funcionamiento correcto y seguro: El
ebctrodom6stico debe sell instalado debidamente y puesto a
tierra poll un t@nico calificado, No intente ajustar, Fepara
presta servicio o reempBzar nmguna pieza de este ebctrodo-
mestico a menos que sea espedficamente recomendado en
esta guia, Todas Bs reparaciones deben set redizadas pot un
t@nico calificado. Pida al instalador que b indique la
ubicaci6n de la vSIvula de cierre del gas y como cerrafla en
caso de una emergencia,
Siempre desenchufe el ebctrodom6stico antes de efectua
alguna reparacion,
Las advertencias e instrucciones importantes sobre seguridad
que aparecen en esta guia no est_n destinadas a cubrir todas
Bs posibbs circunstancias y situaciones que puedan ocurrir,
Se debe ejercer sentido comuJn,precauci6n y cuidado cuando
instab, realice mantenimiento o haga funcionar el artefacto,
Siempre p6ngase en contacto con el fabricante si surgen
probbmas o situaciones que usted no comprenda,
Reconozca los simbo os, advertencias,
etiquetas de seguridad
Si no se sigue estrictamente Ja infermaci6n
proporcienada en esta guia, se puede preducir un
incendio e una explesi6n, causande da_es materiales,
Jesienes persenales e mertales°
No almacene ni use gaselina ni etres vaperes y
J_quides inflaraables en la vecindad de este
eiectredom6stice e de cualquier etreo
- QUE HATER SI PEROIBE OLOR A GAS:
o No trate de encender niag_n aAefacteo
o No toque ningun iaterPapter ei_ctrice.
, No use ningen tei6fene en su edificie,
. Liame inmediatamente a su preveeder de gas
desde el teJ6feno de un vecine. Siga las
instruccienes prepercienadas per el preveeder
de gas.
- Si ne puede lecalizar a su preveeder de gas,
Ilame al cuerpe de bemberes°
- La instalaci6n y reparacienes deben set efectuadas
per un t_cnice califbado, una agencia de
reparacienes e el preveeder de gas.
PODRIAN causar bsi6n personal grave o mortal
PRECAUCiON, Peligros o Pr_Cticas no segu[as clue
PODRIAN causar bsi6n personal menos grave.
detectados pard o!or so!amente, Los Foveederes de gas
acuerdo Con las instrucciones del fabricante,
53
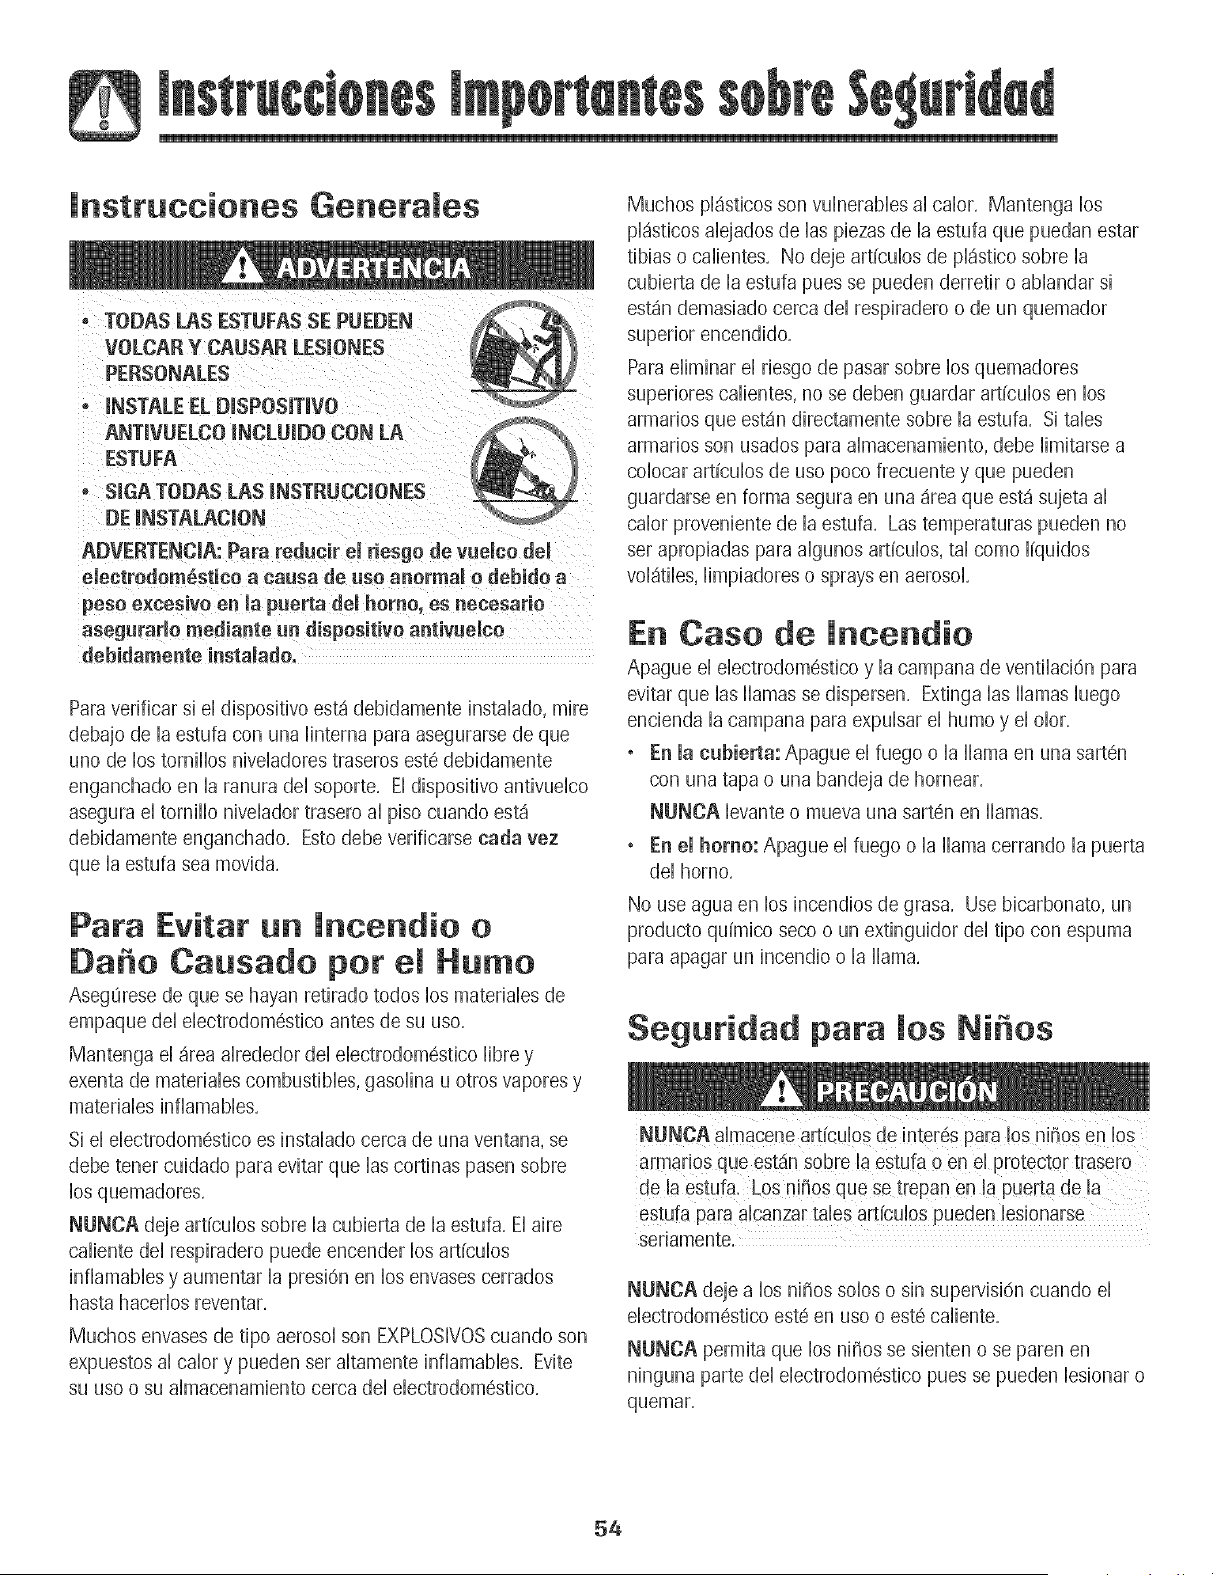
lnstruccienes Generates
o TODA$ LAS ESTUFAS $E PUEDEN
VOLCAR Y CAUSAR LESIONE$
PERSONALES
° INSTALE EL DISPOSJTIVO
ANTIVUELCO INCLUIDO CON LA
ESTUFA
o SIGA TODAS LAS mNSTRUCCIONES
DE mNSTALAC|ON
ADVERTENCmA: Para redueir el desgo de vuelco deU
ebctrodom6stico a eausa de use anormal o debido a
peso e×eesivo en [a puerta del homo, es neoesario
asegurarlo mediante un dispositivo antivueleo
debidamente instalado=
Paraverificar si eI disposidvo est_ debidamente instaBdo, mire
debajo de la estufa con una linterna para asegurarse de que
uno de los torniilos niveladores traseros est6 debidamente
enganchado en la ranura del soporte, Eldispositivo antivuebo
asegura el tornillo niveBdor trasero al piso cuando est_
debidamente enganchado, Estodebe verificarse carla vez
que la estufa sea movida,
Pata Evitar un it|cot|die e
Da e Causado pet el Hume
Asegurese de que se hayan retirado redes los materiabs de
empaque del ebctrodomestico antes de su use,
Mantenga el _rea alrededor del ebctrodomestico libre y
exenta de materiabs combustibles, gasolina u otros vapores y
materiabs infiamabbs,
Si el ebctrodomestico es instalado cerca de una ventana, se
debe tener cuidado para evitar que Bs cortinas pasen sobre
los quemadores,
NUNCA deje articulos sobre la cubierta de la estufa, El aire
caliente del respiradero puede encender los articulos
infiamabbs y aumentar la presi6n en los envases cerrados
hasta hacerlos reventar,
Muchos envases de tipo aerosol son EXPLOSIVOScuando son
expuestos al crier y pueden ser altamente infiamabbs, Evite
su use o su almacenamiento cerca del ebctrodom6stico,
Muchos pl_sticos son vulnerables al calor, Mantenga los
pl_sticos alejados de las piezas de la estufa que puedan estar
tibias o calientes, No deje art[culos de pl_stico sobre la
cubierta de la estufa pues se pueden derretir o ablandar si
est_n demasiado cerca del respiradero o de un quemador
superior encendido,
Paraeiiminar ei riesgo de pasar sobre los quemadores
superiores calientes, no se deben guardar art[culos en los
armarios que estSn directamente sobre la estufa, Si tabs
armarios son usados para almacenamiento, debe limitarse a
colocar articulos de use poco frecuente y que pueden
guardarse en forma segura en una _rea que est_ sujeta ai
calor proveniente de la estufa, Las temperaturas pueden no
set apropiadas para algunos articulos, tal come liquidos
vol_tiles, limpiadores o sprays en aerosol,
En Case de lncendie
Apague ei eiectrodomestico y ia campana de ventiiaci6n para
evitar que las llamas se dispersen, Extinga las llamas luego
encienda ia campana para expuisar ei humo y ei oior,
° En la eubierta: Apague ei fuego o ia llama en una sart6n
con una tapa o una bandeja de hornear,
NUNCA levante o mueva una sarten en llamas,
• En el homo: Apague el fuego o la llama cerrando la puerta
dei homo,
No use agua en los incendios de grasa, Use bicarbonate, un
producto quimico seco o un extinguidor dei tipo con espuma
para apagar un incendio o la llama,
Seguridad para los Ni es
NUNCA aimacene art!cuios de inter6s para !os nihes en bs
armar!os que est_in s0bre la estufa o en el protector trasero
de la estufa, LOSn!5os que se trepan en la puerta de la
seriamente,
NUNCA deje a los niSos solos o sin supervisi6n cuando el
electrodom6stico est6 en use o est6 caliente,
NUNCA permita que los niSos se sienten o se paren en
ninguna parte del electrodom6stico pues se pueden lesionar o
quemar,
54
Se[esdebeense_aralosni_osquee[e[ectrodomesticoy
losutensHiosqueest4nen6[o sobre6[puedenestar
caHentes,DejeenfriarlosutensHioscaHentesenun[ugar
seguro,fuerade[a[cancedelosni_ospeque_os,Se[es
debeense_aralosni_osqueune[ectrodom6sticonoesun
juguete,Nosedebepermitirquelosni_osjueguenconlos
contro[esuotraspiezasde[aestufa,
NUNCAuse[apuertadeestee[ectrodom6st[cocomope[dafio
oas[entoyaquee[e[ectrodom@sticosepuedevo[car,ycausaH
[es[onesgraves.
NUNOAuseestee[ectrodom6sticocomoca[efactordearea
oparae[evar[atemperaturade[ahab[tac[On.Estopuede
causarenvenenam[entopormonOx[dodecarbonoye[
sobreca[entam[entode[homo.
NUNCAcubranngunarend[ja,agujeroocanalen[aparte
inferiorde[homoo cubra[arej[[[acomp[etaconmater[ales
talescomoe[pape[dea[um[n[o.Estoev[taquee[a[ref[uya
atravesdelhomoy puedecausarenvenenam[entopot
mon6x[dodecarbono.E[pape[dea[um[n[otamb[6npuede
contenere[ca[o_y producurunr[esgodeJncendio.
NUNOAobstruyae[f[ujode[a[redecombust[6nyde
vent[[ac[Oncubr[endo[asentradasosa[[dasdea[redelhomo.
Estopuederestr[ng[re[accesode[a[realosquemadoresy
causarenvenenamientopormonOxidodecarbono.
E[respiraderode[homoseencuentraen[apartetraserade[a
superficiedecocci6n,
Evitetocare[4reade[respiraderomientrase[homoest6
encendidoydurantevariosminutosdespu6sdehaber[o
apagado,A[gunaspartesde[respiraderoyde[4reaque[o
rodeaseca[ientan[osuficientecomoparacausar
quemaduras,Despu6sdeapagare[homo,notoquee[
respiraderooe[4reaque[orodeahastaquehayatenido
suficientetiempoparaenfriarse,
Otrassuperficiesquepuedenestarca[ientesinc[uyen[a
cubierta,[assuperficiesqueest4ndirigidashacia[acubierta,
e[respiraderode[homo,[assuperficiescercanasa[aabertura
de[respiradero,[apuertade[homoy [as4reasque[asrodean,
y [aventani[[ade[homo,
Notoqueunfocodehomoca[ienteconunpasohumedoya
quesepuederomper,Sie[focoserompe,desconectee[
suministroe[6ctricoa[e[ectrodomesticoantesderetirare[foco
paraevitarunchoquee[6ctrico,
55
No uti[ice [a cubierta o e[ homo como 4teas de
a[macenamiento para a[imentos o utensi[ios de cocina,
Seguridad Para Cocinar
Siempre co[oque un utensi[io en un quemador superior antes
de encender[o, AsegQrese de usar [a peri[[a correcta que
contro[a carla quemador superior, AseguJresede encender e[
quemador correcto y comprobar de queen efecto e[
quemador haya sido encendido, Cuando haya terminado de
cocinar, apague e[ quemador antes de retirar e[ utensi[io para
evitar exposici6n a [a llama de[ quemador,
Siempre ajuste [a llama de[ quemador superior de modo que
no se extienda m4s a[[4 de[ borde inferior de[ utensi[io, Una
llama excesiva es pe[igrosa, desperdicia energia y puede
daSar [a estufa, e[ utensi[io o los armarios que est4n sobre [a
estufa,
NUNCA deje sin supervisi6n [a cubierta de [a estufa cuando
este cocinando, especia[mente cuando usa un ajuste de ca[or
alto o cuando este usando una freidora, Los reboses pueden
producir humo y los derrames de grasa pueden infiamarse,
Limpie los derrames grasosos tan pronto como sea posib[e,
No use ca[or alto durante periodos de cocci6n pro[ongados,
NUNCA ca[iente un envase cerrado en e[ quemador superior
o en e[ homo, La acumu[aci4n de presi6n puede hacer
exp[otar e[ envase causando una [esi6n persona[ grave o daSo
a [a estufa,
Use tomao[[as secos y gruesos, Los tomao[[as humedos
pueden causar quemaduras a causa de[ vapor, Las toa[[as u
otros sustitutos no deben ser usados como tomao[[as porque
e[[os pueden quedar co[gando a trav6s de los quemadores
superiores y encenderse o enredarse en [as piezas de [a
estufa,
Siempre deje enfriar [a grasa ca[iente que se ha usado en [a
freidora antes de intentar mover o manipu[ar[a,
No permita que se acumu[e grasa u otros materia[es
infiamab[es en [a estufa o cerca de ella, en [a campana o en e[
venti[ador aspirador, Limpie [a campana extractora con
frecuencia para evitar que [a grasa u otros materia[es
infiamab[es se acumu[en en [a campana o en e[ fi[tro,
Encienda e[ venti[ador cuando cocine a[imentos fiameados
debajo [a campana,
NUNCA use vestimentas de materia[es infiamab[es, ropa
sue[ta o de mangas [argas cuando est6 cocinando, La
vestimenta se puede encender o enganchar en los mangos de
los utensi[ios,
Sbmpre coIoque las parriihs deI homo en la posbi6n deseada
cuando eI homo est6 frio, Desibe la parriih deI homo hacia
afuera para agregar o retirar aiimento, usando tomaoiias secos
y resbtentes, Siempre evReabanzar dentro deI homo para
agregar o retirar aiimentos, Si una parriiia debe ser sacada
cuando est4 todavia caiiente, use un tomaoiias seco, Siempre
@ague eI homo despu6s de haber terminado de cocinar,
Tenga cuidado cuando abra la puerta dei homo, Deje que
escape eI aire o eI vapor caibnte antes de sacar o voiver
coIocar eI aiimento,
ADVERTENCIA SOBRE LOS ALIMENTOS PREPARADOS:
Siga Bs instrucciones del fabricante de los aBnentos, Si un
envase de pl4stico de alimento congeBdo y/o su tapa se
deforma, se comba o se daha de alguna otra manera durante
la cocci6n, descarte inmediatamente el alimento y su envase,
Elalimento puede estar contaminado,
NUNCA use papel de duminio para cubrir una parrilh del
homo o la parte inferior del homo, El uso incorrecto puede
resuRar en un riesgo de choque el@trico, incendio o daho al
ebctrodom6stico, Use papel de duminio solamente como se
indica en esta guia,
UtensiJios Apropiados
Use sartenes con rondos pBnos y mangos que sean f4cibs de
tomar y que permanezcan frios, Evite usar sartenes u ollas
inestabbs, combadas que se pueden vobar f4cilmente u olhs
cuyos mangos esten sueRos, Adem4s evite usar utensilios
especidmente peque_ios o sartenes con mangos pesados
pues ellos pueden ser inestabbs y vobarse f4cilmente, Los
utensilios que son pesados de mover cuando est4n Ibnos con
alimento pueden tambi@ ser un peligro,
AsegLirese de que el utensilio sea Io suficientemente grande
como para contener en forma debida los alimentos y evitar
derrames, El tama_io es particularmente importante cuando
se utilizan freidoras, Asegu_resede que el utensilio tiene
capacidad para ei voiumen de aiimentos que se va a agregar
ai iguai que para ia formaci6n de burbujas de ia grasa,
Para reducir a un minimo las quemaduras y que los materiales
inflamables y los derrames se enciendan debidos a contacto
no intencional con el utensilio, los mangos no deben
extenderse sobre el quemador superior adyacente, Siempre
gire los mangos de los utensilios hacia el lado o hacia la parte
trasera de la estufa, no hacia la habitaci6n donde puede set
f4cilmente golpeados o alcanzados por los nihos pequehos,
Nunca deje que un utensilio hierva hasta quedar seco pues
esto puede dahar el utensilio y la estufa,
Siga las instrucciones del fabricante cuando use bolsas para
cocinar en el homo,
Solamente ciertos tipos de utensilios de vidrio cer4mico, de
cer4mica o glaseados son convenientes para uso en la
cubierta de la estufa o en el homo sin quebrarse debido al
cambio repentino de temperatura, Siga las instrucciones del
fabricante cuando use utensilios de vidrio,
Esteelectrodom6stico ha sido probado respecto a su
rendimiento seguro usando utensilios de cocina
convencionales, No use ningun dispositivo o accesorio que no
haya sido espedficamente recomendado en esta guia, No use
tapas para cubrir los quemadores superiores, rejiiias para ia
cubierta de la estufa ni agregue sistemas de convecci6n para
hornos, El uso de dispositivos o accesorios que no son
expresamente recomendados en esta guia, puede crear serios
peligros de seguridad, resultar en problemas de rendimiento y
reducir la vida utii de los componentes de la estufa,
Seguridad de la Limpieza
Apague todos los controies y espere que se enfrien ias piezas
de la estufa antes de tocarlas o limpiarlas, No toque las
rejiiias de los quemadores o ias 4reas circundantes hasta que
elias no hayan tenido tiempo suficiente de enfriarse,
Limpie la estufa con cuidado, Tenga cuidado para evitar
quemaduras de vapor si se usa una esponja o un paho mojado
para iimpiar los derrames en una superficie caiiente, Aigunos
iimpiadores pueden producir vapores nocivos cuando se
aplican a una superficie caliente,
Homo AutoJimpiante
No deje aiimento ni utensiiios de c0cina, etc, en e! homo
durante el cicio de autolimpieza_
Limpie solamente las piezas que se indican en esta guia, No
iimpie ia junta de ia puerta, La junta es esenciai para un
sellado herm6tico, No restriegue, dahe, ni mueva la junta de
la puerta, No use limpiadores de homo de ninguna clase en el
homo ni alrededor de cualquier parte del homo autolimpiante,
56
Antes de la autolimpieza del homo, saque la asadera, las
parrillas dd homo y otros utensilios y limpie los derrames
excesivos para evitar que se produzca demasiado humo,
Ilamaradas o llamas.
Es normal que la cubierta de la estufa se cdiente durante el
ciclo de autolimpieza. Pot Io tanto, se debe evitar tocar la
cubierta durante un ciclo de autolimpieza.
Aviso y Advertencia
lmportante Sobre Seguridad
La Propuesta 65 de la Ley de 1986 del Estado de California
Sobre Seguridad y Contaminad6n del Agua Potable (California
Safe Drinking Water and Toxic Enforcement Act of 1986_}exige
que el Gobemador de California publique una lista de las
sustancias que segun el estado de California causan cSncer o
da_o al sistema reproductivo y exige que hs empresas
adviertan a sus dientes sobre la exposici6n potencid a tales
sustancias.
Se advierte a los usuarios de esta estufa que la combusti6n
del gas puede resultar en exposici6n de bajo nivel a dgunas
de las sustancias publicadas en la lista, induyendo benceno,
formddeh{do y hollin, debido principalmente a la combusti6n
incompleta del gas natural o de los combustibles de petr61eo
licuado. Los quemadores ajustados en forma debida
reducir_n la combusti6n incompleta. La exposici6n a estas
sustancias puede tambi6n set reducida a un minimo
ventilando los quemadores al exterior en forma adecuada.
Se advierte a los usuarios de este electrodom6stico que
cuando el homo est_ funcionando en el cido de autolimpieza,
puede haber exposici6n de bajo nivel a dgunas de las
sustancias indicadas en la lista, induyendo mon6xido de
carbono. La exposici6n a estas sustancias puede set reducida
a un minimo ventilando el homo al exterior en forma
adecuada, abriendo las ventanas y/o la puerta en la habitaci6n
en donde est_ ubicado el electrodom6stico durante el cido de
AVISO mMPORTANTE RESPECTO A LOS PAJAROS
DOMESTmCOS:
Nunca mantenga los p_jaros en la cocina o en las
habitaciones donde puedan Ilegar los humos de la cocina. Los
pSjaros tienen un sistema respiratorio muy sensitivo. Los
humos producidos durante el cido de autolimpieza dd homo
pueden set perjudiciales o mortales para los p_jaros. Los
humos que despide el aceite de cocina recalentado, la grasa,
margarina y los utensilios antiadherentes recalentados pueden
tambi6n set perjudiciales.
Conserve estas lnstrucciones para Referencia Futura
57
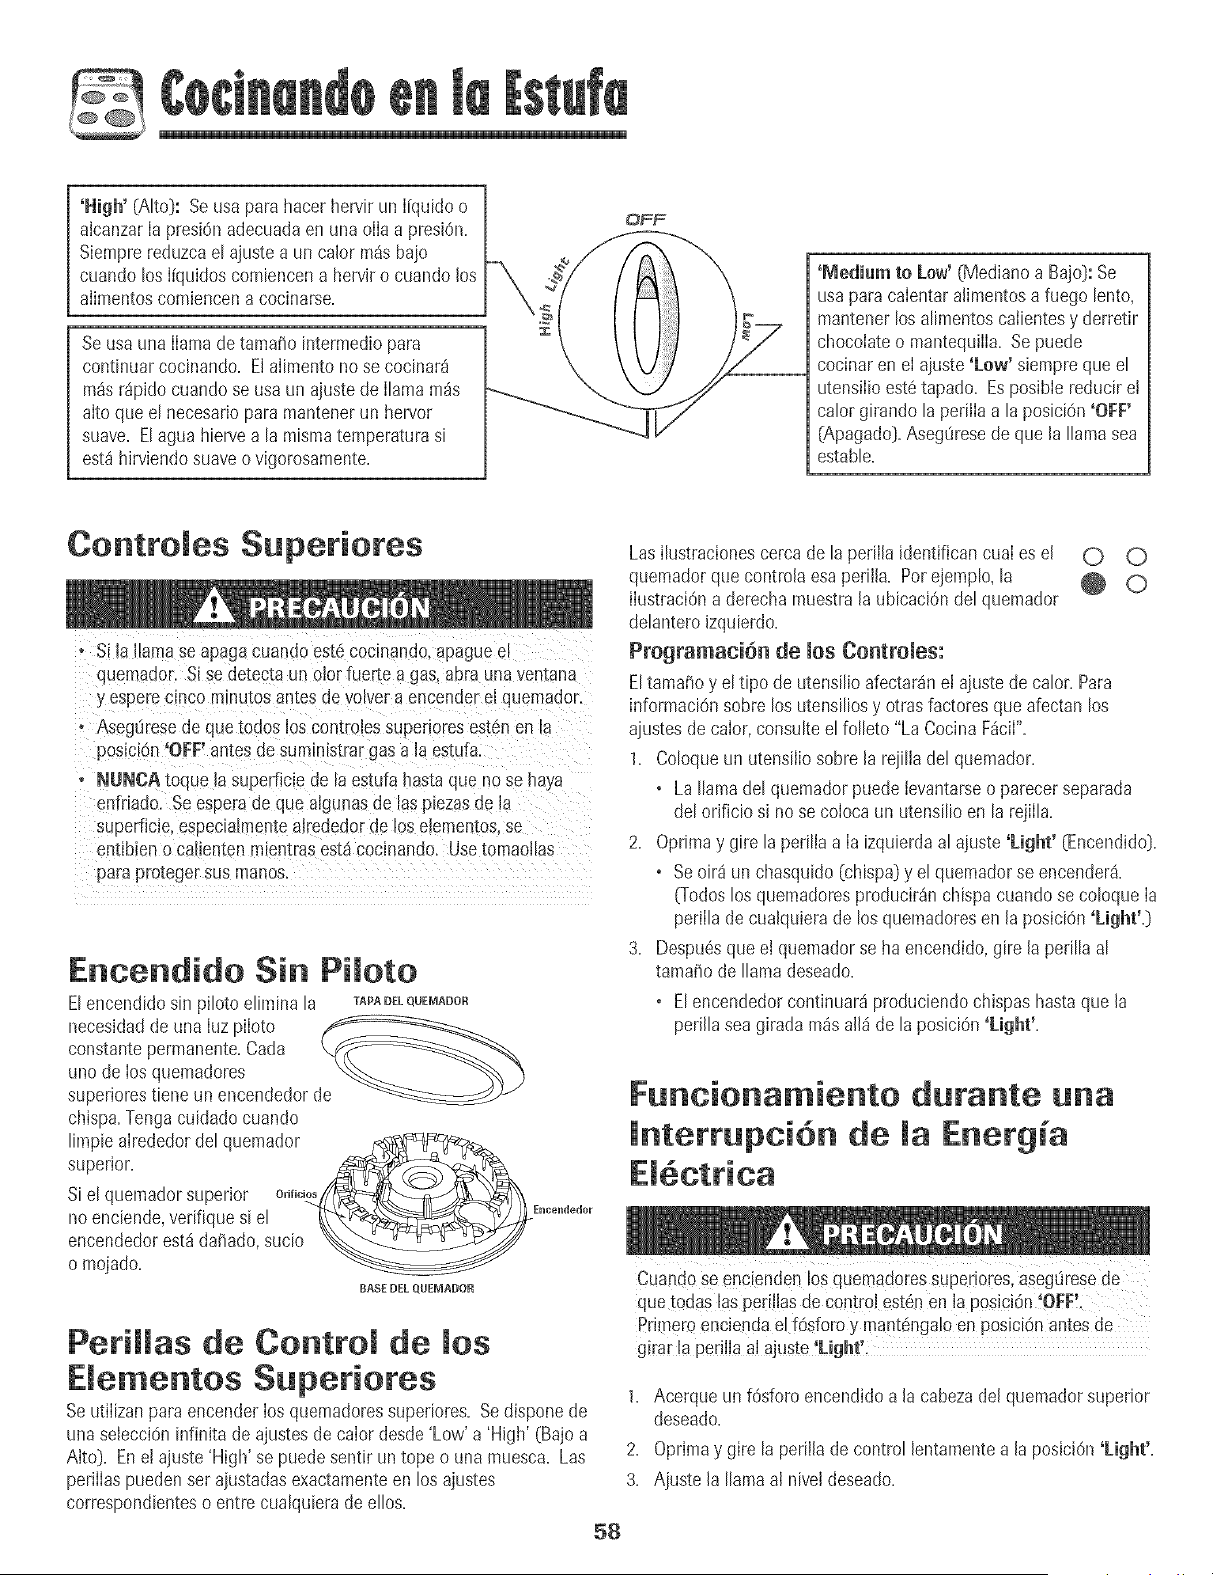
'Nigh' (Alto): Seusa parahacer hen/ir un [[quidoo
aicanzar[a presiOnadecuadaen una oiiaa preskSn+
Siemprereduzcael ajustea un calor m_s bajo
cuando tos[[quidoscomiencena hen/it o cuando los
aiimentoscomiencena cocinarse+
Seusa unallama detamafio intermediopara
continuarcocinando. El alimento no se cocinar_
pa_sr_pido cuando se usa un ajustede llamam_s
alto que el necesar[oparamantenerun hen/or
suave. Elagua hien/ea la mismatemperaturasi
est_hirviendosuaveo vigorosamente.
%
'Medium to Low' (Mediano a Bajo):Se
usa paracalentara]imentosa fuego lento,
mantenerlos a[imentoscaiientesy derretir
chocolateo mantequilla. Sepuede
cocinaren el ajuste 'LeW siemprequeel
utensilioest6tapado. Esposible reducir e!
calor girando [a perillaa [a posiciOn'OFF'
(Apagado).AsegOresede que la llamasea
estable.
Controies Superiores
+ S[ la llamase apagacuando est6 cocinando apagueet
quemaoor. Si se detectaun olor fuer[e a gas,aura una venmna
y esperec+ncommutosames devolve+a encenderel quemador.
• AsegLiresedequetoaos los controlesst+perloresest6nen [a
posiciOn'OFF' antesde summ_strargasa la estufa
° NUNCA toque la superficie de laestufa hastaque nose haya
enfriado. Seesperade que algunasde las 9iezasde la
superficle,especmlmentealrededorde los elementos,se
entlbien o cat+entenm_emrasest_coclnando. Usetornaollas
paraproteger susmanos.
Encendido Sin Pi oto
Eleucendidosin piloto elimina la TapaDELQUEmADOR
necesidaddeuna [uz piloto
constantepermanente+Cada
unode los quemadores
superiorestiene un encendedorde
chispa+Tengacuidado cuando
Las ilustracionescercade la perilla identifican cua[ es el
quemadorque contro[aesaperil[a+Porejemplo,la
[[ustraciOna derecha muestra[a ubicackSndel quemador
delantero[zquierdo+
Programaci6n de los Controles:
Eltamaffoy el tipo de utensi[ioafectar_nel ajuste de calor+Para
informaciOnsobre los utensi[iosy otras factores que afectan los
ajustesde calor,consulteel folleto "La Cocina F_ci["+
1+ Coloqueun utensiiio sobre[a rejilia del quemador+
• La llamade[ quemadorpuedetevantarseo parecerseparada
del orificio s[ no se coiocaun utensilioen la rejilla+
2. Oprimay gire la perilla a la izquierdaal ajuste 'Light' (Encendido}.
. Seoir8 un chasquido (chispa)y el quemadorse encender_.
(Todoslos quemadoresproducir_n chispacuandose coloque la
perillade cualquierade los quemadoresen [a posici6n'Light'=)
3. Despu6squeel quemadorse ha encendido,gire [a perilla al
tama_ode llama deseado.
. Elencendedorcontinuar_produciendochispashastaque [a
perillaseagirada m_sal[_de la posici6n '[Light'+
Funeionamiento durante una
lnterrupei6n de [a Energia
limpie alrededordel quemador
superior, E[6etriea
S[ el quemadorsuperior o,+++_+_/1_,_}_/_ \
no enciende,verifique si el _4__E _ ,l_,_,
encendedorest4da_ado,sucio __..____ _
o mojado.
BASEUELQUEMADO_ Cuand0 Se0ncienden!0Squemadoressupedores,asegOresede
Peri[[as de Control de los
Eiementos Superiores
Seutilizanparaencenderlos quemadoressupedores+Sedispone de
una selecci6ninfinita deajustesde calor desde'Low' a 'High' (Bajoa
Alto)= En e[ ajuste 'High' se puedesentirun tope o una muesca+Las
perillas puedenset ajustadasexactamenteen los ajustes
correspondienteso entre cualquierade ellos+
58
quetodas las pe_i!iasde contm! est6nen la posiciOn+OFF!.
Pr+meroenc+endael f0sforo y mant6nga!oen posici6nantes de
girar la peri]la al ajuste Light i
1. Acerque un f6sforo encendidoa la cabezadel quemadorsuperior
deseado.
2. Oprimay gire la periJJadecontrol lentamentea Japosici6n'Light'.
3. Ajuste Jallamaal niveldeseado.
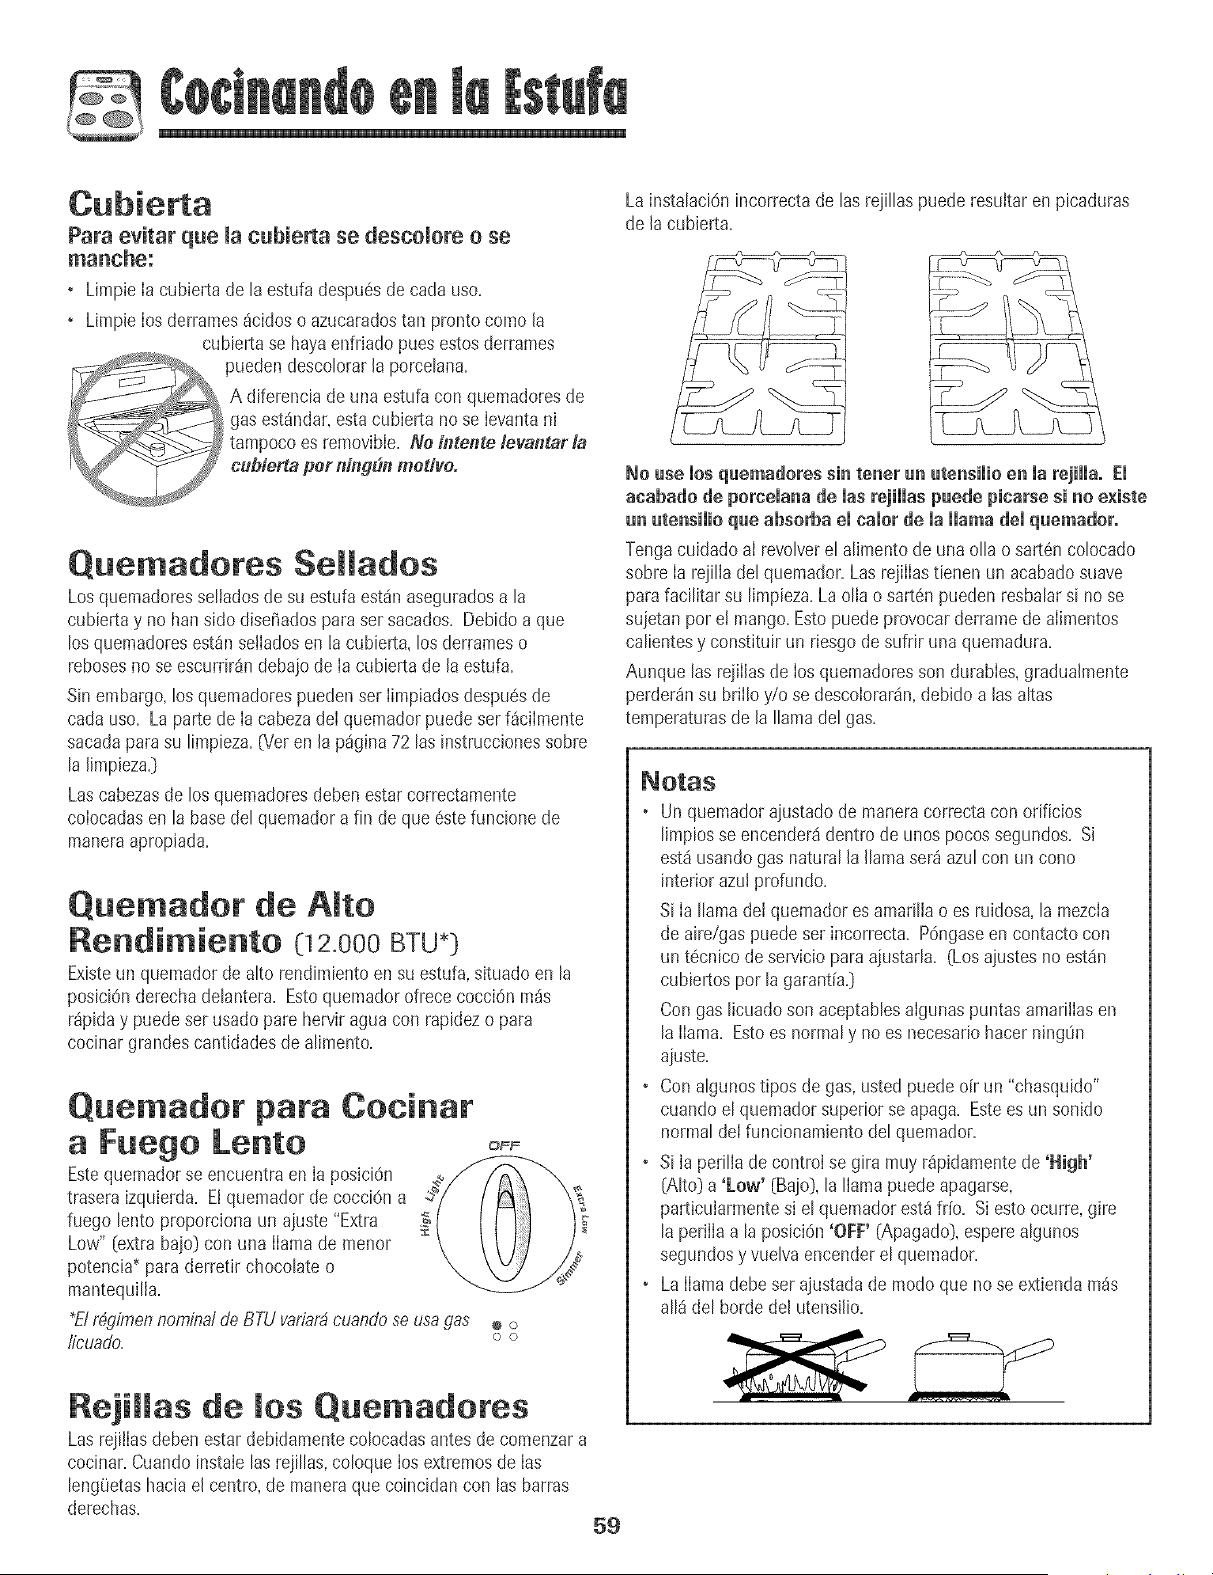
@
Para evitar que b cubieHa se descoiore o se
LainstalaciOnincorrectade las rejillas puede resuitar en picaduras
de la cubb_a+
• Limpie[a cubiertade [a estufa despu6sde carlause+
+ Limpb [osderrames_cidoso azucaradostan pronto come la
cubiertase hayaenfriado puesestosderrames
puedendescolorar la porcebna+
A diferenciade unaestufa con quemadoresde
gas est_ndar+esta cubierta no se [evantani
tampoco es removibie+No il_tentelevantar la
I cubierta per ning_n medve.
Quemadores Seminaries
LosquemadoresseIiadosde su estufa est_naseguradosa la
cubiertay no hartside disefiadospara sersacados+Debido a que
losquemadoresest_nseliadosen la cubierta,los derrameso
rebosesno se escurrir_n debajode [acubierta de [aestufa+
Sin embargo,los quemadorespueden ser [impiadosdespu6sde
cada use+ La parte de [a cabezade[quemadorpuede ser f_ciimente
sacadaparasu limpieza+(Veten [a p_gina72 las instruccionessobre
[a [[mpieza,)
Lascabezasde los quemadoresdebenestar correctamente
co[ocadasen la basedel quemadora fin de que 6stefuncionede
maneraapropiada,
Quemador de Alto
Rendimiento 0 2.000 BTU*)
Existeun quemadordealto rendimientoen su estufa,situado en la
posiciOnderechadeIantera, Estoquemadorofrececocci6n m_is
r_piday puedeser usadopare herviragua con rapidezo para
cocinar grandescantidadesde aIimento,
Quemador para Cocinar
a Fuego Lento
Estequemadorse encuentraen [a posiciOn
traseraizquierda+El quemadorde cocciOna
fuego lento proporciona un ajuste "Extra _(
Low" (extrabajo) con una llamade menor
potencia* para derretir chocolate o
mantequi[ia.
+E/r_qimennomina,;deBTU va,ciarbcuandoseusagas
/icuado.
OFF
@ o
o o
Rejimmasde los Quemadores
Lasrejiilas debenestardebidamenteco[ocadasantesde comenzara
cocinar, Cuandoinstale[asrejiIIas,co[oquelosextremesde [as
[eng0etashaciae( centre, de maneraque coincidancon [asbarras
derechas,
59
No use mosquemadores sin tenet un utensimioen marejimma.Em
aeabado de percemanade masrejimmaspaede piearse si no existe
un utensiiio qae abserba el eaior de ia llama dei quemadoro
Tengacuidado a[ revolvere[ aIimentode unaoIIao sart6ncoIocado
sobre [a rejiIia de[quemador,Lasrejiiiastienen un acabadosuave
parafaciIitarsu [impieza,Lao[[a o sartSnpuedenresbaIarsi nose
sujetan per e! mango,Estopuede provocar derramede alimentos
calientesy constituirun riesgode sufdr una quemadura,
Aunque [as rejiilasde los quemadoresson durables,gradua[mente
perder_nsu bri[[oy/o se descoiorar_n,debidoa [asaitas
temperaturasde [a [lamade[ gas,
+ Un quemadorajustadode maneracorrecta con onficios
[impiosse encender_dentra de unos pocossegundos, Si
est_usandogas natural [a ((areaser_ azu[con un cone
interior azui profundo,
Si[a ((areade[ quemadoresamadiia o es ruidosa,[a mezcia
de aire/gaspuede ser incorrecta, P6ngaseen contactocon
un t6cnico deservicio para ajustar[a, (Losajustesno estSn
cubiertospar [agarant[a,)
Congas [icuadoson aceptabbs aigunaspuntasamarfliasen
[a llama, Estoes normaly no es necesariohacer ningOn
ajuste,
• Conaigunostipos de gas,ustedpuedeoff un "chasquido"
cuandoe[ quemadorsuperior se apaga, Estees un sonido
normal de[funcionamientode[quemador,
• S[[a perilia decontrol se gira muy r_pidamentede 'Nigh'
(Alto} a 'Low' (Bajo},[a (lamapuede apagarse,
particuIarmentesi el quemadorest_ if(o+ Si esto ocurre,gire
la periiiaa la posici6n'OFF' (Apagado},espereaIgunos
segundosy vueIvaencenderel quemador+
• La llamadebeser ajustadade modeque no se extiendamas
aIl_del bordedel utensilio,
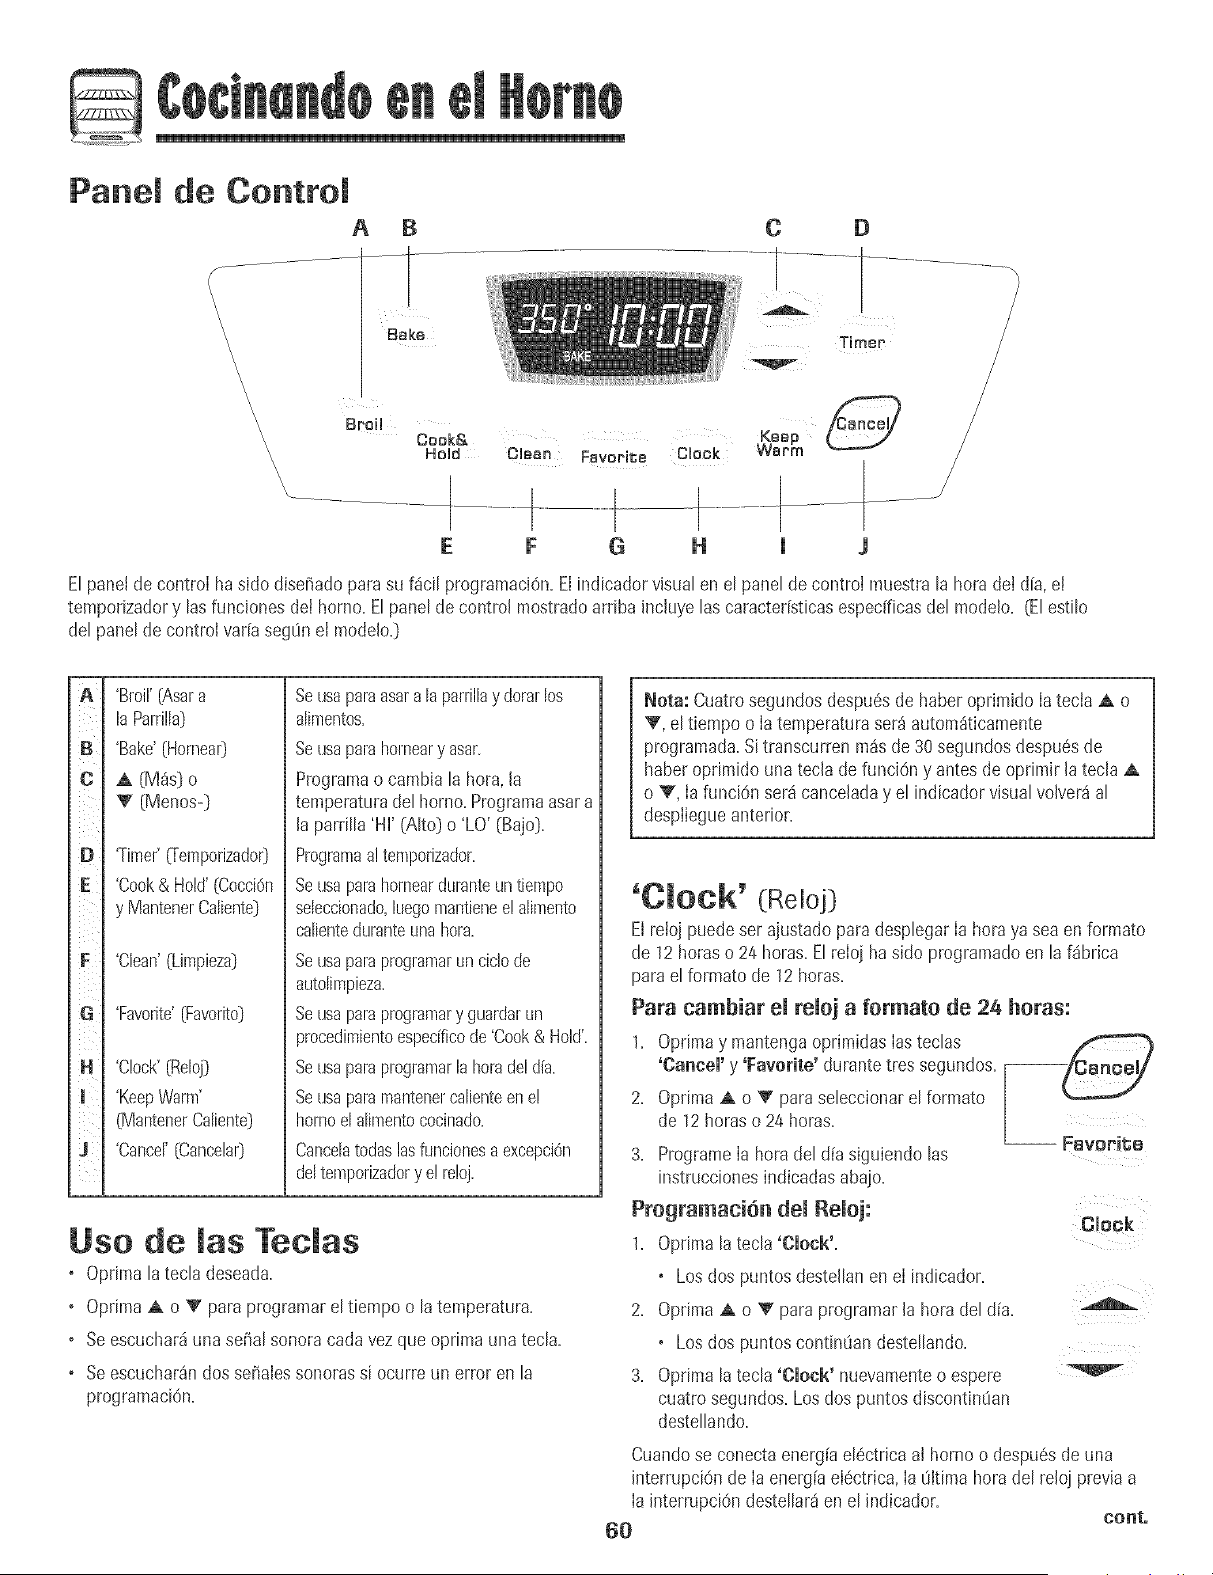
G
Panel de Control
A
\
\
\
\
\
\
\
\
\
\
\
\
\
\
B
Bake
C D
A E
Timer
Broil
Cook@,
Hold Clean Favorite Clock
E
Keep
Warm
1 J
E[parle[de controI haside diseiiadoparasu f_ci[ programaciOn.EIindbador visualen e[ panel de control muestra[a hera deI d[a,el
temporizadory tasfunciones deI homo.Etpanetde centre[ mostradoarribaincIuyetas caracter[sticasespedficasdet mode[o. (Etestib
det panetde controlvar[a segOnel mode[o.]
A
C
E ¸
i ill
F %
G
m
'Broil'{Asara
laParrilla}
'Bake'[Hornear}
A (M_s] o
V (Menos-]
'Timer'_emporizado0
'Cook& Hold'(Cocci@
y MantenerCaliente]
'Clean'(Limpieza]
'Favorite'[Favorite}
'Clock' [Reloj}
'KeepWarm'
(Mantener Caliente}
'Cancel' [Cancelar}
Seusaparaasara laparrillay dorarlos
alimentos.
Seusaparahorneary asar.
Programao cambiala hera,la
temperaturadelborne.Programaasara
[a pard[[a'Hi' (Alto] o 'LO' (Bajo}.
Programaa!temporizador.
Seusaparshornearduranteuntiempo
sebccionado,luegomantienee!alimento
calienteduranteunahera.
Seusaparaprogramaran cidode
autolimpieza.
Seusaparaprogramary guardarun
procedimientoespecificode'Cook& Hold'.
Seusaparaprogramarla heradeldfa.
Seusaparamantenercalbnteen e!
homoelalimentococinado.
Cancelatodaslasfuncionesa excepciOn
deltemporizadory e!reloj.
Use de masTedas
o Optima latecla deseada.
o Optima A o V paraprogramareltbmpo o latemperatura.
o Se escuchar_iunaseRalsonoracada vezque oprima una tecla.
o Se escuchar_ndos se_alessonorassi ocurre un error en la
programaciOn.
Nora: Cuatrosegundosdespu6sde haber oprimido Iatecia A o
V, eltiempo o Ia temperaturaser_autom_ticamente
programada.Sitranscurrenm_s de 30 segundosdespu@de
haberopdmido unatecla de fund@ y antes deoprimir latecla A
o T, Ia funciOnser_canceladay el indicadorvisualvolver_al
despliegueanterior.
'Cmock' (Reloj]
El relojpuede set ajustadoparadespbgar Ia heraya seaen formate
de 12betas o 24 horas.ElreIoi haside programaticen la f_brica
parael formate de 12 horas.
Para cambiar el reloj a formate de 24 horas:
1. Oprimay mantengaoprimidasias teclas
'Cancel' y 'Favorite' durantetres segundos.
2. OptimaA o V para sebccionar el formate
de 12horaso 24 horas.
3. ProgrameIa heradel d[a siguiendolas
hlstruccionesindicadasabaio.
Programaei6n del Reloj: Clock
1. Oprimala tecla'Clock',
• Losdos puntosdestellanen eI indicador.
2. OptimaA o V para programar[a herade[ d{a.
• Losdos puntoscontin8andeste[lando.
3. Opnmala tecla 'Clock' nuevamenteo espere
cuatrosegundos.Los dos puntosdiscontinOan
destellando.
Cuandose conectaenergiael@tricaaI borne o despu6sde una
interrupciOnde Ia energia eI@trica,Ia Oltimaheradel reloi p_eviaa
Ia interrupciOndeste[lar_en el indicador.
60 cont.
G
Paradesp[egar[a horadeI dia cuando el indicadorest6 mostrando
otra funciOndetiempo, oprima tatecta 'Clock'[Retoj}.
La horadeI retoj no puedeser cambiadacuandoel hornoha sido
programatic para'DetayCookor Ctean' {Homeadoo Limpieza
Diferido}o 'Cook& HoW {CocciOny MantenerCaiiente}.
Para cancemar emdespmiegue demremoj:
Si nodeseaque eI indicadorvisuatmuestre tahora del alia:
Oprimay mantengaoprimida iasteclas
'Cancel' [Cancela0y 'Clock' durantetres
segundos.La horadel d[a desaparecer_del
hldicador.
Cuandose cancelael desplieguede! reloj,
oprima Iatecla 'Clock' paradesplegar
brevementeIa horadel d[a.
Para cestaucac emdespmiegue demcemoj:
Oprimay mantengaoprimida Iasteclas 'Cancel' y 'Clock' durante
tres segundos.Lahora del d[a reaparecer_en el indicador.
__ cmock
'Timer' dremporizador}
Eltemporizadorpuedeser programatic de un minuto {0:01}hasta99
horasy 59 minutos{99:59}.
Eltemporizadorpuedeser usado independientementede cualquier
otra actividaddel horno.Adem_spuedeser programadocuando otra
funciOndel homo est6 en funcionamiento.
Eltemporizadorno controlael horno.Solamentecontrolauna sepal
sol, ors.
Para programar emtemporizador:
1. OprimaIatecia 'Timer'.
• 0:00deste!Iaen ei indicadorvisual
• Losdos puntosdestellarSn.
Timer
2. OprimaIatecla A o V hastaque eI tiempo
correctoaparezcaen el indicadorvisual
• Losdos puntoscontinOandestellando.
3. Oprimanuevamentelatecla 'Timer' o esperecuatrosegundos.
• Losdos puntoscontin_an destellandoy comienzala cuenta
regresivadel tiempo.
• El_iltimominutode Ia cuentaregresivadel temporizadorse
desplegar_ensegundos.
4. AI final del tiempo programatic,se escuchar8una seiial sonora
larga.
Paca cancelac el tempocizadoc:
1. Optimay mantengaoprimida la tecla 'Timer' durantetres
segundos.
U
2. Oprimalatecla 'Timer' y coloque la hora a 0:00.
Bloqueo de ruesOontcomes
Eltecladopuedenset bloqueadospara seguridad, limpiezao evitar
el uso no autorizado.No funcionarSncuandoestCnbloqueados.
Siel hornoest_ en uso,los controlespueden bloquearse.
La horaactual del d[a permanecer_en el indicador cuando los
controlesestCnbloqueados.
Para bloqueac:
Oprimay mantengaoprimidashs teclas
'Cancel' y 'Cook & Hold' durantetres
segundos.(OprJmaprimero IatecJa'Cancel'.) Cook&
-- Hold
Para desbloquear:
Oprimay mantengaoprimidaslasteclas 'Cancel' y 'Cook & Hold'
durantetres segundos.(Optimaprimero la tecla'Cancel'.)
CCdigos de Eccoces
'BAKE'[Hornea0o 'LOCK'[Btoquea0puedendestelIarr_pidamente
paraadvertirleque hayun error o un problema.Si 'BAKE'o 'LOCK'
destetlanen el indicador visual,oprimaIe tecla 'Cancel'= Si 'BAKE'o
'LOCK'contin0andestelIando,desconecteIa corrienteeiCctrica
hacia el artefacto.Espereunos pocos minutosy vuelvaa conectar la
corrienteelCctrica.Si las palabrasa0n contin0andestellando,
desconecteIa cordentee!Cctricahacia el artefactoy Ilamea un
tCcnicodeservicioautorizado.
61
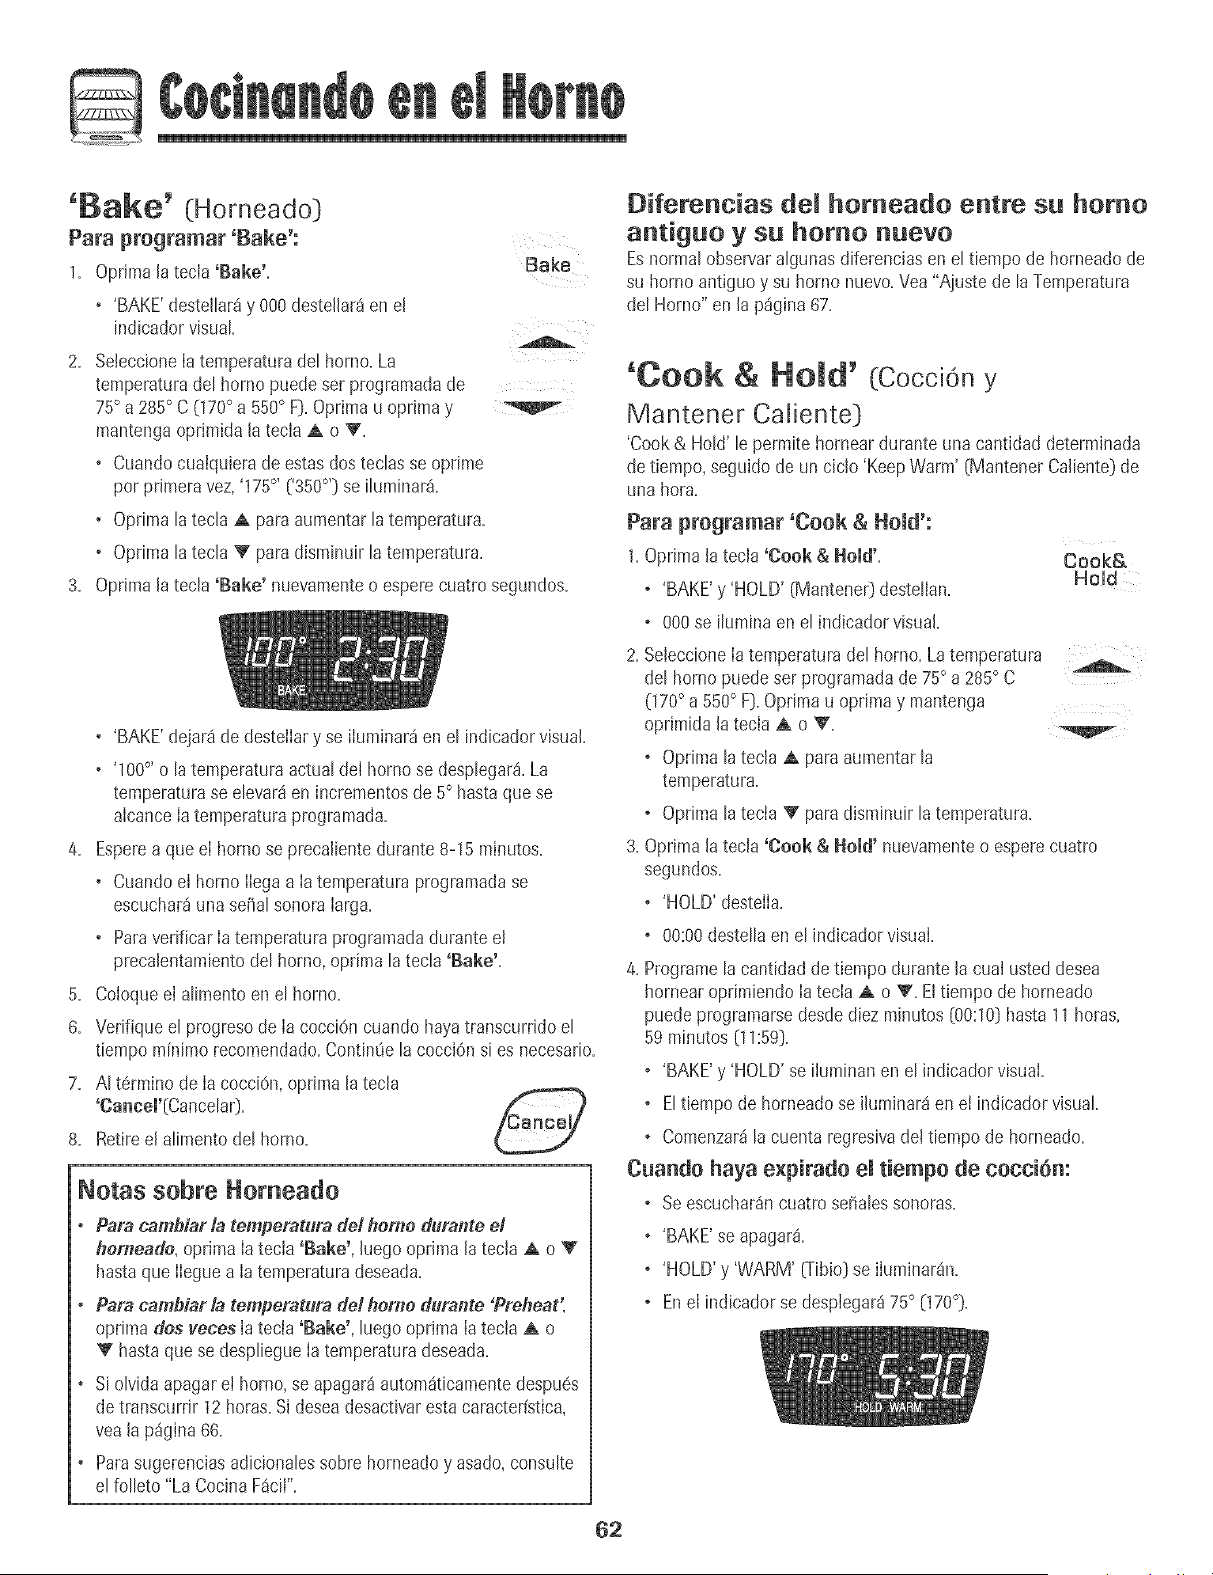
G
'Bake' (Horneado)
Para programar 'Bake':
1, Oprima[atecia 'Bake',
+ 'BAKE'desteihr_iy 000destellar_en el
indicadorvisuat,
Bake
2, SeJeccione[atemperaturade[ homo. La
temperaturade[ horno puedeser programadade
75° a 285° C 070° a 550° F}.Oprimau oprima y
mantengaoprimida latecla A o 'V.
• Cuandocuaiquierade estasdos techs se oprime
por primeravez,'175°, ('350°'} se ituminar&
• Optimatatecta _¶aumentartatemperatura.
• Optimatatecta V parad+sminuirla temperatura.
3. Oprimalatecla 'Bake' nuevamenteo espele cuatrosegundos.
, 'BAKE'dejar8de desteilary se iluminar_en el hldicadorvisual.
• '100°,o latemperaturaactual del hornose desplegar&La
temperaturase elevar8en incrementosde 5° hastaquese
alcanceIa temperaturapragramada.
4. Espereaque el homo se precalientedurante 8-15 minutos.
• Cuandoel hornoIlegaa Iatemperaturaprogramadase
escuchar_unaserial sonoraIarga.
• ParaverificarIa temperaturaprogramadadurante el
precalentamientodel homo,optima latecla 'Bake'.
5. Coloqueel alimentoen el homo.
6. Vedfique el progresode Ia cocciOncuando hayatranscurridoel
tiempo minimorecomendado.ContinUela cocciOnsi es necesario.
7. AI termino de Ia cocciOn,optimala tecia
'Caneei'(Cancelar}.
8. Retireel alimento del horno.
Notas sobre Horneado
+ Para cambiar la temperatura del homo durante el
horneado, oprima Ia tecla 'Bake', hJegoopnma latecla _&o _'
hastaque Ileguea Iatemperaturadeseada.
• Para cambiar la temperatura de! berne durante 'Preheat"
optimados veces [a tecla'Bake', [uegooprima [atecla _&o
V hastaquese despliegueIa temperaturadeseada+
• Si olvida apagarel homo,seapagar_autom_ticamentedespu6s
detranscurrir 12horas.Sideseadesactivarestacaracter(stica,
vea la p%ina 66.
• Parasugerenciasadicionalessobre horneadoy asado,consulte
el falleto"La Cocina F_cii"+
Diferencias del homeado entre su homo
antiguo y su homo nuevo
Esnormal observaralgunas diferenciasen el tiempo de horneadode
su horno antiguoy su homo nuevo+Vea"Ajustede laTemperatura
del Horno" en la p%ina 67+
'Cook & HoJd' (Coccion y
Mantener Caliente}
'Cook& HoW le permitehorneardurante unacantidad determinada
detiempo, seguidode un ciclo 'KeepWarm' (MantenerCaliente}de
una hora.
Para programar 'Cook & Homd':
1.Oprimala tecla 'Cook & Hold'. Cook&
o 'BAKE'y 'HOLD' (Mantener}destellan. Hold
o 000se ilumina en el ind+cadorvisual.
2. SeleccioneIa temperaturadel homo. La temperatura
del hornopuede ser programadade 75° a 285° C
070° a 550° F}.Optima u optima y mantenga
oprimida [atecla A o 'V,
o Optima latecla A paraaumentar la
temperatura+
o Optima [atecia V parad+sminuir[atempe+atura.
3. Opr+mala tecla 'Cook & Hold' nuevamenteo esperecuatro
segundos.
o 'HOLD'destelIa.
o 00:00destella en el indicadorvisual.
4. Programela cantidadde t+empodurante la cual usteddesea
hornearoprimiendoIa tecia A o V. El tiempo de horneado
puedeprogramarsedesded+ezminutos(00:10)hasta 11 horas,
59 minutos (11:59).
o 'BAKE'y 'HOLD'se iiuminan en el indicadorvisual.
o El tiempo de horneadose ihminar8 en el indicadorvisual
o Comenzar_la cuenta regresivadei tiempo de horneado.
Cuando haya expirado emtiempo de cocci(_m
o Se escuchar_nctJatroseiialessonoras.
o 'BAKE'se apagar&
o 'HOLD'y 'WARM' (Tibia)se iluminarBn.
. Enel indicadorse desplegar_75° (170°).
62
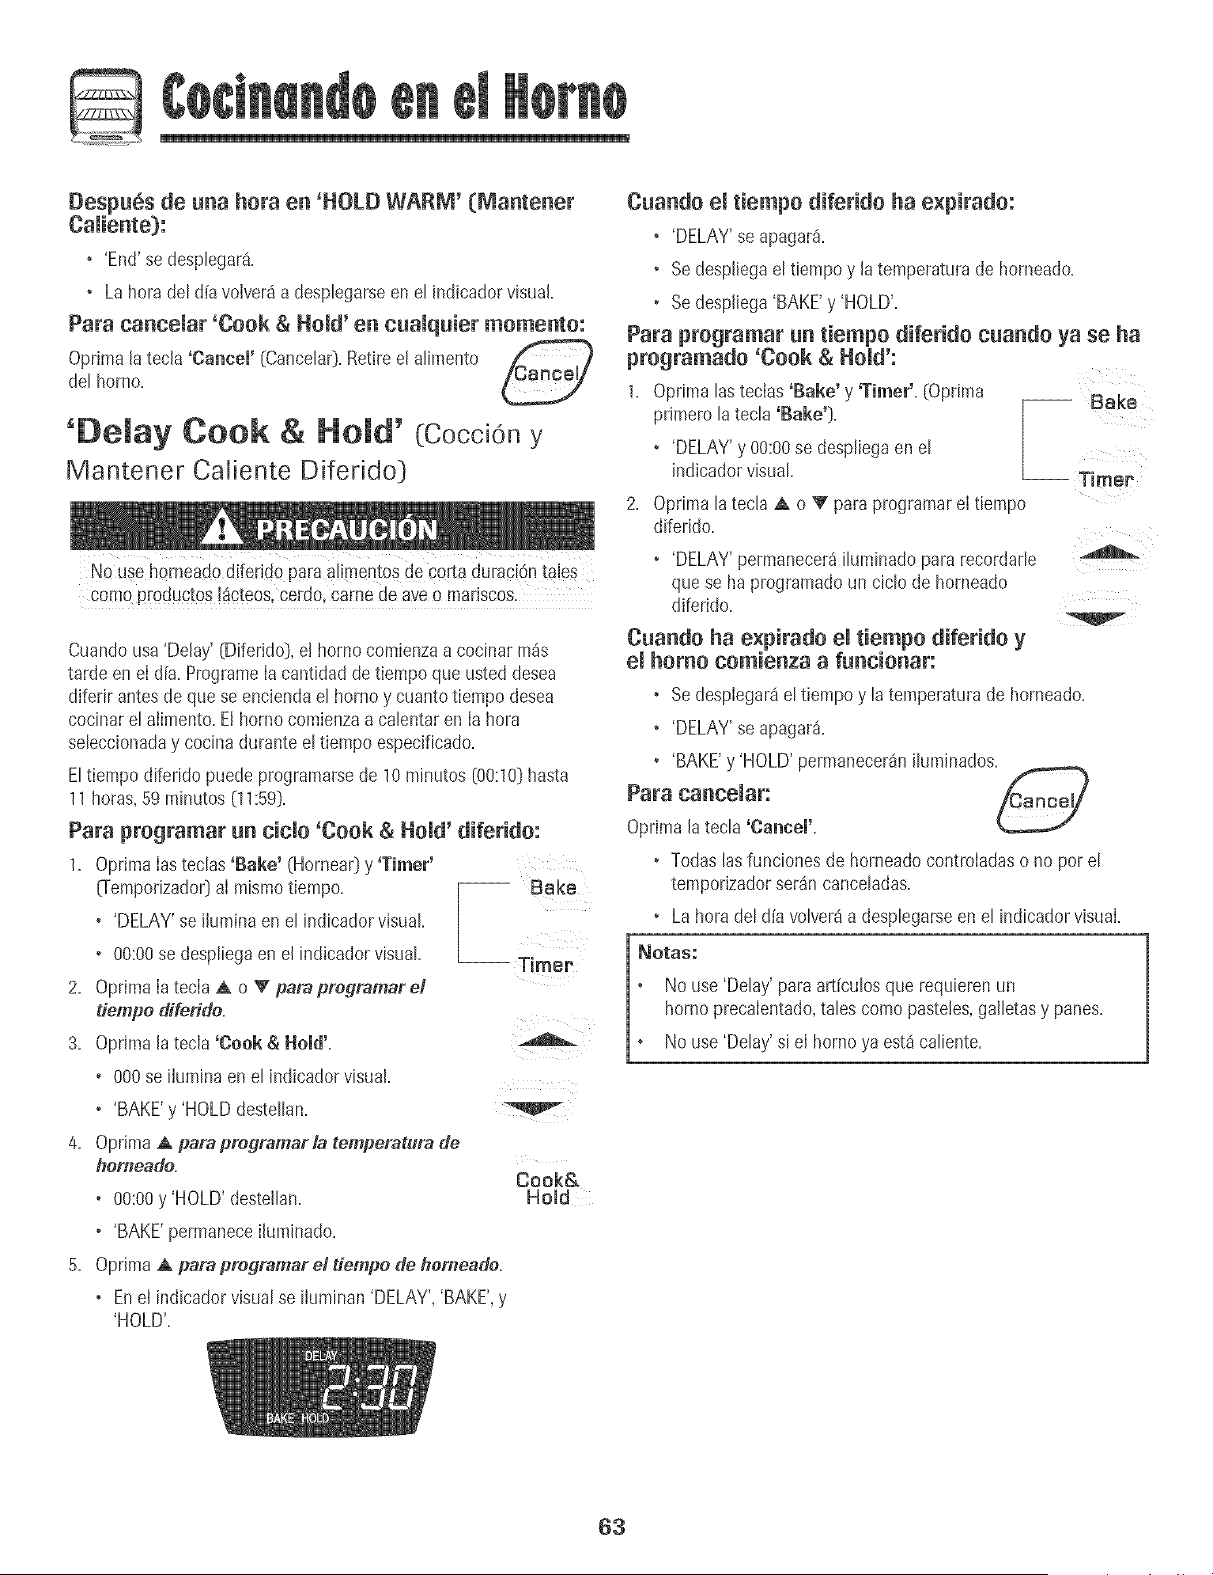
G
Despu6s de una hora en 'HOLD WARM' (Mantener
• 'End'se desplegar&
• La horadel d{avolver8 a desplegarseen el indicadorvisual=
Para cancemar 'Cook & Homd'en cuamquier momento:
Oprimala tecla 'Cancel' (Cancelar]=Retireel alimento ____,_
del homo=
'Demay Cook & Ho d' (Cocciony
Mantener Caliente Difeddo]
Nouse homeado difeddo paraarimentosde costaduraciOntales
comoproductos lacteos,ce[do, Camede aveo mariscos.
Cuandousa 'Delay' [Diferido],e! homo comienzaa cocinarm_s
tarde en eI dfa. ProgrameIacantidadde tiempoque usted desea
diferir antesde qua se enciendael homo y cuanto tiempo desea
cocinarel alimento.Elhomo comienzaa calentaren Ia hora
seleccionaday cocina durante el tiempo especificado.
Eltiempo diferido puedeprogramarsede 10minutos [00:10]hasta
11horas,59minutos (11:59].
Para programar un cicmo'Cook & Hold' diferido:
1= OprimaIasteclas 'Bake' (Hornea0y 'Timer'
O-emporizador]aI mismotiempo. -- Bake
• 'DELAY'se ihmina en el indicadorvisual
• 00:00se despliegaen el indicadorvisual
2= OprimaIatecla A o V pampregramaret
dempe diferide.
3= Oprimalatecla 'Cook & Held'=
• 000se iluminaen el indicadorvisual
• 'BAKE'y 'HOLDdestellan=
4. OprimaA para pregramar b temperatura de
hemeade=
Cook&
• 00:00y 'HOLD' destellan= Hold
• 'BAKE'permaneceihminado=
5, OptimaA para pregramar el dempe de hemeade,
• Enel indicadorvisualse iluminan 'DELAY','BAKE',y
'HOLD'.
-- Timer
Cuando emtiempo diferido ha e×pirado:
• 'DELAY'se apagar_=
• Sedespliegael tiempoy latemperaturade horneado=
• Sedespfiega'BAKE'y 'HOLD'.
Para programar un tiempo diferido cuando ya se ha
programatic 'Cook & Hold':
1= Optima lastecias 'Bake' y 'Timer'=(Optima
primero la tecla 'Bake')= -- Bake
• 'DELAY'y 00:00se despliegaen el
indicadorvisual -- Timep
2= Opnma la tecla A o V paraprogramarel tiempo
diferido=
° 'DELAY'permanecer_iluminadopara recordarle
qua se ha programadoun ciclode horneado
diferido.
Cuando ha e×pirado emtiempo diferido y
emhomo comienza a funcionar:
• Sedespiegar8el tiempoy la temperaturade horneado=
• 'DELAY'se apagar_=
• 'BAKE'y 'HOLD' permanecer_niluminados=
Para cancemar:
Optimala tecla 'Cancel'=
• Todaslasfuncionesde horneadocontroiadaso no Barel
temporizadorser_n canceladas=
• Lahoradel dia volver_a desplegarseen el indicadorvisual
_otas."
No use 'Delay' paraart[culosque requierenun
hornoprecalentado,talescomopasteles,galletasy panes.
No use 'Delay'si el hornoya est_caliente.
63
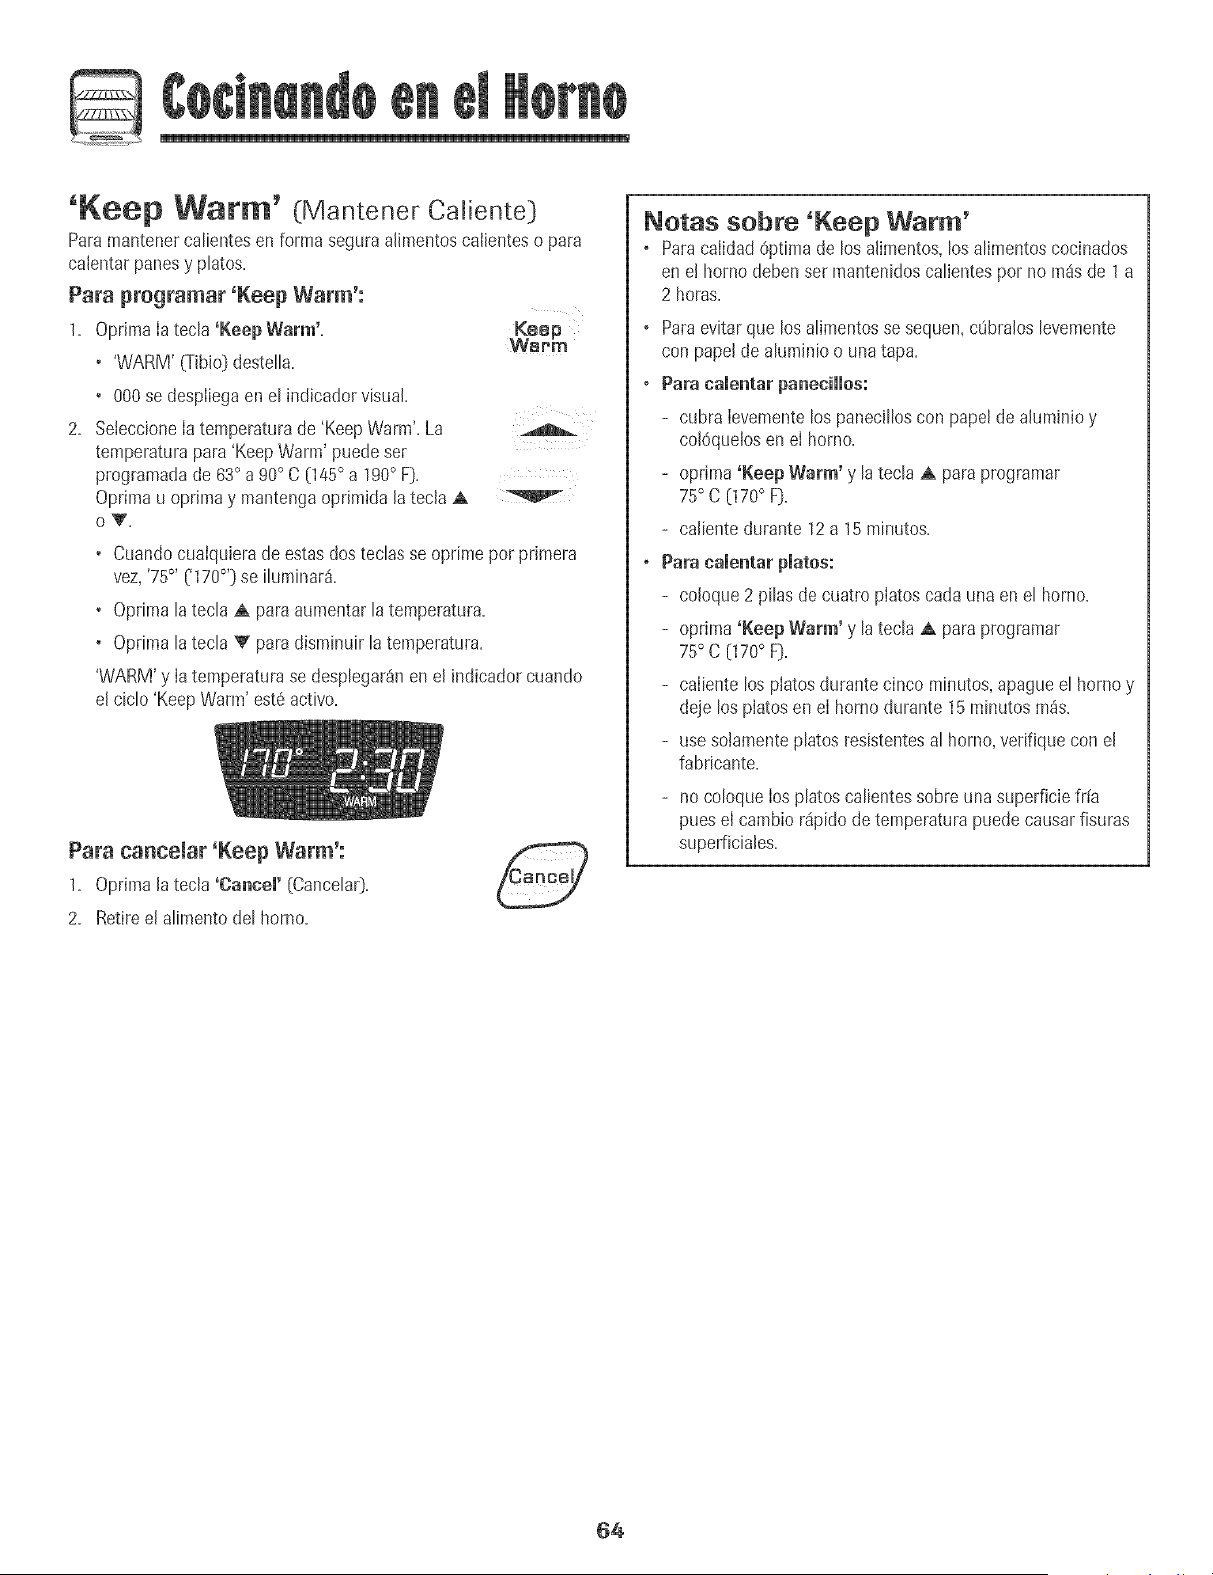
'Keep Warm' (Mantener Caliente)
Paramantenerca[ientesen forma seguraalimentosca[ienteso para
calentarpanesy phtos.
Para pregramar 'Keep Warm':
1. OpripaaIatecla 'Keep Warm'. ;Keep
VVBpM
• 'WARM' {Tibio)desteHa.
• 000se despliegaen et indicadorvisual.
2. SeleccioneIatemperaturade 'KeepWarm'.La
temperaturapara 'KeepWarm' puedeser
programadade 63oa 90oC (145oa 190oF). ....
Oprimau opripaay mantengaoprimida la tecla A
OV,
• Cuandocualquierade estasdos teclasse oprime pot primera
vez,'75°' ('170°'} se iluminar&
• Optimalatecla A para aumentar la temperatura.
• Oprimala tecla V paradisminuirla temperatura.
'WARM'y Iatemperaturase desplegar_nen el indicadorcuando
el ciclo'Keep Warm' est6activo.
Para cancemar'Keep Warm':
1. Optimalatecla 'Cancem'(Cancelar).
2. Retireel alimento del homo.
Notas sobre 'Keep Warm'
, ParacalidadOptimade los alimentos,losalimentoscocinados
en e! homo debenser mantenidoscalientespor no passde 1a
2 horas.
, Paraevitarque losalimentosse sequen,cObraloslevemente
con papelde aluminioo una tapa.
, Pare eamentarpaneeiHos:
- cubra Ievementelos panecilloscon papelde aluminio y
colOquelosenel homo.
- optima 'Keep Warm' y latecla A para programar
75° C (170° F].
- caliente durante 12a 15minutos.
, Para eamentarpmmom
- coloque 2 pilas de cuatro platoscarla unaen el horno.
- optima 'Keep Warm' y la tecla A paraprogramar
75° C (170° F].
- caliente los platosdurante cinco minutos,apagueel homo y
deje los platosen el hornodurante 15minutosm_s.
- use solamenteplatos resistentesal horno,verifique con el
fabricante.
- nocoloque los platoscalientessobreuna superficiefr[a
pues el cambiorSpidode temperaturapuede causarfisuras
superficiales.
64
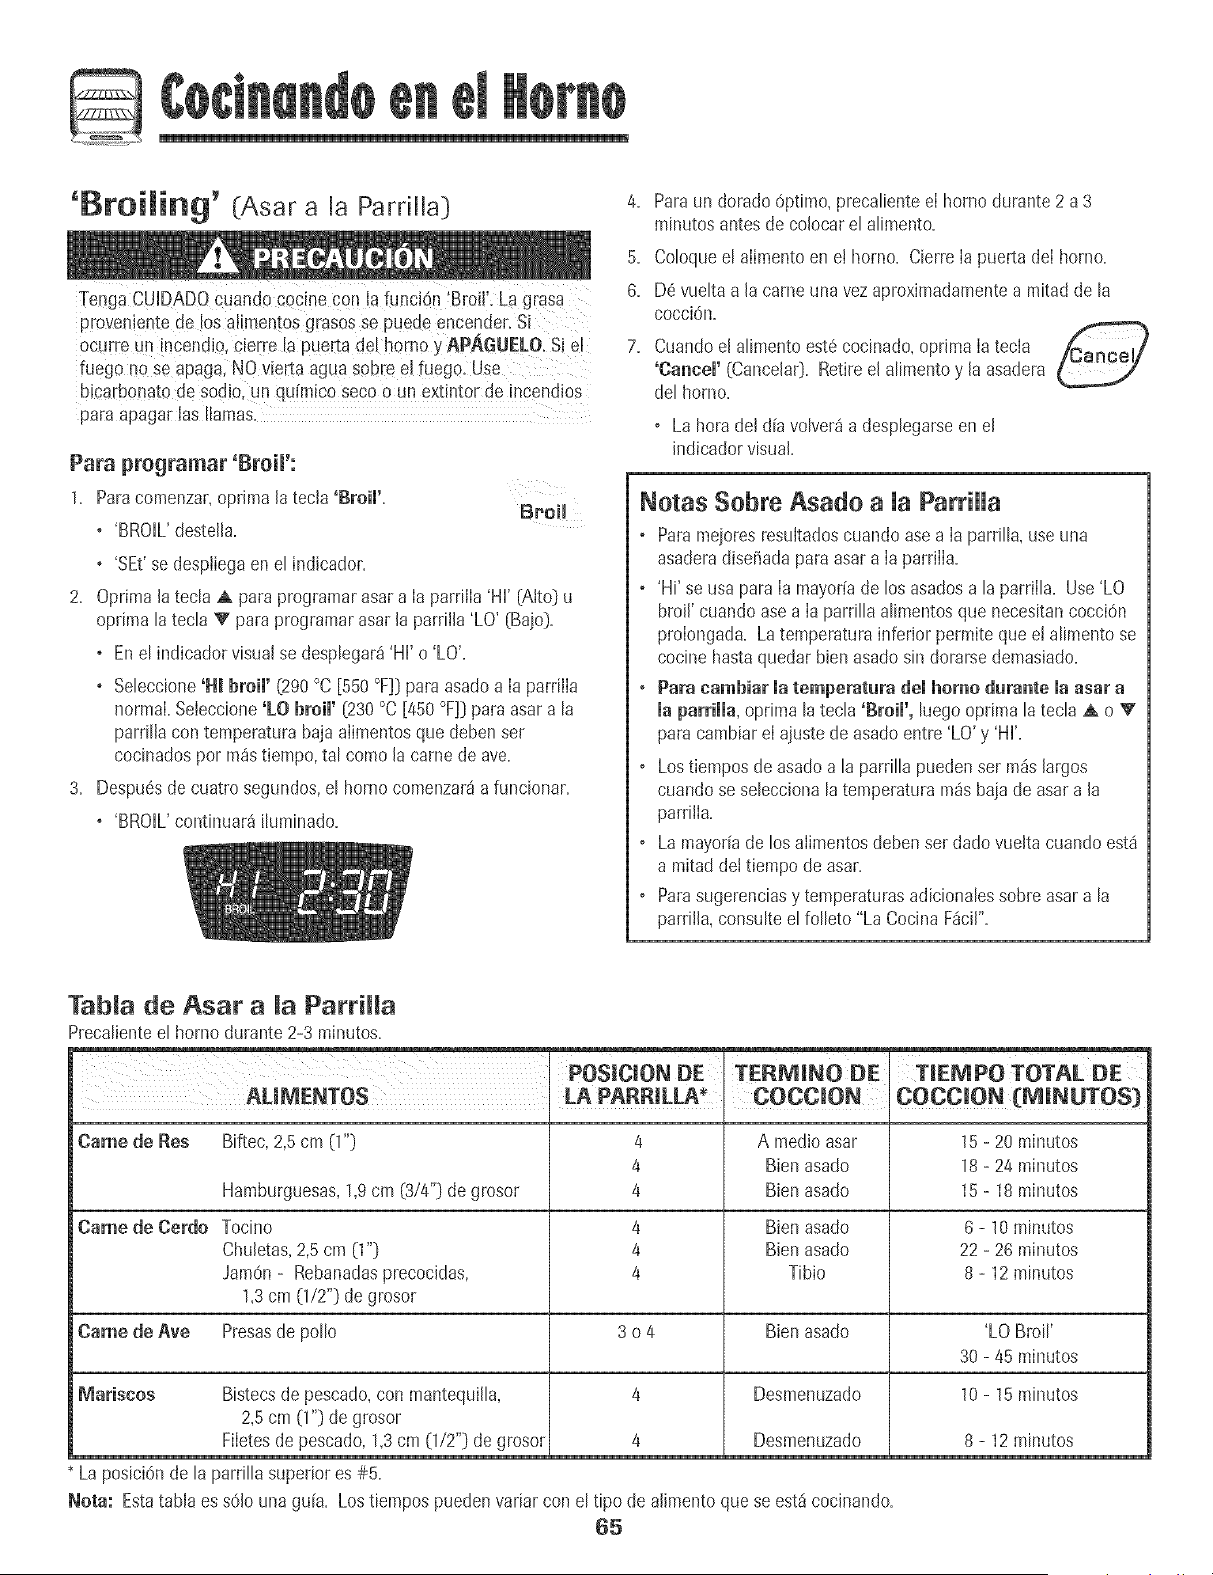
'Broiling' (Asar a Ja PardJJa]
Provenientede Eosalimentosgrasosse PUedeencender.Si
ocurre un !ncendio,Cie[reJapuerta deLhomo YAPAGUELO.Si er
fuego no se apagal NO vierta agua Sobreel fuegel Use
bicarbonato de sod[o,Un qu[mico SeCO0Un extintOrde Jncendios
paraapagar]as llamas,
Para programar 'BroiF:
1. Paracomenzar,optima la tech 'Broil'.
Broil
o 'BROIL'destella.
o 'SEt'se desptiegaen el indicador.
2. Oprimala tecla A para programarasar a Ia parriJIa'HI' {Aito} u
optima latecla V paraprogramarasarla parriJla'LO' {Ba}o].
o En el indicadorvisualse desplegar_'HI' o 'LO'.
o Seleccione'H_broil' (290°C [550 °F]] para asadoa Ia parriJla
normal Seleccione%0 broil' [230°C [450 °F]]para asara la
parriflacon temperatura bajaaiimentosque debenset
cocinadospor m_stiempo,tal comola camede ave.
3. Despu6sde cuatrosegundos,el hornocomenzar_afuncionar.
'BROIL'continuar_ [[uminado.
4.
5.
6.
7_
Paraun dorado 6ptimo, precalienteeI homo durante 2 a 3
minutosantesde co[ocarel alimento.
Coloqueel alimentoen e! homo. CierreIa puerta deI homo.
D6 vuekaa Jacame una vez aproximadamentea mitadde la
cocci6n.
CuandoeJalimentoest6 cocinado,oprJmaIa tecla _P._nr._l/
'Cancel' {Cancelar]. RetireeJalimento y Jaasadera
del homo.
La horadel dfavolver_ a desplegarseen el
indicadorvisual.
Notas Sebce Asado a UaPacciHa
o Paramejoresresultadoscuando asea ia parrilla, useuna
asaderadisefiadapara asara ia parriiia.
o 'Hi' se usa para ia mayor[ade los asadosa laparriila. Use'LO
broil' cuando asea ia parrilla alimentosque necesitancocciOn
proiongada. Latemperaturainferior permite que el alimento se
cocine hastaquedar bJenasadosin dorarsedemasJado.
o Para ¢ambiar matemperatura demhomo durante maasar a
la parrilla, optima latech 'Broil', luegooptima la tecla A o V
para cambiareIajuste de asadoentre 'LO' y 'Hi'.
o Lostiemposde asadoa la pardlla puedenser m_slargos
cuando se seleccionala temperaturam_sbajade asara la
parriJia.
o Lamayoriade los aiimentos@ben ser dado vuelta cuando est4
a mitaddettiempo de asar.
o Parasugerenciasy temperaturasadicionalessobre asara la
parriJJa,consulteel folleto "La Cocina F4ci['.
TabJa de Asar a Ja PatrHJa
Precalienteel horno durante 2-3 minutos.
POSICION DE TERMINODE TmEMPOTOTAL DE
ALIB_ENTOS LA PARRILLA_ COCCION , COCC_ON (MINUTOS)
Came de Res Biftec,2,5cm (1"} 4 A medioasar 15- 20 minutos
4 Bienasado 18- 24 minutos
Hamburguesas,1,9cm (3/4"} de grosor 4 Bienasado 15- 18 minutos
Came de Cerdo Tocino 4 Bienasado 6 - 10 minutos
Chuletas,2,5cm 0 "] 4 Bienasado 22 - 26 minutos
JamOn- Rebanadasprecocidas, 4 Tibio 8 - 12minutos
1,3cm 0/2"] de grosor
Came de Ave Presasde polio 3 o 4 Bienasado 'LO Brow
30 - 45 minutos
lViariseos 10- 15 minutos
Bistecsde pescado,con mantequiJla,
2,5 cm (1"] de grosor
Filetesde pescado,1,3cm 0/2"} de grosor
La posici6nde la parrilla superiores #5.
4
4
Desmenuzado
Desmenuzado
Nora: Estatabia es s6Jouna gu[a. Lostiempos puedenvariar con el tipo de afimentoquese est_cocinando.
65
8 -12mhlutos
G
Cierre Auto tico/
Mode Sab tico
Ethomo se apagar_automSticamentedespu6sde 12 betas si usted Io
dejaaccidentalmenteencendido=Estacaracter[sticade seguddad
puedeset desactivada=
Para cancemar emcierre autem_tice de 12 horas y
dejar que el home funciene centinuamente durante
72 horas:
1= Programeel hornopara homear (vet p_gina 62_L
2= Oprimay mantengaoprimida Ia tecla 'Clock' Cleck
(Reloj)durantecinco segundos=
• 'SAb'se desplegar_y destellar_durantecinco segundos.
• 'SAb'se desplegar_continuamentehastaque se desactiveo
hastaque transcurraet I[mitede 72 horas=
• 'BAKE'(Horneado)tambi6n sedesplegar_isi se est_ usandoun
ciclode homeado cuandoeI homo est8en modesab_tico.
• Lafuncidn 'BAKE'(homeado)es/a 8nica que sepuede utLUzar
con elmode sabdtico,Lasdem_stundones(temporizador,
mantenerca/iente,autob'npieza,etc.) sebtoquear_nduranteel
modesab_tico.
Para cancemar 'Bake' cuande emMode Sab_tice
est_ active:
Optimala tecia 'Cancem'(Cancela0=
• 'BAKE'se apagar8en eI indicadorvisual
• No se oir_ ningunaseiiai sonora.
Para canceiar el Mode Sab_tico:
1= Optima latecla 'Clock' durantecinco segundos=
O
Clock
2. Despu6sde 72horas,eI modesab_ticoterminar&
• 'SAb'destellar_idurante cinco segundos.
• Lahera deldia reaparecer_en el indicadorvisual
Notas Sobre el Mode Sab tico
• ElMode Sab_ticopuedeset activadoen cualquier momenta,
est6o no el hornoencendido=
• ElMode Sab_ticonopuedeser activadosi las teclasest_n
bloqueadaso cuando la puertaest_ bloqueada.
• Siel homo est_homeandocuando el Mode Sab_ticoes
programatic, 'BAKE'se apagar_al final del ciclo de horneado.
No se emitir_nseSalessonatas.
Sise deseaIa hz del horno duranteel Mode Sab_tico,_sta
debeset encendidaantesde que comienceel Mode Sab_tico=
CuandocomienzaeI Mode Sab_tico,no se emitir8 laseiial
sonorade precaientamiento=
CuandoeI Mode Sab_ticoest_active,todos Iosavisos,
mensaiesy seiiaies sonorasest_n desactivadas=
Elbloqueoautom_tico de la puertano funcionadurante el
Mode Sab_tico=
Sioprime latecla 'Cancel' se cancelar_un ciclo 'Bake',sin
embargoel controI permanecer_enMode Sab_tico=
SifaIIa lacorrienteel8ctrica,cuandovuelvalaenergiaet homo
se activar_en Mode Sab_ticocon 72 horasrestantesy ning_n
ciclo active=
66
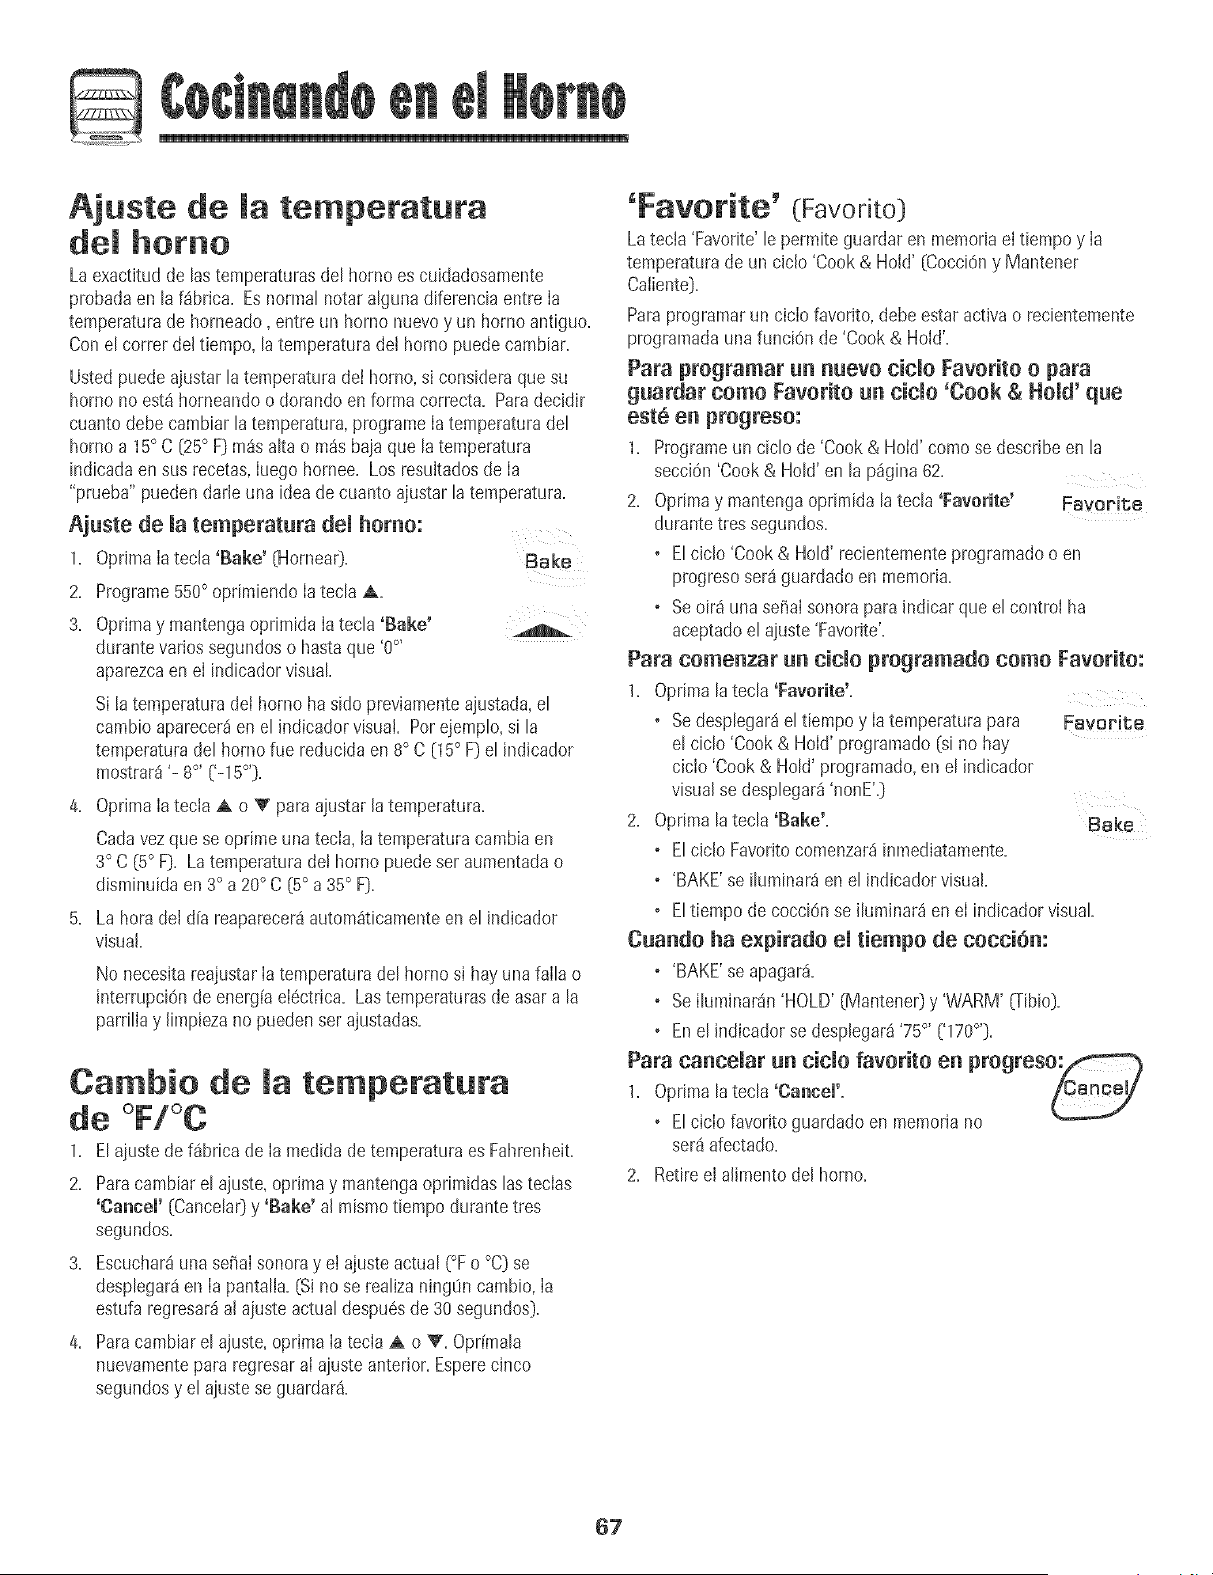
Ajuste de matemperatura
dem homo
Laexactitudde hs temperaturasdel hornoes cuidadosamente
probadaen la f_brica. Esnormal notaralguna diferencia entre Ia
temperaturade horneado, entre un borne nuevoy un borne antiguo.
Con el correr deltiempo, la temperaturadot homo puede cambiar.
Ustedpuedeajustarlatemperaturadot homo,s+consideraque su
borneno est_ horneandoo dorando en formacorrecta. Paradecidir
cuanto debe cambiar la ternperatura,programeIa temperaturadel
bornea 15° C [25° F] m_salto o rossbajaque la temperatura
indicadaensus recetas,Iuegoborneo. Los resultadosde Ia
"prueba" puedendarleuna ideade cuanto ajustar la temperatura.
Ajuste de matemperatura demhomo:
1. OprimaIatecla 'Bake' {Hornea0. Bake
2. Programe550° opdmiendoIa tecla A.
3. Opr+may mantengaoprimida Ia tecla 'Bake'
durantevariessegundoso hastaque '0°'
aparezcaen eI indicadorvisual.
Sila temperaturadot borneha side previamenteajustada,el
cambioaparecer_en el indicadorvisual. Perejemplo,si la
temperaturadel borne rue reducidaen 8° C (15° F) el indicador
mostrar_'- 8°' ['-15°'}.
4. OprimaIatecia A o V paraajustarla temperatura.
Codavezque se oprime unatecla, latemperaturacambiaen
3° C (5° F). La temperaturade! homo puede set aumentadao
disminuidaen 3° a 20° C (5° a 35° F).
5. La hera del d[a reaparecer8automhticamenteen el indicador
visual.
No neces+tareajustarIatemperaturadel homo s+hay una falh o
interrupci6nde energ[aeI6ctrica. Lostemperaturasde asara la
parrillay limpiezano puedenset ajustadas.
Cambio de la temperatura
de °F/°C
1. Elajustedef_brica de Ia medidade temperaturaes Fahrenheit.
2. Paracambiarel ajuste,oprimay mantengaoprimidas lostecias
'Cancel' [Cancela0y 'Bake' al mismotiempodurante tres
segundos.
3. Escuchar_una sefiaisonoray el ajusteactual (°F o °C] se
desplegar_en Ia pantalla.[Si nose realizaning0n cambio,Ia
estufa regresar_alajuste actualdespu6sde30 segundos].
4. Paracambiarel ajuste,oprima Iatecla A o 'V. Opr[mala
nuevamentepararegresaraIajuste anterior.Esperecinco
segundosy el ajuste se guardar&
'Favorite' (Favorite)
Latecla 'Favorite'le permite guardaren memoriael tiempoy Ia
temperaturade un ciclo 'Cook& Hold' [CocciOny Mantener
Caliente].
Paraprogramarun ciclofavorite,debeestaractiva o recientemente
programadaunafunciOnde 'Cook& Hold'.
Para programar un nuevo cido Favorite o para
guardar come Favorite un cido 'Cook & Herod' que
est6 en progreso:
1+ Programeun ciclo de 'Cook& Hok!'come se describeen la
secciOn'Cook& Hold' en la p%ina 62.
2. Oprimay mantengaopdmida latecla 'Favorite' Favorite
durantetres segundos.
o El ciclo 'Cook& HoW recientementeprogramadoo en
progresoset8guardadoen memoria.
o Seoir8 una seiial sonorapara indicar queel control ha
aceptadoel ajuste 'Favorite'.
Para comenzar un cicmoprogramatic come Favorite:
1. Optimala tecla 'Favorite'.
o Sedesplegar_el tiempo y Iatemperaturapara Favorite
el ciclo 'Cook& Hold' programatic [si no hay
ciclo 'Cook& HoW programado,en el indicador
visualse desplegar4'nonE'.]
2. Oprimala tecla 'Bake'. Bake
o El ciclo Favoritecomenzar_iinmediatamente.
o 'BAKE'se iluminar_ enel indicadorvisual.
o El tiempo de cocciOnse iluminar_en eI indicadorvisual
Cuando ha e×pirado emtiempo de cocci6m
o 'BAKE'se apagar_+
o Se ilurninarSn'HOLD' (Mantener}y 'WARM' (Tibio}.
o En el indicadorse desplegar_'75°' ['170°'}.
Para cancemar un cido favorite en progreso:f_'- _
1. Oi)rimala tecla 'Cancel'=
o El ciclo favoriteguardadoen memoriano
ser_afectado.
2. Retireel alimento del homo.
67
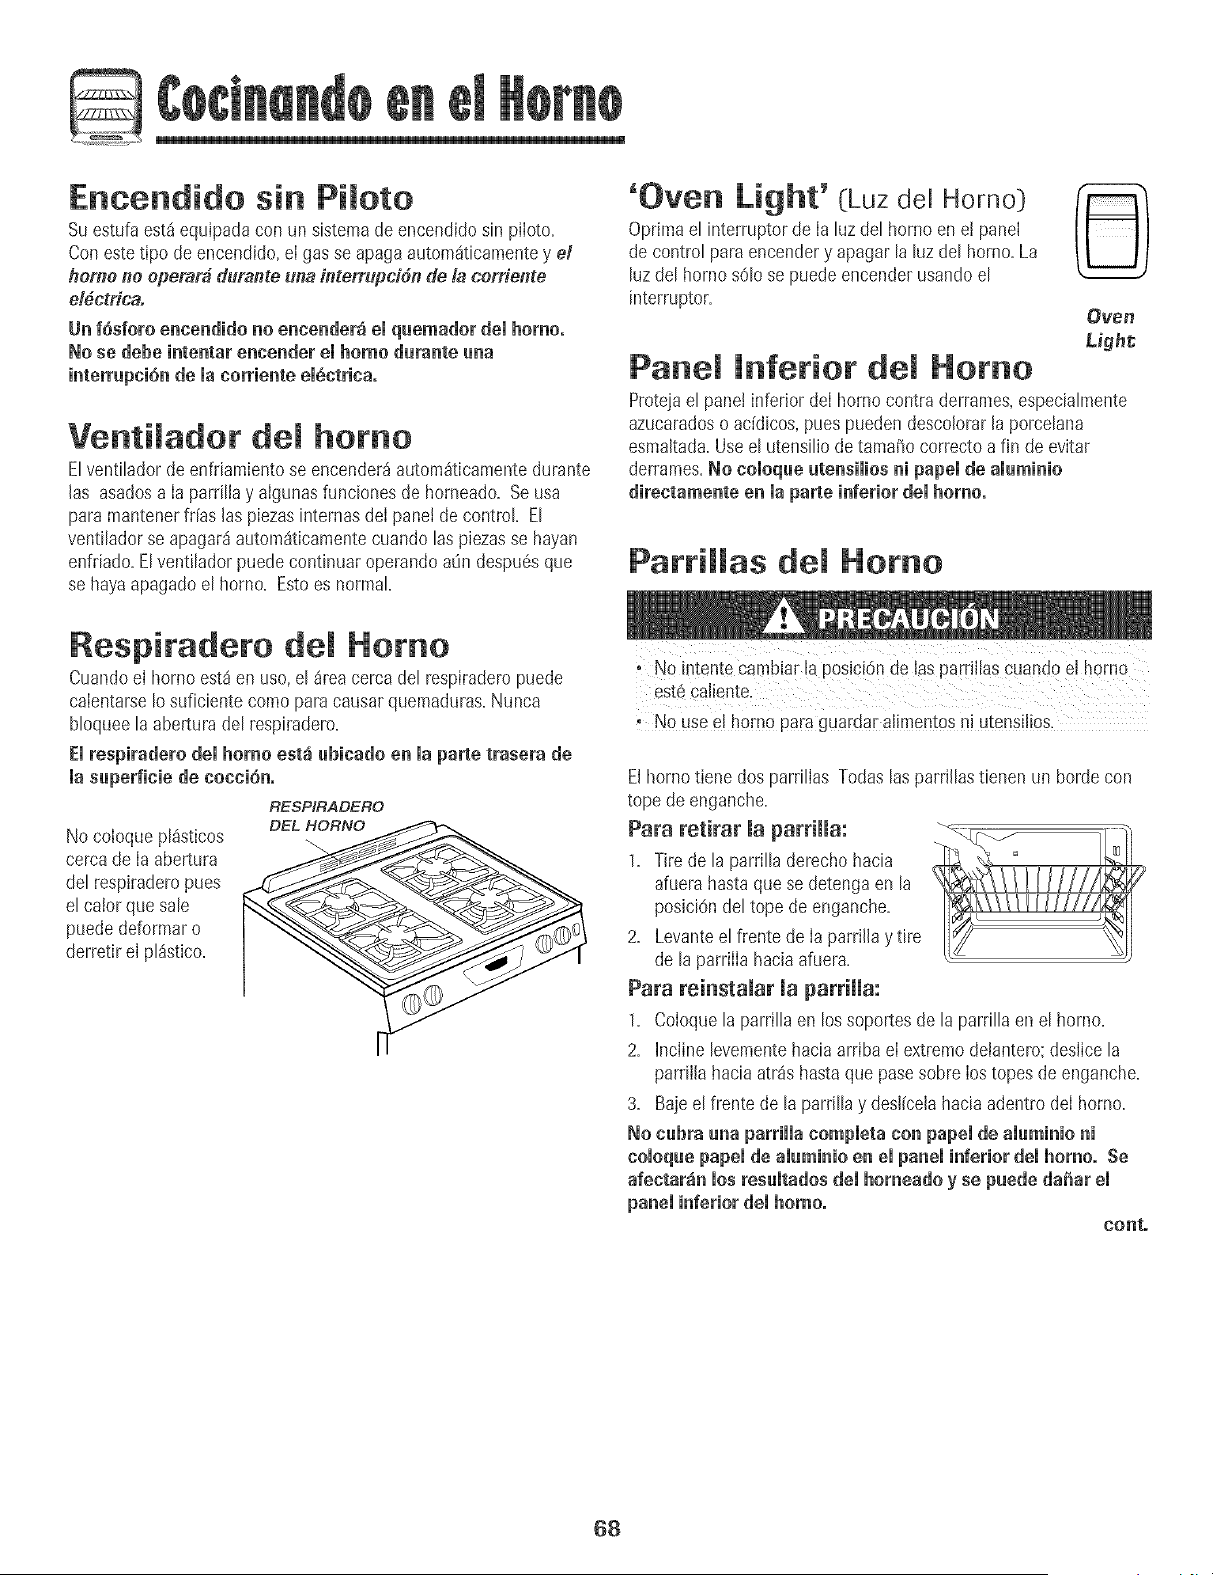
G
Encendido sin Pimoto
Suestufa est_equipadacon un sistemade encendidosin piloto.
Con estetipo de encendido,eI gas seapagaautom_ticamentey el
herl_e#e epeParbdurante una interrupd&t de la cerfiellte
el#ctfica.
Un f6sforo encendido no ennender_ el qaemador del homo°
No sn debe intentar encender el homo durante aria
interrupci6nde la norriente em_ctrina.
Venti ador dem homo
Elventiladorde enfriamientose encender_autom_ticamentedurante
las asadosa Ia pardlla y aIgunasfuncionesde horneado=Seusa
paramantenerfrFaslas piezas internasdeI panel de control El
ventiladorse apagar_automSticamentecuandolas piezasse hayan
enfriado.Elventilador puede continuar operando a0n despu6sque
se hayaapagadoel homo. Estoes normal.
'Oven Light' (Luz del Homo) (_
Optimael interruptorde Ia luzdel homo en e! panel
de control para encendery apagarla luz del homo.La
luz del hornosOlose puedeencenderusandoel
interruptor=
Oven
Mgh#
Panem inferior demHomo
Proteiael panelinferior deI homo contra derrames,especialmente
azucaradoso addicos, puespuedendescolorarla porcelana
esmaltad&Useel utensiliode tamdio correcto a fin de evitar
derrames=No nomoqueutensimiosni papemde amuminio
directamente en maparte inferiordemhomo°
Parrillas del Homo
Respiradero Homo
CuandoeI hornoest_en uso,el _rea cerca del respiraderopuede
caIentarseIosuficiente comopara causar quemaduras=Nunca
bloqueela aberturadel respiradero=
El respiradero dei homo est_ ubinado en ia parte trasnra de
masupnrficie de cocci6n,
No coloque pl_sticos
cemade Ia abertura
del respiradempues
el calor quesale
puededeformaro
derretir el pl_stico.
RESP_ADERO
° No use eJhomo pa[aguardarajirnentosn!UtenS!JieS.
Elhornotiene dos parrillas Todaslas parrillastienen un bordecon
tope de enganche=
Para retirar maparrimma:
1. Tirede [a parri[[aderechohacia
afuerahastaque se detengaen la
posiciOndeltope de enganche=
2= Levanteel frente de [a parri[la y tire
de la parriiia hacia afuer&
Para reinstaiar [a parriiia:
1= CoIoquela parrilla en los soportesde la parrillaen el homo,
2= hmiine levementehacia arriba eI extremodetantero:deslicela
parrillahacia atr_shastaque pasesobreIostopesde enganche=
3= Baje el frente de la parrillay desl[celahacia adentro deI homo,
No nabra aria parrimmacompmetacon papel de amaminioni
oomoquepapemde aluminio en el paneminferiordemhomo. Se
afectar;_n mosresamtadosdemhomeado y se puede daSar em
paneminferiordei homo°
eonto
68
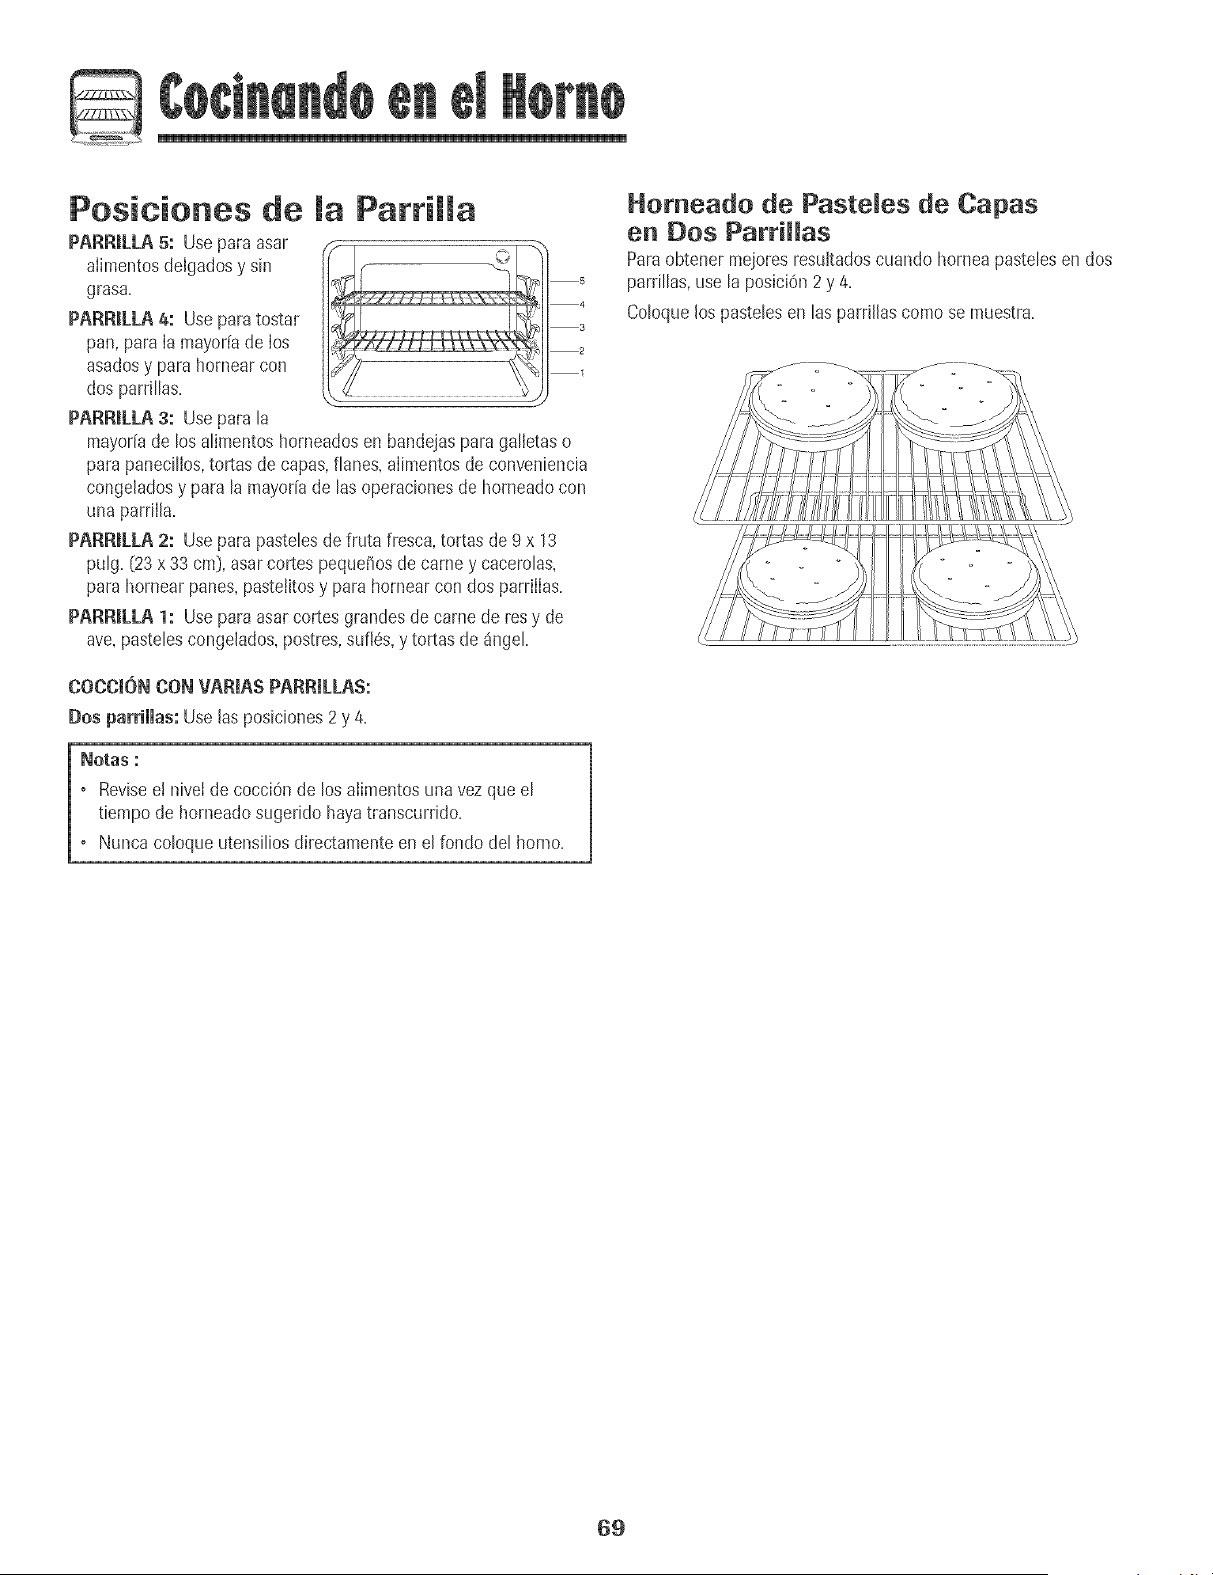
©
Posiciones de la Parriiia
PARR&LA 5: Usepara asar
aiimentosdeigadosy sin
grasa.
PARR[[.LA 4: Useparatostar
pan, para[a mayoffade los
asadosy para homearcon
dos parrillas.
PARRILLA3: Usepara [a
mayoriade bs alimentoshorneadosen bandejasparagaHetaso
parapanecilios,tortas de capas,fianes,aiimentosde conveniencia
congeiadosy para la mayoffade lasoperacionesde homeadocon
una parrfl[a.
PARRiLLA2: Usepara pastelesde fruta fresca,tortas de 9 x 13
puig. {23x 33 cm}, asarcortes pequeffosde carney cacerolas,
para hornearpanes,pastetitosy parahornear con dos parrillas.
PARR&I.A 1: Use para asarcortes grandesdecame de resy de
ave,pastebs congelados,postres,sufl@,y tortas de _ngeL
_ 5
+ i
_ 2
1
COCC[ON CONVARiAS PARRiLLAS:
Dos parriiias: Use [asposiciones2y 4.
Notas ,"
• Revisee[ hive[ de cocciOnde los alimentosunavezque el
tiempode homeadosugerido hayatranscurrido.
+ Nuncacoloque utensiliosdirectamenteen el rondodel homo+
Homeado de Paste[es de Capas
en Dos ParriHas
Paraobtener mejoresresu[tadoscuando horneapaste[esen dos
parrillas,use la posici6n2 y 4.
Coloquelos pastelesen las parrlilascomo se muestra.
69
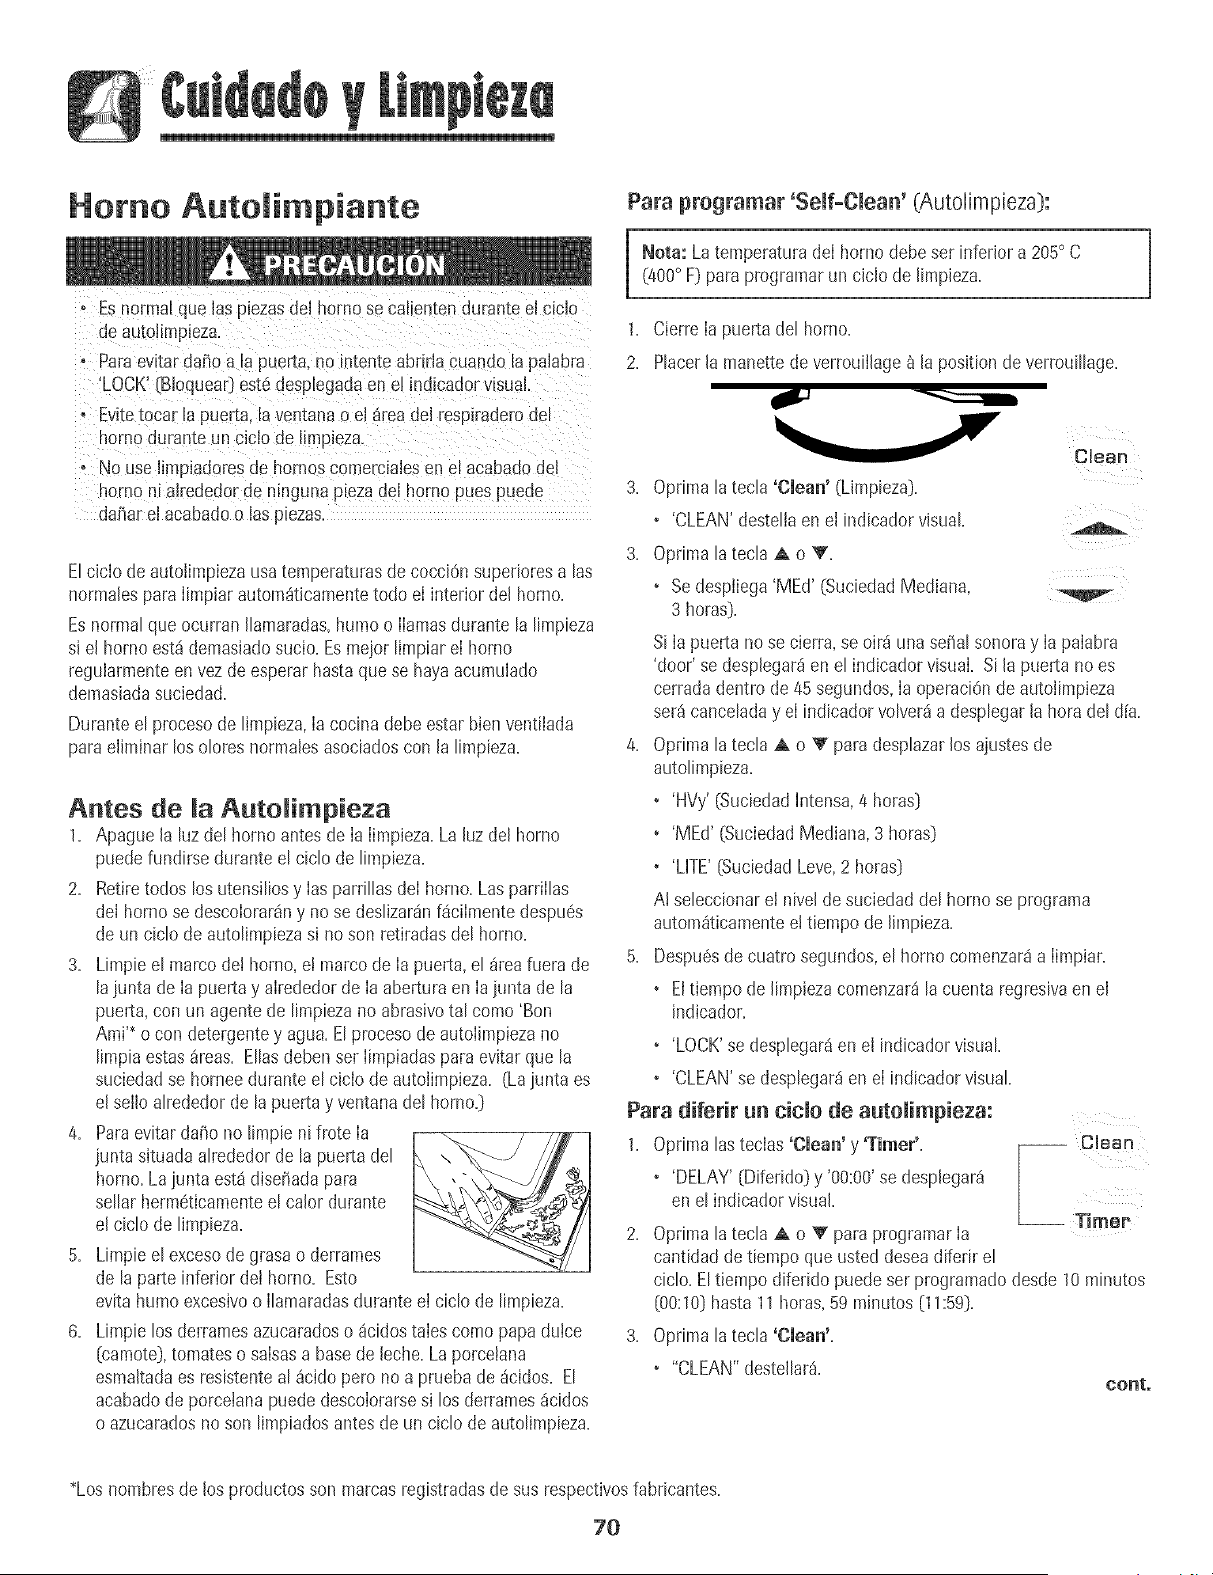
Homo Autoii piante
o Esnormal que Jaspiezasde[ homo se cal_en[endurante el cic[o
de autoJimpleza.
, Paraevitardafio a la puerta,no [ntenteabdrlacuando ia paiabra
'LOCK'(gloquea0est6despEegadaen el [ndicadorvisual.
o Evitetoca_[a puerta.[a ventanao el areade[ respirader_de_
homo duranteun ciclo de I,mp_eza.
o No uselimpiadoresde hornos comerciaiesen el acabadodel
homo ni airededorde nmguna p_ezade[ homo puespueue
dafiar el acabadoo [as Dezas
Elcicio de autoiimuiezaJsa[eN oera_uras(_ecocclon supenoresa as
normalesuara [imE)iarautom_ticamentetodo el interior de norno.
Esnormal queocurran IIamaradas.humoo llamasdurante la limpieza
s[e[ homo est_demasiadosucio. Esmejor limpiar el homo
reguiarmenteenvez de esperarhasta que se hayaacumuiado
demasiadasuciedad.
Duranteel procesode limpieza,[a cocina debe estar bien ventiiada
paraeiiminar los oloresnormaiesasociadoscon la limpieza.
Antes de [a Auto[impieza
1. Apague [a luzdel homo antesde [a [impieza.La hz de[ horno
puedefundirse duranteel ciclode limpieza.
2. Retiretodos los utensiIiosy [asparriIIasde[ homo. LasparriiIas
de[ hornose descoiorar_ny nose desIizar_nf_ciimentedespu6s
deun ciclode autoIimpiezasi noson retiradasdel homo.
3. Limpieel marcode[ horno, e[ marco de [a puerta,el _reafuera de
lajunta de [a puertay airededorde [a aberturaen [a junta de la
pueita,con un agentede limpiezano abrasivotal como'Bon
Ami'* o con detergentey agua. EIprocesode autoiimpiezano
limpia estas_reas. Eliasdebenser [impiadaspara evitar que la
suciedadse homee duranteel cicio de autoiimpieza. (Lajunta es
e[seilo aIrededorde lapuerta y ventanadel homo.)
4. Paraevitardafio no limpie ni frote [a --_ _Fq
junta situadaaIrededorde la puerta del _\ .
homo.Lajunta est_diseiiada para
seIIarherm6ticamenteel calor durante
e[ ciclode limpieza.
5. Limpieel excesode grasa o derrames
de laparte inferior dei homo. Esto
evitahumo excesivoo [lamaradasdurante e[ ciclo de limpieza.
6. Limpie losderramesazucaradoso _icidostaies comopapaduice
(camote),tomateso saisasa basede leche.La porcelana
esmaltadaes resistenteal _cidopero no a prueba de _cidos. El
acabadode porcelanapuededescoiorarsesi los derrames_cidos
o azucaradosno son limpiadosantesde un ciclo de autoIimpieza.
Para programar 'Sdf-Cmean' (Autolimpieza):
[ Nora: La temperaturade[ hornodebe set inferior a 205° C(400° F) paraprogramarun ciclo de limpieza.
1. Cierre [a puertadel homo.
2. Placerla manettede verrouiilage_ la position de verrouiIIage.
Clean
3, Optima [atech 'Clean' (Limpieza).
• 'CLEAN'desteIiaen el indicador visual
3. Optima latecIa A o V.
• Sedespliega'MEd' (SuciedadMediana,
3 horas).
Si [a puerta nose cierra, se oir_ una serial sonoray [a paiabra
'door' se desp[egar_en e[ indicadorvisual. Si la puerta no es
cerradadentro de45 segundos,[a operaci0nde autoiimpieza
ser_ cance[aday el indicadorvo[ver_ia desp[egar[a hora de[d[a.
4. Optima [atec[a A o V paradesp[azarlos ajustesde
autoIimpieza.
• 'HVy'(SuciedadIntensa,4 horas)
• 'MEd' (SuciedadMediana,3 horas)
• 'LifE' (SuciedadLeve,2 horas)
A[ se[eccionarel nivel desuciedadde[ horno se programa
autom_ticamentee[ tiempode [[mpieza.
5. DespuSsdecuatro segundos,e[ hornocomenzar8a [impiar.
• Eltiempo de [impiezacomenzar_[a cuenta regresivaen e[
indicador.
• 'LOCK'se despIegar_en e[ indicadorvisual
• 'CLEAN'se despIegar_en el indicadorvisual
Para diferir un cic[o de autoiimpieza:
1= Optima [astecias 'Clean' y 'Timer'= r-- Clean
L
• 'DELAY'(Diferido)y '00:00'se desplegar_
en el indicadorvisual.
2= Optima [atec[a A o V para programar[a -- TimeP
cantidad de tiempo que usted deseadiferir e[
cic[o=E[tiempo diferido puedeser programadodesde 10minutos
[00:10Dhasta 11horas.59minutos (11:59D=
3. Optima [atec[a 'Clean'=
• "CLEAN"desteliar_=
conto
*Losnombresde los productosson marcasregistradasde sus respectivosfabricantes=
20
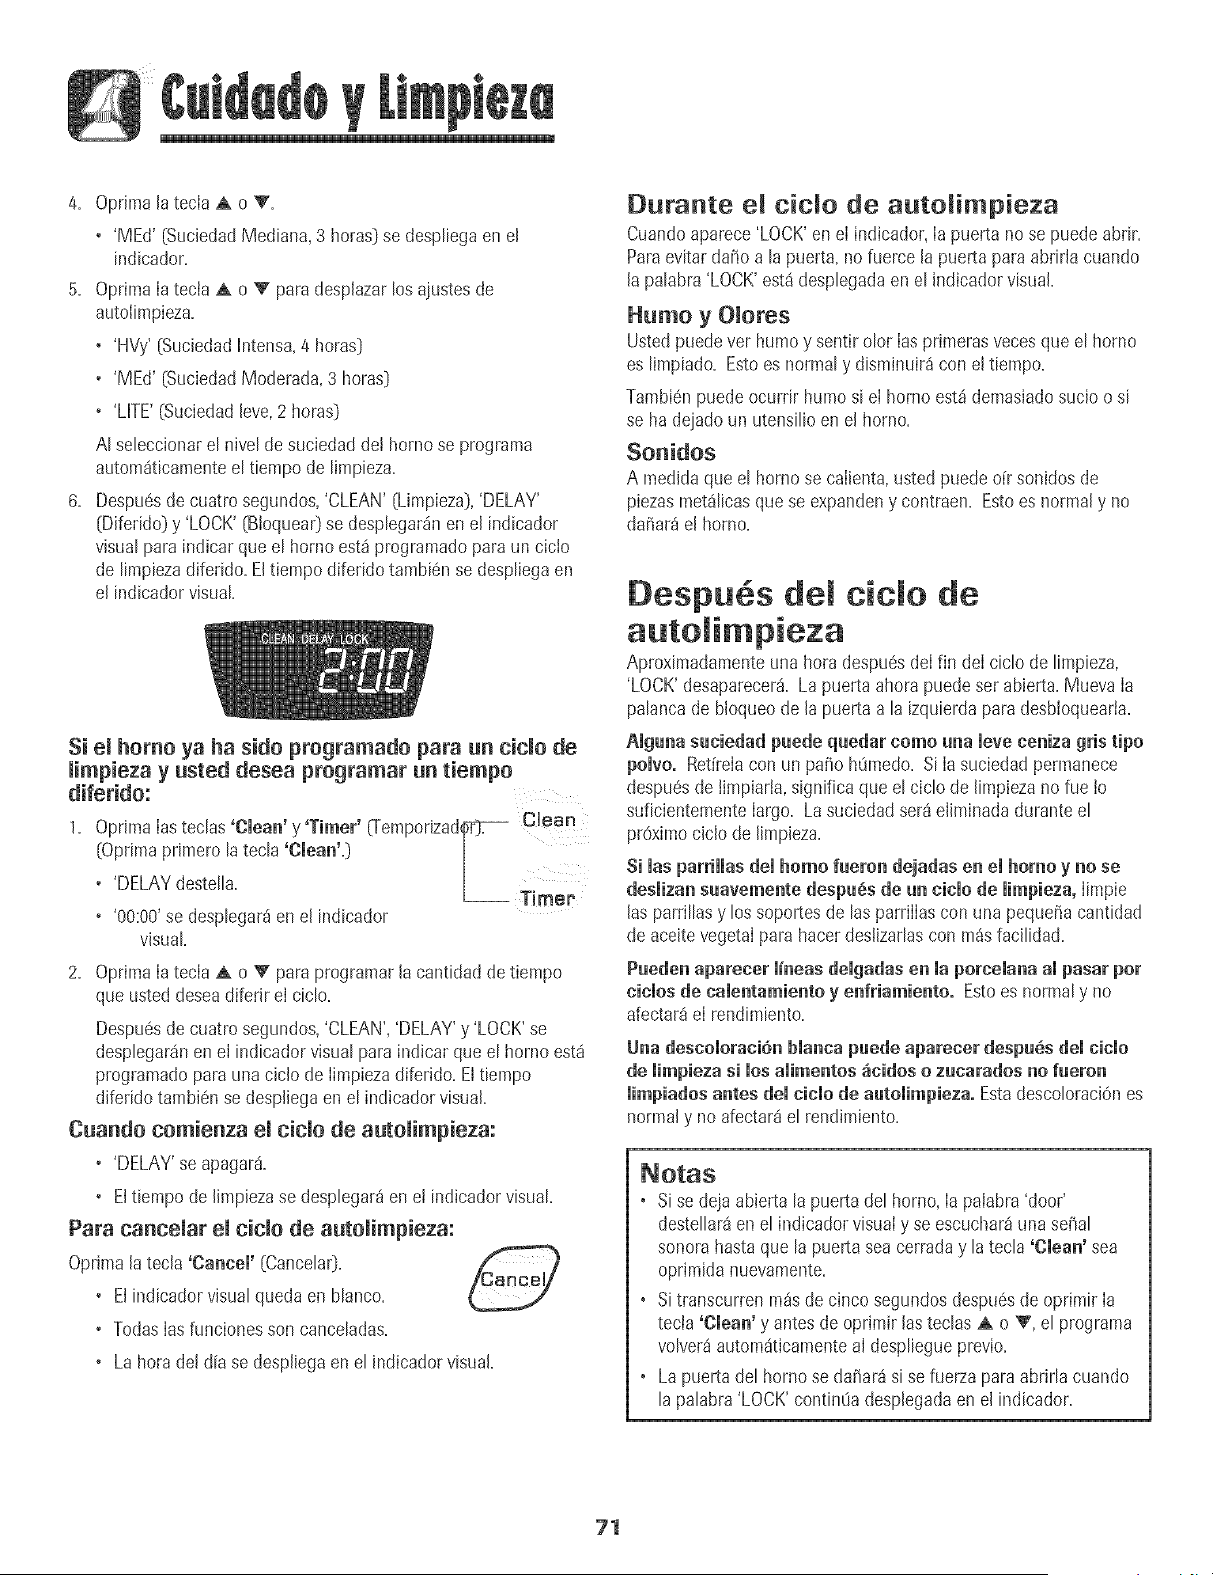
4. Oprima[atecla A o V.
+ 'MEd' [Sucbdad Mediana, 3 horas}se despliegaen el
indicador.
5. OprimaIatecia A o '_ paradesplazarlosajustesde
autoIimpieza.
+ 'HVy'{Suciedadintensa,4 horas}
• 'MEd' {SuciedadModerada+3 horas}
+ 'LITE'(Suciedadleve,2 horas}
AI sebccionar el nivel de suciedadde! homo se programa
autom_ticapaenteel tbmpo de limpieza.
6. Despu@de cuatrosegundos,'CLEAN'{Limpieza},'DELAY'
{Diferido}y 'LOCK'{Btoquea0se despbgar_n en el indicador
vbual paraindicar queel homo est_programadopara un ciclo
de limpiezadiferido.El tiepapodiferido tambi6nse despliegaen
el indicadorvisual.
Si emhomo ya ha sido programatic para un cide de
limpieza y usted desea programar un tiempo
diferido:
, , , , C esn
1. OprimaIastedas Clean y Timer (Temporizad._r}7_
{Optimaprimero latecla 'Clean'.} /
• 'DELAYdestella. |L_ T'_:,,
+ '00:00'se desplegar_en el indicador
vbuaL
2. OptimaIatecla A o V para programarla cantidad de tiempo
queusteddesead+ferirel ciclo.
Despu@de cuatrosegundos,'CLEAN','DELAY'y 'LOCK'se
despbgar_nen el indicadorvisualpara indbar que el horno est_
programaticpara unac+clode Iimpiezadiferido. El tbmpo
diferidotambi@ sedespliegaen el indbador visual.
Cuando comienza el tide de autoiimpieza:
• 'DELAY'se apagar&
• Eltbmpo de [impiezase desplegar4en ei indicadorvisual
Para cancemar emtide de automimpieza:
Oprimala tecla 'Cancem'{Cancelar}.
• Elindicadorvisualquedaen blanco.
• Todas [asfuncionesson canceladas.
+ Lahora de[aliase despJiegaen el indicadorvisual
[}urante e_ cido de autolimpieza
Cuandoaparece'LOCK'en eI indbador, Ia puerta no se puedeabrir.
Paraevitardaiio a la puerta,nofuerce la puertapara abrirtacuando
la palabra'LOCK'est_ despbgada en el ind+cadorvisual+
Humo y Omores
Ustedpuedevet humoy sentirolor Iasprimerasvecesque el homo
es limpiado. Estoes normal y disminuir_con el tiepapo.
Tambi@puedeocurnr humosi eI homo est_ demasiadosucio o si
se ha dejadoun utensilioen el homo.
Sonidos
A med+daque el horno se calbnta, usted puedeoir sonidosde
piezasmet_licasquese expandeny contraen. Estoes normaly no
daiiar_ el homo.
Despu s cic o de
automimpieza
Aproximadamenteunahora despu@deIfin deI ciclo de limpieza,
'LOCK'desaparecer& Lapuerta ahora puede set abierta.MuevaIa
palancade bloqueode la puerta a la izquierdaparadesbioquearia.
Alguna suciedad puede quedar como una mereneniza gris tipo
polvo. Ret[reIacon un paho h@Tledo.Si Ia suciedadperrnanece
despu@de timpiarta,significa que el ciclode lin+pbzano rue to
suficientementeIargo. Lasucbdad set8eliminada duranteel
proximoclclo de [[mpbza.
Si masparrimmasdemhomo fueron dejadas en emhomo y no se
desiizan suavemente despu6s de un cicio de iimpieza,Iimpie
las parrillasy los soportesde lasparriIIascon una pequefiacantidad
de acekevegetaIpara hacerdeslizarlascon m_sfacilidad.
Pueden aparecer m+neasdemgadasen maporcemanaampasar pot
nicmosde camentamientoy enfriamiento. Estoes normaly no
afectar_eI rendimiento.
Una _escomomni_nbmancap_ede aparecer desp_Ss _emc_cmo
de mimpiezasi mosamimentos_cidos o z_carados no f_eron
limpiados antes dem_i_mode a_tomimpieza.EstadescoloraciOnes
normaly no afectar8el rend+miento.
Notas
+ Si se deja abierta la puertadel homo,Ia paIabra'door'
destellar8enel indicadorvisuai y se escuchar_una sehal
sonora hastaque la puertasea cerraday la tecla 'Clean' sea
oprimidanuevamente.
+ Si transcurrenm_s de cinco segundos despu@de oprimir Ia
tecia 'Clean' y antesde oprimir lasteclas _ o V, el programa
volver_autom_tbamenteal despliegueprevio.
• Lapuerta del homo se dahar_si se fuerzaparaabrirla cuando
la palabra'LOCK'continOadesplegadaen el indicador.
71
Procedi ientos de Limpieza
_Loshombresde Iosproductosson marcasregistradas
de susrespectivosfabricantes=
_ Para hacerpedidos, Ilameai 1-877-232-6771EEUU=o
Sise retira algunapieza,aseg6resede que Seareinstaladaenforma correcta, al 1-800-688-8808Canada=
PIEZA PROCEDIMIENTO DE LIMPIEZA
Tapas de
Quemadores y
Quemadores de
Gas Sellados
Rejimmasderues
Quemadores-
pereemanasebre
Area del Reloj y
de las Teclas
de Control
Cubierta y Panel
de Control-
Esmalte de
Poreelana
Cabezas de QuemaderesRemovibles
o Dejeenfdarelquemador=RetirelatapayI_ve]aenaguajaboNosaconuna esponjade restregarde pl_stico=Parasuciedad
dificil, iimpie conunaesponianoabrasivarellenaconjabOno concrema para limpiezadecubiertas'CooktopCleaning
Creme'_ (Pieza#20000001)_y una esponia=
o No las laveenel lavavajillasni en un borne autolimpiante=
O.uemaderes de Gas Sellados
o L[mpieloscon frecuencia=Deieenfriar el quemador=Limpie conjabOny una esponjade restregarde pl_stico=Para
suciedaddificil, limpie con una esponjano abrasivarellenacon jabOn=No agrandeni modifiquelos agujeros=
o Tengacuidado de que no entreagua en ios orificios de ios q_Jemadores=
o Tengacuidado cuando limpie el encendedor=Si elencendedorest_ hOmedoo daiiado, el quemadorsuperior no
encender&
o L_velascon aguatibiajabonosay unaesponjade pI_sticonoabrasiva=Paramanchasrebeldes,limpie conuna esponja
dep]_isticorellenaconiab0n, noabrasivao con 'CooktopCleaningCreme'_[CremaparaLimpiezade Cubiertas)[Pieza
20000001]*_y una esponja=Si la suciedad persiste,wJetvaa aplicar'CooktopCleaningCreme',cubracon unatoalla de
pape!h0meday deieremojardurante 30 minutes=Restrieguenuevamente,enjuaguey seque=
o No las laveenel lavavajillasni en un borne autolimpiante=
o Parabloquearde los controlespara la limpieza,ver 'Btoqueode los Controles'en p%ina 61.
o Limpiecon un paso h_imedoy seque. No use agentesde limpieza abrasivespuespuedenrayarel acabado.
o Sepuede usar limpiaviddossi se rocianen el paiio primero. NO retie directamente en elpaneL
o RetireIas perillascuandoest6nen Ia posici6n 'OFF'(Apagado}tir_indoiashacia adetante=
o Lave,eni_mguey seque=No useagentesde limpiezaabrasivespuespueden rayarel acabado=
o Enciendacada quemadorparaasegurarsede que lasperillas hartside correctamentereinstaladas=
Laporcelanaesmaltadaesviddo fundido en metaly puede agrietarseo picarsesi nose usacorrectamente.Esresistente
a los _cidos,no a prueba de _cidos.Todos Ios derrames,especialmentelos derramesazucaradosoacidicos debenset
limpiadosinmediatamentecon un paso seco.
o Cuandose enfr[e,Iavecon aguajabonosa,enjuaguey seque.
o NuncaIimpie unasuperficietibia o calientecon un paiio h_medo.Estopuedecausar agrietamientoo picaduras.
o Nuncause limpiadoresde borne,agentes de limpiezaabrasiveso c_usticosen el acabadoexteriorde la estufa.
72
PROCEDIMIENTO DE UMP_EZA
Gaveta de
Almacenamiento
y Manijas de las
Puertas+ Esmaite
Pintado
Ventana y Puerta
dei Homo +Vidrio
+ Cuandoest6fr[a, iave con agua tibia jabonosa,enjuaguey seque+Nunca iimpie unasuperficietibia o caliente
con un patio h_imedopues estopuededdiar la superficiey causaruna quemaduraa causadei vapor.
+ Paramanchasrebeides,use agentesde iimpieza ievementeabrasivostal comopastade bicarbonatoo 'BonAmi'*+
No useiimpiadoresabrasivos,c_usticoso _sperostal comoesponjasde lanade acero o limpiadoresde hornos+Estos
productospuedenrayaro daiiar permanentementeia superficie+
Neta: Use uI_atoalla e u# pai_usece para Iimpiar los derrames, especialmente los derramesac[dices u
azucaradusoLa superficie se puede descelurar u perder el bri#e si el defame nu se #mpia i#mediatamente.
Este es espedalmeute impurtante en las superficies btancas.
+ Eviteusar cantidadesexcesivasde aguapues puedeescurrirsedebajo o detrMsdei vidrio causando manchas+
+ Lavecon aguayjabOn+ Enjuaguecon agualimpiay seque+Ellimpiador de viddo puede usarsesi se roda en un
patio primero+
+ No use materialesabrasivostales como esponjasde restregar,limpiadoresen polvo o esponjasde lanade acero
pues puedenrayarelvidrio+
+nteHor dei Homo + Siga las instrucciones en las paginas 70-71 para programar un ciclo de autolimpieza+
Acero lno×idabie
(modelosselectosD
+ Limpiarcon agua con jab6n.
+ Sacarlas manchasdificiles con polvo de limpiezao una esponjaIlenacon jab6n. Enjuaguey seque.
+ Lasparrillassedescolorar4npermanentementey puedennodesJizarseconsuavidadsisondejadasen eJhornodurante
unciclo deautolimpieza.Si estosucede,limpie laparri!lay lossoportesenrelievecon unapequetiacantidad deaceite
vegetalpara restaurarJafaciJidadde movimiento,Juegolimpie elexcesode aceite.
+ NO USENINGUN PBODUCTODE LIMPIEZA QUECONTENGABLANQUEADOBA BASEDE CLOBO.
• NO USELtMPtADOBES "ORANGE" M LIMPIADOBES ABRASIVOS.
+ SIEMPBELIMPIE LAS SUPEBfICIESDE ACEBOA FAVORDEL GBANO,
+ Umpieza Diaria/Suciedad Leve+ Limpie con uno de los siguientes- agua conjabOn+una soluci0nde vinagre
blancocon agua,limpiador parasuperficiesy vidrio 'Formula409'*o un limpiavidriossimiJar- usandouna esponja
o un patio suave. Enjuaguey seque. Parapulir y evitar marcasde Josdedos,use el producto 'StainlessSteel
Magic Spray'*(PiezaNo.20000008)**.
+ Sueiedad Moderada/Intensa + Limpiecon unode lossiguientes- 'Bon Ami'*, 'SmartCleanser'*o 'Soft Scrub'* -
usandounaesponja hOmedao un patio suave. Enjuaguey seque. Lasmanchasdificiles puedenser quitadascon
una esponjamult+-uso'Scotch-Brite'*hOmeda;frote a favordel grano. Enjuaguey seque. Pararestaurarel
lustrey sacar lasvetas,apiique'StainlessSteelMagic Spray'*.
+ Descoioraci6n = Useuna esponjamojadao un paiio suave,limpie con limpiador de acero'CameoStainlessSteel
Cleaner'*.Enjuagueinmediatamentey seque.Paraeliminar lasestriasy restaurareJlustre,use despu+srociador
paraacero inoxidable'StainlessSteeJMagic Spray'*.
*Losnombresde Ios productosson marcasregistradasde sus respectivosfabricantes.
** Parahacer pedidos,Ilameai 1-877-232-6771EE.UU.o al 1-800-688-8408Canada.
73
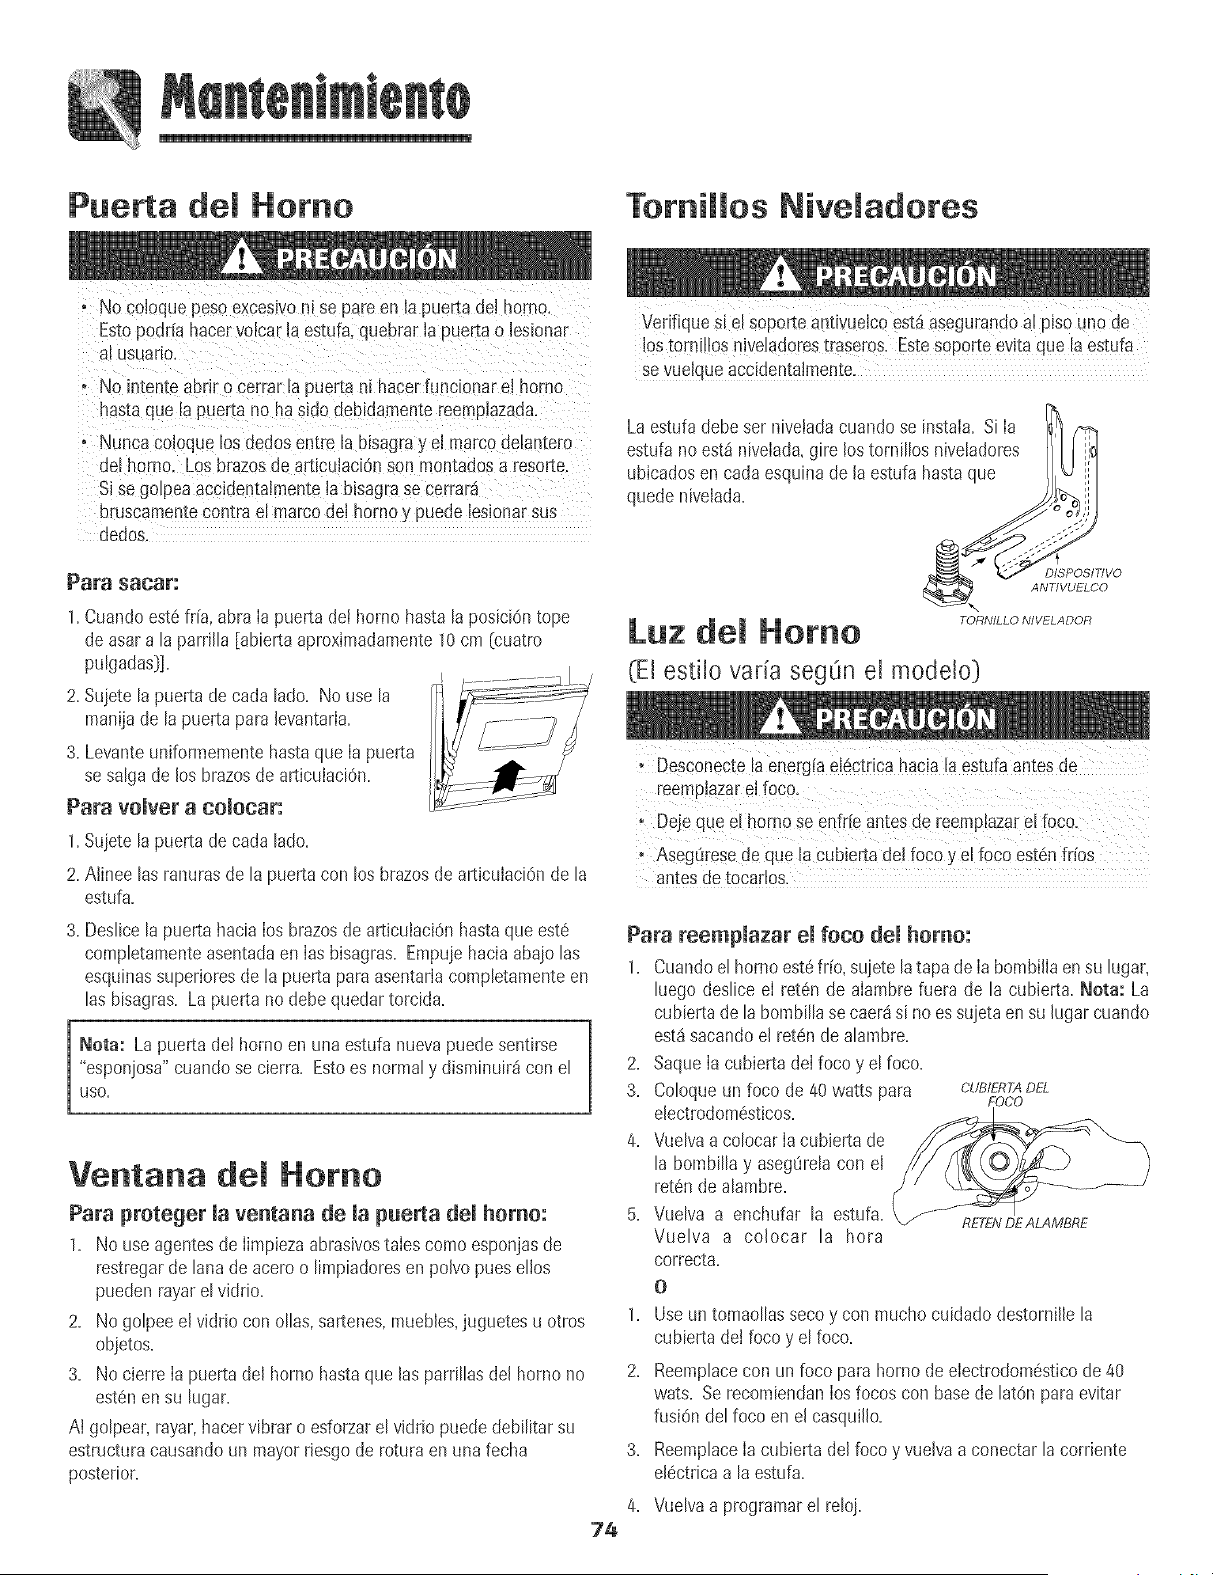
Puerta del Homo Tomillos Niveladores
o No coloquepeso exces_vomse pare en la puertadel homo
Es[opodria hacervobar la estufa,quebrar la auertao lesionar
al usuano.
* No intense aDrir o cerrar Lapuerta ni hacer ful clonar ei homo
has[a que la puer_a no ha sido deDidan mine reempiazada.
, Nunca coioque los dedos entre la bisagra ye] marco aemnmro
del horno. Los brazos de artbuiaci6n son monmdos a resor[e.
Si se golpea accldentaimente la bisagra se cerrara
bruscamente contra e! mar_-odel horno y puede lesionar sus
dedos.
Para sacar-"
1.Cuandoest6fria,abra Ia puerta det homo hastala posiciOntope
de asara laparrilla [abiertaaproximadamente10cm {cuatro
pulgadas}].
2. Suietela puerta de cada lado. No use la
maniiade la puertapara levantarla.
3. Levanteuniformementehastaque Ia pue_a
se salgade los brazosde articulaciOn.
Para volver a coiocar:
I.Suiete la puerta de cada Bdo.
2. Alinee las ranuras de la puerta con los brazos de articuiaciOn de la
estufa.
3. Deslicela puerta hacia los brazosde articulaciOnhastaqueest6
compbtamente asentadaen Ias bisagras. Empuiehaciaabaiolas
esquinassuperioresde la puerta para asentarlacompbtamente en
las bisagras. Lapue_a no debe quedar torcida.
Nora: Lapuerta dei homo en una estufa nuevapuede sentirse
"esponiosa"cuandose cierra. Esto es normaly disminuird con el
usa.
Ventana del Homo
Para proteger la ventana de la puemladei homo:
1. No use agentesde Iimpiezaabrasivostabs comaesponjasde
restregarde lana de aceroo limpiadoresen polvo pues elias
puedenrayarelvidrio.
Z No golpee el vidrio con alias, sartenes,muebles,juguetes u otros
objetos.
3. No cierre Ia puertadel hornohasta que las parrillasde{ homo no
est@len su lugar.
Ai golpear, rayar,hacervibrar o esforzarel vidrio puededebilitar su
estructuracausandoun mayor riesgode rotura en una fecha
posterior.
74
Venfique si el sopor_eantivuelcQ@sty1asegurandoal piso uno de
los to[ni!!0s niveladorestraseros. EsteSOPOrteevita que la estufa
sevueJqueaccidenta!mente,
La estufadebeser nivetadacuandose instala. Si Ia _] #_
estufa noest_ nivelada,gire los tornillos niveBdores II[I ,_
ubicadosen cada esquinade la estufa hastaque } v
_\ ANT/VUELCO
Luz del Homo
(El estilo varia segOn el model@
• Desconecte!a ene[g!aelSctricahaciala estufaantes de
• ksegOresedeque !acubierta del faceyel foco estOnfr[os
antesdetocarlos.
Para reempmazar el foco demhomo:
1. Cuandoel hornoest6fr[o, suietelatapa de Ia bombillaensu lugar,
luego deslice el ret6n de alambre fuera de la cubierta. Nora: La
cubiertadela bombi% secaerasi noes su]etaen su hgar cuando
estasacandoel ret@ dealambre.
2. SaqueIa cubiertadeIfoco y el foco.
3. Coloqueun foco de 40watts para CUB/ERTADEL
FOCO
electrodom@ticos.
4. Vuelvaa colocarIa cubierta de
la bombilla y asegOrelacon el
ret6n dealambre.
5. Vuelva a enchufar la estufa.
RETEN DE ALAMBRE
Vuelva a co{ocar la hora
correcta.
0
1. Useuntomaollassecoy con muchocuidado destomiHela
cubbrta det focoy el foco.
2. Reemplacecon un foco para homo de electrodom@ticode40
wats. Se recombndan losfocos con basede latOnpara evitar
fusion del foco en el casquillo.
3. ReemplaceIa cubmrtadel focoy vuelvaa conectar lacorrbnte
el@tricaa la estufa.
4. Vuelva a programar el reloj.
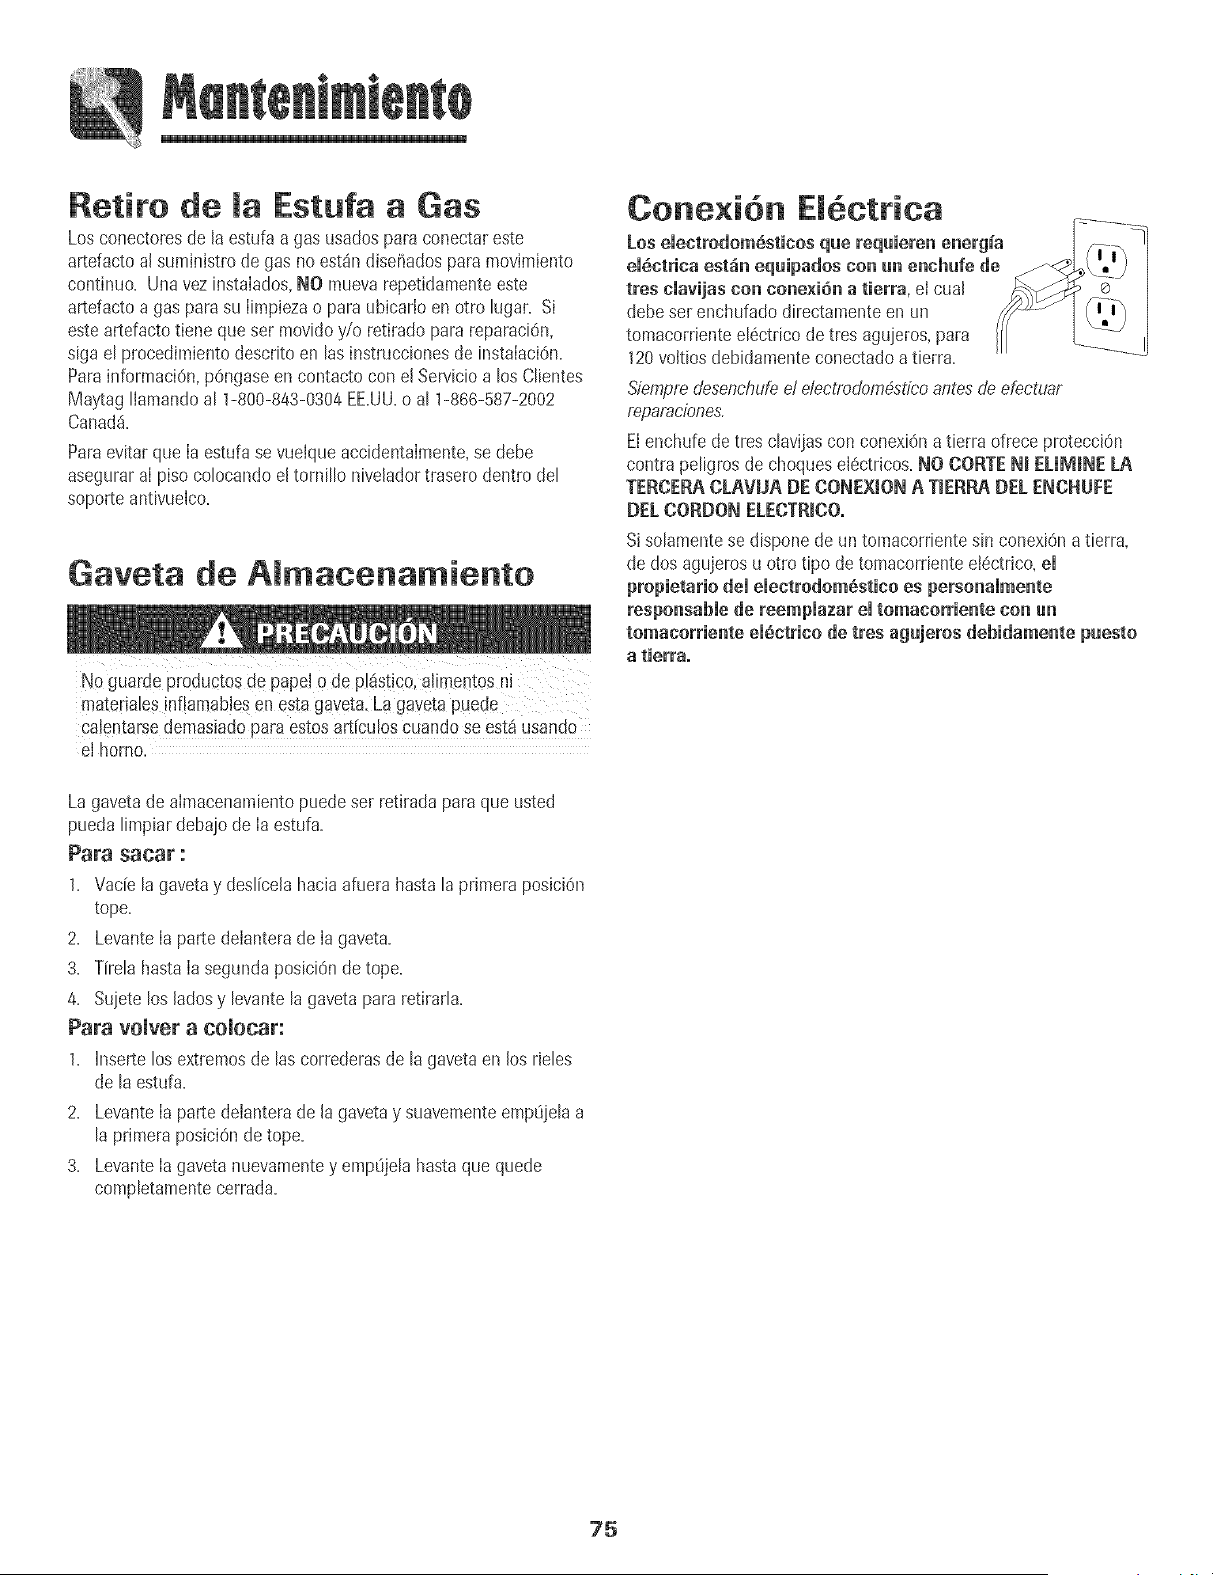
i
Retiro de maEstufa a Gas
Losconectoresde la esttJfaa gas usadospara conectareste
artefactoal suministro de gas no est_ndiseiiadospara movimiento
continuo. UnavezinstaIados,NO muevarepetidamenteeste
artefactoa gas para su limpiezao para ubicar[oen otto [ugar. Si
este artefactotiene que set movidoy/o retirado parareparaciOn,
siga et procedimientodescdto en tasinstruccionesde instaiaci6n.
Parainformaci0n,p0ngaseencontacto con e[ Servicioa los Clientes
Maytag Ilamandoal 1-800-843-0304EE.UU.o al 1-866-587-2002
Canad&
Paraevitarque [a estufase vuelqueaccidentaimente,sedebe
asegurara[ piso colocandoe[tornillo niveladortrasero dentro del
soporteantivue[co.
Gaveta de Ammacenamiento
No guardepr0ductosd@PaPe!0 de p!4st+cQ,aJiment0sni
matefia[es[nf!arnabiesen estagaveta.La gavetaPUede
ca!entarsedemasiadoparaestos art[cubs cuandose est,1usando
el homo.
Cone×i6n Em ctrica
Losemectrodom6sticosque requieren energia
el6ctrica est_n equipados con un enehufe de
ires ciavijas coil eone×iSn a tierra, el cual
debeser enchufadodirectamenteen un
tomacorrienteelSctricode tres agujeros,para
120voitiosdebidamenteconectadoatierra.
Siempredesenchufeel eiecLrodom_,stieoantesde efeetuar
reparaciones,
Elenchufede tres clavijascon conexi0n a tierra ofrece pretecciOn
contrapeligros de choqueseiectricos.NO OORTEN+ELIM[NE LA
TERCERACLAVUA DE CONE×IONA T+ERP_DEL ENCHUFE
DEECORDONELECTR_CO.
Sisolamentese dispone de untomacorrientesin conexiOna tierra,
de dos agujerosu otro tipo de tomacordenteel6ctrico,el
propietario dememectrodomSsticoes personammente
responsable de reemplazar el tomacorriente con un
tomacorriente eiSctrieo de tres agujeros debidamente puesto
a tierra.
Lagavetade almacenamientopuede set retirada paraque usted
puedalimpiar debajode Ia estufa.
Para sacar :
1, Vade la gavetay deslicelahacia afuerahasta la primera posiciOn
tope.
2. LevanteIa parte delanterade Ia gaveta.
3. TirelahastaIa segundaposiciOndetope.
4. Sujetelos ladosy levantelagavetapararetirarla.
Para vomver a comooar:
1, hlserte losextremosde las correderasde lagavetaen los rieles
de la estufa.
2. LevanteIa parte deianterade la gavetay suavementeempt_jelaa
la primera posici0nde tope.
3. LevanteIa gavetanuevamentey emp0jelahastaque quede
completamentecerrada.
?5
PROBLEMA SOLUCION
Para la mayor_ade los preblemas, , Revisesi Ios controbs deI horno est4n debidamenteajustados.
verifique primero io sigaiente. ° VerJfiquesi el enchufe est4 firmemente insertadoen eltomacorrbnte.
• VerJfiqueovueIvaa reponerel disyuntor. VerJfiqueo reempBceeJfusible=
• VerJfiqueeJsuministrode energ[ael@trba.
Elquemador superior no se , VerJfiquesJla estufaest_ debidamenteconectadaa Ia fuentede aIimentaciOn.
eneiendeo , Verifique si est4fundido un fusible del circuito o si se dispar6el disyuntor principal.
• Verifique para asegurarsede queel encendedorest6secoy que emita chasquidos. El
quemadorno seencender_si el encendedorest_ da_ado,sucioo mojado. Si e! encendedor
no produceun chasquido,gire la perilla de control a la posici6n'OFF' (Apagado}.
La llama es dispareja. ° Losorificios del quemadorpueden estar obstruidos.
La llama del quemador saperior se , VerJfiqueparaasegurarsede que el utensil[oest4asentadoen [aparrillasobre elquemador.
levanta del orifieio.
Los resultados del homeado no son , Verifique Iatemperaturadel homo seleccionada.Aseg0resede que el horno est6
come se esperaban o son precalentadocuando la receta o instruccionesrecombndanprecalentamientodeI homo.
diferentes a los del homo anterior° , Aseg0resedequeel respiraderodelhomo noest6bloqueado.Vet p4gina68para laubicaci6n.
• Verifique para asegularsede que ta estufaestanivetada.
• Lastemperaturasa menudovar[anentre un horno nuevoy uno antiguo. A medidaque pasa
eltiempo, latemperaturadet horno cambiay puedehacersem4s caliente o m4s fria. Ver
p4g.67 paralas instruccionescomo ajustarlatemperaturade! homo. Nora: No se
recombnda ajustar la temperaturasi hatenido problemascon solo una o dos recetas.
• Useel utensilio correcto.Los utensiliososcurosproducendoradooscuro.Los utensilios
brilIantesproducendorado claro.Consulteelfolleto "LaCocinaF_cil"paramayorinformaciOn
sobre los utensiliosde hornear.
• Verifique lasposicionesdeIasparrilIasy IacolocaciOnde los utensilios.Alterne losutensilios
cuandouse dosparrillas.Deie2,5-5cm (1-2 pulgadas}entre los utensiliosy las paredesdel
homo.
• Verifique el uso depapeJde ahminio en el homo. Nunca use papel de aluminio para cubrir
unaparriJJacompIetadelhomo.Coloqueunpedazopequeiiodepapelde aluminioen la parrilIa
queest4debajo del utensilio para recibir los derrames.
Los alimentos no se asan a la , Verifique [asposicionesde las parrillasdel homo. Elalimento puede estar muy cerca de
parrillaen forma debida o sale la llama.
demasiado humo. , ElpapeIde aluminiose us0demaneraincorrecta. Nuncaforreel hlsertodeJasadorcon papel
deahminio.
• Recorteel excesode grasade la came antes de ponerlaaasar a la parrJlla.
• Se us0 una asaderasucia.
• Precalienteel hornodurante dos atres minutosantesde colocar el alimento en el horno.
• Ase a la parrJllacon la puerta del hornocerrada.
76
I
PROBLEMA SOLUCION
Elhomo no se autoiimpiao ° Verifique paraasegurarsede que el ciclo noest6 ajustadoparaun comienzodiferido.Ver
p%inas 70-71.
, Verifique si Ia puerta est_ cerrada.
, Verifique si el control est_en Modo Sab_tico.Verp%. 66.
, Elhornopuedeestar a m_s de 205° C [400° F). Latemperaturadel homo debeser inferior a
205° C (400° F) paraprogramarun ciclo de limpieza.
Elhomo no se mimpi6en , Puedequesea necesariountiempo de limpiezam_sIargo.
forma debidao , Losderramesexcesivos,especiaImentede alimentosazucaradosy/o _cidosno fueron
limpiadosantesdel ciclo de autolimpieza.
La puerta demhomo no se ° El interior deI homo todav[aest_ caliente. Deie que paseaproximadamenteuna hora
desbmoqueadespuSs demeicmo paraqueel hornose enfr[eantes de que se complete un cic[o deauto[impieza. Lapuerta
de automimpiezao puedeser abierta cuandodesaparezca[a pa[abra'LOCK' (B[oquea0de[ indicadorvisual
, Elcontro[y [a puerta puedeestarbloqueada. Vet p%. 61.
Se junta humedad en maventana , Estoes normal cuandose cocinanaiimentoscon alto contenidode humedad.
demhomo o samevapor per ° Se us(i humedadexcesivacuando limpi6 laventana.
emrespiradero demhomo°
Hay un omorfuerte o humo mere ° Estoes normal enuna estufa nuevay desaparecer_despuesde unos pocosusos.
euando se enciende emhomo° AI iniciar un ciclo de autoJimpiezase "quemar4n" loso[ores m4s r4pidamente.
, Si se enciendeel ventilador ayudar_a e[iminarel humoy/o el clot.
• Suciedadexcesivade alimentosen el panelinferior del homo. Use un cic[o de auto[impieza.
C6digos de Errores ° 'BAKE'(Horneado]o 'LOCK'puedendeste[[arr_pidamenteen ei indicador para avisar[eque
hayunerroroun problema.Si'BAKE'o 'LOCK'aparecenene[indicadorvisual,oprima[atecla
'Cancel'. Si 'BAKE'o 'LOCK'contin0andesteilando,desconecte[a energfael6ctricaa[
electrodom6stico.Espereunos pocosminutos y vue[vaa reconectar[a energfaei6ctrica. Si
contim_andesteilando,desconectelaenerg[aei6ctricadelelectrodom6sticoy [lameal t6cnico
de servicioautorizado.
, Si el homo est_demasiadosucio,puedenocurrir demasiadas[lamaradas[o cua[resultar_en
unc6digodeerrordurantela[impieza.Oprima[atec[a'Cancel' (Cancela0y dejeque e[horno
se enfrfecomptetamente.[[mpieel excesodesuciedady [uegovuelvaa programarel cic[o de
[impieza.Si el c6digo de error reaparece.Ilamea un t6cnico autorizado.
Se escuehan ruidos. , Elhomo emitevariossonidosbajos. Ustedpuedeoir losrel_sdelhornocuandose encienden
y se apagan.Estoes normal
, A medidaque el homo secaiientayse enfr[a,ustedpuedeoir sonidosde piezasmet_licasque
se expandeny contraen. Estoes normaly nodaiiar_ su e[ectrodomestico.
, Se escuchaei sonido de un ventilador.Estees el ventiladordeenfriamientoyes normal.
Elventiladorseguir_funcionandodespu6sde apagarel horno hasta que el mismose enfrfe.
No se escuehan sesamessonoras , Elhornopuede estar en Modo Sab_tico. Ver p%. 66.
y emindieadorvisual no se aetivao , Elcontrol puede estarbloqueado. Ver p%. 61.
'SAb' desteiia y muegose • E[hornoest_enmodosab_tico.Paraanulare!modosabdtico,optimay mantengaoprimida [a
despmiegaeontinuamenteo tecIa 'Cmock'(RelojDdurantecinco segundos.
77

78
Garantga de la Estufa a Gas
Garantia Completa de Un Afio = Piezas
y Mano de Obra
Duran[eun (1} afio desde la fecna original dc
compraa_per menor,se repararao reempJazara
gr_tu[tamentecualqLnerp_ezaque falle durame
use normalen N booer.
Note Io siguiente: Estasgarantiascompletesse
aplicanL_mcamentecuandoe[ electrodom6sticose
encuentraen los EstadosUnitieso Caned&Los
electrodom6sticosque se encuen[renen otros
pa[sesestar_nuubiertosOnicamenteper las
garant[aslimitadas,incluyendolagarant[a[imitada
parelas piezasquefallen durante el primer aiio.
Residentes Canadienses
Estasgarant[ascubren solamenteaque_Ios
electrodom6sticosinstalauosen Canad_que hayan
side certificadosper laAsociaciOnde Normas
Canadienses(CSA_,a menosqNehayanside
[raidos a Canad_desdeEstates Unidosdebido a
un cambiode residencia.
Lasgarantfasespecfficase_presadasanteriormen_e
son/as _lmcasdaran[laso[orcJadasper elfabncante.
Estasgarantfasle otorgandetachesI_ales
espedficos.Ustedpuede tenerotros detechosque
varfandeun estadoaotro.
Lo que No Cubren Estas Garantias:
1= Situacionesy da_osresultantesdecualquierade lassiguienteseventuNidades:
a= InstNaciOn,entregao mantenimientoinapropiados=
b=Cualq[iierreparaciOn,modificaciOn,alteraciOno aiuste no autorizadoperel
fabricanteo per un centre de servicioautorizado=
c= MN use,abuse,accidentes,use irrazonaNeo hechosfotuitos=
d=Corrienteel6ctric&voltajeo suministroincorrecto=
e= Programacbnincorrectadecualquierade Ioscontroles=
2= Lasgarant[asquedan nuIassi Iosn_memsde serieoriginNeshen side retirados,
Nteradoso no sonf_cilmenteIegibles=
3= Feces=
4= Productoscompradospare use comerciaio industrial
5= El costodelservicioo Ilamadade serviciopare:
a= Corregirermresde instalaciOn=
b= Instruiral usuariosobreel use correctodel artefact&
c= TransportedeIartefactoal estaNecimientode servicioy eI retomo al cliente=
6= Losdaiios consecuenteso incidentNessufridospercuNquierpersonacome
resultadode cuNquier incumplimientode estasgarant[as=EnNgunosestadosno se
permitelaexclusiOno limitaciOnde losdaiios consecuenteso incidentNes,per Io
tantola excluskSnanteriorpuedeque no se apliqueen su case=
Si Necesita Servicio
YeaprimeroIasecci6nde IocNizaci0ny soluciOndeaveriasen Iagalade usey
cuidadoo Ilamea Maytag ServicessM,Servicioa los ClientesAmanaIlamandoal
1-800-843-0304EE=UU=oal 1-866-587-2002Caned&
Pare Obtener Servicio Bajo Garantia
Paraubicarunacompaii[ade servicioautorizadoen su Iocalidad,pOngaseen contacto
conel distribuidorderideadquiriOsu electrodom6sticoo Ilamea MaytagServicessM,
Servicioa losClientesAmana=Si no recibeserviciosatisfactodobajola garant[a,per
favorIlameo escdbaa:
May<agServicessM
Attn: CAIR_ Center
P.O.Box2370,Cleveland,TN37320-2370
EE.U[J. 1=800=843=0304y Caaad_ 1-868-587-2002
Note: Cuandosepongaen contactocon May'tagServicessM,Servicioa Ios
ClientesAmanaacercade un problema,perfavor incluyaIa siguienteinformacbn:
a. Suhombre,direcciOny n0merode teldono.
b. Los nOmerosde modeloy de sedede su Nectrodom6stico;
c. Nombrey direcci6ndel distribuidory lafechadecompra.
d. UnadescripciOnclaradel problemaqueest_experimentando.
e. Pruebade compra.
LasguFasdel usuado,manualesdeservicioe informaciOnsobrelas piezaspuedensolicitarsea Ma_ag ServicesSM,Servicioa los ClientesAmana.
Form No. A/04/05 Part No. 8113P498 60 (cb2005 Maytag Appliances Sales Co. Lithe U.S.A.