VlA 3?AG
®
Gas S_ide-in Range -
Precision Touch Controm 800
Tabme of Contents
Umportant Safety
Unstructions ............................... 1=4
Surface Cooking ...................... 5-6
Surface Controb
Seabd Burners
Oven Cooking ......................... 7=1 ?
Baking
Cook &Hoid
Dday Cook & HoM
Broiling
Keep Warm
Oven Racks
Form No. A/04/05 Part No. 8113P496 60
Care & CJeaning .................. 18=21
Sdf-Cba n Oven
Cleaning Procedures
Maintenance ......................... 22-23
Oven Window & Light
Removal of Gas Appliance
Troubleshooting ................... 24=25
Warranty & Service .................... 27
Guide d'utilisation
et d'entretien ............................... 28
Guia de Use y Cuidado ............. 56
@2005 Maytag Appliances Sales Co. Litho U.S.A.
Consumer: Please read and keep this guide for future
Send! Number
Date Of Purchase
or replace any par of your appliance unless it is
specifically recommended Jn thb guide. All other
servbmg should be referred to a qualified servber.
Have the installer show _ou the location of the gas
shut off valve and how to shut Jt off in an emergency.
AJwa}s dbconnect power to appliance before servbing.
] _8807688:2080 (U.S.]q-Y for hearing 0r speech !mpaired}
Inour continuing effortto improve the qua!ity and performance
of our cooking PrOducts,Jtmay be necessary to make changes
fier setvice #tfermatien_ aee page 27o
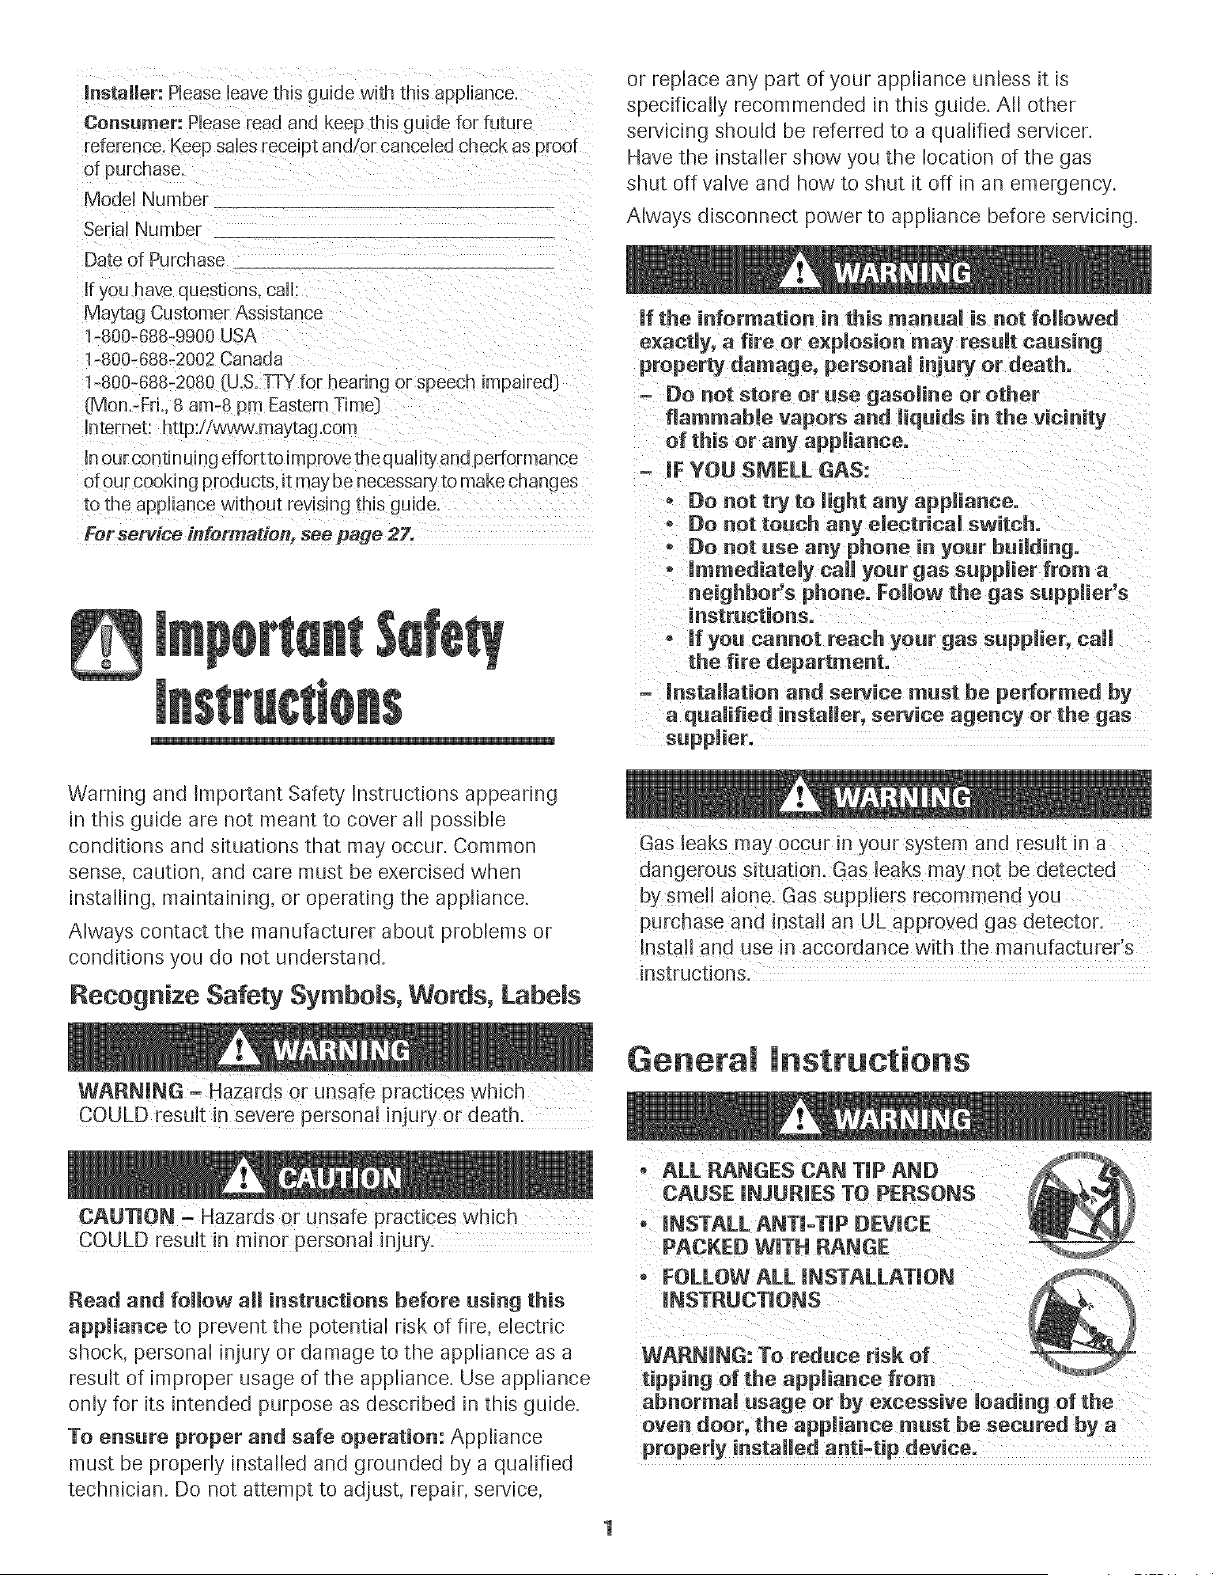
if the information in this manual is not followed
exactJy, a (ire or expJosion may resuJt causing
property damage, personal injury or death.
- Do not store or use gasoJine or other
fJammahJe vapors and Jiquids in the vicinity
of this or any appliance.
IF YOU SMELL GAS:
o Do not try to Jight any applianceo
- Do not touch any eiectricaJ switch.
• Do not use any phone in your buiJdingo
o immediateJy call your gas suppJier from a
neighbor's phone. Follow the gas suppHer's
instructions.
- if you cannot reach your gas suppJier, call
the fire department°
instaUation and service must he pe_ormed by
a quahfied installer, service agency or the gas
su pplier.
Warning and Important Safety Instructions appearing
in this guide are not meant to cover ail possible
conditions and situations that may occur. Common
sense, caution, and care must be exercised when
installing, maintaining, or operating the appliance.
Always contact the manufacturer about problems or
conditions you do not understand.
Recognize Safety SymbeJs, Words, Labels
install and use inaccordance with the manufacturer's
instructions.
WARNING, Hazards or unsafe practices which
COULD resu!t in severe personal injury or death.
COULD result in m!n0r pers0aa! inju_.
Read and follow aH instructions before esing this
appliance to prevent the potential risk of fire, electric
shock, personal injury or damage to the appliance as a
result of improper usage of the appliance. Use appliance
only for its intended purpose as described in this guide.
To ensere proper and safe operation: Appliance
must be properly installed and grounded by a qualified
technician. Do not attempt to adjust, repair, service,
General instructions
ALL RANGES CAN TIP AND
, INSTALL ANTI-TIP DEVICE
PACKED WITH RANGE
, FOLLOWALL INSTALLATION
INSTRUCTIONS
WARNINGI To reduce risk of
tipping of the appliance from
ahnormaJ usage or by excessive Joading of the
oven door, the appJ!ance must he secured by a
properly installed anti.tip device,
To check if device is properly installed, look underneath
range with a flashlight to make sure one of the rear
leveling legs is properly engaged in the bracket slot. The
antFtip device secures the rear leveling leg to the floor
when properly engaged. You should check this anytime
the range has been moved.
Do not use water on grease fires. Use baking soda, a
dry chemical or foam-type extinguisher to smother fire
or flame.
Child Safety
To Prevent Fire or
Smoke Damage
Be sure all packing materials are removed from the
appliance before operating it.
Keep area around appliance clear and free from
combustible materials, gasoline, and other flammable
vapors and materials.
If appliance is installed near a window, proper
precautions should be taken to prevent curtains from
blowing over burners.
NEVER leave any items on the cooktop. The hot air from
the vent may ignite flammable items and may increase
pressure in closed containers which may cause them to
burst.
Many aerosol-type spray cans are EXPLOSIVE when
exposed to heat and may be highly flammable. Avoid
their use or storage near an appliance.
Many plastics are vulnerable to heat. Keep plastics away
from parts of the appliance that may become warm or
hot. Do not leave plastic items on the cooktop as they
may melt or soften if left too close to the vent or a lighted
surface burner.
To eliminate the hazard of reaching over hot surface
burners, cabinet storage should not be provided directly
above a unit. If storage is provided, it should be limited to
items which are used infrequently and which are safely
stored in an area subjected to heat from an appliance.
Temperatures may be unsafe for some items, such as
volatile liquids, cleaners or aerosol sprays.
In Case of Fire
Turn off appliance and ventilating hood to avoid
spreading the flame. Extinguish flame then turn on
hood to remove smoke and odor.
Cooktop: Smother fire or flame in a pan with a lid or
cookie sheet.
NEVER pick up or move a flaming pan.
Oven: Smother fire or flame by closing the oven door.
above an appliance or on backguard of a range,
Children climbing 0n the app!iance door to _:eachitems
coutd be seriously injured.
NEVER leave children alone or unsupervised near the
appliance when it is in use or is still hot.
NEVER allow children to sit or stand on any part of the
appliance as they could be injured or burned.
Children must be taught that the appliance and utensils
in it can be hot. Let hot utensils cool in a safe place, out
of reach of small children. Children should be taught
that an appliance is not a toy. Children should not be
allowed to play with controls or other paRRsof the unit.
About Your Appliance
NEVER use appliance door as a step stool or seat as this
may result in possible tipping of the appliance and serious
injuries.
NEVER use this appliance as a space heater to heat of
warm a room. Doing so may result in carbon
monoxide poisoning and overheating of the oven.
NEVER cover any slots, holes o_ passages in the oven
bottom or cover the entire rack with materials such as
aluminum foil, Doing so blocks air flow through the
oven and may cause carbon monoxide poisoning.
Aluminum foil may also trap heat causing a fire
haza[d.
NEVER obstruct the flow of combustion and ventilation
air by blocking the oven vent or air intakes. Doing so
restricts air to the burners and may result in carbon
monoxide poisoning.
The oven vent is located at the rear of the cooking
surface.
Avoid touching oven vent area while oven is on and for
several minutes after oven is turned off. Some parts of
theventandsurroundingareabecomehotenoughto
causeburns.Afterovenisturnedoff,do nottouchthe
ovenventorsurroundingareasuntiltheyhavehad
sufficienttimeto cool.
Otherpotentiallyhotsurfacesincludecooktop,areas
facingthe cooktop,ovenvent,surfacenearthevent
opening,ovendoor,areaaroundthe ovendoorand
ovenwindow.
Do not touch a hot oven light bulb with a damp cloth as
the bulb could break. Should the bulb break, disconnect
power to the appliance before removing bulb to avoid
ebctrbal shock.
Do not use the cooktop or ovens as a storage area for
food or cooking utensils.
Cooking Safety
Always place a pan on a surface burner before turning it
on. Be sure you know which knob controls which
surface burner. Make sure the correct burner is turned
on and that the burner has ignited. When cooking is
completed, turn burner off before removing pan to
prevent exposure to burner flame.
Always adjust surface burner flame so that it does not
extend beyond the bottom edge of the pan. An excessive
flame is hazardous, wastes energy and may damage the
appliance, pan or cabinets above the appliance.
NEVER leave a surface cooking operation unattended
especially when using a high heat setting or when deep
fat frying. Boilovers cause smoking and greasy spillovers
may ignite. Clean up greasy spills as soon as possible.
Do not use high heat for extended cooking operations.
NEVER heat an unopened container on the surface
burner or in the oven. Pressure build-up may cause
container to burst resulting in serious personal injury or
damage to the appliance.
Use dry, sturdy potholders. Damp potholders may cause
burns from steam. Dish towels or other substitutes
should never be used as potholders because they can
trail across hot surface burners and ignite or get caught
on appliance parts.
Always let quantities of hot fat used for deep fat frying
cool before attempting to move or handle.
Do not let cooking grease or other fiammabb materials
accumulate in or near the appliance, hood or vent fan.
Clean hood frequently to prevent grease from
accumulating on hood or filter. When flaming foods
under the hood turn the fan on.
NEVER wear garments made of fiammabb material or
loose fitting or Iong-sbeved apparel while cooking.
Clothing may ignite or catch utensil handles.
Always place oven racks in the desired positions while
oven is cool. Slide oven rack out to add or remove food,
using dry, sturdy potholders. Always avoid reaching into
the oven to add or remove food. If a rack must be moved
while hot, use a dry potholder. Always turn the oven off
at the end of cooking.
Use care when opening the oven door. Let hot air or
steam escape before moving or replacing food.
PREPARE[} FOOD WARNUNG: Follow food
manufacturer's instructions, if a plastic frozen food
container and/or its cover distorts, warps, or is otherwise
damaged during cooking, immediately discard the food
and its container. The food could be contaminated.
NEVER use aluminum foil to cover oven racks or oven
bottom. This could result in risk of electric shock, fire, or
damage to the appliance. Use foil only as directed in this
guide.
Utensim Safety
Use pans with flat bottoms and handles that are easily
grasped and stay cool. Avoid using unstable, warped,
easily tipped or Ioose-handbd pans. Also avoid using
pans, especially small pans, with heavy handles as they
could be unstable and easily tip. Pans that are heavy to
move when filled with food may also be hazardous.
Be sure utensil is large enough to properly contain food
and avoid boilovers. Pan size is particularly impoRant in
deep fat frying. Be sure pan will accommodate the
volume of food that is to be added as well as the bubble
action of fat.
To minimize burns, ignition of flammable materials and
spillage due to unintentional contact with the utensil, do
not extend handles over adjacent surface burners.
Always turn pan handles toward the side or back of the
appliance, not out into the room where they are easily hit
or reached by small children.
Never let a pan boil dry as this could damage the utensil
and the appliance.
Follow the manufacturer's directions when using oven
cooking bags.
3
Only certain types of glass, glass!ceramic, ceramic or
glazed utensils are suitable for cooktop or oven usage
without breaking due to the sudden change in
temperature. Follow manufacturer's instructions when
using glass.
This appliance has been tested for safe performance
using conventional cookware. Do not use any devices or
accessories that are not specifically recommended in this
guide. Do not use eyelid covers for the surface units,
stovetop grills, or add-on oven convection systems. The
use of devices or accessories that are not expressly
recommended in this manual can create serious safety
hazards, result in performance problems, and reduce the
life of the components of the appliance.
CJeanin 9 Safety
Turn off a[[ controls and wait for appliance parts to coo[
before touching or cleaning them. Do not touch the
burner grates or surrounding areas until they have had
sufficient time to cool.
Clean appliance with caution. Use care to avoid steam
burns if a wet sponge or cloth is used to wipe spills on a
hot surface. Some cleaners can produce noxious fumes if
applied to a hot surface.
SeJf-CJean Oven
during the self-clean cycle,
Clean only parts listed in this guide. Do not clean door
gaskeL The door gasket is essential for a good seal
Care should be taken not to rub, damage, or move the
gaskeL Do not use oven cleaners of any kind in or
around any part of the self-clean oven.
Before self-cleaning the oven, remove broiler pan, oven
racks and other utensils and wipe up excessive
spillovers to prevent excessive smoke, flare-ups or
fiaming_
It is normal for the cooktop of the range to become hot
during a self-clean cycle. Therefore, touching the
cooktop during a clean cycle should be avoided.
important Safety Notice
and Warning
The California Safe Drinking Water and Toxic
Enforcement Act of 1986 [Proposition 65) requires the
Governor of California to publish a list of substances
known to the State of California to cause cancer or
reproductive harm, and requires businesses to warn
customers of potential exposures to such substances.
Users of this appliance are hereby warned that the
burning of gas can result in low-level exposure to
some of the listed substances, including benzene,
formaldehyde and soot, due primarily to the incomplete
combustion of natural gas or liquid petroleum (LP) fuels.
Properly adjusted burners will minimize incomplete
combustion. Exposure to these substances can also be
minimized by properly venting the burners to the
outdoors.
Users of this appliance are hereby warned that when
the oven is engaged in the self-clean cycle, there may
be some low-level exposure to some of the listed
substances, including carbon monoxide. Exposure to
these substances can be minimized by properly venting
the oven to the outdoors by opening the windows and/
or door in the room where the appliance is located
during the self-clean cycle.
UMPORTANT NOTUCE REGARDUNG PET BURDS:
Never keep pet birds in the kitchen or in rooms where
the fumes from the kitchen could reach. Birds have a
very sensitive respiratory system. Fumes released during
an oven self-cleaning cycle may be harmful or fatal to
birds. Fumes released due to overheated cooking oil, fat,
margarine and overheated non-stick cookware may be
equally harmful.
Save These instructions for Future Reference
4
OFF
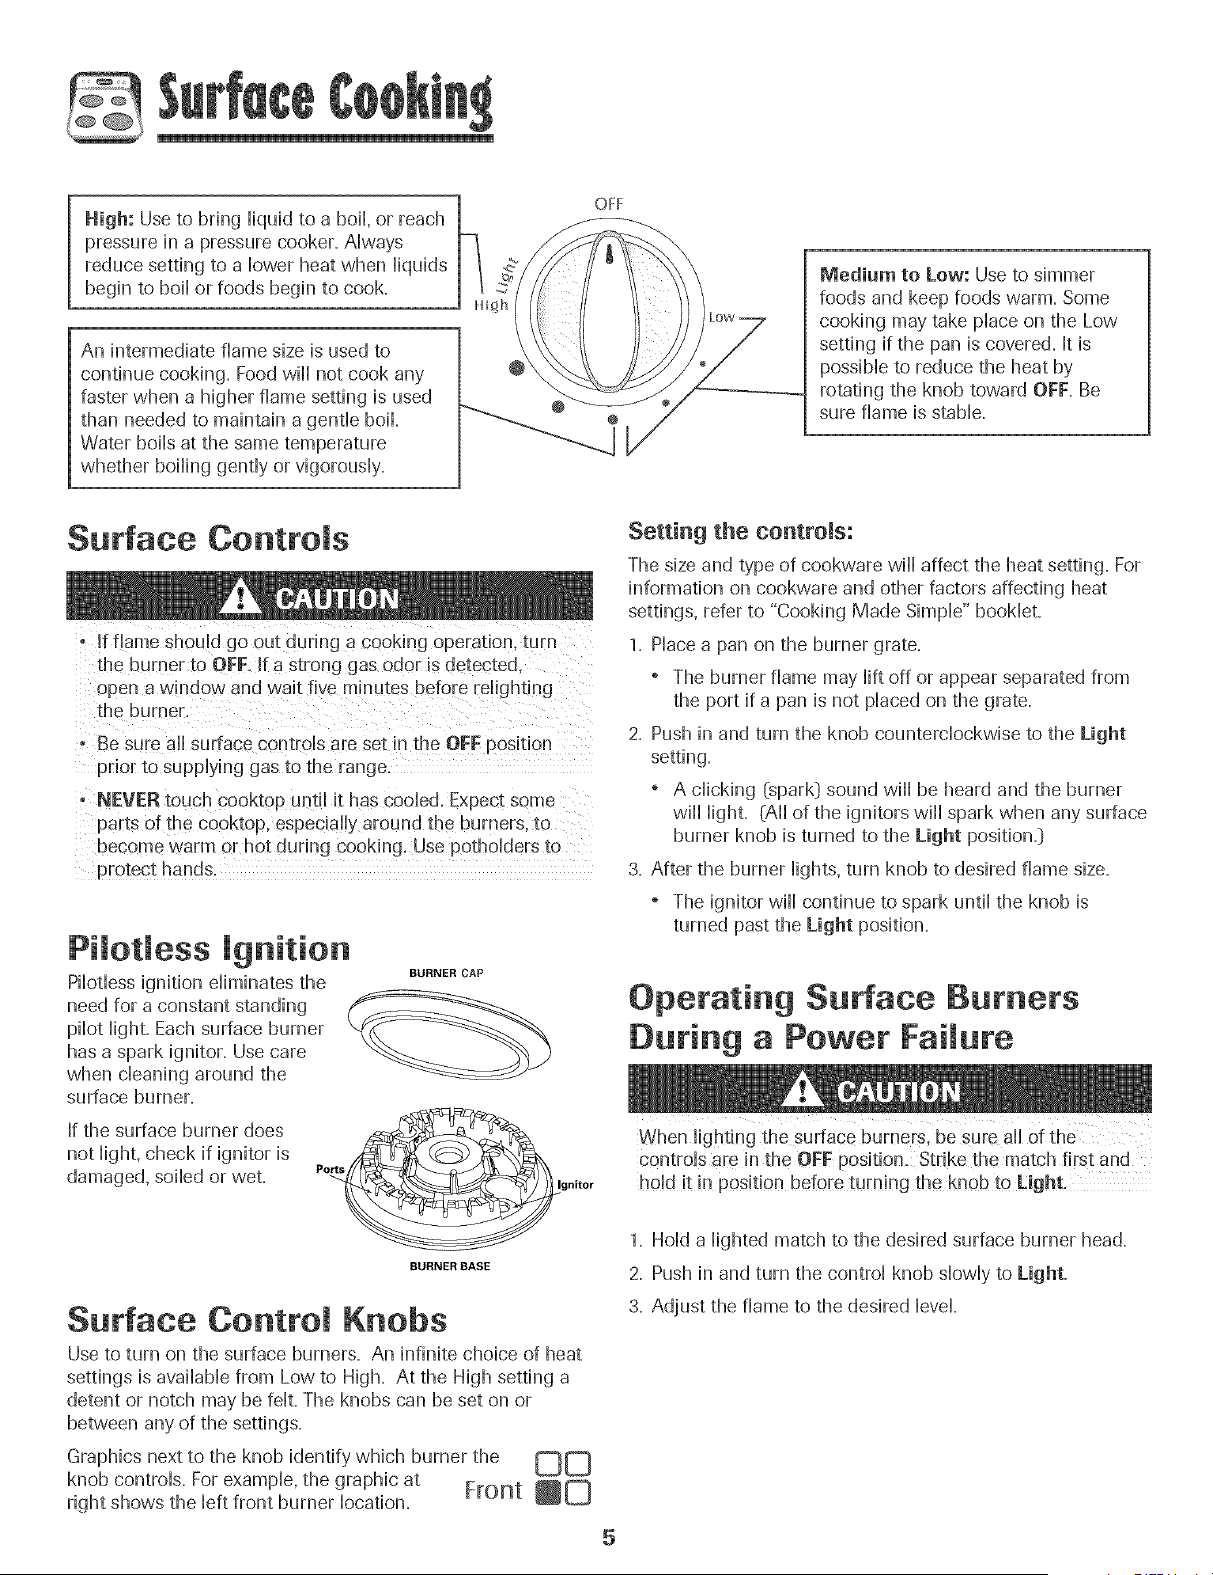
High: Use to bring Hiquidto a boil or reach f----_--..
pressure in a pressure cooker. AHways
reduce setting to a Howerheat when Hiquids
begin to boiHor foods begin to cook.
An intermediate flame size is used to
continue cooking. Food will not cook any
faster when a higher flame setting is used
than needed to maintain a gentile boiL
Water boiHsat the same temperature
whether boiHinggentHyor vigorousHy.
Medium to Low: Use to simmer
foods and keep foods warm. Some
cooking may take princeon the Low
setting if the pan is covered. It is
possible to reduce the heat by
rotating the knob toward OFF. Be
sure flame is stable+
Surface Controls
o +fflame should go out during a cooking operation, turn
the burner to OFF. If a strong gas odor is detected.
open a window and wait five minutes before relighting
the burner.
o Be sure aH surface controls are set in the OFF position
prior to su pplying gas to the range.
• NEVER touch cooktop until it has cooled. Expect some
parts of the cooktop, especially around the burners, to
become warm or hot during cooking. Use potholders to
protect hands.
Pilotless ignition
Pilotless ignition eliminates the
need for a constant standing
pilot light+ Each surface burner
has a spark ignitor. Use care
when cleaning around the
surface burner.
If the surface burner does
not light, check if ignitor is
damaged, soiled or wet.
BURNER CAP
Ports
gnitor
BURNER BASE
Surface Control Knobs
Use to turn on the surface burners+ An infinite choice of heat
settings is available from Low to High. At the High setting a
detent or notch may be felt. The knobs can be set on or
between any of the settings.
Graphics next to the knob identify which burner the DD
knob controls. For example, the graphic at F[Ont _D
right shows the left front burner location.
5
Setting the controls:
The size and type of cookware will affect the heat setting. For
information on cookware and other factors affecting heat
settings, refer to "Cooking Made SimpW' booklet+
1. Place a pan on the burner grate.
o The burner flame may lift off or appear separated from
the port if a pan is not placed on the grate.
2. Push in and turn the knob counterclockwise to the Light
setting+
o A clicking (spark] sound will be heard and tile burner
will light. (All of the ignitors will spark when any surface
burner knob is turned to the Light position+]
3. After the burner lights, turn knob to desired flame size+
+ The ignitor will continue to spark until the knob is
turned past the Light position+
Operating Surface Burners
During a Power Failure
controls are in the OFF position. Strike the match first and
hold it in position before turning the knob to Light.
1. Hold a lighted match to the desired surface burner head.
2. Push in and turn the control knob slowly to Light.
3. Adjust the flame to the desired level.
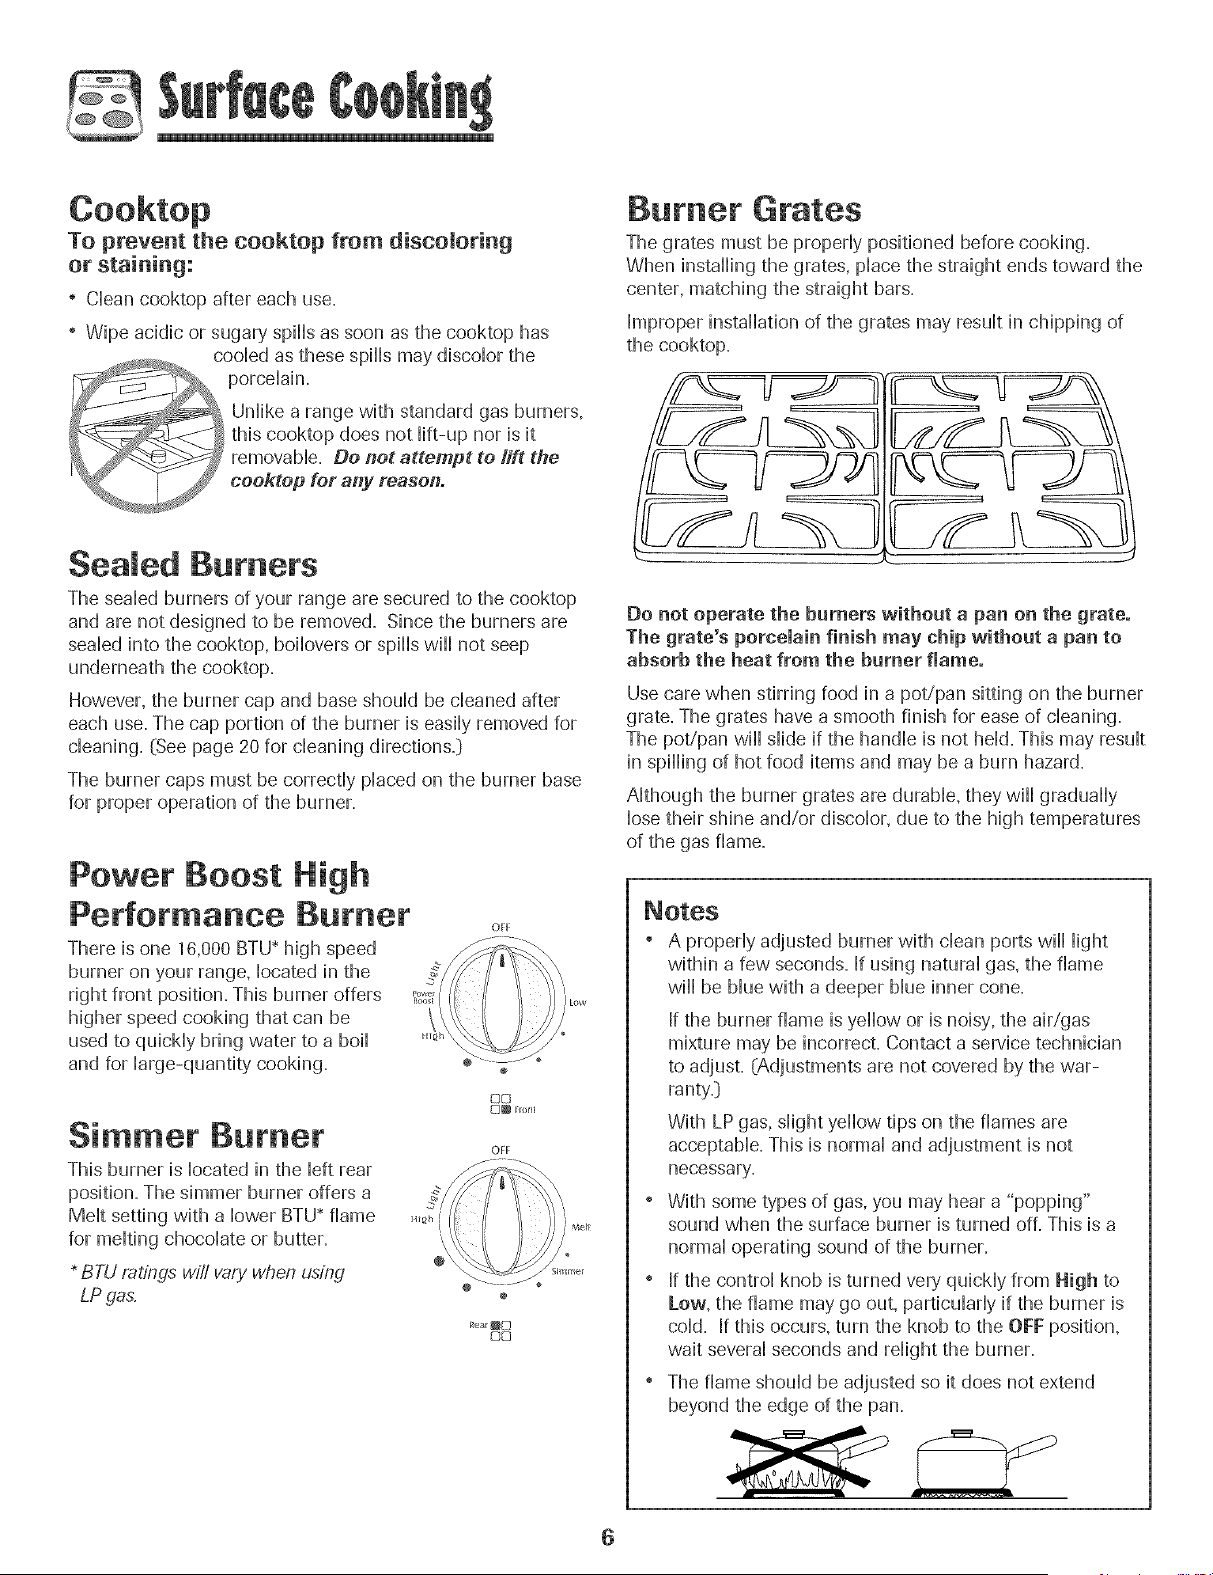
To prevent the cooP, top from discoloring
or staining:
" Cban cooktop after each use.
Wipe acidic or sugar},,spHb as soon as the cooktop has
coobd as these spHb may discobr the
"F__ porcelain.
_ Unlike a range with standard gas burners,
this cooktop does not lift-up nor is it
removable. Do not attempt to lift the
cooktop for any reasoi_o
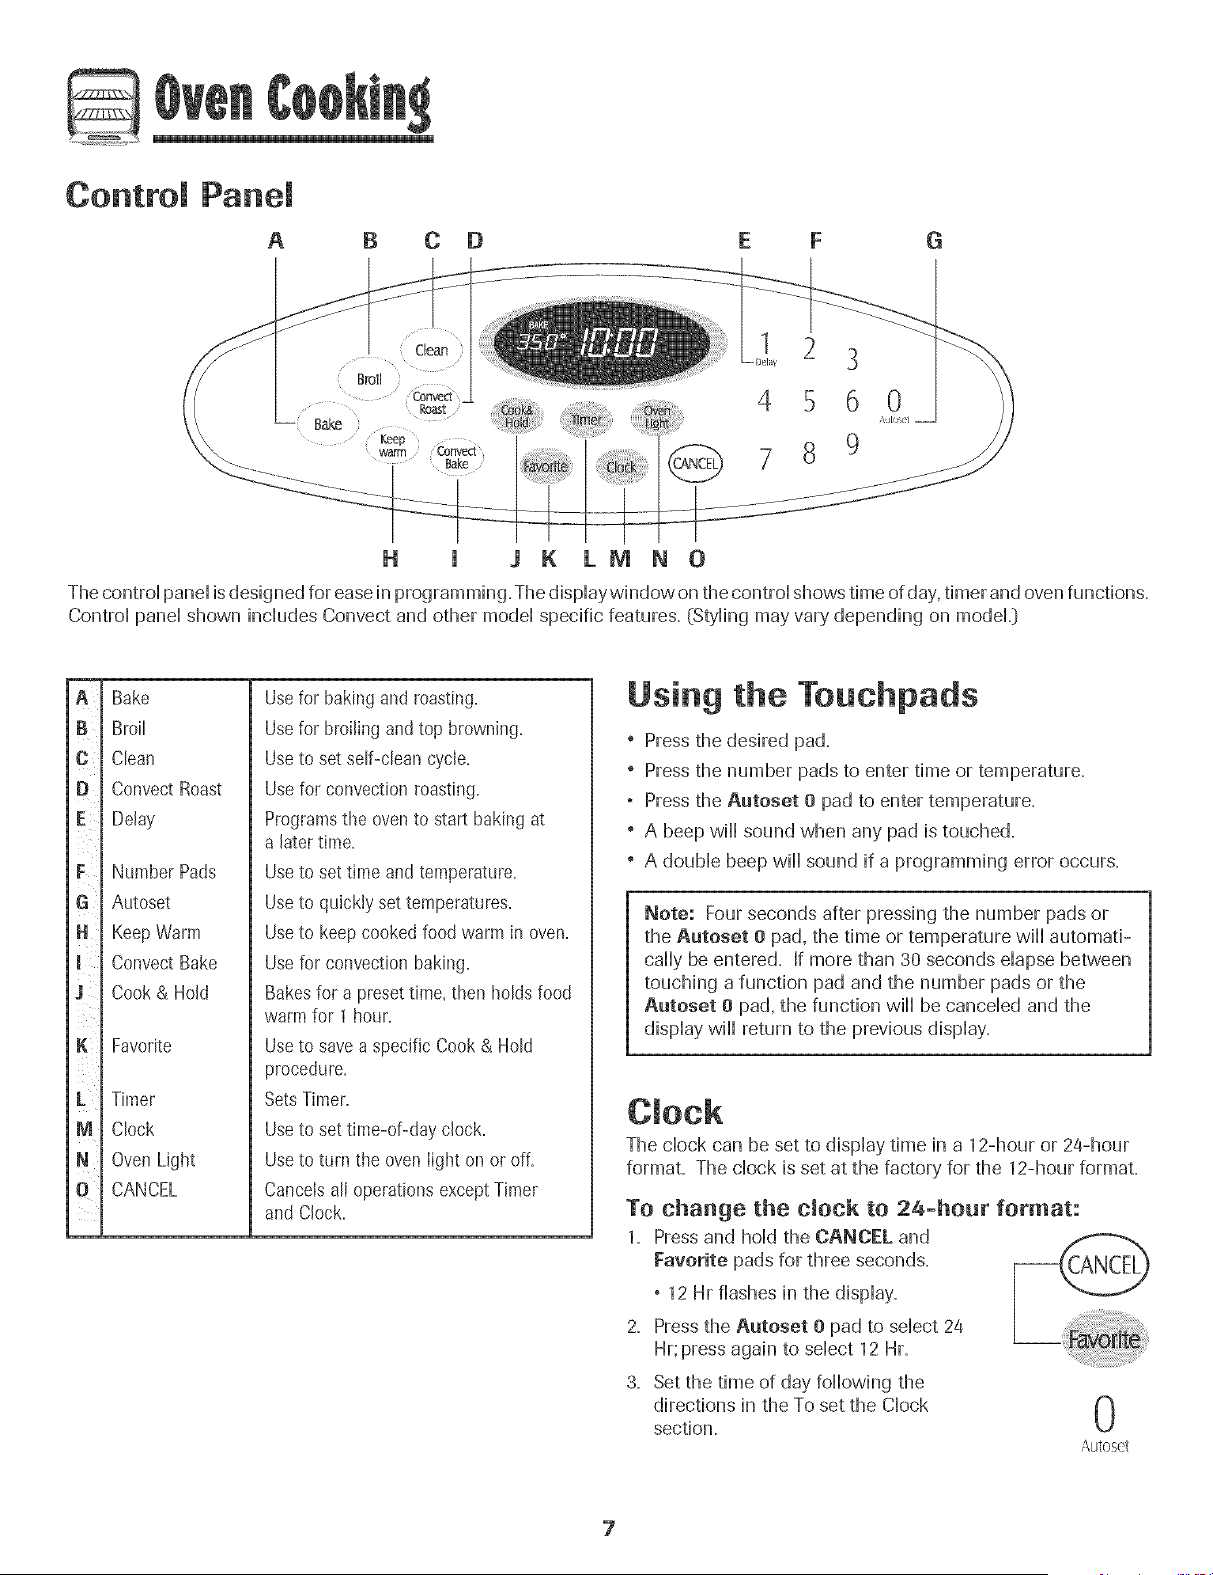
Burner Grates
The grates must be propedy positioned before cooking.
When installing the grates, place the straight ends toward the
center, matching the straight bars.
Improper installation of the grates may result in chipping of
the cooktop.
Sea ed Burners
The seabd burners of your range are secured to the cooktop
and are not designed to be removed. Since the burners are
seabd into the cooktop, boilovers or spills will not seep
underneath the cooktop.
However, the burner cap and base should be cleaned after
each use. The cap portion of the burner is easily removed for
cleaning. (See page 20 for cleaning directions.}
The burner caps must be correctly placed on the burner base
for proper operation of the burner.
Power Boost Nigh
Performance Burner
There is one 16,000 BTU* high speed
burner on your range, located in the
right front position. This burner offers
higher speed cooking that can be
used to quickly bring water to a boil
and for large-quantity cooking.
Ol:f:
{3D
8)W #font
Simmer Burner
OFF
This burner is located in the left rear _____>_l_f.........
position. The simmer burner offers a # ,, ,. ,
Melt setting with a lower BTU* flame '_' i,.,I
for melting chocolate or butter. _\_}_
BTU ratings will vary when using
LPgas. _ o
_a_rW{'}
5Q
Do not operate the bamers withoat a pan on the grate.
The grate's porcelain finish may chip withoat a pan to
absorb the heat from the bamer flame.
Use care when stirring food in a pot/pan sitting on the burner
grate. The grates have a smooth finish for ease of cleaning.
The pot/pan will slide if the handle is not held. This may result
in spilling of hot food items and may be a burn hazard.
Although the burner grates are durable, they will gradually
lose their shine and/or discolor, due to the high temperatures
of the gas flame.
" A properly adjusted burner with clean ports wiii light
within a few seconds. If using natural gas, the flame
wiii be blue with a deeper blue inner cone.
If the burner flame is yellow or is noisy, the air/gas
mixture may be incorrect. Contact a service technician
to adjust. (Adjustments are not covered by the war-
ranty.}
With LP gas, slight yellow tips on the flames are
acceptable. This is normal and adjustment is not
necessary.
" With some types of gas, you may hear a "popping"
sound when the surface burner is turned off. This is a
normal operating sound of the burner.
" If the control knob is turned very' quickly from High to
Low, the flame may go out, particularly if the burner is
cold. If this occurs, turn the knob to the OFF position,
wait several seconds and relight the burner.
" The flame should be adjusted so it does not extend
beyond the edge of the pan.
6
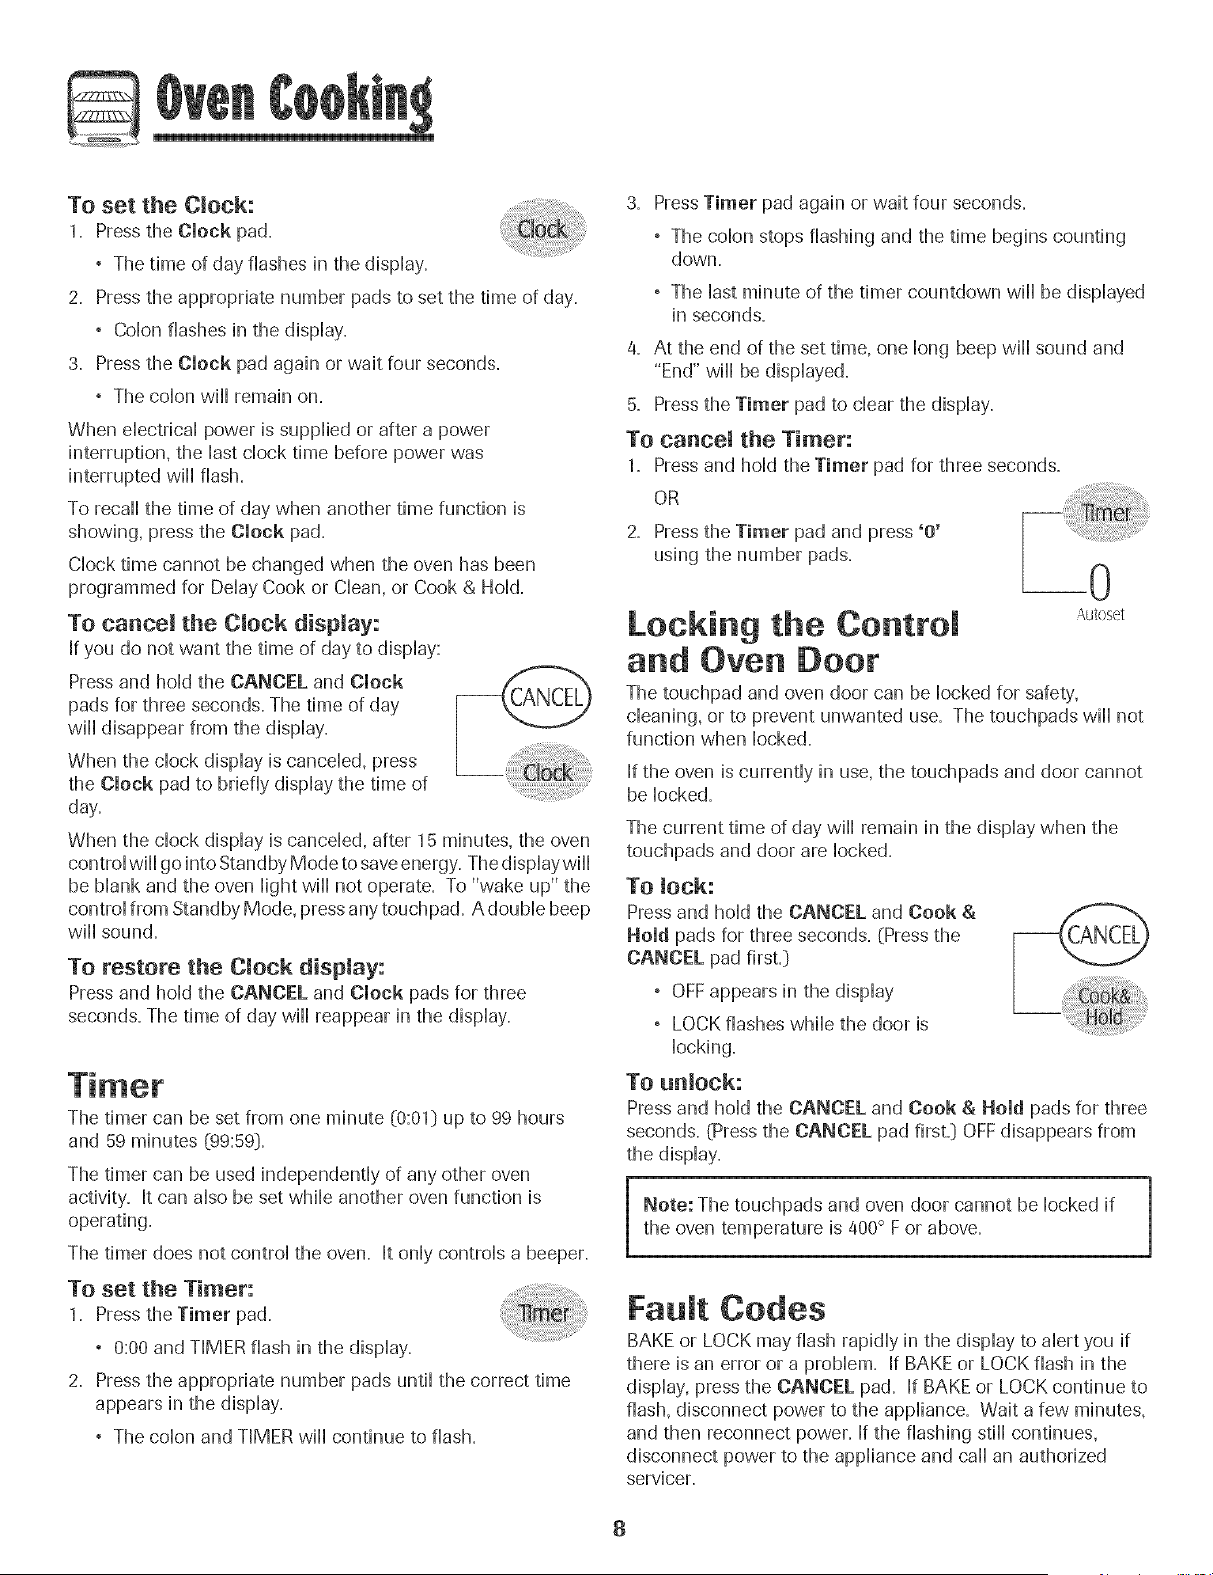
Control Panel
A B C D E F G
H J J K LM N G
The control panel is des(gned for ease hl programming. The display whdow on the control shows time of day, timer and oven functions.
Control panel shown includes Convect and other model specific features. (Styling may vary depending on modek]
C
D
E
F{
H
m¸
J
L
M
N
m
Bake
Broil
Clean
Convect Roast
Delay
Number Pads
Autoset
Keep Warm
Convect Bake
Cook & Hold
Favorite
Timer
Clock
OvenLight
CANCEL
Usefor baking and roasting.
Usefor broilingand top browning.
Useto set self-clean cycle.
Usefor convectionroasting.
Programsthe ovento start baking at
a later time.
Useto set time and temperature.
Useto quickly set temperatures.
Useto keepcooked food warm in oven.
Usefor convectionbaking.
Bakesfor a presettime, then holds food
warm for 1hour.
Useto savea specific Cook& Hold
procedure.
SetsTimer.
Useto set time=of-daycrock.
Useto turn the oven light on or off.
Cancelsall operationsexcept Timer
and Crock.
Using the Touchpads
" Press the desired pad.
" Press the number pads to enter time or temperature.
° Press the Autoset 0 pad to enter temperature.
" A beep will sound when any pad is touched.
" A double beep will sound if a programming error occurs.
Note: Four seconds after pressing the number pads or
the Autoset 0 pad, the time or temperature will automati-
cally be entered. If more than 30 seconds elapse between
touching a function pad and the number pads or the
Autoset 0 pad, the function will be canceled and the
display will return to the previous display.
The clock can be set to display time in a 12-hour or 2a-hour
format. The clock is set at the factory for the 12-hour format.
To change the clock to 24-hour format:
1. Pressand hold the CANCEL and
Favorite pads for three seconds.
° 12 Hr flashes in the display.
2. Press the Autoset 0 pad to select 24
Hr;press again to select 12 Hr.
3. Set the time of day following the
directions in the To set the Clock
section.
0
Autoset
7
To set the Clock:
1. Press the Clock pad.
, The time of day flashes in the dispiay.
2. Press the appropriate number pads to set the time of day.
, Cobn flashes in the dispiay.
3. Press the Clock pad again or wait four seconds.
, The cobn will remain on.
When ebctrbd power is suppibd or after a power
interruption, the Hastchock time before power was
interrupted will flash.
To recall the time of day when another time function is
showing, press the Clock pad.
CHocktime cannot be changed when the oven has been
programmed for Dday Cook or Cban, or Cook & Hoid.
To cancel the Clock display:
If you do not want the time of day to dispiay:
Press and hoM the CANCEL and Clock
pads for three seconds. The time of day
will disappear from the dispiay.
When the chock display is canceled, press
the Clock pad to briefly display the time of
day.
When the clock display is canceled, after 15 minutes, the oven
control will go into Standby Mode to saveenergy. The displaywill
be blank and the oven light will not operate. To "wake up" the
control from Standby Mode, press any touchpad. A double beep
will sound,
_,s_iii!_,!i,_i!i_!_i!iiiiiiiiiiiii!iiiiii!i{!ii!ile',_'_
To restore the Clock display:
Press and hoM the CANCEL and Clock pads for three
seconds. The time of day will reappear in the display.
The timer can be set from one minute (0:01} up to 99 hours
and 59 minutes (99:59}.
The timer can be used independently of any other oven
activity. It can also be set while another oven function is
operating.
The timer does not control the oven. It only controls a beeper.
To set the Timer:
1. Press the Timer pad.
, 0:00 and TIMER flash in the display.
2. Press the appropriate number pads until the correct time
appears in the display.
, The colon and TIMER will continue to flash.
3. Press Timer pad again or wait four seconds.
, The colon stops flashing and the time begins counting
down.
, The last minute of the timer countdown will be displayed
in seconds.
4. At the end of the set time, one long beep will sound and
"End" will be displayed.
5. Press the Timer pad to clear the display.
To cancel the Timer:
1. Pressand hold the Timer pad for three seconds.
OR
2. Press the Timer pad and press '0'
using the number pads.
--0
Autoset
Locking the Contro
and Oven Door
The touchpad and oven door carl be locked for safety,
cleaning, or to prevent unwanted use. The touchpads will not
function when locked.
If the oven is currently in use, the touchpads and door cannot
be locked.
The current time of day wiii remain in the display when the
touchpads and door are locked.
To lock:
Press and hold the CANCEL and Cook &
Hold pads for three seconds. (Press the
CANCEL pad first.}
, OFFappears in the display
, LOCK flashes while the door is
locking.
To unlock:
Press and hold the CANCEL and Cook & Hold pads for three
seconds. (Press the CANCEL pad first.} OFF disappears from
the display.
Note: The touchpads and oven door cannot be locked if
the oven temperature is 400° F or above.
Faumt Codes
BAKE or LOCK may flash rapidly in the display to alert you if
there is an error or a problem. If BAKE or LOCK flash in the
display, press the CANCEL pad. If BAKE or LOCK continue to
flash, disconnect power to the appliance. Wait a few minutes,
and then reconnect power. If the flashing still continues,
disconnect power to the appliance and call an authorized
servicer.

To set Bake:
1. Press the Bake pad.
, BAKE wiHHflash+
, 000 wiHHflash in the dispHay.
2, SeHect the oven temperature+ Press the Aatoset 0 0
3=
pad for 350° F or the appropriate number pads. ,_ulosct
° Each additionaH press of the Aatoset 0 pad will increase
the temperature by 25 degrees.
° The oven temperature can be set from 170° to 550°+
Press Bake pad again or wait four seconds.
, BAKE will stop flashing and Hightin the dispHay.
, 100° or the actuaHoven temperature if over 100° F will
dispHay, it will rise in 5 degree increments until the preset
temperature is reached.
4. Allow the oven to preheat for 8-15 minutes+
° When the set oven temperature is reached, one long
beep will sound.
, The set temperature will display+
° To recall set temperature during preheat, press Bake
pad.
5. Place food in the oven.
0. Check cooking progress at the minimum
cooking time. Cook longer if needed.
7. When cooking is finished, press CANCEL pad.
8. Remove food from the oven.
Bak+ng Notes
, To change the oven temperature during cooking, press
Bake, then press the Aatoset 0 pad or appropriate
number pads until the desired temperature is displayed.
, To eflan_je the oven temperature during preheat, press
the Bake pad twice, then press the Aatoset 0 pad or
appropriate number pads until the desired temperature is
displayed.
, If you forget to turn off the oven, it will automatically turn
off at the end of 12 hours. If you wish to deactivate this
feature, see page 14.
° For additional baking and roasting tips, see "Cooking Made
Simple" booklet.
Bak+ng Differences Between Your Old
and New Oven
It is normal to notice some baking time differences between a
new oven and an old one. See"Adjusting the OvenTemperature"
on page 15.
Baking with Convection
(select models:)
When convection baking, enter your normal baking
temperature° The control will automatically reduce the set
oven temperature by 25 degrees. The entered temperature
will be displayed. The convection fan will start after the
oven has been on for approximately five minutes°
TO set Conveet Bake:
1. Pressthe Convect Bake pad.
° BAKE and the fan icon will flash.
° 000 will flash in the display.
f_
Select the oven temperature. Press the Autoset 0 U
pad for 350° F or the appropriate number pads. Autoset
° Each additional press of the Autoset 0 pad will increase
the temperature by 25 degrees. The oven temperature
can be set from 170° to 550°.
3. Press Convect Bake pad again or wait four seconds.
° BAKE will stop flashing.
, 100° or the actual oven temperature if over 100° F will
display. It will rise in 5 degree increments until the
preset temperature is reached.
° The fan icon will start to rotate. (,_)
4. Allow the oven to preheat for 8-15 minutes.
° When the set oven temperature is reached, one long
beep will sound.
° The set temperature will display.
° To recall the set temperature during preheat, press the
Convect Bake pad.
5. Place food in the oven.
0. Check cooking progress at the minimum cooking time.
Cook longer if needed.
7. When cooking is finished, press _AKI¢I:_
CANCEL pad.
8. Remove food from the oven+
9
Roasting With Convection
(select models:)
When convection roasting, enter your normaJ roasting
time and temperature. The controHwill automatically
prompt you to check the food for aloneness at 750/0of the set
time. The convection fan will start after the oven has
been on for approximately five minutes.
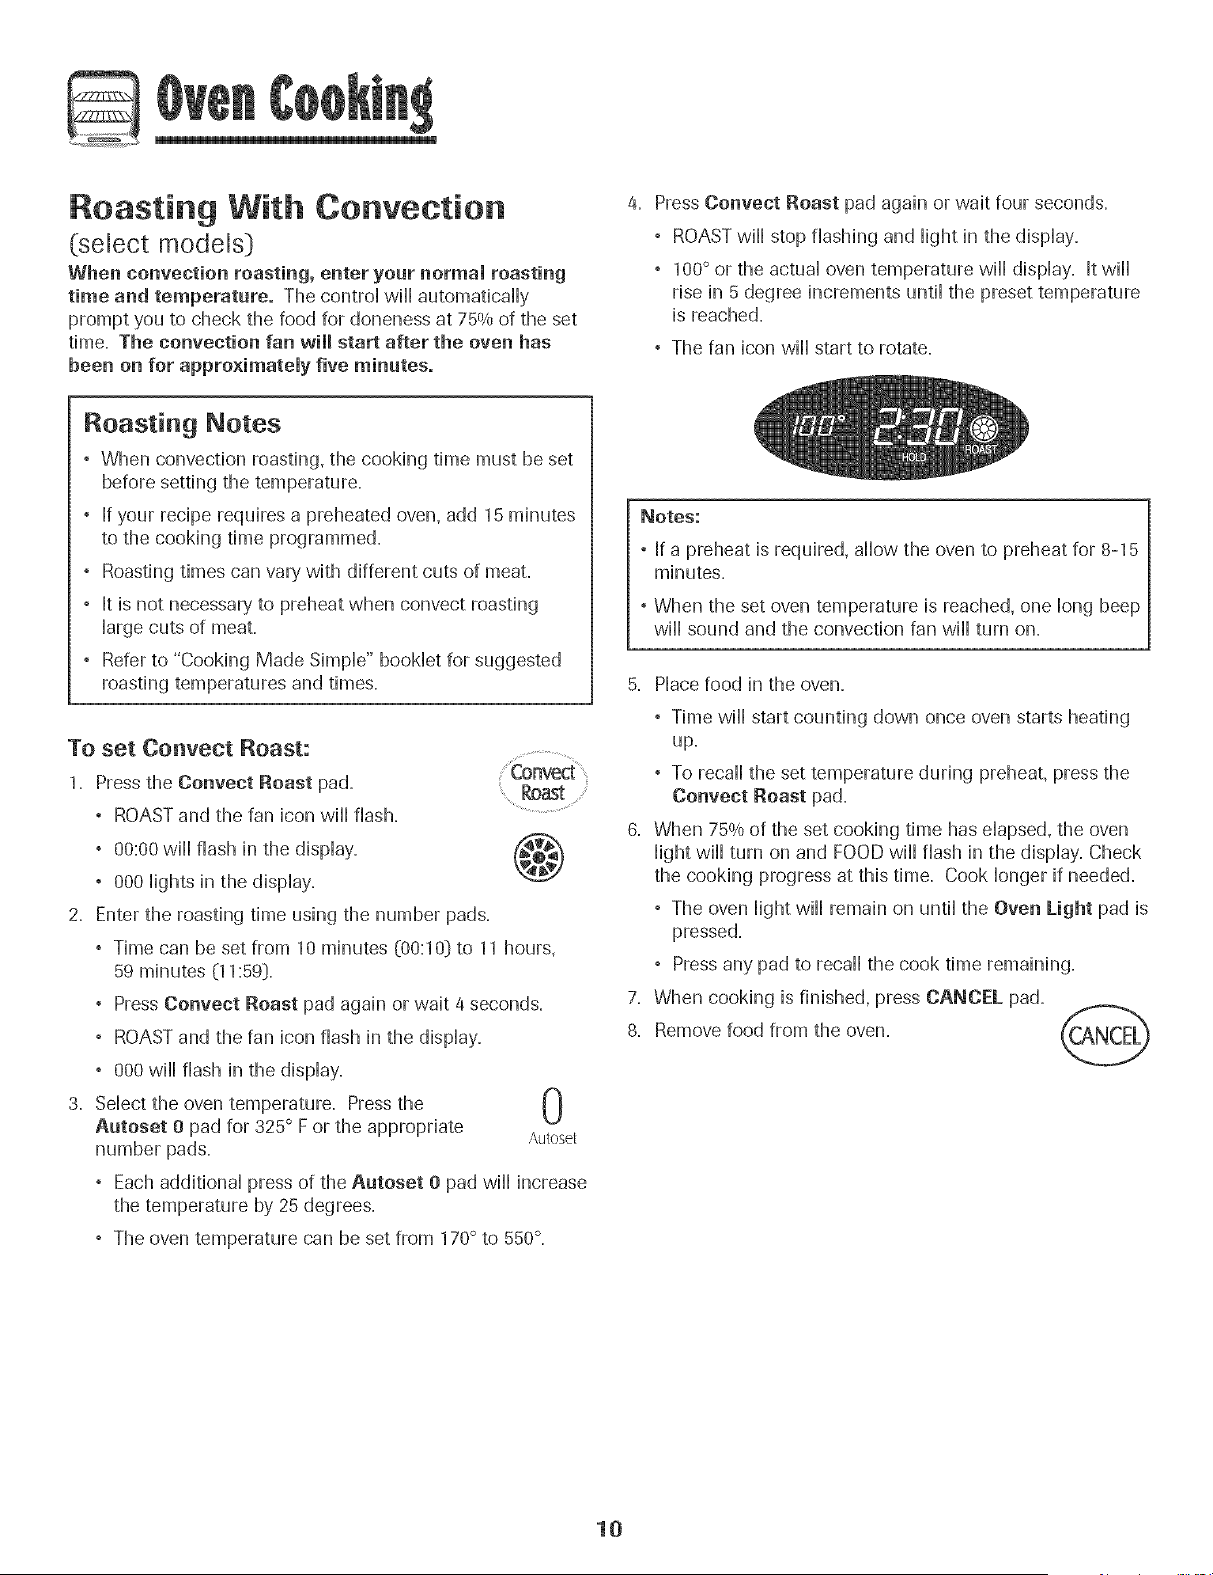
Press Convect Roast pad again or wait four seconds.
° ROAST will stop flashing and Hightin the dispHay.
, 100° or the actuaHoven temperature wiHHdispHay. It wiHH
rise in 5 degree increments until the preset temperature
is reached.
° The fan icon will start to rotate.
Roasting Notes
° When convection roasting, the cooking time must be set
before setting the temperature.
° If your recipe requires a preheated oven, add 15 minutes
to the cooking time programmed.
, Roasting times can vary,with different cuts of meat.
, It is not necessary, to preheat when convect roasting
large cuts of meat.
° Refer to "Cooking Made Simple" booklet for suggested
roasting temperatures and times.
To set Convect Roast:
1.
Press the Convect Roast pad.
° ROAST and the fan icon wiii flash.
, 00:00 will flash in the display.
° 000 lights in the display.
Enter the roasting time using the number pads.
@
, Time can be set from 10 minutes (00:1O}to 11 hours,
59 minutes 0 1:59}.
, Press Oonvect Roast pad again or wait 4 seconds.
° ROAST and the fan icon flash in the display.
, 000 will flash in the display.
3. Select the oven temperature. Pressthe N
Autoset 0 pad for 325° F or the appropriate AutoseL_J
number pads.
° Each additional press of the Autoset 0 pad will increase
the temperature by 25 degrees.
° The oven temperature can be set from 170° to 550°.
Notes:
, If a preheat is required, allow the oven to preheat for 8-15
minutes.
, When the set oven temperature is reached, one long beep
will sound and the convection fan will turn on.
5. Place food in the oven.
, Time will start counting down once oven starts heating
Up.
° To recall the set temperature during preheat, press the
Convect Roast pad.
6. When 75% of the set cooking time has elapsed, the oven
light will turn on and FOODwill flash in the display. Check
the cooking progress at this time. Cook longer if needed.
° The oven light will remain on until the Oven Light pad is
pressed.
° Press any pad to recall the cook time remaining.
7. When cooking is finished, press CANCEL pad.
8. Remove food from the oven.
10
Cook & Hold
When using the Cook & HoM option, the oven begins to heat
immediateiy after the controi has been set. Then, the oven
cooks for a specified bngth of time. When that time has
dapsed, the oven will keep the food warm for up to an hour
then automatically turn off.
TO set Cook & HoJd:
1. Press the Cook & Hold pad.
° HOLD will flash to indicate that you are in
Cook & Hold programming.
° 00:00 will flash in the display.
2. Sdect the amount of time you want to cook by using the
number pads.
° HOLD continues to flash.
° The time will light in the display.
° Time can be set from ten minutes (00:10) to 11 hours,
59 minutes (11:59).
3. While HOLD is still flashing, press Rake,
Conveet Bake or Convect Roast (select
modeb} and select the oven temperature,
Press the Aatoset 0 pad for 350 ° F or the
appropriate number pads.
° The desired function word wii] flash.
Bake .....
0
Autoset
, The oven temperature can be set front
170 ° F to 550 ° F.
4. Press the desired function pad again OR
wait four seconds.
° The desired function word wiii remain ill
° The cooking time wiii show in the display.
° The actual oven temperature wiii be displayed
during preheat.
° The set temperature wiii display when the oven is
preheated.
When the cooking time has elapsed:
° Four beeps will sound.
° HOLD and WARM will @ht.
° 170°and the time of daywiH display.
After one hour in HOLD WARM:
° The oven turns off automatically.
° HOLD and WARM go off.
° Remove food from oven.
To cancem Cook & Hold at any time:
Press the CANCEL pad. Remove food from oven.
Delay Cook & Hold
Do not use delayed baking for highly perishable foods such
as dairy pr0ducts, p0rk, p0ultry, 0r seafo0d .
When using Delay, the oven begins to cook later in the day.
Set the amount of time that you want to delay before the oven
turns on and how long you want to cook. The oven begins to
heat at the selected time and cooks for the specified length of
time.
Delay time can be set front 10 minutes @0:10} to 11 hours, 59
minutes (11:59}.
To set a Delayed Cook & Hold cycJe:
1. Press the Delay 1 pad. 1
|
, DELAY flashes in the display. Delay
° 00:00 flashes in the display.
2. Using the appropriate number pads, enter the amount of
time you want to delay the start of the Cook & Hold cycle.
3. Pressthe Cook & Hold pad.
° HOLD and DELAY flash in the display.
° 00:00 flashes in the display.
4. Enter the amount of dine you want to cook using the
number pads.
5. Press Bake, Convect Bake or Convect
Roast pad (select models}. ..............................
6. Set the oven temperat#re desired by pressing the
Aatoset 0 pad or the appropriate number pads.
U
, 350° will light when Aatoset 0 pad is pressed.
;\u[osct
° After four seconds, the entered delay time
will appear in the display.
° HOLD turns off.
° BAKE and DELAY remain lit to remind you that
a delayed Cook & Hold cycle has been programmed.
Notes:
° Do not use Delayed Cook & Hold for items that require a
preheated oven, such as cakes, cookies, and breads.
° Do not use Delayed Cook & Hold if oven is already hot.
11
Use CAUTtON when Cooking with the Broil feature. The
grease from fatty foods may ignite. If a fire should occur,
close the oven door and turn the oven OFF. If the fire does
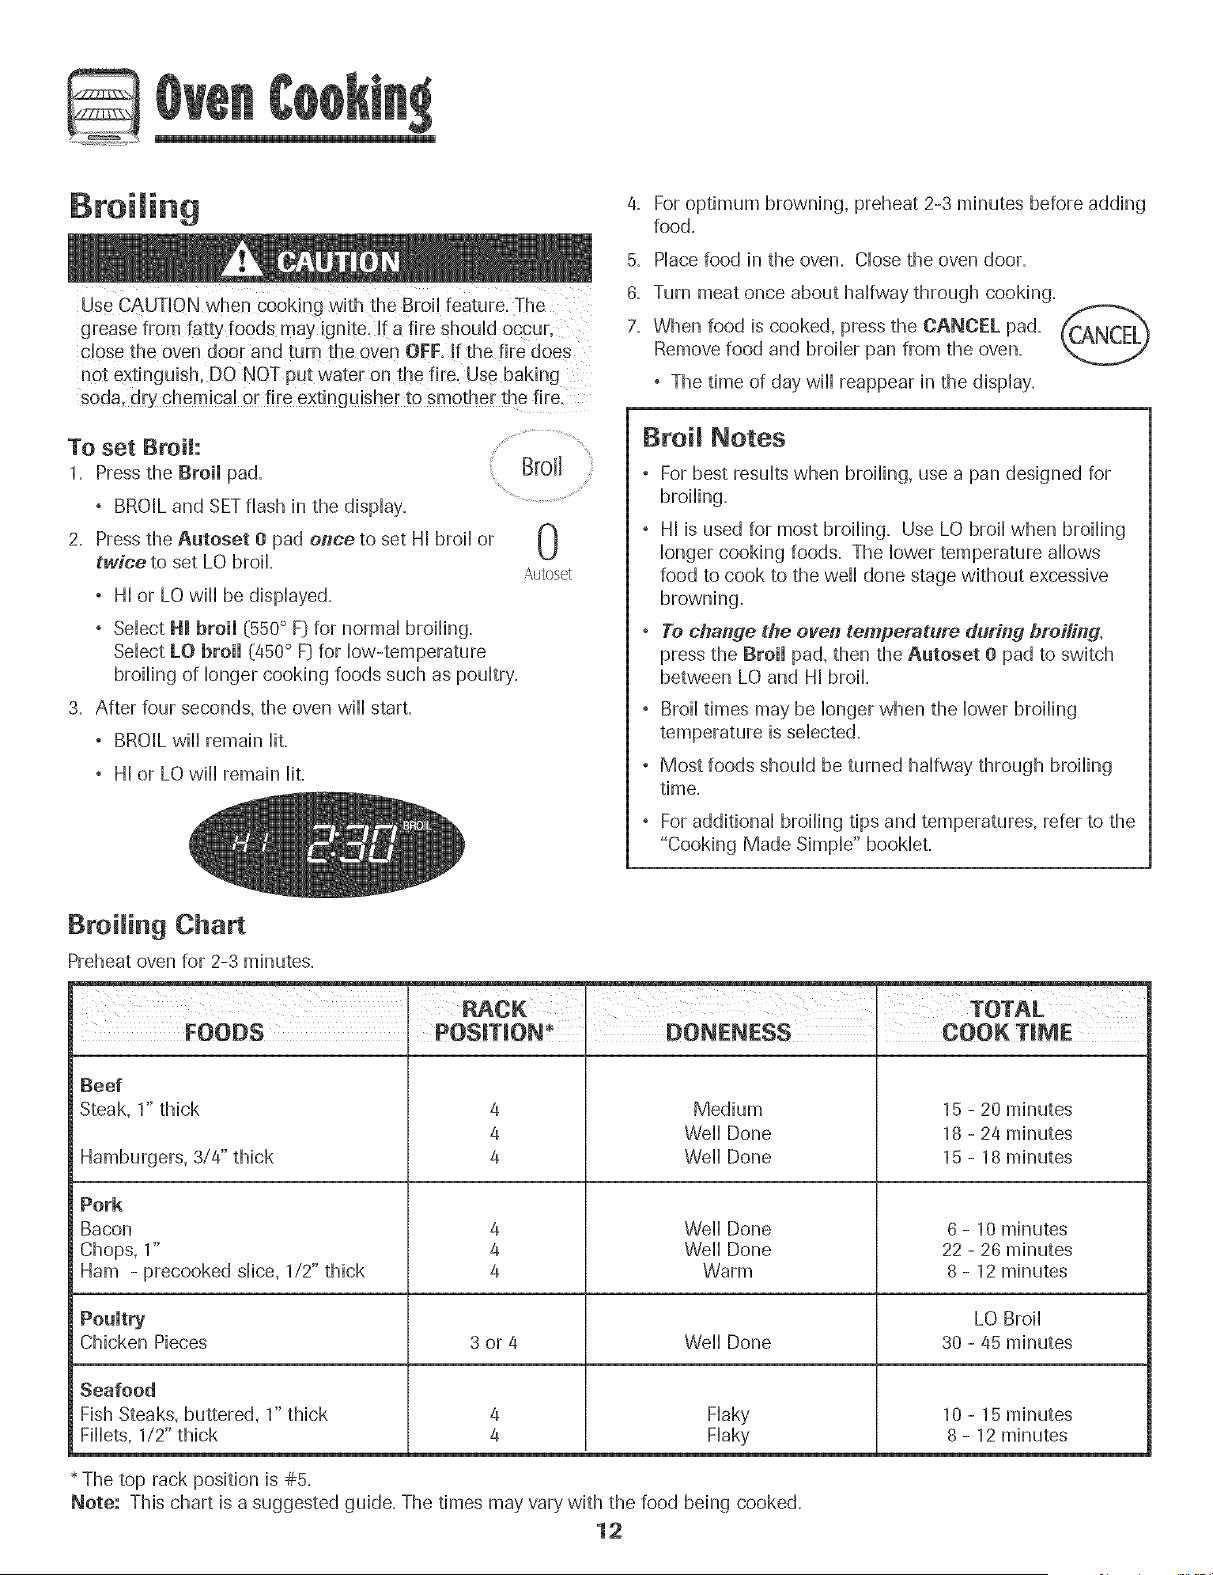
To set Broit:
PresstheBroimpad.
, BROIL and SETflash hi the display'.
2. Press the Autoset 0 pad once to set HI broil or
twice to set LO broil.
, HI or LO will be displayed.
, Select HI broil (550° F} for normal broiling.
Select LO broil (450° FJfor low-temperature
broiling of longer cooking foods such as poultry.
3. After four seconds, the oven will start.
, BROIL will remain lit.
0
Autoset
. HI or LO wiii remain iit.
4, For optimum browning, preheat 2-3 minutes before adding
food.
5. Place food in the oven. Close the oven door.
6. Turn meat once about halfway through cooking.
7. When food is cooked, press the CANCEL pad.
Remove food and broiler pan from the oven.
° The time of day wiil reappear in the display.
BroiJ Notes
, For best results when broiling, use a pan designed for
broiling.
° HI is used for most broiling. Use LO broil when broiling
longer cooking foods. The lower temperature allows
food to cook to the well done stage without excessive
browning.
. Te change @e oven temperature during breiliug,
press the Broil pad, then the Aatoset 0 pad to switch
between LO and HI broil
° Broil times may be longer when the lower broiling
temperature is selected.
° Most foods should be turned halfway through broiling
time.
, For additional broiling tips and temperatures, refer to the
"Cooking Made Simple" booklet.
BroiJing Chart
Preheat oven for 2-3 minutes.
I
} FOODS POSIT(ON*
Beef
Steak, 1" thick a
4
Hamburgers, 3/4" thick 4
Pork
Bacon 4
Chops, 1" 4
J TOTAL
' DONENESS COOK TmME
Medium
Weii Done
Weii Done
Weii Done
Weii Done
15 - 20 minutes
18 - 24 minutes
15 - 18 minutes
6- 10 minutes
22 - 26 minutes
Ham - precooked slice, 1/2" thick 4 Warm 8 - 12 minutes
Poamtry LO Broil
Chicken Pieces 3 or 4 Well Done 30 - 45 minutes
Seafood
Fish Steaks, buttered, 1" thick
Fillets, 1/2" thick
Flaky
Flaky
* The top rack position is #5.
Note: This chart is a suggested guide. The times may vary with the food being cooked.
12
10 - 15 minutes
8- 12 minutes
Keep War
For safdy keephg hot foods warm or for vvarmhg breads and
pHates=
Te set Keep Warm: ......
1= Press the Keep Warm pad= Keep
ws_rm .......
° WARM flashes in the dispHay. ............
° 000 flashes in the dispHay.
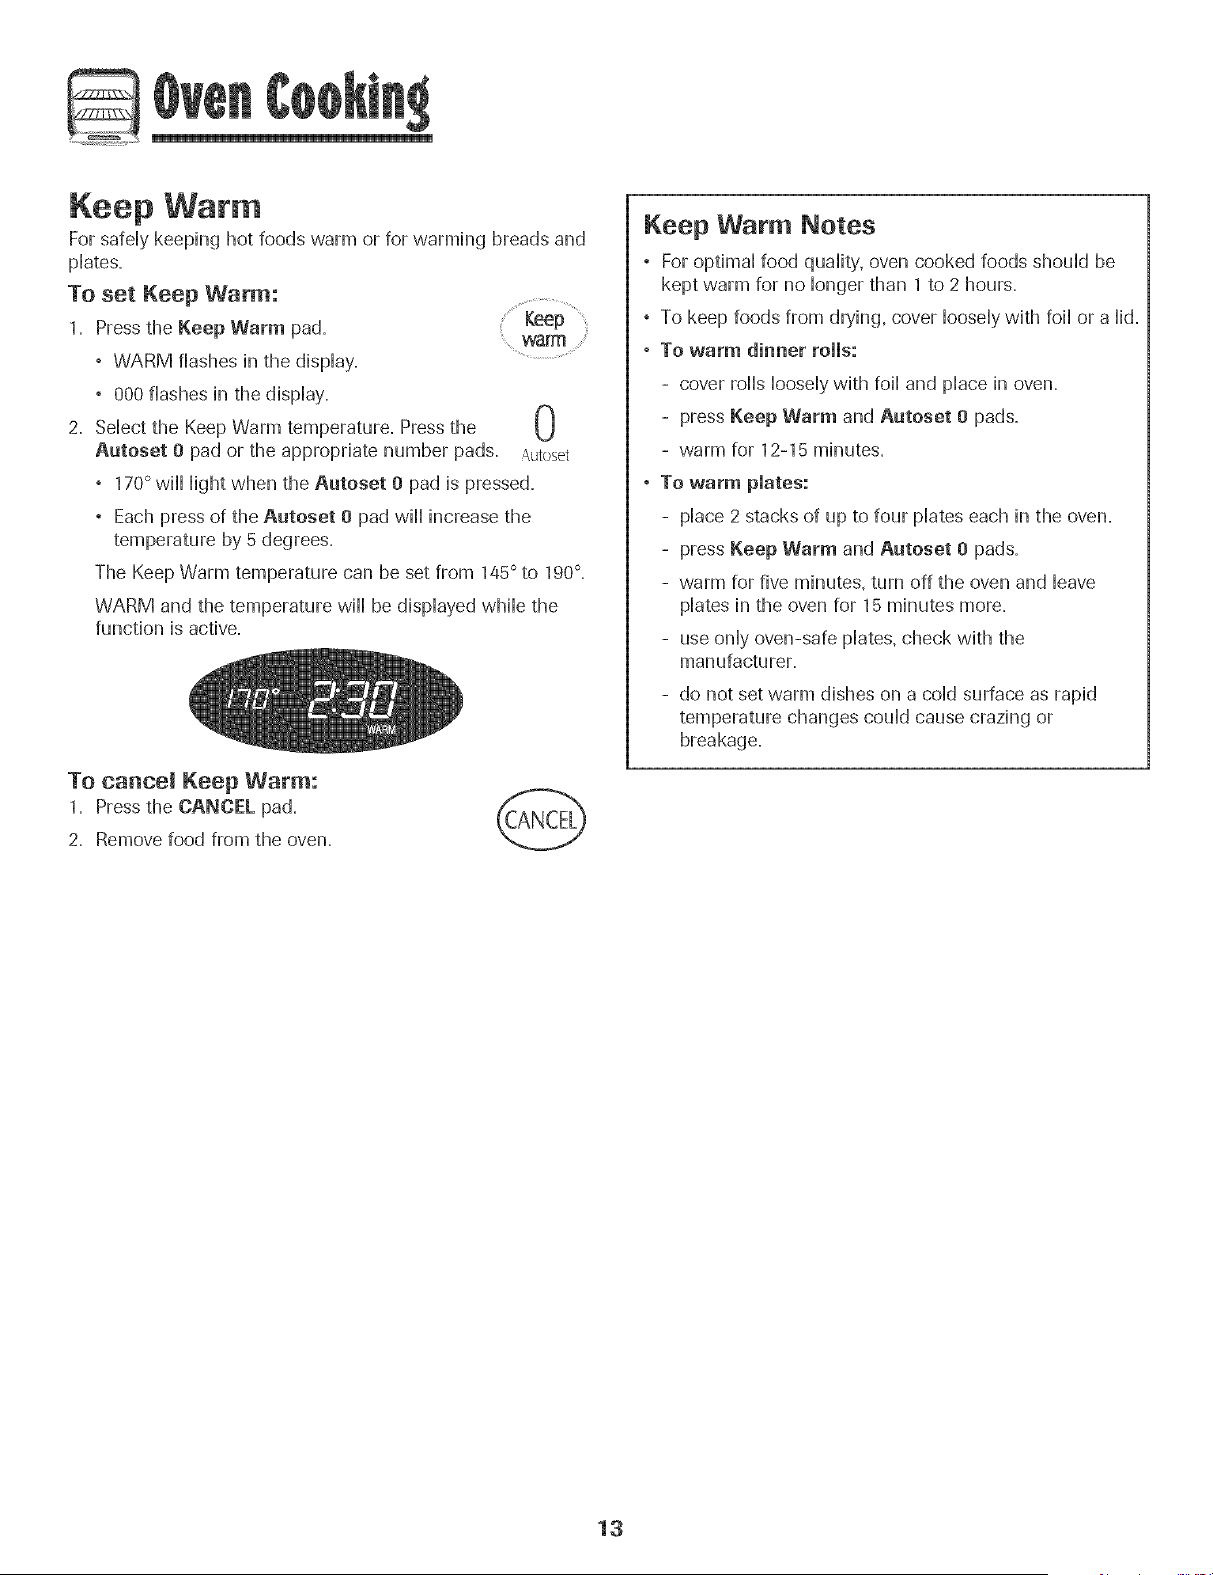
2. Sdect the Keep Warm temperature. Pressthe U
Aatoset 0 pad or the appropriate number pads. Autoset
° 170° will Hightwhen the Aatoset 0 pad is pressed.
° Each press of the Aatoset O pad will increase the
temperature by 5 degrees.
The Keep Warm temperature can be set from 145 ° to 190 °-
WARM and the temperature wiii be displayed while the
function is active.
To canceJ Keep Warm:
1. Press the CANCEL pad.
2. Remove food from the oven.
Keep Warm Notes
° For optimal food quality, oven cooked foods should be
kept warm for no longer than 1to 2 hours.
° To keep foods from drying, cover loosely with foil or a lid.
, To warm dinner rolls:
- cover rolls loosely with foil and place in oven.
- press Keep Warm and Aatoset 0 pads.
- warm for 12-15 minutes.
, To warm plates:
- place 2 stacks of up to four plates each in the oven.
- press Keep Warm and Aatoset 0 pads.
- warm for five minutes, turn off the oven and leave
plates in the oven for 15 minutes more.
- use only oven-safe plates, check with the
manufacturer.
- do not set warm dishes on a cold surface as rapid
temperature changes could cause crazing or
breakage.
13
@
Automatic Shut-Off/
Sabbath Mode
The oven will automatically turn off after 12 hours if you
acddentaHy Heaveit on. This safety' feature can be turned off.
To cancel the 12-hour shut-off and run the
oven continuously for 72 hours:
1. Press and hoid the Clock pad for five
seconds
° SAb will be dispiayed and flash for five seconds.
° SAb will then be dispiayed condnuousiy und] turned
off or until the 72-hour time limit is reached.
° BAKE will also be displayed if a bake cycle is in
use while the oven is in Sabbath Mode.
, BAKEis the only function that operates during the
Sabbath Mode, Aft other functions (7ime,5Keep Warm,
Clean, etc.,)are locked out during the Sabbath Mode,
° A Cook & Hold can be programmed during the Sabbath
Mode, however a Delay Cook & Hold is not allowed.
To cancel the Sabbath Mode:
1. Press the Clock pad for five seconds.
, SAb will flash for five seconds.
° The time of day wiii return to the display.
OR
2. After 72 hours, the Sabbath Mode wiii end.
, SAb wiii flash for five seconds.
° The time of day wiii return to the display.
Sabbath Mode Notes
° Sabbath Mode can be turned on at any time with or
without the oven on.
° Sabbath Mode cannot be turned on if the touchpads are
locked out or when the door is locked.
° Most prompts and messages and aii beeps are
deactivated when Sabbath Mode is active.
° If the oven is baking when Sabbath Mode is set, BAKE
will go out when Bake is canceled. There will be no
audible beeps.
° The oven light will not automatically come on when the
oven door is opened while the oven is in Sabbath Mode.
If the oven light is desired while in Sabbath Mode, it
must be turned on before the Sabbath Mode is started.
, When the Sabbath Mode is started, the temperature
display will immediately show the set temperature, rather
than the actual oven cavity temperature. No preheat
beep will sound.
, The self-clean cycle and automatic door lock do not
operate during the Sabbath Mode.
, Pressing CANCEL pad will cancel a bake cycle, however
the control will stay in the Sabbath Mode.
, If power fails, the oven will power up in Sabbath Mode
with 72 hours remaining and no cycle active.
14
Adjusting the Oven Temperature
Oven temperatures are carefully tested for accuracy at the
factory. It is normaHto notice some baking or browning
differences between a new oven and an oHdone. As ovens
get oHder,the oven temperature can shift.
You may adjust the oven temperature if you think the oven is
not baking or browning correctHy. To decide how much to
change the temperature, set the temperature 25 degrees
higher or Howerthan your recipe recommends, then bake.
The resuHtsof the "test" shouHdgive you an idea of how much
to adjust the temperature.
TO adjust the oven temperature:
1. Press the Bake pad. .....
2. Enter 550° by pressing the appropriate number pads.
3. Press and hem the Bake pad for severaHseconds or untiH
"00°'' appears in the dispHay.
If the oven temperature was previousHyadjusted, the
change will be displayed. For example, if the oven
temperature was reduced by 15 degrees the display will
show "- 15°''.
4. Press the Aatoset 0 pad to adjust the temperature.
Each time the Aatoset 0 pad is pressed, the temperature
changes by 5 degrees. The oven temperature can be
increased or decreased by 5 to 35 degrees.
Pressing the Aatoset 0 pad will first cycle through
increasing the oven temperature (5, 10.... 35_).
Continuing to press the Aatoset 0 pad will then cycle
through decreasing the oven temperature (-35, -30.... -5_).
5. The time of day will automatically reappear in the display.
You do not need to readjust the oven temperature if there is a
power failure or interruption. Temperature adjustment applies
to Bake, Convect Bake and Convect Roast (select modds_)
only. Broiling and cleaning temperatures cannot be adjusted.
Changing Temp °F/°C
1. The factory default setting for temperature is FahrenheiL
2. To change the setting, press and hold the CANCEL and Bake
pads at the same time for three seconds.
3. A single beep will sound and the current setting will be
displayed (°F or °C). (If no change is made, the range will
return to the existing setting after 30 seconds.[)
4. To change the setting, press the Aatoset 0 pad. Pressagain
to return to existing setting. Wait five seconds and the setting
will be complete.
The Favorite pad allows you to save the time and temperature
from a Cook & Hold function.
To set a Favorite cycle, Cook & Hold must be either active or
just programmed.
To set a new Favorite cycle or to save a
currentJy running Cook & Hold as a Favorite:
1. Program a Cook & Hold cycle as described in the Cook &
Hold section on page 11.
2. Press and hold the Favorite pad for three
seconds.
° The newly set or currently running Cook & Hold cycle
will be saved.
, A beep will sound to indicate that the control has
accepted the Favorite setting.
To start a cycle programmed into Favorite:
1. Press the Favorite pad.
° Time and temperature for the set Cook & Hold cycle will
be displayed. (If no Cook & Hold cycle has been pro-
grammed, "nonE" is displayed=_)
2= Press the Bake, Conveet Bake or Conveet Boast (select
modds_)pad=
° The Favorite cycle will begin immediately.
° The selected cycle word will light in the display.
° The cooking time will light in the display.
When the cooking time has elapsed:
° The selected cycle word will turn off.
° HOLD and WARM will light.
, 170°will display.
To cancel a Favorite cycle in progress:
1. Press the CANCEL pad. (_'ANCF_
° The stored Favorite cycle will not
be affected.
2. Remove food from the oven.
15
Pilotless ignition
Your range is equipped with piHotHessignition. With this type
of ignition system, the gas automatically shuts off and the
oven will not operate dur#_g a power failure.
A lighted match wimmnot mightthe oven burner. No
attempt should be made to operate the oven daring a
power failure.
Oven Fans
A convection fan is used to circulate hot air in the oven
when the convection feature is selected= It automatically turns
on approximately five minutes after the Convect pad is
pressed and will turn off when Convect is cancded=
A cooling fan will automatically turn on during all broiling
and some baking operations. It is used to keep internal parts
on the control panel cool. The fan will automatically turn off
when parts have cooled. The fan may continue to operate
after the oven has been turned off. This is normal.
= Note: The convection fan will automatically stop when the
oven door is opened.
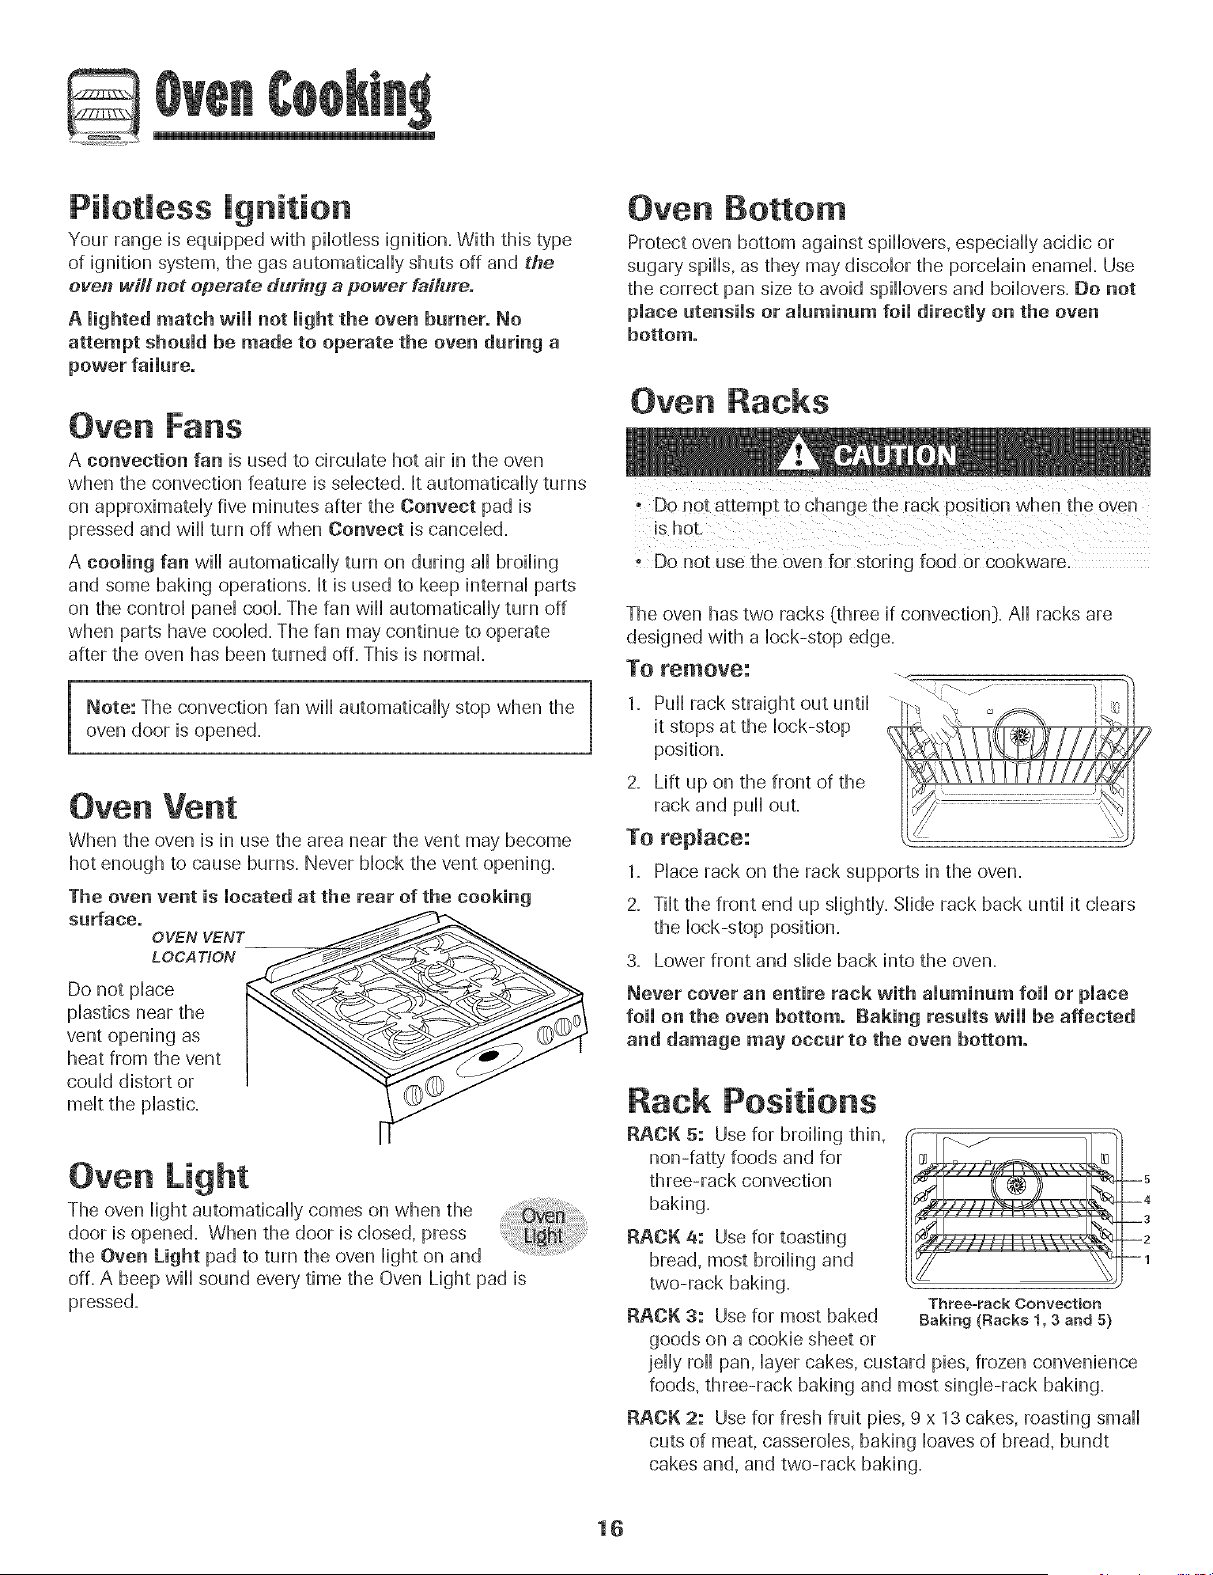
Oven Vent
When the oven is in use the area near the vent may become
hot enough to cause burns. Never block the vent opening.
The oven vent is located at the rear of the cooking
surface.
OVEN VENT
LOCATION
Do not place
plastics near the
vent opening as
heat front the vent
could distort or
Oven Light
The oven light automatically comes on when the
door is opened. When the door is closed, press
the Oven Light pad to turn the oven light on and
off. A beep will sound every time the Oven Light pad is
pressed.
Oven Bottom
Protect oven bottom against spillovers, especially acidic or
sugary spills, as they may discolor the porcelain enamel. Use
the correct pan size to avoid spillovers and boilovers. Do not
place utensils or aluminum foil directly on the oven
bottom.
Oven Racks
Do not attempt to change the rack position when the oven
is hot,
Do not use the oven for storing food Or cookware.
The oven has two racks (three if convection}. All racks are
designed with a lock-stop edge.
To remove: .<_
1. Pull rack straight out until
it stops at the lock-stop
position.
2. Lift up on the front of the
rack and pull out.
To replace:
1. Place rack on the rack supports in the oven.
2. Tilt the front end up slightly. Slide rack back until it clears
the lock-stop position.
3. Lower front and slide back into the oven.
Never cover an entire rack with aluminum foil or place
foil on the oven bottom. Raking results will be affected
and damage may occur to the oven bottom.
Rack Positions
RACK 5: Use for broiling thin,
non-fatty foods and for
three-rack convection
baking.
RACK 4: Use for toasting
bread, most broiling and
two-rack baking.
RACK 3: Use for most baked
goods on a cookie sheet or
Three=rack Convection
Baking (Racks 1,3 and 5)
jelly roll pan, layer cakes, custard pies, frozen convenience
foods, three-rack baking and most single-rack baking.
RACK 2: Use for fresh fruit pies, 9 x 13 cakes, roasting small
cuts of meat, casseroles, baking loaves of bread, bundt
cakes and, and two-rack baking.
16

RACK 1: Use for roasting Hargecuts of meat and pouHtry,
frozen pies, dessert and savory souffles, angeHfood cake
and three-rack baking.
MULTIPLE RACK COOKING:
Two rack: Use rack positions 2 and 4. Stagger food to ensure
proper air flow.
Three rack: (convection functions onHy,seHectmodeHs:)Use
rack positions 1, 3 and 5.
Notes:
, Food should be checked for aloneness at miimum
suggested bake time.
, Never pHacepans directHyon the oven bottom.
Baking Layer Cakes on Two Racks
Forbest resuHtswhen baking cakes on two racks, use racks 2 and
4 for reguHaror convection baking (seHectmodeHs).
PHacethe cakes on the rack as shown.
Create-A-Space TM
SeHectrange modeHsare
equipped with a convertbHe /_
half rack. The left side of the_
rack can be removed to
accommodate a large
roaster on the lower rack.
The right side of the
rack is still available to _,
hold a casserole dish.
Half Rack
J
, The removabHesection of the rack can be used as a
roasting rack in a broiHing pan. Do not use the top insert
when using the rack in a broiHingpan.
, The removabHesection of the rack can be used as a
cooling rack or trivet.
, Make sure oven is cooHbefore removing or reinstaHHing
the haHfrack.
, Do not use cookware that extends beyond edge of rack.
, For best resuHts,aHHowtwo inches between the pan
pHacedon the rack and the oven side waHL
, Use caution when removing items from the haHfrack to
avoid burns.
CarefuHHyremove items from the lower rack to avoid
disturbing the haHfrack.
17
Serf-Clean Oven
- [t is normal for parts of the oven to become hot during a
* To prevent damage to oven door. do not attempt to open
the door when LOCK is displa_ed,
, Avoid touching door, window or oven vent area during a
clean cycle.
, Do not use commercial oven cleaners on the oven finish
or around any part of the oven. The} wilJ damage the
finish o_ parts.
The self-clean cycle uses above-normal cooking temperatures
to automatically clean the oven interior.
It is normal for flare-ups, smoking, or flaming to occur during
cleaning if the oven is heavily soiled. It is better to clean the
oven regularly rather than to wait until there is a heavy build-
up of soil in the oven.
During the cleaning process, the kitchen should be weil
ventilated to get rid of normal odors associated with cleaning.
Before Se[fmCmeaning
1. Turn off the Oven Light before cleaning. The oven light
may burn out during the clean cycle.
2. Remove ail pans and oven racks from the oven. The oven
racks wiil discolor and may not slide easily after a self-
clean cycle if they are not removed.
3. Clean oven frame, door flame, area outside of gasket, and
around the opening in the door gasket with a nonabrasive
cleaner such as Bon Ami* or detergent and water. The
self-cleaning process does not clean these areas. They
should be cleaned to prevent soil from baking on during
the clean cycle. (The gasket is the seal around the oven
door and window.}
4, To preventda,eage, d onotclean or ,_ _'___
rub the gasket around the oven
door. The gasket is designed to __t_
seal in heat during the clean cycle.
5. Wipe up excess grease or spill-
overs from the oven bottom. This
prevents excessive smoking, flare-ups or flaming during
the clean cycle.
6. Wipe up sugary and acidic spiiiovers such as sweet
potatoes, tomato, or milk-based sauces. Porcelain enamel
is acid-resistant, not acid-proof. The porcelain finish may
discolor if acidic or sugary spills are not wiped up before a
self-clean cycle.
To set Self-Clean:
1.
2.
Note: Oven temperature must be below 400° F to
program a clean cycle.
Close the oven door.
Pressthe Clean pad. dean .....
, CLEAN flashes.
, SET flashes in the display. 0
Pressthe Autoset 0 pad. Autoset
, MEd (Medium Soil, 3 hours:) is displayed.
Pressthe Autoset 0 pad to scroll through the self-cleaning
settings.
HVy (Heavy Soil, 4 hours}
MEd (Medium soil, 3 hours}
LifE (Light Soil, 2 hours}
Choosing the soil level of the oven automatically programs
the self-cleaning time.
After four seconds, the oven wiil start cleaning.
, If the door is not closed, beeps wiil sound and "door" wiil
display. If the door is not closed within 30 seconds, the
self-cleaning operation wiil be canceled and the display
wiil return to the time of day.
, CLEAN wiil appear in the display.
, LOCK wiil flash in the display. Once the door locks, the
word wiil remain steady.
, The cleaning time wiil start counting down in the display.
To Delay a Self-Clean Cycle:
1. Pressthe Delay 1 pad. 1
[
° DELAY flashes.
Delay
° 00:00 wi[[ flash in the display,
2, Enter the amount of time you want to delay the cycle using the
appropriate number pads.
3, Press the Clean pad,
° SET flashes in the display,
4. Press the Autoset 0 pad.
f_
° LifE (Light soil level} is displayed. U
Autoset
* Brand names for cleaning products are registered trademarks of the respective manufacturers.
18
5. Press the Autoset 0 pad to scroll through
the sdf-cHeaning settings.
U
,\utoset
HVy (Heavy Soil 4 hours:)
MEd (Medium Soil 3 hours:)
LITE (Light Soil 2 hours:)
Choosing the soiHHevdof the oven automatically programs
the sdf-cHeaning time.
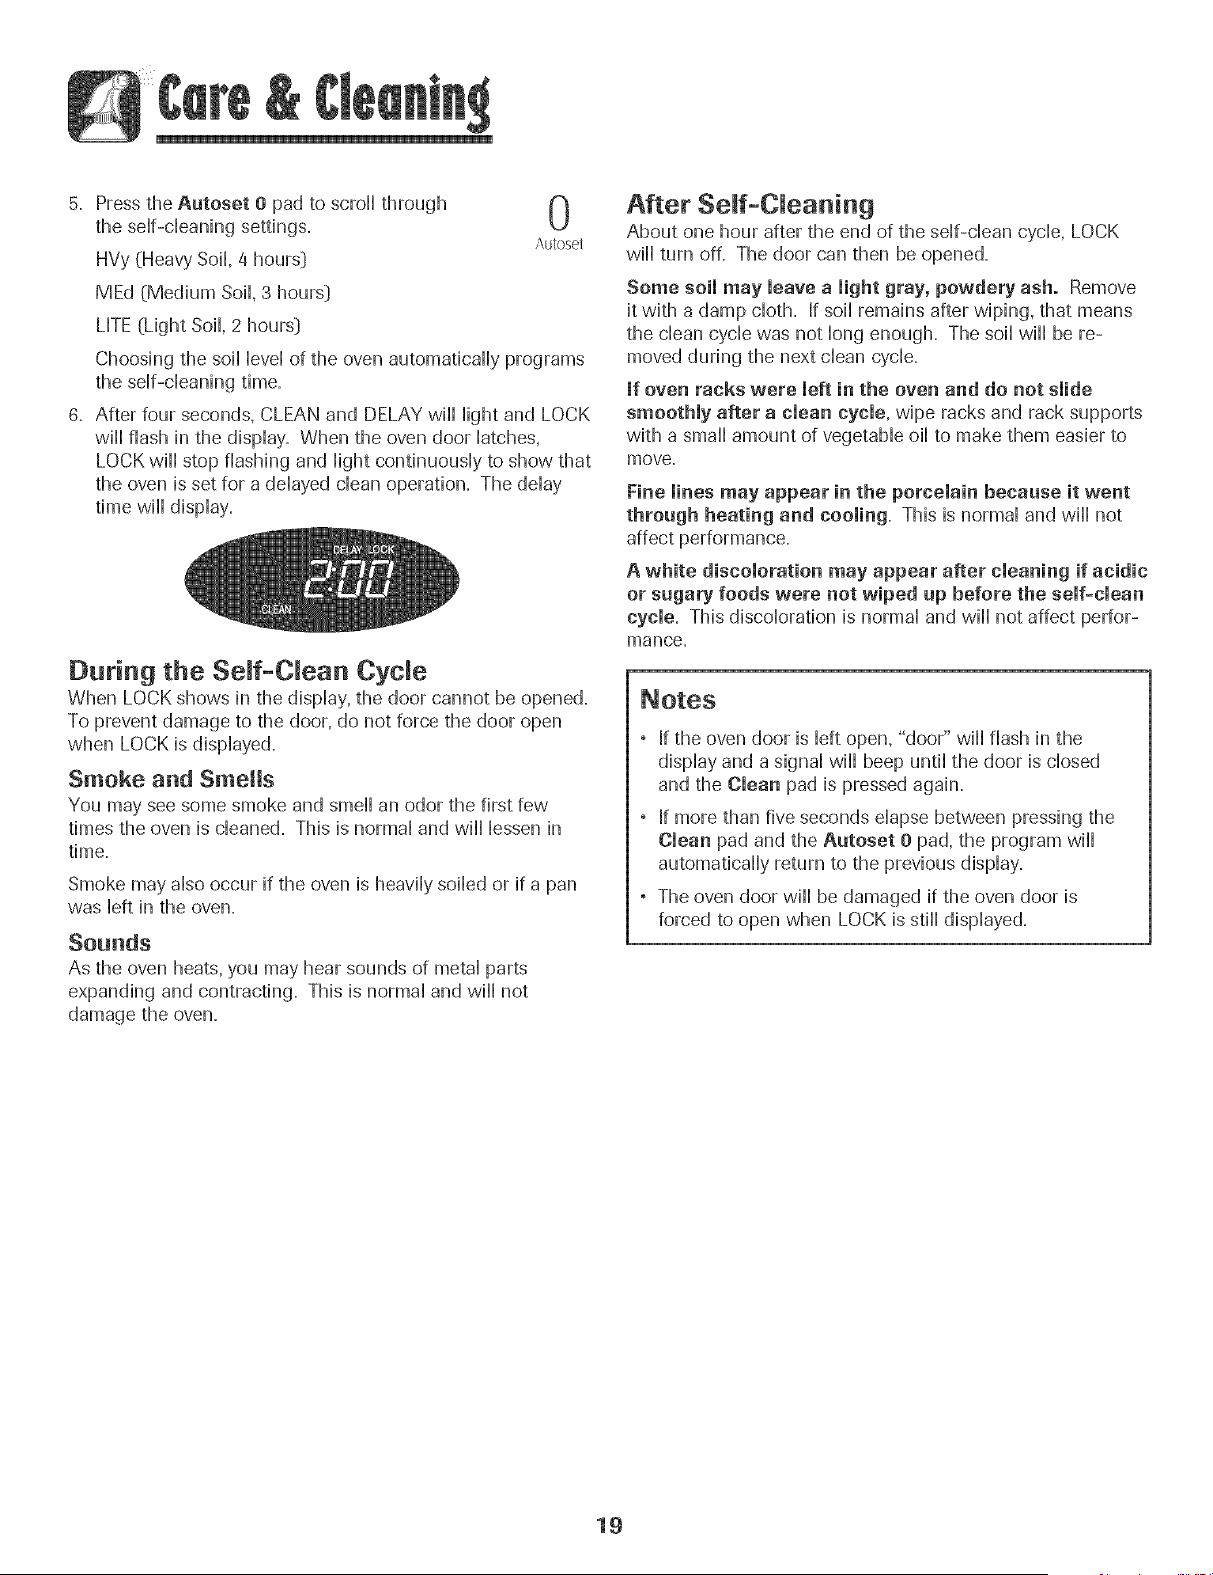
6. After four seconds, CLEAN and DELAY will Hightand LOCK
will flash in the dispHay. When the oven door Hatches,
LOCK will stop flashing and HightcontinuousHy to show that
the oven is set for a ddayed dean operation. The dday
time will display.
During the Seff-CRean Cycle
When LOCK shows in the display, the door cannot be opened,
To prevent damage to the door, do [lot force the door open
when LOCK is displayed,
Smoke and Smells
You may see some smoke and smell an odor the first few
times the oven is cleaned. This is normal and will lessen in
time.
Smoke may also occur if the oven is heavily soiled or if a pan
was left in the oven.
Sounds
As tile oven heats, you may hear sounds of metal parts
expanding and contracting. This is normal and will not
damage the oven.
After Serf-Cleaning
About one hour after the end of the self-clean cycle, LOCK
will turn off. The door can then be opened.
Some soil may leave a light gray, powdery ash. Remove
it with a damp cloth. If soil remains after wiping, that means
the clean cycle was not long enough. The soil will be re-
moved during the next clean cycle.
mfoven racks were left in the oven and do not slide
smoothly after a clean cycle, wipe racks and rack supports
with a small amount of vegetable oil to make them easier to
move.
Fine lines may appear in the porcelain because it went
through heating and cooling. This is normal and will not
affect performance.
A white discoloration may appear after cleaning if acidic
or sugary foods were not wiped up before the self-clean
cycle. This discoloration is normal and will not affect perfor-
mance.
, If the oven door is left open, "door" will flash in the
display and a signal will beep until the door is closed
and the Clean pad is pressed again.
, If more than five seconds elapse between pressing the
Clean pad and the Autoset 0 pad, the program will
automatically return to the previous display.
, The oven door will be damaged if the oven door is
forced to open when LOCK is still displayed.
19
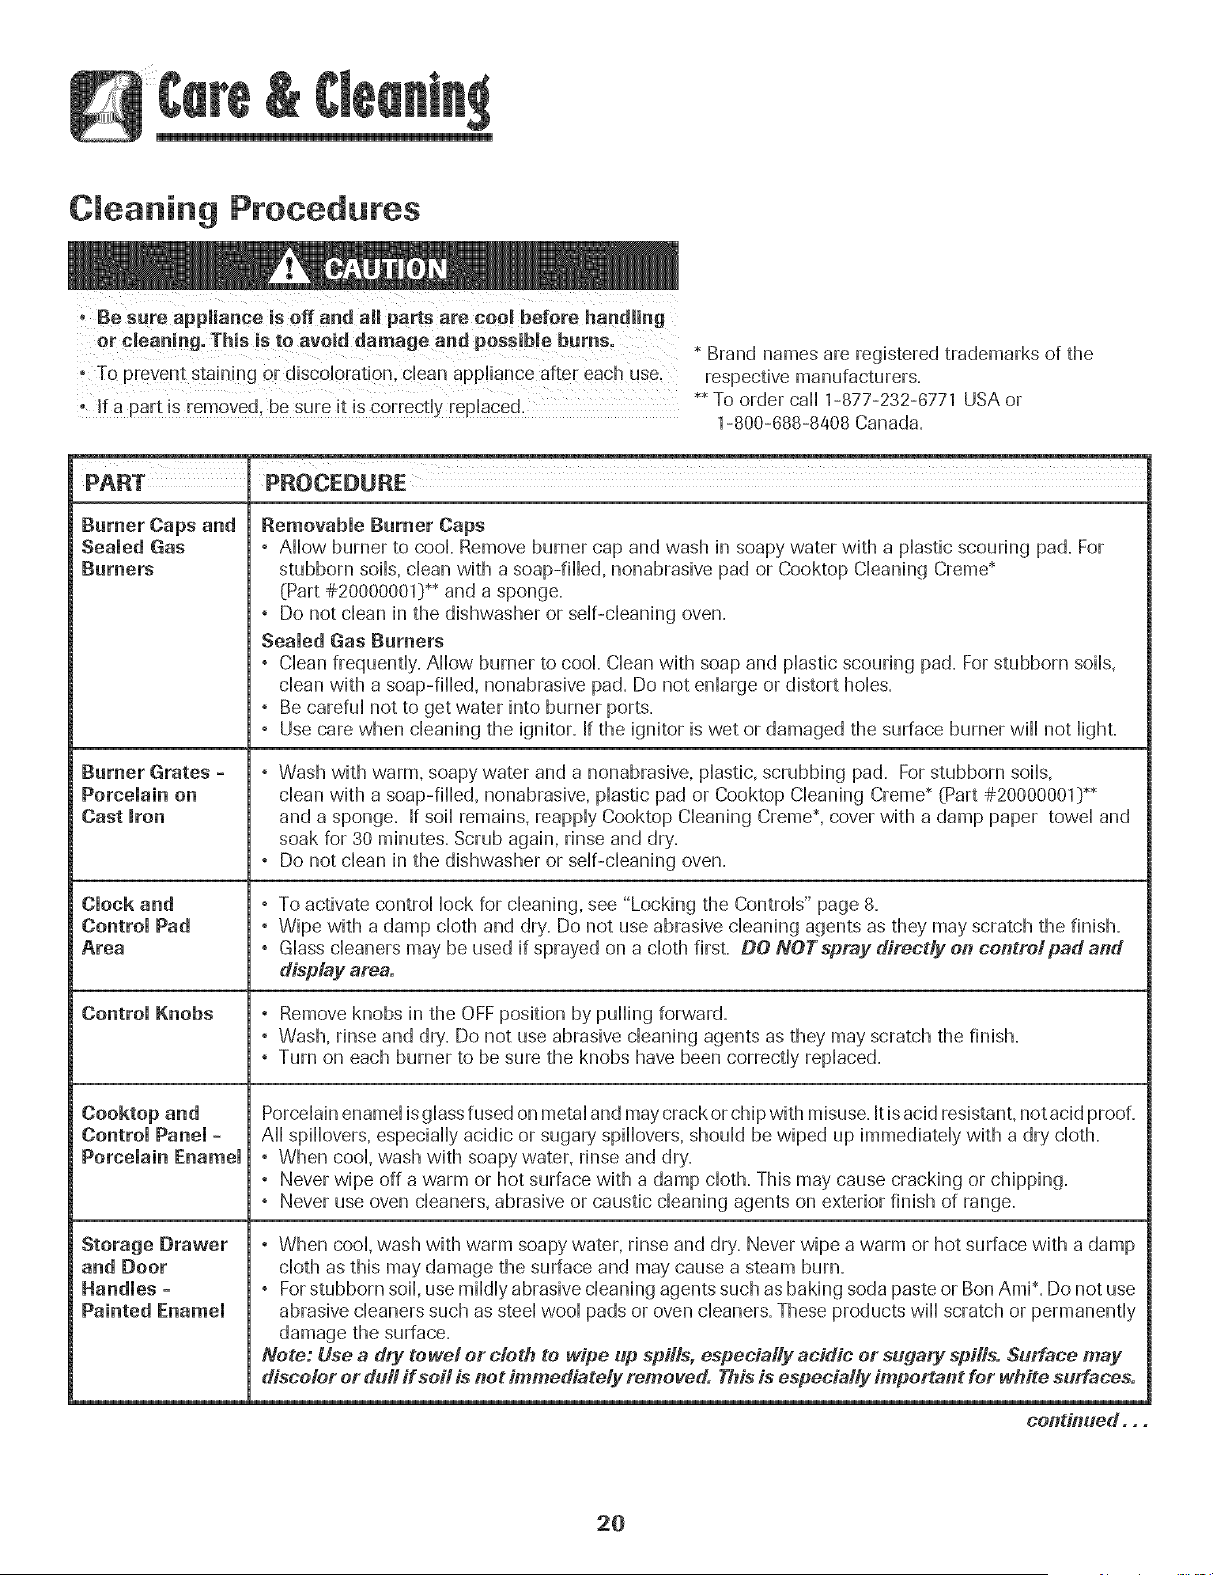
Cleaning Procedures
er cleaning. This is te avoid damage andpossibje burn s,
Brand names are registered trademarks of the
, To Prevent staining or discobrati0n, clean appqiance after each use, respective manufacturers.
!1:a Part is removed, be sure !t is correct!y replaced . _*To order call 1-877-232-6771 USA or
1-800-688-8408 Canada.
PART PROCEDURE
Removable Ramer Caps
Sealed Gas ° Allow burner to cool Remove burner cap and wash in soapy water with a plastic scouring pad. For
Burners stubborn soils, clean with a soap-filled, nonabrasive pad or Cooktop Cleaning Creme_
(Part #20000001} _* and a sponge.
° Do not clean in the dishwasher or self-cleaning oven.
Sealed Gas Burners
° Clean frequently= Allow burner to cool= Clean with soap and plastic scouring pad. For stubborn soils,
clean with a soap-filbd, nonabrasive pad. Do not enlarge or distort holes.
° Be careful not to get water into burner ports.
° Use care when cleaning the ignitor= If the ignitor is wet or damaged the surface burner will not light=
Rumor Grates = ° Wash with warm, soapy water and a nonabrasive, plastic, scrubbing pad. For stubborn soils,
Porcelain on clean with a soap-filbd, nonabrasive, plastic pad or Cooktop Cleaning Creme_ (Part #20000001} _*
Cast iron and a sponge. If soil remains, reapply Cooktop Cleaning Creme_,cover with a damp paper towel and
soak for 30 minutes= Scrub again, rinse and dry.
° Do not clean in the dishwasher or sdf-cbaning oven.
Clock and ° To activate control lock for cleaning, see "Locking the Controls" page 8=
Control Pad ° Wipe with a damp cloth and dry. Do not use abrasive cleaning agents as they may scratch the finish.
Area , Glass cleaners may be used if sprayed on a cloth first= DO NOTspray direcdy oo cootrolpad and
display area.
Control Knobs ° Remove knobs in the OFF position by pulling forward.
° Wash, rinse and dry. Do not use abrasive cleaning agents as they may scratch the finish=
° Turn on each burner to be sure the knobs have been correctly replaced=
Ceoktop and Porcelain enamel is glass fused on metal and may crack or chip with misuse, kis acid resistant, not acid proof.
Control Panel = All spillovers, especially acidic or sugary spillovers, should be wiped up immediately with a dry cloth.
Porcelain Enamel ° When cool, wash with soapy water, rinse and dry.
, Never wipe off a warm or hot surface with a damp cloth This may cause cracking or chipping.
, Never use oven cleaners, abrasive or caustic cleaning agents on exterior finish of range.
Storage [}rawer , When cool, wash with warm soapy water, rinse and dry. Never wipe a warm or hot surface with a damp
and [}oor cloth as this may damage the surface and may cause a steam burn.
Handles = ° Forstubborn soil, use mildly abrasive cleaning agents such as baking soda paste or Bon Ami*. Do not use
Painted Fnamei abrasive cleaners such as steel wool pads or oven cleaners. These products will scratch or permanently
damage the surface.
Note: Use a dry towel or cloth te wipe up spills, especially acidic or su_jary spills. Surface may
discolor or dull if soil is not immediately removed. This is especially important for white surfaces.
coi_tinued. . .
2O
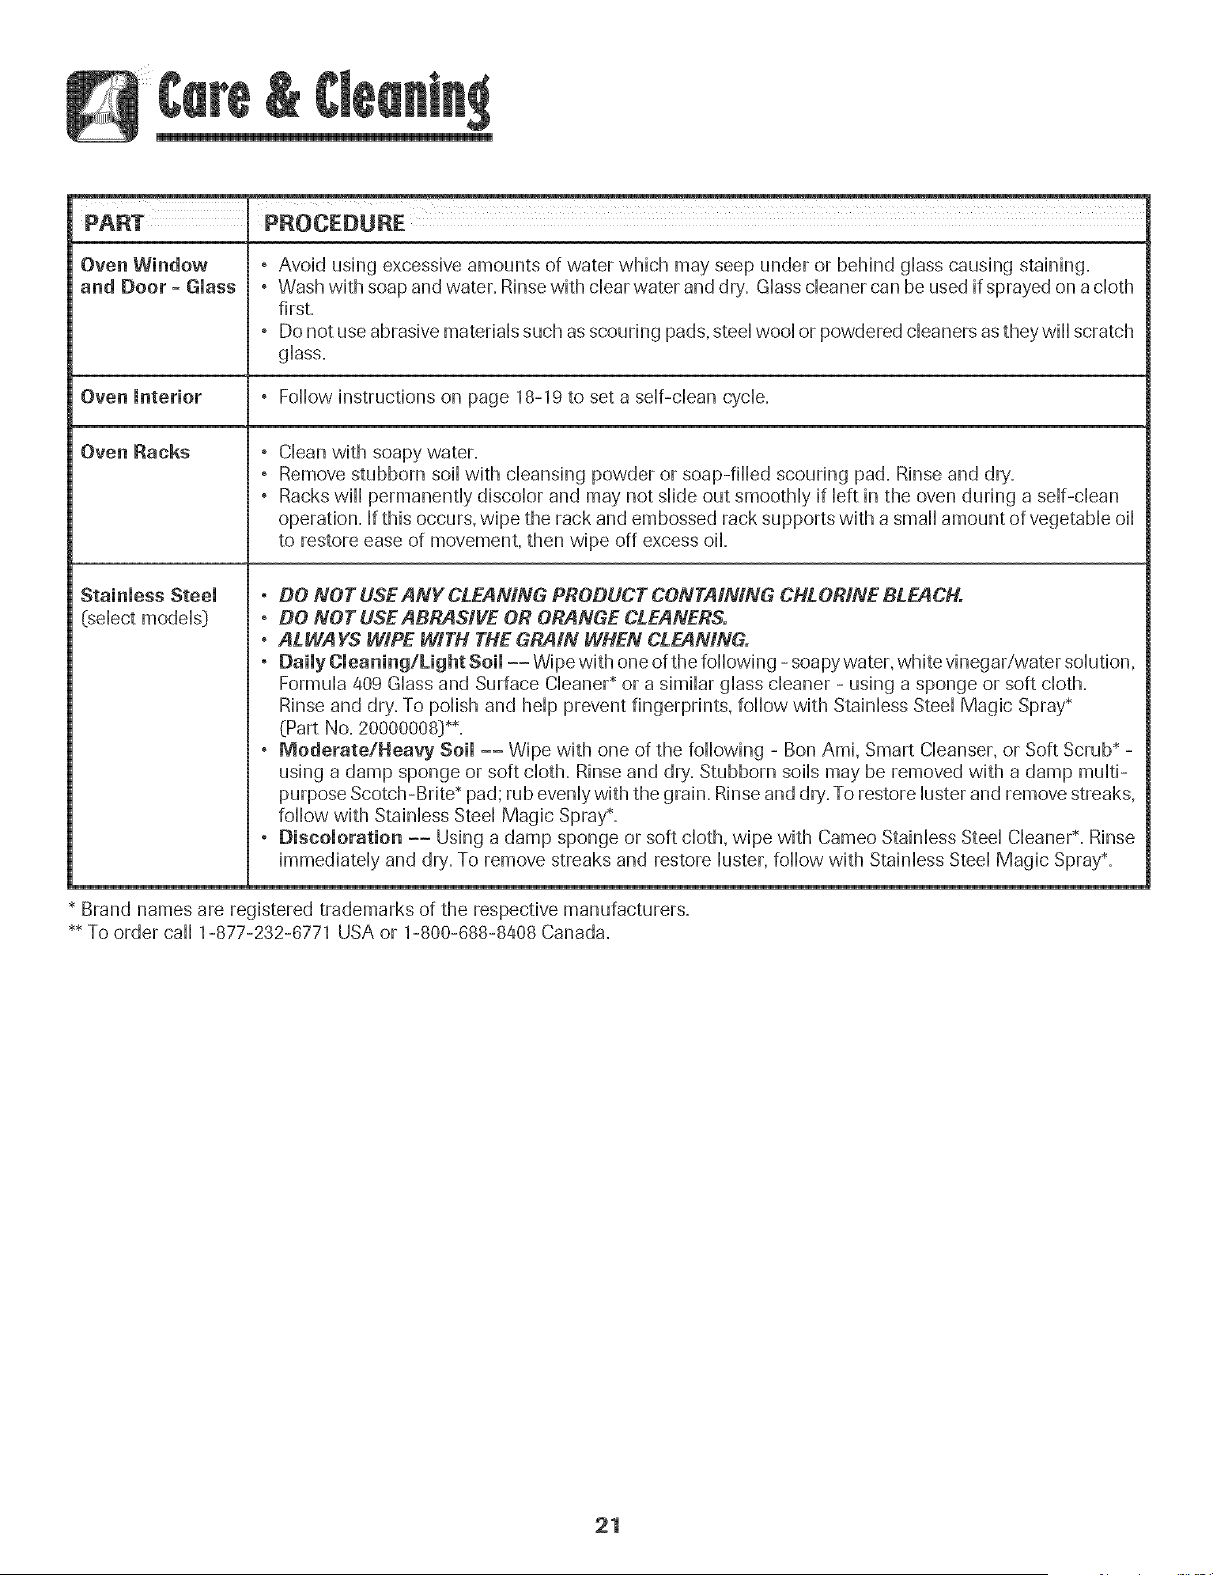
Oven Window
and Door - Glass
, Avoid using excessive amounts of water which may seep under or behind glass causing staining,
, Wash with soap and water, Rinse with dear water and dry', GHasscleaner can be used if sprayed on a cloth
first,
, Do not use abrasive materials such as scouring pads, steal wooHor powdered cleaners as theywiH scratch
gHass,
Oven Interior ,FoHow instructions on page 18-19 to set a stir-dean cycle,
Oven Racks
Stainless Steel
(sdect modds_)
CHeanwith soapy water=
Remove stubborn soiHwith cHeansingpowder or soap-filled scouring pad, Rinse and dry,,
Racks will permanently discolor and may not slide out smoothly if left in the oven during a self-clean
operation, Ifthis occurs, wipe the rack and embossed rack supports with a small amount of vegetable oil
to restore ease of movement, then wipe off excess oil,
° DO NOT USE ANY CLEANING PRODUCT CONTAiNiNG CHLORINE BLEACH.
° DO NOT USEABRASIVE OR ORANGE CLEANERS.
° ALWAYS WiPE WITH THE GRAIN WHEN CLEANING.
° Dai_yC_eaning/LightS_i_-_Wi_ewith_ne_fthef_wing-s_a_ywater_whitevinegar/waters_hti_n_
Formula 409 Glass and Surface Cleaner_ or a similar glass cleaner - using a sponge or soft cloth,
Rinse and dry, To polish and help prevent fingerprints, follow with Stainless Steel Magic Spray*
(Part No=2000000d)_*=
° Moderate/Heavy Soil -- Wipe with one of the following - Bon Ami, Smart Cleanser, or Soft Scrub* -
using a damp sponge or soft cloth, Rinse and dry, Stubborn soils may be removed with a damp multi-
purpose Scotch-Brite _pad; rub evenly with the grain, Rinse and dry, To restore luster and remove streaks,
follow with Stainless Steel Magic Spray_,
, Discoloration -- Using a damp sponge or soft cloth, wipe with Cameo Stainless Steel Cleaner_, Rinse
immediately and dry, To remove streaks and restore luster, follow with Stainless Steel Magic Spray_,
Brand names are registered trademarks of the respective manufacturers=
_ To order call 1-877-232-6771 USA or 1-800-688-8408 Canada,
21
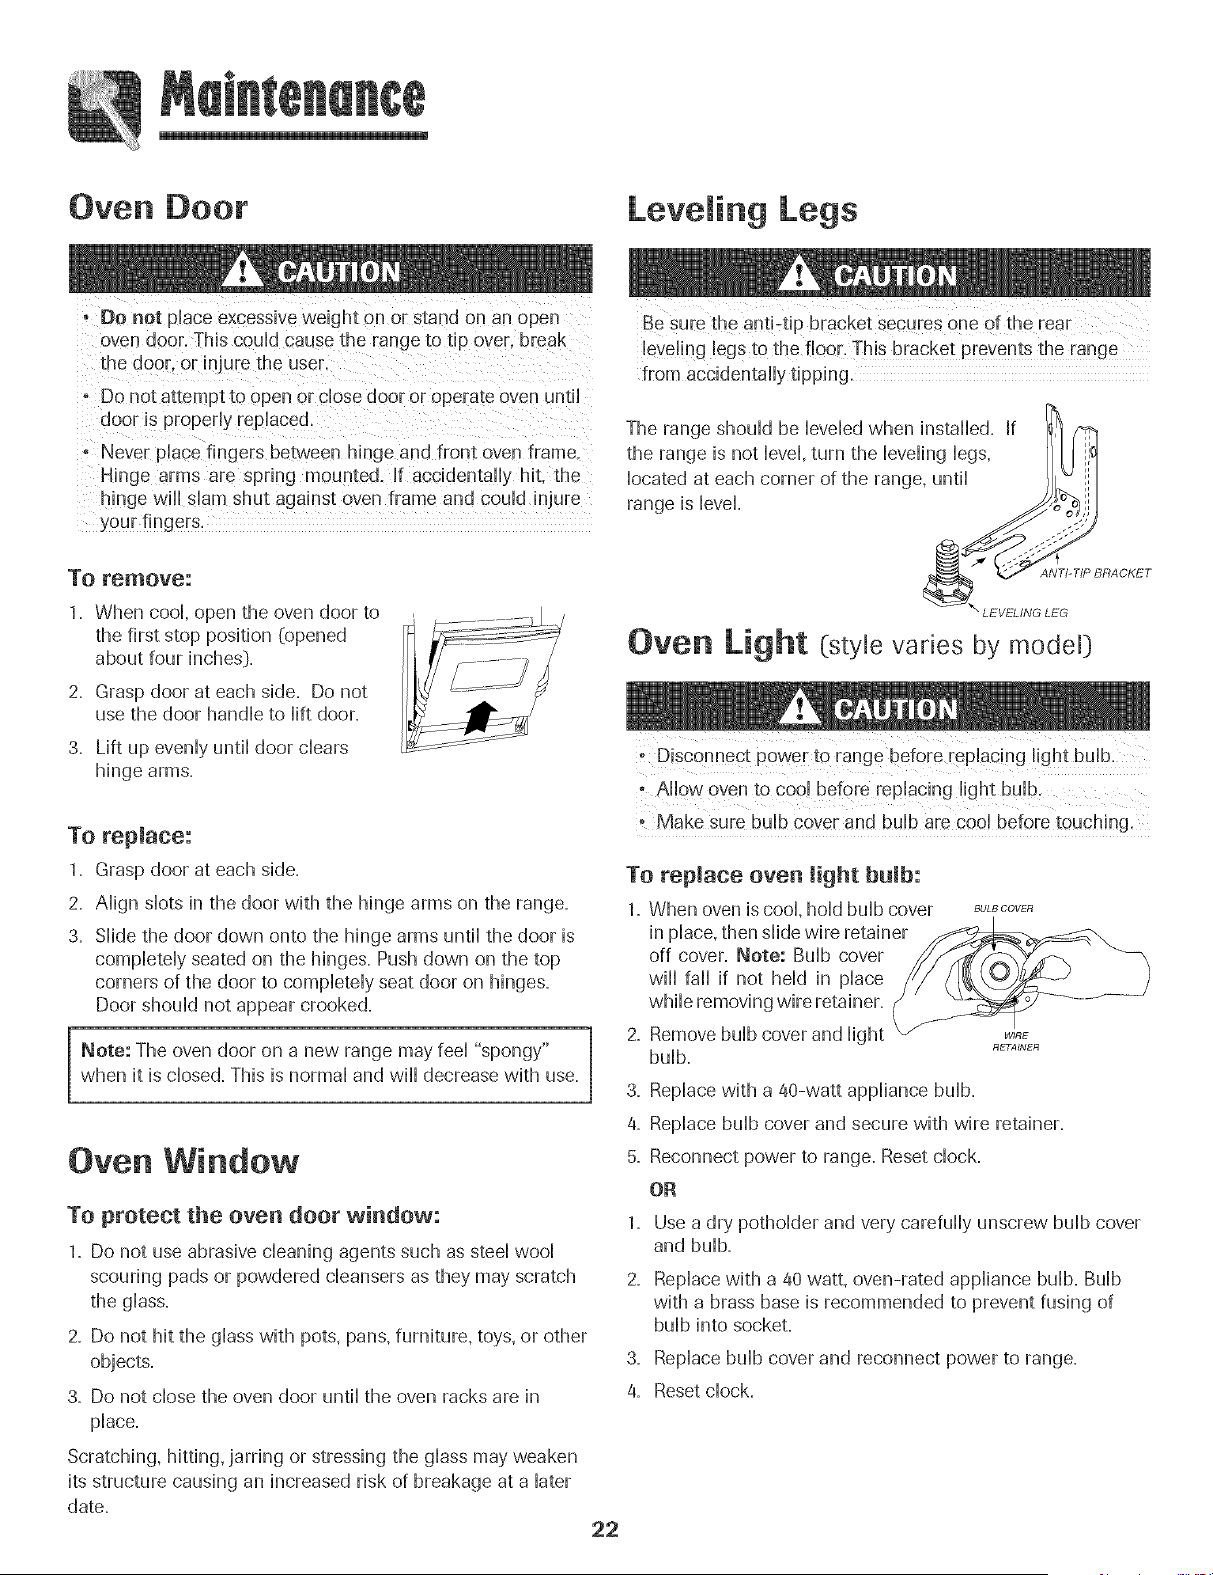
Oven Door
, Do not place excessive weight on or stand on an open
o_en door. This could cause the range to tip o\ er. break
Leve ing Legs
Do not attempt to open or close door or operate oven until
door is properly replaced.
Never place fingers between hinge and front oven frame.
Hinge arms are sprung mounted, if accidentally hit. the
hinge will siam shut against oven frame and could injure
your fingers.
Be sure the anti-tip bracket Secures one of the rear
leveling legs to the floor. This bracket prevents the range
from accidentally tipping.
To remove:
1. When cool, open the oven door to
the first stop position (opened
about four inches}.
2. Grasp door at each side. Do not
use the door handle to lift door.
3. Lift up evenly until door clears
hinge arms.
To replace:
1. Grasp door at each side.
2. Align slots in the door with the hinge arms on the range.
3. Slide the door down onto the hinge arms until the door is
completely seated on the hinges. Push down on the top
corners of the door to completely seat door on hinges.
Door should not appear crooked.
Note: The oven door on a new range may feel "spongy"
when it is closed. This is normal and will decrease with use.
Oven Window
To protect the oven door window:
1. Do not use abrasive cleaning agents such as steel wool
scouring pads or powdered cleansers as they may scratch
the glass.
2. Do not hit the glass with pots, pans, furniture, toys, or other
objects.
3. Do not close the oven door until the oven racks are in
place.
Scratching, hitting, jarring or stressing the glass may weaken
its structure causing an increased risk of breakage at a later
date.
22
Oven Light (style varies by model)
- Make sure buib Cover and bulb are coo! before touching,
To replace oven light bulb:
1. When oven is cool, hold bulb cover BuL_oovER
in place, then slide wire retainer
off cover. Note: Bulb cover
will fall if not held in place
while removing wire retainer. (
\
2. Remove bulb cover and light
RETAINER
bulb=
3= Replace with a @-watt appliance bulb.
4= Replace bulb cover and secure with wire retainer.
5. Reconnect power to range. Reset clock.
OR
1. Use a dry potholder and very carefully unscrew bulb cover
and bulb.
2. Replace with a a0 watt, oven-rated appliance bulb. Bulb
with a brass base is recommended to prevent fusing of
bulb into socket.
3. Replace bulb cover and reconnect power to range.
4. Reset clock.
Remova of Gas Appmiance
Gas appHiance connectors used to connect this appHianceto
the gas suppHyare not designed for continuous movement.
Once instaHHed,DO NOT repeatedHymove this gas appHiance
for cHeaningor to reHocate=If this appHiancehas to be moved
and/or removed for servicing, foHHowthe procedure described
in the instaHHationinstructions. For information, contact
Maytag Customer Assistance at 1-800-888-9900 U.S.A.or
1-800-688-2002 Canada.
To prevent range from accidentaHHytipping, range must be
secured to the floor by sHidingrear HeveHingHoginto the anti-
tip bracket.
Storage [}rawer
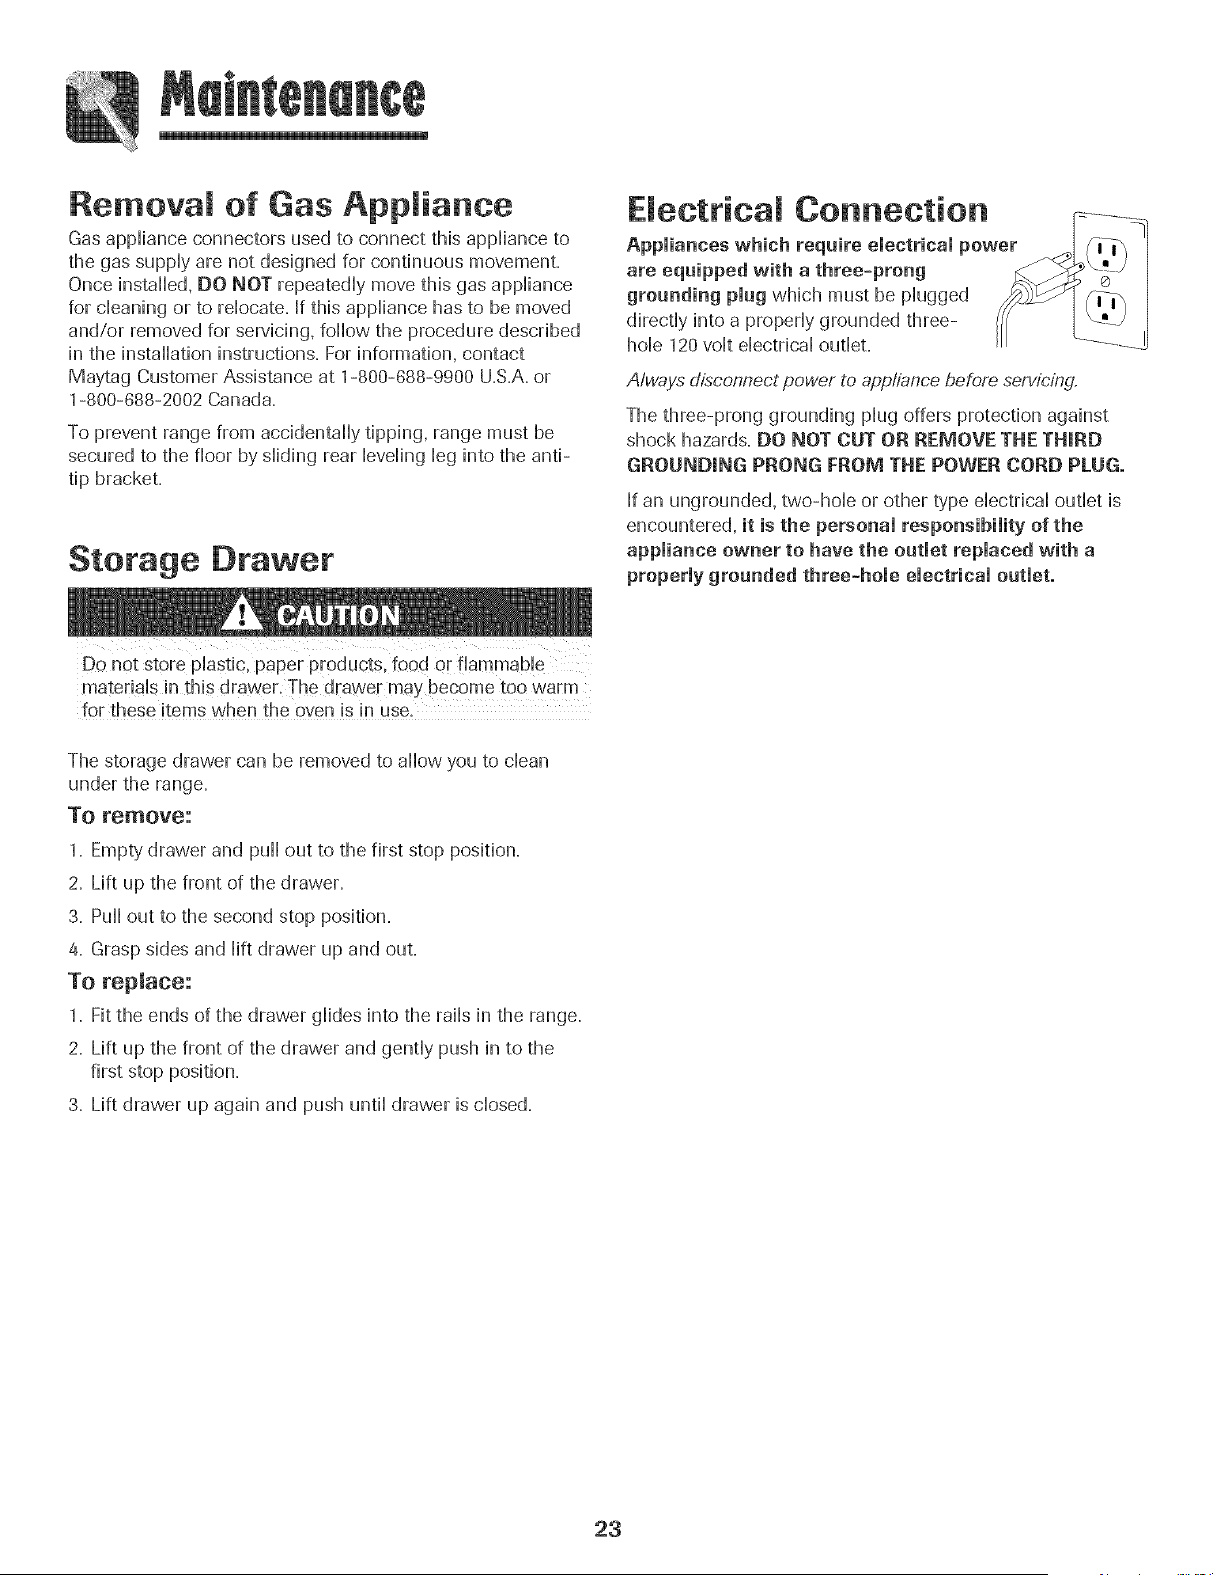
E ectticam Connection
Appmiances which require emectrical power
are equipped with a three-prong
grounding plug which must be pHugged
directHyinto a properHygrounded three-
home120 voHteHectricaHoutHet.
Always disconnect power to app!;iancebefore servicing.
The three-prong grounding pHugoffers protection against
shock hazards. DO NOT CUT OR REMOVE THE THIRD
GROUNDING PRONG FROM THE POWER CORD PLUG.
If an ungrounded, two-hollo or other type eHectricaHoutHet is
encountered, it is the personal responsibility of the
appliance owner to have the outlet replaced with a
properly grounded three=hole electrical outlet.
Do not store pHastic,paper products, food or fiammabHe
materiaHsin this drawer. The drawer may become too warm
for these items when the oven is in use.
The storage drawer can be removed to aHHowyou to dean
under the range.
To remove:
1=Empty'drawer and puHHout to the first stop position,
2= Lift up the front of the drawer.
3. PuHHout to the second stop position.
4. Grasp sides and Hiltdrawer up and out.
To replace:
1. Fit the ends of the drawer gHidesinto the raiHsin the range.
2. Lift up the front of the drawer and gentHypush in to the
first stop position.
3. Lift drawer up again and push untiHdrawer is dosed.
23
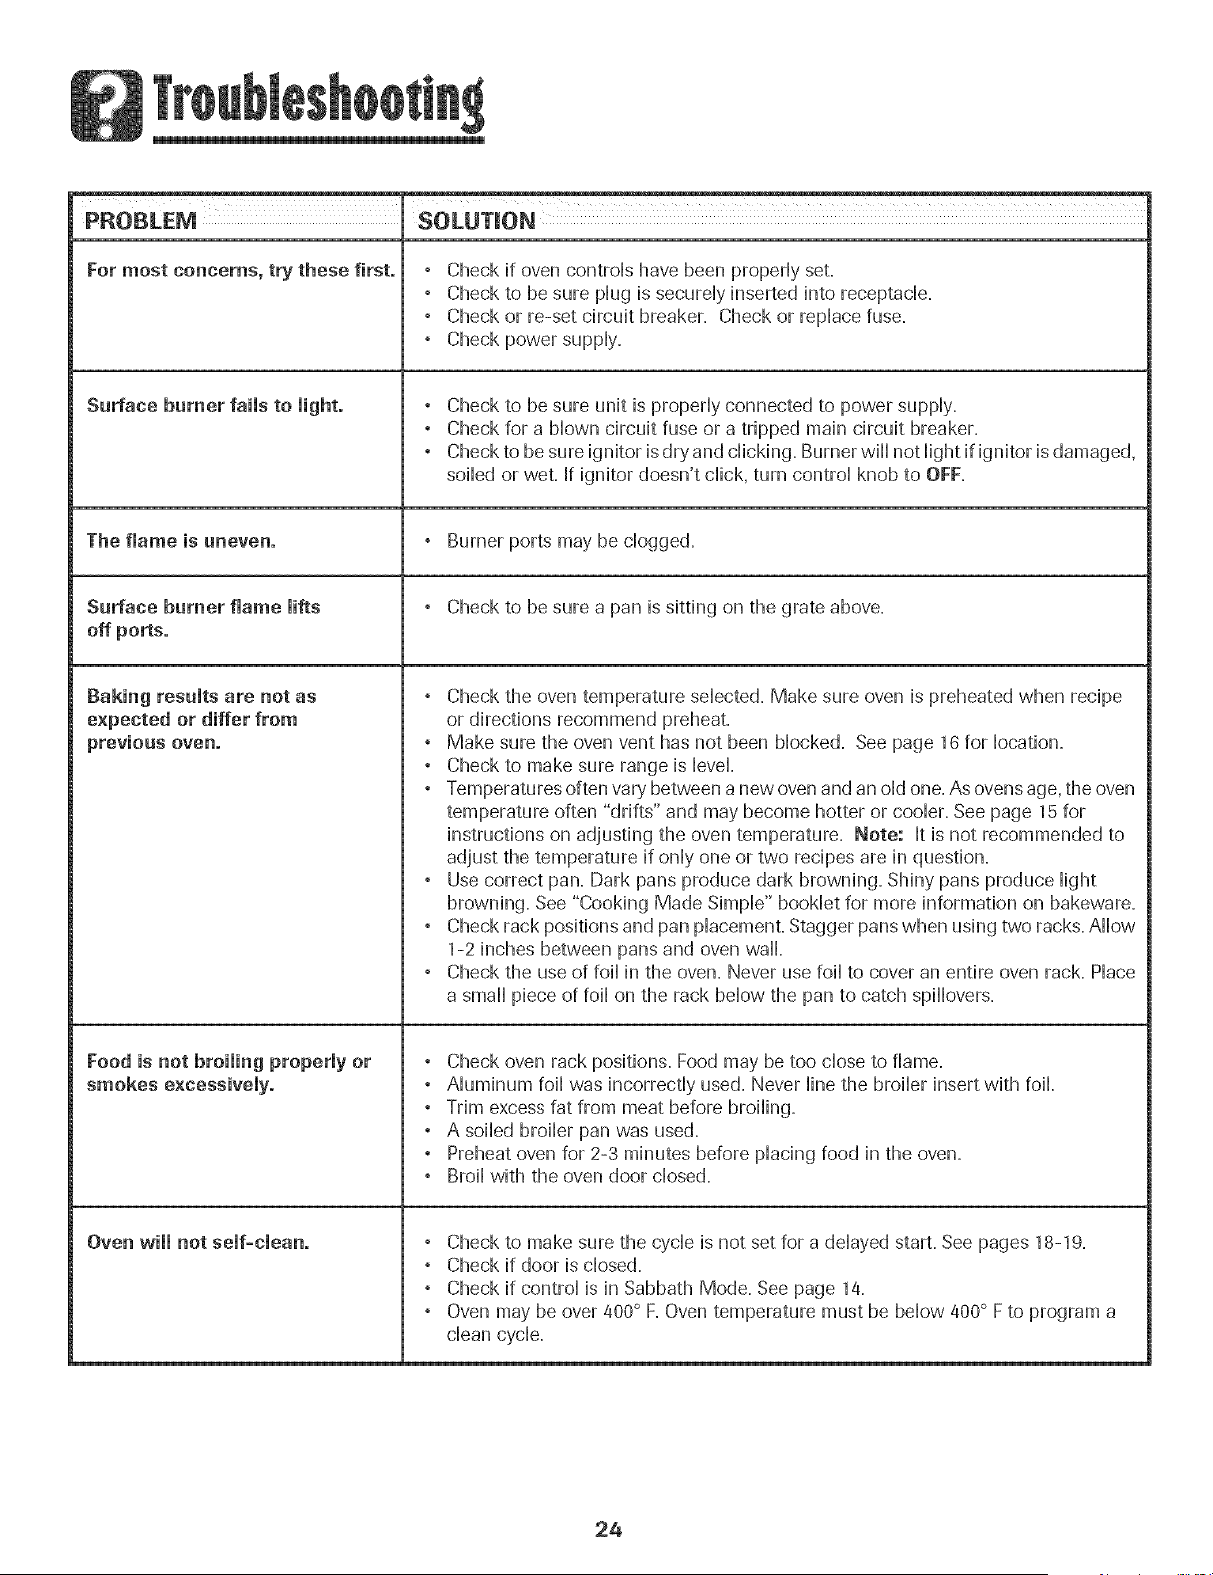
PROBLEM SOLUTION
For most concerns, try these first. ° Check if oven controHshave been properHyset.
, Check to be sure pHugis secureHyinserted into receptacle.
, Check or re-set circuit breaker. Check or repHacefuse.
, Check power suppHy.
Surface burner fails to light. , Check to be sure unit is propedy connected to power suppHy.
, Check for a Mown circuit fuse or a tripped main circuit breaker.
, Check to be sure ignitor is dry and cHicking.Burner will not Hightif ignitor is damaged.
soiHedor wet. If ignitor doesn't chick, turn controHknob to OFF.
The flame is uneven. , Burner ports may be clogged.
Sarface burner flame lifts , Check to be sure a pan is sitting on the grate above.
off ports.
Baking results are not as , Check the oven temperature selected. Make sure oven is preheated when recipe
expected or differ from or directions recommend preheat.
previous oven. , Make sure the oven vent has not been blocked. See page 16 for location.
, Check to make sure range is level.
, Temperatures often vary between a new oven and an old one. As ovens age. the oven
temperature often "drifts" and may become hotter or cooler. See page 15 for
instructions on adjusting the oven temperature. Note: It is not recommended to
adjust the temperature if only one or two recipes are in question.
, Use correct pan. Dark pans produce dark browning. Shiny pans produce light
browning. See "Cooking Made Simple" booklet for more information on bakeware.
, Check rack positions and pan placement. Stagger pans when using two racks. Allow
1-2 inches between pans and oven wall.
, Check the use of foil in the oven. Never use foil to cover an entire oven rack. Place
a small piece of foil on the rack below the pan to catch spillovers.
Food is not broiling properly or , Check oven rack positions. Food may be too close to flame.
smokes excessively. , Aluminum foil was incorrectly used. Never line the broiler insert with foil.
, Trim excess fat from meat before broiling.
, A soiled broiler pan was used.
, Preheat oven for 2-3 minutes before placing food in the oven.
, Broil with the oven door closed.
Oven will not self-clean. ° Check to make sure the cycle is not set for a delayed start. See pages 18-19.
, Check if door is closed.
, Check if control is in Sabbath Mode. See page 14.
, Oven may be over 400° F. Oven temperature must be below 400° F to program a
clean cycle.
24
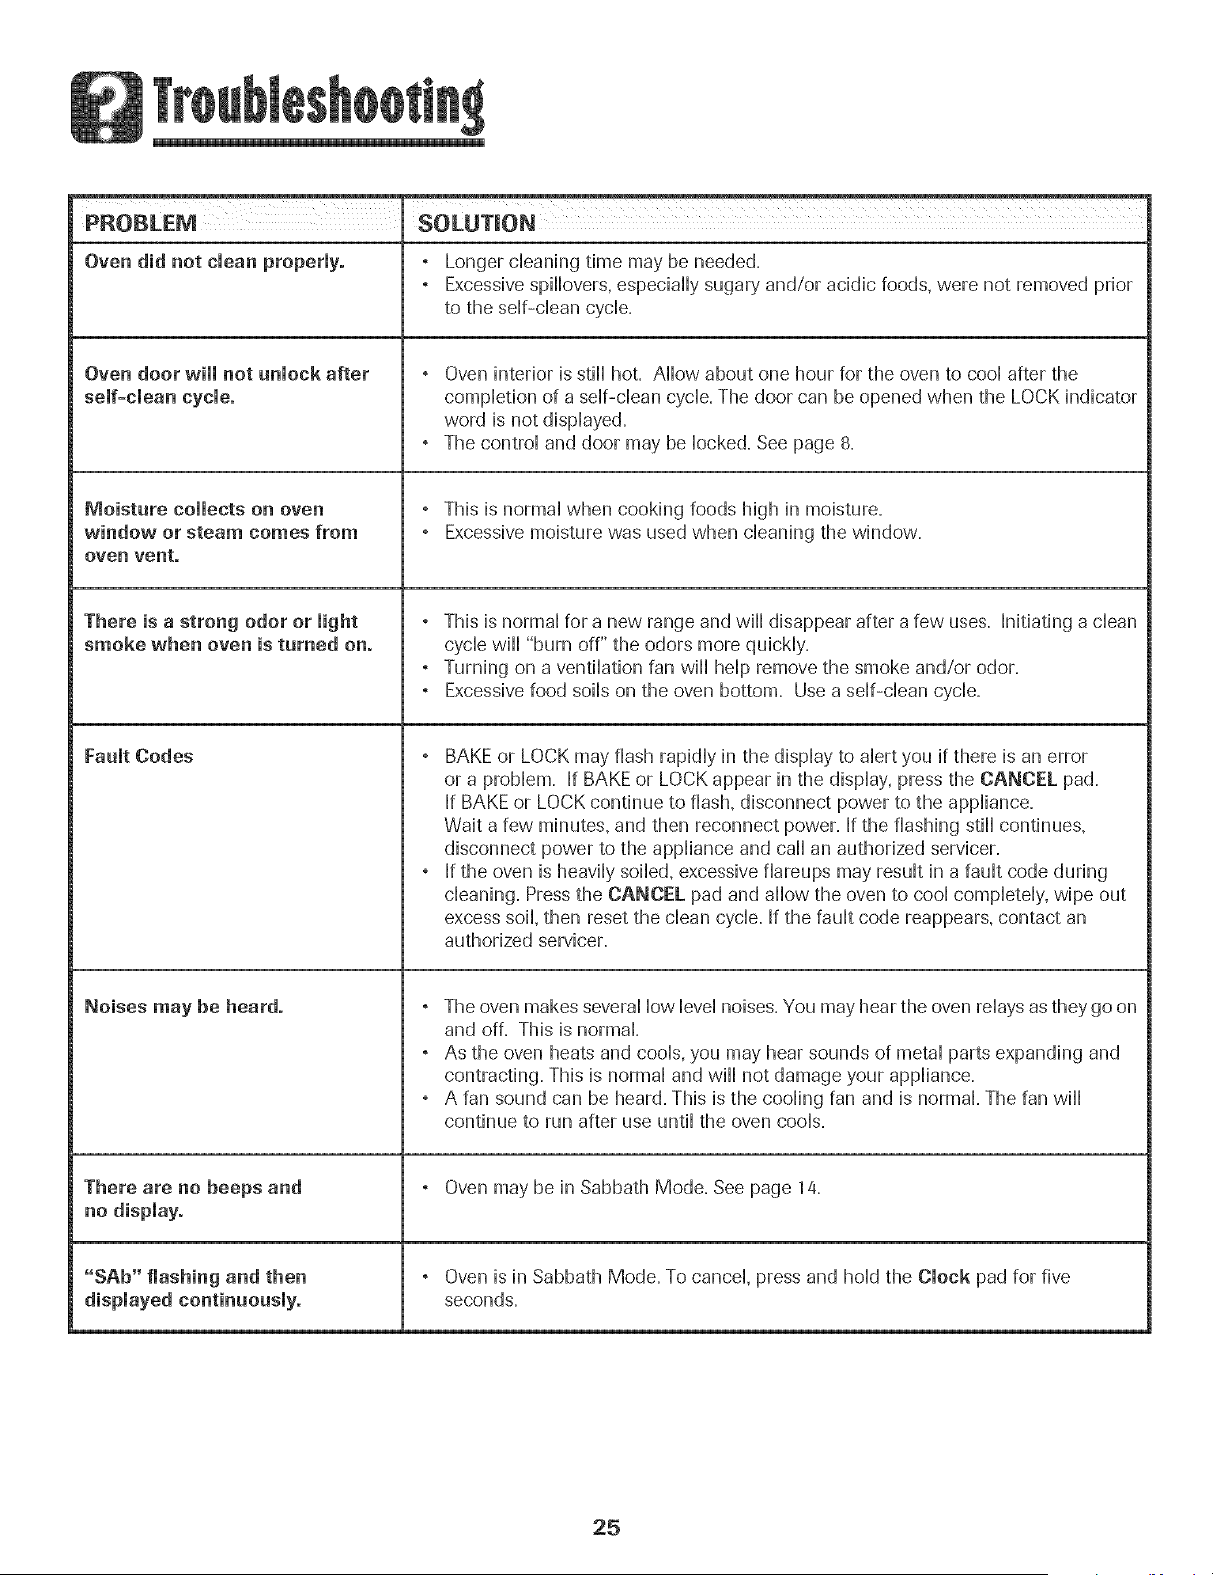
PROBLEM $OLUTmON
Oven did not clean properly. ° Longer cHeaningtime may be needed.
° Excessive spiHovers, especially sugary and/or acidic foods, were not removed prior
to the stir-dean cycle.
Oven door will not unlock after
self=clean cycle.
Moisture collects on oven
window or steam comes from
oven vent.
There is a strong odor or might
smoke when oven is turned on.
Fault Codes
Noises may be heard.
There are no beeps and
no display.
"SAb" flashing and then
Oven interior is still hot. AHow about one hour for the oven to cooHafter the
completion of a self-clean cycle. The door can be opened when the LOCK indicator
word is not displayed.
The control and door may be locked. See page 8.
, This is normal when cooking foods high in moisture.
, Excessive moisture was used when cleaning the window.
, This is normal for a new range and wi[[ disappear after a few uses. Initiating a dean
cycle will "burn off" the odors more quickly.
, Turning on a ventilation fan will help remove the smoke and/or odor.
, Excessive food soils on the oven bottom. Use a self-clean cycle.
° BAKE or LOCK may flash rapidly in the display to alert you if there is an error
or a problem. If BAKEor LOCK appear in the display, press the CANCEL pad.
If BAKE or LOCK continue to flash, disconnect power to the appliance.
Wait a few minutes, and then reconnect power. If the flashing still continues,
disconnect power to the appliance and call an authorized servicer.
° If the oven is heavily soiled, excessive flareups may result in a fault code during
cleaning. Press the CANCEL pad and allow the oven to cool completely, wipe out
excess soil, then reset the clean cycle. If the fault code reappears, contact an
authorized servicer.
° The oven makes several low level noises. You may hear the oven relays as they go on
and off. This is normal.
° As the oven heats and cools, you may hear sounds of metal parts expanding and
contracting. This is normal and will not damage your appliance.
° A fan sound can be heard. This is the cooling fan and is normal. The fan will
continue to run after use until the oven cools.
° Oven may be in Sabbath Mode. See page 14.
° Oven is in Sabbath Mode. To cancel, press and hold the Clock pad for five
seconds.
25

26
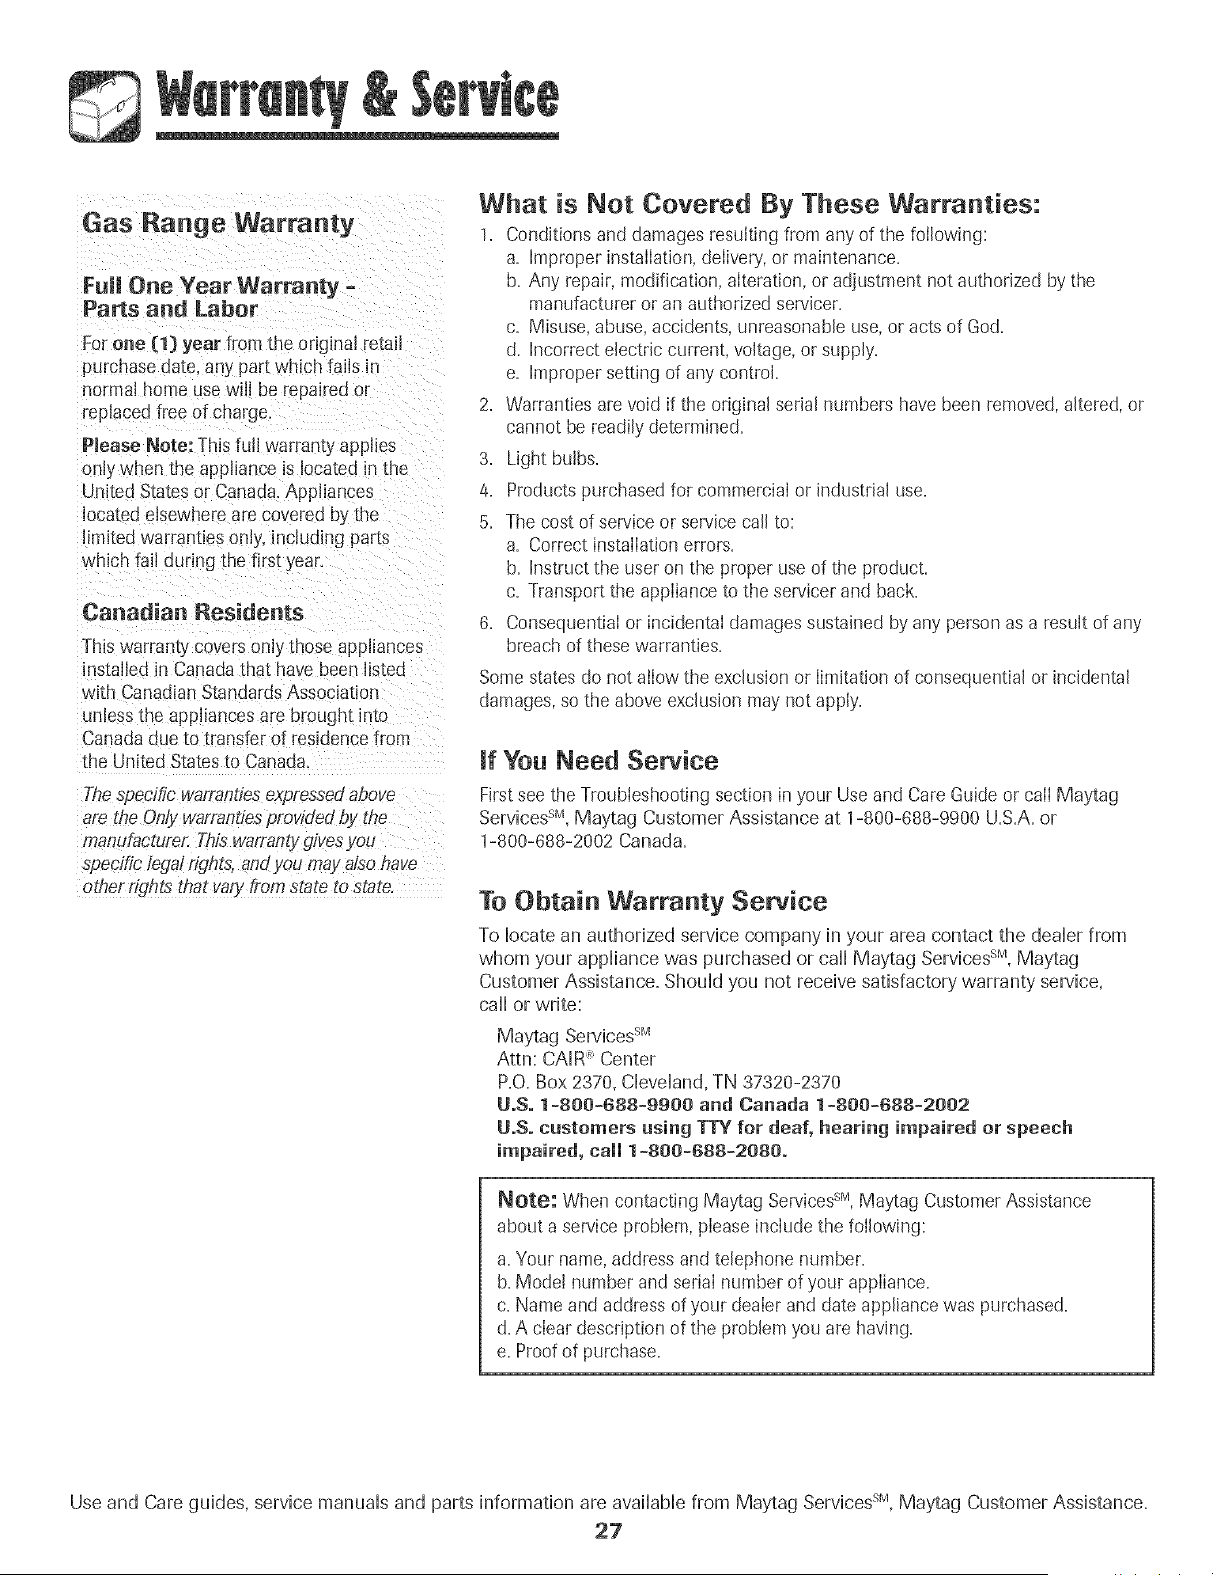
Gas Range Warranty
Full One Year Warranty -
Parts and Labor
For one ( 11}year from the original retail
purchase date, any part which fails iF
normal hon_euse will be repaired or
replaced free of char{_e.
Please Nero: This fulJwarranty applies
only when the appliance is located inthe
United States or Canada.Appliances
located elsewhere are covered by the
limited warranties only, including parts
which fail during the first year,
Canadian Residents
Thiswarranty covers only those appliances
instdiea in Canada that have been listed
with Canadian Standards Association
unless Eheappliances are brought n_o
Canada due _otransfer of resioencefrom
the United States to Canada.
Thespecific'warrantiesexpressedabove
are the Only warrantiesprodded by the
manufaeturer,Th£ warrantygivesyou
specific'legal rights, andyou may also have
other rights that varyfroth,state to state.
What is Not Covered By These Warranties:
1. Conditions and damages resuIting from any of the following:
a. Improper installation, delivery, or maintenance.
b. Any repair, modification, alteration, or adjustment not authorized by the
manufacturer or an authorized servicer.
c. Misuse, abuse, accidents, unreasonable use, or acts of God.
d. Incorrect electric current, voltage, or supply.
e. Improper setting of any control.
2. Warranties are void if the original serial numbers have been removed,altered, or
cannot be readily determined.
3. Light bulbs.
4. Products purchased for commercial or industrial use.
5. The cost of service or service call to:
a. Correct instailation errors.
b. Instruct the user on the proper use of the product.
c. Transport the appliance to the servicer and back.
8. Consequential or incidental damages sustained by any person as a result of any
breach of these warranties.
Some states do not allow the exclusion or limitation of consequential or incidental
damages, so the above exclusion may not apply.
if You Need Service
Firstsee the Troubleshooting section in your Use and Care Guide or call Maytag
ServicessM,Maytag Customer Assistance at 1-800-688-9900 U.S.A.or
1-800-688-2002 Canada.
To Obtain Warranty Service
To locate an authorized service company in your area contact the dealer from
whom your appliance was purchased or call Maytag ServicessM,Maytag
Customer Assistance= Should you not receive satisfactory warranty service,
call or write:
Maytag ServicessN
Attn: CAIR': Center
P.O.Box 2370, Cleveland, TN 37320-2370
UoSo1-800=688-9900 and Canada 1-800=688-2002
UoSocustomers using TrY for deaf, hearing impaired or speech
impaired, call 1=800=688=2080o
NOte: When contacting Maytag ServicessM,Maytag Customer Assistance
about a service probiem, pIease inciude the following:
a. Your name, address and telephone number=
b. Model number and seriaI number of your appIiance.
c. Nameand address of your deaIer and date appliance was purchased=
d. A cIear description of the problem you are having.
e. Proof of purchase=
Use and Care guides, service manuals and parts information are available from Maytag ServicessM,Maytag Customer Assistance.
27
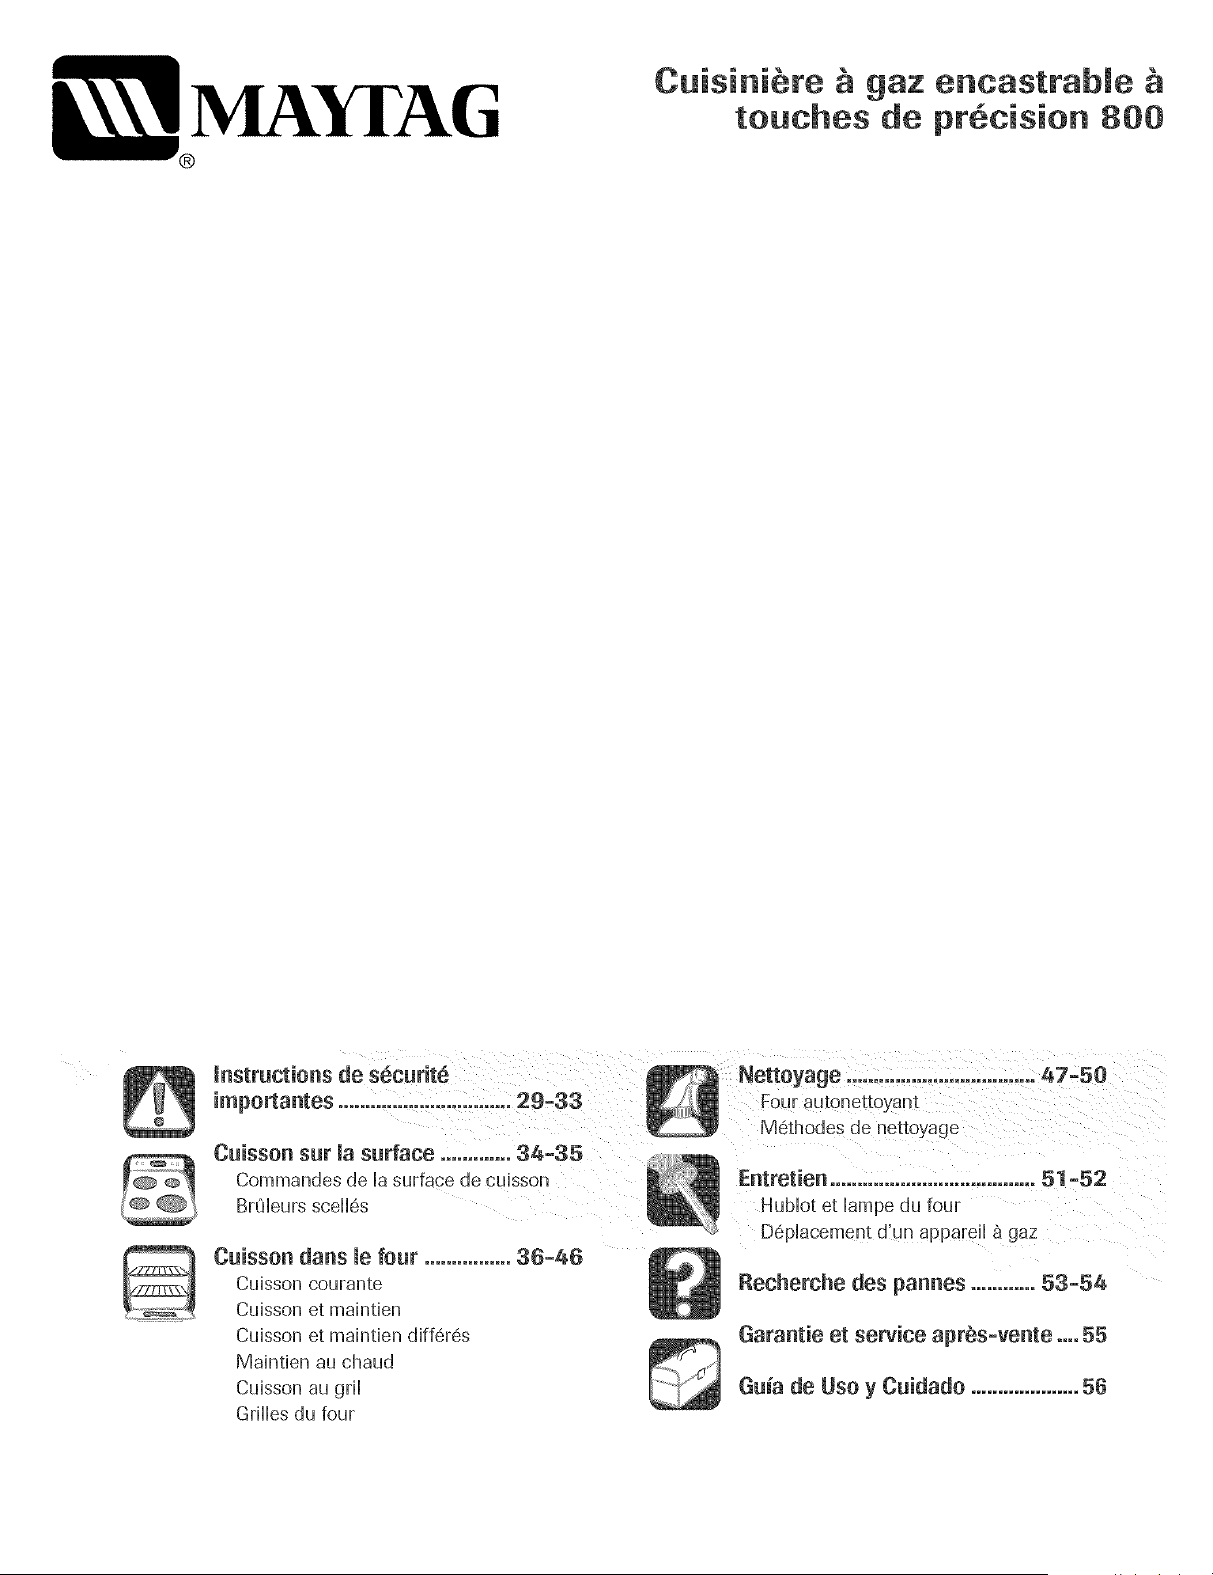
M_& AG
®
Cuisini_re ;_ gaz encastrable t_
touches de pr6cision 800
instructions de s6curit_
Cuisson sur la surface ...,......... 34-35
Commandes de la surface de cuisson
BrSleurs scell6s
Cuisson darts mefour ................ 36=46
Cuisson courante
Cuisson et maintien
Cuisson et maintien diff6r6s
Maintien au chaud
Cuisson au gril
Grilles du four
Four autonettoyant
M6thodes de nettoyage
.......... 42-50
Entretien ...................................... 51-52
HuMot et lampe du four
D6placement d'un appareii a gaz
Recherche des pannes ............ 53=54
Garantieet serviceapres=vente .... 55
Guia de Use y Cuidado ....................56
Consommateur:Veuillezlife !e guide et !eConserverpour
consultation ULterieure,Cons,ervezB [acture dlachat ou le cheque
encaiss_c0mmepreuvede Iachat.
NumSrode modSle
Numero des6rie
Dated'achat
Service _ la cHent6Uede Maytag
{lurid[ au vendredi,8 h _ 20 h, heure de I'Est]
Dartsle Cadredenos prat!quesd'am_liorationc0nstantede la
qualit6 et de la performancede !!os pr0dults de cuissonldes
modifications de I appareilqui ue sont pas mentionn6esdans Ce
Life toutes los instructions avant d'utiliser cot appareii;
observer toutes bs instructions pour eliminer bs risques
d'incendie, choc 6bctrique, dommages materiels et corporeb
que pourrait susciter une utilisation incorrecte de Fappareil,
Utiliser I'appareil uniquement pour bs fonctions pr@ues,
d@rites dans ce guide
Pour ane utilisation adequate et en sdcurit_ :i[ faut que
Fappareil soit convenabbment install6 pa un technicien
qualifi& et reli6 a la terre. Ne pas r6gbr, r@arer n rempBcen
un composant, a morns que ceB ne soit s p@ifiq uement
recommand6 darts ce guide, Toute autre reparation doit 6tre
effectu6e pa un technicien qualifi6 Demander a Finstallateu
de montren ou se trouve b robinet d'arr6t de gaz et comment
b former en cas d'urgence,
Toujours d6brancher [a ppareil avant d'y faire de [entretien,
cenCenta#t le Setdce apr_s?vel_teo
Les instructions de s@urite importantes et bs paragraphes
<<avertissement >>de ce guide ne sont pas destines 8 couvrir
toutes bs conditions et situations qui pourraient se presenter.
II faut faire preuve de bon sons, de prudence et de soin Iors de
Finstdlation, de Fentretien ou du fonctionnement de Fappareil.
Toujours prendre contact avec le fabricant darts b cas de
problames ou de conditions qui ne seraient pas comprises.
Reconna tre Ues6tiquettes, paragraphes et
symboUessur Uas6curit6
Si les directives donn_es dan s le pr6sent guide ne
sent pas respeet_es _ mamettre,il y a risque d'incendie
ou d'explesion peuvant causer des dommages, des
bless_ res et mSme la _o_
- Ne pas ranger ni utiliser _'essenee eu a_tre vapeur
ou liquide inflammable a pre×imit_ _e cet appareil
ou de tout autre appareil.
- QUE FAIRE S! L'ON SENT ONE ODEUR DE GAZ :
. Ne mettre aucun appareil en marche.
. Ne pas teacher _ _n interrupteur _leetrique,
o N utiliser aucun t_l_phone _e _i_euble°
- Se ren_re ehez un veisin et t_l_phoner
imm_diate_ent a _a co_pagnie _e gaz. Suivre _es
_irectives _onn_es par le pr_pos_ _e la
eo_pagnie _e gazo
. S'il est i_possible de join_re la eo_pagnie _le
gaz, t_l_phoner au sewiee ees incen_ieso
- L'instailatien et les r_parations _oivent etre
eonfi_es _ un insta_lateur competent, _ une
entreprise _e service ou _ la ee_pagnie _e gaz.
POURR_-!ENT r6sulter en de _raves bbSSures ou m6me !a
mort.
Une fuite de gaz pourrait Survenir dans b Syst6meet
POURRAIENTr6sulter en des blessures mineures.
(homologatio n UL}_ Installer et utiiiser le d6tecteur
conform_ment aux instructions du fabricant.
29
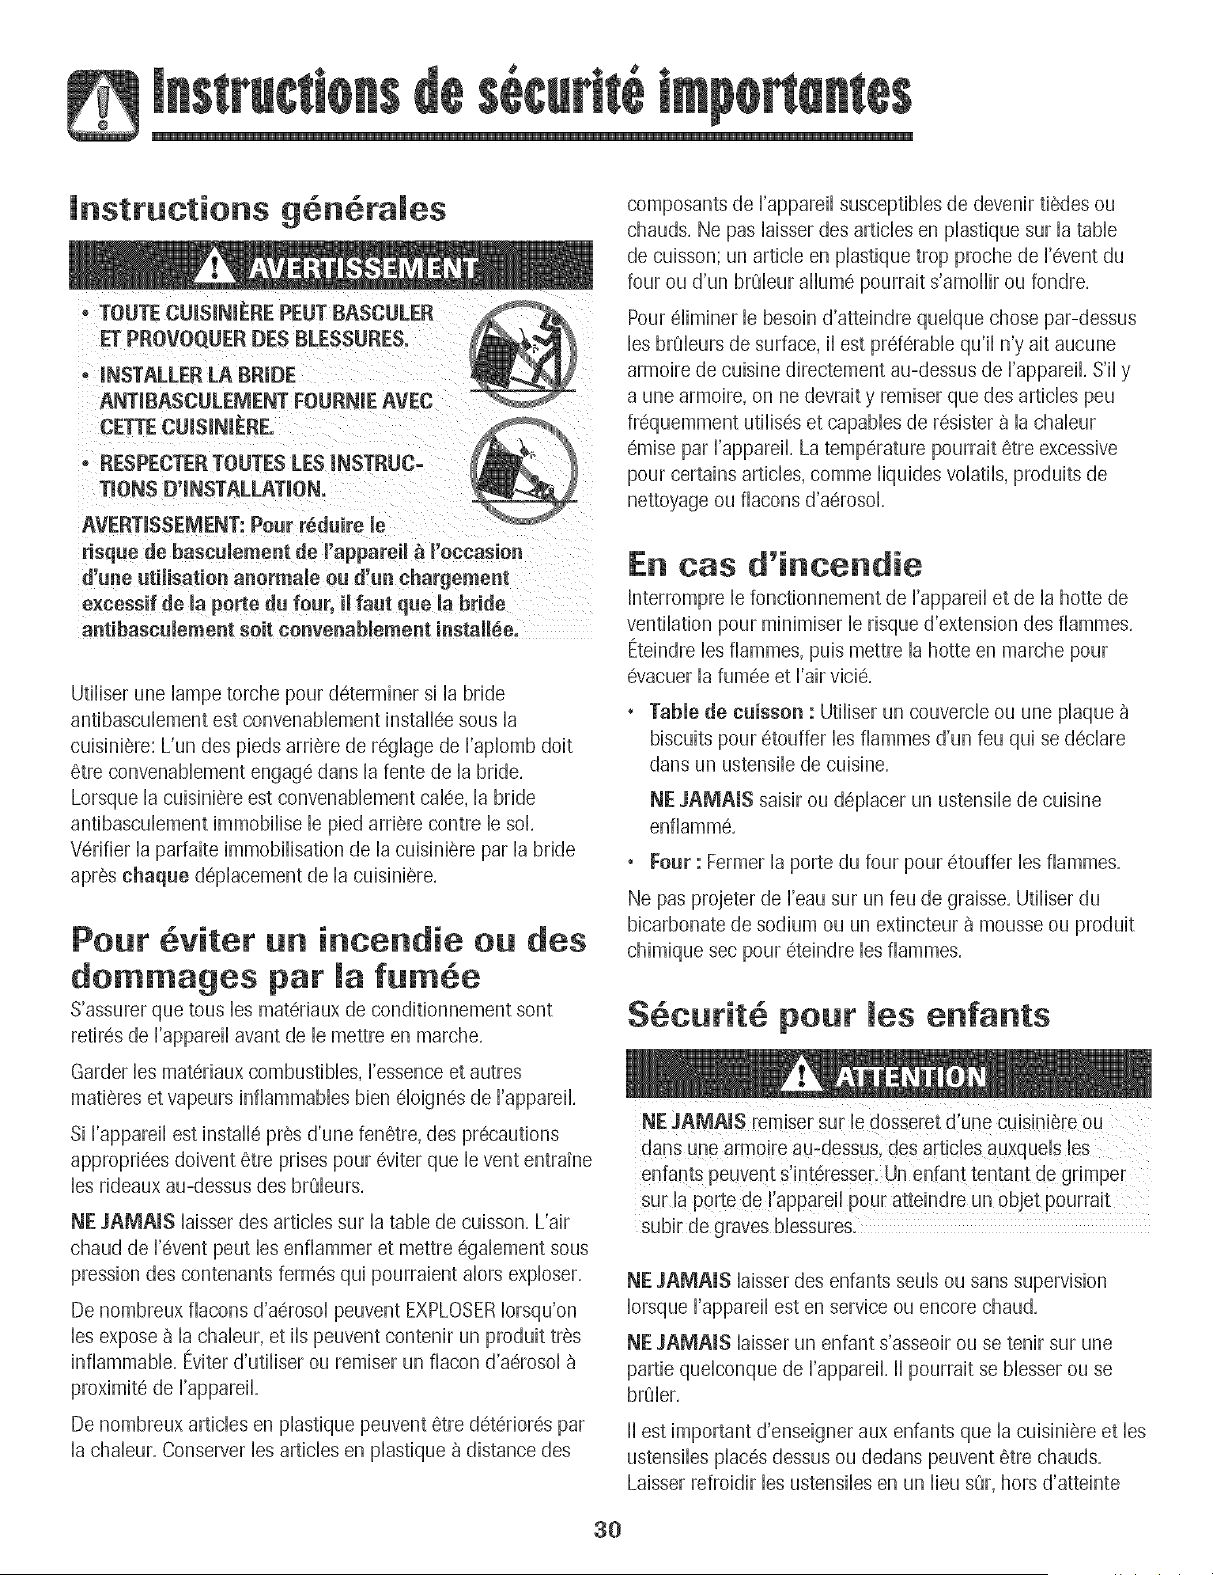
instructions g nera es
° TOUTE CUm$1NIEREPEUT BASCULER
ET PROVOQUER DES BLESSURES.
° INSTALLER LA BRIDE
ANTiBASCULEMENT FOURNIE AVEC
CETrE CUJSJNJERE.
° RESPECTERTOUTES LES mNSTRUC-
TmONSD'mNSTALLATBON.
AVERTISSEMENT: Pour r_duire Be
risque de bascubment de I'appareil _ i'eccasion
d'uae utilisatien anermale eu d'un chargement
e×cessif de maporte du four, il faut que la bride
aatibasculement seit eenvenablement install_e.
Utiliser une lampe torche pour determiner si la bride
antibascubment est convenabbment installee sous la
cuisiniere: L'un des pie@ arriere de reghge de Faplomb doit
6tre convenabbment engage darts la fente de la bride,
Lorsque la cuisiniere est convenabbment calee, la bride
antibascubment immoNise b pied arriere contre b sol,
Verifier la parfaite immoNisation de la cuisiniere par la bride
apres ehaqae @placement de la cuisiniere,
Pour viter ur| incendie ou des
dommages par la fumee
S'assurer que tous bs materiaux de conditionnement sont
retires de I'appareil avant de b mettre en marche,
Garder bs materiaux combustibles, Fessenceet autres
matieres et vapeurs inflammables bien eloignes de Fappare&
Si I'appareil est install6 pres d'une fenetre, des precautions
appropriees doivent 6tre prises pour @iter que b vent entrame
bs rideaux au-dessus des brQburs,
NE JAMAIS laisser des articles sur la table de cuisson, L'air
chaud de F@ent peut bs enfiammer et mettre egabment sous
pression des contenants fermes qui pourraient dors exploser,
De nombreux flacons d'aerosol peuvent EXPLOSERIorsqu'on
bs expose _ la chabur, et ils peuvent contenir un produit tres
inflammable, Eviter d'utiliser ou remiser un flacon d'aerosol
proximite de Fappareik
De nombreux articles en pBstique peuvent 6tre deteriores par
la chabur, Conserver bs articles en plastique _ distance des
composants de ['apparei[ susceptibbs de devenir tiedes ou
chauds, Ne pas laisser des articles en plastique sur la table
de cuisson; un article en plastique trop proche de I'@ent du
four ou d'un brQleur allume pourrait s'amollir ou fondre,
Pour eliminer le besoin d'atteindre quelque chose par-dessus
les brQburs de surface, il est preferable qu'il n'y air aucune
armoire de cuisine directement au-dessus de I'appareil, S'il y
a une armoire, on ne @wait y remiser que des articles peu
frequemment utilises et capables de resister a la chaleur
6mise par I'appareil, La temperature pourrait etre excessive
pour certains articles, comme liquides volatils, produits de
nettoyage ou flacons d'aerosol,
En cas d'incendie
Interrompre b fonctionnement de Fappareil et de la hotte de
ventilation pour minimiser b risque d'extension des fiammes,
Eteindre bs fiammes, pub mettre la hotte en marche pour
@acuer la fumee et Fair vicie,
, Table de cuisson : Utiliser un couverde ou une plaque
biscuits pour etouffer bs fiammes d'un feu qui se declare
darts un ustensib de cuisine,
NE JAMAIS saisir ou d@Bcer un ustensib de cuisine
enfiamme,
, Four : Fermer la porte du four pour 6touffer bs fiammes,
Ne pas projeter de Feau sur un feu de graisse, Utiliser du
bicarbonate de sodium ou un extincteur a mousse ou produit
chimique sec pour eteindre bs fiammes,
S curit6 pour enfants
NE JAMAIS remiser surle dosseret d'une cuisini6re ou
enfants peuvent s'intdresser, Un enfant tentant de gEimper
subir de groves bbssure&
NE JAMAIS iaisser des enfants seuis ou sans supervision
Iorsque I'appareil est en service ou encore chaud,
NE JAMAIS laisser un enfant s'asseoir ou se tenir sur une
partie quelconque de I'appareil, II pourrait se blesser ou se
brOler,
II est important d'enseigner aux enfants que la cuisiniere et les
ustensiles places dessus ou dedans peuvent etre chauds,
Laisser refroidir les ustensiles en un lieu sQr, hors d'atteinte
30
des enfants. II est important d'enseigner aux enfants qu'un
appareiI menager n'est pas un jouet, et qulb ne doivent
toucher aucune commande ou autre composant de rappare&
Familiarisation avee l'appareil
NE JA_IAIS utiliser la porte de four comme tabouret/siege/
escabeau: ceci pourrait faire bascuUerU'appareil et entramer
doramages corporels serbux.
NE JAMAmS utHiser la cuisJniere comme source de chaleur
pour le chauffage de la piece. Sinon. un empoisonnement au
monoxyde de carbone pourrait s'ensuivre ainsi qu'une
surchauffe du four.
NE JAMAmS mcouvmr les fentes, ouvertums ou passages
de la sole de four ni la grille toute entiere avec un materiau
comme du papier d'aluminium. Sinon, la circulation de raft
dans le four sera entravee et donc entra[ne_ un
empoisonnement au monoxyde de carbone. Le papier
d'aluminium peut aussi emprisonner de la chaleur el
entra[ner un risque d'incendie,
NE JAMAIS obstruer la circulation de I'air de combustion et
de ventilation au niveau de r@ent de four ou des entrees
d'air. Sinon. I'air ne parvuent pas correctement aux brQleurs
et donc cela peut poser un nsque d'empolsonnement au
monoxyde de carbone,
L'event de four est situ6 _ rarriere de la surface de cuisson.
Evitez de toucher b voisinage de I'event de four Iorsque b four
est utilise et pendant plusieurs minutes apres I'arret du four.
Certains composants de r@ent et la zone voisine peuvent
devenir suffisamment chauds pour provoquer des brQlures.
Apres I'arret du four, ne touchez pas r@ent de four ou la zone
voisine avant que ces composants aient pu se refroidir
suffisamment.
Autres surfaces potentielbment chaudes : table de cuisson,
zones faisant face 8 la table de cuisson, event de four, zone
voisine de r@ent, porte de four et zone voisine de porte et de
huNot.
Ne touchez pas I'ampoule chaude du four avec un linge
humide; le choc thermique pourrait la briser, Si tel est le cas,
debranchez I'appareil avant de retirer I'ampoule pour eviter
Ne pas remiser des aliments ou ustensiles de cuisine sur la
table de cuisson ou dans le four,
Cuisson et s6curit
Placer toujours un ustensiie sur un brQieur de surface avant de
i'aiiumer. Veiiier a bien connaitre ia correspondance entre ies
boutons de commande et ies brQieurs. Veiiier a aiiumer ie
brQieur correct et verifier que ie brQieur s'aiiume
effectivement. A ia fin de ia periode de cuisson, eteindre ie
brQieur avant de retirer i'ustensiie, pour eviter une exposition
aux fiammes du brQieur.
Veiller a toujours ajuster correctement la taille des flammes
pour qu'elles ne d@assent pas sur la peripherie de I'ustensile,
Des flammes de trop grande taille sur un brQleur sont
dangereuses, elles entrament un gaspillage d'energie et elles
peuvent faire subir des dommages _ I'ustensile, a I'appareil ou
I'armoire situee au-dessus,
NE JAMAIS iaisser un brQieur de surface aiiume sans
surveillance, particulierement avec une puissance de
chauffage elevee ou Iors d'une operation de friture, Un
debordement pourrait provoquer la formation de fumee et des
produits gras pourraient s'enflammer, Eiiminer des que
possible les produits gras renverses, Ne pas utiliser une
puissance de chauffage elevee pendant une periode
proiongee,
NF JAMAIS faire chauffer un recipient non ouvert dans le
four ou sur un brQleur de surface; I'accumulation de pression
dans le recipient pourrait provoquer son eclatement et de
graves dommages materiels ou corporels,
Utiliser des maniques robustes et s@hes, Des maniques
humides peuvent provoquer la formation de vapeur brQlante,
Ne jamais utiliser un torchon a vaisselle ou autre article textile
la place de maniques; un tel article pourrait trainer sur un
brQleur et s'enflammer, ou accrocher un ustensile ou un
composant de I'appareil,
Laisser toujours refroidir un recipient d'huile de friture chaude
avant de tenter de le deplacer et le manipuler,
Ne pas laisser la graisse de cuisson ou autre materiau inflam-
mane s'accumuler dans ou pres de I'appareil, de la hotte ou
du ventilateur de I'@ent, Nettoyer frequemment la hotte pour
empecher toute accumulation sur la hotte elle-meme ou sur le
filtre, Lors du flambage d'aliments sous la hotte, mettre le
ventilateur en marche,
NE JAMAmS porter, Iors de I'utilisation de I'appareil, des
vetements faits d'un materiau inflammable, ou amples, ou
Iongues manches, De tels vetements peuvent s'enflammer ou
accrocher la poignee d'un ustensile,
31
Racertoujours[esgrillesa[apositionapproprieedarts[efour
Iorsquelefourestfroid,FairecoulisserlagrilleversI'exterieur
avantd'ajouterouenleverunplat;utiliserpourcelaune
maniquerobusteetseche,Eviterd'introduirelamaindartsle
fourpouryplacerouretirerunplat,S'ilestnecessairede
deplacerunegrilleIorsqu'elleestchaude,utiliserunemanique
seche,Veiller_toujoursarreterlefour_lafind'uneperiode
decuisson,
Ouvrirtoujours[aportedufourtresprudemment,Laisser['air
chaudoulavapeurs'echapperavantderetirer/introduireun
plat,
AVERTmSSEMENT: Metsprepares: Respecterlesinstruc-
tionsdufabricant,Silecontenantoulecouvercleenplastique
d'unmetssurgeleseddormeouestendommagedurantla
cuisson,jeterimmediatementlerecipientetsoncontenu,Les
alimentspourraientetrecontamines,
NEJAMAISgarnirlasoleouunegrilledufouravecdela
feuilled'aluminium,Cecipourraitsusciterunrisquedechoc
electriqueoud'incendie,ouuneautredeteriorationde
I'appareil,Utiliserdelafeuilled'aluminiumuniquementselon
lesinstructionsdeceguide,
Ustensimes et s curit
Utiliser des ustensiles a fond plat comportant une poignee
qu'on peut facilement saisir et qui reste froide, Eviter d'utiliser
un ustensile instable ou ddorme, qui pourrait facilement
basculer, ou dont la poignee est mal fixee, Eviter egalement
d'utiliser des ustensiles de petite taille comportant une
poignee Iourde; ces ustensiles sont generalement instables et
peuvent facilement basculer, Un ustensile Iourd Iorsqu'il est
rempli peut egalement etre dangereux Iors des manipulations,
Veiller a utiliser un ustensile de taille suffisante pour que le
contenu ne risque pas de deborder, Ceci est particulierement
important pour un ustensile rempli d'huile de friture, Verifier
que la taille de I'ustensile est suffisante pour qu'il puisse
recevoir les produits alimentaires a cuire, et absorber
I'augmentation de volume suscitee par %bullition de la
graisse,
Pour minimiser les risques de brOlure, d'infiammation de
matieres et de renversement par contact non intentionnel avec
un ustensile, ne pas orienter la poignee d'un ustensile vers un
brQ[eur adjacent; orienter toujours [a poignee d'un ustensi[e
vers le cote ou I'arriere de I'appareil; ne pas laisser non plus la
poignee d'un ustensile deborder a I'avant de I'appareil, ou_un
jeune enfant pourrait facilement la saisir,
Veiller a ne jamais laisser le contenu liquide d'un ustensile
s'evaporer completement; I'ustensile et I'appareil pourraient
subir des dommages,
Appliquer les instructions du fabricant Iors de I'emploi d'un
sachet pour cuisson au four,
Seuls certains materiaux en verre, vitroceramique, ceramique,
ou certains ustensiles vitri%s/emailles peuvent etre utilises sur
la table de cuisson ou darts le four sans risque de bris sous
I'effet du choc thermique, Observer les instructions du
fabricant Iors de I'utilisation d'un ustensile en verre,
La secur[te de fonctionnement de cet apparel[ a ete testee
I'aide d'ustensiles de cuisine conventionnels, Ne pas utiliser un
ustensile ou accessoire qui n'est pas specifiquement
recommande darts ce guide, Ne pas utiliser de couvre-brOleur,
gril place sur la table de cuisson ou systeme de convection
additionnel, L'utilisation d'un dispositif ou accessoire qui n'est
pas expressement recommande darts ce guide peut degrader
[a securite de ['apparei[ ou sa performance, ou reduire [a
Iongevite des composants,
Nettoyage et s curit
Arreter routes les commandes et attendre le refroidissement
de tousles composants avant de les toucher ou d'entre-
prendre le nettoyage, Ne pas toucher la grille d'un brOleur ou
la zone voisine avant que ces composants aient pu suffisam-
merit refroidir,
Exercer une grande prudence [ors du nettoyage de I'appareil,
Travailler prudemment pour eviter des brQlures par la vapeur
en cas d'utilisation d'un chiffon ou d'une eponge humide Iors
de I'elimination d'un produit renverse sur une surface chaude,
Certains produits de nettoyage peuvent generer des vapeurs
nocives Iorsqu'on les applique sur une surface chaude,
32
Four autonettoyant
dangereuses pour le systeme reproducteur, et impose aux
entreprises commerddes I'obligation de signaler aleurs
clients les risques d'exposition a de telles substances,
Les uti[isateurs de cet apparei[ peuvent etre exposes _ une
faible concentration de certaines substances figurant dens la
dens Uefour Uorsd'une operation dlautonettoyage, liste mentionnee ci-dessus, dont benzene, formaldehyde et
suie, du fait de la combustion incomplete du gaz naturel ou du
Ne laisseraucune nourriture ni ustensile de cuisine, etc,
Nettoyer uniquement les pieces mentionnees dans ce guide,
Ne pas nettoyer le joint de porte; le joint joue un rOle essentiel
quanta I'etancheite, Ne pas frotter, endommager ou deplacer
ie joint, Ne pas utiiiser de produit de nettoyage du four dens
ie four autonettoyant ou sur ies zones voisines,
Avant d'executer une operation d'autonettoyage, retirer la
lechefrite, les grilles du four et les autres ustensiles, et eliminer
par essuyage tout exces de residus renverses pour eviter ia
formation de fumee ou i'infiammation de ces residus,
II est normal que la surface de cuisson devienne chaude
durant une operation d'autonettoyage; par consequent, eviter
de toucher ia surface de cuisson durant i'autonettoyage,
Avertissement et avis
important pour la s curit
La Ioi califomienne <_Safe Drinking Water and Toxic Enforce-
ment Act >>de 1986 {proposition 65} stipule la publication par
le gouverneur de la Califomie d'une liste de substances que
I'etat de Califomie considere comme cancerigenes ou
gaz de petroie iiqudie, Pour minimiser ia combustion
incomplete, veiiier _ ce que ies br0ieurs soient parfaitement
regies, Pour minimiser i'exposition a ces substances, veiiier
bien evacuer ies gaz de combustion a i'exterieur,
Nous informons ies utiiisateurs de cet appareii que iors d'une
operation d'autonettoyage, iis peuvent etre exposes a une
faibie concentration de certaines substances figurant dens la
iiste mentionnee ci-dessus, dont ie monoxyde de carbone,
Pour minimiser [exposition, veiiier ace que ia piece ouse
trouve ie four soit convenabiement aeree durant une operation
d'autonettoyage par i'ouverture d'une fenetre ou d'une porte,
AViS iMPORTANT - OISEAUX FAMIUERS : Les oiseaux ont
un systeme respiratoire tres sensible, Ne pas garder un oiseau
famiiier dens ia cuisine ou dens une piece o8 ii pourrait etre
expose aux fumees, Les fumees emises durant une operation
d'autonettoyage peuvent etre dangereuses ou morteiies pour
un oiseau, de meme que les fumees emises Iors du chauffage
excessif de graisse, huile, margarine, et du chauffage excessif
dans un ustensile _ revetement antiadhesif,
Conserver ces instructions pout consultation ult tieute
33
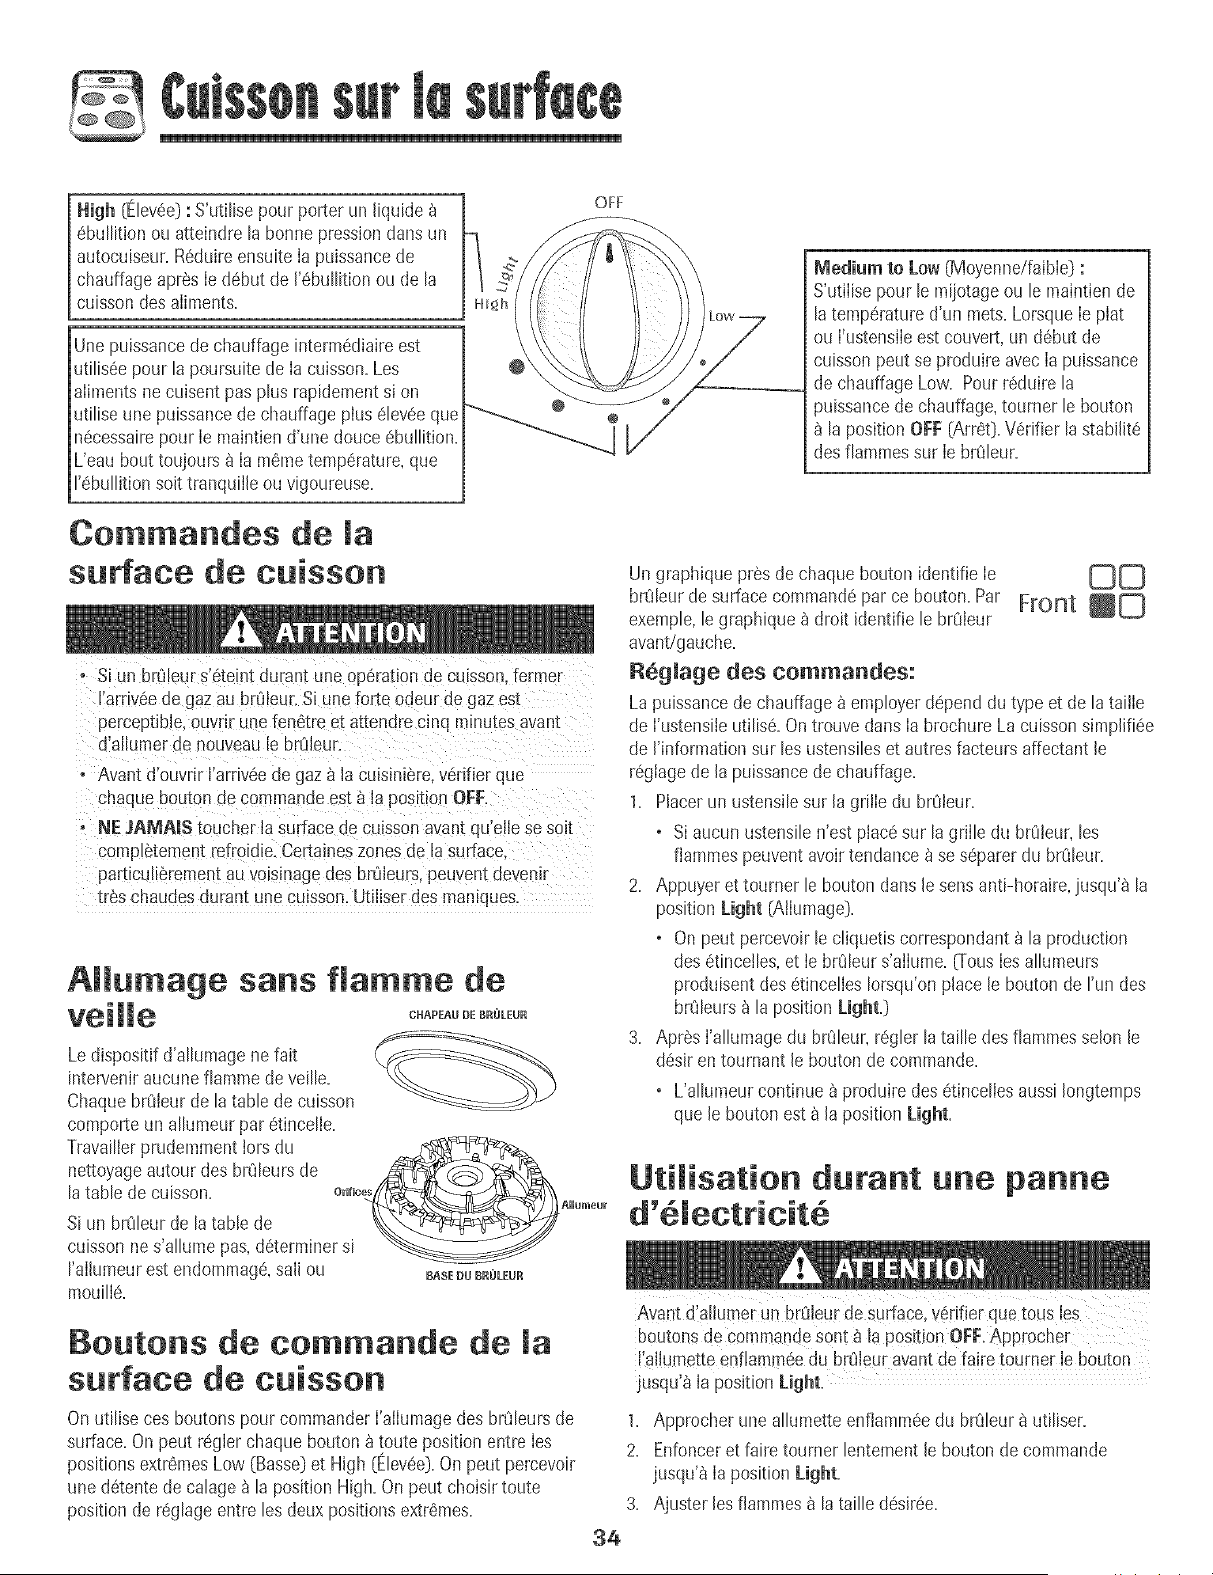
@
High (Elevee): S'utilise pour porter un [iquide
ebul%on ou atteindre [a bonne press[ondansun
autocuiseur+Reduireensuite [a puissancede
I chauffageapres [edebut de I'ebul%on ou de [a
[cuisson des ailments+
Une puissancede chauffage intermediaireest
utiliseepour la poursuitede la cuisson+Les
alimentsnecuisent pas plus rapidementsi on
utiliseune puissancede chauffageplus eleveeque
necessairepour le maintiend'une douceebullition+
Ueau bout toujours_ la memetemperature,que
I'ebullition soittranquille ou vigoureuse+
Commandes de [a
surface de euissor|
o Si un brOleurs'eteintdurant uneoperationde cuisson.Termer
I'arriveede gazau brOleur.Si uneforte odeur degaz es1:
perceptible,ouJnr unefenetre et atlenurec+nqminutesavan-[
d'ailumerde nouveau[e brOleur.
+ Avant d'ouvrir I'arriveeRegaz _ la cuisiniere vdrifierque
cnaque bouton (_ecommanuees[ a la pomt_onOFF.
, NE_AMAiS toucher [a surfacede su+ssonavant qu'eile se sort
compietementrefroidie. Certalneszonesde la surface.
part_culLerementauvoLs+nagedes brOleurs,peuvent deven+r
ires cnauaesauran[ unecuisson. Ut+l+serdes maniques.
Aiiumage sans fiamme de
CHAPEAU DE BROLEUR
Ledispositif d'a[[umagene fait
interveniraucunefiamme de veil[e.
ChaquebrOieurde [atable decuisson
comporte un allumeurpar etincelie.
Travailierprudemmentiors du
nettoyageautour des br_[eursde ___,,
[atamede cuisson, o,mot_//_"--_L_Z_/\\
Si un brO[eurde [atable de _"_'__..._A"
cuisson ne s'allume pas,determiner si
['al[umeurestendommage,sal[ ou BASEUUBROLEUR
moui%.
Boutons de commande de [a
surface de cuissor|
On utilise cesboutonspourcommander['allumagedes brOleursde
surface.On peut regler chaquebouton _ toute positionentre [es
positionsextremesLow (Basse)et High (Elevee).On peut percevoir
une detentede caIage_ [a position High.On peut choisirtoute
position de regIageentre [esdeux positionsextremes.
34
Medium to Low (Moyenne/faible) :
S'utiiise pour [e mijotageou [e maintiende
[atemperatured'un mets.Lorsque[e plat
ou ['ustensileest couvert,un debut de
cuisson peut se produire avec [a puissance
de chauffage Low. Pour reduire [a
puissancede chauffage,tourner [e bouton
[a position OFF (Arret).Verifier [astabi[ite
des fiammessur [e brOIeur.
Un graphiquepres de chaquebouton identifie le _
brCJ[eurdesurface commandepar ce bouton.Par Front
exempIe,[e graphique_ droit [dentifie[e br0Ieur
avant/gauche.
R69mage des commandes:
La puissancede chauffage_ employerdependdu type et de la taiiie
de ['ustensi[eutilise.Ontrouve darts[abrochure La cuissonsimp[ifiee
de ['informationsur [esustensileset autresfacteursaffectant[e
regiagede [a puissancede chauffage.
1. Placerun ustensi[esur [a griiie du br0[eur.
o Si aucun ustensilen'est place sur la griile du br0ieur, les
flammespeuventavoirtendance _ se separerdu bffJieur.
2. Appuyeret tourner le bouton darts[e sensanti-horaire,jusqu'_ la
positionLight (Allumage).
o Onpeut percevoir[e cIiquetiscorrespondant_ [a production
des etincelIes,et ie brCJIeurs'allume.0-ous[es a%meurs
produisentdes etinceIles[orsqu'onplace [e bouton de ['un des
br_[eurs_ [a position Light+)
3. Apres['a%mage du br0Ieur,regIer[a taiIIedes fIapamesselon [e
desiren tournant [e bouton decommande.
o L'aIIumeurcontinue_ produiredes etinceIlesaussi[ongtemps
que [e bouton est _ [a position Light+
Uti[isation durar|t ur|e parme
Avant dla[iumerun brQleurdesurface,verifier quetous [es
boutons de comr_)andesont_ [a P0SitionOFF.Approcher
%[[umette enflammeedu br_[eur avantde fa!re tourner [e bouton
jusqu'_ [a positionLight.
1. Approcher unea%mette enfiammeedu brOJeur_ utiJiser.
2. Enfonceret faire tourner [entement[e bouton de commande
jusqu'_ la position Light+
3+ Ajuster [esflampaes_ [a taiIIedesiree+
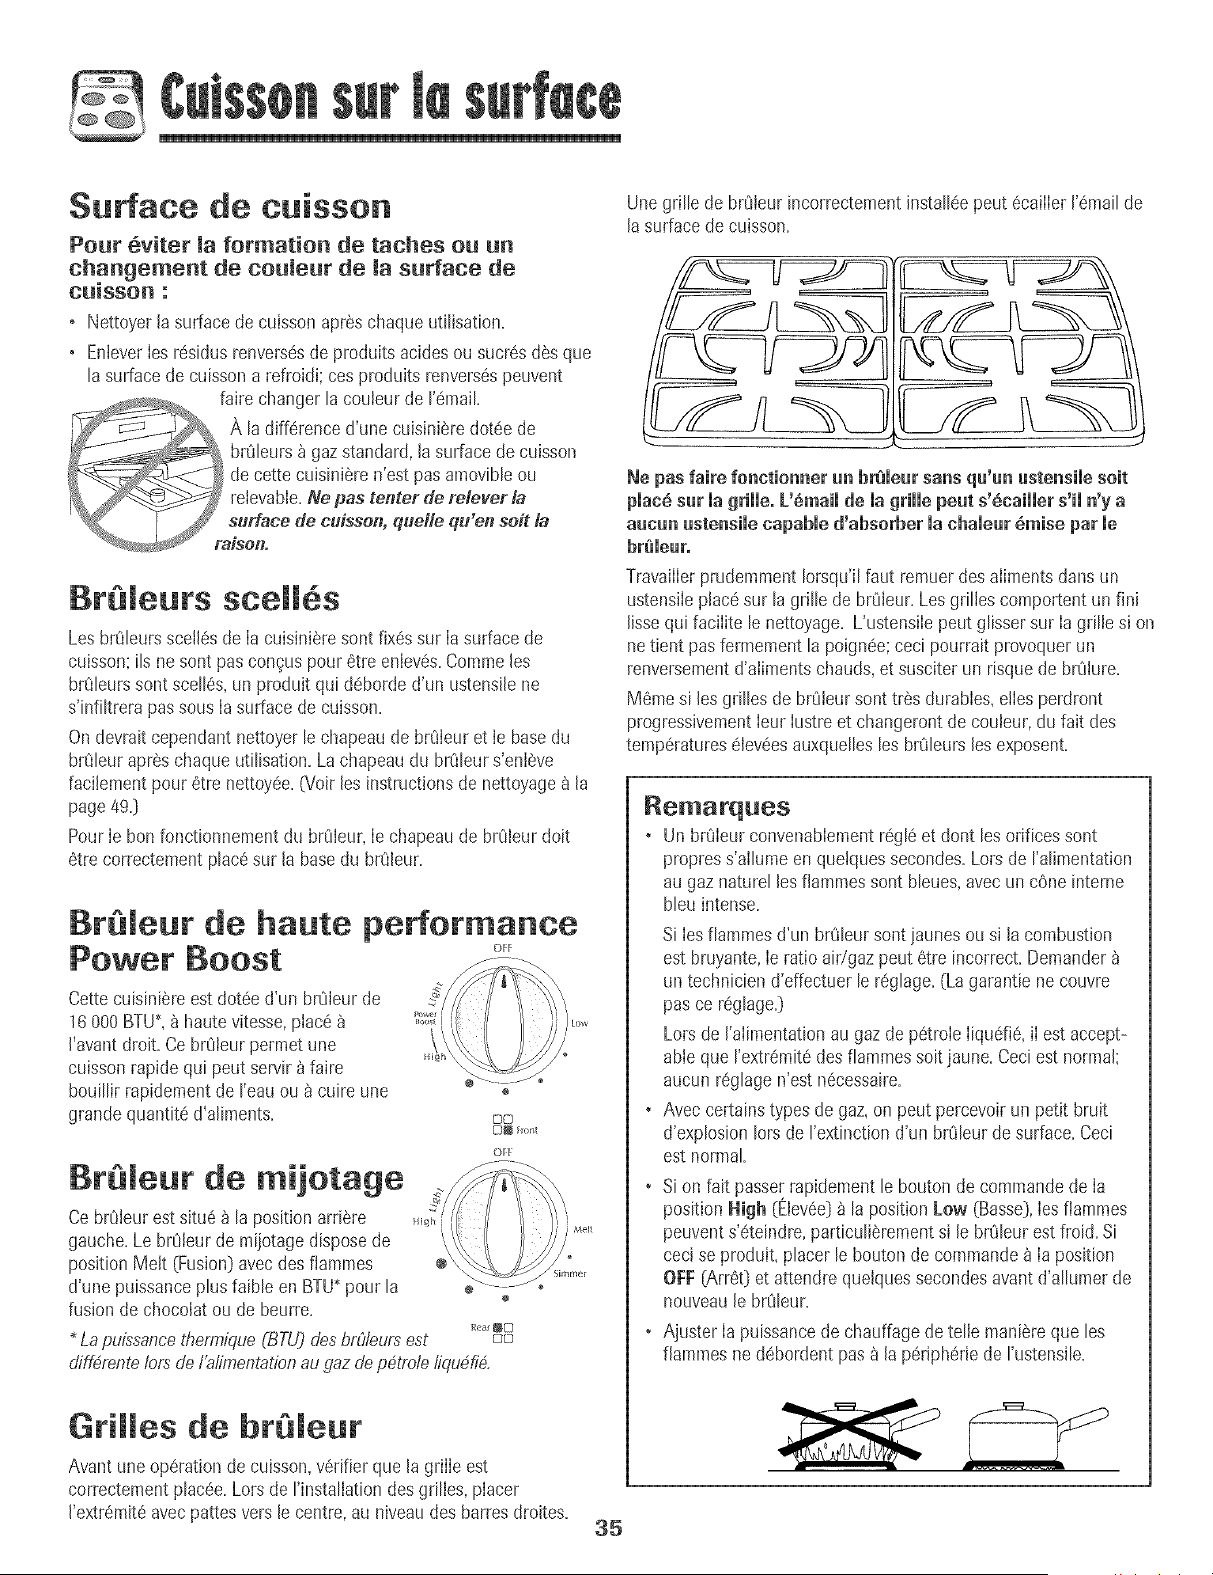
@
Surface de cuisson
Pour _viter Ja formation de taches ou un
changement de couleur de la surface de
cu[sson :
° Nettoyerla surfacede cuissonapr_schaque utiIisation=
• En[ever[esr6sid_Jsrenvers_sde produits acidesou sucr6sd_s que
lasurfacede caissona refroidi;cosproduits renvers6speuvent
Br@leurs scell s
Les brQIeurssceil6sde [a cuisini_resent fix6ssur [asurface de
cuisson;[Is ne sent pas censuspour 6tre enlev6s=Commeles
brQIeurssent sceII6s,un produit qui d6borded'un ustensJlene
s'infiItrera passous[a surfacede cuisson=
Ondewait cependantnettoyerle chapeaude br_Jieuret ie basedu
brOIeurapr_s chaqueutiIisatJon=Lachapeaudu brQIeurs'enl_ve
facilementpour 6tre nettoy6e=(Voir [es instructionsde nettoyageb [a
page49=]
Pour[e ben fonctionnementdu brOieur,[e chapeaude brOieurdoit
6tre correctementpIac6sur la basedu brQleur=
Br@leur de haute performance
Power Boost
Cettecuisini6reest dot#e d'un brOleurde
16000BTU? b hautevitesse,plac6
I'avantdroit.Ce brOleurpermet une
cuissonrapidequi peut servir_faire
bouiIIirrapidementde I'eauou _cuire une
grandequantit6 d'aliments.
Br@leur de mijotage
Ce br0ieur est situ6 _ la position artiste
gauche=Le br0leurde rniiotagedispose de
positionMelt [Fusion] avec desflampaes
d'une puissanceplus faibIe en BTU*pour la
@
fusionde chocolat ou de beurre=
Lapuissancethe_ffque (BTU)desbrdeurs est c:_
diff4rente,,'orsde f'a_;_mentationaugaz ryep4.trote/iqu_fi4.
Grilles de br@le r
Avantune opSrationde cuisson,vSrifierque la grille est
correctementpIac_e.Lotsde I'instaIiationdes grilles, placer
I'extrSmit8avecpattesversle centre,au niveaudes barresdroites.
Une grille de br0ieur incorrectementinsta[[eepeut 6caiiier['6mailde
[a surfacede cuisson=
Ne pas faire fo_ctio_ner a_ breieur sa_s qu'u_ ustensiie soit
piac6 sur ia grille, L'_maii de ia grille peat s'_caiiier s'ii _'y a
aucan ustensiie capable d'abserber machameur6raise par ie
bremeur,
Travaiiierprudemment[orsqu'i[faut remuerdesailments dansun
ustensiieplacesur [a grille de br0leur=LesgriIiescomportent un fini
Hssequi faciiite [e nettoyage=Uustensiiepout gIissersur [a griIie s[on
netient pas refinement[a poign_e;ceci pourrait provoquerun
renversementd'aiimentschauds,et susciterun risquede br0iure=
MSmesi los grilles de br0ieursenttr_s durabies,elies perdront
progressivement[our [ustreet changerontde couieur, du fait des
tempSratures_[evSesauxqueIIes[es bffJIeurs[es exposent=
Remarques
• Un br_ieurconvenabiementr_gl8et dent lesorifices sent
propress'aiIurneen queiquessecondes=Lotsde I'aIimentation
au gaz naturel lesflammessent bIeues,avecun cone interne
bIeuintense=
Si[es fiammesd'un br_Ieursent )aunesou si la combustion
est bruyante,[eratio aidgaz peut 8tre incorrect=Demander
un technicien d'effectuer le regIage=(La garantie necouvre
pas ce reglage.)
Lorsde I'aiimentationau gazde pStroie[iqudiS, i[ est accept-
able que rextremit8desfiammessoit jaune=Ceciest normal:
aucun regIagen'est nScessaire.
• Aveccertainstypes de gaz,on pout percevoir un petit bruit
d'expIosionIorsde I'extinctiond'un br_Ieurde surface. Ceci
est normal
• Sion fait passerrapidementle bouton decommandede [a
position High (ElevSe)_ la positionLow (Basse],los flammes
peuvents'eteindre,particuIi_rementsile brOIeurestfroid=Si
ceci se produit, placer le bouton de commando8 [a position
OFF(Arret) et attendre quelquessecondesavant d'aIIumerde
nouveau[e br(_[eur=
• Ajuster [a puissancede chauffagedeteIie mani6reque [es
f[apapaesnedebordent pas_ [a p_ripheriede ['ustensiIe=
35
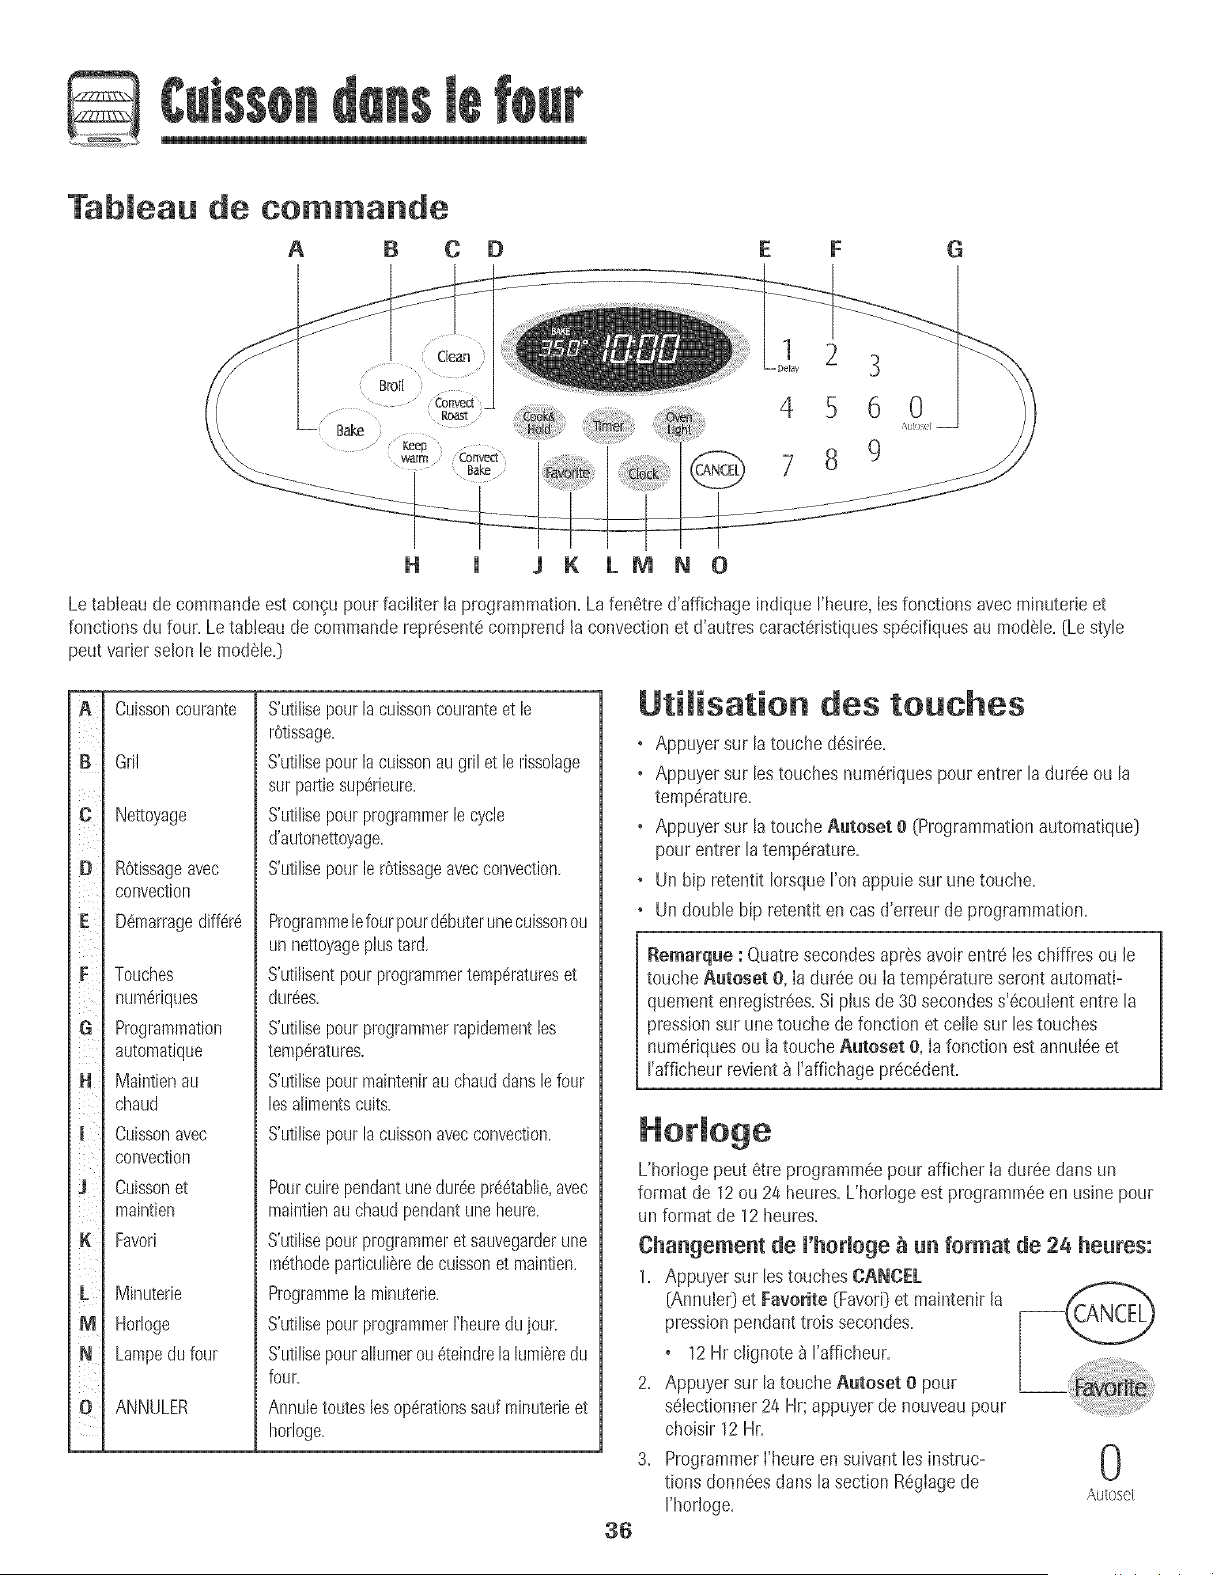
Tableau de commande
A B C 0 E F G
H J J K LM N 0
Letableau de cornmandeest con_upour faciliter la programmation.La fen6tre d'affichage indique Hleure, Ies fonctions avec minuterie et
fonctionsdu four. Letableau decommanderepr6sent6comprendla convectionet d'autres caract6ristiquessp6cifiquesau module.(Lestyle
peut variersolon le mod_le.]
B
O
G
L
M
m
Cuisson courante
Gril
Nettoyage
R6tissageavec
convection
D6marrage diff6r6
Touches
nura6riques
Programmation
automatique
Maintienau
chaud
Cuissonavec
convection
Cuissonet
maintlen
Favori
Minuterie
Horloge
Lampedu four
ANNULER
S'utilisepourlacuissoncouranteet le
r6tissage.
S'utilisepourlacuissonaugrilet le rissolage
sur pattiesup_rieure.
S'utilisepourprogrammerle cycle
d'autonettoyage.
S'utilisepourle r6tissageavecconvection.
Programmelefourpourd6buterunecuissonou
un nettoyageplustard.
S'utilisentpourprogrammertemp6ratureset
dur6es.
S'utilisepourprogrammerrapidementlos
temperatures.
S'utilisepourmaintenirau chauddansle four
lesalimentscuits.
S'utilisepourlacuissonavecconvection.
Pourcuirependanturle dur6epr@6tablie,avec
maintienauchaudpendantuneheure.
S'utilisepourprogrammeret sauvegarderune
methodeparticuli6redecuissonet maintien.
Programmelarainuterie.
S'utilisepourprogrammerI'heuredujour.
S'utilisepourallumerou6teindrelalumi_redu
four.
Annuletouteslosop6rationssaufminuterieet
horloge.
36
Utilisation des touches
• Appuyer sur la touche d_sir6e.
• Appuyer sur les touchesnum6riquespour entrer la dureeou la
temp6rature.
• Appuyer sur la touche Autoset 0 (Programmationautomatique]
pourentrer la temperature.
• Un hip retentit IorsqueI'onappuie sur une touche.
• Undouble hip retentit en cas d'erreur deprogrammation.
Remarque : Quatresecondesapr6savoirentre [eschiffres ou [e
toucheAutoset O,Iadur6e ou Iatemp6ratureseront automati-
quementenregistr6es.Si pius de 30 secondess'6couiententre la
pressionsur unetouche de fonction et celle sur lostouches
num_riquesou la touche Autoset e, Iafonction estannui6eet
I*afficheurrevient_ I*affichagepr6c6dent.
L'horlogepeut 6tre progmmm6epour afficher Ia dur6e darts un
format de 12ou 24 heures.L'horlogeest programm6een usine pour
un format de 12 heures.
Changement de l'horloge _ un format de 24 heures:
1. Appuyersur lestouches CANCEL
[Annule0 et Favorite (Favor[)et mahltenir la
pressionpendant trois secondes.
• 12 Hr clignote _ I'afficheur.
2. Appuyersur latouche Aatoset 0 pour
s6tectionner24Hr; appuyerde nouveaupour
choisir 12Hr.
3. ProgrammerI'heureen suivant lesinstruc- ('_
tions donn6esdans la section R6glagede ,_,u[oset
I'horloge.
R6gmagede m'hormoge
1. Appuyer sur Ia toucheClock (Hodoge}.
• L'heuredignote b i'afficheur.
2. Appuyer sur bs touchesnum6riquesappropri@s pour program-
mer rheure du jour,
• Deuxpoints ciignotent _ I'afficheur.
3. Appuyer b nouveausur B touche Clock ou attendre quatre
secondes.
• Lesdeux pointsrestent.
Lorsqueie courant6bctrique arriveou apr_s une interruption de
courant,la demiSreheureavantI'intermption de courant va clignoter.
Pourrappebr I'heuredujour Iorsqu'uneautre fonction de dur@
s'affbhe, appuyersur latouche Clock.
L'heure de i'horloge ne peut 6tre chang6eiorsquele four a 6t6
programmepour une cuissonou un nettoyagediff6r6 ou pour la
fonction de cuissonet maintien.
Annumation de m'affichage de m'heure :
Si I'onne desire pasI'affbhage de I'heuredu
jour: __@
Appuyersur Iestouches CANCEL (Annub0 et
CJocket les maintenir ainsi pendanttrois
secondes.L'heure du jour disparait de
]'afficheur.
LorsqueI'affichagede I'heureest annuI6,
appuyersur Ia toucheCJock pour afficher brievementI'heuredu jour.
LorsqueI'affichagede I'heureest annui6,apr6s15minutes,lefour
passeen modeAttente pour @onomiserde I'@ergie.L'afficheursera
vierge et I'@lairagedu four ne fonctionnerapas.Pour_ r@eiiler>>Ies
commandosb partir du mode attente,appuyersur n'importequelb
touche. Un doubb hip retentira.
R6affichage de m'heure :
Appuyersur Iestouches CANCELet Clock et bs maintenirainsi
pendanttrois secondes.L'heuredu jour r6apparait8 I'afficheur.
La minuteriepeut 6tre programm@de une minute (0:01}jusqu'_
99 heureset 59 minutes(99:59}.
La minuterb peut 6tre utilis@ ind@endammentdetoute autre
activit6du four. Ellepeut 6tre aussiprogramm@alors qu'une autre
fonction du four est en cours d'utilisation.
La minuterb necommandopas Jefour. Elle ne sert qu'_ 6mettredes
bips.
Programmation de maminuterie :
1. Appuyer sur Ia toucheTimer (Minuterie}.
• 0:00et Ie mot TIMERclignotent
raffbheur.
5,
Annumation de maminuterie :
1. Appuyer sur Ia toucheTimer et la maintenir
ahlsi pendanttrois secondes.
OU
2. Appuyer sur Ia touche Timer et sur la touche
num6rique_ e _.
2. Appuyer sur Iestouches num6riquesappropri@sjusqu'_ ce que
I'heurejuste paraisse_ I'afficheur.
• Losdeux pointset le motTIMERcontinuent_ clignoter.
3. Appuyer _ nouveausur la touche Timer ou attendre quatre
secondes.
• Losdeux pointss'arr6tentde clignoteret le d@omptede la
dur@ commence.
• La derni6re minute du d@omptesera affich@ sousforme de
secondes.
4. A lafin de Iadur@ programm6e,un bip long retentit et le mot
End{Fin}seraaffich6.
Appuyer sur la toucheTimer pour effacer rafficheur.
--0
Autoset
Verro i age des commandos
et de porte fo r
La porte du four et ies touchespeuvent _tre verrouiiI@spourdes
raisonsde s@urit_, nettoyageou pour emp@hertoute utilisation
non souhait@.Lestouches nefonctionnerontpas si eiles sont
verrouill@s.
Si lefour esten cours d'utilisation,lostouches et la porte ne peuvent
_tre verrouili@s.
L'heure actueIIedujour restera_ I'afficheur Iorsque lestouches et la
porte seront verrouili@s.
Verrouiiiage :
Appuyersur lestouches CANCELet Cook &
HoJdet losmaintenirainsi pendanttrois
secondes.(Appuyerd'abord sur ]atouche
, OFF(Arr60 parait _ I'afficheur.
, Lemot LOCK[Verrouillage}clignote
Iorsquela porte est en cours de verrouillage.
D_verrouillage :
Appuyersur [estouches CANCELet Cook & Hold et [es maintenir
ainsi pendanttrois secondes.(Appuyerd'abord sur la touche
CANCEL.)Le mot OFFdisparakde rafficheur.
Remarq_e : Laporte du four et lestouches ne peuvent8tre
verrouili@ssi la tempSraturedu four est de 205 °C (400°F)ou
plus.
37
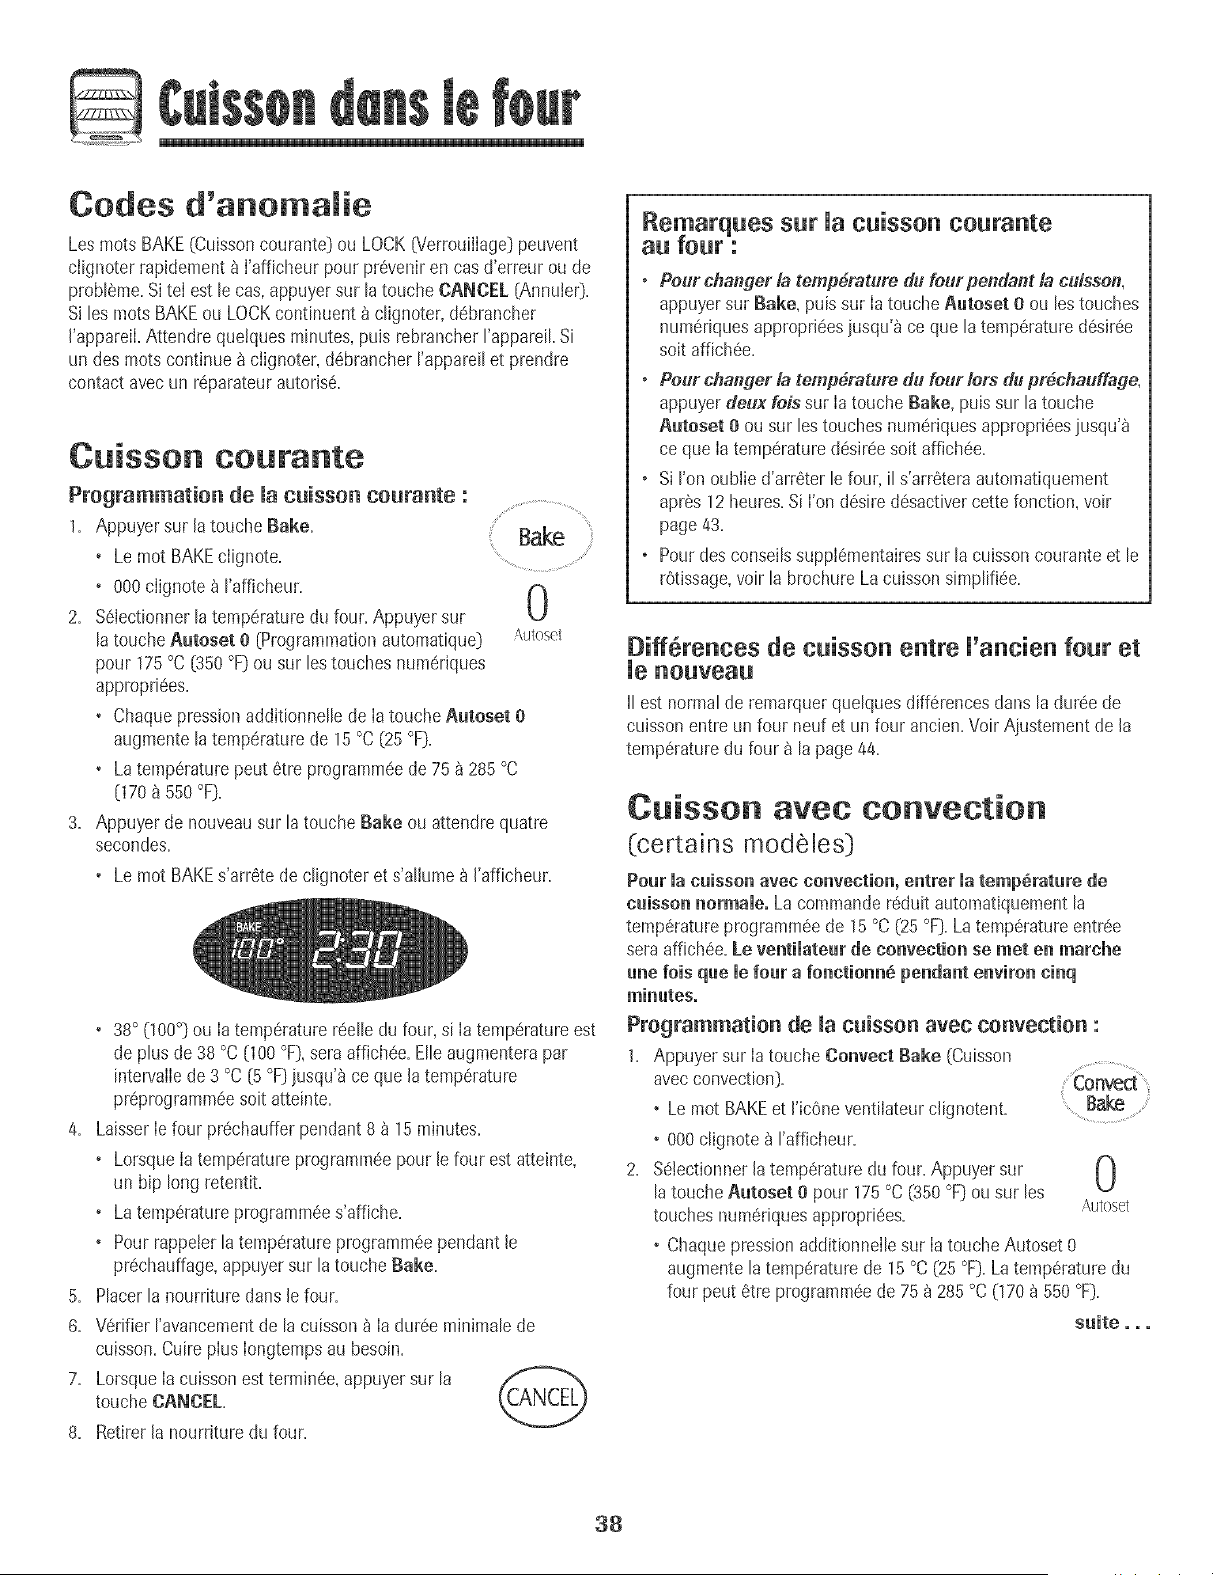
G
Codes d'anomalie
Les roots BAKE(Cuissoncourante} ou LOCK[Verrouillage[ peuvent
ciignoterrapidement _ I'afficheur pour preveniren cas d'erreur oude
probleme.SiteI est bcas, appuyersur latouche CANCEL [Annub0.
Si bs rootsBAKEou LOCKcontinuent _ c@noter,debrancher
I'appareiLAttendre quetquesminutes,pub rebrancherI'appareiLSi
un des roots continue _ ciignoter,@brancher I'appareilet prendre
contactavec un r@arateurautoris&
Cuisson COUrante
Programmation de macuisson courante : .............................
1. Appuyer sur la touche Bake. Bake
• Lemot BAKEclignote. ............
• 000ciignote _ I'afficheun F_
U
2. Sebctionner latemperaturedu four. Appuyersur
latoucheAatoset 0 (Programmationautomatique} i\ulosd
pour 175°C (350 °F}ou sur leatouches numeriques
appropri@s.
• Chaquepressionadditionnelb de iatoucheAatoset 0
augmentelatemperaturede 15 °C (25 °F}.
• Latemperaturepeut etre programm@de 75 _ 285 °C
0 70_ 550 °F}.
3. Appuyer de nouveausur la touche Bake ou attendre quatre
secondes.
• LemotBAKE s'arr6tede c@noterets'aIlume_ l'afficheur.
+ 38° (100°} ou Ia temperaturer@lb du four, si Ia temperatureest
deplus de 38 °C (100°F},sera affichee.Elleaugmenterapar
intervalIede 3 °C (5°F}jusqu'_ ce que la temperature
pr@rogrammeesoit atteinte.
4. LaisserIefour pr@hauffer pendant8 _ 15minutes.
• LorsqueIatemperatureprogramm@pour le four est atteinte,
un bip long retentit.
• Latemperatureprogramm@s'affiche.
• Pourrappeterla temperatureprogrammeependant le
pr@hauffage,appuyersur la toucheBake.
5. Placerla nourriture dartsle four.
6. Verifier I'avancementde la cuisson_ Ia dureeminimab de
cuisson.Cuireplus Iongtempsau besoin.
7. LorsqueIacuissoneat terminee,appuyer sur la
touche CANCEL.
8. Retirerla nourriture du four.
Remarques sur Uacuisson courante
au four :
+ Pour chaltger la tempdrature du feurpendaat & cuissen,
appuyer sur Bake, puis sur Ia touche Aatoset 0 ou lea touches
numeriques appropri@s jusqu'_ ce que la temperature desiree
soit affich@.
o Pour changer la temperature du four lots du pr6chauffage,
appuyer deux lois sur Ia touche Bake, puis sur la touche
Autoset e ou sur lea touches numeriques appropriees jusqu'_
ce que Ia temperature d@iree soit affich@.
o Si I'on oublie d'arreter le four, il s'arretera automatiquement
apr@ 12 heures. Si I'on desire desactiver cette fonction, voir
page 43.
o Pour des conseiB supplementaires sur la cuisson courante et le
rOtissage, voir la brochure La cuisson simplifi@.
Differences de cuisson entre U'ancien four et
_e BOBVeaB
II est normalde remarquerquelques differencesdans ladur@ de
cuissonentre un four neuf et un four ancien.VoirAjustementde la
temperaturedu four a la page 44.
Cuisson avec co vectio
(certains modeles)
Pear maeaisse_ avee convection, e_trer matemp_ratare de
caisso_ _ermame,Lacommandereduit automatiquementla
temperatureprogramm@de 15°C(25°F).Latemperatureentr@
seraaffich@. Le ve_tilatear de eo_vectio_ se met e_ marehe
a_e lois qae mefo_r a fo_etio_ pendant e_viro_ ei_q
mi_ates.
Programmatio_ de la c_isso_ avec convection :
1. Appuyer sur Ia toucheCo,veer Bake (Cuisson
avecconvection).
• Le mot BAKEet I'ic0ne ventilateurclignotent. Bake ........
• 000clignote a I'afficheur.
2. SelectionnerJatemperaturedu four. Appuyersur N
latoucheAateset Opour 175°C (350°F)ou sur les
Autoset
touches numeriquesappropri@s.
+ Chaquepressionadditionnellesur IatoucheAutoset 0
augmentela temperaturede 15 °C (25 °F}.Latemperaturedu
four peut etre programm@de 75 _ 285 °C 070 _ 550°F}.
s_ite ooo
38
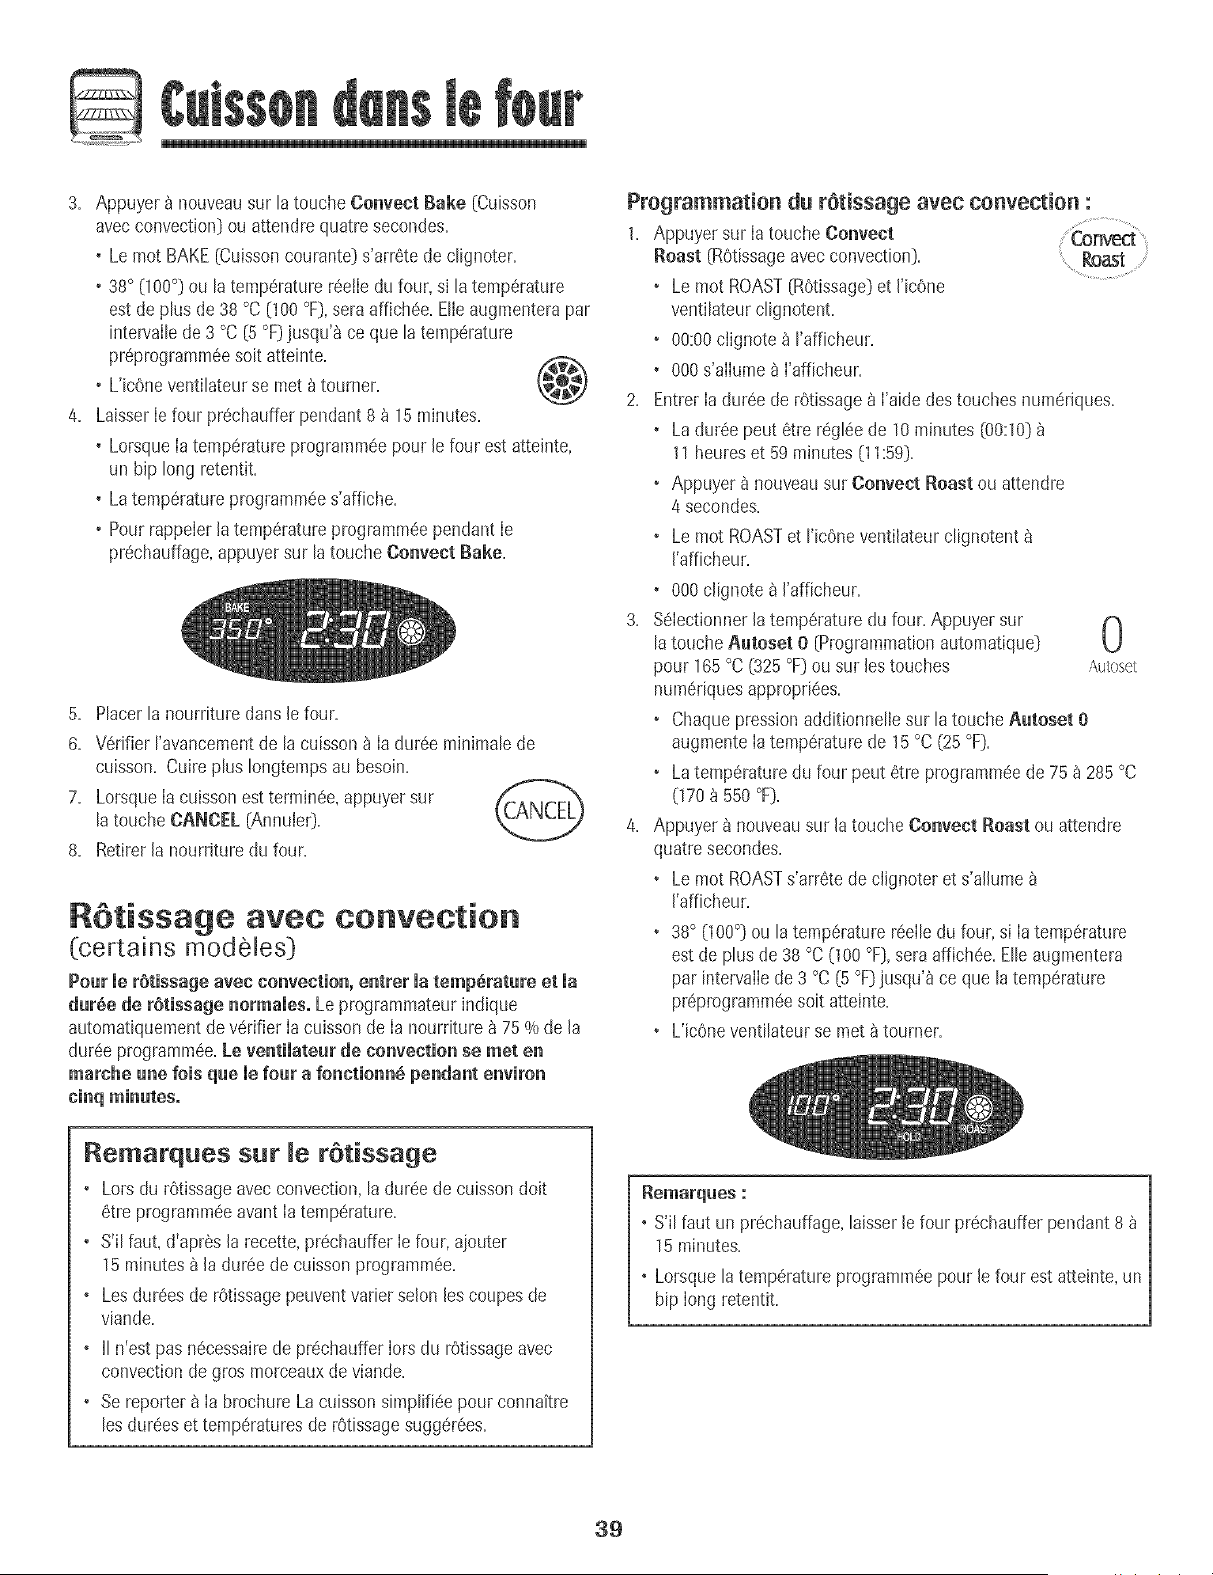
3+ Appuyer _ nouveausur tatouche Convect Bake [Cuisson
avecconvection}ou attendre quatre secondes.
+ Lemot BAKE[Cuissoncourante}s'arretede c@noter+
+38° (100°} ou ta temperaturereeHedu four,si tatemperature
est de ptusde38 °C 000 °F},seraaffichee+BIe augmenterapar
intewaltede3 °C [5 °F}jusqu'8 ce queta temperature
preprogrammeesoit atteinte.
• L'icOneventihteur se met_ toumer.
4. LaisserIefour prechauffer pendant8 _ 15minutes.
+ LorsqueIa temperatureprogrammeepourle four est atteinte,
un hip long retentit.
+ Latemperatureprogrammees'affiche.
• Pourrappelerlatemperatureprogrammeependant Ie
prechauffage,appuyersur la touche Conveet Bake.
5. Placerla nourriture dans le four.
6. Verifier I'avancementde la cuisson_ Ia dureeminimalede
cuisson. Cuireplus Iongtempsau besoin.
7. LorsqueIacuissonest terminee,appuyer sur _,.r,_
latouche C,_,NCEL{Annule0.
8. Retirerla nourriture du four.
Retissage avec convection
(certains rnodeles}
Poar meretissage avee convection,entrer matemperatare et ma
duree de retissage normames.Leprogrammateurindique
automatiquementde verifier Ia cuissonde Ia nourdture8 75% de la
dureeprogrammee.Le ventimateurde convection se met en
marche ane lois qae meroar a fonctionn_ pendant environ
Programmation du retissage avec convection :
1. Appuyer sur Ia toucheConveet
Boast (Rbtissageavecconvection}.
• Le mot ROAST(Rbtissage}et I'icOne
ventilateurclignotent.
• 00:00ciignote_ I'afficheur.
+ 000s'aiIumea I'afficheur.
2. EntrerIaduree de rbtissage_ I'aidedes touchesnumeriques.
+ Ladureepeut 6tre reglee de 10 minutes (00:10}
11heureset 59 minutes (11:59}.
• Appuyer _ nouveausur Conveet Boast ou attendre
4 secondes.
• Le mot ROASTet I'icOneventilateur clignotent
I'afficheur.
+ 000c@note _ I'afficheur.
3. SelectionnerJatemperaturedu four. Appuyersur t_
latouche Aatoset O (Programmationautomatique} U
pour 165°C (325 °F}ou sur lostouches Autosot
numedquesappropriees.
• Chaquepressionadditionnellesur la touche fmtoset e
augmenteIatemperaturede 15 °C (25 °F}.
• La temperaturedu four peut 6tre programmeede 75 _ 285°C
070 _ 550 °F}.
4. Appuyer _ nouveausur la touche Conveet Boast ou attendre
quatre secondes.
• Le mot ROASTs'arretede c@noter et s'allume
I'afficheur.
• 38° (100°} ou la temperaturereeIledu four,si Iatemperature
est de plus de 38 °C (100°F},seraaffichee.Elleaugmentera
par intervailede3 °C[5 °F}jusqu'_ ceque la temperature
preprogrammeesoit atteinte.
• L'icOneventilateur se met_ tourner.
Roast ........
Remarques sur Reretissage
• Lotsdu rOtissageavecconvection,la dureede cuissondoit
etre programmeeavant Ia temperature+
• S'il faut, d'apresla recette,prechauffer Iefour, ajouter
15minutesa la duree decuissonprogrammee.
+ Losdureesde rOtissagepeuventvarier selonles coupesde
viande.
+ IIn+estpasnecessairede prechaufferIorsdu rOtissageavec
convectionde gros morceauxde viande.
• Se reportera Ia brochure La cuissonsimplifieepour conna_tre
losdureeset temperaturesde retissagesuggerees.
Bemar_ue$ :
+ S'il faut un prechauffage,laisserlefour prechaufferpendant 8
15minutes+
• Lorsquela temperatureprogrammeepour le four est atteinte, un
hip long retentit.
39

5. Placerla nourriture darts[e four.
• Ladur6ecommencete compte_ reboursdes quele four se met
chauffer.
• Pourrappeler[atemperatureprogramm6ependant ie
pr_chauffage,appuyersur [a toucheCenvect Beast,
6. LorsqueIestrois quarts de Ia dur6ede cuissonprogramm6ese
sont 6coul6s,Ie four se meten marcheet Ie mot FOOD
(Nourriture] clignote _ I'aff+cheur.Verifier ravancementde la
cu+sson_ ce moment.Cuire plus Iongtempsau besoin.
+ LaIampedu four resteallum6ejusqu'_ ceque I'onappuie sur la
toucheOven Light (Lampedu fou0.
• Appuyersur n'importe que[letouchepour rappeler[a dur6ede
cuisson restante.
7. Lorsque[acuissonest terminee,appuyer sur la
touche CANCEL (Annu[e0.
8. Retirer[a nourrKuredu four.
4. Appuyer a nouveausur la touche de fonction d6sir6eOU
attendrequatre secondes.
• Le mot correspondant_ la fonction d6sir6eresteallure6.
+ Ladur6ede cuissonparait _ I'afficheur.
+ Latemperaturer6elledu four sera afficheependant le
pr6chauffage.
• La temperatureprogrammees'affiche Iorsque le four est
pr6chauff6.
Lorsque [a dur6e de cuisson s'est 6couLee :
• Quatrebips retent[ssent+
• Losroots HOLD (Maintien} et WARM (Chaud}s'al[ument.
• 75° 0700 et I'heuredujour parak _ ['afficheur.
Cuisson et maintien
Lors de rutilisation de l'opt[on Cook& Hold (Cuissonet maintien[, le
four se met 8 chauffer imm6diatementunefois que la commandea
6t6 programm6e.Puis,[efour cuit pendantla dur6e sp6cifi6e.Lorsque
cette dur6e s'est6couI6e,le four maintient la nourritureau chaud
pendant une heure au maximum,puis s'#teint automatk uement.
Programmation de Cuisson et maintien :
1+ Appuyer sur [a toucheCeek & Held+
+ Lemot HOLD(MAINTIEN]clignote pour
indiquerque [a programmationde cuisson
et maintien est en cours.
+ 00:00clignote _ rafficheur.
2. %[ectionner la dur6edSsirSede cuissonen utilisant lostouches
numeriques.
• Lemot HOLDcontinue _ clignoter.
+ Ladur6es'allume _ ['afficheur.
+ Ladur6e peut #tre r6giSede 10 minutes [00:10}_ 11heures
et 59 minutes(11:59}.
3. A[orsque [e mot HOLDciignote, appuyersur [a ....................
touche Bake (Cuissoncourante},Cenvect Bake Bake
[Cuissonavecconvection]ou Cenvect Beast
(R6tissageavecconvection] (certainsmodules]et
s61ectionner[a temperaturedu four. Appuyersur N
[atoucheguteset O(Programmationautomatique} :\utoset
pour 175°C (350 °F}ou sur lestouches numeriques
appropri_es.
• Lemot correspondant8 la fonction d6s+r6eclignote.
• Latemperaturedu four pout 6tre programm6ede 75 _ 285 °C
[I 70_ 550°F]+
Apres une heure de _NNTIEN AU CHAUD :
• Le four s'Steh_tautomatiquemenL
• Losroots HOLDet WARM s'_teignent+
• Retirerla nourriture du four.
Annulation de Cook & Hold _ tout moment :_
Appuyersur latouche CANCEL.Retirer [a
nourriture du four.
CuissoB et maiBtieB diff6r6s
Ne pas UtH!se[la cuissondiff6rdepour des denr6estr6s p6rissabies
commelos produits iaitiers,ie porc, la volaille oulos fruits de me[.
Avec[a fonction diff6r6e,[e four set met_ cuire plus tard dans la
journ6e. Programmerla dur#ed'attented#sir6eavant que le four ne
se mette en marcheet la dur6ede cuissond6sirSe.Lefour com-
mence_ chauffer_ I'heures#lectionn#eet cuit pour la dur#e
sp_cifi6e.
La dur6ed'attentepout 8tre programmeede 10minutes(00:10]
11heureset 59 minutes01:59].
Programmation d'un cycle de cuisson et maintien
diff6r_s :
1+ Appuyer sur [a toucheDelay 1+ 1
• Le mot DELAY(DiffSr#e]c%note _ I'afficheur. Delay
• 00:00clignote_ I'afficheur.
2. A I'aidedestouches num#riquesappropriSes,entrer/_ d_6e
d'_ttente a_t q_e tte d6b_te le cyclede cuissonet maintien.
suite...
4O
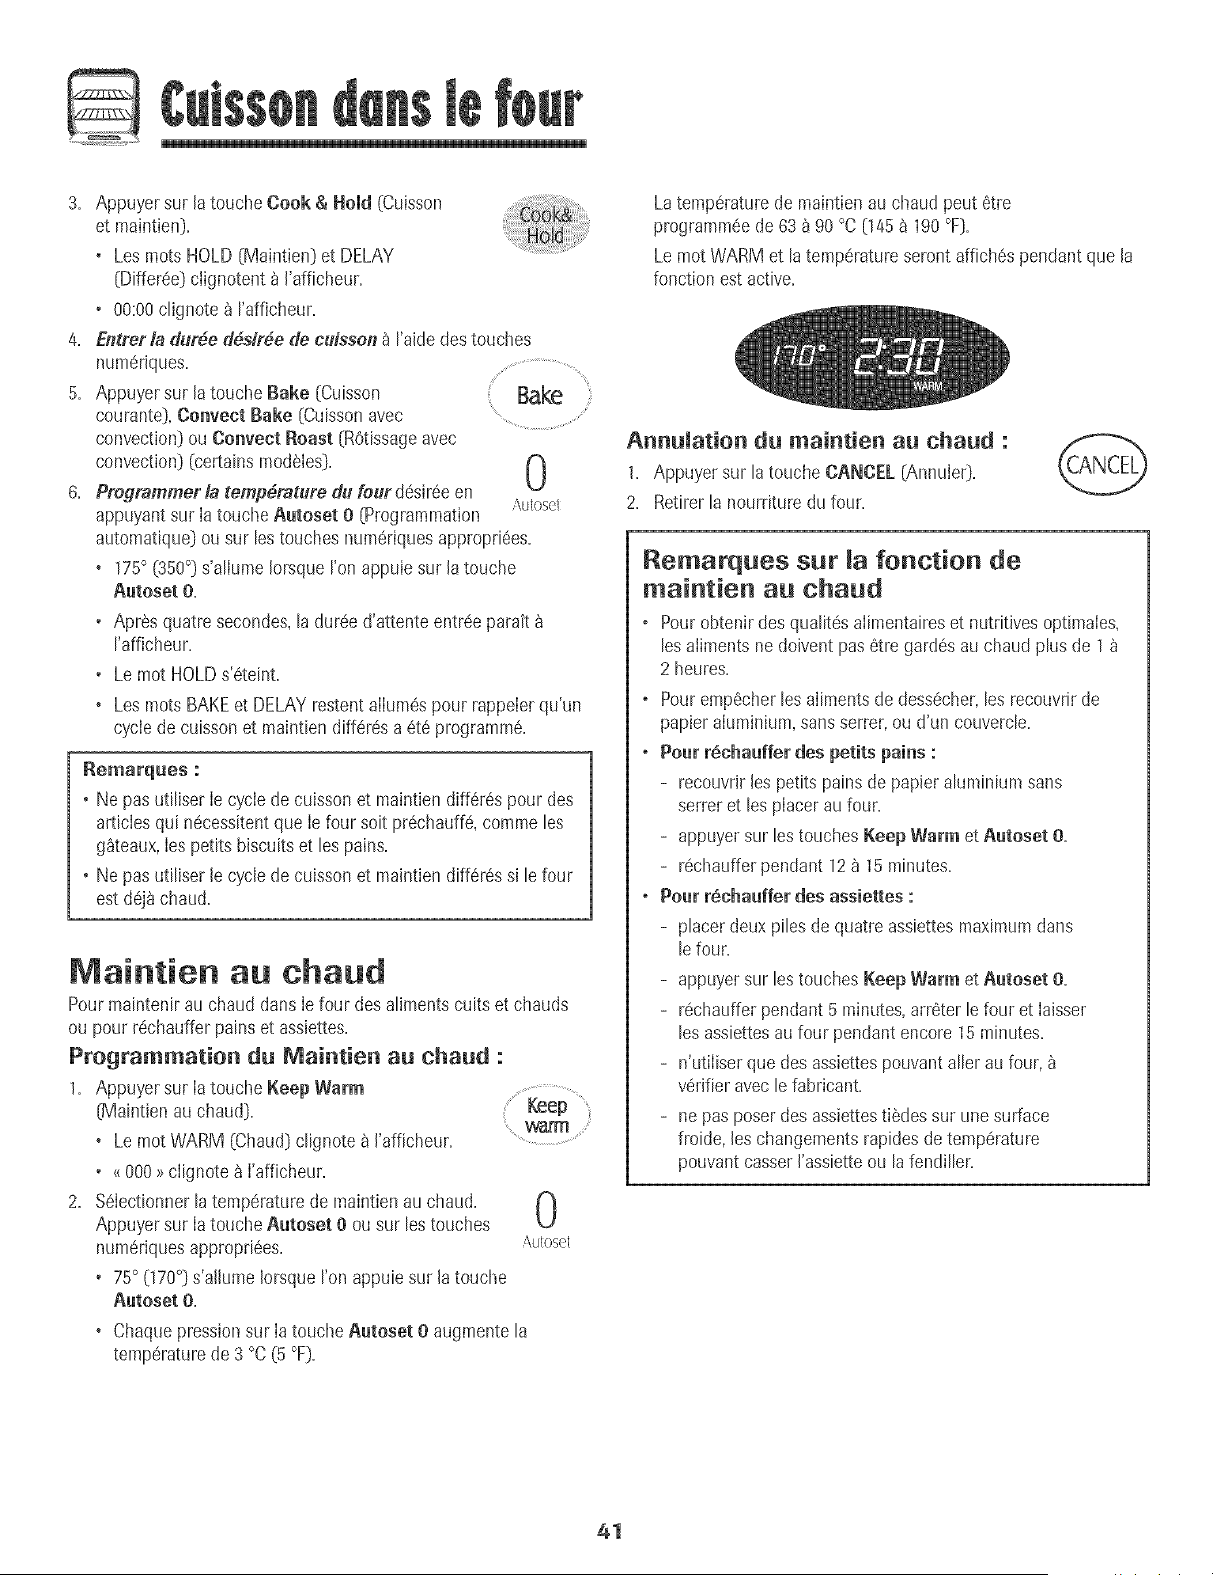
3. Appuyer sur la toucheCook & Hold (Cuisson
et maintien).
• LesrootsHOLD(Maintien)et DELAY
[Differ@) ciignotent _ I'afficheur.
• 00:00c%note _ rafficheur.
4. E#trer la dur#e d#dr#e de cuisson _ Faidedestouches
num_riques.
5. Appuyer sur la toucheBake {Cuisson
courante},Convect Bake {Cuissonavec .....
convection}ou Cenveet Roast {ROtissageavec
convection}(certainsPaod_bs).
tJ
6. Programmer la temp#rature du fourd@ir@ en
,\u[osel
appuyantsur Ia toucheAutoset 0 {Programmation
automatique}ou sur lestouches num_riquesappropri6es.
• 175° (350°} s'allumeIorsqueI'onappuiesur latouche
Autoset O.
• Apres quatre secondes,la dur@ d'attenteentr@ parait
I'afficheur.
• Lemot HOLDs'eteint.
• LesrootsBAKEet DELAYrestentaIIum@pour rappeIerqu'un
cyclede cuissonet maintbn differesa 6t6 programme.
Remarques :
o Ne pus utiliser Ie cyclede cuissonet maintiendifferes}}our des
articlesqui n@essitentque Iefour soit pr@hauffe,commeles
g_teaux,Ies petits biscuitset les pains.
o Ne pas utiliser le cyclede cuissonet maintiendifferessi le four
estdej8 chaud.
Maintien au chaud
Pourmaintenir au chaud dansIe four desaliments cuits et chauds
ou pour r@haufferpains et assiettes.
Programmation du Maintien au chaud :
1. Appuyer sur Ia toucheKeep Warm .................................
(Maintienau chaud}. £ Keep '
• Lemot WARM {Chaud}clignotea I'afficheur.
• _ 000 >)clignotea I'afficheur.
2. %Iectionner latemperaturede rnaintienau chaud. ('_
Appuyer sur Ia touche Autoset e ou sur les touches
U
num_riquesappropri@s. ,_ulose_
• 75° 070°} s'alhme IorsqueI'on @pub sur la touche
Autoset O.
• Chaquepressionsur Ia toucheAutoset 0 augmentela
temperaturede 3 °C(5 °F}.
Latemperaturede maintien au chaud peut 6tre
programmeede 63_ 90 °C 045 _ 190°F}.
Lemot WARMet latemperatureserontaffiches pendant que la
fonction estactive.
Annuiation du maintien au chaud :
1. Appuyer sur la touche CANCEL {Annubr}.
2. Retirerla nourriture du four.
Remarques sur fonction de
maintien au chard
o Pourobtenir desqualit@ aIimentaireset nutdtivesoptimaies,
les ailmentsne doivent pas6tre gardes au chaud plus de 1
2 heures.
o Pouremp@herles alimentsdedess@her,les recouvrirde
papieraiuminium,sansserrer, ou d'un couvercle.
o Pour r_chauffer des petits pains :
- recouvdrles petits painsde papieraluminium sans
serrer et les pIacerau four.
- appuyersur les touchesKeep Warm et Autoset O.
- rechaufferpendant 12 _ 15 minutes.
o Pour r_ehauffer des assiettes :
- placerdeux piles de quatre assbttes maximumdarts
lefour.
- appuyersur les touchesKeep Warm et Autoset &
- rechaufferpendant 5 minutes,arreter lefour et iaisser
les assiettesau four pendant encore 15 minutes.
- n'utiliser que des assiettespouvantaller au four,
verifier aveclefabricant.
- ne pasposer des assbttestiedessur unesurface
froide, les changementsrapidesde temperature
pouvantcasserI'assbtte ou lafendiller.
41
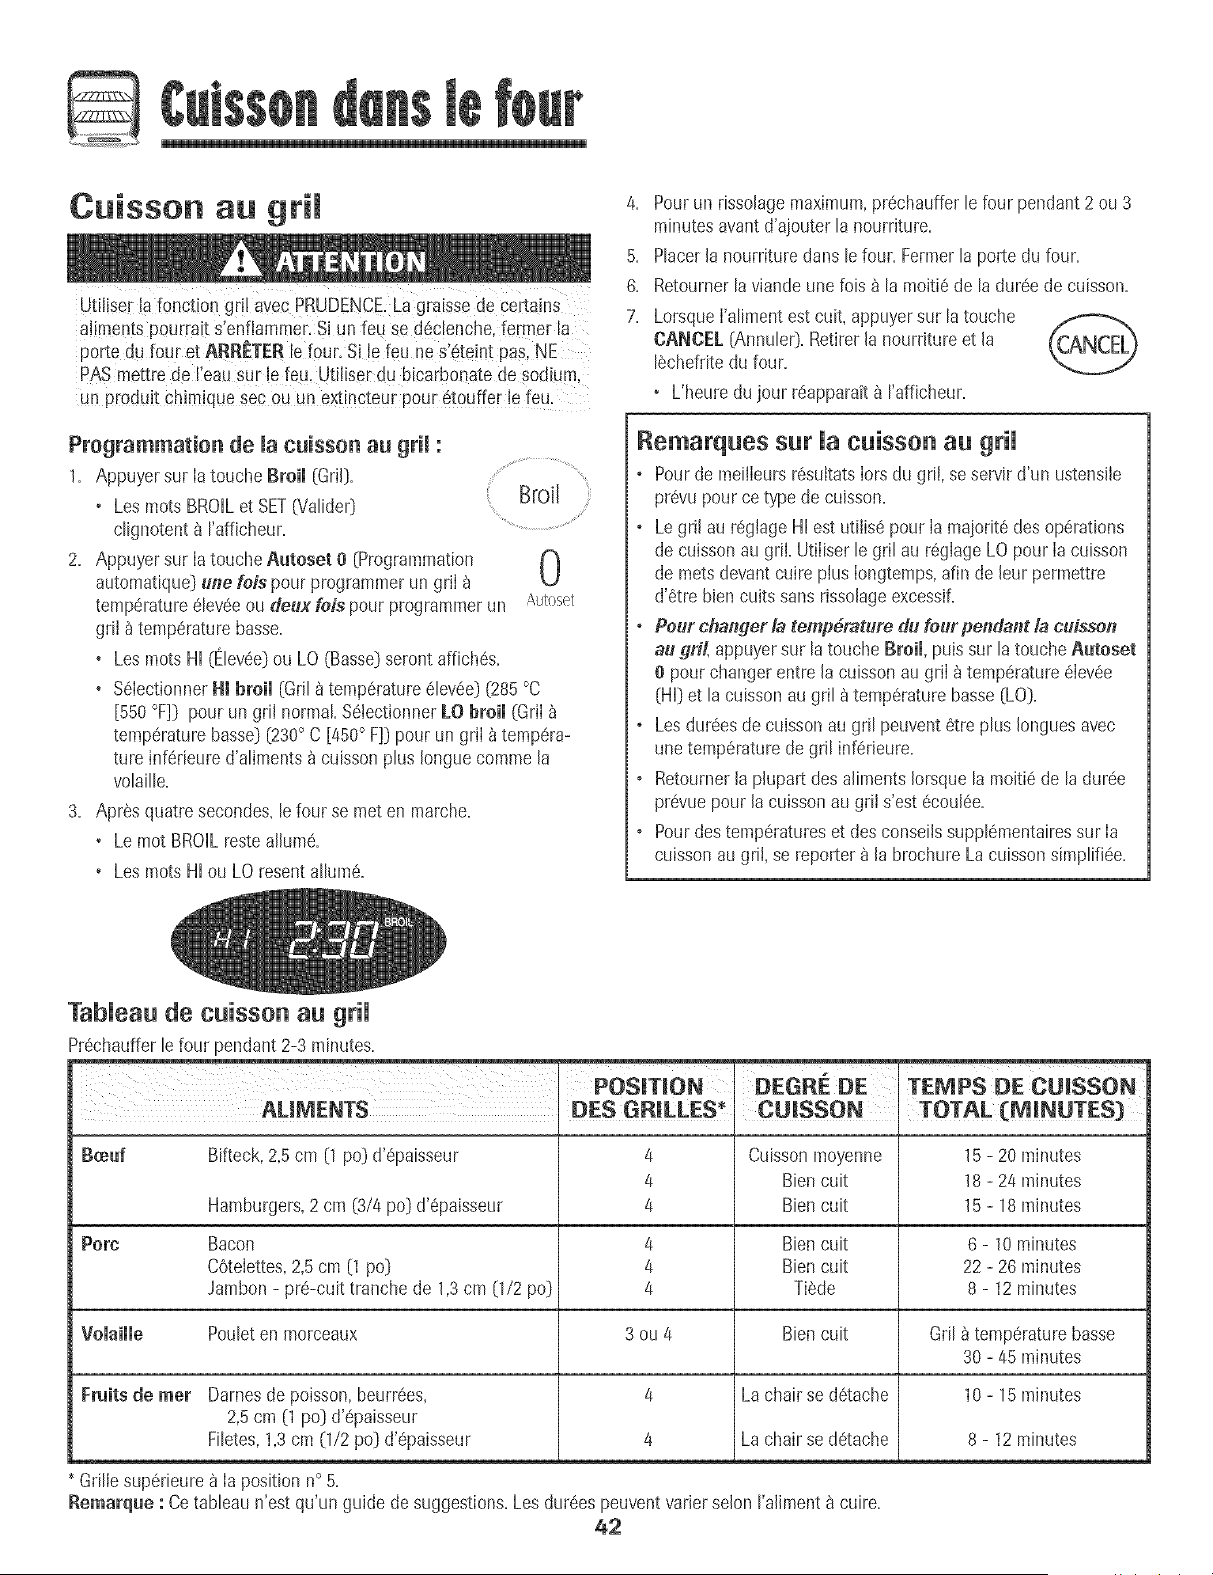
Cuisson au gril
UtiNser!a fonction gri! avecPRUDENCE/Lagraisse de certains
aliments pourrait s'enflammer.Si un feu se declenche,fermer la
porte du four et AIIRETIEItle f0ur. Si !e feu ne s:_teintpas, NE
PASmettre de !ieau sur !efeu, UtiNserdu bicarbonatedesodium,
un produit chimique secou un extincteur pour 8touffer !efeu:
Programmation de la cuisson au grii :
1= Appuyer sur Ia toucheBroil {GriO=
Broil
• LesrootsBROILet SET(Valider] ...... ....
clignotenta rafficheur. ........
2. Appuyer sur Ia touche Auloset 0 [Programmation N
automatique}line feis pour programmerun griI
IJ
temperatureeleveeou deux feis pour programmerun Autoset
gril _ temperaturebasse.
° Lesroots Hi (l_levee}ou LO (Basse}serontaffiches.
• SelectionnerHI broil [Gril _ temperatureelevee}{285°C
[550 °F]} pour un griI normal.SetectionnerlO broil {GriI
temperaturebasse}{230° C [450° F]}pour un griI _ tempera-
ture inferieured'aliments_ cuissonplus Ionguecommela
volaille=
3= Apres quatre secondes,le four se meten marche.
• Lemot BROILrestealhme.
• Les roots HI ou LO resent allume=
4. Pourun rlssolagemaximum,prechaufferle four pendant 2 ou 3
minutesavantd'ajouterla nourriture=
5= Placerla nourriture dans lefour. Fermerla porte du four=
6= Retournerlaviande unelois _ la moiti6de ladureede cuisson=
7= LorsqueI'alimentest cult, appuyersur latouche
CANCEL [Annuler]=Retirer la nourritureet la
Iechefritedu four.
• L'heuredu jour reappara7t_ rafficheur=
Remarques sur la cuisson au gtil
o Pourde meilIeursresultatsIors du griI,se servird'un ustensile
prevu pour ce type de cuisson=
o Legril au reglageHI est utllis6 pour Ia majorit6 des operations
de cuissonau griLUtiliser le gril au reglageLO pour Ia cuisson
de metsdevantcuire plus Iongtemps,afin de leur permettre
d'etre biencults sans rissolageexcessif.
o PeurchangerlatempePaturedufeurpendantlacuissen
au gdf. appuyersur latouche Broil, puis sur la toucheAuloset
t) pourchanger entre la cuissonau griI _ temperature6Ievee
[HI]et la cuissonau gril _ temperaturebasse[LO]=
o Les dureesde culssonau gril peuvent6tre plus Ionguesavec
unetemperaturede gril inferieure=
o Retournerla phpart des alimentsIorsque la moiti6 de la duree
prevuepour la cuissonau gril s'est 6coulee=
o Pourdestemperatureset desconseilssupplementairessur Ia
cuissonau grlI,se reporter_ la brochureLa cuissonsimplifiee=
Tableau de cuisson au gril
Prechaufferle four pendant2-3 minutes=
POSITION DEGltlE ' TEMPS DE CtllSSON
Bceuf Bifteck, 2,5 cm [1 pc] d'epaisseur 4 Cuisson moyenne 15 - 20 minutes
4 Bien cult 18 - 24 minutes
Hamburgers, 2 cm (3/4 pc] d'epaisseur 4 Bien cult 15 - 18 minutes
Pore Bacon 4 Bien cult 6 - 10 minutes
COtelettes, 2,5 cm [1 pc] 4 Bien cult 22 - 26 minutes
Jambon - pre-cuit tranche de 1,3cm [1/2 po_} 4 Tiede 8 - 12 minutes
Volaille Poulet en morceaux 3 ou 4 Bien cult Gril _ temperature basse
30 - 45 minutes
I:fuils de reef 10 - 15 minutes
Damesde poisson,beurrees,
2,5 cm {1 pc} d'epaisseur
Filetes,1,3cm (1/2 pc} d'epaisseur
Grillesuperieurea Ia position n° 5.
4
4
La chair se detache
La chair se detache
Remarque : Cetableau n'est qu'un guide de suggestions,Les dureespeuventvarierselon I'aliment8 cuire,
42
8 - 12 minutes

@
Arr t auto atique/
Mode sabbat
Lefour s'arr6teautomatiquementapr_s12he,ires s'il a 6t6
accidenteIlementlaisseen marche=Cettecaract6rJstiquede s6curit6
peut 6tre arr6t6e=
Pour annuler l'arr_t 12 heures et faire fonctionner le
four eu coutiuu peudaut 72 heures :
1= Appuyer sur la touche Clock [Horlogd)et la
maintenirainsipendant cinq secondes=
• <<SAb _>seraaffiche et clignoterapendantcinq secondes=
• <<SAb 7>seraensuite affich6 en continuiusqu'_ ce qu'on
I'arr6teoujusqu'b ce que ladur6e limitede 72 heuressoit
atteinte=
• Lemot BAKE(Cuissoncourante_seraaussiaffich6 si un
cyclede cuissoncouranteesten coursalors que lefour est en
modesabbat,
• LaCU/SSONAU FOURestfa seulefonetionqui est
op4mtionne/leen mode sabbat,Toutesfesautresfonetions
(Minuterie,Maintienauchaud,Nettoyage,etc,) sont verrou_;14,es
pendantlemode sabbat,
• Un cyclede cuissonet maintienpout 6tre programm6durant
le modesabbat=Cependant,un cyclede cuissonet maintien
diff_resn'est pas possible=
Auuulatiou du mode sabbat :
1= Appuyer sur la touche Clock pendantcinq
secondes=
• <<BAh >7clignote pendantcinq secondes=
• L'heuredu iour revient_ I'afficheur=
OU
2= Apres 72 heures,le modesabbatsetermine=
• <<BAh >7clignote pendant5 secondes=
• L'heuredu iour revient8 I'afficheur=
Remarques sur Uemode sabbat
• Le modesabbat peut 6tre mis en marche_ tout moment,que
le four soit en marche ou non=
• Le modesabbat ne pout pas 6tre misen marchesiles touches
sontverrouilJ6esou Japorte verro_Jill_e,
• La majorit6des messageset tous los bJpssont d6sactiv6s
Iorsquele modesabbatest actiE
• SiIe four esten mode cuissonIorsquele modesabbatest
programm6,le mot BAKEs'6teint Iorsquela cuissoncourante
estannuI6e,II n'y auraaucun signalsonore audible,
• La Iampedu four ne s'alIumepas automatiquement
I'ouverturede Ia porte Iorsque le four est en modesabbat,Si
1'6clairagedu four est souhaitependant Ie modesabbat,la
lampedevra 6treailum6e avantqueIe mode sabbatne d6bute,
• Lorsquele modesabbat a d6marr6,I'afficheur indique
imm6diatementla temp6ratureprogramm6eplutOtque la
temperaturer8e!Iede lacavitQdu four,Aucun hip de
prQchauffageneretentit,
• Lecycle d'autonettoyageet Ieverroui!lageautomatiquede Ia
porte ne fonctionnent pas pendantle mode sabbat,
• SiI'on appuie sur la touche CANCEL (AnnuleO,un cyclede
cuissoncouranteau four seraannulS,Cependant,le
programmateurresteraen mode sabbat,
• Apr_s unepannede courant,le four revienten modesabbat
avec72 heuresrestanteset aucuncycle actiE
43
Ajustement de la temperature
du four
La precisiondes temperaturesdu four a ete soigneusementverifiee
rusine+Hiest normalde remarquerquetquesdifferencesdans la
cuissonou ia couleur du rissohge obtenu entre un four neuf et un
four ancien+Au fur et _ mesureque le four est moins neuf, sa
temperature poutvarier+
II estpossibied'ajusterla temperaturedu four si ton penseque ie
four necuit pasou ne rissolepas correctemenLPourdeciderde
I'ajustementb apporter,ropierlefour _ une temperaturede 15°C
(25°F)ptus eieveeou pius basseque ia temperatureindiqueedans
la recette,puisfaire cuire ia preparation+Les resuitatsde<i+essai>7de
cuissondoiventdonner une idee du hombrede degresduquel la
temperaturedolt etre ajustee+
Ajustement de la temperature du four :
1+ Appuyer sur la touche Bake (Cuissoncourante)+
2+ Entrer285°C (550 °F)en appuyantsur ies
touches numeriquesappropriees+
3+ Appuyer sur ia toucheBake et la maintenirainsi pendant
plusieurssecondesou jusqu'_ ce que<<00° >7paraisse
rafficheur+
Si Iatemperaturedu four a ete precedemmentajustee,Ie
changementseraaffiche+Parexemple,si la temperaturedu four
a ete reduitede 8 °C (15 °F),I'afficheurindiquera -8° (-15°)+
4+ Appuyer sur Ia toucheAutoset e (Programmat[onautomatique)
pourajuster latemperature+
A chaquefois que I'on appuie sur la toucheAutoset e, la
temperaturechange de 3 °C (5 °F)+Latemperaturedu four peut
6tre augmenteeou diminuee de 3 _ 20 °C(5 _ 35 °F)+
Appuyer sur Ia touche Autoset 0 pour augmenterlatemperature
dufour (5, 10+++35)+Continuerd'appuyersur Iatouche Autoset
e pour diminuer la temperaturedu four (-35,-30+++-5)+
5+ L'heuredu jour reapparakautomatiquement_ rafficheur+
II n'est pas necessairede reajuster la temperaturedu four en cas de
panneou d'interruption de couranL L'ajustementde latemperature
s'appliqueseulementaux fonctions de cuissoncourante,cuisson
avecconvectionet rOtissageavec convection (certainsmodeles)+Les
temperaturesde gril et de nettoyagene peuvent6tre ajustees.
Changement de la
temperature °F/°C
1= Le reglage par defaut de I'usine pour la temperatureest en
Fahrenheit.
2+ Pourmodifierce re.glage,appuyersur los touchesCANCEL
(Annule0 et Bake simuitanementet maintener-lesenfoncees
pendanttrois secondes+
3+ Un hip retentit et ie regiagecourant (°Fou °C)parait b i'afficheur+
(Sivous nefaites pas de changement,la cuisiniere retoume au
regiageexistantapres30 secondesy
4+ Pourmodifierle reglage,appuyersur latouche Auteset O+
Appuyer _ nouveausur ia touche pour retournerau reglage
existanLAttendercinq secondeset le reglageseraeffectue+
Latouche Favorite(favor[)permetde sauvegarderla dureeet la
temperatured'une fonction de cuissonet maintien+
Pourprogrammerun cycle Favor[,unefonction de cuissonet
maintiendoit 6tre activeou tout juste programmee+
Programmation d'un nouveau cycle favori ou
sauvegarde d'un cycle en cours de cuisson et
maintien comme favori :
1+ Programmerun cycIede cuissonet maintiencommeil est decr+t
lasection Cuissonet maintien _ la page 40
2+ Appuyer sur la toucheFavorite et la maintenir
ainsi pendanttrois secondes+
• Le cyciecuisson et maintiennouvellementprogrammeou en
cours defonctionnementserasauvegarde+
• Un hip sonoreretentit pourindiquer que lescommandesont
accepte ie reglagefavorL
Demarrage d'un cycle programme darts favori :
1+ Appuyer sur la touche Favorite+
+ Ladureeet latemperaturedu cycleprogrammede cuissonet
maint[enserontaffichees (siaucun cycle decuisson et
maint[enn'a ete prograpapae,<<nonE >7sera affiche)+
2+ Appuyer sur ia toucheBake (Cuissoncourante),Convect Bake
(Cuissonavecconvection)ou Convect Boast (ROtissageavec
convection)(certainsmodeles)+
+ Lecyciefavori commenceimmediatement+
+ Lemot correspondantau cycleselectionn6s'aliume
I'afficheur+
• La duree de cuissons'ailume_ i'afficheur+
Lorsque la duree de cuisson s'est ecoulee :
+ Lemot correspondantau cycieselectionnes'eteint+
+ LosrootsHOLD(Maintien)et WARM (Chaud)s'alhment+
+ 75° (170°) parait _ rafficheur+
Annulation d'un cycle favor[ en tours :
1. ApptJyersur la toucheCANCEL (Annuler).
+ Lecyciefavod sauvegardenesera pas affecte.
2. Retirerla nourriture du four.
44
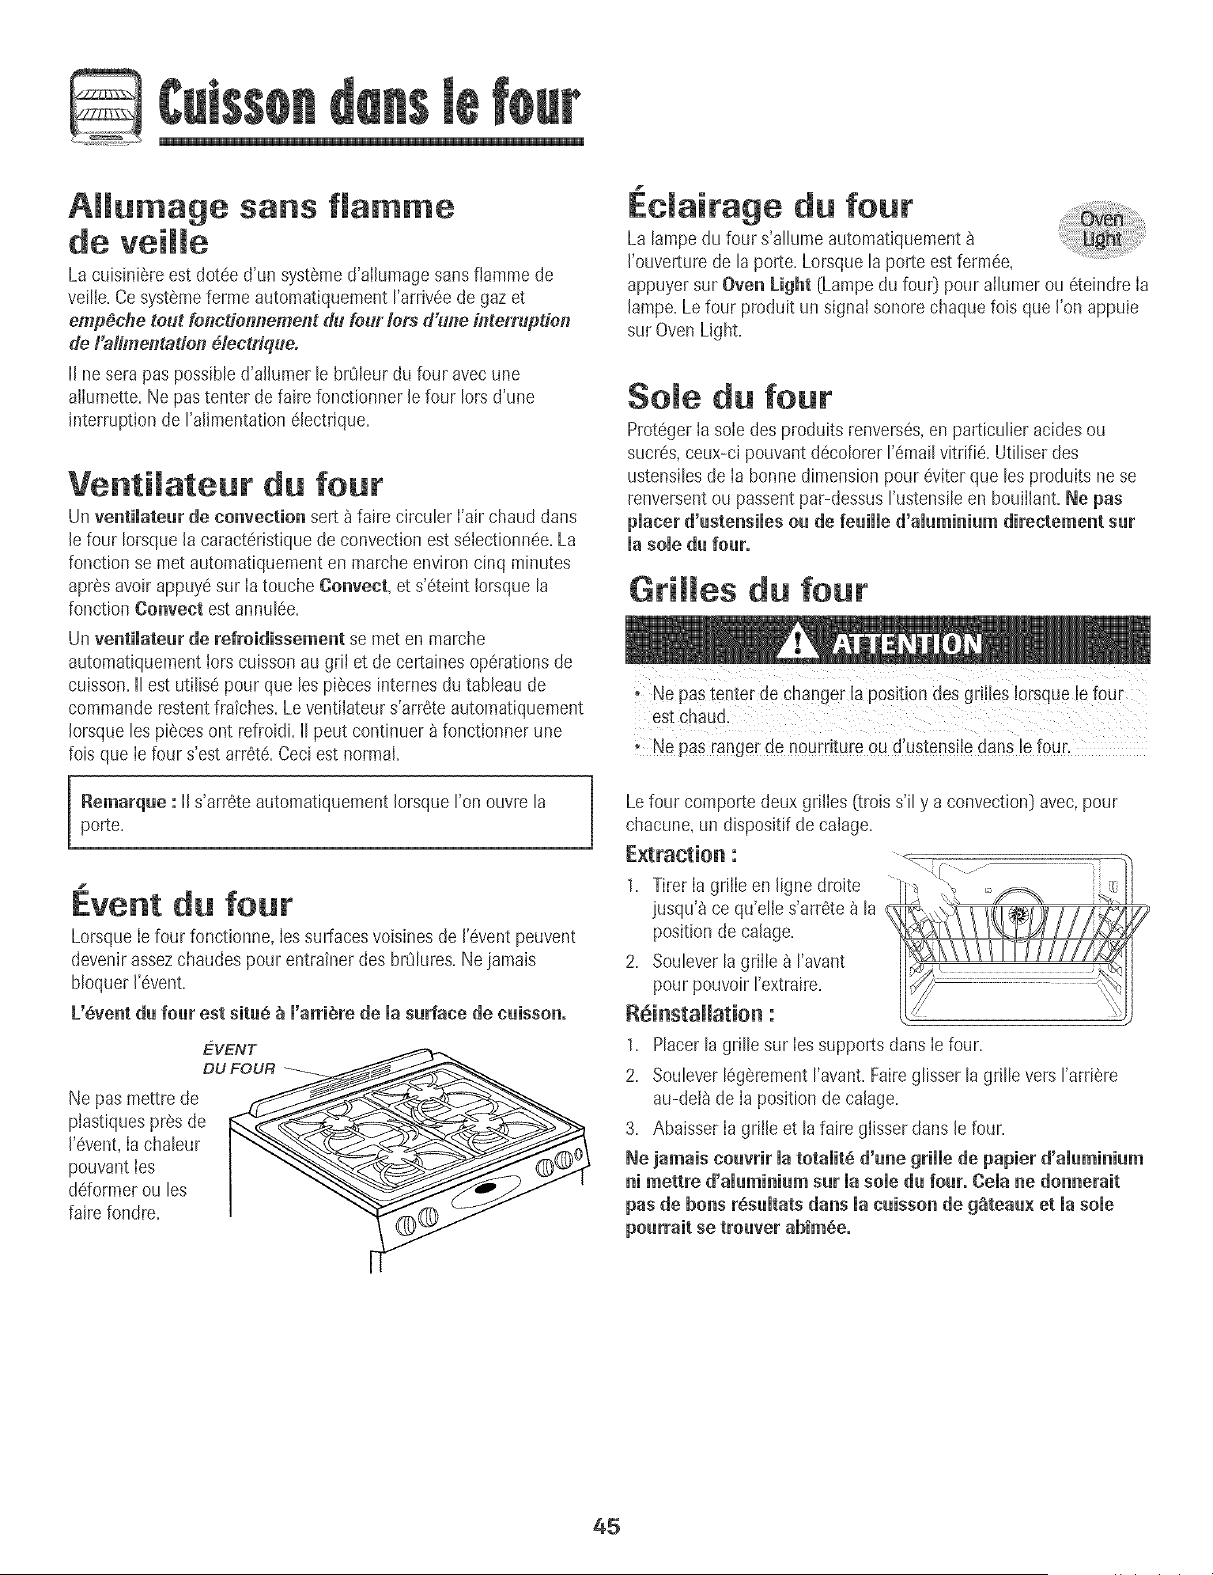
5
Affumage sans flamme
de veimme
La cuisini_reest dot6ed'un syst_med'alJumagesansfJammede
veille=Ce systemeferme automatiquementI'arriv6ede gazet
emp_che tout fencdem_ement du four lets d'une [l_terruptien
de/'aHmer_tatien 61ectrique.
II nesera pas possibled'alhmer le brQIeurdu four avecune
allumette.Nepas tenter defaire fonctionnerle four Iorsd'une
interruptionde I'alimentation61ectrique.
VentiJateur du four
Un ventilatear de convection sort _ faire circuler I'air chaud dans
le four Iorsquela caracteristiquede convectionest s6Iectionnee=La
fonction se met automatiquementen marcheenviron cinq minutes
apresavoir appuy6sur Ia toucheConveet, et s'6teint Iorsquela
fonction Conveet est annulSe=
Un ventimatearde refroidissement se met en marche
automatiquementtors cuissonau griJet de certainesop6rationsde
cuisson=II estutilis6 pour que lespiecesinternesdu tableau de
commanderestentfra_ches=Leventilateurs'arr6te automatiquement
Jorsquelospieces ont refroidi=IIpout continuer _ fonctionnerune
lois que Iefour s'estarr6t6=Ceciestnormal.
Remarqae : IIs'arr6teautomatiquementIorsque I'on ouvrela
porte.
1
Event du four
LorsqueIe four fonctionne,Ies surfacesvoisinesde 1'6ventpeuvent
devenirassezchaudespour entrainerdes br(Jlures.Ne iamais
bloquer1'6vent.
L'Sventdu four est situs _ re'artiStede masarface de euisson.
EVENT
DU FOUR
Ne pas mettre de
piastiquesprosde
1'6vent,Ia chaleur
pouvantIes
ddormer ou los
faire fondre=
.cJairage fo r
La lampedu four s'allume automatiquement
I'ouverturede la porte. Lorsquela porte est ferm6e,
appuyersur Oven Light [Lampedu fou0 pourailumer ou 8teindrela
lampe=Lefour produit unsignal sonorechaque fois queI'onappuie
sur OvenLight.
So e fo r
Prot_gerIa soIedes produits renvers6s,en particulieracidesou
sucres,ceux-ci pouvant dScolorer1'Smailvitrifie=Utiliserdes
ustensilesde Ia bonne dimension pour 8viter que los produits nese
renversentou passentpar-dessusI'ustensileen bouiIlant=Ne pas
placer d'_ste_siles oa de fe_ille d'alami_iam directeme_t s_r
masole d_four.
Griffes fo r
• Ne pastenter de changer la positiondes gdlles Iorsque!e four
estchaud.
"Ne pas rangerde nourdture ou d'ustens!ledans le four,
Lefour comportedeux grilles (troiss'il y a convection}avec,pour
chacune,un disposJtifde calage=
1= Tirer Ia griileen Jignedroite
]usqu'_ce qu'elJes'arr6te_ la
positionde caJage=
2. Souleverla grille _ I'avant
pour pouvoir I'extraire=
R_i_sta_atio_ : 4,
1= Placerla grillesur Iessupportsdans Ie four.
2= Soulever18g_rementI'avant=Faireglisser la gdlle vers I'arriere
au-dei8de Ia position de calage=
3= AbaisserIa grille et la faire glisserclansle four.
Ne jamais eoavrir matotamit8_'a_e grille de papier d'am_mi_iam
_i mettre d'al_mi_iam sat masomed_ roar. Coma_e don_erait
pasde bo_sr_s_mtatsda_smacaisso_ deg_tea_×et masome
poarrait se troaver aMmSe.
45
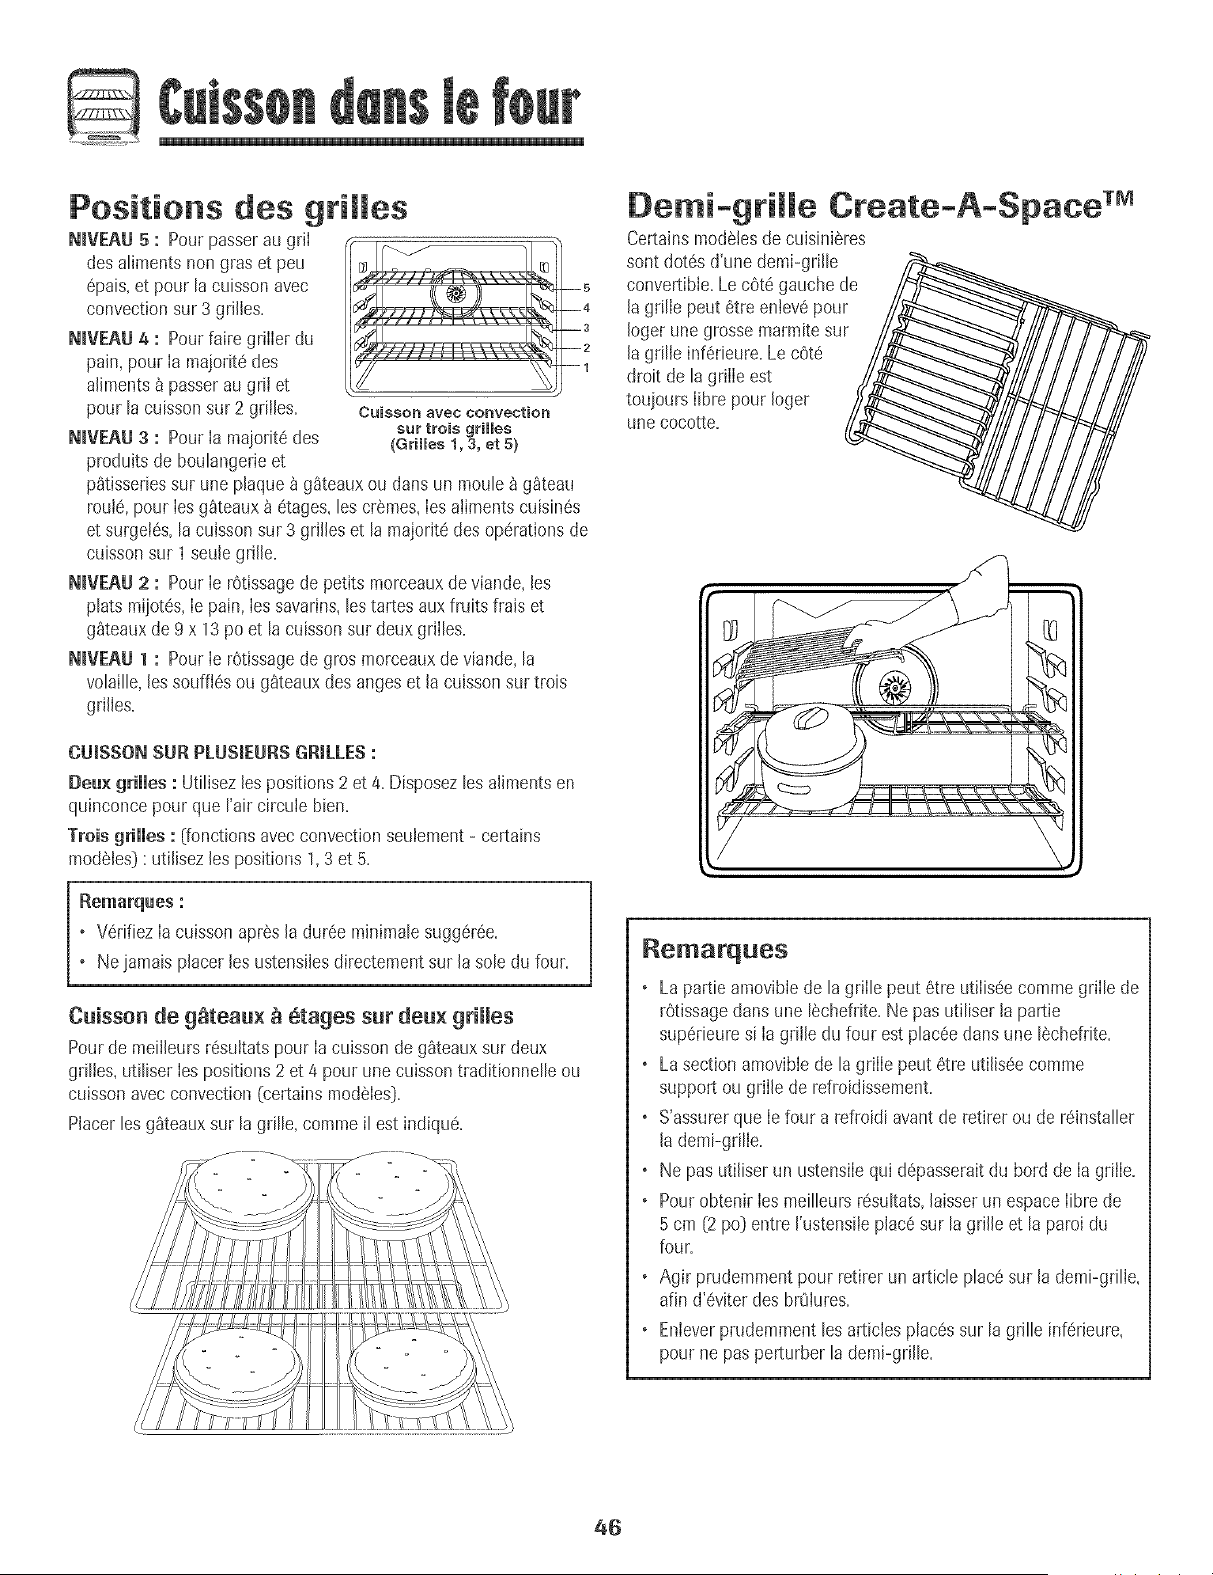
Positions des grilles
N+VEAU5 : Pour passerau griI
des alimentsnon gras et peu
@ais+et pour la cuisson avec
convectionsur 3 grilles+
N+VEAU4 : Pour faire griIIerdu
pain, pour Ia majoritedes
aliments_ passerau grii et
pour la cuissonsur 2 grilles.
N+VEAU3 : Pour la majorit6 des
produitsde boutangerieet
CuissOn avec Convection
sur trois grilles
(Grilles 1,3, et 5)
p_tisseriessur une plaque _ g_teaux ou dartsun moub _ g_teau
roui6, pour Ies g_teaux_ 6tages,les crSmes,Iesalimentscuisin@
et surgel6s,la cuisson sur 3 grilles et la paajorit6des operationsde
cuissonsur 1seule grille+
N+VEAU2 : Pour Ie rOtissagedepetits morceauxdeviande,bs
plats mijot6s,Ie pain,Ies savarins,lestartes auxfruits frais et
g_teauxde 9 x 13poet lacuissonsur deuxgriIles+
N+VEAU1 : Pour Ie rOtissagedegros morceauxde viande, la
volaille,les souffl@ ou g_teauxdes angeset la cuissonsur trois
grilles.
CU_SSONSUR PLUSlEURSGRILLES:
DeLl×grilles : Utilisezles positions2 et 4+Disposezles ailmentsen
qu+nconcepour que Faircircub bbn+
Trois grilles : (fonctions avec convectionseubment - certains
mod_bs} : utilisezles pos+tions1,3 et 5.
Remarques :
+ V6rifiez Ia cu+sson apr6s la dur6e minimale sugg6r@.
+ Ne jamais placer les ustensiles directement sur la sob du four.
Cuisson de g_teaux _ etages sur deux grilles
Pourde meilleursr@ultats pour Iacuisson de g_teauxsur deux
grilles,utiliserbs positions2 et 4 pour unecuissontraditionnelb ou
cuissonavecconvection (certainsmod6Ies}+
Placerles gateauxsur la grille, commeil estindiqu6+
Oemi+grille
Certainsmod6bs decuisini_res
sont dot@ d'une demi-grilb//_
convertible.Lec6t6 gauchede_
la grille peut 6tre entev6pour
Ioger une grosse marmitesur
Jagrille inf6rieure.Le cOt6
droit de lagrille est
toujoursIibre pour Joger
une cocotte. S
Cteate-A+Space Tm
//
Remarques
o Lapattie amovibiede la griIle peut 6tre ut+Iis@comme griIle de
rOtissageclansune I_chefrite+Ne pas utiliserla partie
sup6rieuresi Iagrille du four est plac@ clansune I@hefdte+
o Lasectionamovibie de la griIIe peut 8tre utilis@ comme
support ou griIle de refroidissement+
o S'assurerque Ie four a refroidi avantde retirer ou de r6installer
Jademi-gdlJe.
o Ne pas utiliserun ustensiIequi d@asseraitdu bord de Ia grilIe+
o Pourobtenir Iesmeilleursr@ultats,laisserun espaceIibre de
5 cm (2po} entre I'ustensib plac6sur la grille et la paroidu
four.
+ Agir prudemmentpour retirer unarticle plac6sur la demi-grilIe,
afin d'@iter des brOlures.
+ Enleverprudemmentles articles plac6ssur lagrille inf6rieure,
pourne pas perturber lademi-grille.
46
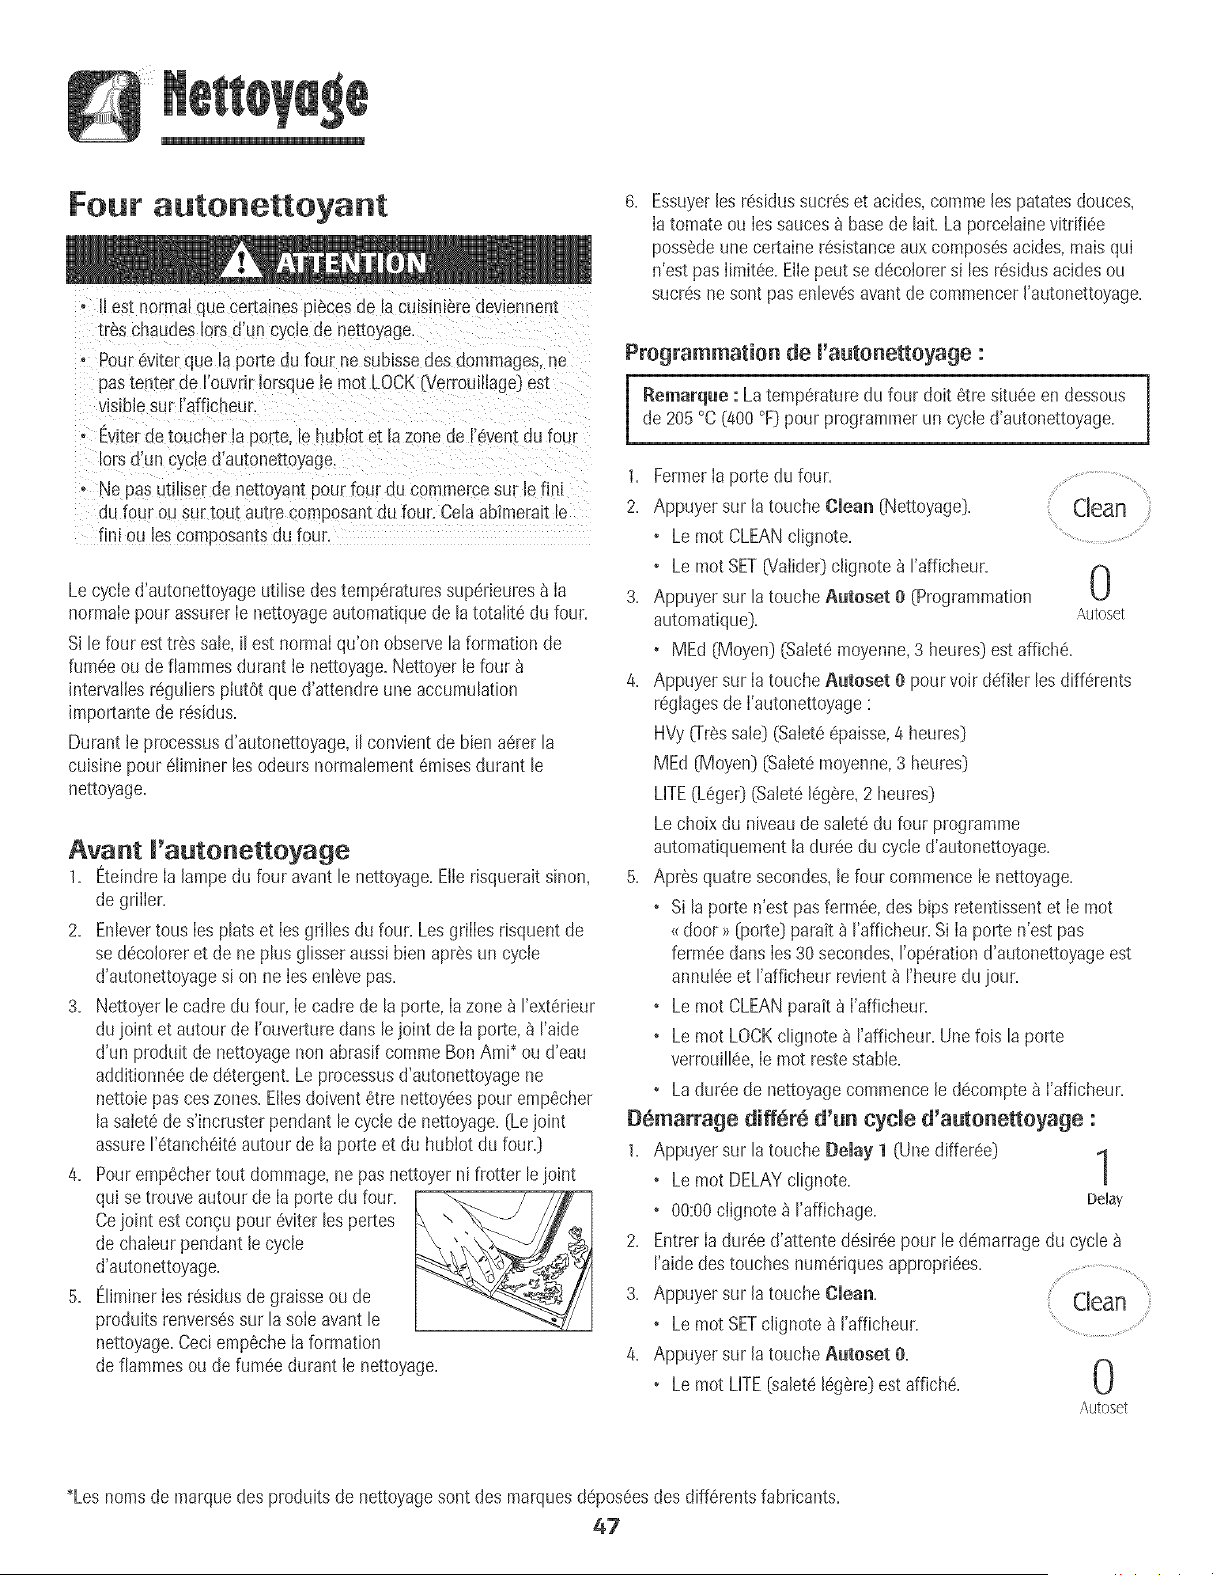
Four autonettoyant
o II eatnorma quecertaines piecesde la cuislmeredeviennent
tres chaudesIorsd'un cyclede nettoyage.
. Pour 6viter que la porte du four ne sublssedes aommages,ne
pastenter de FouvdrJorsquele roD1LOCK(Verrouiilage}est
visiblesur I'afficheur.
o Evlterde toucher laporte, le hublot et la zone de I'eventdu foul
lotsd'un cycled'autonettoyage.
o Ne pas utiliserde nettoyantpour four du commercesur Jefini
du four ou sur tout autre composantdu four. Celaabimeraitle
fini ou les composantsdu four,
Le cycled'autonettoyageutilise destemp6raturessuperieuresa la
normaIepour assurerIe nettoyageautomatiquede la totaiit6 du four.
Si b four esttres sale,il estnormaIqu'on observelaformation de
rum@ ou de flammesdurant ie nettoyage.Nettoyerlefour
intervallesreguliersphtOt qued'attendre une accumulation
importantede r@idus.
Durant le processusd'autonettoyage,il convient de bien aerer la
cuisinepour eliminer les odeursnormalement6raisesdurant le
nettoyage.
Avant I'autonettoyage
1. EteindreIa lampe du four avant le nettoya% Eib risqueraitsinon,
degriller.
2. Enbvertous Ies plats et Ies grilles du four. Lesgrilles risquentde
se d@oloreret de ne plus glisseraussibien apr6s un cycle
d'autonettoyagesi on ne Iesenl@epas.
3. Nettoyerle cadre du four, Ie cadrede la porte,Iazone _ I'ext6rieur
duioint et autour de I'ouverturedans lejoint de Ia porte,_ I'aide
d'un produit de nettoyagenonabrasif commeBon Ami* ou d'eau
additionn6ede detergent.Le processusd'autonettoyagene
nettob pas ceszones.Ellesdoivent etre nettoy@spour crop@her
lasaiet6de s'incrusterpendant le cycle de nettoyage.(Lejoint
assure1'6tanch6it6autour de laporte et du hubtot du four.[}
4. Pouremp6chertout dommage,ne pasnettoyer ni frotter leioint
qui setrouve autour de Ia porte du four.
Cejoint estcongu pour @iter les pertes
dechabur pendant le cycle
d'autonettoyage.
5. EliminerIesr@idus de graisseou de
produitsrenvers@sur la soleavant le
nettoyage.Ceci emp@heIa formation
defiammes oude rum@ durant le nettoyage.
6. Essuyerles r@idussucr@et acides,commeles patatesdouces,
Iatomate ou Ies sauces_ basede Bit. La porcelainevitrifi@
pos@deunecertainer6sistanceauxcompos@acides,maisqui
n'est pas limit@. Elle peut se d@olorersi les r@idusacidesou
sucresnesont pas enlev@avantde commencerI'autonettoyage.
Programmation de l'autenettoyage :
[ Remarque : La temperaturedu four dolt 6tre situ@ en dessous
de 205°C(400 °F[}pour programmerun cycb d'autonettoyage,
1. FermerIa porte du four.
2. Appuyer sur Jatouche Clean (Nettoyag@.
• Le mot CLEANclignote.
• Le mot SETUalide0 clignote _ I'afficheur.
U
3. Appuyer sur la toucheAutoset e (Programmation
automatique}. Autoset
•MEd (Moyen)(Saiet6moyenne,3 heures)estaffich6.
4. Appuyer sur [a touche gutoset e pourvoir defiler les differents
reglagesde ['autonettoyage:
HVy(Tressale) (Saiet8@aisse,4 heures]
MEd (Moyen)(Salet6moyenne,3 heures}
LITE(L6ge0 (Salete[6gere,2 heures}
Lechoix du niveaude salet6 du four programme
automatiquementla duree du cycle d'autonettoya%
5. Apres quatre secondes,le four commencelenettoya%
• Si la porte n'est pas ferm6e,des hips retentissentet ie mot
{{door >>[porte] parait _ I'afficheur.Si ia porte n'est pas
ferm@ darts ies 30secondes,I'operationd'autonettoyageest
annul6eet I'afficheur revient_ I'heuredu ]our.
• Le mot CLEANparait _ I'afficheur.
• Le mot LOCKclignote _ I'afficheur.Unefob la porte
verrauill@,Ie mot restestable.
• La dur@ de nettoyagecommencele d@ompte_ I'afficheur.
D6marrage differ8 d'un cycle d'autenetteyage :
1. Appuyer sur la touche Delay 1 (Une differee} 1
/
• Le mot DELAYclignote.
• 00:00clignote_ I'affichage. Delay
2. EntrerIadur6e d'attente@sir@ pour le @marragedu cycle
I'aidedestouches num6riquesappropri@s.
3. Appuyer sur la toucheClean.
• Le mot SETclignote _ I'afficheur. .........................
4. Appuyer sur la toucheAutoset 0.
• Le mot LITE(saleteleg6re} est affiche. U
Autosd
*Lesnoms de marquedes produits de nettoyagesont des marquesd@os6esdes diff6rentsfabricants.
_7

5. Appuyer sur Ia touche Autoset e [Programmation (_
automatique]pour voir dd+Ier Iesdiff6rents
U
r6glagesde I'autonettoyage: ,\uteset
HVy0-ressale] (Satet66paisse,4 heures]
MEd (Moyen] (Salet6moyenne,3 heures]
UTE(L6geO(Salet6Iegere,2 heures]
Lechoix du niveaude saletedu four programmeautoma-
tiquement Ia dur6edu cycle d'autonettoyage.
6. Apres quatre secondes,les rootsCLEAN(Nettoyage]et DELAY
(Differ6e]s'allumerontet le mot LOCKG_errouillage]clignotera
rafficheur.Lorsquela porte du four se verrouille,Ie mot LOCK
s'arr6te de clignoteret reste allure6en continu pour indiquer que
lefour est programm6pour uneoperation de nettoyagediff6r6.
Led61aid'attenteseraaffich6.
Aprbs le cycle d'autonettoyage
Environuneheure apres la fin du cycle,le motLOCKs'#teint+Ace
moment,la porte peut 6tre ouverte.
La samet6peut aveir maiss6un r6sidu gris poudreu×, L'enlever
avecun linge humide.S'il restede lasalet6,cetaindiqueque le cycle
de nettoyagen'a pas 8t6 assezlong. Cettesalet8restantesera
enleveeau prochain cycled'autonettoyage.
si les grilles ont _t_ maiss_es_ m'int_rieurdu four pendantle
cycle d'uutonettoyuge et qu'elles glissent real sur leurs sup-
ports, lesenduire,ainsi que lessupports,d'une fine couched'huile
v6g_tale.
De fines iignespeuventappuraitre duns ia porceiaine puree
qu'elle a subi chaleur et refroidissement. Ceciest normal et
n'affecterapas Ia performance.
Une d_comorationblanche peut apparaitre upr_s menetteyage
si des aliments acides ou sucrSs n'ont pus _t8 enlevSs avunt
que ne commence l'autenettoyageo La decoloration est normale
et n'affecterapas la performancedu four=
Pendant le cycle d'autonettoyage
LorsqueIe mot LOCKparait _ I'afficheur,la porte ne peut 6tre
ouverte+Poureviter d'endommagerla porte,ne pas forcer la porte
pour I'ouvrir IorsqueLOCKestaffiche+
Fum6e et odeurs
La premierefois o(JIefour est nettoy_,il peut y avoir production
d'odeur et defum6e=Ceciest normalet disparaitra_ I'usage+
Si lefour esttres saleou si une ustensilea ete laiss6edans le four, il
peut y avoirproduction de fumSe+
Bruits
Pendantque Ie four chauffe,il peut se produire desbruits de m6taI
en dilatationou en contraction+Ceci est normal et n'indique pasque
le four s'abime+
Remarques
• Si Ia porte du four n'est pas ferm6e,Ie mot ((door >>[porte]
clignote_ I'afficheur et lefour emet des hips jusqu'_ ce que la
porte soit ferrule et que I'on appuie_ nouveausur Clean+
• S'il s'ecoulepIus de cinq secondesentre Ie momentoQI'on
appuiesur Clean et cetuio_ I'onappuiesur latouche
Autoset O,I'afficheur retourneautomatiquement_ I'affichage
precSdent+
• Laporte du four se trouvera endommag6es+ton force son
ouverturealors que le mot LOCKest encore affichS+
48
M6thodes de nettoyage
et que teas [es eempesants sent freids, afin d'_viter des demmages eu des br_lureso *Leshams de marquesent des marques
, P0ui6_iter la f0rmation detacheSOU UnChar_gemerltde coUleuilnettoYeri,appare[iapi_s d6pos6esdes diff6rentsfabricants.
chaque utflisation, ** Pourcommanderdirectement,
o Apr_s tout d6montagede composants,vei!ler_ effectuerun remontagecorrect, corrlposerle 1-877-232-6771E.-U.ou
1-800-888-8408Canada.
NETTOYAGE
surfonte
Zone de la
console de
commande et
Boutons de
commande
Table de caisson
et tabmeau de
commande -
_maii vitrifi_
Chapeau× de br_leur amovibles
o LaisserIe brOieurrefmidir. EnieverIechapeau de brOleurpour le laverdanade I'eausavonneuseavecun tampon
r_!cureren piastique.Pourles souillurestenaces,nettoyeravec un tampon non abrasif,savonneux,ou avecune
6pongeet lacr_mede nettoyagepourtable de cuissonCooktopCleaningCreme_ (produit n° 20000001[}*_,
o Ne pas effectuerle nettoyageau [ave-vaisseileou dans le four autonettoyant.
gr_leurs _ gaz scell_s
o Nettoyer%quemment. Laisserle brOleurrefroidir. Nettoyeravec du savon et un tampon_ rScureren piastique.Pour
les souillurestenaces,nettoyeravec un tampon savonneuxet non abrasif. Ne pasagrandir ou ddormer les tmus.
o Veiller_ ne pasintroduire d'eau darts Ies orificesdu br_Jleur.
o Travaillerprudemment[orsdu nettoyagede ralhmeur. Si rallumeur estendommageou mouilie,les brOieursde [a
table de cuissonne pourront pass'aliumer.
o Laverles grilIes avecde I'eausavonneusetiSde et un tampon _ r6cureren piastiquenonabrasifl Pourlessouillures
tenaces,nettoyeravec un tampon en pIastiquenon abrasif,savonneux,ou avec une 6pongeet Ia cr6mede nettoyage
pour table de cuissonCooktopCleaningCreme_ (produit n° 20O0O0Ol__, S'il restedes souiliures,appliquer de
nouveauIacrSmepour table de cuisson,recouvriravecun essuie-touthumide,et laissertremperpendant30 minutes.
Frotterde nouveau,rincer et faire s6cher.
o Ne pas effectuerle nettoyageau Iave-vaisseiIeou dans le four autonettoyant.
o Pourutiliserla fonction Vermuillagedes commandeset de la porte du four pour Ie nettoyage,voir page37.
o Essuyeravecun linge humide et s6cher.Ne pas utiliserun agent de nettoyageabrasifsusceptiblede rayerIa finition.
o Onpeut utiliserun produit de nettoyagedu verre, pulv6rls6d'abord surun chiffan. NEPASprejeteHepreduit
directement sur les teecfles de cemmande ell sur ffafffcfleur.
o Placerchaquebouton _ Ia positiond'ARRET,et retirer chaque boutonen le tirant.
o Laver,rincer et faire s6cher.Ne pasutiliser un agent de nettoyageabrasif susceptiblede rayer lafinition.
o Fairefonctionner bHTvementchaquebrOleurpour verifier que le bouton a6t6 correctementr6instalI6.
L'6mai[vitrifi6 eatdu verre lie au metalpar fusion. II peut se fissurerou s'6cailler en cas de mauvaiseutiiisation. II est
r6sistantauxacides,mais pastotalement inattaquablepar leaacides.Tousles produits renvers6s,en particulier acides
ou sucrTs,doivent6tre essuy6simm6diatementavec un Iinge sec.
o Une lois refroidi, laveravec de reau savonneuse,rincer et s6cher.
o Ne iamais essuyerune surfacetiede ou chaudeavec un Iinge humide.Cecipourrait la fissurer ou 1'6cailler.
o Ne iamais utiliser de nettoyantspour four, d'agents de nettoyagecaustiquesou abrasifssur le fini ext6rieurde la
cuisini_re.
49

NETTOYAGE
Tiroir de
de porte -
_U _OUr en verre
. Une lois les pi6cesrefroidies,los laver_ I'eausavonneusetiSde, rinceret s6cher.Nejamais essuyerune surface
tiSdeou chaude avecun Iinge humide,ceci pouvantendommagerIa surfaceet entrainerune br0Iurepar Ia vapeur.
. PourIestaches rebetles,utiIiserdes agents de nettoyageI6g6rementabrasifscomme la pSteau bicarbonatede
soudeou BonAmR Ne pasutiliser de nettoyantsabrasifs,caustiquesou 6nergiquescomme los nettoyantspour
four ou Iestampons en laine d'acier. Cosproduits raieraientou endommageraientde fa_on permanentelasurface.
Remarque : Uti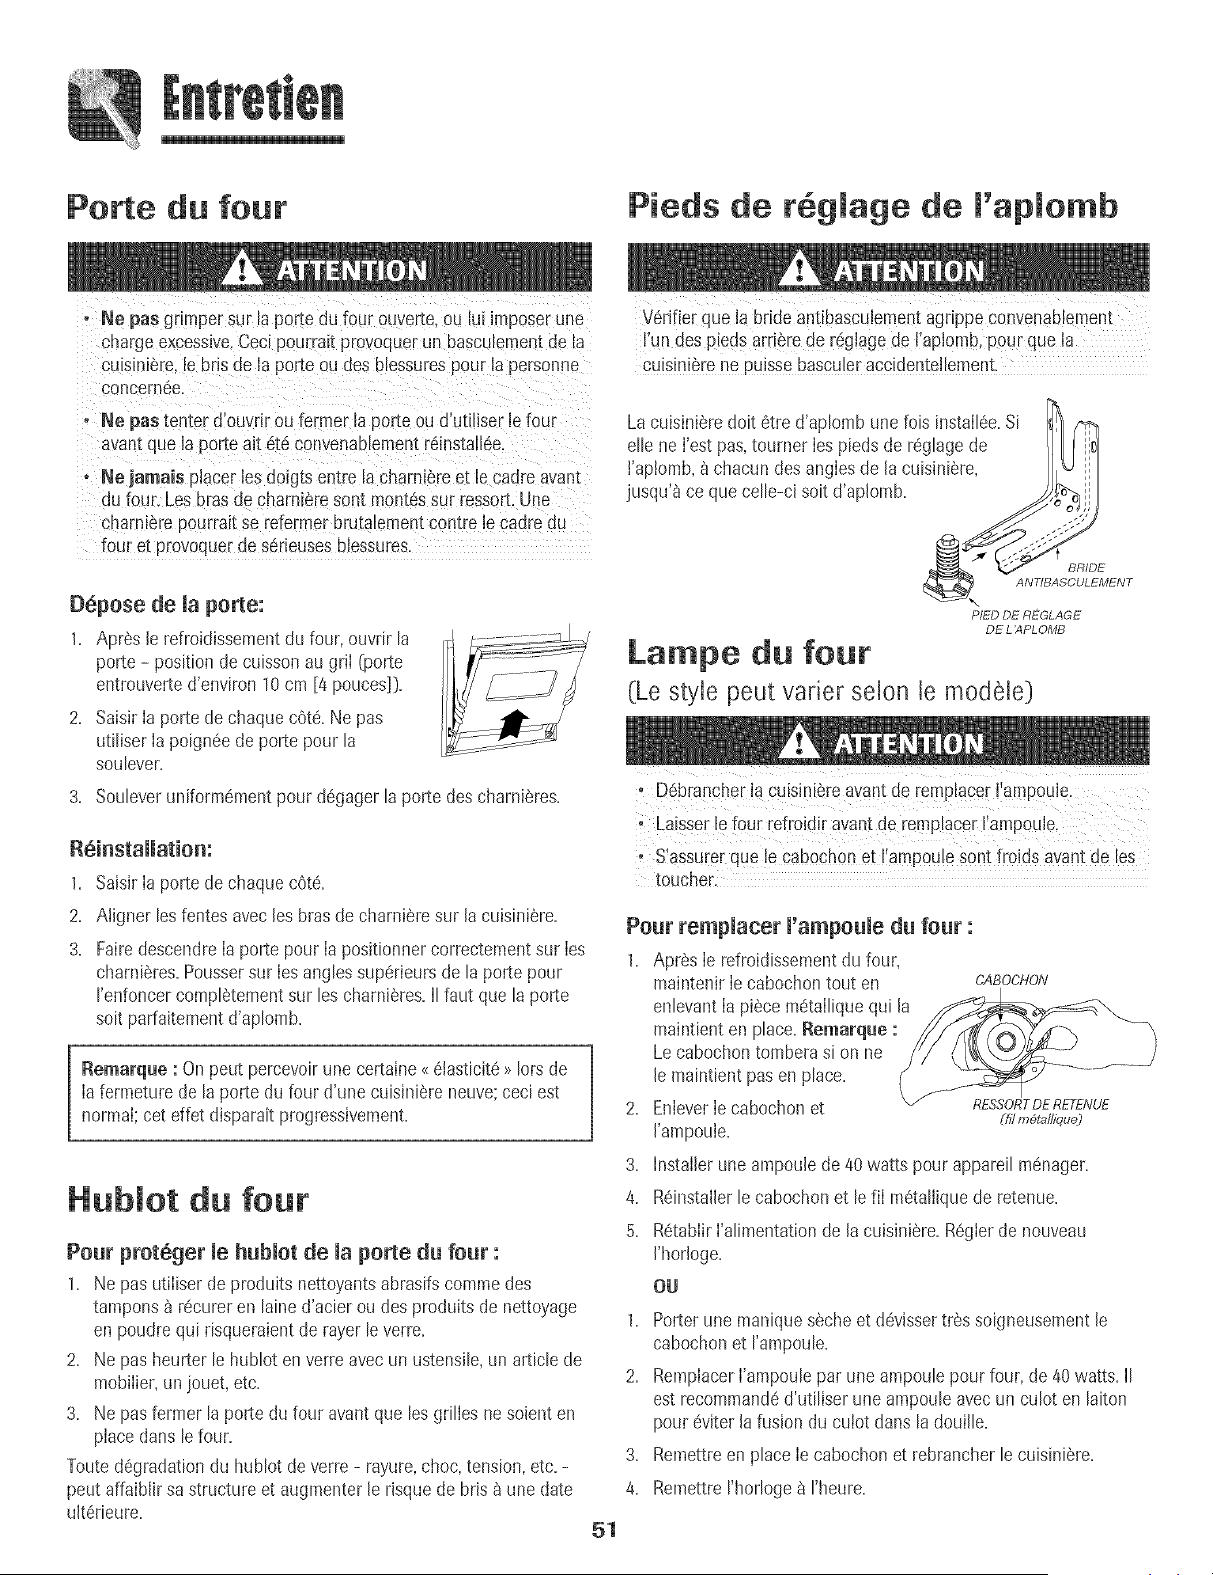
Porte du four
Pieds de r6glage de l'aplomb
°Ne pas gnmper sur la porte du four omerte.ou lui imposerune
charge excessive.Cec[pourraJtprovoquerun basculementde la
ctnsmlere _ebris de Japorte ou des blessurespour la personne
concern6e.
• Ne pas tenter d'ouvrir oufermer Laporte ou d'utHiser[efour
avantque la porte ait 6t6 convenabiementr6insta[16e
- Ne ]amais placerles doigtsentre lacharniSreet le cadre avant
du four. Les brasde cbarni6resent montessur [essort.Un_
charmerepourraitse refermer brutalementcentre [ecadre du
four et provoquerde s6rieusesbiessures.
Depose de la porte:
1. Apres le refroidissement du four, ouvdr la
porte - position de cuisson au griI (porte
entrouverte d'envimn 10 cm [4 pouces]).
2. SaisirIa porte de chaquec6t6. Ne pas
utiliser Iapoign6ede porte pour la
soulever.
3. Sou[everuniform6mentpour d6gagerla porte descharni@res.
V6dfierque la bride antibascuiementagdppeconvenablement
I'un des p!eds arri@rede r_glage de %piomb, pour que [a
cuisin[Brene puissebasculeraccidenteHemenL
La cuisinieredoit 6tre d'apiomb unefois instaii6e.Si
e[[ene I'estpas,tourner Iespiedsde r6g[agede I 0]
t'ap!omb,_}_chacun desangIesde [a cuisini_re,
jusqu'_ ce quecelle-ci solt d'aplomb.
BA ENT
PIED DE REGLAGE
DE L _ PL OMB
Lampe du four
(Le style peut varlet se[on le mode[e)
° D6brancher[a cuisini_reavant de remp[acer[ ampoule.
1. Saisirla porte de chaquec6t6.
2. Aligner lesfentes avec [es brasde charni6resur [acuisiniere.
3. Fairedescendrela porte pour la positionnercorrectementsur les
charni6res.Poussersur les anglessup6rieursde la porte pour
renfoncer compl6tementsur les charni6res.II faut que la porte
soit parfaitementd'aplomb.
l Remarque : Onpeut percevoirune certaine_ 6[asticit6>>lots de
lafermeture de la porte du four d'une cuisini6re neuve;ceci est
normal;cet effet disparait progressivement.
Hub[ot du four
Pour prot6ger [e hublot de [a porte du four :
1. Ne pas utiIiser de pmduits nettoyants abrasifs comme des
tampons _ r6curer en laine d'acier ou des pmduits de nettoyage
en poudre qui dsqueraient de rayer le verre.
2. Ne pas heurter [e hub[oten verre avecun ustensi[e,un articlede
mobilier,un jouet,etc.
3. Ne pas fermer[a porte du four avant que lesgrilles ne soienten
piacedons le four.
Touted6gradationdu hublot de verre - rayure,choc, tension,etc. -
peut affaiblir sa structureet augmenter[e risque de bris _ une date
ult6rieure.
51
Sassurerquele Cabochonet ! ampoulesent froids avantde les
touehe_.
Pour remplacer ['ampoule du four :
1. Apr_s le refroidissementdu four,
maintenirle cabochontout en CASOCHON
enlevantla piecemdtalliquequi [a
maintient en place. Remarque :
Le cabochontomberasi on ne
[e maintient pasen place.
2. Enleverle cabochon et RESSORTDERETENUE
(h7nl#_tallique)
['ampoule.
3. Instai[erune ampoulede 40 watts pour appareil menager.
4. R6installerle cabochon et le fi[ m6taliiquede retenue.
5. R6tabiir['alimentationde [acuisiniere.R6gierde nouveau
['hor[oge.
OU
1. Porterune maniquesecheet d6vissertr6s soigneusementle
cabochonet rampoule.
2. Remplacer['ampoulepar uneampoulepour four, de 40watts. II
est recommand@d'utiIiser uneampoule avecun cuIot en [aiton
pour eviter[a fusion du cuIot dans la doui[le.
3. Remettreen place [ecabochon et rebrancherlecuisini6re.
4. Remettrerhorloge a rheure.
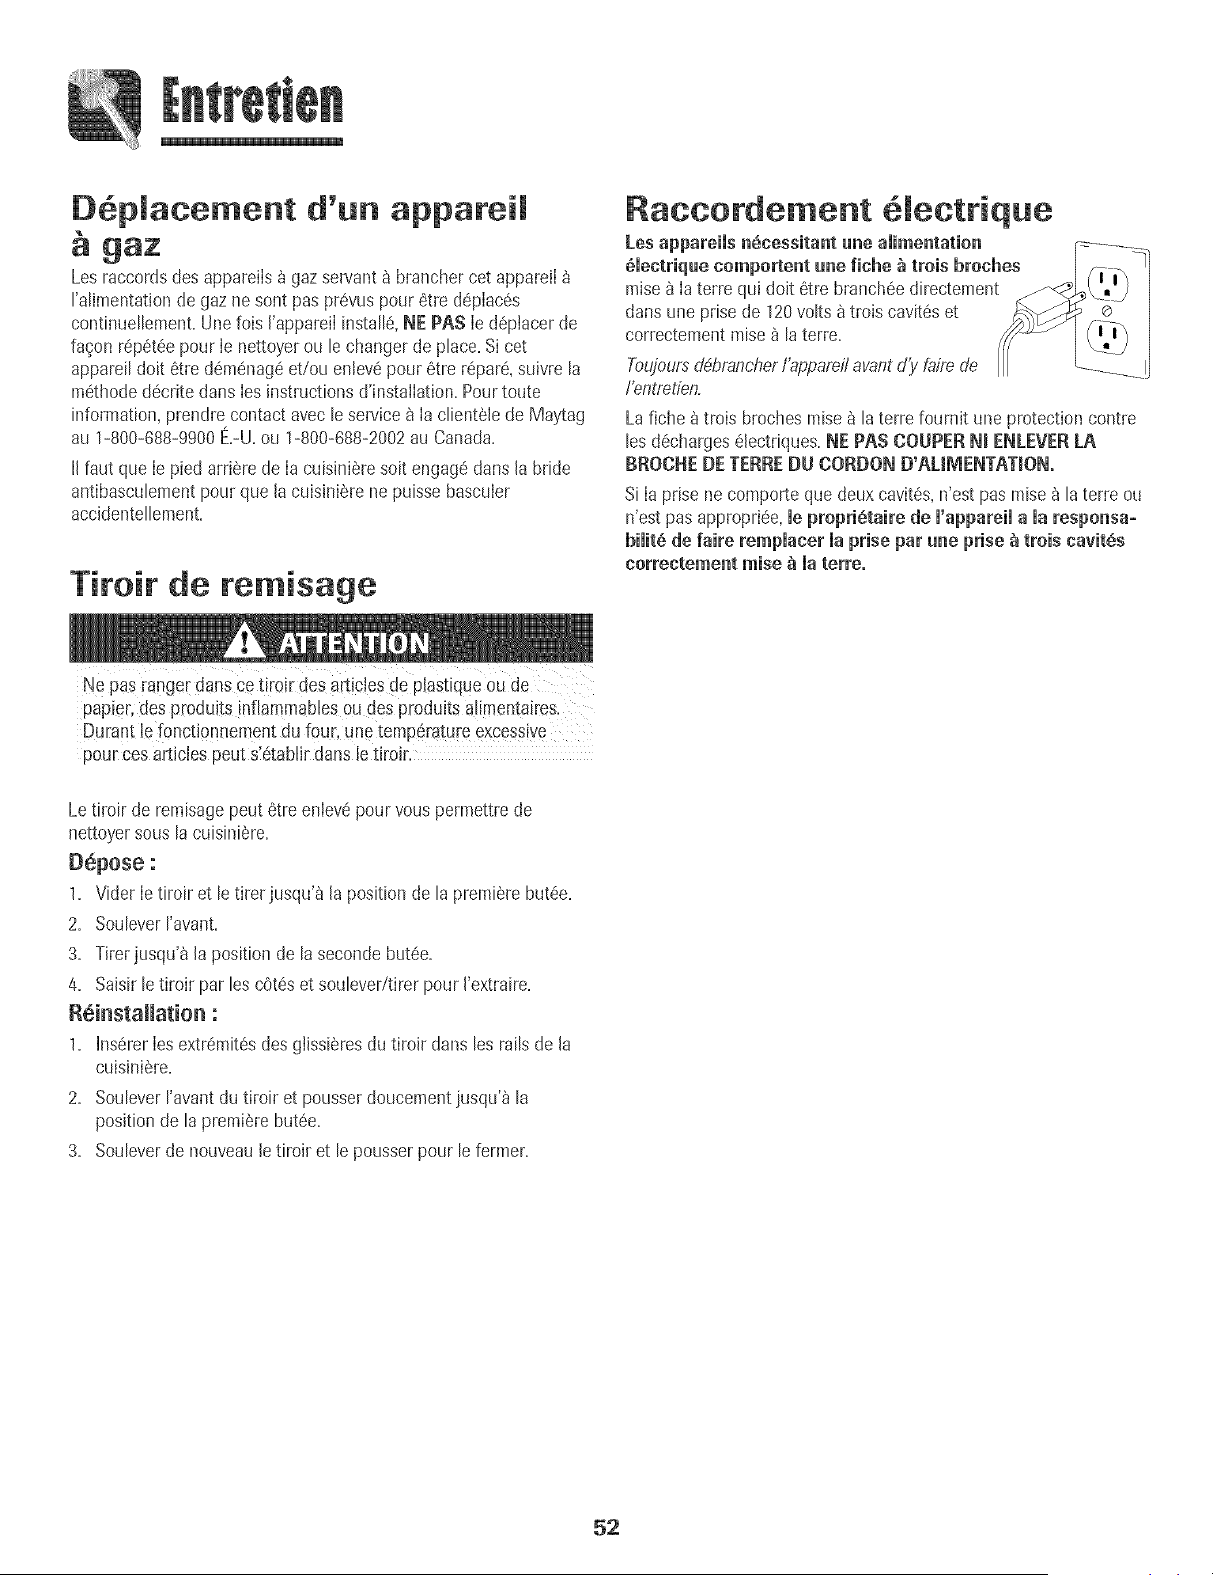
06placement d'un appareil
gaz
Lesraccordsdesappareils_ gazservant_ branchercot appareiI
FaNmentationde gaz ne sont pas pr6vuspour 6tre d@Iac6s
continuellement.Une fois I'appareiIinstall6,NF PAS Ie d@iacer de
fagon r@6t6e pour Ie nettoyerou le changerde phce. Sicet
appareildoit 6tre d6menageet/ou eniev6pour 6tre r6.par6,suivre la
m6thoded6critedarts Ies instructionsd'instalIatJon.Pourtoute
information,prendrecontact avec le service8 Ia client61ede Maytag
au 1-800-688-9900E.-U.ou 1-800-688-2002au Canada.
IIfaut que Ie pied arri_re de Ia cuisJniSresoitengage darts la bride
antibasculementpour que lacuisJnierene puissebascuier
accidentellement.
Tiroir de remisage
Raeeordement leetrique
Losappareiis n6eessitant une amimentation
_mectriquecomportent une fiche _ trois broches
raise8 Ia terre qui doit 8tre branch6edirectement
dans une prisede 120volts _trois cavitSset
correctementraise_ laterre+
Toujoursd4braneherl'apparei/avantd'y fairede
f'entretien+
Lafiche _trois brochesraise_ la terre fournit une protection contre
lesd6charges61ectriques.NE PASCOUPERN+ENLEVERLA
BROCNEDETERREDU CORDOND'ALIMENTATION.
Si Ia prise necomporte que deux cavit6s,n'est pas raise_ la torte ou
n'estpas appropri6e,mepropriStaire de m'appareimamaresponsa+
bimit+de faire rempmaeermaprise par une prise _ trois eavitSs
eorreetement raise _ matorte.
papier,des pmduits inflammablesou dos produits a!imentaires.
Durant lefonctionnementdu four, un@temperatureexcess!ve
pour cosarticles pout s'6taNir dans [etiroJr.
Letiroir de remisagepeut 6tre enlev6pour vouspermettrede
nettoyersousla cuisiniSre.
D6pose :
1. Vider Ietiroir et le tirer jusqu'_ la position de la premierebutte.
2. SouleverI'avant.
3. Tirerjusqu'& la position de lasecondebutte.
4. Saisir le tiroir par les c6tSset soulever/tirerpour I'extraire.
R_i_stallatio_ :
1+ hs_.rerIes extr_mit_sdes giJssi_resdu tiroir clansles rails de Ja
cuisiniSre.
2. SouleverI'avantdu tiroir et pousserdoucementjusqu'_ la
positionde la premiSrebutSe.
3. Souleverde nouveaule tiroir et lepousser pour le former.
52
PROBL[ME SOLUTION
Pour mapmupartdes probmemes , V6rifier que Iescommandesdu four sont correctementregl6es.
observes, essayer d'abord mes , Verifier si lefour est bien raccordeau circuit electrique.
somationspossibles, _ droite. , Inspectedrearmerle disioncteur.Inspecter/remplacerJesfusibles.
, ContrOlerIa sourced'alimentationelectrique.
Un br_lear de surface ne s'allame , Verifier que I'appareiIestcorrectementraccorde_ la source d'electricite.
paso , Determinelsi I'alimentationelectriqueest interrompue(fusible grilIddisjoncteur ouvert}.
, Verifier que I'allumeurest sec et qu'iI emetdes etJncelles.LebrOleurne peut s'alJumersi
J'allumeurestendommage,souilleoumouiJle.SiI'alIumeurnegenerepasd'etincelles,ramener
le bouton de commande_ la position OFJ:(Arret).
[:iammes non aniformes. , Orificesdu brOleurobstrues.
Separation entre les flammes et , VeilIer & placercorrectementrustensilesur Ia grille du brOleur.
mebremeuro
R_samtatsde caisson aa four , Verifier que Ia temperatureseJectionneeest correcte. VeiJJer_ prechaufferJefour sJ
diff6rents des attentes oa de eeux ceciest demandeclanslarecette.
produits par le roar antSriear. , Determinersi I'eventdu four est obstrue.Voir son emplacementpage45.
• S'assurerque iacuisiniSreest d'aplomb.
, Les regJagesde temperaturevarientsouvententre un four neuf et ie four qu'iI remplace.
Onobsewesouventune delive du reglagede temperatured'un four _ mesurequ'iI vieiIlit;
il peut devenirplus chaud ou mains chaud.Voir page 44 Ies instructionsd'aiustementde
la temperaturedu four. Remarqae : lI n'est pas utile de modifierle reglagede temperature
si lavariationn'affecte qu'une ou deux recettes.
, UtiIiserIesborisustensiles.LesustensiIesfoncesdonnentun brunissementdecouJeurfoncee,
les ustensiIesbrillants,un brunissementplus clair.Pourd'autres informationsau sujetde la
cuissonau four,voir Ia b_ochureLa cuissonsimpiifiee.
, Verifier la positiondesgrilles et des ustensiles. Lorsde la repartition sur deux griIles,ne pas
superposerIes plats. Veiller _ hisser unespacede 2,5& 5 cm (1 _2 po) entre lesplats et les
paroisdu four.
, ContrOlerI'utiJisationde feuiIIed'aluminiumdans Ie four. Nejamais recouvrircomplStement
unegrilIedufour avecde la feuilled'aIuminJum.Placerun petit morceaudefeuille d'aluminium
sur la grille sous le plat pour recuperer les matieresrenversees.
RSsaJtatsineorreets lots de la , Determinerla position des grilJes.Lesalimentspeuvent6tre trap pr6sdes flammes.
caisson au grim,ou 6mission , Utilisationincorrectede feuille d'ahminium. Nejamais garnir lagriJlede 18chefriteavec
excessive de famSeo de [afeuille d'aJuminium.
, EnJever['exeCsde graissesur [a piecede viandeavantla cuissonau gril.
UtiiisatJond'une [echefritesouill6e.
Pr6chauffer[e four pendanttrois minutesavantde placer le pJatdans [e four.
Portedu four ferm6edurant la cuissonau gril.
53
PROBLEME SOLUTION
Impossibimit_ d'autonettoyage
du four.
Le four ne se nettoie pus
corr@ctem@nt,
La porte du four ne se d6verrouimme
pus apr_s i'autonettoyage,
Accumumationd'humidit_ sur me
hubmotou vapeur so,ant de m'_vent.
Emission d'une forte odeur ou de
fum6e morsde muraise en marche
du four.
Codes d'anomaiie.
Des bruits se font entendre.
imn,ya ni hip ni affichage.
SAb cmignoteputs
reste ummum_.
Determinerque rappareiln'a pas ete programmepour un autonettoyagediffere.Voir
pages47-48.
, Verifierque Ia porte est fermee.
, Verifiersi la commandeest en modesabbat.Voir page 43.
Le four est peut etre _ une temperaturesuperieure_ 205 °C [400oF).Latemperaturedu
four doit etre inferieure_ 205 °C [400°F)pourpouvoir programmerun cycled'autonettoya%
° Un temps de nettoyagepIus long peut 6tre necessaire.
° Onn'a pas6Iimineavant I'operationd'autonettoyageIesaccumuIationsexcessivesde residus.
particuIierementlesr6sidus d'alimentsacidesou sucres.
° L'interieur du four est encorechaud.Attendre environ une heureapresI'achevementde Ia
p6rioded'autonettoyage.II est possibled'ouvrirla porteapresladisparitiondu messageLOCK
07errouillage)sur I'afficheur.
, Les commandeset la porte sontpeut-etre verrouillees.Voir page 37.
, Ceci est normaldurant la cuissond'alimentscontenant beaucoupd'eau.
Utilisationexcessived'humidit6 Iorsdu nettoyagedu hublot.
Ceciest normalpour un four neuf et disparait apresquetquesutitisations.
Un cycle d'autonettoyage<brCJIera>>plus rapidementlesodeurs.
La raiseen marched'un ventJIateuraide_ retirerfumee et odeurs.
Presencede saletessur la sole. Proc6der_ un autonettoya%
Les rootsBAKE(Cuissoncourante) ou LOCKpeuvent ciignoter rapidement8 I'afficheurpour
pr6venird'une erreurou d'un probI_me.Sile motBAKEou LOCKparak_ I'afficheur,appuyer
sur la touche CANCEL(Annule0. SiIe mot BAKEou LOCKcontinue_ ciignoter,debrancher
I'appareil.f_ttendrequelquesminutes,puisrebrancherI'appareiI.Sile mot continue_ciignoter.
d6brancherI'appareiIet prendrecontact avecun reparateurautorise.
SiIefour esttres sale,lesflammechespeuventproduireun coded'anomalieaucours du cycle
d'autonettoyage.Appuyersur Iatouche CANCELet IaisserIe four refroidir compietement,
essuyerlasalet6enexcespuisreprogrammerI'autonettoya%Silecoded'anomalier6apparait,
prendrecontact avec un reparateurautorise.
° Lefour fait phsieurs bruits faibies,lI estpossibled'entendreles relaisdu four qui se mettent
en marcheet s'arretent.Ceciest normal
AiorsqueIefourser6chauffeet serefroidit,iIest possibied'entendre desbruitscorrespondant
[adiIatationet 8 Iacontractiondespiecesmetalliques.Ceciest normalet n'endommagepas
['appareil.
Le bruit d'un ventilateur peut 6tre entendu.C'estie ventiiateurde refroidissementet cec[
est normal Leventi[ateurcontinue _ fonct[onner tant que [e four n'a pas refroidi.
Le four est peut-etre en modesabbat.Voir page 43.
Le four est en modesabbat.Pour annulet, appuyersur [a touche Clock [horioge) et
maintener-iaenfonceependant cinq secondes.
54
Garant[e de la cuisini te a gaz
Garantie co replete d'une annie -
Pi_ces et main-d'oeuvre
Durantune perioded'un (1} an _ comp-[etde ladate
de I'achatinitialau a_ta[Ltou[epiecequl se revelerait
ddec[ueusedansaes conditionsnormalesd'usage
menagerserarear@ ou rempla@egratuitemen[.
VeuiUezBorer : Cegarantlecompletene
s'app[tqgentque s_leapparellsetrouv_au Canada
ou au×Etats-Unis.Lesappam_lssltuesailburs ne
sontcouver[sque parles garantieslimit@s,y
compnsde pi_,cesqu_se r_,v_leraientddec_ueusesla
premiereannee.
P,esidents canadiens
Legarant[ec[-dessuscouvrelesappare[isinstallesau
Canadaseubments'ils ont 6t6 agreespar la CSA.
saulst cesapparellsont ate introduitsauCana(Ja
[occasiond'un changemen[de residencedes Eta_s-
Unisversle Canada.
Les garaptiessp_cifiques fo!_lu/#es ci-dessus sont les
SEULES que le fa,glicantaccorde. Ce9aran[le vous
conbrent des droitsjuridiques sp#cifiques et vous
pouvez egalementjouZr d'autres dro£_, vawab/esd'un
_tat a/'autre, d'une province a une au[re.
Ne sent pas couverts par ces garant[es :
1, Lesdommagesouderangementsdus _:
a. Miseen service,Iivraisonou entretieneffectu@incorrectement
b.Touter@aration,modification,alterationet tout reglagenonautoris@par
Iefabricantou parun prestatairedeserviceapr@-venteagree.
c. Mauvaisemploi,emploiabusif,accidents,usagenon raisonnabb,ou
catastrophenaturelle.
d. Alimentation61ectrique{tension,intensit@incolrecte.
e. Reglageincorrectd'une commande.
2. Lesgarantiesnepeuvent6tre honoreessi bs numerosde seried'origineont et6
enbves,modi%sou nesont pasfacilementlisibles.
3. Ampoules.
4. Appareilsachetesauxfins d'usagecommercialou industrieI.
5. Lesfrais devisited'un prestatairede serviceoude serviceapres-venteencourus
pourIes raisonssuivantes:
a. Correctiond'erreursde raiseen service.
b. initiationde I'utilisateur_ I'emptoide I'appareil.
c. Transportde I'appareiliusqu'8I'entreprisedeserviceapres-venteet son retour.
6. Dommagessecondairesou indirectssubispartoutepersonnesuite au non-respect
de cesgaranties.Certains6tatsou provincesne permettentpas I'exclusionou la
limitationdes dommagessecondairesou indirects;parconsequentleslimitationsou
exclusionsci-dessuspeuventnepass'appliquer_votre cas.
Si un sewice apr s vente est necessaite
it faut d'abordconsulterB sectionsur le d@annagedu manue!d'utilisationet
d'entretbn ou appelerMaytagServicesSM/service_ Iaclienteb de Maytagau
1-800-688-9900E.-U.ou 1-800-688-2002au Canada.
Po r obtenir prestations de garantie
PourIocaliseruneagenceagree deserviceapres-ventedansvotreregion,prenez
contactavecle detaiIlanto8 vous avezachete!'appareil;ouappebz MaytagServicesSM/
servicea laclienteledeMaytag.Sivousn'obtenezpas unservicesatisfaisanten vertu
de lagarantie,veuillezecrireou t_l@honer_ :
MaytagServicessM
A I'attentiondu CAIR_ Center
RO.Box2370,CIeveland,TN 37320-2370
F:o-Uo1-800-688-990e et Canada 1-800-688-2092
Remarq_e : Lots de tout contact aupresde MaytagServices sM,sewice _ la
clientelede Maytag et concernantun probleme,veuillezfournir I'information
suivante:
a.Vos nora,adresseet numerode tel@hone;
b. Numerode modeleet numerode serb de I'appareil;
c. Noraet adressedu @taillantavecladate I'appareilachete;
d. Descriptionclairedu problemeobserve;
e. Preuved'achatavecla date.
Lesguidesd'utJJisatbn,Jesmanuelsde serviceet les renseignementssur Jespiecessontdisponiblesaupresde MaytagServbessF'a,service_ JaclienteJe.
55
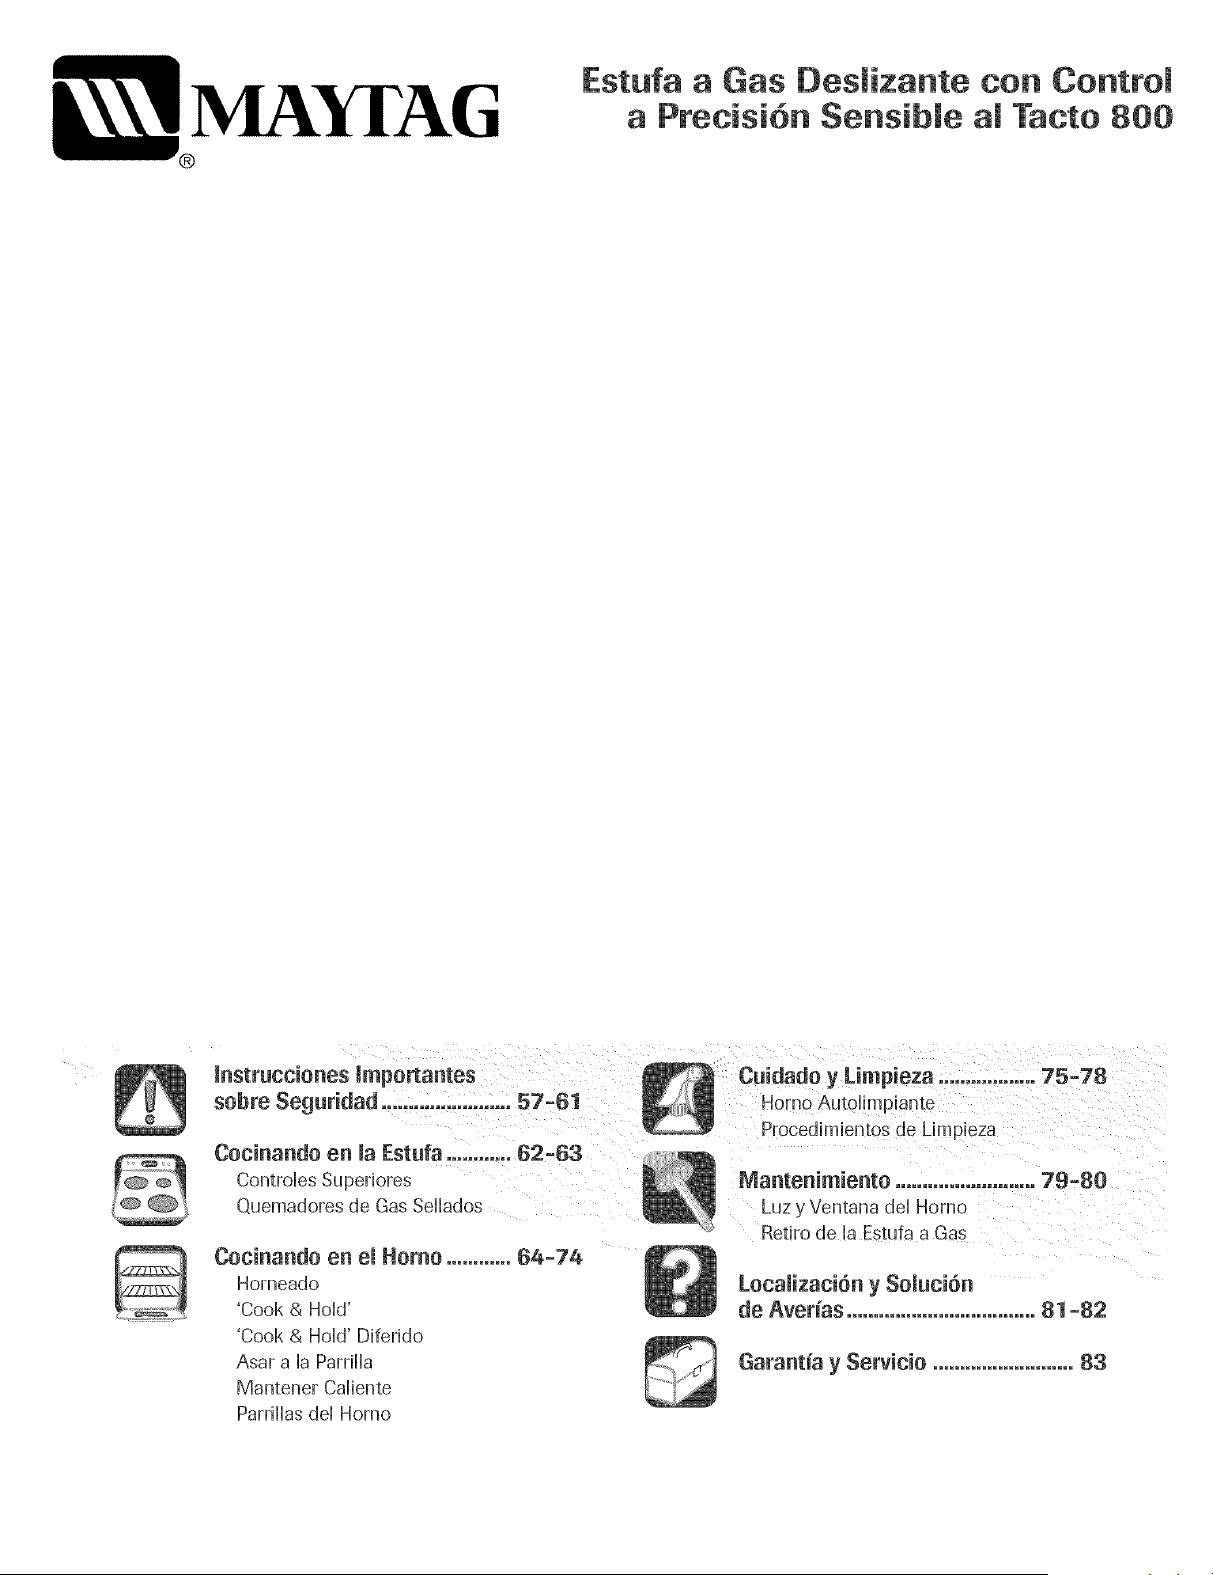
®
Estufa a Gas Desmizante con Controm
a Precisi6n Sensibie ai Tacto 800
lnstrucciones Jmpottantes
sobte Seguridad ........................ 57-61
Cocinando en maEstufa ............ 62-63
ControHesSu penores
Quemadores de Gas Seflados
Cocinando en el Homo ............ 64=74
Horneado
'Cook & HoM'
'Cook & HoHd'Diferido
Asar a HaParriHa
Mantener Cdiente
Parrillas dd Homo
Cuidado y/impieza ..................75-78
Procedimienlosde Limpieza
Mantenimiento ..........................79-80
Luz _ Ventana del Homo
Retiro de la Estufa a Gas
ILocalizaciOn y Soluci6n
de Avefias ...................................81 =82
Garantia y Servicio .......................... 83
mnstaiader: %r [avordeje eStagu[ajunto con el
e[eotrodom6stico.
Consumidor:%r favorbay conserveesta gu[a pagarderencia
N8merode Serie
Intemet: httpl!!www.maytag.com
Ennuestr0continuo af_n de mejo[arB calidady rendimbnto do
nuestros electrodomestb0s,puede que seanecesariomodif[car
e!ectFod0m6sticoSinactua!!zaresta gu[a.
Para infermacidn sebre servide, ver p_gina 83.
Lea y siga todas las instrucciones antes de usar este
electrodom_stico para evitar eI rbsgo potential de incendio,
choque ei@trico, bsi6n personal o daSo al ebctrodom6stico
como resultado de su uso inapropiado. Utilice este
ebctrodom6stico solamente para el prop6sito que ha sido
destinado seg0n se describe en esta guia.
Para asegurar funcionamiento correcto y seguro: El
ebctrodom6stico debe ser instalado debidamente y puesto a
tierra por un t@nico calificado. No intente ajustar, reparar,
prestar servicio o reempBzar ninguna pieza de este
ebctrodom6stico a menos que sea especfficamente
recomendado en esta guia. Todas Bs reparaciones deben ser
realizadas por un t@nico cdificado. Pida al instalador que b
indique la ubicaci6n de la v_lvuB de cierre del gas y como
cerrafla en oaso de una emergencia.
Siempre desenchufe el ebctrodom6stico antes de efectuar
alguna reparaci6n.
= No almaeene ni use gaso!ina n! otros vapores y
I!quidos inflamab!eS en la veCindad de este
Las advertencias e instrucciones importantes sobre seguridad
que aparecen en esta guia no est_n destinadas a cubrir todas
las posibbs circunstancias y situaciones que puedan ocurrir.
Se debe ejercer sentido com0n, precauci6n y cuidado cuando
instab, redice mantenimiento o haga funcionar el artefacto.
Siempre p6ngase en contacto con el fabricante si surgen
probbmas o situaciones que usted no comprenda.
Reconozca los simbolos, advertencias,
etiquetas de seguridad
, Llame inmediatamente a su proveedor de gas
desde el tel_fono de un vecino, $!ga las
inStruceiones proporcionadas per el proveedor
de gas,
llame ai euerpo de bomberoso
- La instalaci6n y reparaciones deben set efectuadas
porun t6cnico califlcado, una agen¢ia de
reparaciones o el proveedor de gas.
PODRIAN Causar bsi6n personal grave o mortal,
PODRIAN causar lesi6n personal menos grave,
una situaci6n pe!igresa, Los escapes de gas ne pueden ser
rec0miendan que comp_e e instale un detector de gas
acuerdo con las inst_ucciones del _abricante,
57
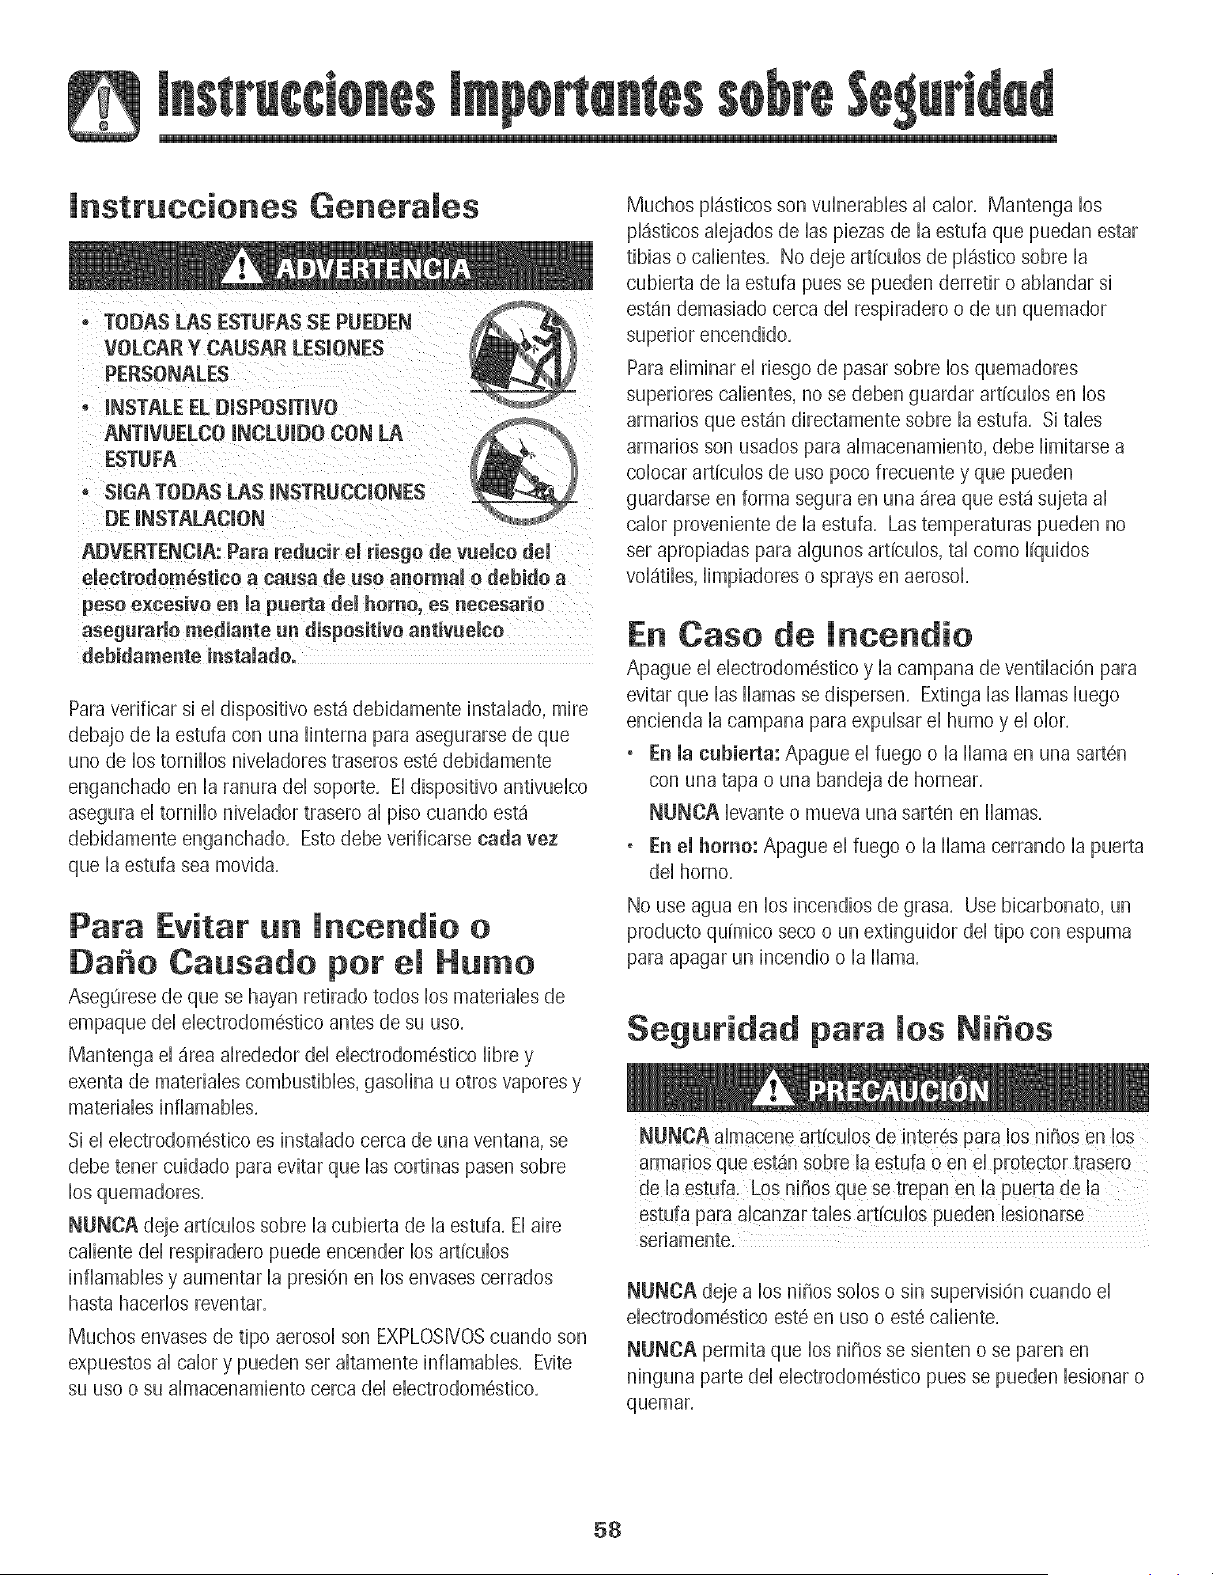
lnstruccienes Generales
o TODAS LAS ESTUFAS SE PUEDEN
VOLCAR Y CAUSAR LESIONE$
PERSONALES
° INSTALE EL DISPOSITIVO
ANTIVUELCO mNCLUIDOCON LA
ESTUFA
. SIGA TODAS LAS INSTRUCCIONES
DE INSTALACION
ADVERTENC_A: Para reducir el riesgo de vueico dem
eiectrodom#.stico a eausa de use anormal e debide a
peso e×cesivo en la puerta del homo, es necesario
asegurarle mediante un dispesitive antivuelco
debidamente instalade.
Para vefificar si eI dispositivo est_ deNdamente instalado, mire
debajo de la estufa con una linterna para asegurarse de que
uno de los tornillos nivehdores traseros este debidamente
enganchado en la ranura dd soporte, El dispositivo antivuebo
asegura el tornillo nivelador trasero al piso cuando est_
debidamente enganchado, Esto debe verificarse carla vez
que la estufa sea movida,
Para Evitar un lncendie e
ease Causade pot el Hume
Asegurese de que se hayan retirado redes los materiabs de
empaque del ebctrodomestico antes de su use,
Mantenga el _rea drededor del ebctrodom6stico libre y
exenta de materiabs combustibles, gasolina u otros vapores y
materiabs infiamabbs,
Si el ebctrodom6stico es instdado cerca de una ventana, se
debe tenor cuidado para evitar que las cortinas pasen sobre
los quemadores,
NUNCA deje articulos sobre la cubierta de la estufa, El aire
cdiente del respiradero puede encender los articulos
infiamabbs y aumentar la presi6n en los envases cerrados
hasta haceflos reventar,
Muchos envases de %0 aerosol son EXPLOSIVOScuando son
expuestos al calory pueden ser dtamente infiamabbs, Evite
su use o su almacenamiento cerca del ebctrodom6stico,
Muchos pl4sticos son vulnerabbs al crier, Mantenga los
pl4sticos abjados de hs piezas de la estufa que puedan estar
tibias o cdientes, No deje articulos de pl4stico sobre la
cubierta de la estufa pues se pueden derretir o aNandar si
est4n demasiado cerca del respiradero o de un quemador
superior encendido,
Para eliminar el riesgo de pasar sobre los quemadores
superiores calientes, no se @ben guardar articulos en los
armarios que est4n directamente sobre la estufa, Si tales
armarios son usados para almacenamiento, debe limitarse a
colocar articulos de use poco frecuente y que pueden
guardarse en forma segura en una 4rea que est_ sujeta al
calor proveniente de la estufa, Las temperaturas pueden no
ser apropiadas para dgunos articulos, td come liquidos
vol4tibs, limpiadores o sprays en aerosol,
En Case de lncendie
Apague el ebctrodom6stico y la campana de ventilaci6n para
evitar que las llamas se dispersen, Extinga las llamas luego
encienda la campana para expubar el humo y el olor,
, En ia cubierta: Apague el fuego o la llama en una sarten
con una tapa o una bandeja de homear,
NUNCA bvante o mueva una sarten en llamas,
, En el homo: Apague el fuego o la llama cerrando la puerta
del homo,
No use agua en los incendios de grasa, Use bicarbonate, un
producto quimico seco o un extinguidor del %o con espuma
para apagar un incendio o la llama,
Seguridad para los Ni es
seriamente,
NUNCA deje a los niSos solos o sin supervisi6n cuando el
electrodom6stico est6 en uso o est6 caliente,
NUNCA permita que los niSos se sienten o se paren en
ninguna parte del electrodom6stico pues se pueden lesionar o
quemar,
58
Se les debe ense_ar a los ni_os que el electrodomestico y
los utensilios que est_n en 61o sobre 61pueden estar
calientes, Deje enfriar los utensilios cdientes en un lugar
seguro, fuera del alcance de los niCiospequeCios, Se les
debe ense_ar a los ni_os que un electrodom6stico no es un
juguete, No se debe permitir que los ni_os jueguen con los
controles u otras piezas de la estufa,
NUNCA use la puerta de este electrodom6stico como pelda_o
o asiento ya que el electrodom6stico se puede volcar, y causar
lesiones graves,
NUNCA use este dectrodom6stico como cdefactor de area
o para elevar la temperatura de la habitaciOn, Esto puede
causar envenenamiento pot mon6xido de carbono '. el
sobrecdentamiento del homo,
NUNCA cubra ninguna rendija, agujero o canal en la parte
inferior del homo o cubra la rejilla completa con materiales
tales como el papel de aluminio, Esto evita que el aire fluya
a traves del homo y puede causar envenenamiento pot
mon6xido de carbono, El papel de aluminio tambiSn puede
contener el calory producir un riesgo de incendio,
NUNCA obstruya elfiujo del aire de combustion _,de
ventilaci6n cubriendo las entradas o salidas de aire del homo,
Esto puede restringir el acceso del aire a los quemadores y
causar envenenamiento pot monOxidode carbono,
El respiradero del homo se encuentra en la parte trasera de la
superficie de cocci6n,
Evite tocar el _rea del respiradero mientras el homo est6
encendido y durante varios minutos despu6s de haberlo
apagado, Algunas partes del respiradero y del _rea que Io
rodea se calientan Io suficiente como para causar
quemaduras, Despu6s de apagar el homo, no toque el
respiradero o el _rea que Io rodea hasta que haya tenido
suficiente tiempo para enfriarse,
Otras superficies que pueden estar calientes induyen la
cubierta, las superficies que est_n dirigidas hacia la cubierta,
el respiradero del homo, la superficie cercana a la abertura del
respiradero, la puerta del homo y la _rea que la rodea, y la
ventanilla del homo,
No toque un foco de homo caliente con un paso humedo ya
que se puede romper, Si ei foco se rompe, desconecte ei
suministro ei6ctrico ai eiectrodom6stico antes de retirar ei foco
para evitar un choque ei6ctrico,
59
No use [a cubierta o e[ homo como una _rea para a[macenar
alimentos o utensilios de cocina,
Segutidad Para Cocinar
Siempre coloque un utensilio en un quemador superior antes
de encenderlo, Asegurese de usar la perilla correcta que
controla cada quemador superior, Aseg_rese de encender el
quemador correcto y comprobar de queen efecto el
quemador haya sido encendido, Cuando haya terminado de
cocinar, apague el quemador antes de retirar el utensilio para
evitar exposici6n a la llama del quemador,
Siempre ajuste la llama del quemador superior de modo que
no se extienda mSs all_ del borde inferior del utensilio, Una
llama excesiva es peligrosa, desperdicia energia y puede
da_iar la estufa, el utensilio o los armarios que est_n sobre la
estufa,
NUNCA deje sin supervisi6n la cubierta de la estufa cuando
est6 cocinando, especidmente cuando usa un ajuste de calor
alto o cuando est6 usando una freidora, Los reboses pueden
producir humo y los derrames de grasa pueden infiamarse,
Limpie los derrames grasosos tan pronto como sea posible,
No use calor alto durante periodos de cocci6n prolongados,
NUNCA cdiente un envase cerrado en el quemador superior
o en el homo, La acumulaci6n de presi6n puede hacer
explotar el envase causando una lesi6n personal grave o da_o
a la estufa,
Use tomaollas secos y gruesos, Los tomaollas hOmedos
pueden causar quemaduras a causa del vapor, Las todlas u
otros sustitutos no deben ser usados como tomaollas porque
ellos pueden quedar colgando a traves de los quemadores
superiores y encenderse o enredarse en las piezas de la
estufa,
Siempre deje enfriar la grasa caliente que se ha usado en la
freidora antes de intentar mover o manipularla.
No permita que se acumule grasa u otros materides
infiamables en la estufa o cerca de ella, en la campana o en el
ventihdor aspirador. Limpie la campana extractora con
frecuencia para evitar que la grasa u otros materiales
infiamables se acumulen en la campana o en el filtro.
Encienda el ventiWor cuando cocine dimentos fiameados
debajo la campana.
NUNCA use vestimentas de materides infiamables, ropa
suelta o de mangas largas cuando est6 cocinando. La
vestimenta se puede encender o enganchar en los mangos de
los utensilios.
Sbmpre coIoque las parriihs deI homo en la posbi6n deseada
cuando eI homo est6 frio, Desibe la parriih deI homo hacia
afuera para agregar o retirar aiimento, usando tomaoiias secos
y resbtentes, Siempre evReabanzar dentro deI homo para
agregar o retirar aiimentos, Si una parriiia debe ser sacada
cuando est4 todavia caiiente, use un tomaoiias seco, Siempre
@ague eI homo despu6s de haber terminado de cocinar,
Tenga cuidado cuando abra la puerta dei homo, Deje que
escape eI aire o eI vapor caibnte antes de sacar o voiver
coIocar eI aiimento,
ADVERTENCIA SOBRE LOS ALIMENTOS PREPARADOS:
Siga Bs instrucciones del fabricante de los aBnentos, Si un
envase de pl4stico de alimento congeBdo y/o su tapa se
deforma, se comba o se daha de alguna otra manera durante
la cocci6n, descarte inmediatamente el alimento y su envase,
Elalimento puede estar contaminado,
NUNCA use papel de duminio para cubrir una parrilh del
homo o la parte inferior del homo, El uso incorrecto puede
resuRar en un riesgo de choque el@trico, incendio o daho al
ebctrodom6stico, Use papel de duminio solamente como se
indica en esta guia,
UtensiJios Apropiados
Use sartenes con fondos pBnos y mangos que sean f4cibs de
tomar y que permanezcan frios, Evite usar sartenes u ollas
inestabbs, combadas que se pueden vobar f4cilmente u olhs
cuyos mangos esten sueRos, Adem4s evite usar utensilios
especidmente peque_ios o sartenes con mangos pesados
pues ellos pueden ser inestabbs y vobarse f4cilmente, Los
utensilios que son pesados de mover cuando est4n Ibnos con
alimento pueden tambi@ ser un peligro,
AsegLirese de que el utensilio sea Io suficientemente grande
como para contener en forma debida los alimentos y evitar
derrames, El tama_ioes particularmente importante cuando
se utilizan freidoras, Asegu_resede que el utensilio tiene
capacidad para ei voiumen de aiimentos que se va a agregar
ai iguai que para ia formaci6n de burbujas de ia grasa,
Para reducir a un minimo las quemaduras y que los materiales
inflamables y los derrames se enciendan debidos a contacto
no intencional con el utensilio, los mangos no deben
extenderse sobre el quemador superior adyacente, Siempre
gire los mangos de los utensilios hacia el lado o hacia la parte
trasera de la estufa, no hacia la habitaci6n donde puede set
f4cilmente golpeados o alcanzados por los nihos pequehos,
Nunca deje que un utensilio hierva hasta quedar seco pues
esto puede dahar el utensilio y la estufa,
Siga las instrucciones del fabricante cuando use bolsas para
cocinar en el homo,
Solamente ciertos tipos de utensilios de vidrio cer4mico, de
cer4mica o glaseados son convenientes para uso en la
cubierta de la estufa o en el homo sin quebrarse debido al
cambio repentino de temperatura, Siga las instrucciones del
fabricante cuando use utensilios de vidrio,
Esteelectrodom6stico ha sido probado respecto a su
rendimiento seguro usando utensilios de cocina
convencionales, No use ningun dispositivo o accesorio que no
haya sido espedficamente recomendado en esta guia, No use
tapas para cubrir los quemadores superiores, rejiiias para ia
cubierta de la estufa ni agregue sistemas de convecci6n para
hornos, El uso de dispositivos o accesorios que no son
expresamente recomendados en esta guia, puede crear serios
peligros de seguridad, resultar en problemas de rendimiento y
reducir la vida utii de los componentes de la estufa,
Seguridad de la Limpieza
Apague todos los controies y espere que se enfrien ias piezas
de la estufa antes de tocarlas o limpiarlas, No toque las
rejiiias de los quemadores o ias 4reas circundantes hasta que
elias no hayan tenido tiempo suficiente de enfriarse,
Limpie la estufa con cuidado, Tenga cuidado para evitar
quemaduras de vapor si se usa una esponja o un paho mojado
para iimpiar los derrames en una superficie caiiente, Aigunos
iimpiadores pueden producir vapores nocivos cuando se
aplican a una superficie caliente,
Homo Autolimpiante
durante e! cid0 de autol!mpieza_
Limpie solamente las piezas que se indican en esta guia, No
iimpie ia junta de ia puerta, La junta es esenciai para un
sellado herm6tico, No restriegue, dahe, ni mueva la junta de
la puerta, No use limpiadores de homo de ninguna clase en el
homo ni alrededor de cualquier parte del homo autolimpiante,
6O
Antes de la autolimpieza del homo, saque la asadera, las
parrillas dd homo y otros utensilios y limpie los derrames
excesivos para evitar que se produzca demasiado humo,
Ilamaradas o llamas.
Es normal que la cubierta de la estufa se cdiente durante el
ciclo de autolimpieza. Por Io tanto, se debe evitar tocar la
cubierta durante un ciclo de autolimpieza.
Aviso y Adverteneia
lmportante Sobre Seguridad
La Propuesta 65 de la Ley de 1986 del Estado de California
Sobre Seguridad y Contaminad6n del Agua Potable (California
Safe Drinking Water and Toxic Enforcement Act of 1986_}exige
que el Gobemador de California publique una lista de las
sustancias que segun el estado de California causan cSncer o
da_o al sistema reproductivo y exige que hs empresas
adviertan a sus dientes sobre la exposici6n potencid a tales
sustancias.
Se advierte a los usuarios de esta estufa que la combusti6n
del gas puede resultar en exposici6n de bajo nivel a algunas
de las sustancias publicadas en la lista, induyendo benceno,
formddeh{do y hollin, debido principalmente a la combusti6n
incompleta del gas natural o de los combustibles de petr61eo
licuado. Los quemadores ajustados en forma debida
reducir_n la combusti6n incompleta. La exposici6n a estas
sustancias puede tambi6n ser reducida a un minimo
ventilando los quemadores al exterior en forma adecuada.
Se advierte a los usuarios de este electrodom6stico que
cuando el homo est_ funcionando en el cido de autolimpieza,
puede haber exposici6n de bajo nivel a dgunas de las
sustancias indicadas en la lista, induyendo mon6xido de
carbono. La exposici6n a estas sustancias puede ser reducida
a un minimo ventilando el homo al exterior en forma
adecuada, abriendo las ventanas y/o la puerta en la habitaci6n
en donde est_ ubicado el electrodom6stico durante el cido de
AVlSO IMPORT,_NTE RESPECTO ,_ LOS PA3,_ROS
DOMESTICOS:
Nunca mantenga los p_jaros en [a cocina o en [as
habitaciones donde puedan [[egar los humos de [a cocina. Los
pSjaros tienen un sistema respiratorio muy sensitivo. Los
humos producidos durante el cido de autolimpieza del homo
pueden ser perjudiciales o mortales para los p_jaros. Los
humos que despide el aceite de cocina recalentado, la grasa,
margarina y los utensilios antiadherentes recalentados pueden
tambi6n ser perjudiciales.
Conserve estas lnstrucciones para Referencia Futura
61
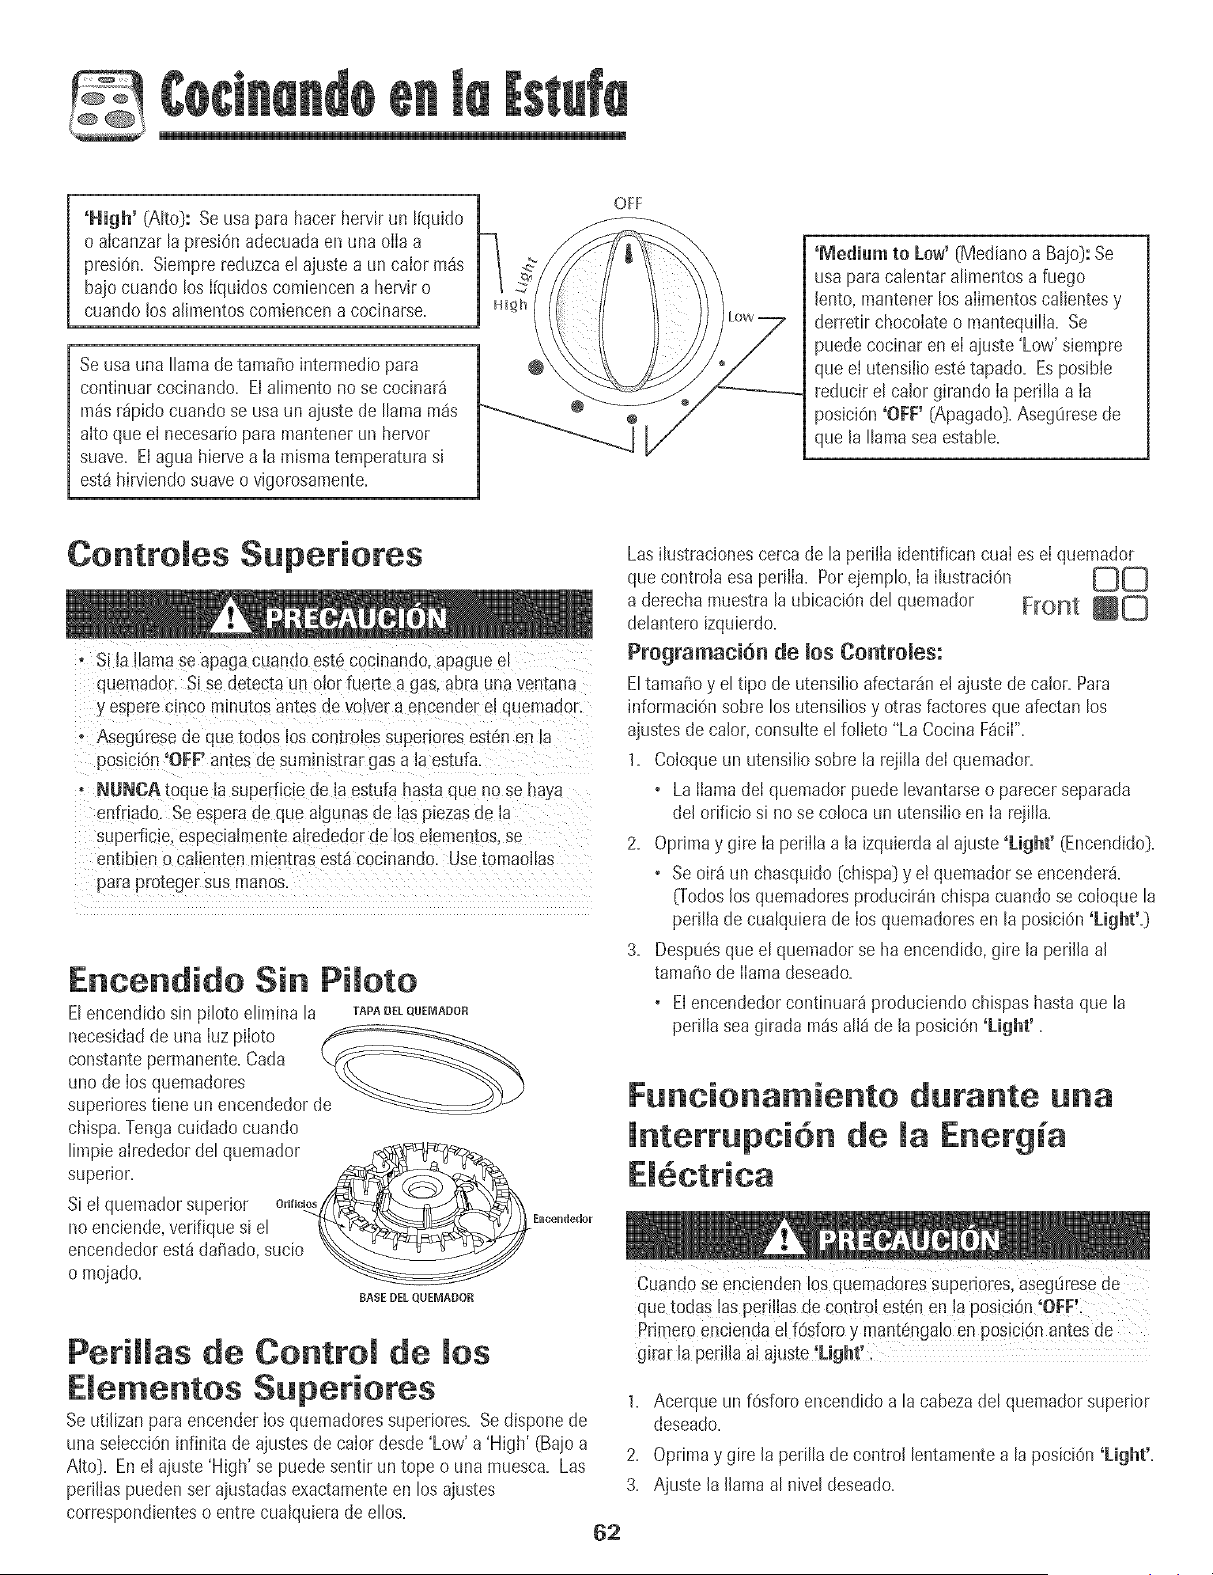
'High' (AltoD:Se usapara hacerhewir un ffquido
o aicanzar[a presiOnadecuadaen una oiia a
presiOn.Siemprereduzcael ajustea un caior m_s
bajocuando los [[quidoscomiencena herviro
cuando los alimentoscomiencena cocinarse.
Seusauna llama de tama_o intermediopara
continuarcocinando. El alimento no se cocinar_
pa_sr_pidocuando se usaun aiustede llamam_s
alto que el necesariopara mantener un hervor
suave. Elagua hiervea [a mismatemperaturasi
est_hirviendosuaveo vigorosamente.
OFF
'Medium to Low' {Medianoa Baio}:Se
usa para ca[entara[imentosa fuego
lento,mantener los aiimentoscalientesy
derretir chocolateo mantequiIia. Se
puedecocinar en el aiuste'Low' siempre
queel utensii[oest6tapado. Esposible
reducir el calor girando[a periIIa a [a
posiciOn'OFF' {Apagado}.AsegOresede
que la IIapaasea estabIe.
Controies Superiores
o S[ [a Hamase apaga ctlando est6 coc[nando,apagueeL
quemador. Si se detec_aun olor fuerte a gas,aDrauna ven_ana
y esperecmco mLnutosantesde voIvera encenuerel quemador.
o Asegtiresedeque _o6oslos controiessuperioresest61=en [a
posiciOn'OFF' antes de suministrar gas a laestufa
• NUNCA toque la supefficie de [aestufa nasLaque nose naya
enfriado. Seesuerade que algunasde las pLezasde la
superficie,especiaLmentealrededorde Ios elementos,se
entibien o calienten miem_asest_cocinando. Usetomao[Ias
paraproteger susmanos.
Encendido Sin Pi[ote
ELencendidosin pi[oto e[imina [a TAPADELQU[MAUOR
necesidaddeuna [uz piioto
constantepermanente.Cada _,
unode los quemadores
superiorestiene un encendedorde
chispa.Tengacuidado cuando
limpie ahededordel quemador
superior.
Si el quemadorsuperior o,n_n_//_)),L_,}@_/\\
no enciende,verifique si e[ -_4__E,_.d_do,
encendedorest_ dafiado, sucio __,.___
o mojado.
BgSE DEL QUEMgDOR
Periiias de Centre[ de los
Eie entos Superiores
Seutilizan para encender[os quemadoressupedores. Sedispone de
una selecci6ninfinita deajustesde caior desde'Low' a 'High' (Baio a
Alto}. En el ajuste'High' se puedesentir un tope o una muesca. Las
perilias puedenser ajustadasexactamenteen los ajustes
correspondienteso entre cuaIquierade olios.
62
Las i[ustracionescerca de [a peri[iaidentifican cua[ es el quemador
que controlaesa peri[ia. Porejemp[o,[a iIustraciOn
a derechamuestra la ubicaciOndel quemador [:roF_t _
deIanteroizquierdo.
Pregramaci6n de Los Centro[es:
EItama_oy el tipo de utensiIioafectar_ne[ ajustede calor.Para
informaciOnsobre los utensiliosy otrasfactoresque afectan los
ajustesde calor,consuIteel foIieto "La CocinaF_ci[".
1. Co[oqueun utensiIiosobre la rejilIade[ quemadoL
• La iiamade[ quemadorpuedelevantarseo parecerseparada
del orificiosi no se coloca un utensiiio en [a reiiIia.
2. Oprimay gire laperilla a la izquierdaal ajuste 'Light' (Encendido].
• Seoir_un chasquido {chispa}y el quemadorse encenderZ
[TodosLosquemadoresproducir_nchispacuandose co[oque[a
periIiade cuaIquierade [osquemadoresen [a posici6n'Light'.}
3. Despu6sque e[ quemadorse haencendido,gire [a peri[[aal
tamaiiode [[amadeseado.
• Elencendedorcontinuar_produciendochispashastaque [a
peri[iasea girada pa_sa[[_de [a posiciOn'Light'.
Funeiona iento durante una
[nterrupci6n de [a Energ[a
E[6ctrica
Cuandose eneiendenlos quemadoressuperioms,aseg_imsede
que todas !asperiiiasde control est6nen ia posici6n!OFF!
Primero endenda e[fOsforoy mantenga[oen pos!c!6n antes de
gi[ar [a peri!ia a! ajuste_Light' ;
1. Acerque un fOsforeencendidoa lacabezadel quemadorsuperior
deseado.
2. Optimay gire la periIIade control lentamentea la posiciOn'Light'.
3. Ajuste la llamaal nivel deseado.

Para evitar que macubierta se descomore o se
• Limpie [acubierta de [aestufa despu6sde cada use.
• Limpie [osderrames_cidoso azucaradostan pronto come ta
cubbrta se hayaenfriado puesestos derrames
puedendescotorarta porcelana.
A diferenciade unaestufa con quemadoresde
gas est_ndar,esta cubierta no se bvanta ni
tampocoes removible. No intettte/evalltarla
cubierta per ningdn motive.
Quemadores Semmados
Losquemadoressettadosde st[ estufaest_n aseguradosa [a cubierta
y no banside dise_adosparaset sacados. Debidoa que [os
quemadoresest_n seiladosen la cubierta, los derrameso rebosesno
se escurrir_n debajo de la cubierta de [a estufa.
Sin embargo,lastapasde losquemadoresy la basedel quemador
puedenser [impiadosdespu6sde cadause. La parte de la tapa dei
quemadorpuedeser f',._ciimentesacadapara su limpieza.0deren [a
p_g+na77 las instruccionessobre [a limpieza.}
Lastapasde los quemadoresdebenestar correctamentecolocadasen
la basede[ quemadora fin de que @te funcionede manera
apropiada.
RejiJJas de rues Quemadores
Las rejiiiasdeben estar debidamentecolocadasantes de cornenzara
cocinar.Cuandoinstaielas rejillas,coloque [osextremesde [as
lengLietashacia el centre,de maneraque coincidancon las barras
@re@as.
La [nstalaciOnincorrectade [asrejiilaspuederesultaren picaduras
de la cubierta.
No use mosquemadores sin tenor un utensimioen murejimma.Em
acabado de perceJanade JasrejJJJaslmede pJcarsesJno exJste
un utensilio que abserba el namerde mallamademquemador.
Tongacuidado ai revolverel aiimentode una olia o sart@co[ocado
sobre la reji[iade[ quemador.Lasrejillas tbnen un acabadosuave
parafaciiitar su [impieza.La oiia o sart@ puedenresbalars+nose
sujetanper e[ mango. Estopuede provocarderramede aiimentos
calientesy constituir un rbsgo de sufrir una quemadura.
Aunquelas rejHlasde los quemadoresson durables,gradualmente
perder_nsu bri[Ioy/o se descoiorar_n,debido a [asaltas
temperaturasde la llamade[ gas.
Quemador de Amto
Rendimiento Power Boost
Existeun quemadorde alto rendimiento OFF
{16.000BTU*}en su estufa,situado en la
pos+ciOnderechadelantera. Esto
quemadorofrece cocci6n m_s r@iday
puedenset usadosparahervir aguacon
rapidezo paracocinargrandescantidades
dea[imento.
Quemador para
Cocinar a Fuego
DD
[_JWb>nt
OFF
High
Estequemadorse encuentraen [a posiciOn
izqubrda trasera. El quemadorde cocci6n
a fuego lento proporciona un ajuste
"Melt" {derret[0 con una llama de menor
potencia* para derretir chocolateo mantequilla.
_' r(qimen nominalde BTU va,n@r4cuandoseusa
gas/£uado.
C}C)
63
Un quemadorajustado de maneraconecta con orificios
limpiosse encender_dentro de unos pocossegundos. Si
est_usandogas natural la [lapaaser_ azu[con un cone
interiorazul profundo.
S[ [a llamadel quemadores amarillao es ruidosa,[a mezcla
de alto/gas puede ser inconecta. POngaseen contactocon
un t6cnico de serviciopara ajustaria. {Losajustesno est_n
cubiertos per [agarantia.}
Con gas [icuadoson aceptablesalgunas puntasamarillasen
lallama. Estoes normaly no es necesarbhacer ningtTn
ajuste.
Con algunostipos de gas+usted puedeoir un "chasqu+do"
cuando el quemadorsuperior se apaga. Estees un sonido
normaldel funcionamientodel quemador.
Si [a perilla de control se gira muyr@idamentede 'High'
{,alto}a 'low' (Bajo},[a llamapuede apagarse,
particularpaentesi e!quemadorest_ frfo. Si estoocurre, gire
laperilla a Ia posiciOn'OFF' {Apagado},esperealgunos
segundosy vuelva encenderel quemador.
Lallama debeserajustadade modeque no se extiendapa_s
all8 del bordedel utensilio.
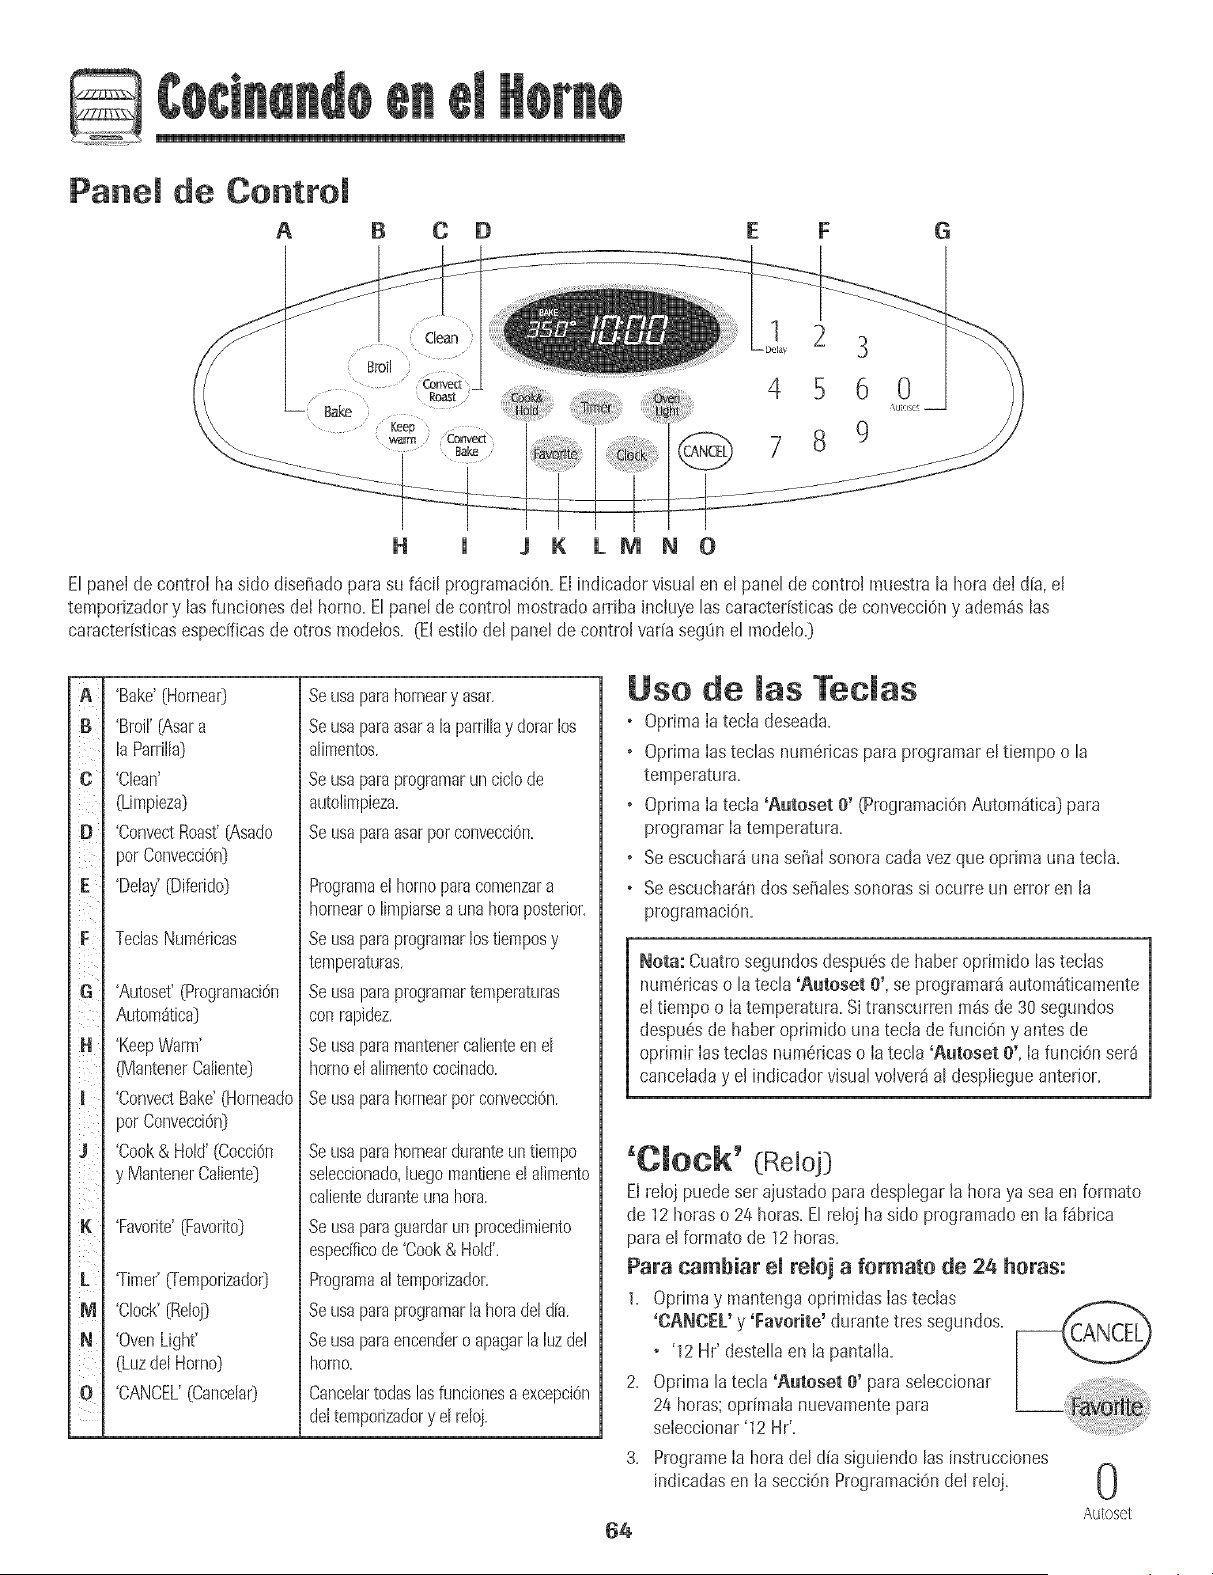
5
Panel de Control
A B C D G
Clean
Broil
Roast
Bake
Keep
Bake
2 3
4560
Auto_et
789
H J 3 K LM N 0
Elparle[de control hasldo diseiiadoparasu f_ci[ programaci6n.El indicador visualen el panelde control muestrala hora del dFa,el
temponzadory lasfunciones del horno.El panel de contro! mostradoarribaincluyelas caracteffsticasde convecci6ny adem_slas
caracteristicasespecificasdeotros modelos. (Elesti[odel panelde controlvaria segQnel mode[o.}
B
i_ iii
C
D ¸
N
Z
i i
I
3
[.
M
N
m
'Bake'[Homea0
'Broil'(Asara
laParrilla}
'Clean'
(Limpieza}
'ConvectRoad (Asado
porConvecci6n]
'Delay_[Difefido}
TeclasNumer+cas
'Autose((Pmgramaci6n
Autom_tica]
'KeepWarm'
(MantenerCaIiente]
'ConvectBake'(Horneado
porConvecci6n]
'Cook& Hold'(Cocci6n
y MantenerCaIiente]
'Favorite'[Favorito]
'Timer'_emporizador)
'Clock'[Reloj)
'OvenLight'
(Luzde[Homo)
'CANCEL'(Cancela0
Seusaparahomear y asar.
Seusaparaasara laparriIIay dorarlos
aIimentos.
Seusaparaprogramaruncic[ode
autolimpieza.
Seusaparaasarporconvecckin.
Pmgramaelhornoparacomenzara
hornearo [impiarsea unahoraposterior.
Seusaparaprogramarlostiemposy
temperaturas.
Seusaparaprogramartemperaturas
conrapidez.
Seusaparamantenercalienteenel
homoel alimentococinado.
Seusaparahornearpotconvecci6n.
Seusaparahomearduranteuntiempo
seleccionado,luegomantieneel a[imento
calienteduranteuna hora.
Seusaparaguardarun procedimiento
especificode 'Cook& Hold'.
Programaaltetr}porizador.
Seusaparaprogramar[ahorade[dia.
Seusaparaencendero apagarla luzde!
horno.
Cancelartodaslasfuncionesaexcepci0n
dettemporizadory e[ reIoj.
Use de [as Tecias
, Oprima[a tecia deseada.
, Oprima[astecIas num6ricaspara programare[ tiempo o [a
temperatura.
, OprJma[atecia 'Autoset O' (ProgramaciOnAutom4tJca]para
programar[a temperatura.
, Se escuchar_una seiia[ sonoracarlavez que oprima una tec[a.
, Se escuchar_ndosseffaIessonoras si ocurre un error en [a
programaciOn.
Nora: Cuatm segundosdespu6sde haber oprimido [astecJas
num#ricaso [atec[a 'Autoset 0', se programar_iautom_ticamente
el tiempo o [atemperatura.Sitranscurren m_s de 30 segundos
despu6sde haberoprimido una tecIade funci6n y antesde
oprimir [astecIasnum6ricaso [atec[a 'Autoset 0', [a funciOnser_
canceIaday el indicadorvisualvolver_a[ despIiegueanterior.
'Clock' (Re[oj]
Elreioj puedeser ajustadopara despIegar[a hora ya sea en formato
de 12horas o 24 horas.E[reIoj hasido programatic en [a f_brica
parae[ formato de 12horas.
Para cambiar el reloj a formate de 24 betas:
1. Optima y mantengaoprimidas lastec[as
'CANCEl.' y 'Favorite' durantetres segundos.
+ '12 Hr' desteIIaen [a pantalIa.
2. Oprima [atecIa 'Autoset O' paraseleccionar
24 horas;oprimala nuevamentepara
seleccionar'12 Hr'.
3. Programe[a horade[ d{asiguiendo [asinstmcciones
indicadasen [asecciOnProgramaciOnde[ reIoj.
64
Programaci6n demRemoj:
1. Opr[ma[atecia 'Clock' (Re[oj).
• Enel indicadordesteth ta horadeI alia.
2. Opdmalastectas num6ricasapropiadaspara programarta hora
deldfa.
+ Losdos puntos destellan en et indicador.
3. OprimaIatecia 'Clock' nuevamenteo esperecuatrosegundos.
• Losdos puntos permanecerSniluminados.
Cuandose conectaenerg[aeI6ctricaal homo o despu6sdeuna
interrupciOnde la energ[aeI6ctrica,Ia _ltima horadel reloj previaa la
interrupci6ndestellar8en el indicador.
Paradesplegarla horadeI aliacuando el indicadorest6 mostrando
otra funci6n de tiempo, optima latecla 'Clock'.
La horadet reloj no puede ser cambiadacuandoet hornoha sido
programatic para 'DelayCookor Clean' (Horneadoo Limpieza
Diferido)o 'Cook& HoW (Cocci6ny Mantener Caliente).
Para cancemar el despmiegue demremoj:
Si nodeseaque el indicadorvisualmuestre [ahora de[ dia:
Oprimay mantengaoprimida [asteclas
'CANCEL' (Cancelar}y 'Clock' durantetres _ _,r-ru'_
segundos.La horadel d[a desaparecer8del
indicador.
Cuandose canceiael desplieguedei reloj,
oprima [atecia 'Clock' paradesp[egar
brevemente[a horadel d[a.
Cuandose canceiaeLdesplieguede[ reloj,despu6sde 15minutos,el
contro[ del horno pasar_ia Modo de Reservaparaahorrarenergia.El
indicadorvisualestar_ en biancoy la [uzdel horno nofuncionar&
Paraactivar el control y sacarlodei modo de reserva,oprima cualquier
tecia. Se escuchar_ndos seiia[essonoras.
Para restaurar e[ despiiegue de[ reioj:
Oprimay mantengaoprimida Iastechs 'CANCEL' y 'Clock' durante
tres segundos.Lahora del d[a reaparecer8de[ indicador.
'Timer' (TemporizadoO
Eltemporizadorpuedeser programatic de un minuto (0:01)hasta99
horasy 59 minutos[99:59).
Eltemporizadorpuedeset usado independientementede cualquier
otra actividaddel homo. Adem_s puede ser programadocuando otra
funciOndel homo est6 en funcionamiento.
Eltemporizadorno controlael homo.Solamentecontrola una seSal
sonora,
Para programar el temporizador:
1. Oprimalatecia 'Timer',
+ Enel indicadorvisualdeste!lar_'0:00'y 'TIMER'.
2. OpdmaIastec+asnumSricasapropiadashastaque el tiempo
correctoaparezcaen el indicadorvisual
• Losdos puntosy 'TIMER'continuar_ndestellando.
3. Optima nuevamentela tecla 'Timer' o esperecuatro segundos.
• Losdos puntosdejan dedestellary el tiempo comienzala
cuenta regresiva.
• El _ltimo minuto de la cuenta regresivadel temporizadorse
desplegar_en segundos.
4. AI final del tiempo programatic,se escuchar_una serial sonora
largay 'End' {Fin}se desplegar_en el indicador visual.
5. Optima latecla 'Timer'para despejaret indicadorvisual
Para canceiar el temporizador:
1+ Optimay mantengaopdmida la tecla'Timer'
durante tres segundos.
U
2. Optima latecla 'Timer' y oprima 'e' usando
lasteclas num_ricas.
i+!!iiiiiiiiii!iiiiiiii ili +ii! !i i!+ii+ii+i! ilililiiii+i +++
--0
,'_,ul()s_'t
Bloqueo de los Controles y de
la Puerta del Homo
Eltecladoy Ia puertadel horno puedenser bloqueadospara
seguridad,Iimpiezao evitarel uso noautorizado.Lasteclas no
funcionancuando esdmbloqueadas.
Siel homo est_ en funcionamiento,lasteclas ni lapuerta puede ser
bloqueada.
La horaactualdel d(apermanecer_en el indicador cuando lasteclas
y la puerta est6bloqueada.
Para bloquear:
Oprimay mantengaoprimidaslasteclas
'CANCEL'y 'Cook & Hold' durante tres
segundos+(Oprimaprimero Iatecia 'CANCEL'I+
• Ene+indicadorvisualaparece'OFF'
(Apagado]+
• 'LOCK'[Bloquea0 destellacuando la puertase est_ bloqueando+
Para desbloquear:
Oprimay mantengaopdmidaslasteclas 'CANCEL' y 'Cook & Hold'
durantetres segundos+(Oprimaprimero la tecla 'CANCEL']+'OFF'
desaparecedel indicadorvisual
j Nora: Lasteclasy Ia puertadot homo no puedebloquearsesi la
1
temperaturadel homo es 205 C (400 F) o superior. |
o
!
C( digos de Errores
'BAKE'[Hornear)o 'LOCK'puedendesteilarrSpidamentepara
advertirieque hay un error o un problema+Si 'BAKE'o 'LOCK'
deste!lanen el indicador visual,optima Ie tecla 'CANCEL'. Si 'BAKE'
o 'LOCK'contint_andestellando,desconecteIa cordente ei_ctrica
hacia el artefacto.Espereunos pocosminutosy vuelvaa conectar la
corrienteelSctr+ca.Si las palabrasa0n contin0an destellando,
desconecteIa corriente el_ctdcahacia el artefactoy Ilamea un
tecnico de servicioautorizado.
65
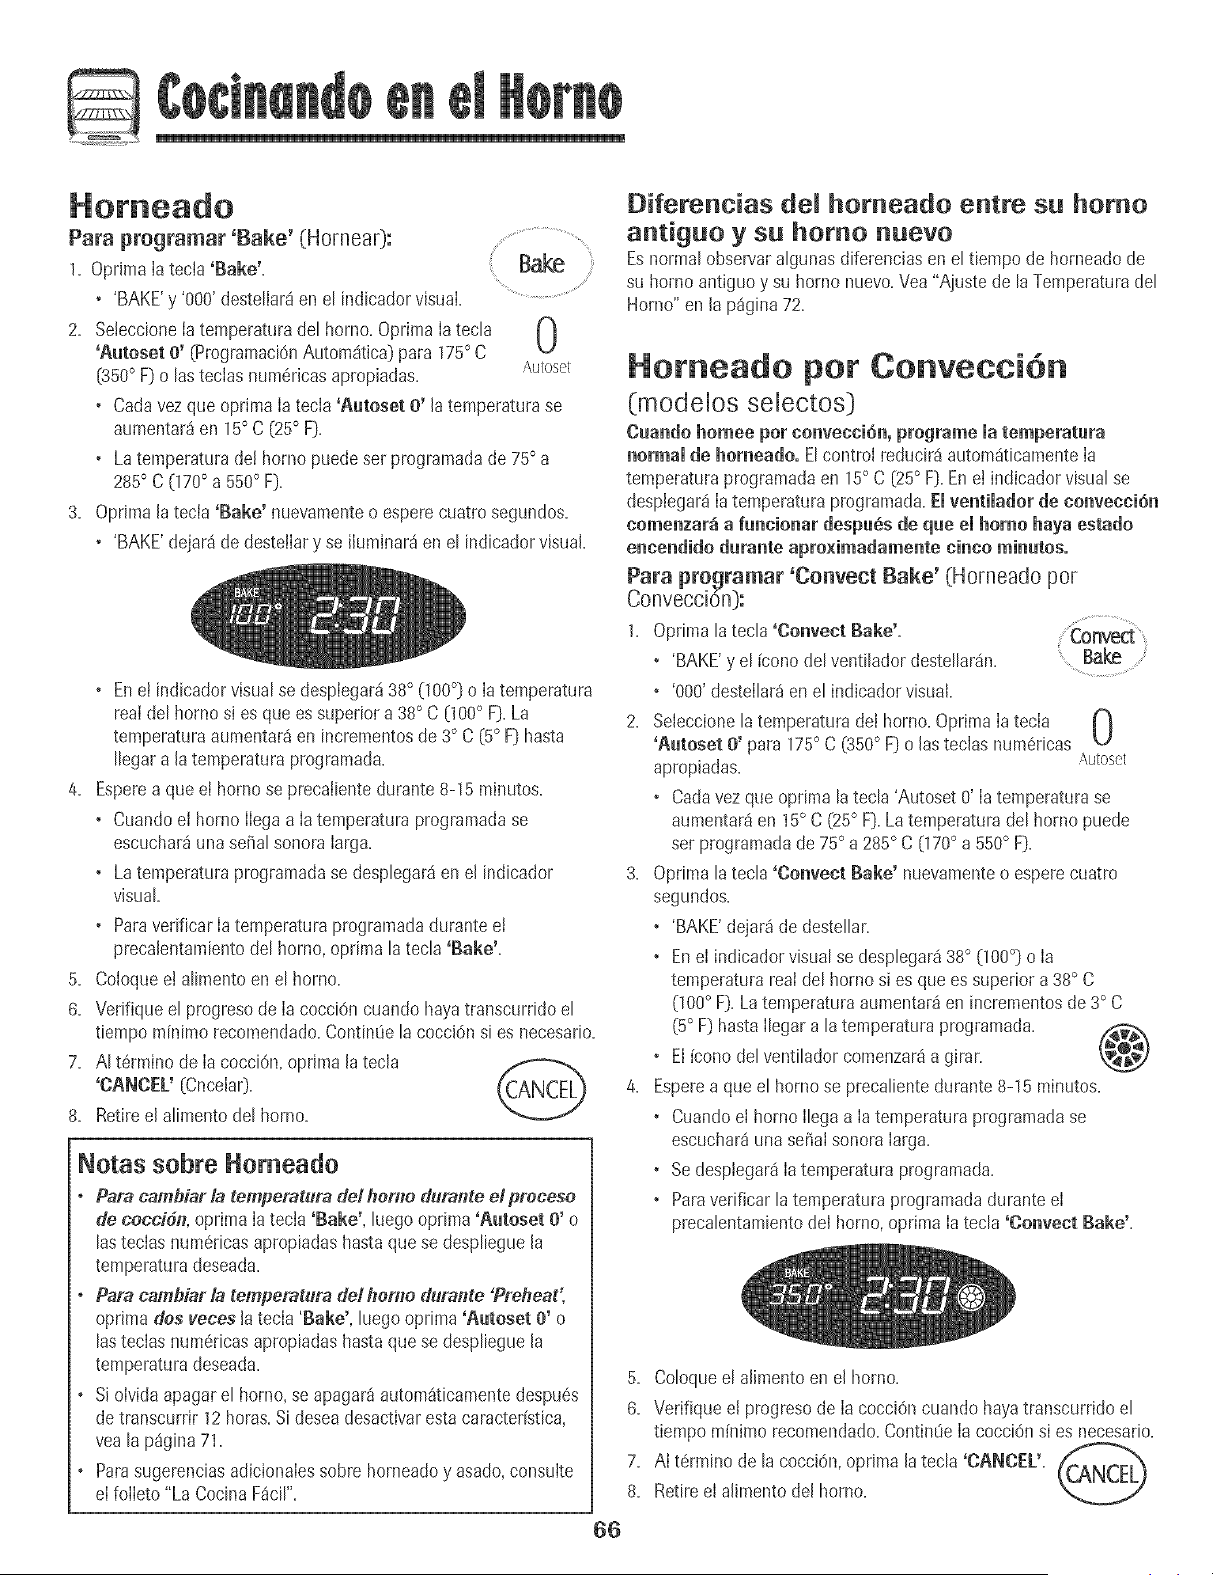
Paraprogramar+Bake'(Hornear):
1. Optima latecia 'Bake'+ Bake
+ 'BAKE'y '800'destelJar8en el indicadorvisual
2. Seleccione[atemperaturade[ horno. Oprima[atecla N
'Aatoset e' (ProgramaciOnAutomatica}para 175° C
u
{350° F}o lasteclas num6rbasapropiadas, i\utoset
+ Cadavezque oprima [atecia 'Autoset O' latemperaturase
aumentar_en 15° C (25° F}.
+ Latemperaturade[ horno puede ser prograpaadade 75° a
285° C 070° a 550° F}.
3. Optima la tecla 'Bake' nuevamenteo esperecuatrosegundos.
• 'BAKE'dejar8 de @stellary se iluminar_ien el indicadorvisual.
+ Enel indbador visualse despiegar_38° (100°} o Iatemperatura
realdel hornosi es que essuperior a 38° C 000 ° F}.La
temperaturaaumentar_en incrementosde3° C (5° F} hasta
IIegara [atemperatura programada.
4. Esperea que et homo se precatbnte durante 8-15minutos.
+ Cuandoel hornoIlegaa Iatemperaturaprogramadase
escuchar_unaserial sonoraIarga.
+ Latemperaturaprogramadase despIegar_en e[ indicador
visual.
+ Paravenficar[a temperaturaprogramadadurante el
preca[entambntode[ horno,optima [atec[a 'Bake'.
5. Co[oqueel aIimentoen el homo.
6. Venfique el progresode Ia cocci@ cuando hayatranscurridoel
tbmpo minimorecomendado.Contint]ela cocci@ si es necesario.
7. A[ t6rmino de Ia cocci@, optima [a tecla
'CANCEL' (Cnceiar}.
8. Retiree[ aIimentodel homo+
Notas sebre Herneade
+ Para cambJar la tempetatura del heri1udutar_ted precese
de eeeeidn, oprima [atecla 'Bake', [uegoopnma'Autoset O' o
lasteclas num6dcasapropiadashasta que se despIbgue la
temperaturadeseada.
+ Para camhiar la tempetatura det home durarlte 'Preheat',
optimades veces [atecia 'Bake', [uegoopr[ma 'Auteset 0' o
lasteclas num6ricasapropiadashasta que se despIbgue la
temperaturadeseada.
o Si oividaapagarel homo, seapagar_autom_ticamentedespu@
detranscurrir 12 horas.Si deseadesactivarestacaracteffstica,
yea [a p_gina71.
o Parasugerenciasadbionalessobre horneadoy asado,consulte
elfoiieto "La Cocina F_cil'.
66
Diferenc+as de[ homeado entre su homo
antiguo y su homo nuevo
Esnormal observaraIgunasdiferenciasen el tiempo de horneadode
su homo antiguoy su horno nuevo.Vea "Ajustede la Temperaturadel
Horno" en [a p_gina 72.
Homeado par Convecci6n
(mode[os se[ectos)
Cuando homee per convecci6n, pregrame [a temperatura
normal de homeado. EIcontro[ reducir_autom_ticamente[a
temperaturaprogramadaen 15° C (25° F}.En ei indicadorvisual se
desplegar_[a temperaturaprogramada.Elventilador de convecci6n
comenzar_ a fancionar despu6s de qae el home haya estado
ence_ido dara_te aproximadame_te circe mi_atos,
Para pregramar 'Ce_vect Bake' (Horneado por
ConvecciOn):
1. Optima la tecIa 'Co_vect Bake'+
• 'BAKE'y el [conodel ventiIadordesteIIar_n. Bake
+ '808'desteiIar_en el indicadorvisual
2. Seleccione[atemperaturadei horno.Oprima [atecia A
'A_toset O' para 175° C (350° F} o lasteclas num6ricas
apropiadas. ,_ulosel
• Carlavez que opnma latecIa 'Autoset8' [a temperaturase
aurnentar_ien 15° C (25° F}.Latemperaturadel horno puede
set programadade75° a 285° C 070° a 550° F}.
3. Opnma la tecIa 'Ce_vect Bake' nuevamenteo esperecuatro
segundos.
+ 'BAKE'dejar_ de desteIIar.
+ Enel indicadorvisualse despIegar_38° (100°} o [a
temperaturarea[del hornosi es que es superiora 38° C
(100° F}.La ternperaturaaumentar_en incrementosde 3° C
(5° F} hastalbgar a [atemperaturaprogramada. /:_
+ El[conode[ventiIadorcomenzar8a girar.
4. Esperea que e[ homo se precaIientedurante8-15 minutos.
+ Cuandoe[ homo [bga a [a temperaturaprogramadase
escuchar_unasefia[sonora [arga.
+ Sedesplegar_[a temperaturaprogramada.
+ Paraverificar [a temperaturaprogramadadurante e[
precabntamientode[ horno,optima [atecIa 'Co_vect Bake'.
5. Co[oqueel alh_entoen el homo.
6. Verifique el pmgreso de la cocciOncuando hayatranscurridoel
tiempo m[nimo recomendado.ContinOela cocci@ si es necesado.
7. AI t6rminode lacocci@, oprima [atecla 'CANCEL'.
8. Retireel alimentode[ homo.
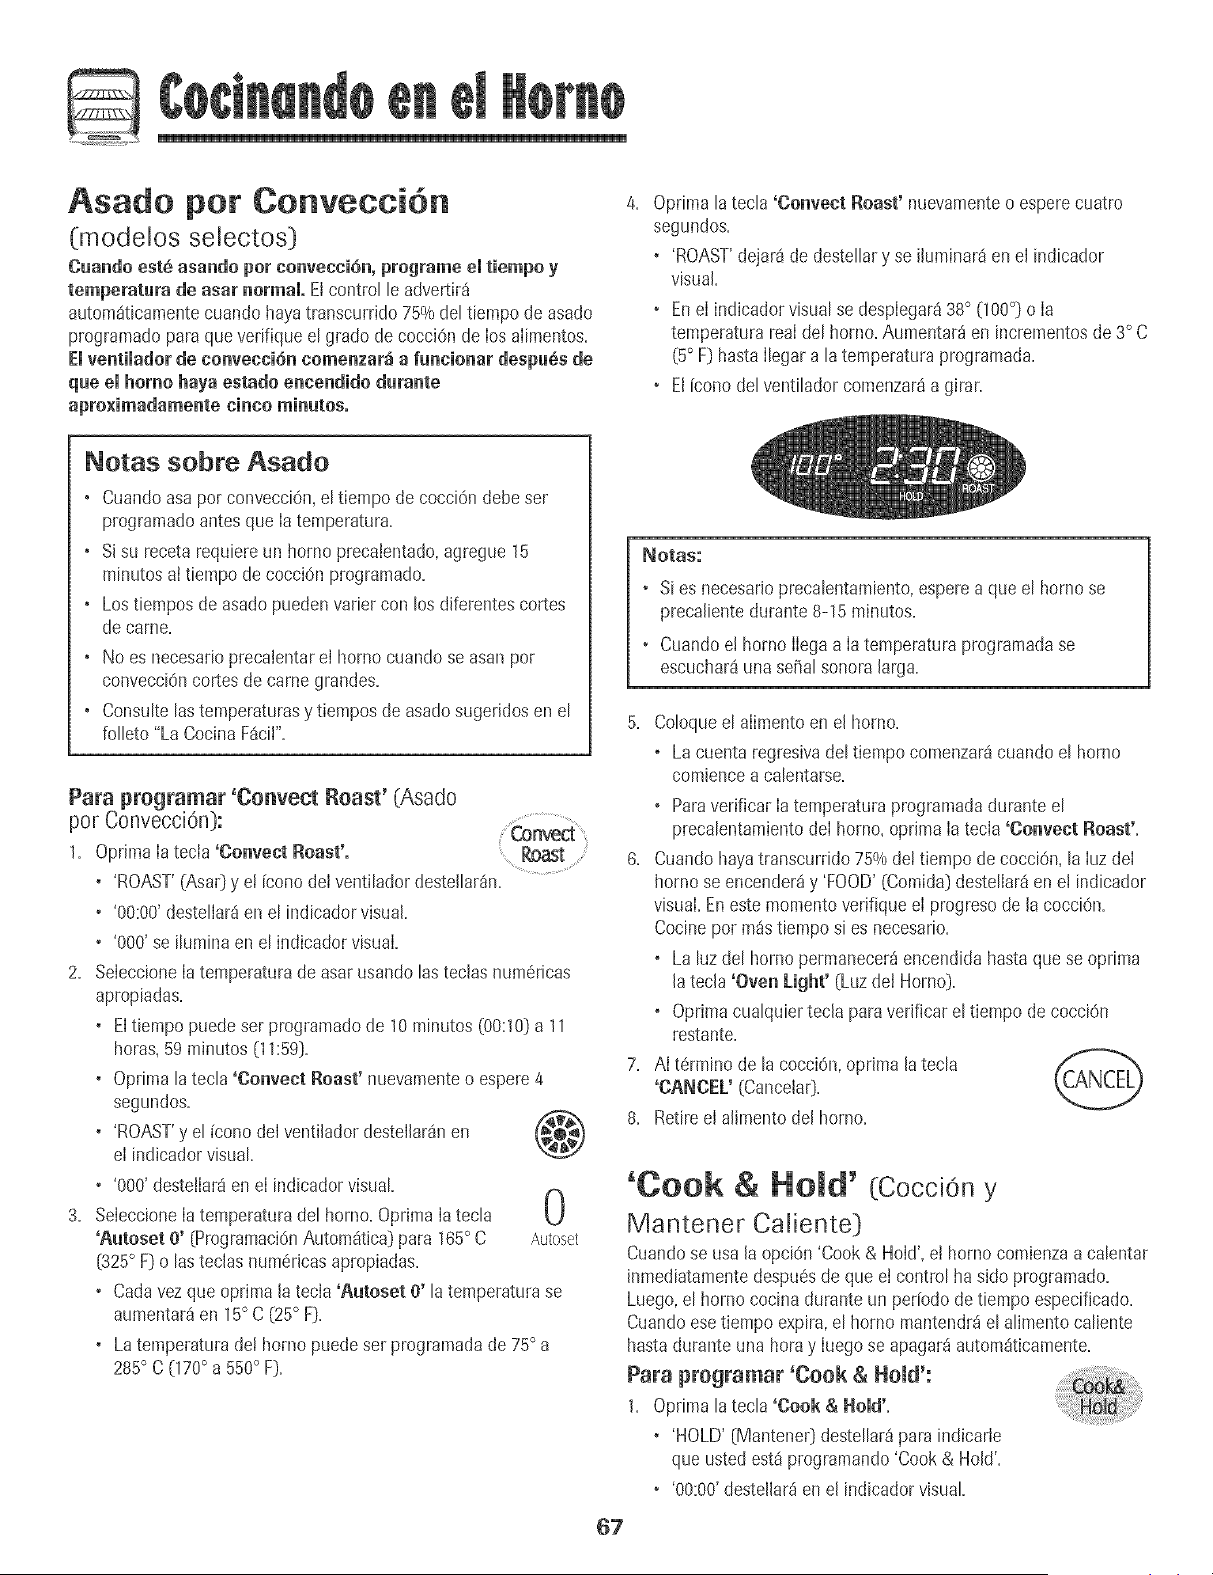
Asado pot Convecci6n
(modelos selectos)
Cuando est8 asando per nonvecci6n, programe el tiempo y
temperatara de asar normal. El control le advertir_
autom_ticamentecuando hayatranscurrido 75%del tiempo deasado
programatic para que verifique el grado de cocciOnde los alimentos.
Elventimadorde convenciSn comenzar_ a funcionar despa_s de
que el homo haya estado encendido darante
apro×imadamente cinco minutes°
Notas sobte Asado
• Cuandoasapar convecciOn,el tiempode cocci6n debeser
programaticantesque Ia temperatura.
• Sisu recetarequiereun homo precalentado,agregue 15
minutosaI tiempo de cocci6n programatic.
• Lostiempos de asadopuedenvarier con los diferentescortes
de carrie.
• No es necesarioprecalentarel horno cuandose asan por
convecciOncortesde carne grandes.
• Consultelastemperaturasy tiemposde asadosugeridosen el
falleto "La CocinaF_cil".
Para programar 'Convent Roast' (Asado
por Convecci0n):
1. OprimaIatecia 'Convent Roast'. Roast
• 'ROAST'(Asa0 y e! [conodeIventilador destellar_n.
• '00:00'destelIar_en el indicadorvisual.
• '000'se ilumina en el indicadorvisuaI.
2. SeIeccioneIatemperaturade asarusando lasteclas num6ricas
apropiadas.
• EItiempo puedeser programadode 10 minutos (00:10)a 11
horas,59minutos (11:59).
• Optimalatecla 'Convent Roast' nuevamenteo espere4
segundos.
• 'ROAST'y el [cono del ventilador desteilarSnen (_$_
eI indicadorvisual.
• '000'destelIar8en eI indicadorvisual
f_
3. SeIeccioneIatemperaturadel horno. OprimaIatecla U
'Autoset o' (Programaci6nAutomfitica)para 165° C Autoset
[325° F)o lastedas num6ricasapropiadas.
• Cadavezque oprima latecIa 'Autoset e' latemperaturase
aumentar_en 15° C (25° F).
• Latemperaturade! hornopuede ser programadade 75° a
285° C (170° a 550° F).
Optima latecla 'Convent Roast' nuevamenteo esperecuatra
segundos.
• 'ROAST'dejar8 de destellary se ihminar_ en el indicador
visual.
• Enel indicadorvisual se desplegar_38° (100°) o Ia
temperaturarealdel homo.Aumentar_ en incrementosde 3° C
(5° F) hastaIlegar a la temperaturaprogramada.
• El [cono del ventilador comenzar8a girar.
_OtaS."
• Sies necesarioprecalentamiento,espereaque el barrio se
precalientedurante 8-15 minutos.
• Cuandoe! homo Ilega a Iatemperaturaprogramadase
escuchar8una se5alsonoralarga.
5. Coloqueel alimentoen e( homo.
o Lacuenta regresivadel tiempocomenzar8cuando el homo
comiencea calentarse.
o Paraverificar Iatemperaturaprogramadadurante el
precalentamientodeI homo,oprima Ia tecla'Convent Roast'.
6. Cuandohayatranscurrido75% de!tiempo de cocciOn,la IuzdeI
homo se encender_y 'FOOD'(Comida}destellar_en el indicador
visual. Eneste momentoverifique el progresode la cocciOn.
Cocinepar m_stiempo si es necesario.
o La luzdel hornopermanecer_encendidahastaque se oprima
la tecla'Oven Light' (Luzdel Homo].
o Oprimacualquiertecla paraverificar eltiempo de cocciOn
restante.
7. AI t6rminode lacoccidn,oprima latecla
'CANCEL' (Cancelar}.
8. Retireel alimentodel homo.
'COOk & (CocciOn y
Mantener Caliente)
Cuandose usa la opciOn'Cook & Hold',e! homo comienzaa calentar
inmediatamentedespu6sde que et controlha sido programatic.
Luego,el homo cocina durante un per[ododetiempo especificado.
Cuandoesetiempo expira,el homo mantendr_elalimento caliente
hastadurante una horay Iuegose apagar_autom_ticamente.
Para programar 'Cook & Hold':
1. Optima la tecla 'Cook & Homd'.
• 'HOLD'[Mantene0 destelhr_ paraindicarle
que ustedest_ programando'Cook& Hold'.
• '00:00'destellar_en el indicadorvisual
67
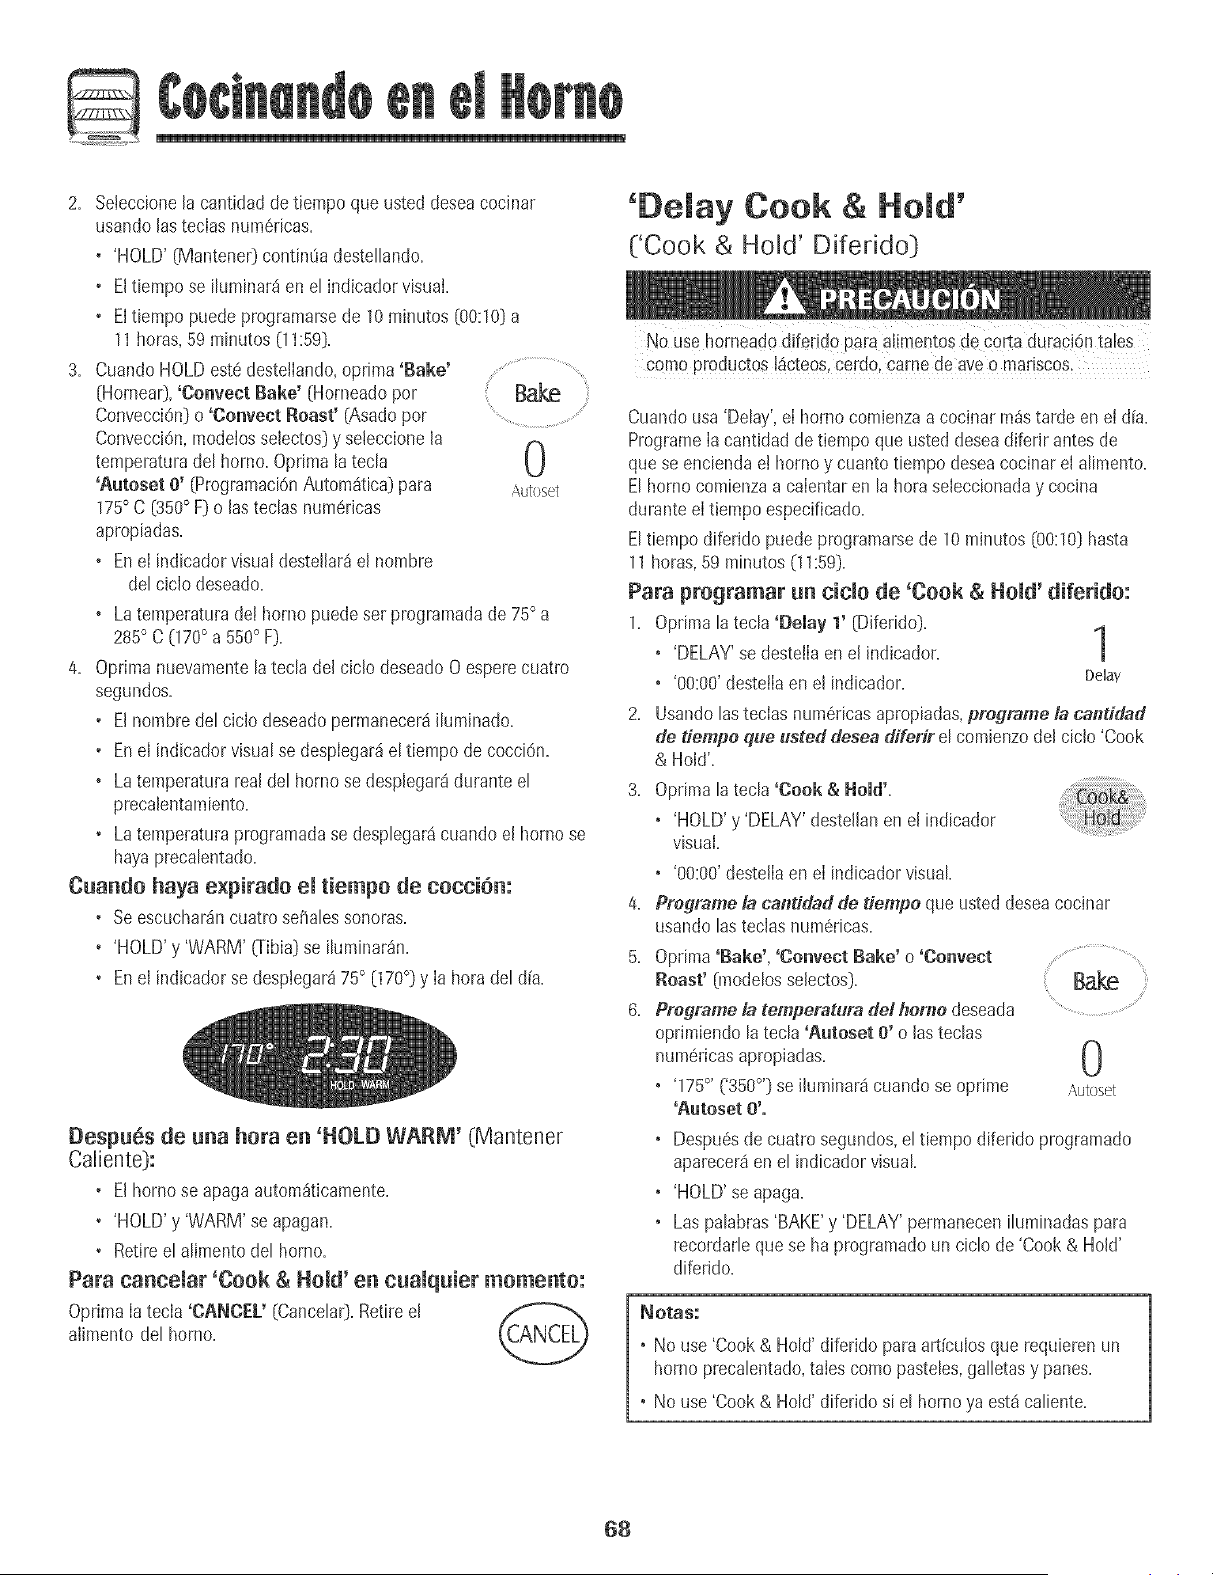
2. Seleccionela cantidadde tiempo que usted deseacocinar
usandolasteclas num6ricas.
+ 'HOLD'(Mantene0 continOadestellando.
+ Eltiempo se iluminar_en el indicador visual.
+ Eltiempo puedeprogramarsede 10minutos [00:10)a
11horas,59 minutos 01:59).
3. CuandoHOLDeste desteliando,oprima'Bake'
(Hornea0,'Convect Bake' (Horneadopar Bake
Convecci0n)o 'Convect Roast' (Asadopor
Convecci0n,modeiosselectos)y se[eccionela
f_
temperaturade[ homo. Oprima[atec[a U
'Autoset 0' (Programaci6nAutom4t[ca}para Autoset
175° C (350° F)o lastecIasnum_ricas
apropiadas.
+ Ene[ indicadorvisualdestellar_el hombre
del ciclodeseado.
+ Latemperaturadel hornopuede ser programadade 75° a
285° C 070° a 550° F).
4. Oprimanuevamentela tecia de[ cic[o deseadoO esperecuatro
segundos.
• Elhombredel ciclo deseadopermanecer_iluminado.
• Enel indicadorvisualse despiegar_el tiempo de cocciOn.
+ Latemperaturarealdel homo se desplegar8durante el
precaientamiento.
• Latemperaturaprogramadase despiegar_cuando el homo se
hayaprecalentado.
Cuando haya expirado el tiempo de cocci6n:
+ Se escuchar_incuatro sefiaIessonoras.
+ 'HOLD'y 'WARM' (Tibia)se iIuminar_n.
• Enel indicadorse despiegar_i75° 070°) y [a hora deld[a.
Despues de una hora en 'HOLD WARM' (Mantener
Caliente):
+ Elhornose apaga autom_ticamente.
+ 'HOLD'y 'WARM' se apagan.
+ Retiree[ aIimentode[ horno.
Para canoe[at 'Cook & Hold' en cua[quier momento:
Oprima[a tecia 'CANCEL' (Cance[a0.Retiree[
aiimento de[ horno.
'Delay Cook & Hold'
('Cook & Hold' Difeddo)
No use horneadodiferido paraaiimentosde coffa duraci6n tales
cornoproductos [_cteos,cerdo, came de aveo mariscos.
Cuandousa 'Delay',el hornocomienzaa cocinar m_starde ene[ d[a.
Programe[a cant[dadde tiempo que usted deseadiferir antes de
quese enciendael hornoy cuantotiempo deseacocinar el aIimento.
E[hornocomienzaa caientaren [ahoraseleccionaday cocina
duranteel t[empo especificado.
E[tiempodiferido puedeprogramarsede 10minutos (00:10)hasta
11horas,59 minutos (11:59).
Para programar an cic[o de 'Cook & Hold' diferido:
1, Oprima la tecIa 'Delay 1' (Diferido),
1
+ 'DELAY'se desteiiaen e[ indicador. |
+ 'O0:00'desteliaen el indicador. Delay
2. Usando[astecias num6ricasapropiadas,pregmme/a canddad
de tiempo que usted desea dfferir e[ com[enzode[ cic[o 'Cook
& Hold'+
3. Optima [atec[a 'Cook & Reid++
• 'HOLD'y 'DELAY'destel[anen e[ indicador
visual
• '80:00'deste[iaen e[ indicadorvisual
4. Programe /a canddad de dempe que usted deseacocinar
usando [astec[as numSricas.
5, Oprima'Bake', 'Convect Bake' o 'Conveet
Roast' (mode[osse[ectos).
6, Programe ta temperatura del hor1_edeseada ........... ....
oprimiendo la teeIa 'gatoset O'o lastecIas
num6ricasapropiadas. 0
+ '175°' ('350°'} se ihminar_ cuando se opr[me ,\utoset
'Autoset 0'o
• Despu6sde cuatro segundos,e[tiempo diferklo programado
aparecer8en e[ indicadorvisual
• 'HOLD'se apaga.
• Las paIabras'BAKE'y 'DELAY'permaneceniIuminadaspara
recordarIequese ha programadoun cic[o de 'Cook & Hold'
diferido.
_OtaS."
• No use 'Cook& Hold' diferido para art[culos que requierenun
homo precaIentado,tales como pasteIes,gaIIetasy panes.
• No use 'Cook& Hold' diferido si el hornoya est_caIiente.
68
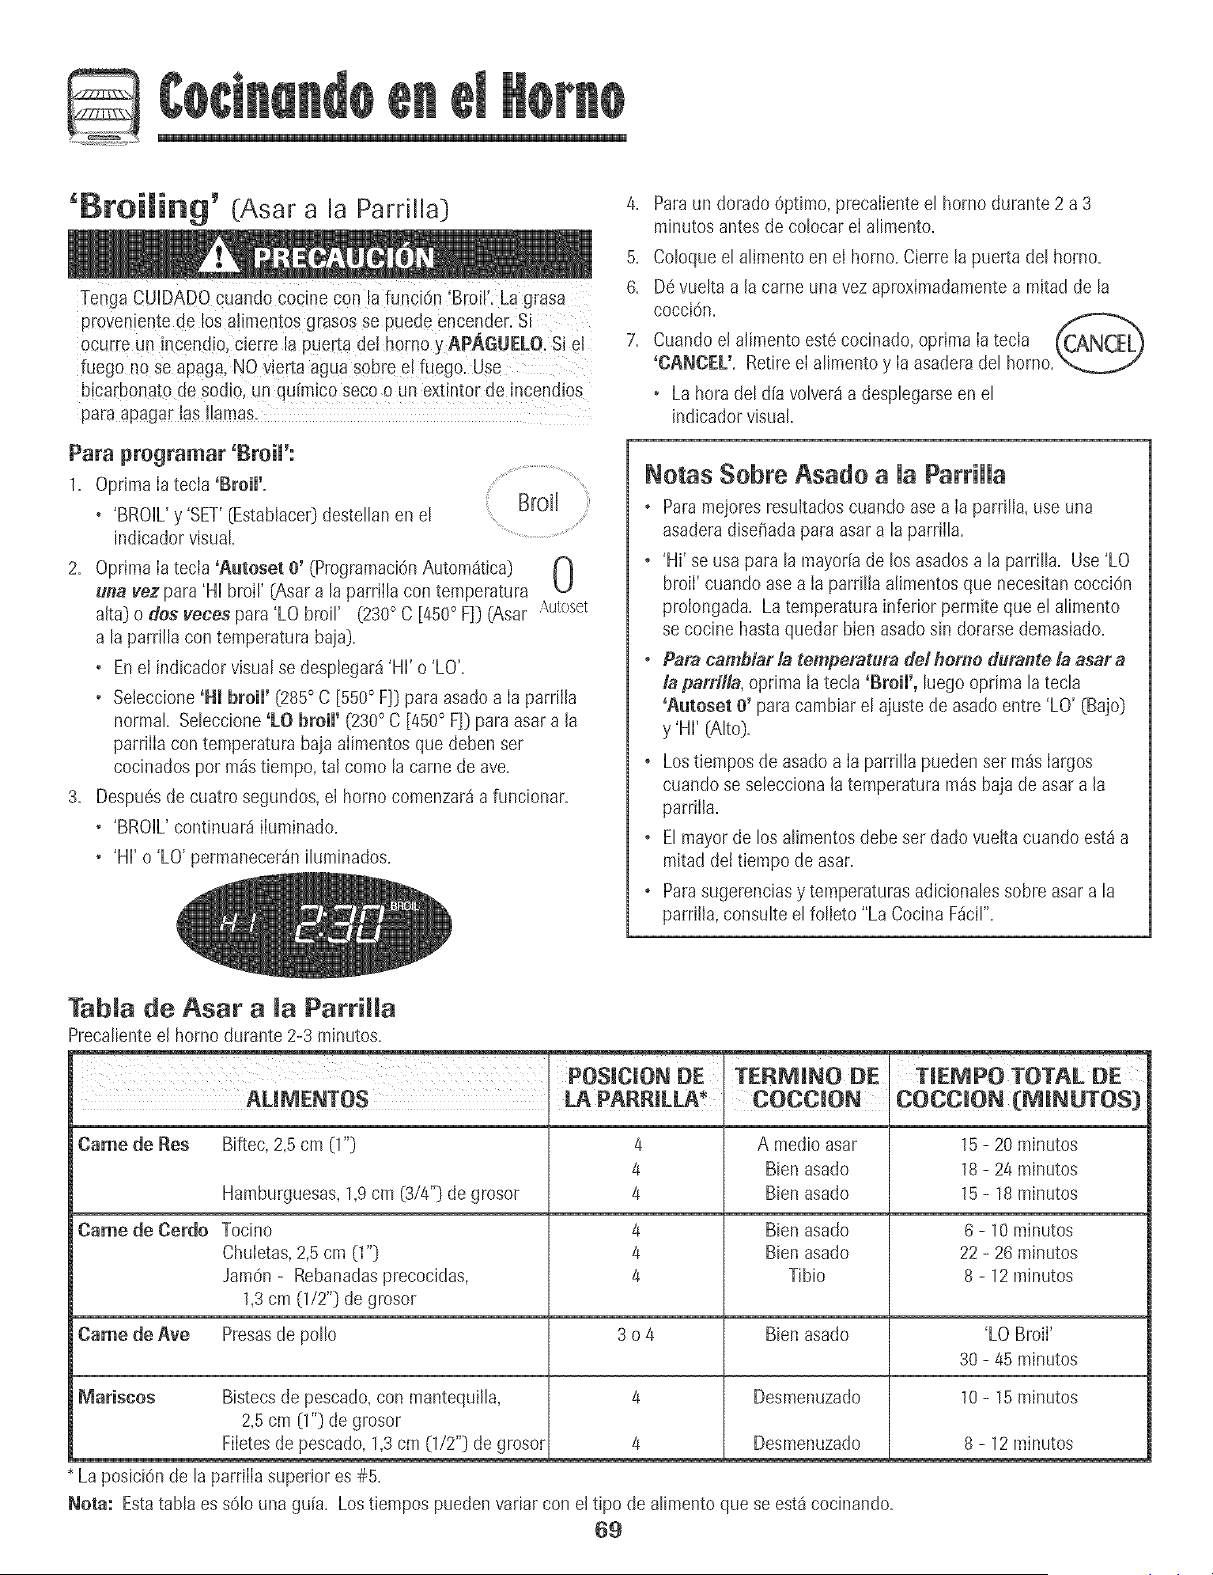
'Broiming' (Asar a [a Pardiia)
prove!3!entede [osalimentas grasosse puede encender. Si
ocurre un incend!o,c+erre[a puer[a delhomo yAPAGUELO, S+e+
fuego no se apaga,NO vierta agua sobre e! fuego. Use
bicaFbonat0de sodi01un qu[mico secoo un extintor de +ncend+os
Para programar 'Broi[':
1. Oprima[atecla 'Broil',
+ 'BROHUy 'SET'(Estabiacer}desteHanen e[
indicadorvisual
2. Oprima[atecia 'Autoset O'(Programaci6nAutom4tica} N
uea vez para'HI broil' (Asara la parriiIacon temperatura
L#
alta} o des veces para 'LO broil' (230° C [450° F]) (Asar '\u[oset
a laparrflIacon temperaturabaja}.
• EneI indicadorvisualse desplegar_i'HI' o 'LO'.
• Seieccione'Hi broil' (285° C [550° F]} para asadoa [a parrilla
normal SeIeccione1.O broil' (230° C [450° F]}paraasar a la
parriiiacon temperaturabaja aiimentosque deben ser
cocinadospot m_s tbmpo, tal como la came de ave.
3. Despu@de cuatrosegundos,el homo comenzar_a funcionar.
• 'BROIL'continuar_ iiuminado.
• 'HI' o 'LO' permanecer_niIuminados.
4. Paraun dorado @timo, precaiienteel hornodurante 2 a 3
minutosantesde colocarel aIimento.
5. Coloqueel aIimentoen el horno.Cierre la puerta del horno.
& DevueItaa la came una vez aproximadamentea mitadde la
cocci@.
7. Cuandoel alimentoest6 cocinado,oprima [atecla (Ca_NCF_
'CANOEU. Retireel aIimentoy [aasaderadel horno.\,,U
• La hora del d[a voIver8a despIegarseen el
indicadorvisual
Notas Sobre Asado a la ParrNa
o Paramejoresresukadoscuando asea [a parriIIa,use una
asaderadiseffadaparaasara la parriiIa.
o 'Hi' se usa parala mayoffade los asadosa la parriIIa. Use'LO
broil' cuando asea [a parriIlaaIimentosque necesitancocciOn
prolongada. Latemperaturainferior permiteque el aIimento
se cocine hasta quedar bien asadosin dorarsedemasiado.
+ Pare cambiar/a temperatura de/heree duraete/a asar a
/a parriHa, optima la tecIa 'Broil', luego optima la teda
'Autoset e' paracambiar el ajuste de asadoentre 'LO' (Bajo}
y 'Hi' CA(to}.
+ Lostiempos de asadoa Ia parriIiapuedenset m_slargos
cuandose seIeccionala temperaturam_s bajade asar a la
parrilla.
+ EImayorde los aHmentosdebe ser dadovueltacuando est_a
mitad de[tiempo deasar.
+ Parasugerenciasy temperaturasadicionaIessobre asar a la
parrilla,eonsuIteel foIieto "La CocinaF_eil'.
Tab[a de Asar a [a ParriHa
PrecaIienteel homo durante2-3 minutos.
POSICiON DE ' TERMiNO DE T[EMPO TOTAL DE
ALiMENTOS PARRILLA* COCCION .COCC[ON (MINUTOS}
Came de Bes Biftec, 2+5cm (1"} 4 A medio asar 15 - 20 minutos
4 Bien asado 18 - 24 minutos
Hamburguesas, 1,9cm (3/4"} de grosor 4 Bien asado 15 - 18 minutos
Came de Cerdo Tocino 4 Bien asado 6 - 10 minutos
Chuietas, 2,5 cm (1"} 4 Bien asado 22 - 26 minutos
JamOn - Rebanadas precocidas, 4 Tibio 8 - 12 minutos
1,3 cm (1/2"} de grosor
Came de Ave Presas de polio 3 o 4 Bien asado 'LO Broi['
30 - 45 minutos
Mariscos 10 - 15 minutos
Bistecsde pescado,con mantequiHa,
2,5 cm (1"} de grosor
Fiietesde pescado,1,3cm (1/2"} de grosor
LaposiciOnde laparriiiasuperior es #5.
4
4
Desmenuzado
Desmenuzado
Nora: EstatabB es sOb una guia. Lostiempos puedenvariar con el tipo de aHmentoque se est_cocinando.
69
8 - 12 minutos
@
'Keep Warm' (Mantener Caliente)
Paramantenercatientesen forma seguraalimentoscalienteso para
calentarpanesy phtos+
Para programar 'Keep Warm':
1. Oprima[atecla 'Keep Warm' en e[ indicador ........Keep
visual warm .........
• 'WARM'(Tibia] desteiIaen eI indicadorvisual
• '000'desteflaen ei indicadorvisual
2+ SeleccioneIatemperaturade 'KeepWarm'+ U
OprimaIatecia 'Autoset e' (ProgramaciOn ,_,utosd
AutomStica]o Iastecias num6dcasapropiadas+
• 75° (170°] se ihminar8 cuando se oprima latecla 'Autoset 0'+
• Cadavezque oprima Iatecla 'Autoset 0', latemperatura
aumentarden 3° C [5° F]+
Latemperaturade 'KeepWarm' puedeser pmgramadade 63° a
90° C (145° a 1%° F).
'WARM'y latemperaturase desplegar_nen el indicador cuando
lafunciOnest8activa.
Notas sobre 'Keep Warm':
o ParacaIidadOptimade los alimentos,losalimentoscocinadus
en el homo debenser mantenidoscalientespor no ross de 1 a
2 horas+
o Paraevitarque losalimentosse sequen,cdbralos levemente
con papelde aluminioo una tap&
o Para eamentarpaneeiHos:
- cubra Ievementelos panecilloscon papel de alumhfio y
col6quetosenei homo+
- oprima las teclas 'Keep Warm' y 'Aatoset 0'+
- calientedurante 12a 15 minutos+
o Para eamentarpmatos:
- coloque 2 filas de cuatro platos carlauna en el homo+
- opdma las teclas 'Keep Warm' y 'Autoset 0'+
- caIiente los piatosdurante cinco minutos,@ague el homo y
deje los piatos en e! hornodurante 15minutosm_s+
- use solamenteplatos resistentesal horno,verifique con el
fabricante+
- nocoloque Ios platos calientessobreuna superficiefr[a
pues et cambior@ido de temperaturapuede causarfisuras
superficialeso rotura+
Para canceiar 'Keep Warm':
1+ Oprimala tecia 'CANCEl' (Cancelar)+
2+ Retireel alimentodel homo+
?O
Cietre Auto tico/
Modo Sab tico
Elhomo se apagar_autom_ticamentedespu6sde 12horassi usted
IodeiaaccidentaImenteencendido=Estacaracter[sticade seguridad
puedeset desactivada=
Para caneemar emcierre autom_tieo de 12 horas y
dejar que el homo funcione continuamente durante
72 horas:
1. Oprimay mantengaoprimida Ia tecla 'Clock'
[Reloi_durantecinco segundos=
• 'SAb'se desplegar_y destellar_durantecinco segundos=
• 'SAb'se desptegar_continuamentehastaquese desactiveo
hastaque transcurraeI I[mite de 72 horas=
• 'BAKE'(Hornea0 tambi_nse despIegar_si se est_ usando un
ciclode horneadocuandoel homo est_en modosab_tico=
• Lafuncidn 'BAKE'esla Emicaque sepuede ud/izar
con el modo sabfitieo,Lasdem_stuncionesCtempo,s_zado/,
mantenerca/iente,autdimpieza,etc.) sebtoquearfinduranteel
modosabfitico,
• Se puede programar'Cook& Hold' [CocciOny Mantene0
durantee! Modo Sab_tico,sin embargono se puede
programar'Delay(Diferido] Cook& HoW.
Para canceiar el Mode Sab_tico:
1. OprimaIatecla 'cmock' durantecinco segundos=
• 'SAb'destellar_durante cincosegundos=
• Lahora deldia reaparecer_en el indicadorvisual
O
2. Despuesde 72horas,el modosab_ticoterminar&
• 'SAb'destel[ar_durante cincosegundos.
• Lahora de[dia reaparecer_en eLindicadorvisual
Notas Sobre eUMode Sab tico
• ElModo Sab_iticopuedeset activadoen cualquier momento,
est6o no el hornoencendido.
• ElModo Sab_ticonose puedeactivar si lasteclasest_n
bloqueadaso cuando la puertaestd bloqueada.
• La mayor[ade Iasadvertenciasy mensajesy todas lasseSales
sonorasestdndesactivadascuandoel Modo Sab_ticoest_
activo.
• Siel hornoest8horneandocuando el Modo Sab_ticoes
programado,'BAKE'se apagardcuandose canceleel
horneado. No se emitirSnseiialessonoras.
• Mientras el hornoesteen Modo Sab_tico la Iuz dei homo se
encenderdautom_ticamentecuandose abrala puerta. Si se
deseala Iuzdet horno durante el Modo Sab_tico,6sta debe ser
encendidaantesde que comienceei Modo Sab_tico.
• Cuandocomienzaei Modo Sab_tico,latemperaturaquese
despiiegaserd latemperaturaprogramadaenvezde la
temperaturarealde la cavidaddel horno. No se emitir_ la
seSalsonorade precalentamiento.
• Elciclo de autolimpiezay b!oqueoautom_ticode la puertano
funcionar8durante el Modo Sab_tico.
• Sioprime latecla 'CANCEL' [Cancela0se cancelar_un ciclo
'bake',sin embargoel controlpermanecer_en Modo Sab_tico.
• Sifalla lacorrienteel_ctdca,cuandovuelvalaenergiae! horno
se activar_en Modo Sab_ticocon 72 horasrestantesy ning_n
ciclo activo.
71
@,
Ajuste de [a temperatura
de[ homo
La exactitudde las temperaturasde! homo es cuidadosamente
probadaen la f_brica. Es normalnotar algunadiferenciaentre la
temperaturade horneadoo en el dorado,entre un borne nuevoy un
homo antiguo. A medldaque el bornese usa,la temperaturadel
homo puedecambiar.
Usted puedeajustar la temperaturadeI borne,sl consideraquesu
homo noest_ horneandoo dorando en forma correct& Paradecidir
cuantodebe cambiar la temperatura,programela temperaturadel
homo a 15° C (25° F) m_isalta o m_sbaja que la temperatura
indicadaensus recetas,luego hornee. Los resultadosde la
"prueba" puedendarle una idea de cuanto debe ajustar la
temperatura.
Para ajustar la temperatura del homo:
1. Oprima[atecia 'Bake' (Hornea0. .................
2. Programe285° C (550° F) oprimiendolasteclas numSricas
apropiadas.
3. Oprimay mantengaoprimida la tecla 'Bake' durantevaries
segundoso hastaque 00° aparezcaen el indicadorvisual
Si [atemperaturadel homo ha side previamenteajustada,el
cambioaparecer_en el indicadorvisual. Perejemp[o,s[ la
temperaturadel bornefue reducidaen 8° C 05° F) el ind+cador
mostrar_"- 8°" C-15°"D.
4. Oprima[atecia 'Autoset e' (ProgramaciOn
AutomSt[ca}paraajustar latemperatura.
Cadavezque se optima la tecIa 'Autoset O',la temperatura
cambiaen 3° C (5° F}. La temperaturadel borne puede ser
aumentadao disminuida en 3° a 20° C [5° a35° F}.
S[ oprime latecIa 'Autoset O'+latemperaturade[ homo pasar8
per un cic[o de aumento de temperatura(5, 10... 35}.Si
contint_aoprimiendola tecIa'Autoset 0', la temperaturade[
bornepasar8per un ciclo de descensodetemperatura (-35,
-3o...-5}.
5. La hera de[ dfa reaparecer_autom_ticaPaenteen el indicador
visual
No necesitareajustar [atemperaturadel borne si hayuna fa[[ao
interrupciOnde energ[ae[6ctdca. El ajuste de [a temperaturaes
v_lido para 'Rake','Convect Rake'y 'ConvectRoast'(mode[os
seIectos_)solamente.Lastemperaturasde asara [a parri[[ay de
[impiezano puedenser ajustadas.
Cambio de [a temperatura de
].
2.
Elajustede f_brica de la medidadetemperaturaes Fahrenheit+
Paracambiarel ajuste,optima y mantengaoprimidas[astec[as
'CANCEL' (AnuIa0y 'Bake' a[ mismotiempo durante tres
segundos+
3+ Escuchar_unaseiia[ sonoray el ajuste actual (°F o °C] se
despiegar_en [apantaiIa+(Sino se reaiizaningQneatable,[a
estufa regresar8a[ ajusteactualdespu#sde 30segundos]+
4+ Paracambiarel ajuste,oprima [a tec[a 'Autoset O'+Opr[maIa
nuevarnentepara regresara[ ajuste anterior+Esperecinco
segundosy el ajustese guardar&
'Favorite' (Favorite)
Latecla 'Favorite'[e permite guardar en memoriael tiempoy [a
temperaturadeun cic[o 'Cook& HoW (CocciOny Mantener
Caiiente).
Paraprogramarun cic[o favorite, debe estar activao recientemente
programadaunafunciOnde 'Cook& HoW.
Para programar un nuevo cido Favorite o para
guardar come Favorite un cic[o 'Cook & Hold' que
est6 en progreso:
1. Programeun ciclo de 'Cook & Hokl' come se describeen [a
secci6n'Cook & Hold'en la p_ginaB7-68.
2. Optima y mantengaopdPaida[a tecIa'Favorite'
durante tres segundos.
+ Elciclo'Cook & Hold' recientementeprogramatico en
progresoser_ guardadoen memoria.
+ Seoir_ una sepalsonorapara [ndicarque e[ control ha
aceptadoel ajuste 'Favorite'.
Para comenzar un cicio programado come Favorite:
1. Optima [atecIa 'Favorite'+
+ Sedesplegar_el tiempoy la temperaturaparael ciclo 'Cook&
Hold'programatic (si no hay ciclo 'Cook & Hold' programatic,
en el indicadorvisualse despiegar_'nonE'.)
2. Optima [atec[a 'Bake', 'Conveet Bake' (Horneadoper
ConvecciOn)o 'Conveet Roast' (Asadoper Convecci6n,
modelosseiectos).
, Elciclo Favoritecomenzar_inmediatamente.
+ Elhombredel ciclo seleccionadose se iluminar_en el
indicadorvisual.
+ Eltiempo de cocciOnse ihminar_ enel indicadorvisual
Cuando ha expirado el tiempo de cocci6m
• El hombredel ciclo seIeccionadose se apagar&
• SeihminarSn 'HOLD'y 'WARM'.
+ Enel indicadorse despIegar_'75°' ('170°'D.
Para canceiar un cic[o favorite en progreso:
1. Optima [atec[a 'CANCEL', _rAkl_
• El cic[ofavorite guardadoen memoriano
ser_iafectado.
2. Retiree[ aiimentode[ homo+
72
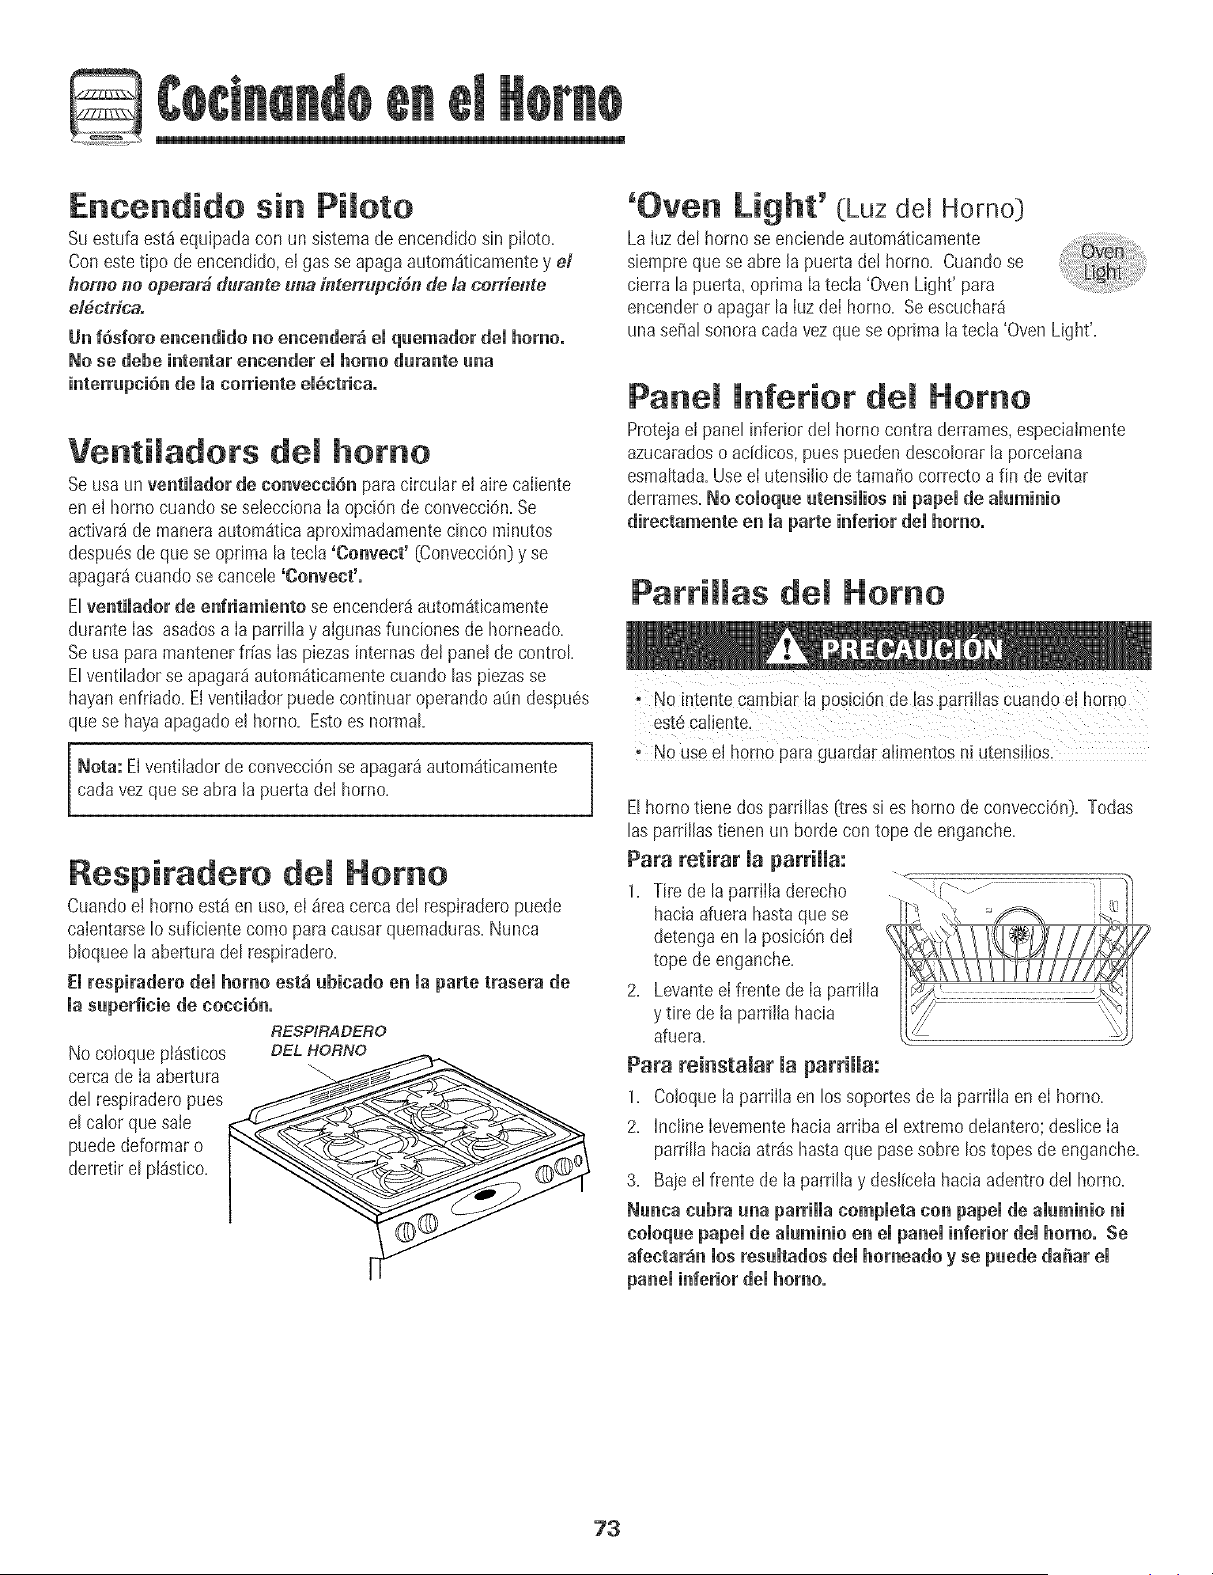
G
Encendido sin Pimoto
Suestufa est8equipadacon un sistemade encendidosin ptoto=
Con estetipo de encendido,el gas seapagaautomSticamentey e/
home no epemr_ durante u#a interrupcidn de la cerriente
el#ctric&
Un f6sforo emcemdidono emeender_el qaemador dei homo.
No se debe intentar eneender el homo durante aria
interrupei6nde la eorriente emSctrieao
Venttadors del homo
Seusa unventimatorde conveeei6n para circular el aire caiiente
en el bornecuando seseteccionaIa opciOnde convecciOn=Se
activar_de maneraautom;Jticaaproximadamentecinco minutes
despu6sde quese oprima la tecla'Convect' (ConvecciOn)y se
apagar_cuandose cancele'Convect'.
Elventiladorde enfriamiento se encender_iautom£ticamente
durante Ias asadosa Ia parrillay aigunasfunciones de horneado=
Seusa paramantenerfr[as Iaspiezasinternas det panelde control
Elventiladorse apagar_ autom£ticamentecuando laspiezasse
hayanenfdado=EIventilador puede continuar operando aOndespu6s
quese hayaapagadoel homo= Estoes normal
I Nora: Elventiladorde convecciOnse apagar_autom_ticamente
cada vez que se abra la puertadei homo=
Respiradero dem Homo
Cuandoel borneest_ en use,el _ireacerca del respiraderopuede
caIentarseIo suficiente come para causar quemaduras=Nunca
bloqueela abertura del respiradero=
! respiradero dei homo est_ ubieado en la pare trasera de
la saperfieie te eoeei6n,
RESPIRADERO
No coloque pt£sticos
cercade Ia abertum
del respiradempues
el calor que sale
puededeformar o
derretir el pl£stico.
DEL HORNO
'Oven Light' (Luz del Homo}
La Iuzdel hornose enciendeautom£ticamente
siemprequese abre la puertadel homo. Cuandose
cierra la puerta, oprima IatecIa 'OvenLight' para
encendero apagarla IuzdeI homo= Seescuchar_
una seial sonoracada vezque se optima latecla 'OvenLight'.
Panel inferior del Homo
Protejaei panelinferior del borne contra derrames,especiatmente
azucaradoso acfdicos,puespuedendesco[orar[aporcelana
esmaltada=Use e[ utensi[iodetamaiio correctoa fin de evitar
derrames.No comoqaeutensilios ni papei de amaminio
directamente en la parte inferiortel homo°
Parrilas del Homo
, No intentecambiar la POsici6nde !as parrillasCuandoe! homo
est6 caNente.
o NOusee! homo para guardar a!imentes ni t!tensiNos_
E[homo t[enedos pard/as {tressi es homo deconvecci6n)=Todas
las parrii[astienen un hordecon tope de enganche=
Para retirar maparrila:
1, Tire de la parriNaderecho
haciaafuera hastaque se
detenga en la posiciOndel
tope deenganche.
2. Levanteel frente de Ia parrilla
y tire de la parrlla hacia
afuera.
1
.... ........ i .....
\ YY[ [I[ I
_c ............
\AJ
Para reiastalar la parrila:
1. Coloquelaparrilla en los soportesde laparrilla enel horno.
2= IncNne[evementehacia arribael extremede[antero;desNce[a
parrillahacia atrSshastaque pasesobre los topes de enganche=
3= Bajeel frente de la parrHlay des/cela hacia adentrodel homo=
Nanca e_bra _na parrimmacompmetacon papei te am_minioni
eomoq_epapel de amaminioen el panel inferiortel homo, Se
afeetar_n los resallatos del homeado y se paede daiar el
panel inferiortel homo.
73
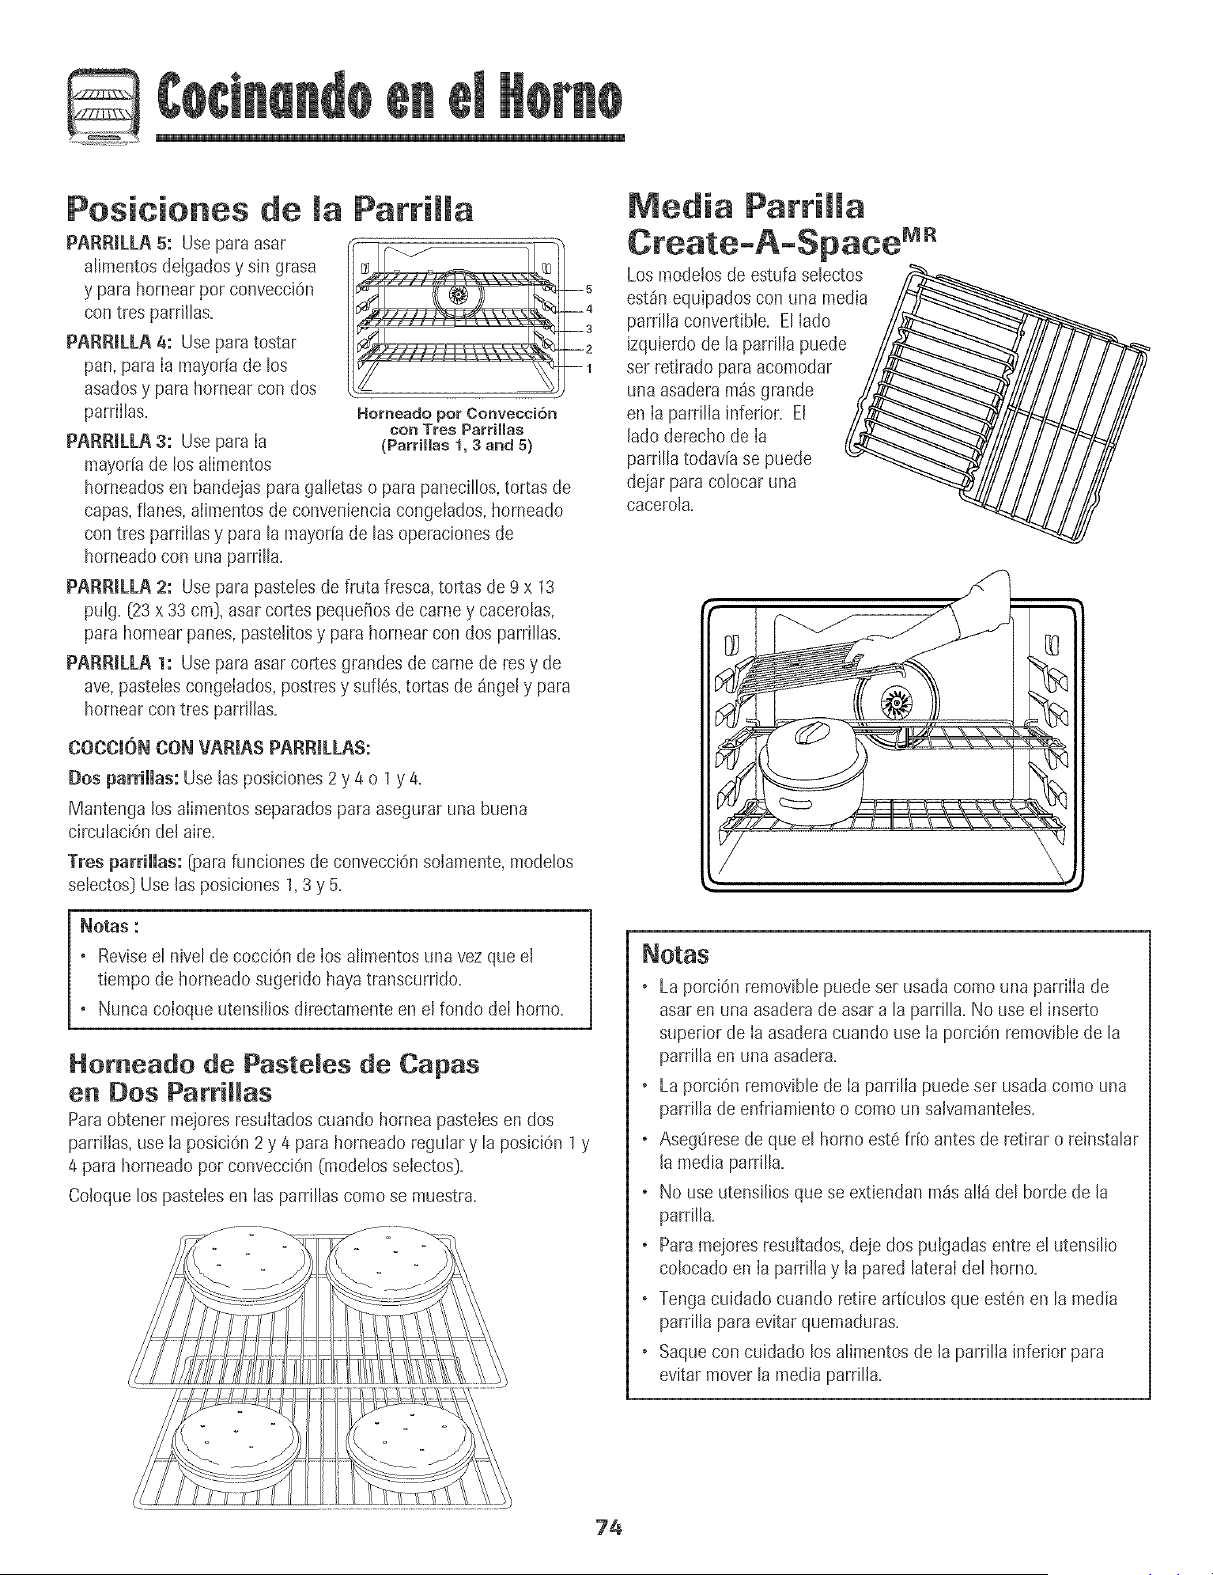
Posiciones de [a Parriiia
PARFI_LLA5: Usepara asar
atimentosdelgadosy s[n grasa
y para hornearpor convecckin
con tres parrilhs+
PARR_LLA4: Useparatostar
pan, para [a mayoffade [os
asadosy para hornearcon dos
parrillas.
PARRILLA3: Usepara la
mayoffade [osaiimentos
Homeado pot Convecci6n
con Tres ParHllas
(Parrillas 1+ 3 and 5)
horneadosen bandejasparagaHetaso para panecillos,tortas de
capas,fIanes,alimentosde convenienciacongeIados,horneado
con tres parrilIasy para la mayoffade las operacionesde
horneadocon unaparri[[a.
PARR_LLA2: Usepara paste[esde fruta fresca,tortas de 9 x 13
puIg.(23 x 33 cm), asarcortes pequefiosde camey caceroIas,
parahornear panes,pastelitosy para hornear con dos parriIIas.
PARR[LLg 1: Usepara asarcortesgrandesde came de resy de
ave,pasteIescongeiados,postresy su%s, tortas de _nge[y para
hornearcon tres parri[[as.
COCCION CON VARJASPARR[LLAS:
Dos parrimmas:Uselasposiciones2y 4 o 1y 4.
Mantengalosalimentosseparadospara aseguraruna buena
circuIaci0ndel aire+
Tres parHllas: _ara funcionesde eonvecci0nsoiamente,modeIos
seIectos:)Use[asposiciones1,3 y 5+
Notas :
+ Reviseel nivelde eocciOnde los aIimentosunavez que e]
tiempo de horneadosugerido hayatranscurrido+
+ Nuncaco[oqueutens[fiosdirectamenteen e[ fondo de[ homo+
--3
--2
--1
Homeado de Paste[es de Capas
en Dos Parr+Has
Paraobtener mejoresresultadoscuando homea pastelesen dos
parriIlas,use [a posiciOn2y 4 para horneadoregulary la posiciOn1y
4 para horneadopot convecciOn(modelosseiectos_+
Co[oquelos pastelesen [as parriIIascomo se muestra+
Media ParriHa
Los mode!osde estufaselectos
est_nequipadoscon una media
parri[[aconvertible+E[[ado
izquierdode [a parri[ia puede
ser retirado paraacomodar
una asaderamasgrande
en [a parri[Jainferior.El
[ado derechode [a
pardIIatodav[ase puede _
dejarpara colocaruna %
oaoerola.
//
Notas
, La porcicinremovibIepuede ser usadacomouna parrilla de
asar en una asaderade asar a la parriIIa+No useel inserto
superior de [aasaderacuandouse [a porciOnremovibIede la
parriIIaen unaasadera+
, La porciOnremoviNede [a parriIla puedeset usadacomo una
parriIIade enfriamientoo comoun saivamanteIes+
, AsegOresedeque el horno est6 fifo antesde retirar o reinstaIar
[amedia parriIIa+
, No use utensiliosquese extiendanpa_saI[_ del horde de [a
parri[[a+
, Paramejoresresu[tados,deje dos pu[gadasentre e[ utensi[io
colocadoen [a parrii[ay la paredlateraldel homo.
, Tengacuidado cuando retireartfcuIosque est6nen lamedia
parriIIaparaevitar quemaduras.
, Saquecon cuidado losaIimentosde [a parriIia inferiorpara
evitar moverlamedia parriIia.
74
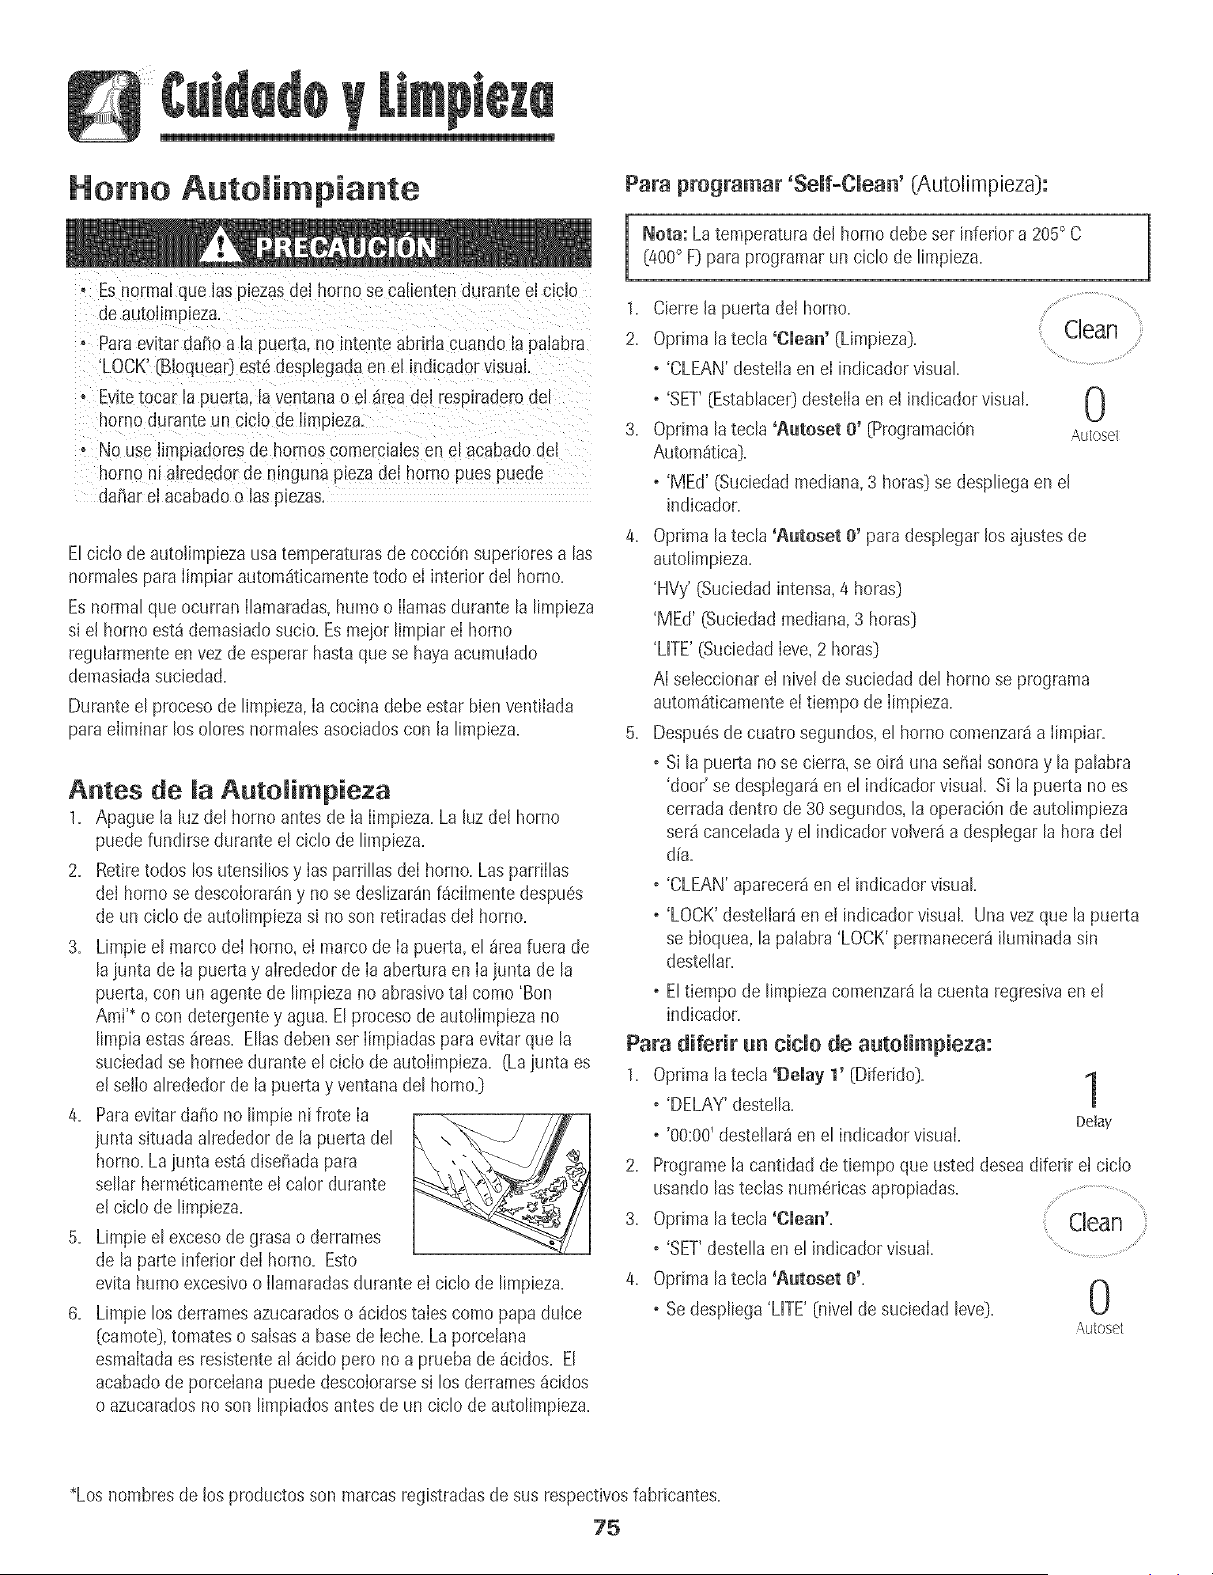
Homo Autoii piante
, Es normal que las piezas de[ homo se caiienten durante el ciclo
de autoiimDeza.
, Para evitar da_o a la puerta, no mtente abrirla cuando la paiabra
'LOCK' {Bioquea0 est6 desplegaua en el indicador visual.
o Evlte tocar la puerta, la ventana o el drea dei respiradero ael
horno durante un cicio de [impleza.
o No use [impiadores de boreas comerciales en el acabado del
homo ni airededor de ninguna pleza del homo pues puede
dafiar e[ acabado o las Dezas
EIcic[o de autolimpiezausatemperaturasde cocci0n supenoresalas
normalespara [impiarautom_iticamentetodo e[ interior del homo.
Esnormal que ocurran [lamaradas,humoo [[amasdurante la limpieza
si el horno est_ demasiadosucio. Esmeior limpiar e[ horno
reguiarmenteenvez de esperarhasta que se hayaacumuiado
demasiadasucieda&
Duranteel procesode limpieza,[a cocina debe estar bien ventilada
paraeiiminar los oloresnormalesasociadoscon la limpieza.
Antes de ia Autoiimpieza
1. Apague [a luzdel hornoantesde [a [impieza.La hz de[ homo
puedefundirse duranteel ciclo de limpieza.
2. Retiretodos los utensiliosy [asparrillasde[ homo. Lasparriilas
dei homo se descoiorar_ny nose desiizarainfaciimente despu6s
deun ciclo de autolimpiezas[ no son retiradasdel homo.
3. Limpieel marcode[ homo, el marco de [a puerta,el _reafuera de
laiunta de [a puertay airededorde [a aberturaen [a iunta de la
puerta,con un agentede limpiezano abrasivotal como'Bon
AmP o con detergentey agua. Eiprocesode autolimpiezano
limpia estasdreas. Eliasdeben set [impiadaspara evitar que la
suciedadse homee duranteel cicio de autoiimpieza. (Laiunta es
e[sei[oairededorde la puerta y ventanadel homo.)
4. Paraevitar daffo no limpie ni frote [a "_=_Z_ 7_77E/7
iunta situadaalrededorde la puerta del
homo.La iunta est_ diseiiada para
sellar herm6ticamenteel caior durante _'_,_._
e[ ciclo de limpieza.
5. Limpieel excesode grasa o derrames
de laparte inferior de[ homo. Esto
evitahumo excesivoo [lamaradasdurante el cicio de limpieza.
6. Limpie losderramesazucaradoso _cidostaies coredpapaduice
[camote),tomateso saisasa basede [eche.La porcelana
esmaitadaes resistenteal _cidopero no a pruebade_cidos. Ei
acabadode porceianapuededescoiorarsesi los derramesacidos
o azucaradosno son limpiados antesde un ciclo de autolimpieza.
Para programar 'Self-Clean' (Autoiimpieza):
i ora: Latemperaturadel hornodebeset inferiora 205° C[400° F) paraprogramarun cicio de limpieza.
1. Cierre[a puerta de[ homo.
2. Optima [atec[a 'Clean' (LJmpieza). Clean
• 'CLEAN'destella en el indicadorvisual
o 'SET'(Estab[ace0destellaen el indicadorvisual N
3, Optima latech 'Aatoset O' (ProgramaciOn Autosel
Autom_tica).
o 'MEd' (Suciedadmediana,3 horas}se despHegaen el
indicador.
4. Oprima la tecia 'Autoset e' para despiegarlos ajustesde
autolimpieza.
'HVy' (Suciedadintensa,4 horas}
'MEd' (Suciedadmediana,3 horas}
'LifE' (Suciedadleve,2 horas}
AI seleccionare! nive[de suciedaddel homo se Dograma
autom_ticamenteet tiempode limpieza.
5. Despu6sde cuatro segundos,el homo comenzar_a limpiar.
o Si lapuerta no se cierra,se oir8una seiiaIsonoray la palabra
'door' se desplegar_en el indicadorvisual. Si lapuerta no es
cerradadentlo de 30segundos,la operaci6nde autollmpieza
ser8canceladay el indicadorvolver_a desplegarla hora de[
d[a.
o 'CLEAN'aparecer_en e[ hldicador visual
o 'LOCK'destei[ar_en e[ hldicadorvisual Unavezque la puerta
se bioquea,la pa[abra'LOCK'permanecer8[[umhada shl
destellar.
o Eitiempode limpiezacomenzar_la cuenta regresivaen el
indicador.
Para diferir un tide de autoiimpieza:
1. Optima [atecia 'Delay 1' [Diferido). 1
!
o 'DELAY'destella.
Delay
o '00:00'destellar_en e[ indicadorvisual
2. Programe[a cantidadde tiempoque usteddeseadiferir et cic[o
usando [astecias numericasapropiadas. .........................
3. Optima [atec[a 'Clean'. dean
o 'SET'destellaene[ indicadorvisual. ...... .......
4. Oplima [atec[a 'Autoset e'.
U
o Sedespiiega'LifE' [hive[de suciedad[eve).
,'\u[osel
*Losnombresde los productosson marcasregistradasde sus respectivosfabricantes.
75
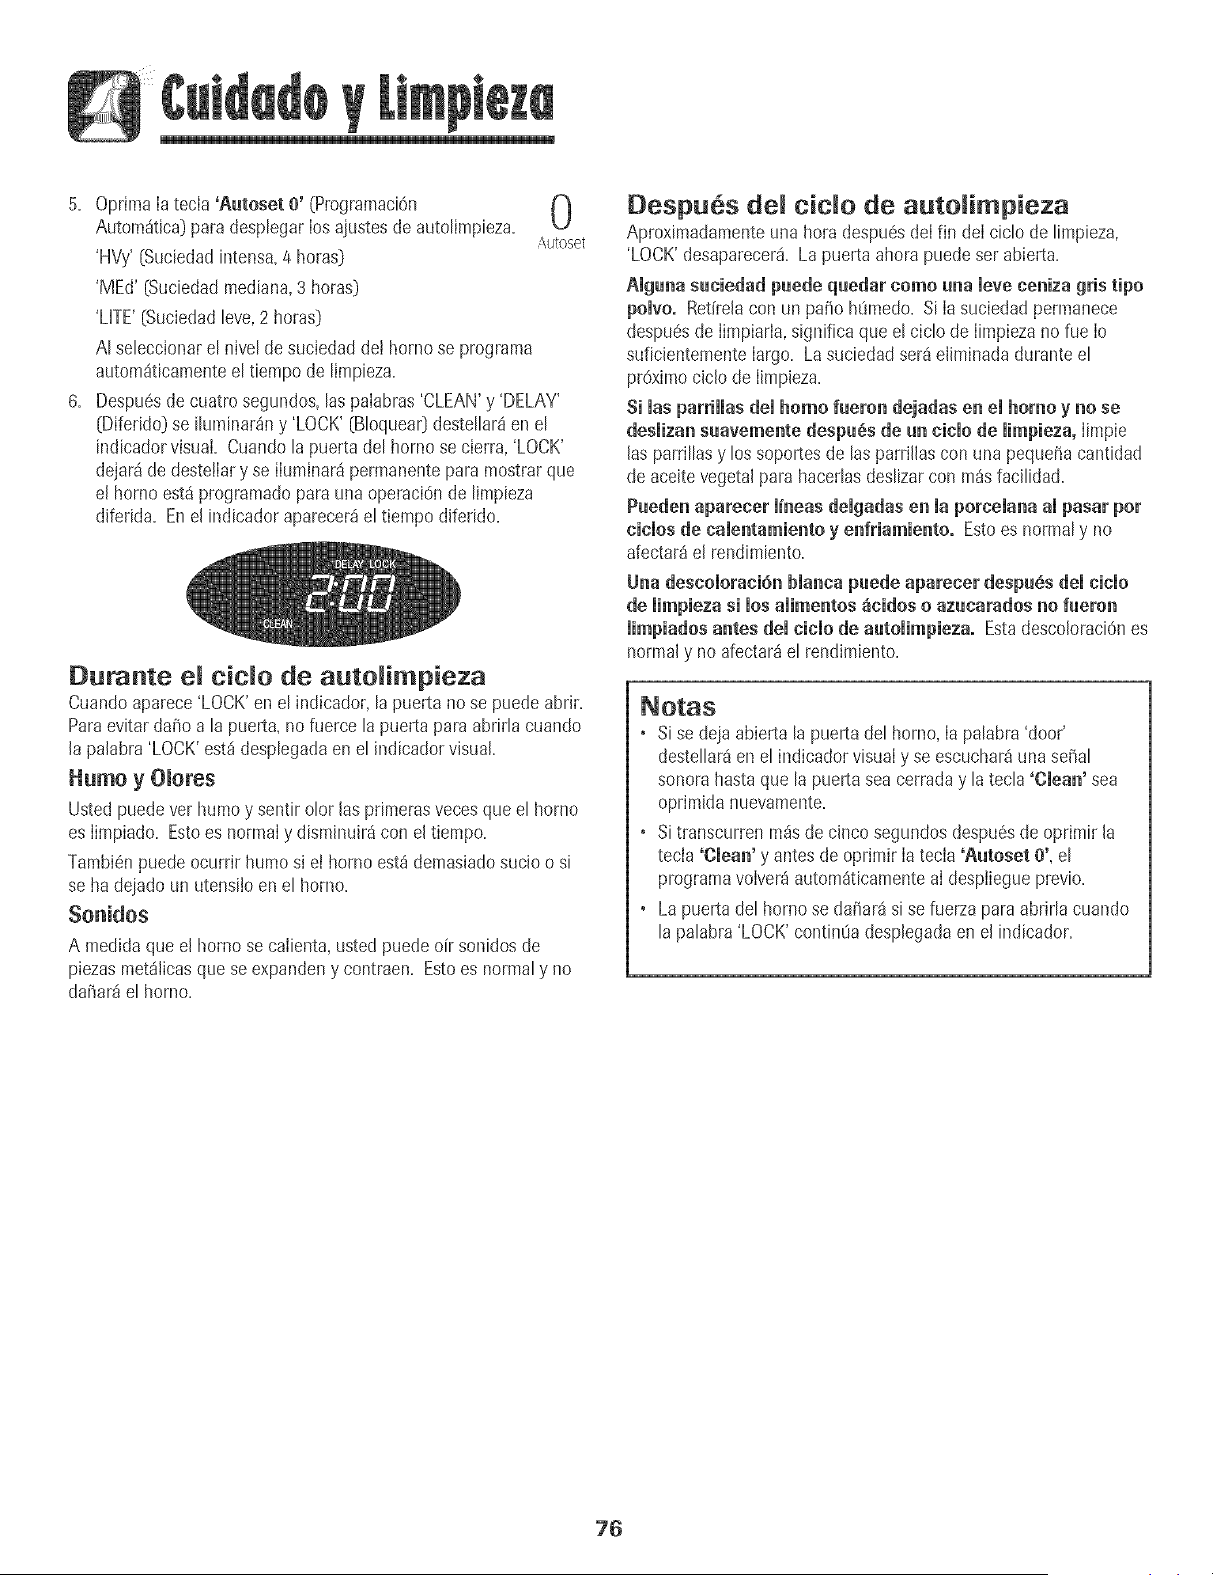
5, Oprima [a tecla 'gutoset 0+(ProgramaciOn (_
AutomSt+ca) para desplegar Ios ajustes de autolimpieza,
t_J
Autoset
'HVy' (Suciedad intensa, 4 horas)
6,
'MEd' (Suciedadmediana,3 horas]
'L[TE'(Suciedadleve,2 horas)
At seteccionaret nivetde suciedadde[ homo se programa
autom_iticamenteet tiempo de timpieza.
Despu6sde cuatrosegundos,tas palabras'CLEAN'y 'DELAY'
(Diferido)se iturninar_ny 'LOCK'(BIoqueaOdestellar_en el
indicadorvisuai. Cuandolapuerta del homo se cierra,'LOCK'
dejar_de deste!lary se iluminar_ipermanentepara mostrarque
e[ horno est_ programatic parauna operaci6nde limpieza
diferida. Ene[ indicadoraparecer_eltiempo diferido.
Durante c+do de auto impieza
Cuandoaparece'LOCK'enel ind+cador,la puerta no se puedeabrir.
Paraevitardafio a la puerta,no fuerce la puertapara abrirlacuando
la palabra'LOCK'est_desplegadaenel indicadorvisual.
Usted puedever humoy sentir clot las primemsvecesque el homo
es Iimpiado. Estoes normaly disminuir_con el tiempo.
Tambi6npuede ocurrir humo s+el homo est_ demasiadosucio o si
se ha dejado un utensilo en el homo.
Sonidos
A medida que el homo se caIienta,usted puede oir sonidosde
piezasmet_Iicasque se expandeny contraen. Estoes normaly no
daiiar_ e[ horno.
Despu6s tide de autolimp+eza
Aproximadamenteuna hora despu6sdeIfin deI ciclo de limpieza,
'LOCK'desaparecer& Lapuerta ahora puede ser abierta+
Alguna suciedad puede quedar como una mereceniza gris ripe
polvo. Ret[relacon un paso hOmedo.Si Ia suciedadpermanece
despuesde Iimpiarla,significa que e! ciclode Iimpiezano rueIo
suficientementelargo. Lasuciedadser_eiiminada duranteel
proximociclo de Iimpieza.
Si masparriHasdemhomo fueron dejadasenel homo y no +e
desmizansuavemente despu6s de un cicmode mimpieza,Iimpie
las parrillasy los soportesde hs parr+llascon una pequeSacantidad
de acekevegetalpara hacedasdeslizarcon m_sfacilidad+
Pueden aparecnr m+neasdemgadasen maporcemanaampasar pot
ciemosde camentamientoy enfriamiento. Estoes normaly no
afectar_el rendimiento+
Una descomorad6n bmancapuede aparener despu6s demc+cmo
de mimpiezasi mosamimentos_icidos o azunarados no fueron
limpiados antes dem¢i¢mode automimpieza° EstadescoloraciOnes
normaly no afectar_el rendimiento+
Notas
• Si se dejaabierta la puertadel horno,Ia palabra'door'
destellar_enel indicadorvisaaIy se escuchar_una seSal
sonora hasta que la puertasea cerraday la tecla'Clean' sea
oprimidanuevamente.
+ Si transcurrenm_sde cincosegundos despu6sde oprimir la
tecIa 'Clean' y antesde oprimir Iatecia 'Autoset 0', el
programavoIver_autom_ticamenteaI despiiegueprevio+
• Lapuerta del homo se da_ar_si se fuerzapara abrirla cuando
la palabra'LOCK'continOadesplegadaen el indicador+
76
Procedi ientos de Li pieza
fr_as antes de tocario o iimpiatmo.De este mode se evitat_ data y
POsiblesquemaduras. *Loshombres de Iosproductosson marcasregistradas
de susrespectivosfabricantes.
, Paraevitarmanchaso dec010[aei6[!limpie el homo despu6sdecada usa.
*_Parahacerpedidos,Ilameal 1-877-232-6771EEUU.o
Sise retira algunapieza,asegQresede que Seareinstaladaen formacorrecta. 1-800-688-8408Canadi
P_EZA PROOEBi[M_ENTO BE LIM PmEZA
Tapasde Tapas de Qeemadores Removibies
Qaemadores y o Dejeenfdarelquemador.RetirelatapayI_vetaenaguajabonosaconunaesponjaderestregardepl_stico.Parasuciedad
Quemadores de dificil, timpieconunaesponjanoabrasivarellenaconjabOno concremaparalimpiezadecubiertas'CooktopCleaning
Gas Seiiados Creme'*(Pieza#20000001)*_y una esponia.
o No las laveen el lavavajillasni en un homo autolimpiante.
O.uemadores de Gas semmadas
o L[mpieloscon frecuencia.Deieenfriar el quemador.Limpie conjabOny una esponjade restregardepl_stico.Para
suciedaddificil, Iimpiecon una esponjano abrasivare!lenacon jabOn.No agrandeni modifiquelos agujeros.
o Tengacuidado de que no entreagua en Ios orificios de Iosq_Jemadores.
o Tengacuidado cuando limpie el encendedor.Si elencendedorest_ h0medo odaiiado, el quemadorsuperior no
encender&
Rejiiias de los o L_velascon aguatibiajabonosay unaesponjade pldstico noabrasiva. ParamanchasrebeHes,limpie conunaesponja
Quemadores _ depI_sticorellena conjabOn,no abrasivao con 'CooktopCleaningCreme'*(Cremapara Limpiezade Cubiertas_(Pieza
porceiaea sabre 20000001)**y una esponja.Sila suciedad persiste,wJetvaa aplicar'CooktopCleaningCreme',cubracon unatoalla de
pape!h_meday dejeremojardurante 30 minutos.Restrieguenuevamente,enjuaguey seque.
o No las laveen el lavavajillasni en un horno autolimpiante.
Area del Reloj y o Parabloquear de los controlespara Ia Iimpieza,vet 'Bioqueode IosControles'en p_gina65.
de ias Tecias o Limpiecon un patio h_medoy seque. No use agentesde limpieza abrasivospunspueden rayareJacabado.
de Control o Se puede usar limpiaviddossi se rocianen el paiio primero. NO retie directamente en elpanelo
Periiias de o RetireIas perillascuandoest6n en Ia posici6n'OFF'tir_ndolashaciaadelante.
Control o Lave,enj_Jaguey seque. No useagentes de Jimpiezaabrasivospunspueden rayarel acabado.
o Enciendacada quemadorpara asegurarsede que lasperillas ban sido correctamentereinstaladas.
Cubierta y Panel Laporcelanaesmaitadaesviddo fundido en metaly puede agrietarseo picarsesi no se usacorrectamente.Esresistente
de Control- a Ios_cidos,no a pruebade4cidos.TodosIosderrames,especiaJmentelos derramesazucaradoso acidicos debenset
Esmaite de [impiadosinmediatamentecon un patio seco.
Porceiaea o Cuandose enfr[e,Iavecon aguajabonosa,enjuaguey seque.
o Nunca[impie unasuperficietibia o caiientecon un paiio hOmedo.Estopuede causar agrietamientoo picaduras.
o Nuncause limpiadoresde homo, agentes de limpiezaabrasivoso c_usticosen el acabadoexterior de [a estufa.
77

PIEZA PROCEDIM_ENTO DE LIMPIEZA
Gaveta de + Cuandoest6fr[a, Iavecon aguatibia jabonosa,enjuaguey seque.Nunca Iimpie una superficietibia o caliente
Almacenamiente con un patio h0medopues estopuede ddiar la superficiey causaruna quemaduraa causadeI vapor.
y Manijas de las + Paramanchasrebeides,use agentesde IimpiezaIevementeabrasivostal comopastade bicarbonatoo 'BonAmi'*.
Puertas + Esmalte No useIimpiadoresabras+vos,cSusticoso _sperostal comoesponjasde lanade acero olimpiadoresde hornos.Estos
Pintado productospuedenrayaro daiiar permanentementeIa superficie.
Neta: Use una toalla e un paso sece para limpiar los derrames,especialmente los dert_mesadduces e
azucaradesoLa superfide se puede descelerar o perder el bH!le si el defame no se #mpia ir_mediatamente.
Este es espedalmer_te impertante en las superficies blancas.
Ventana y Puerta + Eviteusar cantidadesexcesivasde aguapues puede escurrirsedebajo o detr_sdeI vidrio causandomanchas+
del Homo +VidHo • Lavecon aguay jabOn. Enjuaguecon agualimpiay seque. El limpiador deviddo puede usarsesi se roda en un
patio primero.
• No use matedalesabrasivostales come esponjasde restregar,limpiadores en polvo o esponjasde lanade acero
pues pueden rayarel vidrio.
+nterior del Homo • Siga las instruccionesen las p_ginas75-76para programarun ciclo de autolimpieza.
Parriiias dei , Limpiarcon aguacon jab6n.
Homo • Sacar[asmanchasdificiies con po[vo de [impiezao una esponja[lenacon jab6n. Enjuaguey seque.
+ Lasparrillassedescoiorar_npermanentementey puedennodes[izarseconsuavidadsisondejadasen e[hornodurante
unciclo deautolimpieza.Siestosucede,[irnpie[aparrillay lossoportesen relievecon una pequetiacantidad de aceite
vegetalpara restaurar[a faci[idadde movimiento,[uego [impiee[excesode aceite.
Acero Jnoxidabie + NO USEMNGUN PBODUCTODE UMPtEZA QUECONTENGABLANQUEADOBA BASEDE CLOBO.
¢_ yy
(rnodelosselectos) • NO USEUMPtADOBES ORANGE M UMPIADOBES ABRASIVOS.
+ SIEMPBEUMPIE LAS SUPEBFICIESDE ACEBOA FAVOBDEL GBANO.
+ Limpieza Diaria/Suciedad Leve+ Limpie con uno de los siguientes- agua conjabOn+tJnasoluciOnde vinagre
blancocon agua,limpiador para superficiesy vidrio 'Formula409'*o un limpiavidriossimilar - usandounaesponja
o un patio suave. Enjuaguey seque. Parapulir y evitar marcasde los dedos,use el producto 'StahllessSteel
Magic Spray'*(PiezaNo.20000008)**.
+ Suciedad Moderada/Jntensa + Limpiecon uno de Ioss+guientes- 'Bon Ami'*, 'SmartCleanser'*o 'Soft Scrub'* -
usandounaesponja h0medao un patio suave. Enjuaguey seque. Lasmanchasdificiles puedenset quitadascon
una esponjamuiti-uso 'Scotch-Bdte'*h0meda;frote a favor del grano. Enjuaguey seque. Pararestaurarel
lustrey sacar lasvetas,aplique 'StainlessSteelMag+cSpray'*.
, DescoiomciSn - Useuna esponjamojadao un paiio suave,limpie con limpiador de acero'CameoStainlessSteel
Cleaner'*.Enjuagueinmediatamentey seque.Paraeliminar lasestr[asy restaurarel lustre,use despu6srociador
paraacero inoxidable'StainlessSteelMagic Spray'*.
*Loshombres de Iosproductosson marcasregistradasde susrespectivosfabricantes.
** Parahacerpedidos,Ilameal 1-877-232-6771EE.UU.o 1-800-688-8408Canadi
78

Puerta del Homo Tornillos Niveladores
, No co[oquepesoexcesivoni se pareen la puertade[ homo.
Est0podr(ahacervolcar la estufa,quebrar!a Puertao les!onar
, NOintenteabrir 0 cerrar lapuerta ni hacer[uncionarel horn0
hasta quela puerta no ha Sidodebidarnentereemplazada.
o Nuncacoloque losdedos entre la bisagray_! marcodeiantero
del homo. Losbrazosde articulaci0nson moutadosa resorte.
Sise goipea accidentalmentela bisagrase cerrara
bruscamentecontra el marco de! h0rn0Ypuede les!ona[sus
dedos.
Para sacar:
1.Cuandoest6fr[a, abrala puerta del homo hastala posici6ntope
de asara laparrilla [abie_aaproximadamente10 cm (euatro
pulgadas}].
I
2. Sujetela puerta de carla lado. No use la
manija de la puerta para[evantarla.
3. Levanteuniformementehasta que la puerta
se salgade los brazosde articulaci6n.
Para volver a colocar:
1. Sujete la puerta de carla Iado.
2. AIinee Ias ranuras de la pue_a con los brazos de articulaci6n de la
estufa.
3. Deslicela puerta hacia los brazosde articu[aciOnhastaque este
completamenteasentadaen las bisagras. EmpujehaciaabajoIas
esquinassuperioresde Ia puerta paraasentarlacompletamenteen
las bisagras. La puerta no debequedartorcida.
l ora: Lapuerta deI homo en unaestufa nuevapuedesentirse
"esponjosa"cuandose cierra. Estoes normaly disminuir_con el
USO.
Ventana dem Homo
Para proteger la ventana de la puerta dei homo:
1. No use agentesde limpiezaabrasivostaies como esponjasde
restregarde lanade aceroo limpiadoresenpolvo pues elIos
puedenrayarel vidrio.
2. No golpeeel vidrio con ollas, sartenes,muebles,juguetes u otms
objetos.
3. No cierre Ia puertadel homo hastaque las parrillasdel homo no
est6nen su lugar.
AI golpear,rayar, hacervibrar o esforzarel vidrio puededebilitar su
estructuracausandoun mayor riesgode rotura en unafecha
posterior.
79
Verifique si e[ soporte antivueicoes-[aasegurandoai p[so uuo de
lostorni[Iosniveladorestraseros. Estesoporteevita que [aestufa
sevuelque accidenta[mente.
P_
La estufaaeDeser mvetaaacuandose nstala. Si Ia I_'
estufa no est_ nivelada,gire los tornillos niveladores I] ,q
ubicadosen cada escuina de a estufa hastaque _
c_uedenivelada, j_._%
TORNILLO NIVELADOR
Luz del Norno
(El estilo varia segOn el modelo)
, AsegSresede que ia cubierta del foco yel foco est6nfrios
antesde tocarlos.
Para reempiazar emfoco dei homo:
1. Cuandoel horno est6frio, sujete la tapa de labombiIh en su lugar,
luego desliceeI ret6n de aIambrefuera de Ia cubierta. Nora: La
cubiertade la bombiliasecaer_si no essujeta en su hgar cuando
est_sacando eI ret6nde alambre.
2. SaqueIa cubiertadeIfoco y elfoco. CABOCHON
3. Coloque un foco de 40 watts para
electrodomesticos.
4. Vuelvaa colocarIa cubiertade
la bombilla y asegOrelacon el
ret6nde alambre. _ RE3-2_ORTDERETENUE
5. Vueiva a enchufar la estufa, ff_Tm_t,,//i_tu_.)
Vuelvaacolocarlahoracorrecta.
O
1. Useun tomaoliassecoy con muchocuidadodestornille la
cubierta delfoco y ei foco.
2. Reemplacecon un foco para horno de electrodom6sticode 40
wats. Se recomiendanlosfocos con basede latOnpara evitar
fusion del foco enei casquilIo.
3. Reemplacela cubiertadel focoy vuelvaa conectarla corriente
elOctricaa Iaestufa.
4. Vuelvaa programarel reloj.
Retire de la Estufa a Gas
Losconectoresde taestufa a gas usadosparaconectareste
artefactoal suministrode gas no est_n diseiiados para movimiento
continue=Unavez instatados,NO muevarepet+damenteeste
artefactoa gas para su timpiezao paraubicadoen otro Iugar=Si
esteartefactotiene gue ser movidoy/o retiradopara reparaciOn,
siga et procedimientodescrito en hs instruccionesde instaiaci6n=
ParainformaciOn,p6ngaseen contacto con el Servicioa los CIientes
Maytag IIamandoal 1-800-688-9900EE=UU=o al 1-800-688-2002
Canad&
Paraevitargue la estufase vuelqueaccidentaimente,se debe
aseguraral piso coIocandoel tornilIo niveladortrasero dentro del
soporteantivuelco=
Gaveta de Ammacenamiento
NO guardeproductos de paiseI 0de p!_istico,alimentosni
materiales +nfiamabtesen esta gaveta.La gaveta puede
calenta[sedemasiadoparaestosart[culoscuando se est_ usando
e!homo.
Cone×i6n El ctrica
Loseiectrodom6sticos que requieren energia
emSetrieaest_n equipados con un enehufe de
ires cmavijascon cone×i6na tierra, eI cual
debeset enchufadodirectamenteen un
tomacorrientee!6ctricode tres agujeros,para
120vokiosdebidamenteconectadoa tierra=
S_empredesenchufee/ e/eetrodom6,sticoantes de efeetuar
reparaeiones,
Elenchufede tres clavijascon conexi6na tierra ofrece pmtecci6n
contra peligmsde chequeselectricos=NO CORTEN_EMMINE LA
TERCERACLAVUADE CONE×IONA TiERRADEEENCHUFE
DEL CORDON ELECTR_CO.
Sisolamentese disponede un tomacordentesin conexiOna tierra,
de dos agujerosu otro %0 de tomacorrienteel6ctrico,el
propietario demeieetrodom_stieo es personammente
responsable de reempmazarel tomacorriente con un
tomacorriente elSetrieo de tres aglijeros debidamente puesto
a tierra.
La gavetade almacenamientopuedeset retiradapara que usted
puedalimpiar debajode la estufa.
Para sacar :
1+ Vade la gavetay desl(celahaciaafuera hastala primeraposiciOn
tope+
2. Levantela partedelanterade la gaveta.
3+ T(relahasta Iasegundaposici6n de tope.
4+ Sujete los ladesy IevanteIa gavetapara retirarla+
Para velvet a coiocar:
1. InserteIosextremesde las correderasde la gavetaen los rieles
de laestufa.
2. Levantela partedelanterade la gavetay suavementeemp8jelaa
la primeraposici6ndetope.
3. Levantela gaveta nuevamentey empt_jelahasta gue guede
completamentecerrada.
8O
PROBLEMA SOLUCION
Para mamayor_a de mosprobmemas, ° Revises[ los controbs dei borneest_n debkJamenteajustados.
verifique primero mesiguiente. ° Verifique si et enchufeest_firmementeinsertadoen eltomacorriente.
• Verifique o vuelva a reponer el disyuntor. Verifique o reempBceel fusible.
• Verifique el suministro de energ[ael@trica.
Emquemador superior no se , Verifique si la estufaest_ debidamenteconectadaa Ia fuentede alimentaciOn.
enniendeo ° Verifique si est_fundido un fusibledel circuito o si se dispar6el disyuntor principal.
• Verifique para asegurarsede queel encendedorest6 seco y que emitachasquidos. El
quemadorno seencender_si el encendedorest_daffado,sucioo mojado. Sie! encendedor
no produceun chasquido,gire la perillade control a la posici6n'OFF' [Apagado}.
La llama es dispareja. ° Losorificios del quemadorpuedenestar obstruidos.
La llama del quemador superior se ° Verlfique paraasegurarsede que el utensillo est_asentadoen [aparrilla sobre elquemador.
levanta del orificio,
Los resultados del homeado no son ° Verifique la temperaturadel homo seteccionada.Aseg_iresede que el borne est6
come se esperaban o son precaientadocuando la recetao instmcciones recombndan precalentamientodeI horno.
diferentes a los del homo anterior° ° AsegOresedequeelrespiraderodelhomo noest6bloqueado.Vet p%lna 80paralaubicaci6n.
• Verifique para asegurarsede que ta estufaest_ nlvelada.
• Lastemperaturasa menudovaffanentre un borne nuevoy uno antiguo. A medidaque pasa
eltiempo, la temperaturadeI homo cambiay puedehacersem_s caliente o m_isfr[a. Ver
p_g.72 paralas instruccionescome aiustar la temperaturade! borne. Nora: No se
recombnda ajustarla temperaturasi ha tenido problemascon solo una o dos recetas.
• Useel utensilio correcto. Los utensiliososcurosproducendoradooscuro.Los utensilios
brilIantesproducendorado clare.Consulteel folleto "LaCocinaF_cil"paramayorinformaciOn
sobre los utensiliosde hornear.
• Verifique lasposicionesde Ias parrilIasy IacolocaciOndelos utensilios.Alterne losutensilios
cuandouse dosparrillas. Deie2,5-5cm (1-2 pulgadas}entre los utensiliosy las paredesdel
homo.
• Verifique eI use depapeI de aIuminioen el homo. Nuncause papel de aIuminio para cubrir
unaparrilIacompletadelhomo.CoIoqueun pedazopequeiiode papelde aIuminioenla parriIIa
queest_ deba]odel utensiIiopara recibir los derrames.
Losalimentos no se asan a la , Verifique lasposbiones de las parrillasdel homo. Elalimentopuedeestarmuycercade
parrilla en forma debida o salen la llama.
demaslado humo° ° Elpape[de aluminb se us0de maneraincorrecta. Nuncaforreel insertode[asadorcon pape[
deahminlo.
• Recorteel excesode grasade [a came antesde ponerlaaasar a la parrilla.
• Seus0 una asaderasucia.
• Precalbnte el borne durante dos a tres minutesantes de colocar el alimento en el borne.
• Ase a la parrilla con la puerta del bornecerrada.
81

m
PROBLEMA SOLUC_ON
Emhomo no so automimpiao ° Vedfique paraasegurarsede queel ciclo noest6ajustadoparaun comienzodiferido.Ver
p%inas 75-76.
, Vedfiquesi ia puerta est_cerrada.
, Verifiquesi el control est_ en Mode Sab_tico.Vet p%. 71.
, E!homo puedeestara m_sde 205° C [400° F). Latemperaturadel borne debe ser inferiora
205° C [400° FDparaprogramarun ciclo de limpieza.
Emhomo no so Jimpi6on , Puedeque sea necesar[oun tiempo de limpiezaross Iargo.
forma dobidao ° Losderramesexcesivos,especiaImentede alimentosazucaradosy/o _cidosno fueron
limpiadosantesdel ciclo deautolimpieza.
La puerta demhomo no so ° Elinterior deI homo todav[aest,1caliente. Deje que paseaproximadamenteuna hera
dosbloquea despu_s dol cinlo paraqueeLbornese enfr[e antes de que se completeun cic[o de autoiimpieza. Lapuerta
puedeser abierta cuandodesaparezcala palabra'LOCK'(BIoqueaOdel indicadorvisual
, Elcontrol y la puerta puedeestarbloqueada. Vet p%. 65.
Se junta humedad on maventana , Estoes normalcuando se cocinan alimentoscon alto contenidode humedad.
del homo o sale vapor per , Se us6 humedadexcesivacuando limpi6 la ventana.
omrespiradoredorahomo.
Hay un omorfuer!.o o humo move ° Estoes normalen una estufa nuevay desaparecer_despuSsde unos pocosuses.
nuando so onniondo omhomo° Ai iniciar un cicio de autoiimpiezase "quemar_n" Loso[oresm_sr_pidamente.
, Si se enciendee[venti[adorayudar_a eiiminarel humo y/o el olor.
, Suciedadexcesivade alimentosen eLpanel inferior del homo. Useun cic[o de autolimpieza.
C6diges de Erroros ° 'BAKE'[HorneaOo 'LOCK'puedendestellarrSpidamenteenel indicadorparaavisarleque hay
un erroro un problema. Si'BAKE'o 'LOCK'aparecenen el indicadorvisual,oprima Iatecla
'CANCEL' [CancelarD.Si'BAKE'o 'LOCK'contin_an destellando,desconecteIa energ[a
el6ctrica al electrodom6stico.Espereunospocos minutes y vuetvaa reconectarla energ[a
el6ctrica. SicontinOandesteilando,desconectela energ(aeI6ctricadeI electrodomesticoy
Ilameal t6cnico de sewicio autorizado.
, Si el horno est_demasiadosucio, puedenocurrir demasiadasIlamaradasIocual resultar_en
uncOdigodeerror duranteIaIimpieza.Oprimala tecia 'CANCEL' ydeieque e!homo seenfr[e
compietamente,Iimpieel excesode suciedady luegovuelvaa programarel ciclo delimpieza.
Si el c6digo de error reaparece,Ilamea un t6cnico autorizado.
Se esnuchan ruidos. ° ELhomo emitevariessonidosbaios. Ustedpuede o(r Losre[6sde[hornocuandose encienden
y se apagan.Esto esnormal
, A medidaque el homo secaiientay seenfr[a,usted puedeo[r sonidosdepiezasmet_iicasque
se expandeny contraen. Estoes normaly no daffar_ su e[ectrodom6stico.
, Se escuchaet sonidode un ventilador.Estees e! ventiiadorde enfriamientoyes normal
Elventiladorseguirbfuncionando despu6sde apagar eLborne hastaque el mismose enfr[e.
No se escunhan se_alos sonoras ° El horno puede estar en Mode Sab_tico. Crierp%. 71).
y omindinadorvisuamno se antivao
'SAb' destemmay luogo so , Elhornoestaen modesabStico.Paraanuhr eJmodesab_tico,optimay mantengaoprimida[a
tecla 'Clock' (RelojDdurante cinco segundos.
82
Ga ntia de la Estufa a Gas
Garantia Compbta de Un A_o - Piezas
y Mane de Obra
Du;ante un (1} aFiodes@ la fecha original ue
ccmpra al por menor,se repararao reemplazar_
#ratuitamentecuaEquierp_eza£ue faHeuuran[e
uso normal eneJhogar
Note mesiguiente: Estasgarantiascompletasse
aplican [_nicamen[ecuaneo eEebctrodomestico se
encuemraen los EstadosUnidoso Canad£ Los
electrodom#.sticosque se encuen[renen o-[ros
poisesestar_ncubler[os umcamemepot las
garant[aslimitadas,incluyendola garant[alimitada
para losplezasque fallen duran[e e_primer a_lo,
Residentes Canadienses
Estasga[antiascubren soiamenteaquel!os
electrodom@ticosmstaiaaosen Canad_que hayan
sldo certlficadospor la AsociaciOnde Normas
Canadienses(CSA},a menos@e hayansido
[rafdosa Canad_desdeEstadosUnidos debido a
un cambiode residencia.
Losgarantfasespec/ficasexpresadasamenormeme
sonas unicasgarant/asotorgadaspot d fabr£'ante.
Esrasgarant/asle otorgandereehoslegates
especificos.Ustedpuede tenorotresdereehosque
vaffandieun estadoa otto.
Lo que No Cubren Estas Garantias
1. Situacionesy da_osresultantesde cualquierade lassigubntes eventuatidades:
a. hstalaci@,entregao mantenimientoinapropiados.
b. CuaIquierreparaci6n,modificaciOn,aiteraci6no ajusteno autorizadopot el
fabricanteo pot un centro de servicioautorizado.
c. Mal uso,abuso,accidentes,uso irrazonabbo hechosfotuitos.
d. Corrbnteel6ctdca,voItaieosuministroincorrecto.
e. ProgramaciOnincorrectadecualqubra de los controbs.
2. Losgarant[asquedannuIassi los n_merosde serb originabs bansido retirados,
alteradoso noson f_cilmentelegibles.
3. Focos.
4. Productoscempradosparausocomerciaio industrial
5. Elcostodel servicioo IJamadadeserviciopara:
a. Corregirerroresde instalaciOn.
b. InstruiralusuariosobreeJuso correctodel a¢[efacto.
c. Transportedel artefactoaI estabbcimientode sewicioy el retornoal cliente.
6. Losdaiios consecuenteso incidentabssufridosporcualqubr personacomo
resultadode cualqubr incumplimbntode estasgarant[as.En algunesestadosno se
permitelaexclusi6no limitaci6nde los daiiosconsecuenteso incidentabs,pot Jo
tanto laexclusionanteriorpuedeque no seaplJqueen su caso.
Si Necesita Sewicio
VeaprimerolasecciOnde IocalizaciOny sohci6n deaveriasen la guia de usoy
cuidadoo Ilamea May¢agServicesSM,Servicioa los ClientesMaytagIlamandoal
1-800-688-9900EE.UU.o al 1-800-688-2002Canad&
Para Obtener Servicio Bajo Garantia
Paraubicarunacompa_[ade servicioautorizadoensu IocaIidad,pOngaseencontacto
con eIdistdbuidordonde adquiriOsu ebctrodom@ticoo llamea MaytagServices*M,
Servicioa IosCiientesM@_ag.Si norecibeserviciosatisfactoriobajola garant[a,por
favorIlameo escribaa:
Mayd:agServicessM
Attn: CAIR_ Center
P.O. Box 2370, Cbveiand, TN 37320-2370
EE.UU. 1-800-688-9988 y Canad_ 1-800-688-2082
Nora: Cuandose pongaencontactocon MaytagServicessM,Sel¥icioa los
Clbntes Maytagacercade un problema,porfavor incluyala siguienteinformaciOn:
a. Su hombre,direcciOny n0merode teldono.
b. Los n0merosde modeloy deseriede su ebctrodom@tico;
c. Nombrey direcciOndeI distribuidory lafecha de compra.
d. UnadescripciOnclaradel probbma queest_experimentando.
e. Pruebade compra.
Losguiasdelusuario,manuabsde servicioe Jnformaci6nsobreJaspiezaspuedensolicitarsea MaytagServicessM,Servicioa JosCJJentes.
Form No. A/04/05 Pal1 No. 8113P496 60 (cb2005 Maytag Appliances Sales Co. Litho U.S.A.