1
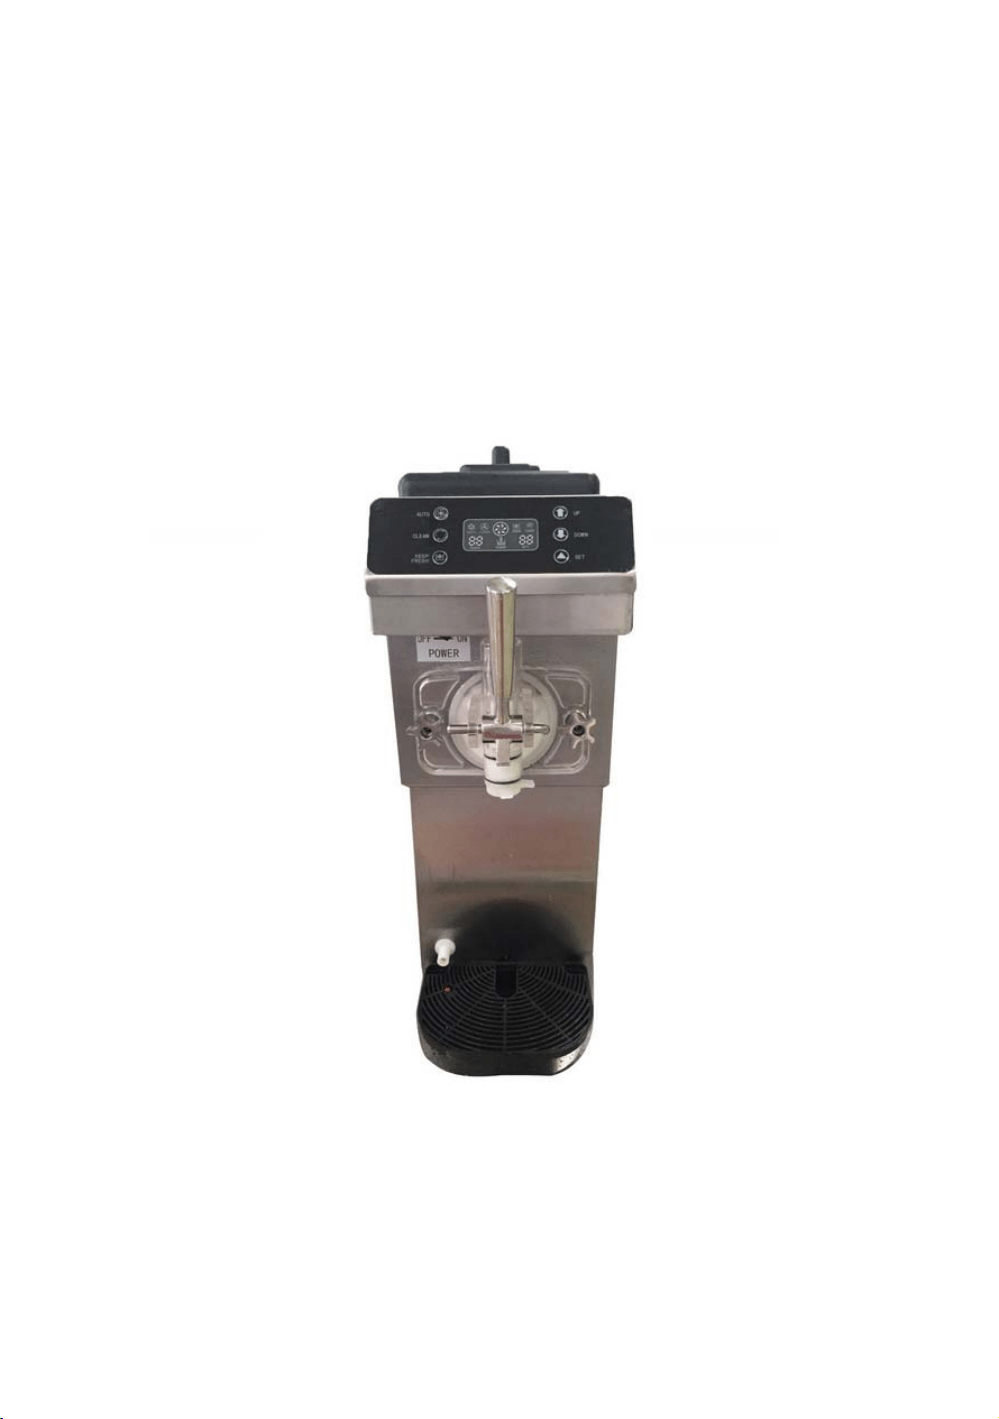
ICE CREAM MACHINE OPERATING
INSTRUCTION
Please Read the Instructions Carefully Before Operating the Machine
2
C O N T E N T S
Safety Caution·········································3
Installation and Test Run ··································5
Operating Instruction ·····································7
Cleaning and Maintenance··································9
Trouble shooting and Solution······························10
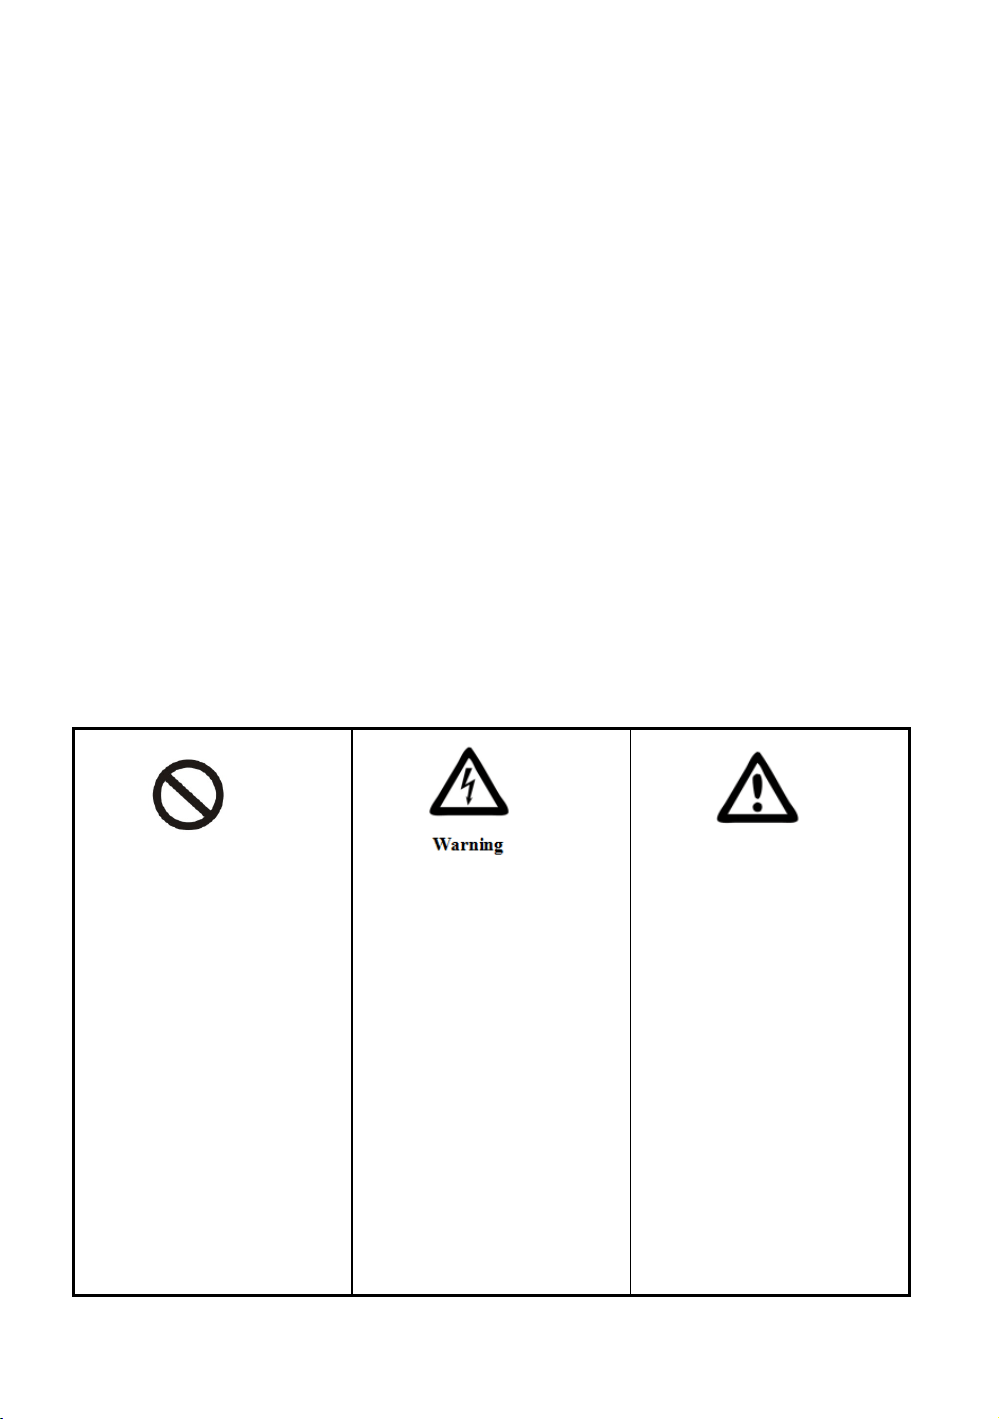
Content with this sign are
acts that must be prohibited;
otherwise it may result in
product damage or threaten
the safety of users.
Content with this flag is
related to product safety or
consumer safety. We must
strictly follow the
requirements of the
operation.
Content with this flag is a
matter of consumer must pay
attention to, or it may cause
damage to the product due to
improper operation or other
damage.

3
>SAFETY CAUTION<
To prevent the water and other conductive liquids flow into the machine;
When there is no mix or water in the freezing cylinder, the machine is not allowed to work,
failure to follow this instruction may damage the beater.
When the machine is working, no stick or something like that put into the air grid or the
dispenser door spout.
Carrying or moving the machine, the maximum tilt angle is 45°.
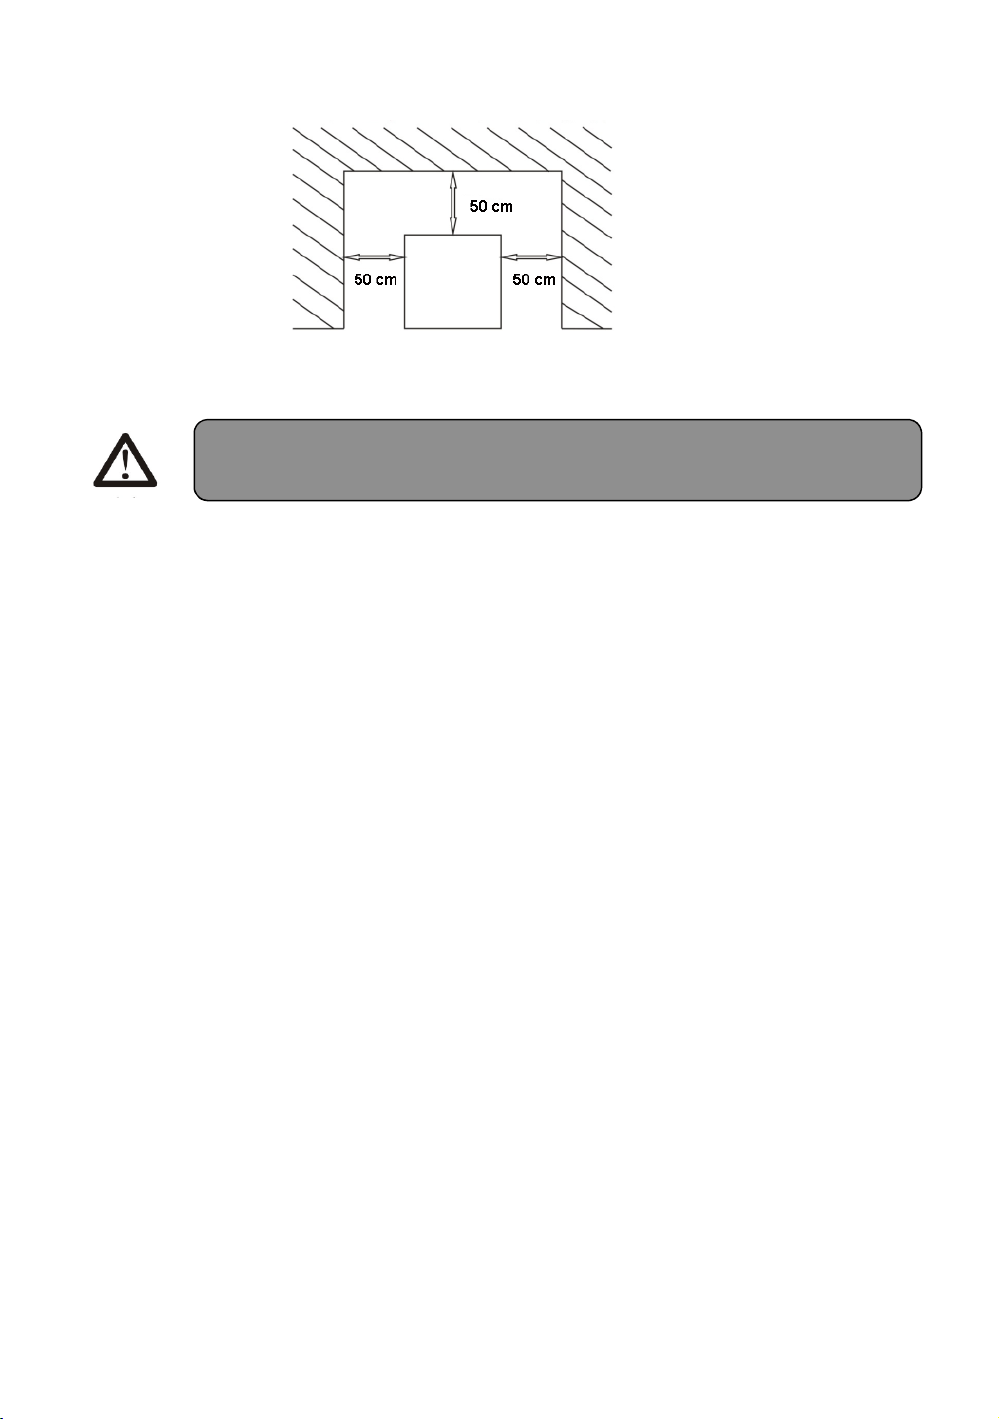
The machine is applying to use indoor, keeping the inside working environment good
ventilation and heat dissipation. Keep dry and clean. Avoid the heat source, direct sunlight
and the place where water splashing. The distance between the air grid and the wall or some
similar barrier should be over 50cm.
The machine should be operated by the professional or the trained staff.
To ensure the personal security, please keep ground connection.
If the power wire is damaged, to avoid the danger, please contact the manufacture or
serviceman of the Maintenance department.
To ensure the using voltage power is same as the nameplate on the machine and the working
voltage is ranging from the ±10% of the rated voltage.
If the power wire is damaged to avoid the danger, please contact the manufacture or
serviceman of the Maintenance.
If the machine needs to be repaired, please contact the manufacturer or serviceman of the

4
maintenance department.
When remove the assembly unit or clean the machine, please cut off the power after stopping
the use of machine,
For the machine without plug, the power wire must be connected with the external power
with air switch, and the power wire should be connected with the air switch directly. If the
rated power of the machine is lower than 2000w, use the air switch of 10Amp (single-phase
source) or 10A(three-phase source); if the rated power is over than 2000w, please use
32A(single-phase source) or 16Amp(three-phase source).
The material of foaming layer is flammable. The user may not discard them or handle it
personally. It should be handled by the specialized department according to the relevant
regulations of the state.
>INSTALLATION AND TEST RUN<
A. Installation
*Ambient temperature: 10~25 ℃ Ambient humidity: Relative humidity≤90%
*Put the machine in a stable flat indoor environment so as to make sure it works well
and prevent any accident;
*Good ventilation and heat dissipation environment; Avoid heat, direct sun or water
splash;
5
1. Unpack the case, move the machine to a suitable place. Count the accessories according
to the packing list.
Description of the least space for installation
2. Connect power (professional technicians only)
Must obey the safety standards regulated by the country;
Ensuring power type and capacity according to the voltage and power on the nameplate;
Connect the power cord to air switch, make sure the yellow and green line is reliably
connected with the ground line;
Three phase power supply cord regulation: ground line is yellow/green line or green line;
zero line is the black line; others are fire lines(L1/L2/L3), same color is forbidden in power
lines;
The power outlet must be placed convenient to customer, so the customer can cut the power
immediately when needed.
Any type of extension cord is prohibited;
Changing original plug is prohibited;
Using adaptor is prohibited
Attention: Enough space must be guaranteed to make sure operator can work
well;

6
B. Run Test
1. Connected the machine to the power.
2. Put the main power switch in the “on” position, the screen lights up and the
machine is in standby mode.
3. Press the “WASH” button, and the sign will be in the status of rolling.
4. Press the “AUTO” button, the auger will start turning, minutes later, the
compressor will also starting freezing.
5. In either “AUTO” mode , press “STANDBY” button, wait 2-3 minutes, check
the hopper bottom to see if it is freezing on the hopper.
C. Cleaning and Sanitizing
1. Before the first time of using the machine, the machine should be thoroughly
cleaned and sanitized as the following steps:
2. Prepare 3 liters of solution using sanitizer in bucket cold water, pour the
solution
into the hopper and clean all the surface parts of the hopper carefully.
3. Turn on the main power, press “WASH” button and let the machine run for 2
minutes.
4. Place a bucket beneath the dispenser door, pull down the handle to drain out
the solution.
5. When solution comes out, press “WASH” button to quit the washing mode.
Attention:
1, Make sure the ground line is perfectly connected;
2, All outside wires and electrical appliance meet the relative national standard;
3, For the machine without plug, the power line can only be directly connected to the air switch;
If rated power less then 2000W, please use air switch with 10A (single phase power) or 10A
(three phase power); If rated power greater than 2000W, please use air switch with 32A (single
phase power) or 16A (three phase power).

7
6. Use the clean water to repeat the above steps 2-3 times.
>
OPERATING INSTRUCTION<
A. Front Panel
. Instructions for settingⅠ
1.1 Cup counting checking and reset function: it will show the counting while
pressing the“UP”and“DOWN” buttons
together(Only when in auto mode, and only count when the micro-switch works),
it will return to the previous state if no operation for more than 5 seconds. And
the counting will be cleared away if pressing the “UP”and“DOWN”buttons
together for 5 Second.
1.2 Firmness setting: Under standby state, press“UP ”for 1 second, “HARD/SET”
window flashing, then
press“UP”or“DOWN”to adjust the firmness (from 1 to 10). The level value will
be saved and return to the standby state if no operation for more than 5 seconds.
1.3 Temperature checking function: Press“UP ”for 3 seconds, you can check the
temperature of hopper and cylinder.
1.4 System parameter setting: Press“SET ”for 3 seconds, and continue to press
“SET ”from P0 to P5, you can press “UP”or“DOWN” to adjust the parameter
when prompt change, the details are as follows:
1. The temperature of the solutions should be less than 60℃, or it
will damage the parts.
2. After the cleaning, please make sure no any water in the cylinder,
or the frozen ice will damage the auger when the machine is
freezing.

8
P1 is not suggested to adjust.
.Instruction for functionⅡ
2.1 Wash
Press the “WASH” button to enter into the washing mode when the machine is
in standby, then the drive motor will turn on, press the “WASH” button again
to quit the washing mode.Press the “WASH” button for 10 seconds to enter
into the online speed measurement function and can measure the current no
load speed of the motor.
2.2 Keep Fresh
Press the “Keep Fresh”button to enter into the keep fresh mode,the
compressor is working to freeze the frozen cylinder until it is 70% frozen,the
solenoid valve of freezing is off and the solenoid valve of pre-cooling is on,
when the temperature of hopper reach the setting temperature(P0), the
solenoid valve of pre-cooling and compressor stop. The compressor will
continue to freeze the frozen cylinder when the P3 reaches.
2.3 Auto
Press the “Auto”button to enter into the auto mode,the compressor is working
to freeze the frozen cylinder until it is 100%
frozen.Then the compressor will continue to work to freeze the hopper until it
reach the setting temperature(P0).
Alert functionⅢ
1. If the RPM can not be detected by the limit switch, the screen will show “-
N Meaning Prom Scope of Default
1 Hopper pre-cooling temperature P0 1--19℃ 4℃
2 Frozen cylinder keep fresh P1 1--10℃ 4℃
3 Hopper pre-cooling temperature P2 1--10℃ 2℃
4 Compressor restart period setting P3 2-15min 15min
5 Compressor restart period setting P4 1--15min 5min
6 Beater motor shutdown delay P5 1-- 30secon

9
-”, and the machine will buzz and stop working at the same time.
2. The rotating speed of drive motor is too slow, the screen will show “NL”,
and the machine will buzz and stop working at the same time.
3.If the limit switch behind the dispenser door is connected to the power for
over 1 minute, the screen will show “Cb”, and the machine will buzz and stop
working at the same time.
4. If the mix in hopper is not low, the screen will show“QL”
B. Making Ice Cream
1. Rinsing before making the ice cream
1.1 Prepare 3 liters of solution using sanitizer in bucket of cold water, pour the
solution into the
hopper and clean all the surface parts of the hopper carefully.
1.2 Turn on the main power, press “WASH” button and let the machine run for 3
minutes.
1.3 Place a bucket beneath the dispenser door, pull down the handle to drain
out the solution.
1.4 When solution comes out, press “WASH” button to quit the washing mode.
1.5 Unscrew two bolts of dispenser door, take off the dispenser door assembly
and remove all
the part from it, put all the parts into the solution for cleaning, then
reassembly the
Parts and install the dispenser door assembly back to the machine.
1.6 Pour moderate amount of clean water into the hopper and drain the water
out, repeat the
above steps until the water becomes as clear as possible.
1.7 At last, dry off the dispenser door with a dry, clean, lint-free towel.

10
2. Preparation of Mix
Follow the instruction to make the mix with ice cream powder, avoid ice cream
particles or
impurities inside.
Fill into the container after 5 minutes’ standing, or you can use liquid ice cream
mixture
directly.
If a fridge is available , the mix can be pre-stored in it to 4 for better ice cream ℃
producing.
3. Adding mix to the hopper
3.1 Pour half of the prepared mix into the hopper.
3.2 Press the “WASH” button to have the mix fully stirred until there is no bubble
going out from the feed hole on the hopper, press the“WASH”button again to stop
stirring.
3.3 Pour the other half of the mix into the hopper and put on the lid, press the
“AUTO” button to
enter into the ice cream mode, pay attention to the percentage display,
when the
percentage is over 99, it indicates the ice cream is ready.
3.4 Pull down the handle to dispense the ice cream with a cone or other
container beneath the dispenser door.
4. Press the “STANDBY” button to turn on the hopper cooling function, which
not only prevent the mix going bad in high temperature, but also get the ice
cream ready in a shorter time.
5. Remember to drain out the residual mix before the machine is going to be
cleaned,
refer to the above cleaning steps to clean the machine.

11
>CLEANING AND MAINTENANCE<
A. Cleaning
1. Cleaning of hopper and cylinder
1.1 Press “WASH” button and draw off all the residual mix in the hopper and cylinder, then
press “WASH” button again to stop.
1.2 Prepare 3 liters of solution using sanitizer in a bucket of cold water, pour the solution
into the
hopper.
1.3 Press “WASH” button and let the machine run for 3 minutes, then draw off all the
sterilizing
solution, repeat the above steps with clean water two or three times to clean the
machine thoroughly, press “WASH” button to stop the machine.
1.4 Unplug the machine, remove and wash all the parts.
Unscrew the four bolts on the dispenser door and remove the dispenser door.
Disassemble the parts of the dispenser door in turn, pin, handle, piston, O-rings.
Remove the auger from the cylinder, and then remove the gasket for the auger.
Clean all the parts, and change new ones if it is necessary.
Assemble all the parts according to reverse procedure of disassembling, use
lubricate
There is no set period and procedures of the maintenance. It depends
on the using and working condition, so each ice cream machine needs

12
while assembling the piston, O-ring and gasket.
2. Cleaning of the exterior of machine
Keep the exterior of machine clean, use wet towel to clean it, and do not flush the machine
with water directly.
3. Cleaning of condenser
After be used over a period of time, the condenser maybe thick with dust, and this will
effect heat dissipation and cause bad refrigeration, so it needs periodic cleaning (every
half year).
Cleaning methods:
Step 1: Disconnected the main power switch.
Step 2: Remove the back panel and side panels.
Step 3: Clean dust with tools such as vacuum cleaner, high-pressure air and soft brush, be
careful while cleaning to avoid damaging the fins of the condenser.
B. Maintenance Tip
Be sure to drain the product, and thoroughly clean and sanitize your unit daily. Proper
cleaning and preventative maintenance results in a creamier product consistency,
increases your unit reliability and efficiency, and prevents costly repairs from occurring
in the future.
Do not run the machine while the machine is empty. This can severely damage the
1. B
efore installing the piston, O-ring for piston, beater and gasket for
auger, you should lubricate Vaseline (lubricating Vaseline onto the
groove of the gasket, do not onto the auger’s end ), using the Vaseline

13
internal parts.
Be familiar with all the operational modes of your machine and what they do.
Understand the different features of each mode for safe and reliable operation.
Use a recommended soft serve machine cleaner and sanitizer when cleaning your unit.
Regular dish soap, chemicals, and detergents can degrade seals and leave unwanted
residues in your machine.
Do not run the machine with water in Auto Mode. The water will solidify into ice,
expand, and severely damage the beater, freezing cylinder, bearing, and drive motor
which can lead to unrepairable damage.
Lubricate seals and o-rings with a food grade lubricant
Do not pour water, product, or any fluid into the hopper while the beater are removed
from the freezing cylinder. Doing this will cause the fluid to be discharged from the
discharge tube located under the machine.
Do not add any candies, jellies, or other particles into the hopper. Particles may clog
the passageway leading into the freezing cylinder causing damage to the unit.
Do not operate the machine while the stainless steel panels are removed from the unit.
Loose garments and long hair can get caught in the moving parts resulting in serious
injury.
14
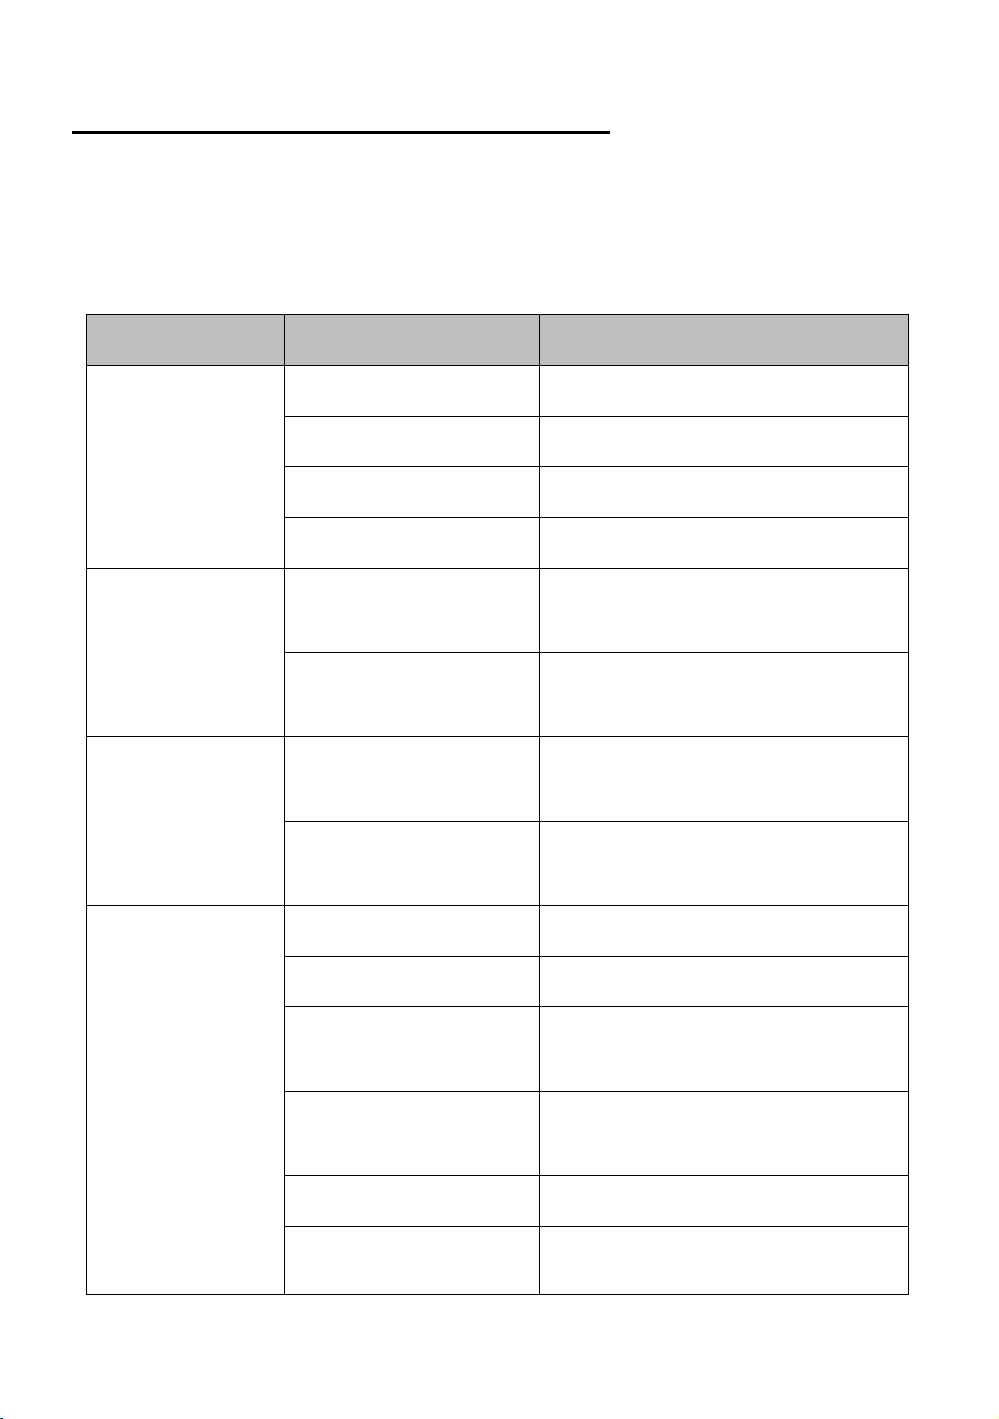
>TROUBLE SHOOTING AND SOLUTION<
Some problems may happen to the machine, the corresponding solutions have been
listed on the following trouble shooting sheet for your reference, if the problem persists,
please don’t handle it by yourself and contact our professional technicians for help, in
order to avoid unnecessary loss.
PROBLEM PROBABLE CAUSES SOLUTIONS
Machine does
not run
Machine is not plugged in. Check it and plug it properly.
The general switch is not on.
Turn the general switch on.
The general switch is broken. Replace the general switch with new one.
Protective circuit works. Change the fuse.
The washing mode
does not work
The wiring for this function
is loose.
Check the wiring and make it connected.
The drive motor is not
working.
Repair the motor or replace it.
The AUTO mode or
does not work
The wiring for this
function is loose.
Check the wiring and make it
connected.
The control board is not
active
Replace the control board.
Compressor does
not work
The voltage is low. Try to get a high and stable voltage.
The relay is bad. Replace the control board.
There is something wrong
with control board.
Replace the control board.
The overload protection is
working.
Find the cause and restart.
The compressor is bad. Replace the compressor.
The capacitor for
compressor is not
Replace the capacitor.

15
working.
Machine does not
freeze
Refrigerant leaking.
Find the leaking point and fix it, charge
the refrigerant after vacuuming the
refrigeration system.
Solenoid valve is not
working.
Replace the solenoid valve.
The fan motor does not work.
Fix the fan motor or replace it.
The compressor is out of order. Check the compressor, replace it if necessary.
Machine does not
stop
The hardness is set too high.
Reduce the hardness setting.
There is something wrong
with control board.
Replace the control board.
Bad refrigeration system. Check the refrigeration system.
Relay is tripped
out
The voltage is low. Try to get a high and stable voltage.
There is something wrong
with control board.
Replace the control board.
The contactor is burnt. Replace the contactor.
No product is
being dispensed
with draw
valve open and
the
machine in soft
serve mode
The improper mix caused
frozen cylinder.
Prepare a proper mix.
No mix in the cylinder. Add mix to the hopper.
The limit switch is not
working or the wiring of
limit switch is loose.
Replace the limit switch or rewire.
The coupling or auger is
broken.
Replace coupling or auger.
Ice cream is too
soft
Wrong ratio of mix. Make the mix with a correct ratio.
The hardness is set too
low.
Increase the hardness setting.
The dispenser hole is Check the O-ring for piston, replace it

16
Mix leaking
leaking. if it is necessary.
The dispenser door is
leaking.
Check the O-ring for dispenser door,
replace it if it is necessary.
The drain pipe is leaking.
Check the gasket for the auger, replace
it if it is necessary.
The buzzer keep
squealing
Low voltage protection.
Turn off the machine first, then turn on
the machine 5 minutes later.
Shutdown protection.
Turn off the machine first, then turn on
the machine 5 minutes later.
Limit switch does not reset
in time.
Pull up the handle to reset the limit
switch.
“NL” CODE
The speed of drive motor
decreases fast.
The hardness is set too high, or check if
it is a problem with motor.
“——”CODE
The proximity switch is
not in the right position or
bad.
Adjust the position of the proximity
switch or replace it.