
ICE CREAM MACHINE
MANUAL
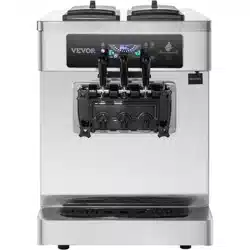
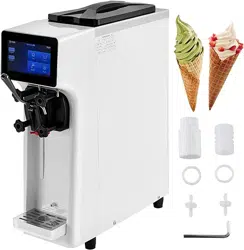
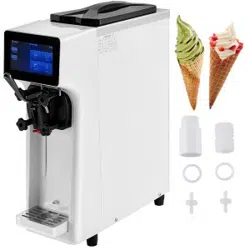
1.Parameter
Model
Capacity
Yield
Voltage
Power
Refrigerant
Dimensions
ZM-168
4.2L*2
16-18L/H
220V50Hz
110V60Hz
220V60Hz
1200W
R22
410a
55*42*76CM
2. Conditions
Our ice cream machine can work under below conditions:
Ambient temperature:5-40℃ Mixture temperature:2-35℃
Power:200-230V/50±1HZ(standard model),customized model e.g. 110V/60Hz,or
220V/60Hz,please follow other instruction.
▲The above conditions can directly affect performance and capacity.
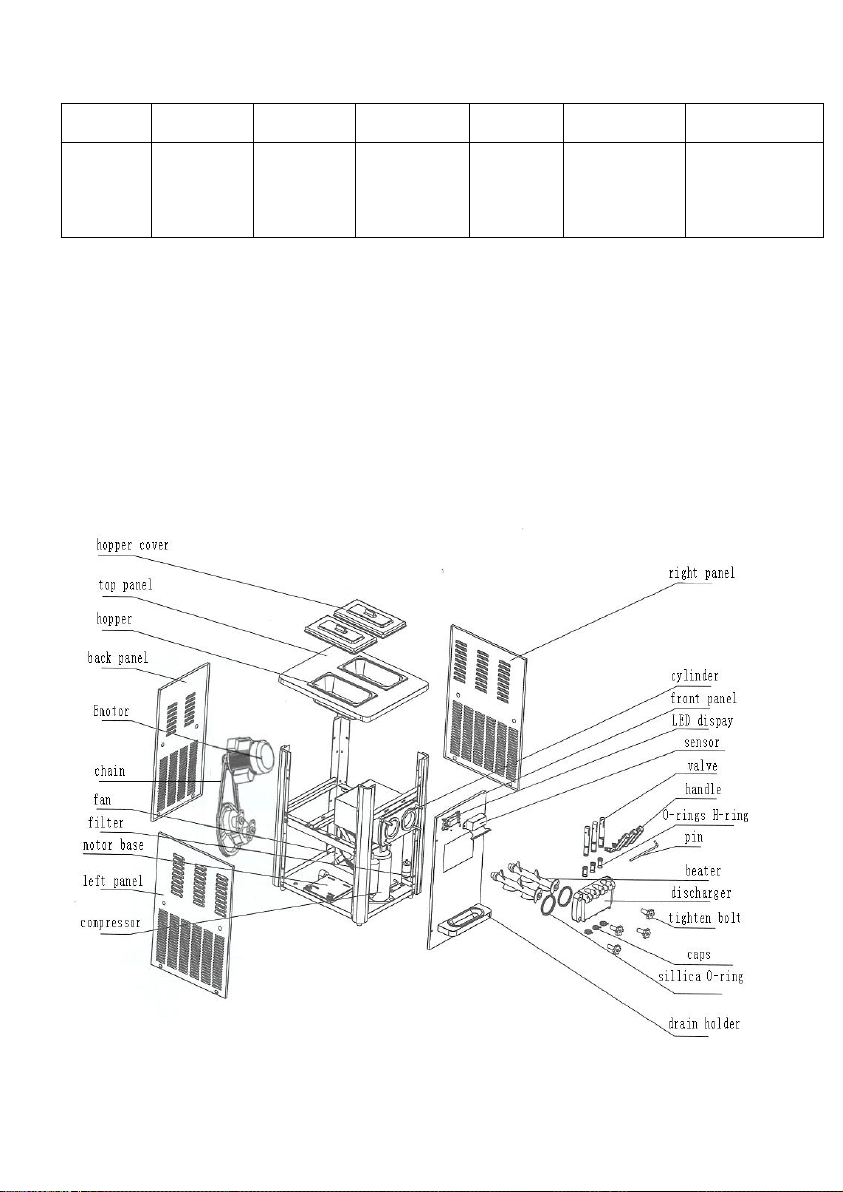
3. Structure
4. Installation & Cautions:
Please strictly follow the instruction on the sticker.
▲After received the machine, please lay it aside for more than 5 hours
before using.
▲There must be a free space more than 50cm left on both sides of the
machine for heat releasing.
▲Please make sure both cylinders to be filled with stuff before using,
neither single nor both cylinders short of stuff will be forbidden. Do
not use the water as stuff to test the machine.
▲Put the machine still for 24 hour after transportation before using it.
▲Power wire should not exceed 10m.
▲Always use both cylinders at the same time.
▲Ice cream mixture should be in accordance with appropriate formula.
▲Always use the machine in stable voltage.
1)Placement
1 Place the machine on an even plain ground,and lock the brakes.
2 Make sure the machine is in good ventilation,avoid heat sources or
sunlight,Air outlets of the machine should be at least 1m away from walls
or any other barriers,other sides should be at least 0.5m away from any
barrier.
3 Avoid dust.
2)Wiring:
1 Make sure the socket is connected to the ground.
2 Make sure the power supply has a circuit-breaker or any other device
for protection against electric shock.
3 The section area of power code copper core(a) MUST BE a≥2.5 ㎡.
4 Under-size power code can result in low voltage and overload,which
affect machine performance or causing damage.

1.Parameter
Model
Capacity
Yield
Voltage
Power
Refrigerant
Dimensions
ZM-168
4.2L*2
16-18L/H
220V50Hz
110V60Hz
220V60Hz
1200W
R22
410a
55*42*76CM
2. Conditions
Our ice cream machine can work under below conditions:
Ambient temperature:5-40℃ Mixture temperature:2-35℃
Power:200-230V/50±1HZ(standard model),customized model e.g. 110V/60Hz,or
220V/60Hz,please follow other instruction.
▲The above conditions can directly affect performance and capacity.
3. Structure
4. Installation & Cautions:
Please strictly follow the instruction on the sticker.
▲After received the machine, please lay it aside for more than 5 hours
before using.
▲There must be a free space more than 50cm left on both sides of the
machine for heat releasing.
▲Please make sure both cylinders to be filled with stuff before using,
neither single nor both cylinders short of stuff will be forbidden. Do
not use the water as stuff to test the machine.
▲Put the machine still for 24 hour after transportation before using it.
▲Power wire should not exceed 10m.
▲Always use both cylinders at the same time.
▲Ice cream mixture should be in accordance with appropriate formula.
▲Always use the machine in stable voltage.
1)Placement
1 Place the machine on an even plain ground,and lock the brakes.
2 Make sure the machine is in good ventilation,avoid heat sources or
sunlight,Air outlets of the machine should be at least 1m away from walls
or any other barriers,other sides should be at least 0.5m away from any
barrier.
3 Avoid dust.
2)Wiring:
1 Make sure the socket is connected to the ground.
2 Make sure the power supply has a circuit-breaker or any other device
for protection against electric shock.
3 The section area of power code copper core(a) MUST BE a≥2.5 ㎡.
4 Under-size power code can result in low voltage and overload,which
affect machine performance or causing damage.
3) Installation
1 Open the carton box,you will find a parts bag in the hopper.In the parts
bag you will find consumable parts,keep the spare parts for the future
replacement.
2 Please check the nameplate on the right panel,confirm this is the
correct model(voltage,frequency and power)you order.
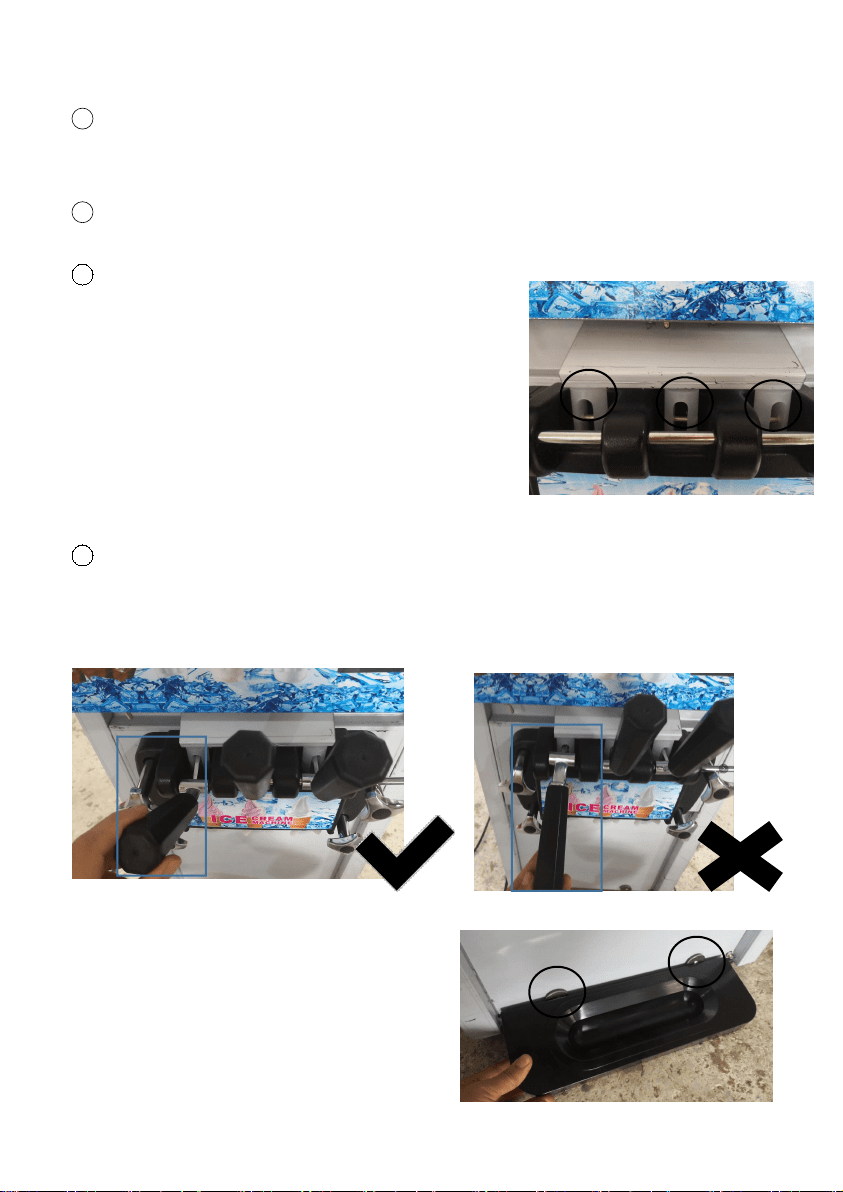
3 Install the discharger properly,tighten
it to the machine with 4 bolts(2 long ones
up,2 short ones down),screw the 2 bolts in
diagonal at the same time,mate sure no gap
between the discharger and the
machine,otherwise,water or mixture can leak
from it during washing or making ice
cream.Notice:sensor plate MUST BE on top of
all valve stems.(see right photo)
4 Install the handles to the valve stems one by one ,in the mean
time,slowly push the steel pin through the discharger and the
handles.(Refer to below photo for the correct direction of the handles)
⑤Install the drain holder to the 2
nuts on machine,to catch the possible
falling ice cream.DO NOT put heavy
object like buckets or basins on it,as
it is too weak to support that.
5. How to Make ice cream
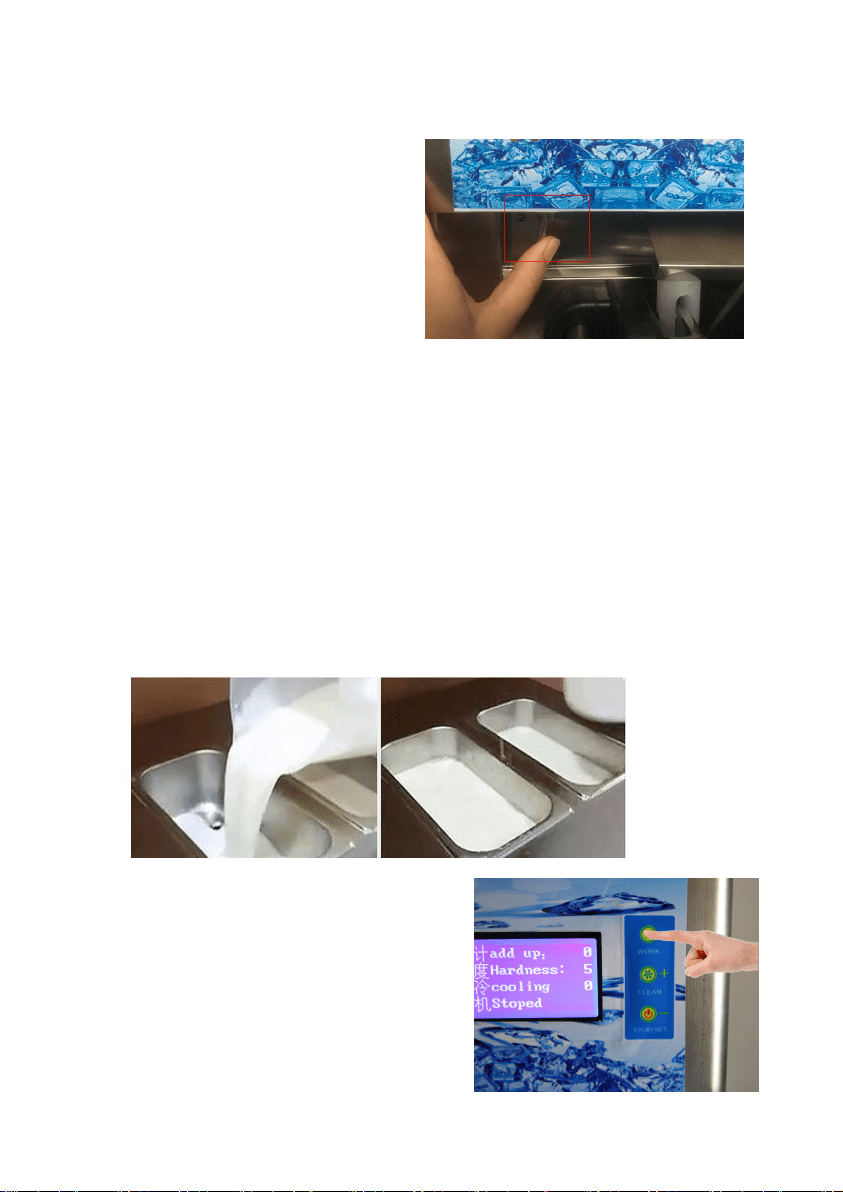
1) Wash
Connect it to 16A socket,switch on
the power with the stick on the left
down part of control panel.Pour water
from the hoppers to fulfill the
cylinders,press“CLEAN”mode.Repeat
this 2-3 times,until the water comes
out is all clean.
2) Make mixture
Currently in the market,there are ready-made mixture of ice cream,or the
powder that needs to mix with water.Please follow the instructions and
formula on powder package(generally speaking:1kg powder to 2.5-3kg
water),stir them even,let them completely dissolve and mix together,avoid
lumps forming,leave it still for 30 minutes.These are very important
factors for the texture and amount of the ice cream later produced.
3) Make ice cream
①Make sure water is completely drained,them pour the mixture into the
hopper.
② Press “ CLEAN ” (beater will start to
rotate,to beat it even),after 2
minutes,press“STOP”,then press “WORK”
to start freezing(Notice:Make sure the
mixture level in neither cylinder should
be lower than the inlet of discharger,or
else can result in loud noise or damage.)
3) Installation
1 Open the carton box,you will find a parts bag in the hopper.In the parts
bag you will find consumable parts,keep the spare parts for the future
replacement.
2 Please check the nameplate on the right panel,confirm this is the
correct model(voltage,frequency and power)you order.
3 Install the discharger properly,tighten
it to the machine with 4 bolts(2 long ones
up,2 short ones down),screw the 2 bolts in
diagonal at the same time,mate sure no gap
between the discharger and the
machine,otherwise,water or mixture can leak
from it during washing or making ice
cream.Notice:sensor plate MUST BE on top of
all valve stems.(see right photo)
4 Install the handles to the valve stems one by one ,in the mean
time,slowly push the steel pin through the discharger and the
handles.(Refer to below photo for the correct direction of the handles)
⑤Install the drain holder to the 2
nuts on machine,to catch the possible
falling ice cream.DO NOT put heavy
object like buckets or basins on it,as
it is too weak to support that.
5. How to Make ice cream
1) Wash
Connect it to 16A socket,switch on
the power with the stick on the left
down part of control panel.Pour water
from the hoppers to fulfill the
cylinders,press“CLEAN”mode.Repeat
this 2-3 times,until the water comes
out is all clean.
2) Make mixture
Currently in the market,there are ready-made mixture of ice cream,or the
powder that needs to mix with water.Please follow the instructions and
formula on powder package(generally speaking:1kg powder to 2.5-3kg
water),stir them even,let them completely dissolve and mix together,avoid
lumps forming,leave it still for 30 minutes.These are very important
factors for the texture and amount of the ice cream later produced.
3) Make ice cream
①Make sure water is completely drained,them pour the mixture into the
hopper.
② Press “ CLEAN ” (beater will start to
rotate,to beat it even),after 2
minutes,press“STOP”,then press “WORK”
to start freezing(Notice:Make sure the
mixture level in neither cylinder should
be lower than the inlet of discharger,or
else can result in loud noise or damage.)
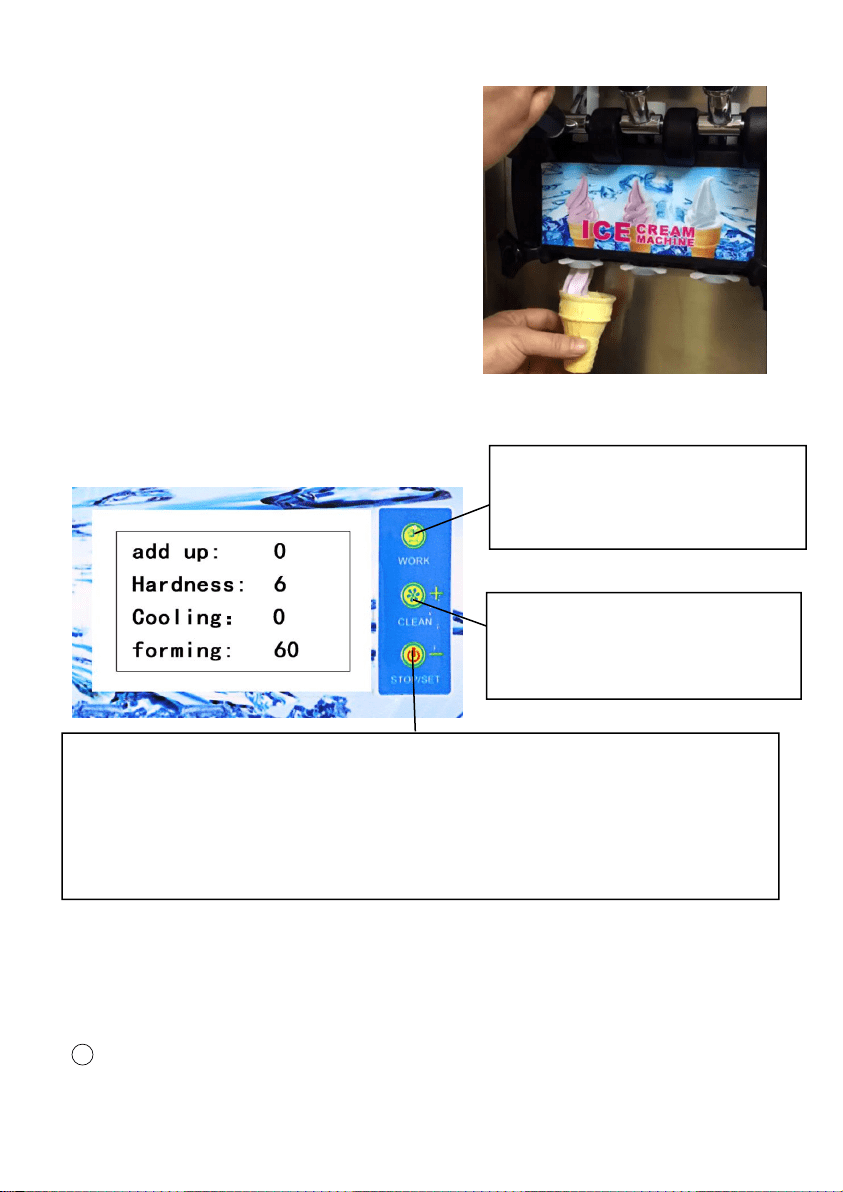
③In “forming”mode,displayer shows the
progress of ice cream making,generally
speaking,when it reach 60 ,the ice cream
is ready for dispensing.When it reach
100%,the machine will stop
automatically and back to “OK”mode.
④Serve:Put a cone or a cup under the
nozzle,press the handle down,slowly
rotate the cone in hand,press the handle
back to stop.
6. How to Operate
7. Maintenance
1) Wash cylinder
Please wash the cylinder once a day to improve the serve life of the machine and also
to ensure food safety for customers.
1 Press “ CLEAN ” ,to beat out all the mixture from the cylinder,then
press”STOP/SET”.
2 Dissolve proper amount of disinfectant in warm water,pour it inside the hopper.
3 Press”CLEAN”to beat for 5minutes,then drain it.
4 Pour in clear,to wash 3-5 minutes,then stop the machine.
5 Turn off the machine,and disassemble all other components(detail see the above
picture for washing)
Please disassemble and wash the components according the following steps if the
machine has stopped serving for a long time.
A. Unscrew all 4 bolts from the discharger,unload the discharger,then disassemble all
components from the discharger,
B. Take off the pin,handles,valve stems and silicone O-ring.
C. Take our the beater,disassemble the silicone seal from the beater end.
D. Wash the components thoroughly and replace the broken ones,
E. Assemble back all the components.(apply some lubricant to the valve stem for
easier assembling the O-rings and the valve stem back to discharger).
Notice:the O-ring on the middle stem is H shape,while the side stems are all O shape.
2) Wash the case
Please use a wet cloth to wipe the case only,avoid pouring water directly on control
board or the inside,or else can result in malfunction.
3) Clean the condenser
After serving for a certain period of time,dust will cover the condenser and affect
refrigeration(symptom:Ice cream hardness decreases in the same running
time),please wash it at least once in 3 months.(or once a month in a worse
condition).Make sure the machine is disconnected to electricity before washing,and
avoid damaging the fins inside the condenser.Hiring a professional cleaner is
recommended.
4)Lubricate the chain
After serving for a long time,it is recommended to open the back cover and maintain
the chain with oil every month.
Press”WORK”OUTO to start
freezing process to make ice
cream.
Press “CLEAN”to start the wash
function,the beater rotates,bu
no freezing.
Press”STOP/SET”:
A. Stop the freezing process or the clean function.
B. Press the ”STOP/SET” for 5 seconds until the GRD number blinks,then you
can press the ”STOP/SET” to adjust hardness set value.Range from 1-9,the
higher the harder.

8. Error & Solution
Problem
Cause
Solution
Voltage too
low
Voltage too low
Install a voltage stabilizer.
Voltage too
high
Voltage too high
Install a voltage stabilizer.
No display
while
machine
turned on
1. Out of power,socket not
well plugged.
2. Stabilizer not well
connected,or display not
well connected
3. Fuse broken
4. PCB broken
1. Check if power supply is
normal.
2. Reconnect wires.
3. Solve the abnormality and
replace with the same
specification of fuse.
4. Check PCB
Display not
clearly
Display and motherboard not
well connected.
Motherboard malfunction
Reconnect display to the
motherboard well.
Check motherboard.
Ice cream
won't come
out
1. No mixture inside
2. Mixture contains too much
water.
1. DO NOT turn to freeze mode
when no mixture inside.
2. Shut down for 30 minutes,
then restart.Please make
mixture according to the right
proportion.
Ice cream is
too soft
1. Mixture contains too
little water.
2. Insufficient heat
dissipation space
3. Hardness set too low
4. Cylinder lack of mixture
1. generally speaking:1kg
powder to 2.5-3kg water
2. Air outlets of the machine
should be at least 1m away from
walls or any other
barriers,other sides should
be at least 0.5m away from any
barrier
3. Increase hardness value
4. Pour in mixture.
Leakage
1. Tighten bolt is not
tightened
2. Apron misalignment
3. Apron damage
1. Tighten the tighten bolt
2. Put the apron in place
3. Replacing aprons
9.Repair
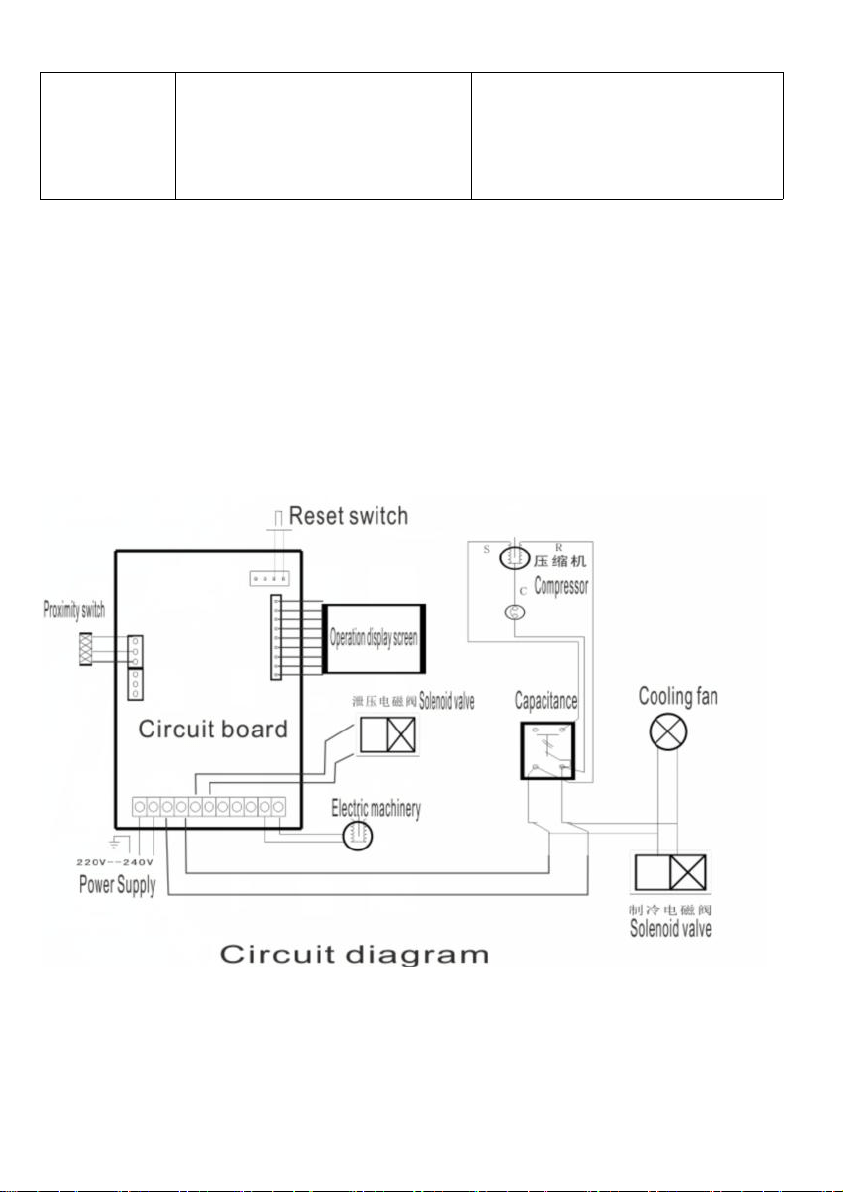
1)Please disconnect power before installing or wiring,always follow the circuit
diagram,and make sure the power supply is in accordance with that on the
nameplate.
2)Please hire a professional electrical technician for wiring.
3)Make sure all terminals are firmly connected to connectors.
4)Keep hands,fluid or any foreign objects off the PCB,and at least 6mm away from
the panels,or else may result in short-circuit and fire.
8. Error & Solution
Problem
Cause
Solution
Voltage too
low
Voltage too low
Install a voltage stabilizer.
Voltage too
high
Voltage too high
Install a voltage stabilizer.
No display
while
machine
turned on
1. Out of power,socket not
well plugged.
2. Stabilizer not well
connected,or display not
well connected
3. Fuse broken
4. PCB broken
1. Check if power supply is
normal.
2. Reconnect wires.
3. Solve the abnormality and
replace with the same
specification of fuse.
4. Check PCB
Display not
clearly
Display and motherboard not
well connected.
Motherboard malfunction
Reconnect display to the
motherboard well.
Check motherboard.
Ice cream
won't come
out
1. No mixture inside
2. Mixture contains too much
water.
1. DO NOT turn to freeze mode
when no mixture inside.
2. Shut down for 30 minutes,
then restart.Please make
mixture according to the right
proportion.
Ice cream is
too soft
1. Mixture contains too
little water.
2. Insufficient heat
dissipation space
3. Hardness set too low
4. Cylinder lack of mixture
1. generally speaking:1kg
powder to 2.5-3kg water
2. Air outlets of the machine
should be at least 1m away from
walls or any other
barriers,other sides should
be at least 0.5m away from any
barrier
3. Increase hardness value
4. Pour in mixture.
Leakage
1. Tighten bolt is not
tightened
2. Apron misalignment
3. Apron damage
1. Tighten the tighten bolt
2. Put the apron in place
3. Replacing aprons
9.Repair
1)Please disconnect power before installing or wiring,always follow the circuit
diagram,and make sure the power supply is in accordance with that on the
nameplate.
2)Please hire a professional electrical technician for wiring.
3)Make sure all terminals are firmly connected to connectors.
4)Keep hands,fluid or any foreign objects off the PCB,and at least 6mm away from
the panels,or else may result in short-circuit and fire.